
My previous guide for Doku involved the use of Task Scheduler. Today I’m offering a recommended and excellent alternative for installing the latest Doku version via Portainer. Doku is a simple, lightweight web-based application that allows you to monitor Docker disk usage in a user-friendly manner. The Doku displays the amount of disk space used by the Docker daemon, splits by images, containers, volumes, and builder cache. Doku is a great alternative to Glances. In this step by step guide I will show you how to install Doku on your Synology NAS using Docker & Portainer. 🚀Note: If you need a more powerful and professional tool to monitor your Docker containers, check out my outstanding article: Monitor Your Synology With Grafana and Prometheus Dashboard.
STEP 1
Please Support My work by Making a Donation.
STEP 2
Install Portainer using my step by step guide. If you already have Portainer installed on your Synology NAS, skip this STEP. Attention: Make sure you have installed the latest Portainer version.
STEP 3
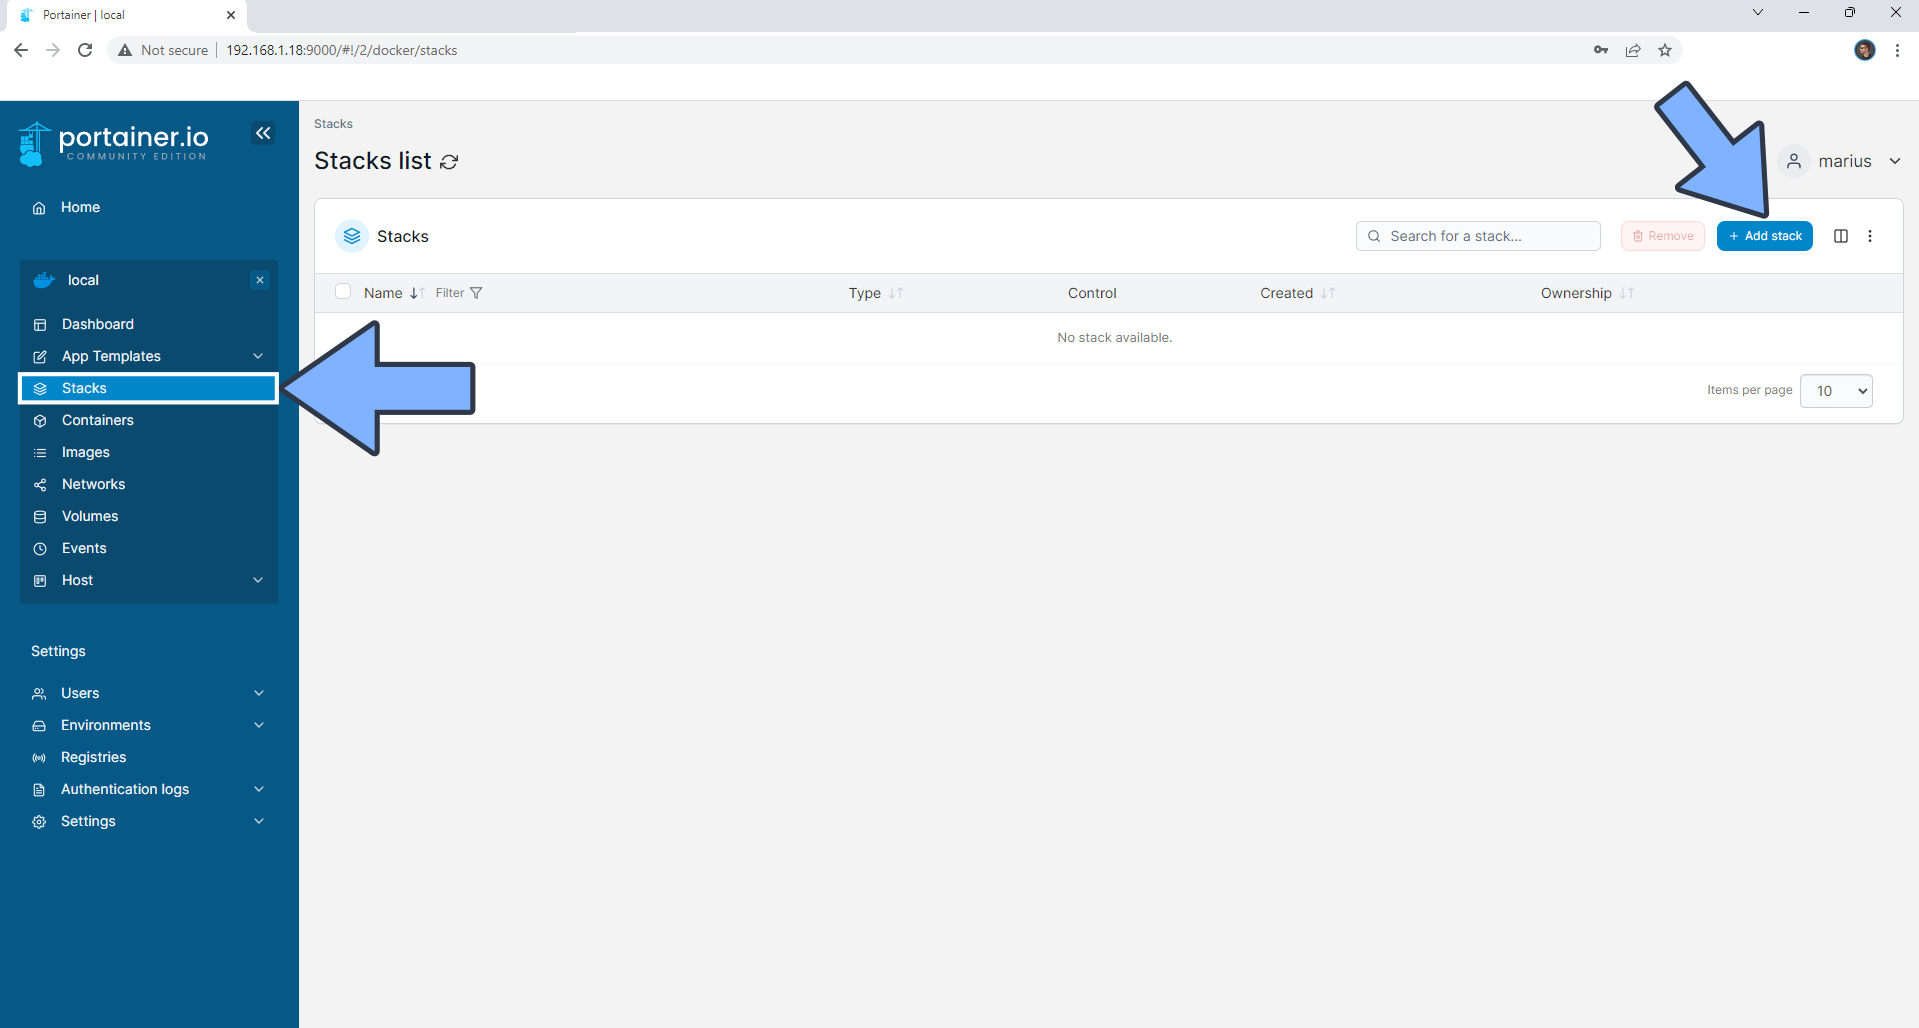
Log into Portainer using your username and password. On the left sidebar in Portainer, click on Stacks then + Add stack. Follow the instructions in the image below.
STEP 4
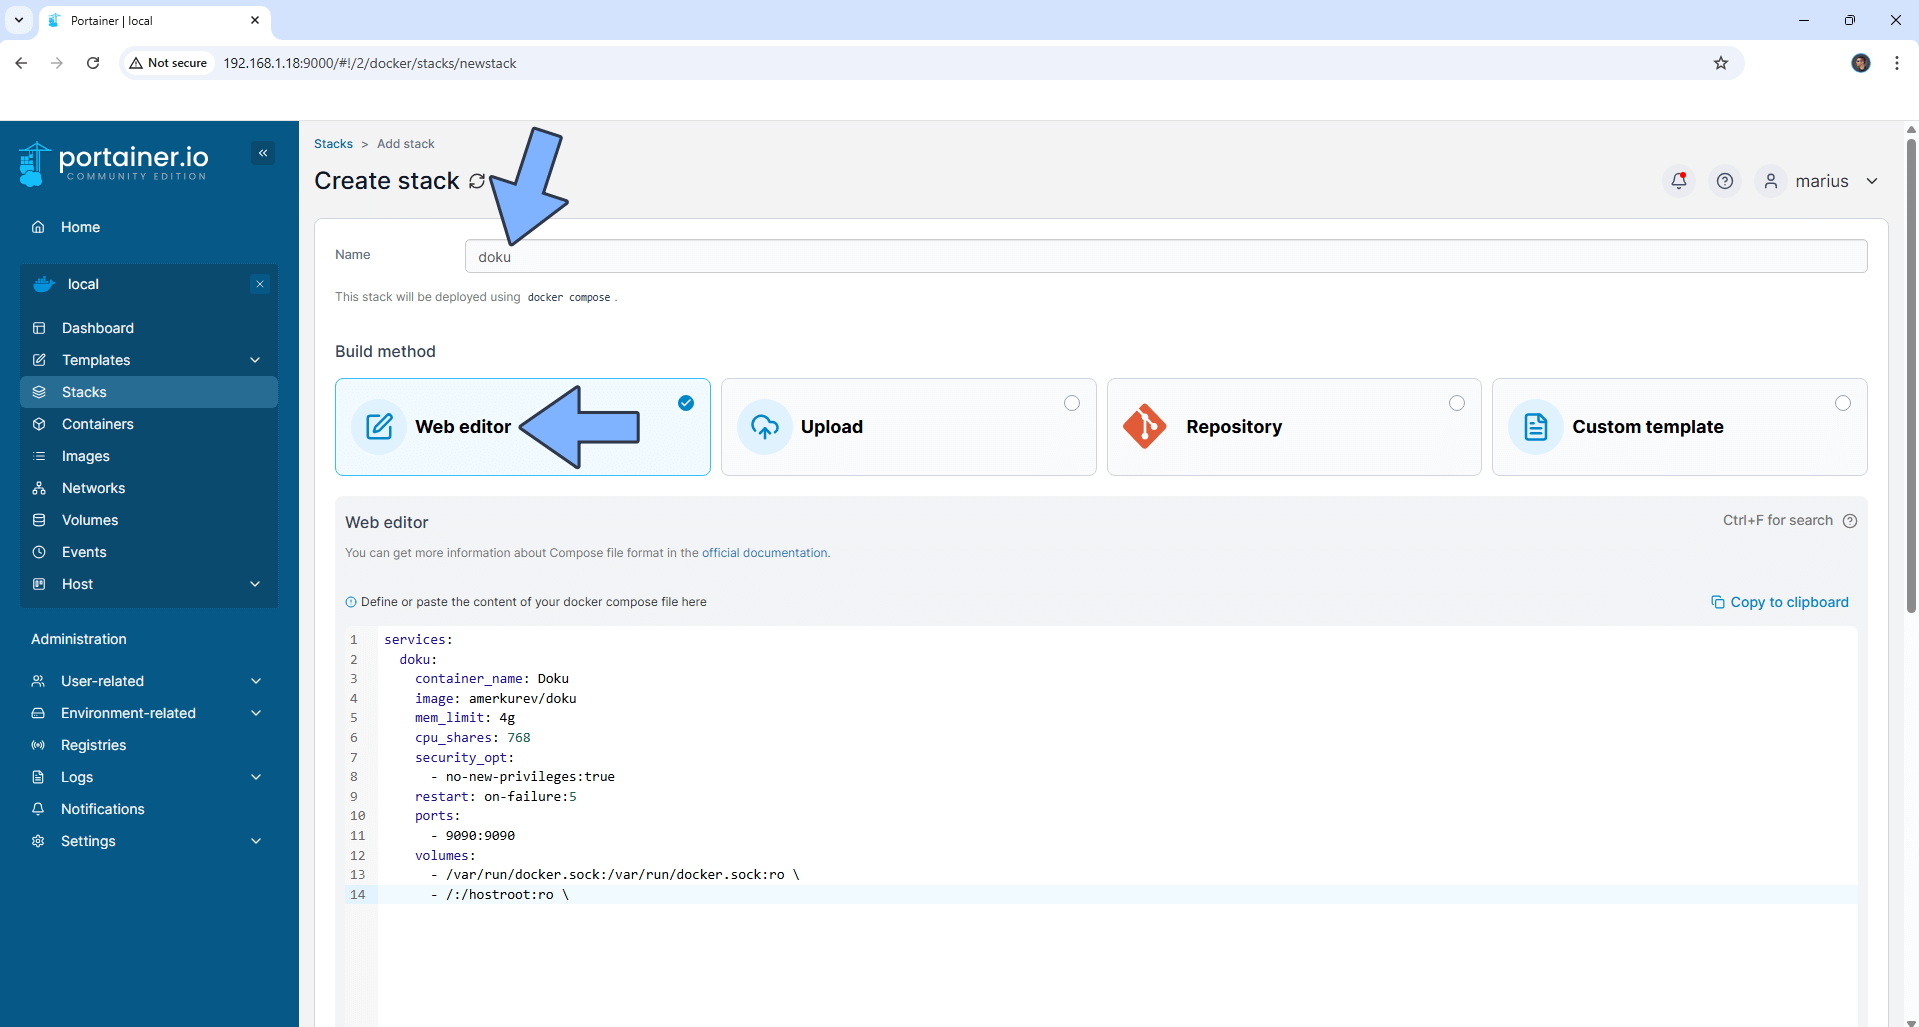
In the Name field type in doku. Follow the instructions in the image below.
services:
  doku:
    container_name: Doku
    image: amerkurev/doku
    mem_limit: 4g
    cpu_shares: 768
    security_opt:
      - no-new-privileges:true
    restart: on-failure:5
    ports:
      - 9090:9090
    volumes:
      - /var/run/docker.sock:/var/run/docker.sock:ro \
      - /:/hostroot:ro \
STEP 5
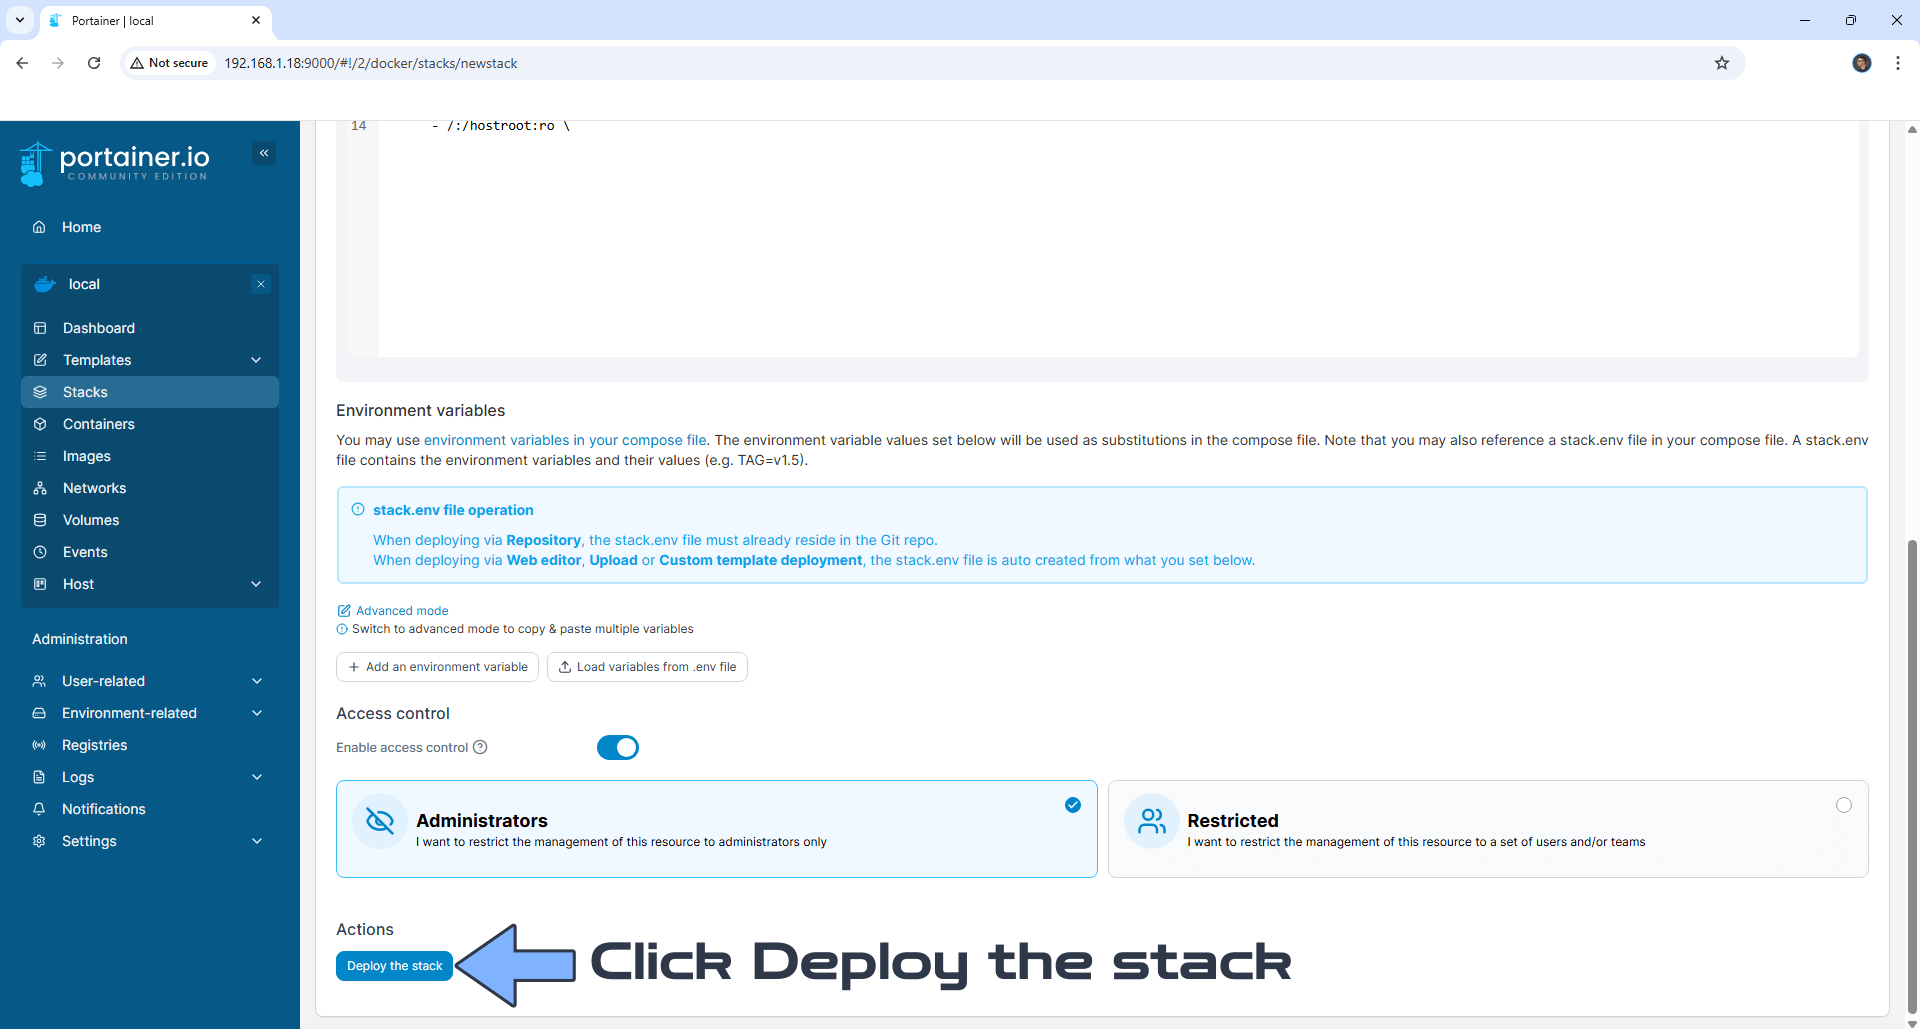
Scroll down on the page until you see a button named Deploy the stack. Click on it. Follow the instructions in the image below. The installation process can take up to a few minutes. It will depend on your Internet speed connection.
STEP 6
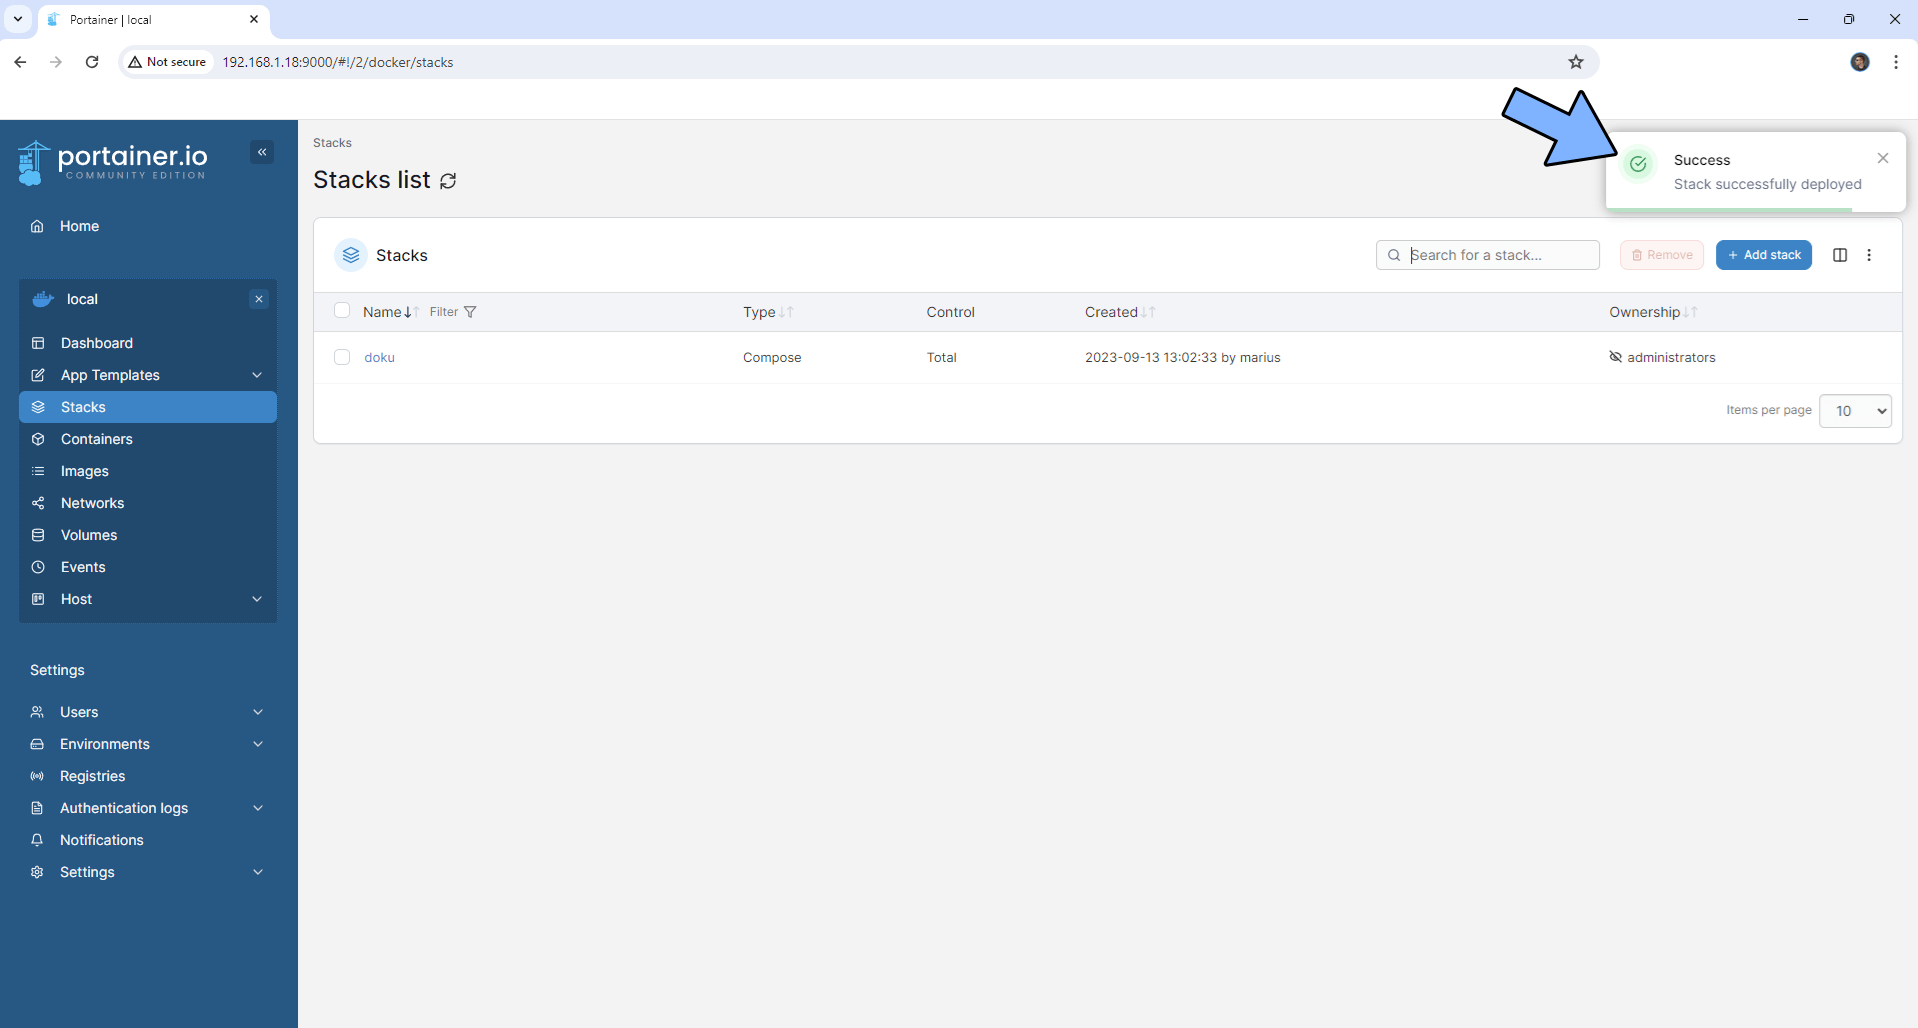
If everything goes right, you will see the following message at the top right of your screen: “Success Stack successfully deployed“.
STEP 7
🟢Please Support My work by Making a Donation. Almost 99,9% of the people that install something using my guides forget to support my work, or just ignore STEP 1. I’ve been very honest about this aspect of my work since the beginning: I don’t run any ADS, I don’t require subscriptions, paid or otherwise, I don’t collect IPs, emails, and I don’t have any referral links from Amazon or other merchants. I also don’t have any POP-UPs or COOKIES. I have repeatedly been told over the years how much I have contributed to the community. It’s something I love doing and have been honest about my passion since the beginning. But I also Need The Community to Support me Back to be able to continue doing this work.
STEP 8
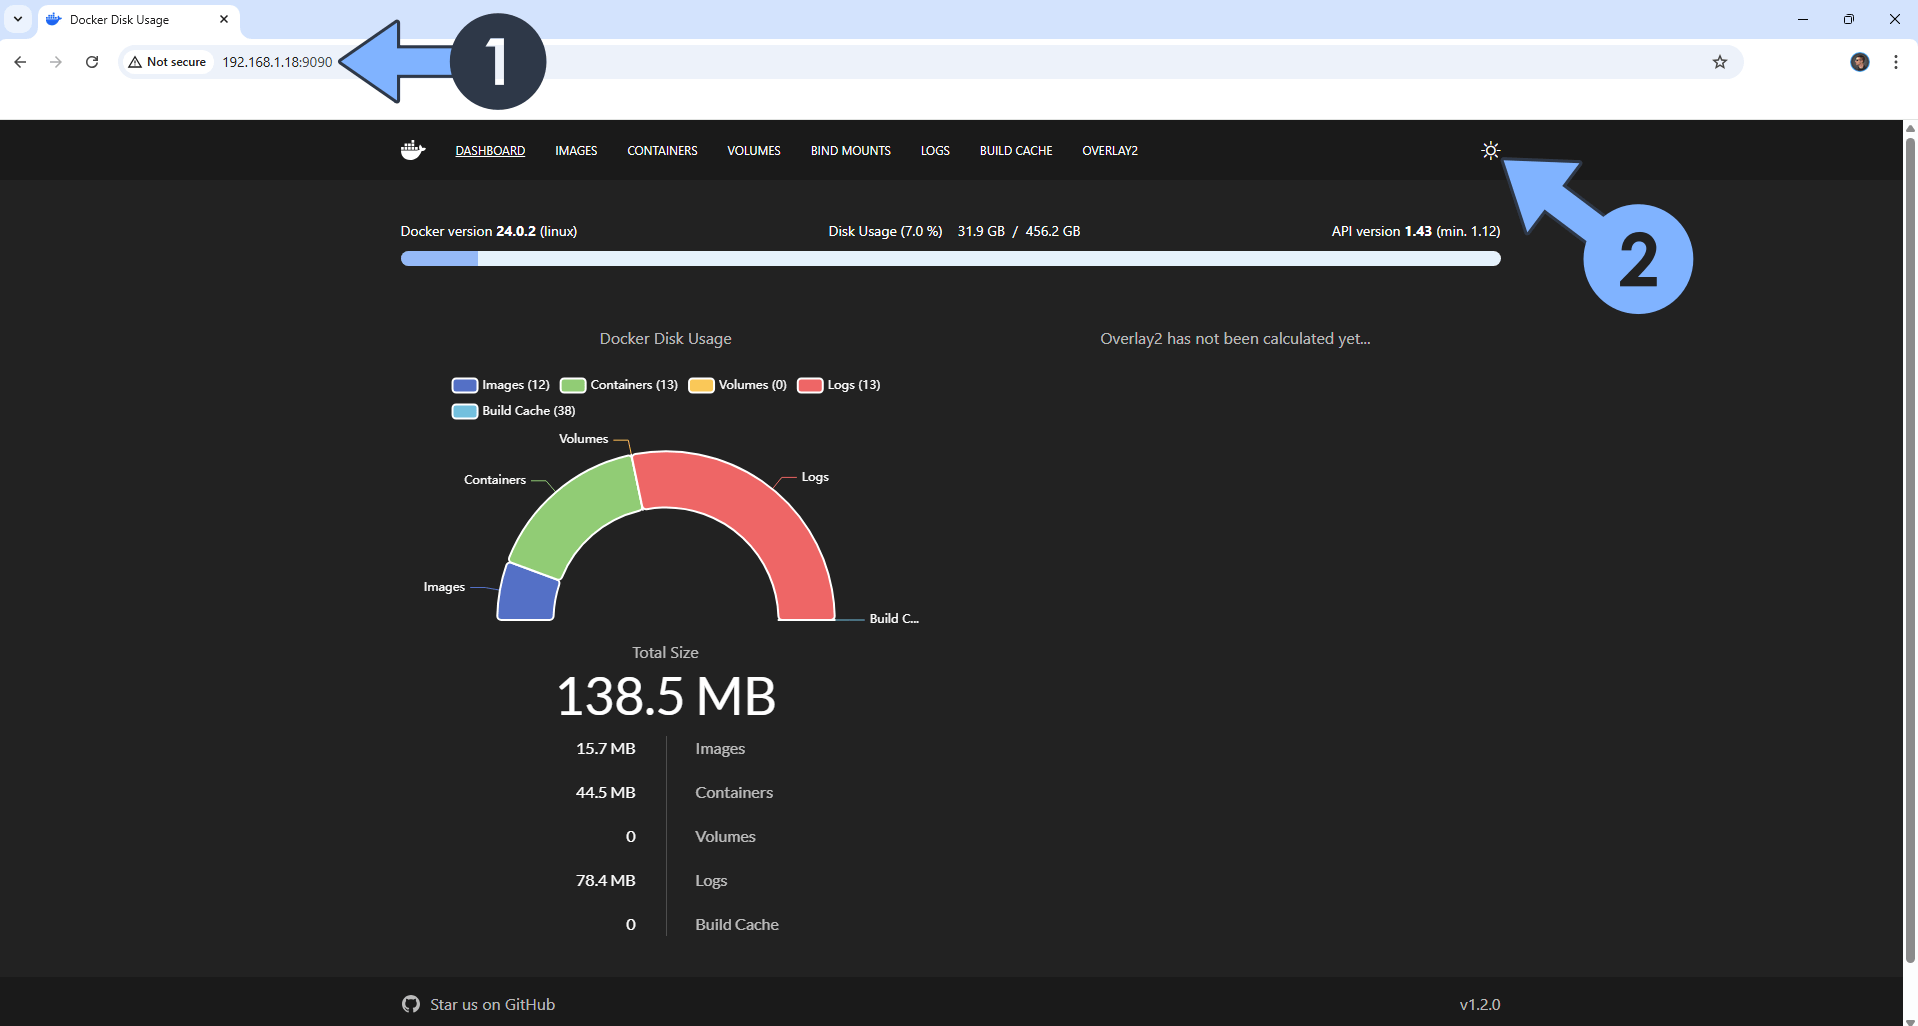
The installation process can take up to a few seconds/minutes. It will depend on your Internet speed connection. Now open your browser and type in http://Synology-ip-address:9090 At the top right of the page, click on the half moon icon to switch the theme to Dark. Follow the instructions in the image below.
Enjoy Doku!
If you encounter issues by using this container, make sure to check out the Common Docker issues article.
Note: If you want to run the Doku container over HTTPS, check How to Run Docker Containers Over HTTPS. In order to make Doku work via HTTPS, it’s mandatory to activate WebSocket.
Note: Can I run Docker on my Synology NAS? See the supported models.
Note: How to Back Up Docker Containers on your Synology NAS.
Note: Find out how to update the Doku container with the latest image.
Note: How to Free Disk Space on Your NAS if You Run Docker.
Note: How to Schedule Start & Stop For Docker Containers.
Note: How to Activate Email Notifications.
Note: How to Add Access Control Profile on Your NAS.
Note: How to Change Docker Containers Restart Policy.
Note: How to Use Docker Containers With VPN.
Note: Convert Docker Run Into Docker Compose.
Note: How to Clean Docker.
Note: How to Clean Docker Automatically.
Note: Best Practices When Using Docker and DDNS.
Note: Some Docker Containers Need WebSocket.
Note: Find out the Best NAS Models For Docker.
Note: Activate Gmail SMTP For Docker Containers.
This post was updated on Friday / March 21st, 2025 at 10:52 AM
