When using an SSL certificate to access your Docker containers in HTTPS, there are a few complementary good practices to take into consideration. The best good practices come from mariushosting of course, and applying them to your environment will not only increase your online security, but also speed up the access to your favorite applications. Below is a summary of the top 7 best practices for your system from your friend Marius!
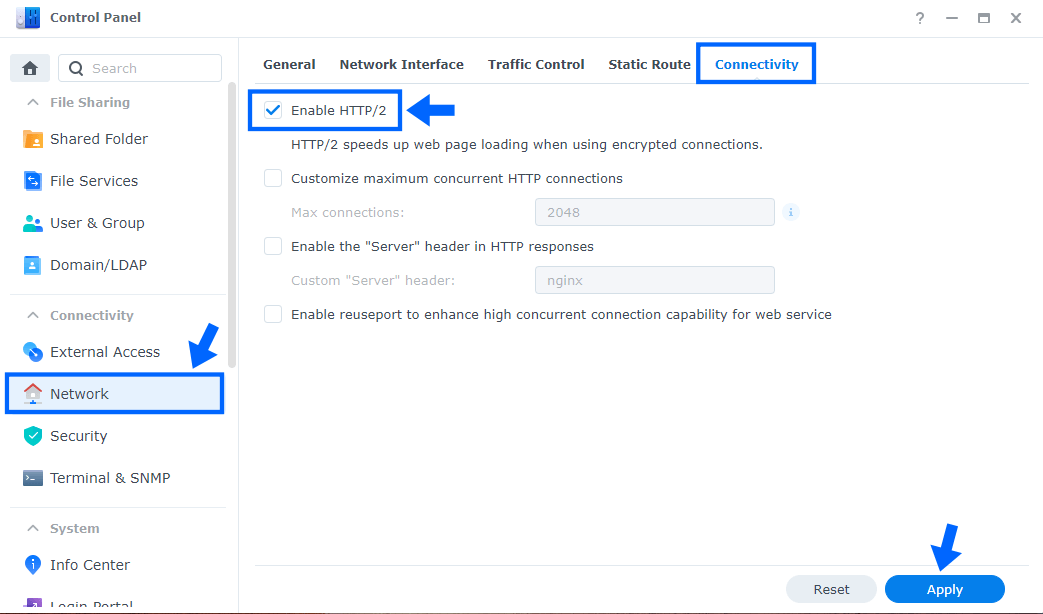
HTTP/2. HTTP/2 optimizes website connections without changing the existing application semantics. This means you can take advantage of HTTP/2’s features such as improved performance, updated error handling, reduced latency, and lower overhead without changing your web applications. You can easily activate HTTP/2 on your Synology NAS with a simple option check.
Go to Control Panel / Network / Connectivity tab/ Check Enable HTTP/2 then click Apply. Follow the instructions in the image below.
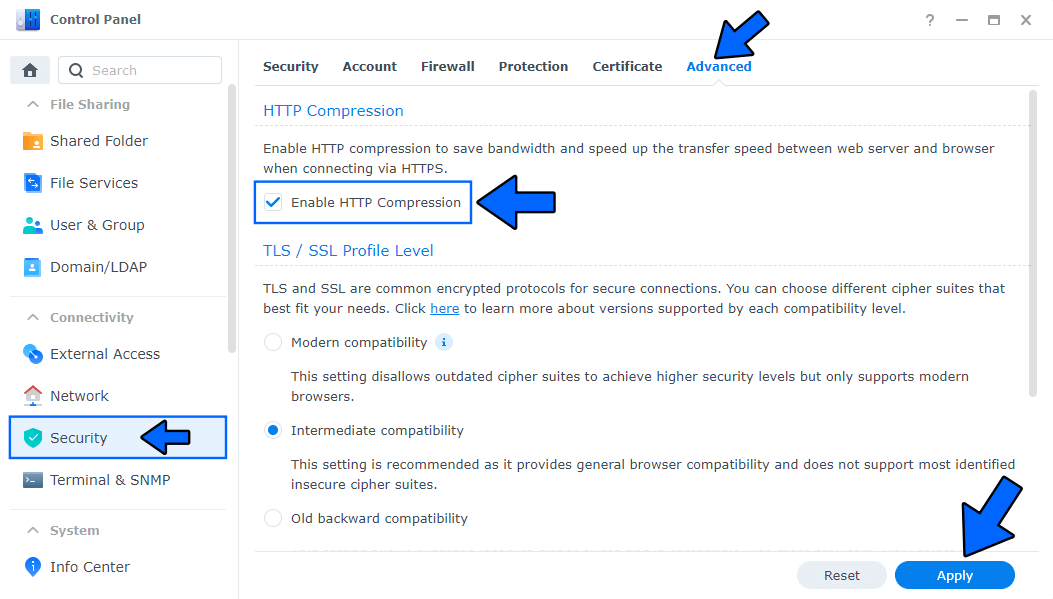
Enable HTTP compression to save bandwidth and speed up the transfer speed between web server and browser when connecting via HTTPS. HTTP compression addresses some of the performance problems of the Web by attempting to reduce the size of resources transferred between a server and client, thereby conserving bandwidth and reducing user perceived latency.
Go to Control Panel / Security / Advanced tab/ Check Enable HTTP Compression then click Apply. Follow the instructions in the image below.
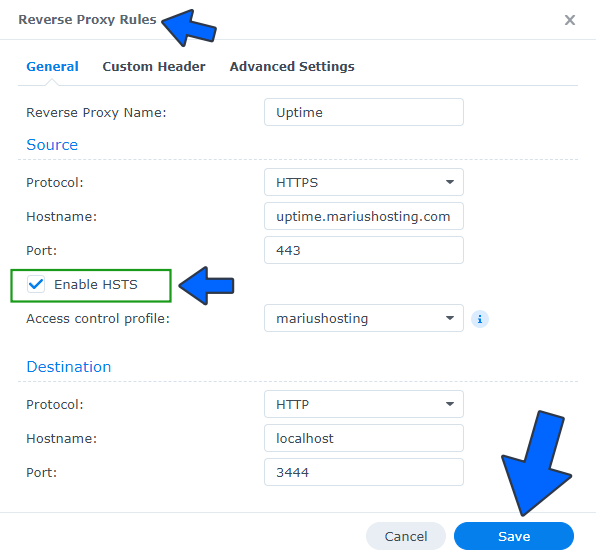
HTTP Strict Transport Security (HSTS) is a web security policy mechanism that helps to protect websites against man-in-the-middle attacks such as protocol downgrade attacks and cookie hijacking. It allows web servers, in this case Synology NAS devices, to declare that web browsers (or other complying user agents) should automatically interact with them using only HTTPS connections which provide Transport Layer Security (TLS/SSL), unlike the insecure HTTP used alone. The HSTS Policy is communicated by the server to the user agent via an HTTPS response header field named Strict-Transport-Security.
Go to Control Panel / Login Portal / Advanced Tab / click Reverse Proxy then modify all of your reverse proxies and check the Enable HSTS option. Click Save. Follow the instructions in the image below.
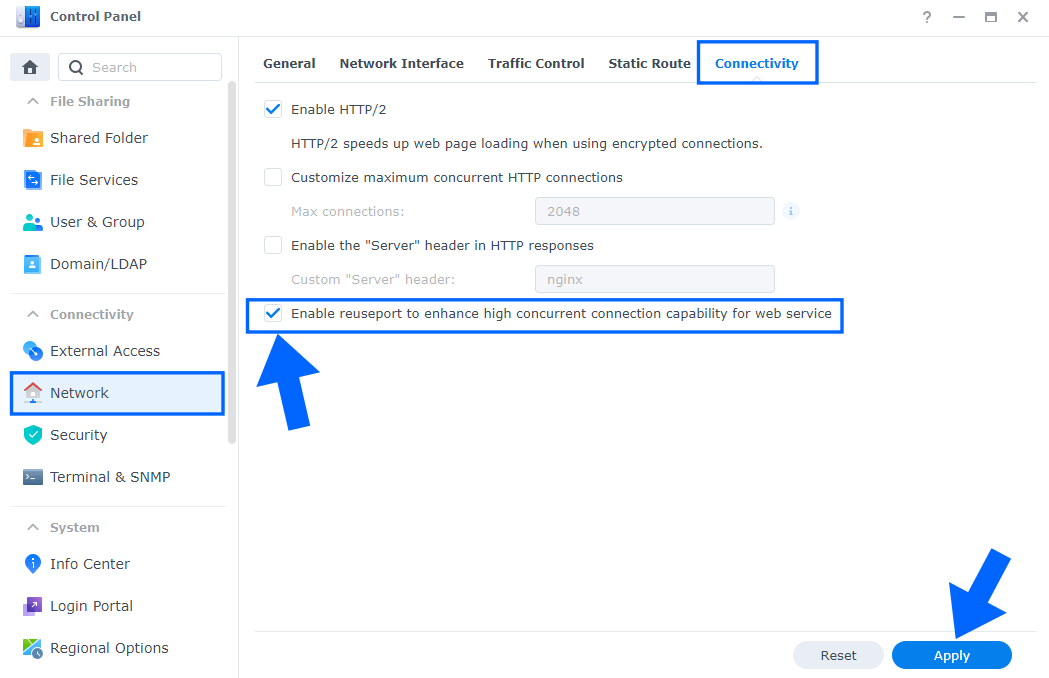
Enable Reuseport. Reuseport is an option that allows you to enhance high concurrent connection capability for web services. With this option enabled, each worker has its own listening socket and on each new connection, the kernel chooses one of them which will receive it – so there is no port contention.
Go to Control Panel / Network / Connectivity / Check Enable reuseport to enhance high concurrent connection capability for web service, then click Apply.
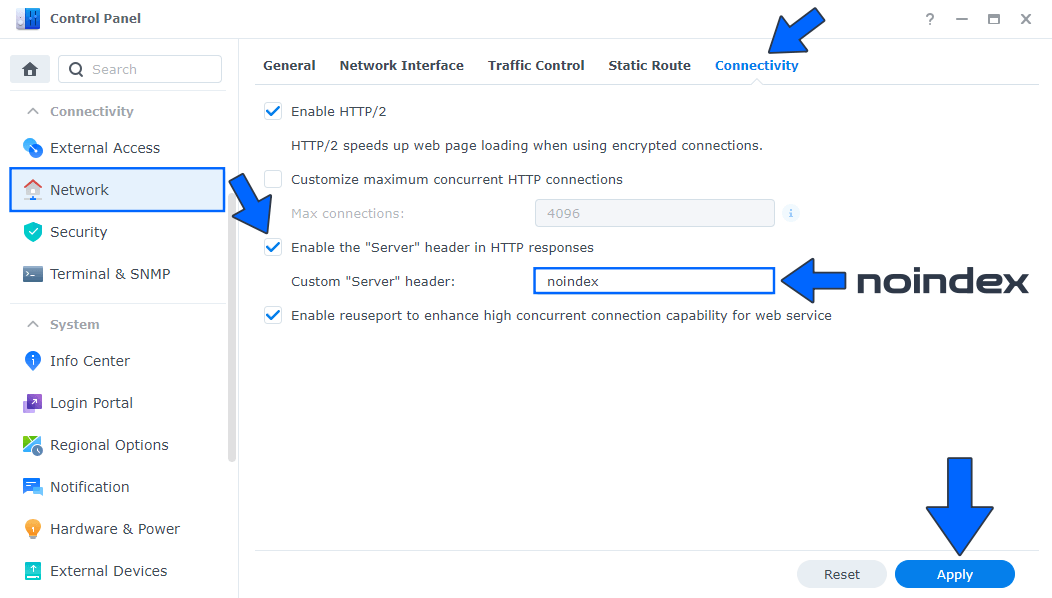
Prevent Search Engines From Indexing Your DDNS Address. When searching on Google or another search engine, did you find your Synology DDNS address? Well, today I want to teach you a little trick to make sure that your DDNS address, be it synology.me or another, will not be indexed by search engines such as Google, Bing etc. This little trick increases your online privacy.
Go to Control Panel / Network / Connectivity tab / Check Enable the “Server” header in HTTP responses. In the Custom “Server” header area type in noindex instead of nginx. Click Apply. Follow the instructions in the image below.
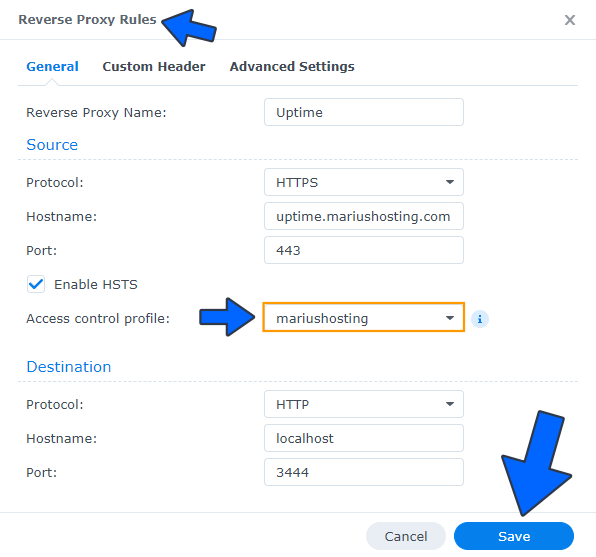
Access Control Profile. Did you know you can restrict an IP’s access to your website hosted on your Synology NAS? You can also restrict user access to every Docker container that uses Reverse Proxy according to the user’s source IP. Synology has an option that allows you to create an Access Control Profile. I will teach you how to restrict/deny access to users by banning their IP so they can’t reach your website hosted on your Synology NAS anymore.
Create your first Access Control Profile. Next, go to Control Panel / Login Portal / Advanced Tab / click Reverse Proxy then modify all of your reverse proxies and select your Access control profile you have previously created. Follow the instructions in the image below.
Activate Synology Firewall by following my article on How to Correctly Set Up Firewall on DSM 7.
Note: Additional best practice: Support mariushosting 🙂
This post was updated on Saturday / April 18th, 2026 at 8:57 PM