
Today I happened to notice that my Synology NAS was using up more disk space than it should have. I didn’t understand right away why this was happening, but then I remembered that over the last few months I had installed several images for Docker for various containers. The funny thing is that “junk” images are not displayed in the graphical interface of the Docker/Container Manager package. So everything seemed in order. It then came to me that over the last year I have been using Watchtower to do automatic updates of all my docker containers. Surely it was an oversight on my part that I had never noticed that so many old container images were saved on my NAS, but not visible in the Docker interface itself.
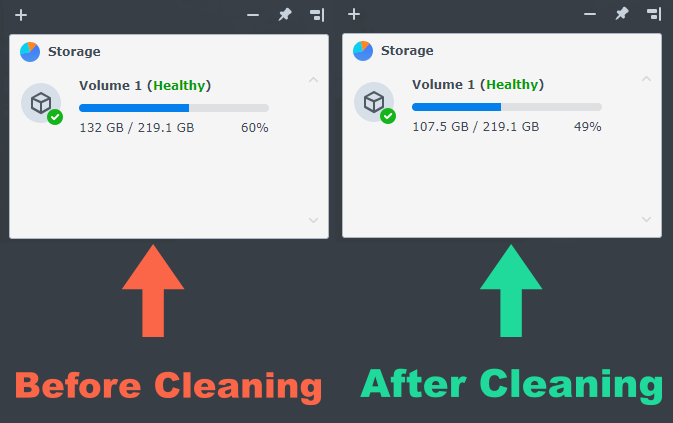
Thanks to Portainer, I was able to locate the junk images and delete them from my Synology NAS. And it was extremely easy. I managed to free a whopping 24.5 GB of space on my SSD drives and went from 132 GB to 107.5 GB. Below I will explain how I did it so you can do it yourself too.
STEP 1
Please Support My work by Making a Donation.
STEP 2
Install Portainer on your Synology NAS using my Step by Step Guide. Note: If you already have Portainer installed, skip this STEP. Attention: Make sure you have installed the latest Portainer version.
STEP 3
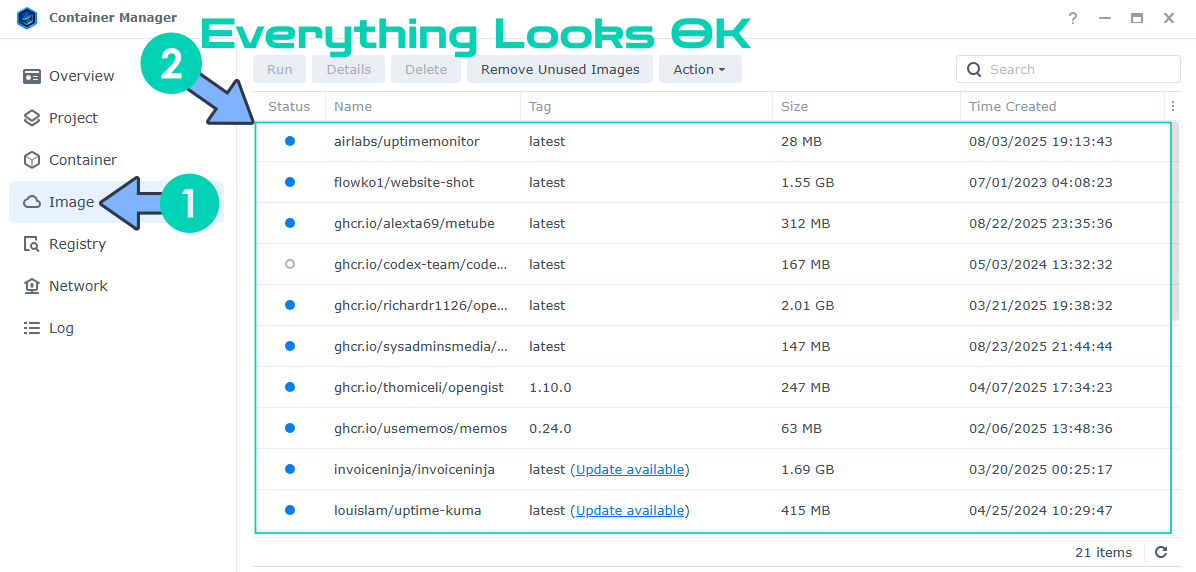
Open Portainer then locate the text “Images” in the menu on the left. Click on “Images“. You will see so many “Unused” images labeled as such against an orange background. So select all the Unused images, then click Remove. The removal process will start instantly and it can take a few minutes depending on how many unused images you have. Note: Remember to select only the images labeled Unused in the orange background. The ones that aren’t labeled as “Unused” are perfectly working images belonging to the containers you are currently running. Follow the instructions in the image below.
Log into Portainer. In the menu on the left click on Images. Click Filter. Check Unused Images. Follow the instructions in the image below.

You will find a list of images marked in orange with the word “Unused” – these are the images that you no longer use. Check all the images with the Unused tag then click the Remove button. Follow the instructions in the image below.

A new pop up window will open. Click Remove the image. Follow the instructions in the image below.

Once you click the Remove the image button, all images tagged Unused will be automatically deleted.

STEP 4
🟢Please Support My work by Making a Donation. Almost 99,9% of the people that install something using my guides forget to support my work, or just ignore STEP 1. I’ve been very honest about this aspect of my work since the beginning: I don’t run any ADS, I don’t require subscriptions, paid or otherwise, I don’t collect IPs, emails, and I don’t have any referral links from Amazon or other merchants. I also don’t have any POP-UPs or COOKIES. I have repeatedly been told over the years how much I have contributed to the community. It’s something I love doing and have been honest about my passion since the beginning. But I also Need The Community to Support me Back to be able to continue doing this work.
STEP 5
Go check how much space you have cleared. I have freed up 24.5 GB of space which is Whoa!
Note: Portainer becomes a must have if you have Docker installed on your Synology NAS.
Note: To avoid this issue with old container images, you should install Watchtower using my step by step guide.
This post was updated on Saturday / April 18th, 2026 at 8:58 PM