Do you remember my article on how to install Home Assistant on Your Synology NAS? Today I will teach you how to Install Home Assistant Supervisor. Many of you have asked me how you can install the supervised version of Home Assistant on a Synology NAS, and today I decided to do an article about it. Home Assistant is an Open source home automation that puts local control and privacy first. Powered by a worldwide community of tinkerers and DIY enthusiasts. Perfect to run on a Synology NAS server. Supervisor integration allows you to monitor and control Supervisor add-ons and operating system from Home Assistant.
STEP 1
Please Support My work by Making a Donation.
STEP 2
If you have already installed Home Assistant on your Synology NAS, delete everything that has to do with Home Assistant from your NAS using my guide on How to Clean Docker. This will help you install a fresh copy of Home Assistant with the built-in Supervisor, avoiding incompatibility issues created by previous installations.
STEP 3
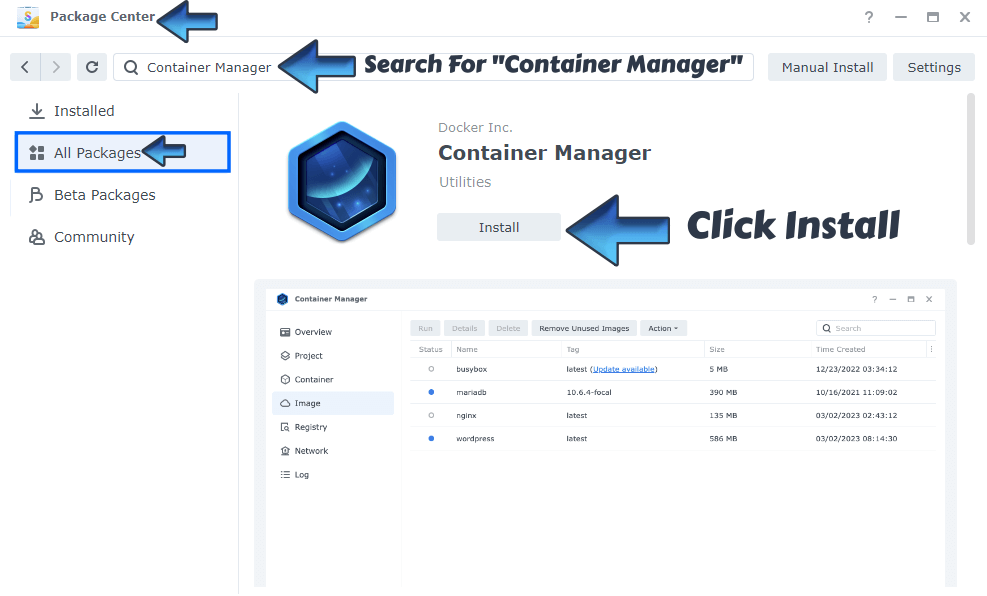
Install Container Manager via Synology “Package Center”. If you run an older DSM version (under 7.2), search for Docker instead of Container Manager.
STEP 4
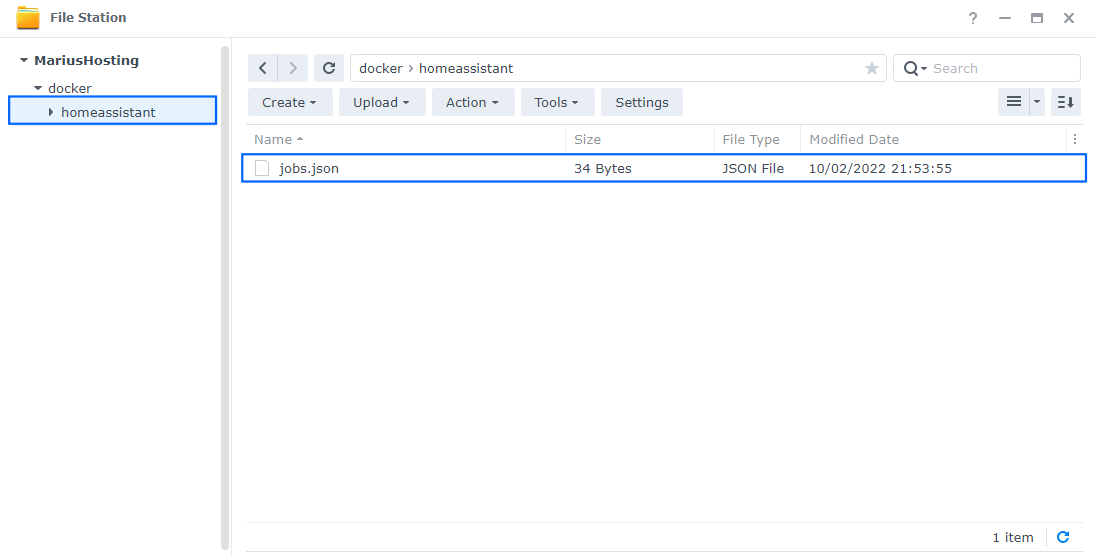
Go to File Station and open the docker folder. Inside the docker folder, create one new folder and name it homeassistant. Follow the instructions in the image below.
Note: Be careful to enter only lowercase, not uppercase letters.

STEP 5
Download (click on the blue link below) then upload the jobs.json file below in the homeassistant folder that you created at STEP 4. Follow the instructions in the image below. 🔒Note: Support my work to unlock the password. You can use this password to download any file on mariushosting forever!
STEP 6
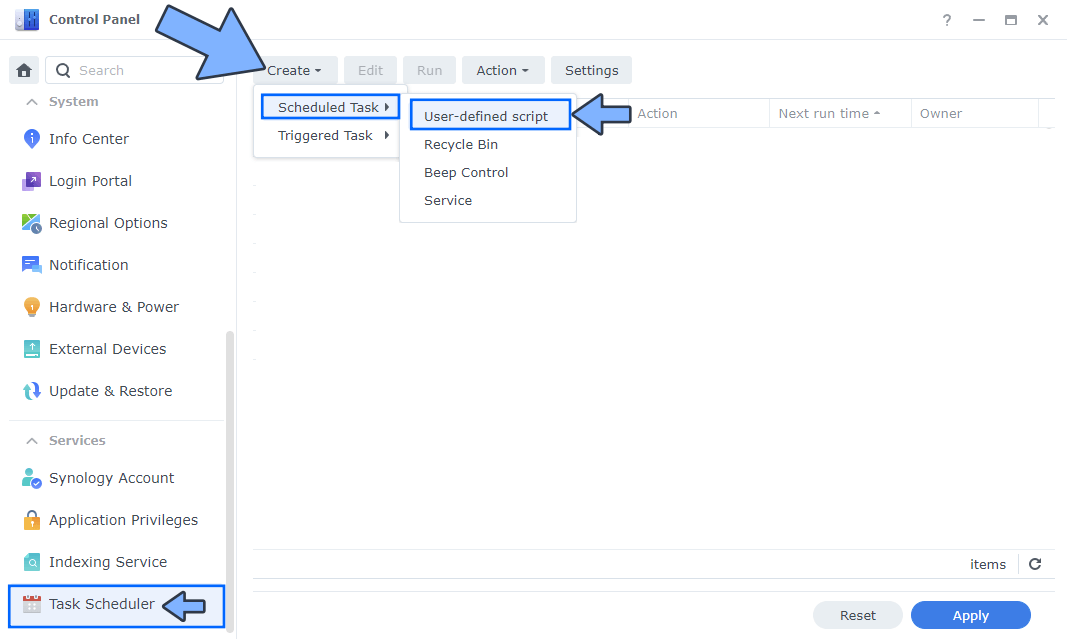
Go to Control Panel / Task Scheduler / Create / Scheduled Task / User-defined script. Follow the instructions in the images below.
STEP 7
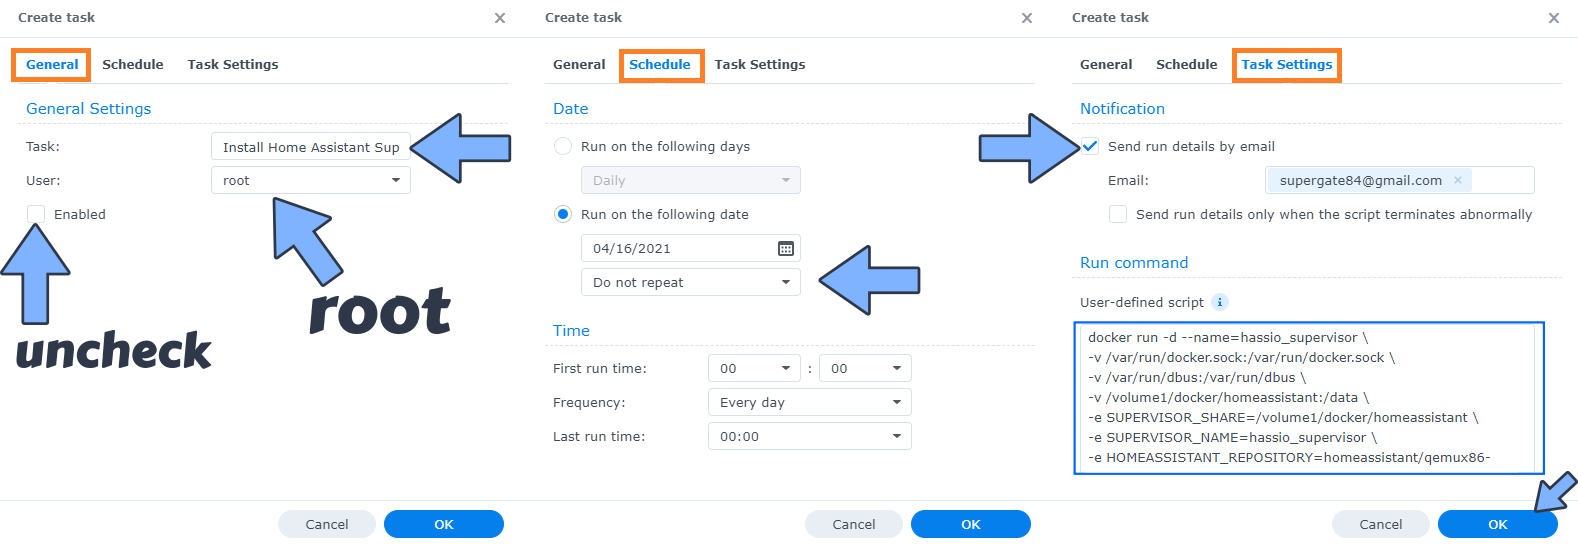
Once you click on User-defined script a new window will open. Follow the instructions below:
- General: In the Task field type in Install Home Assistant. Uncheck “Enabled” option. Select root User.
- Schedule: Select Run on the following date then select “Do not repeat“.
- Task Settings: Check “Send run details by email“, add your email then copy paste the code below in the Run command area. After that click OK.
docker run -d --name=hassio_supervisor \
-v /var/run/docker.sock:/var/run/docker.sock \
-v /var/run/dbus:/var/run/dbus \
-v /volume1/docker/homeassistant:/data \
-e SUPERVISOR_SHARE=/volume1/docker/homeassistant \
-e SUPERVISOR_NAME=hassio_supervisor \
-e HOMEASSISTANT_REPOSITORY=homeassistant/qemux86-64-homeassistant \
--security-opt seccomp=unconfined \
--privileged \
--restart always \
ghcr.io/home-assistant/amd64-hassio-supervisor:2026.07.5
mount --make-shared /volume1/
STEP 8
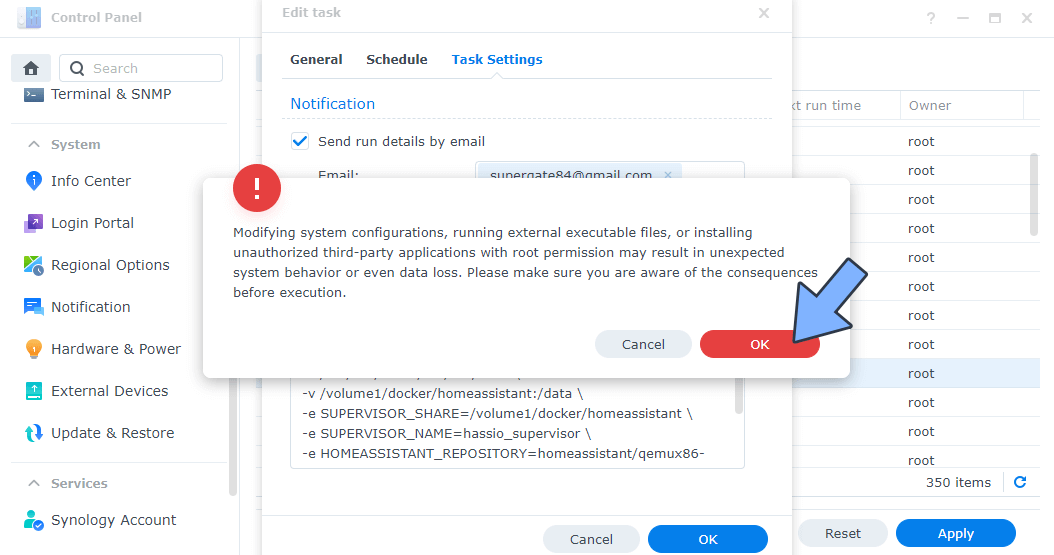
After you click OK on STEP 7 a new warning pop up window will open. Click OK.
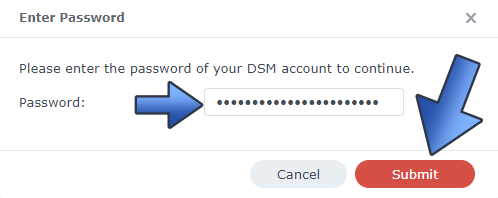
After you click OK, type in your DSM Password then click Submit. Follow the instructions in the image below.
STEP 9
After you click Submit on STEP 8, select your “Install Home Assistant Supervisor” Task then click the “Run” tab. You will be asked to run Install Home Assistant Supervisor – click OK. Follow the instructions in the image below.

STEP 10
🟢Please Support My work by Making a Donation. Almost 99,9% of the people that install something using my guides forget to support my work, or just ignore STEP 1. I’ve been very honest about this aspect of my work since the beginning: I don’t run any ADS, I don’t require subscriptions, paid or otherwise, I don’t collect IPs, emails, and I don’t have any referral links from Amazon or other merchants. I also don’t have any POP-UPs or COOKIES. I have repeatedly been told over the years how much I have contributed to the community. It’s something I love doing and have been honest about my passion since the beginning. But I also Need The Community to Support me Back to be able to continue doing this work.
STEP 11
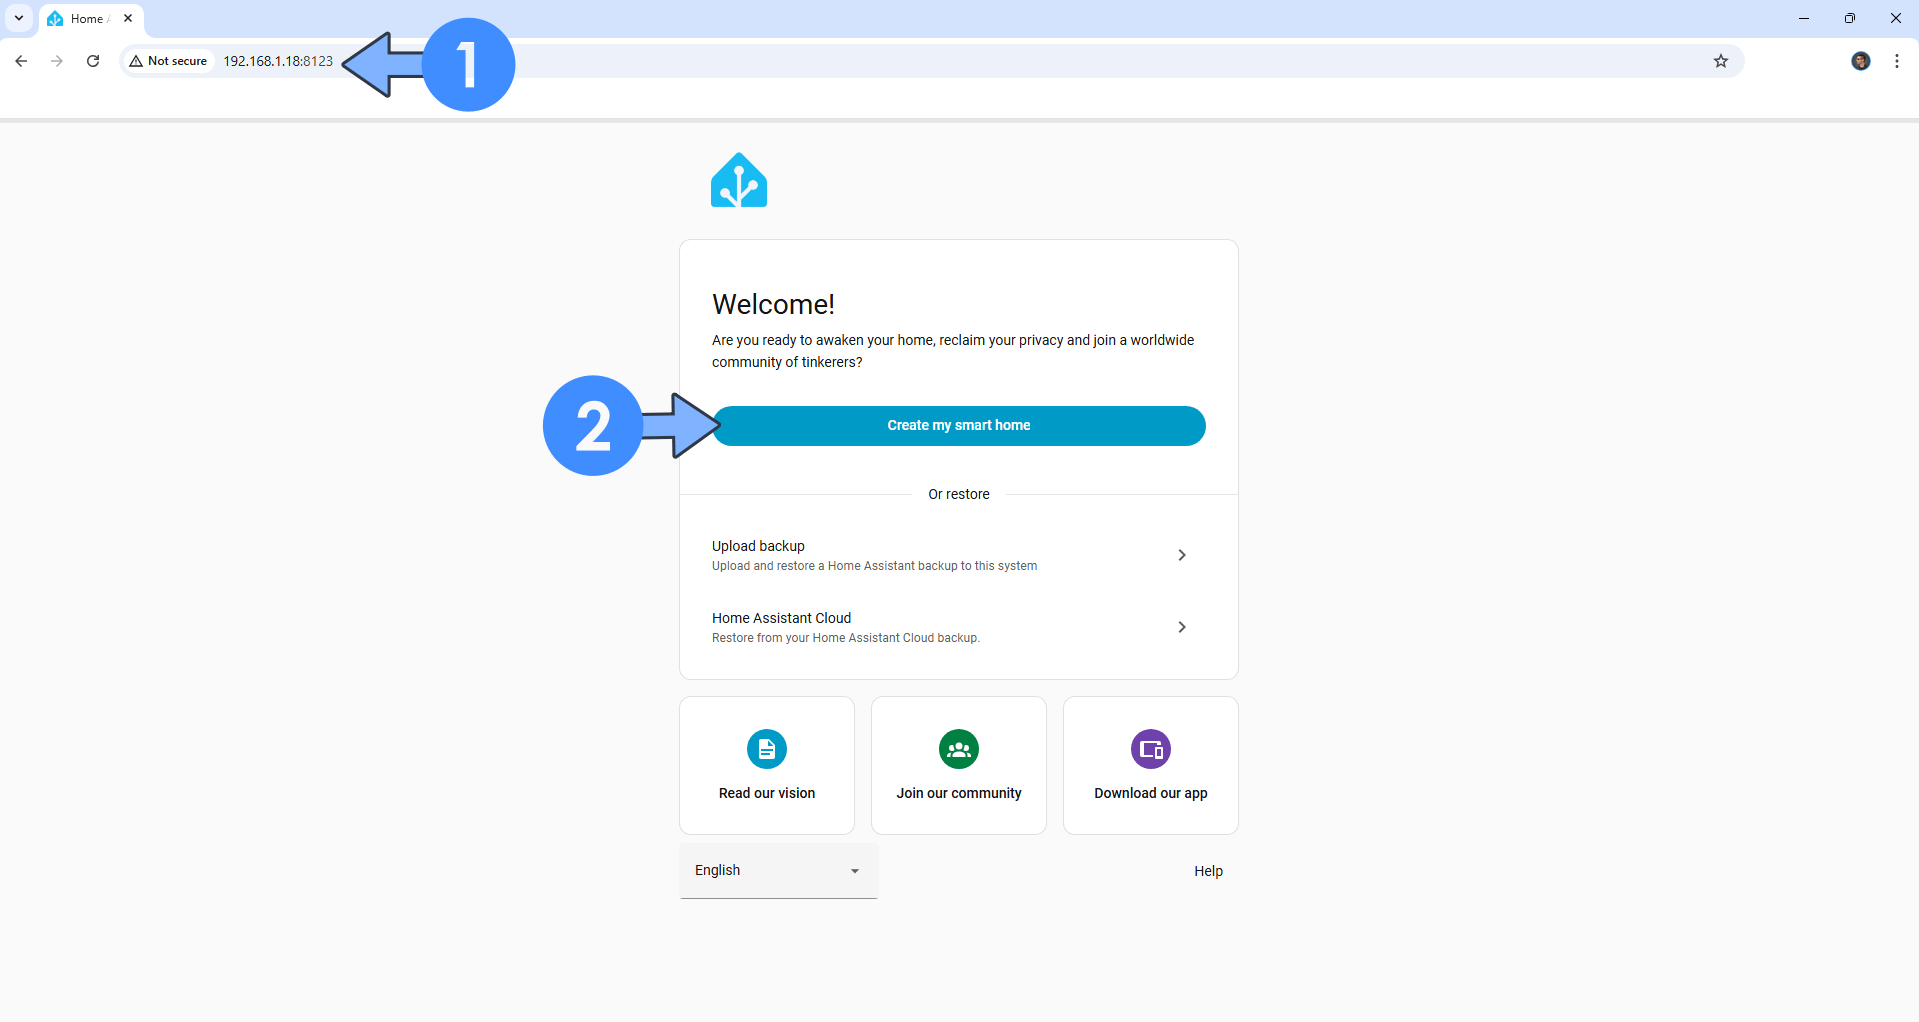
Please wait approximately 10 or more minutes for the installation to be completed or you will get a blank page if you try to connect too soon. Now open your browser and type in http://Synology-ip-address:8123 Click Create my smart home. Follow the instructions in the image below.
STEP 12
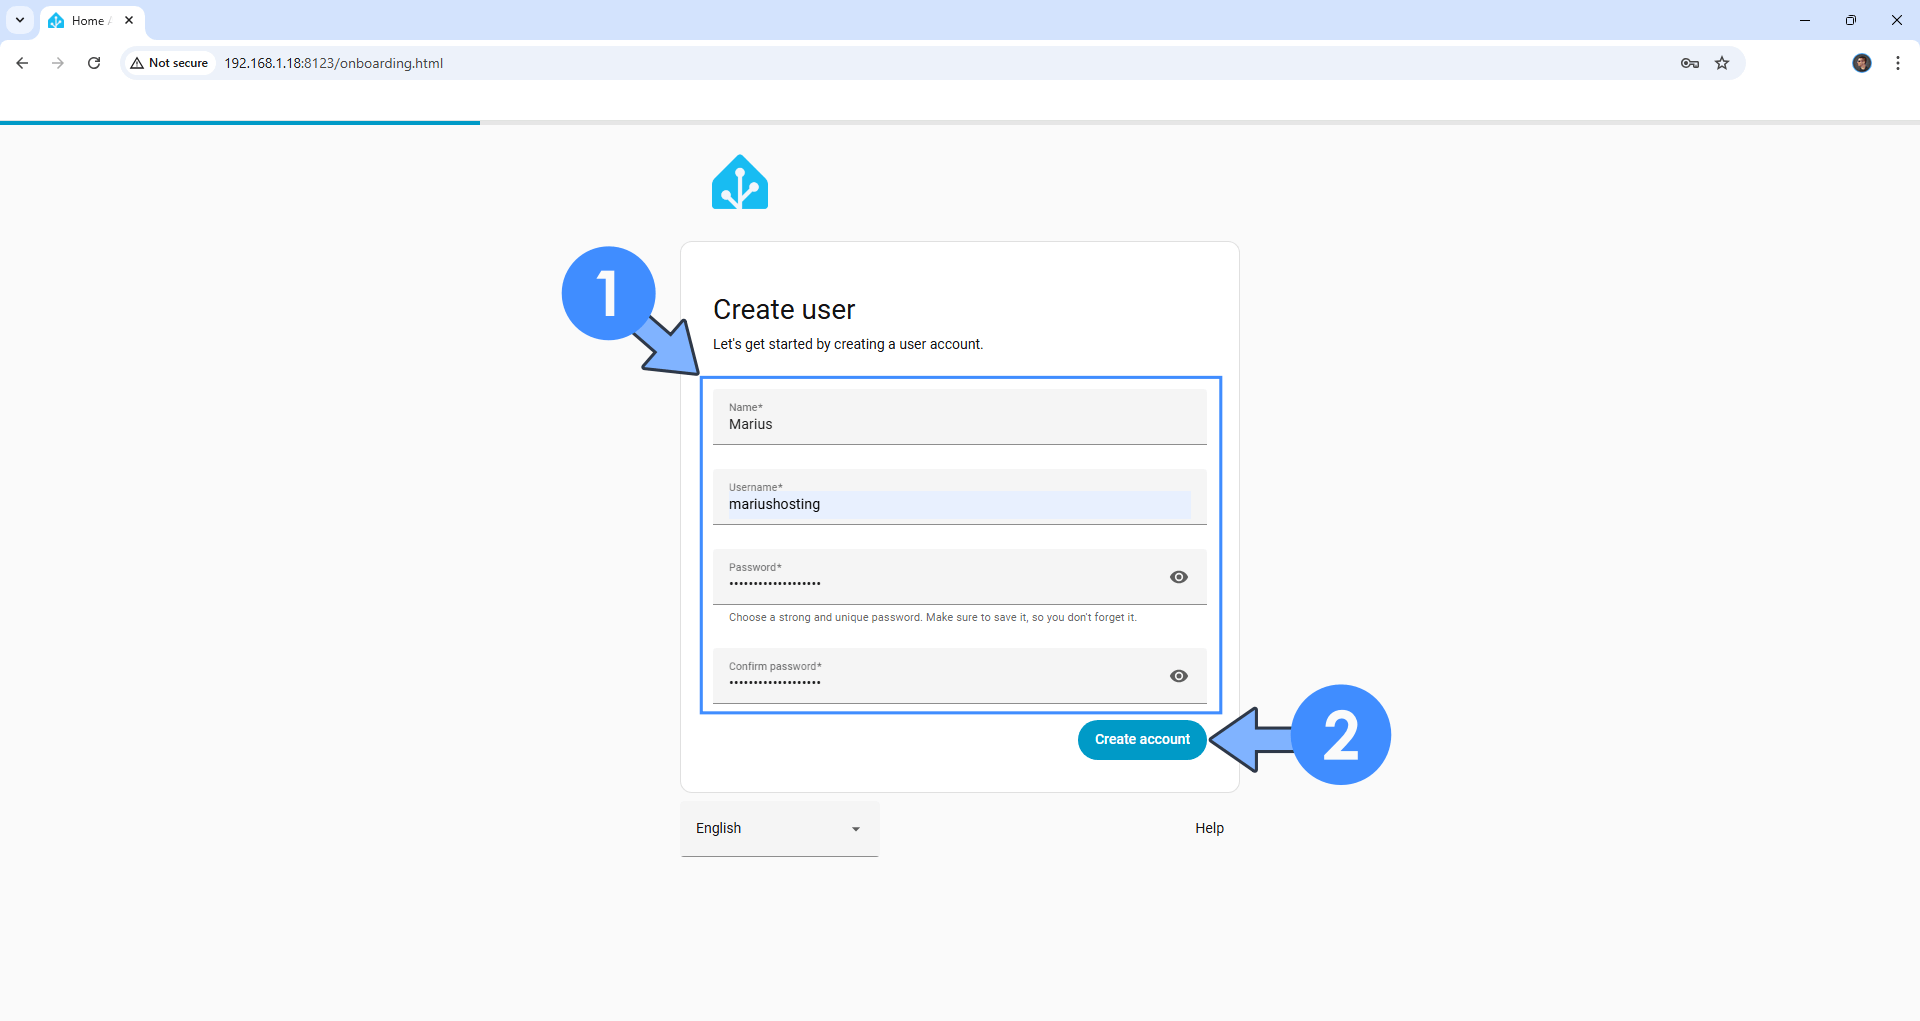
Choose Name, Username, Password and Confirm Password, then click Create account. Follow the instructions in the image below.
STEP 13
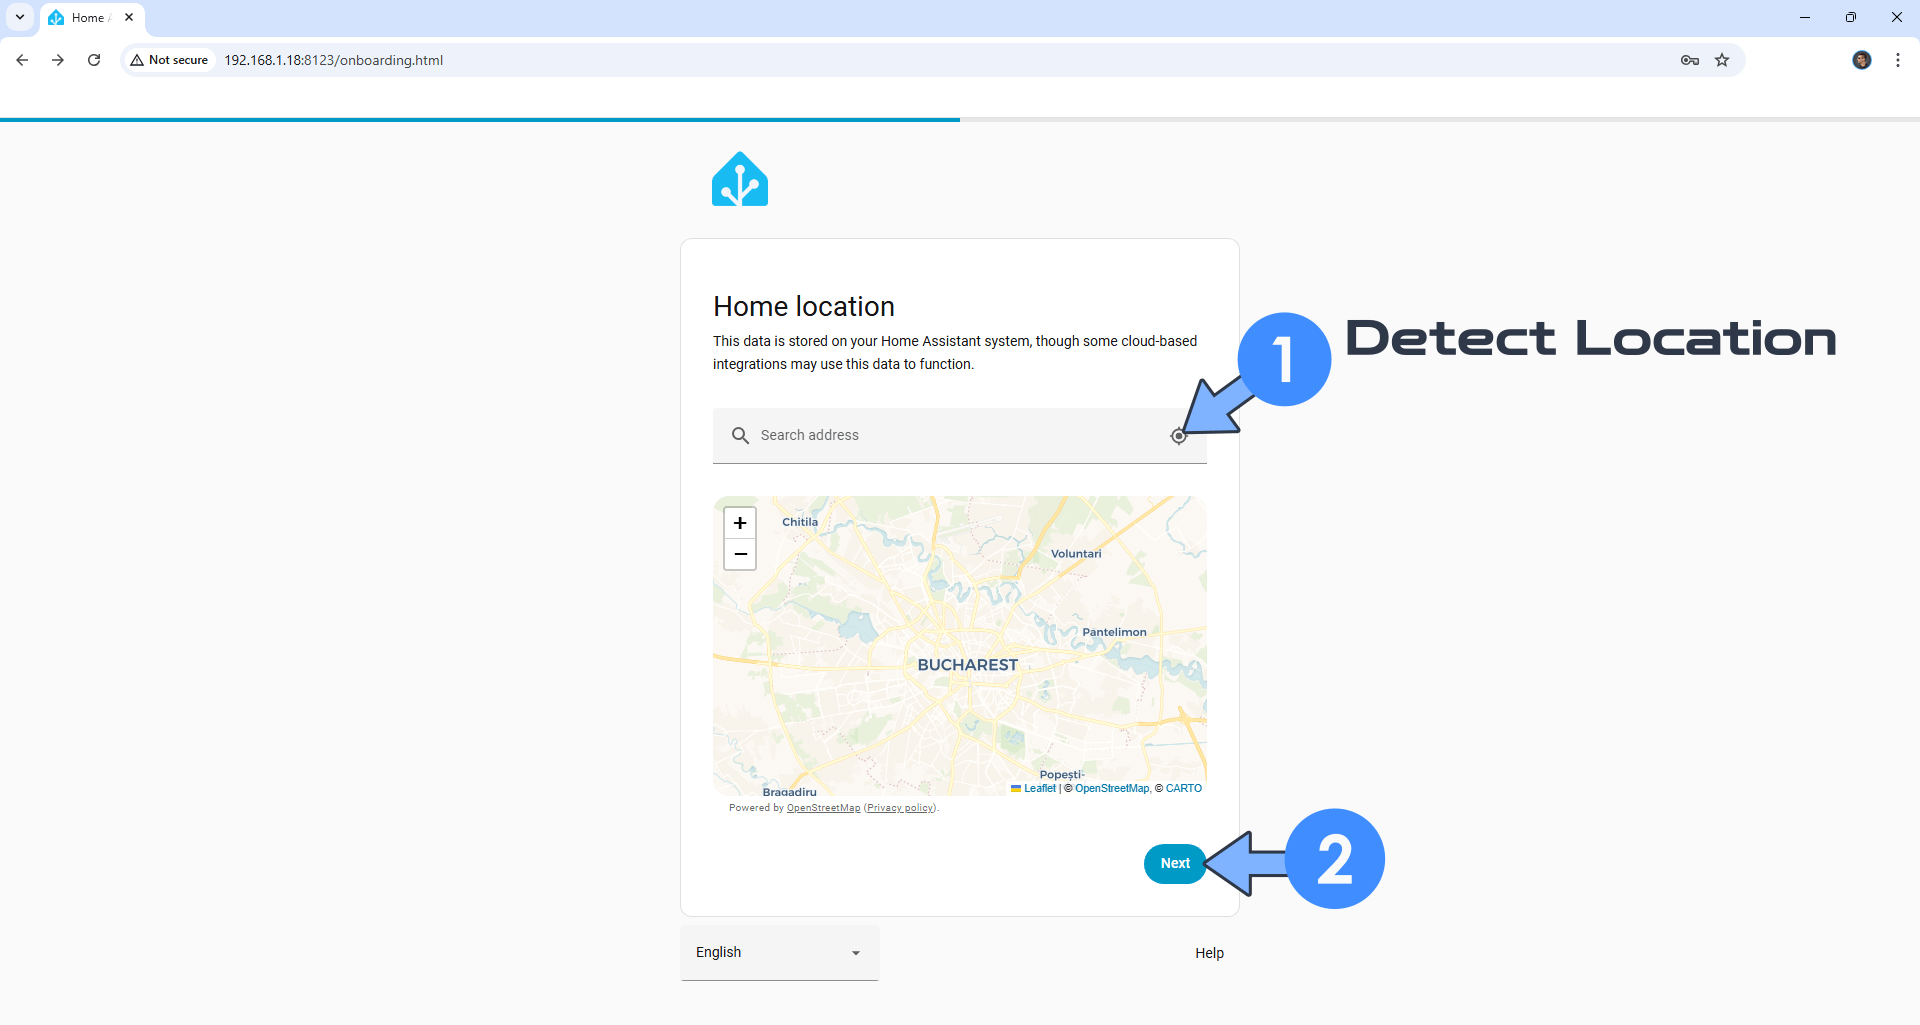
Click the Detect Location icon. For a more accurate location, move your location point on the MAP. Click Next. Follow the instructions in the image below.
STEP 14
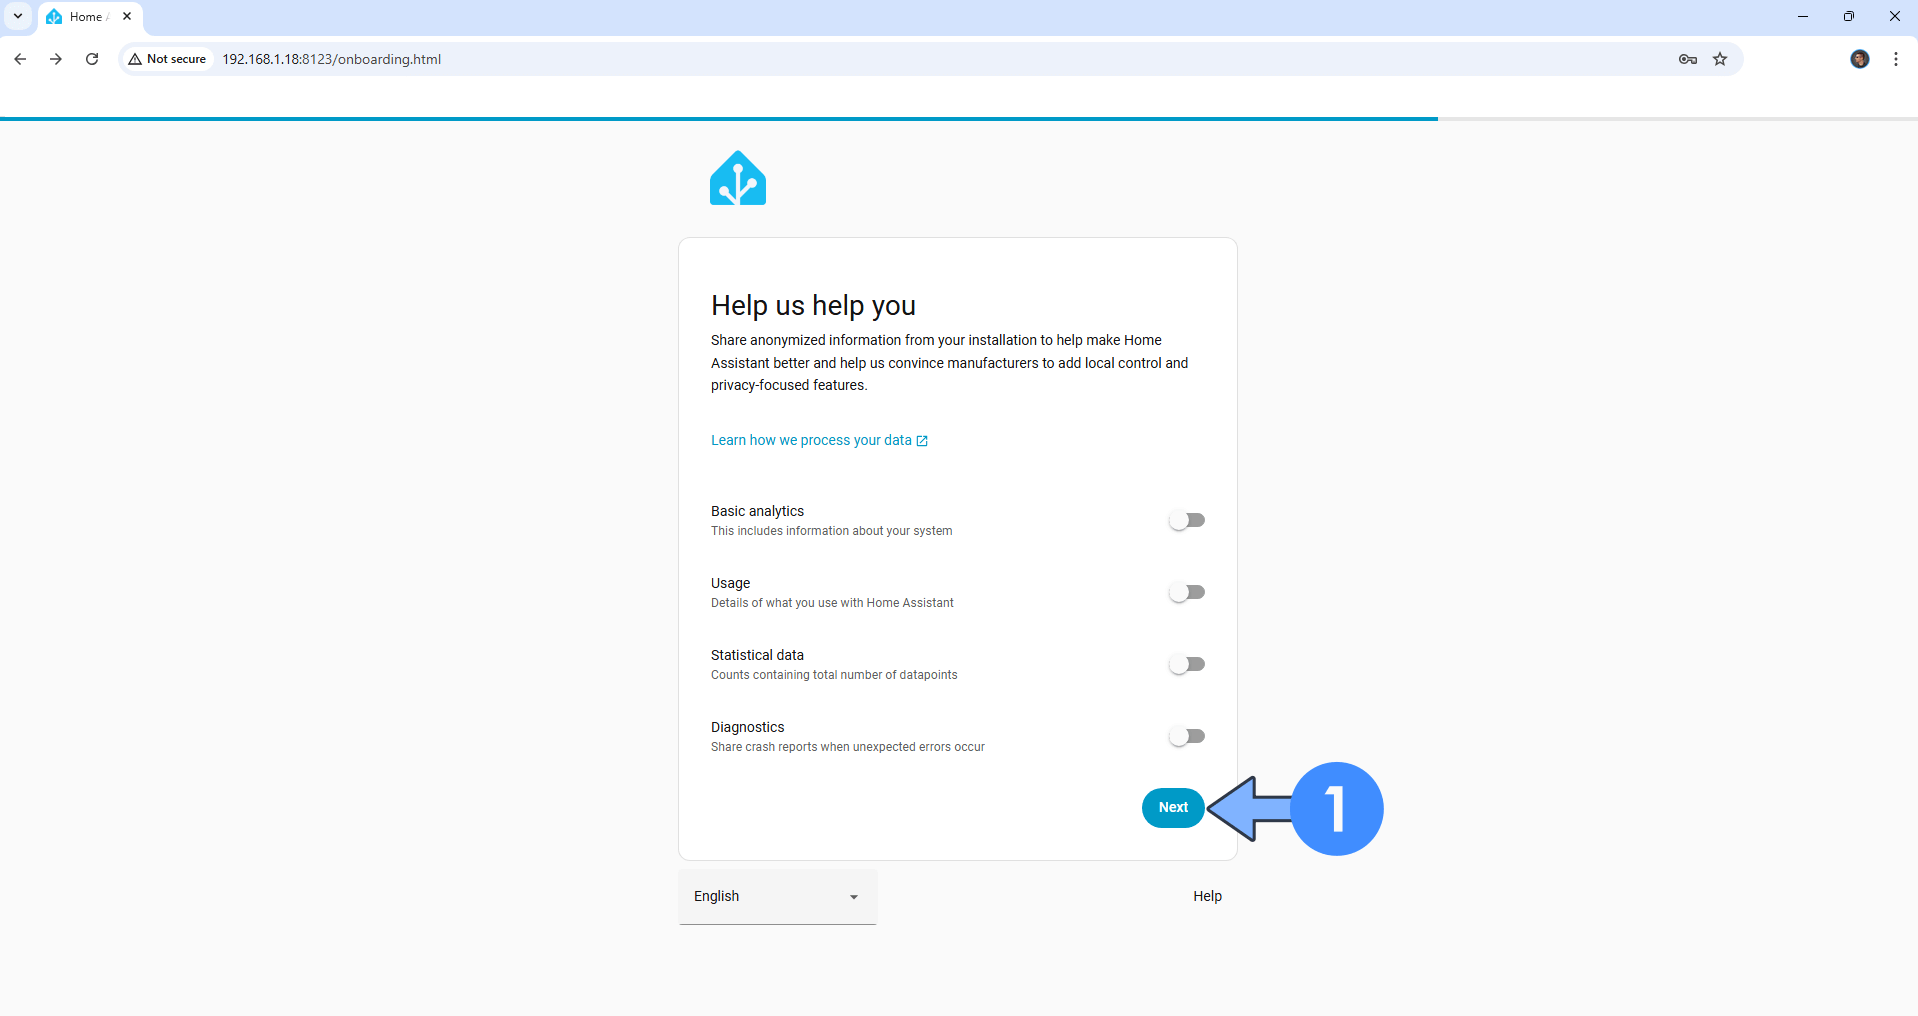
Choose to share or no anonymized information. Click Next. Follow the instructions in the image below.
STEP 15
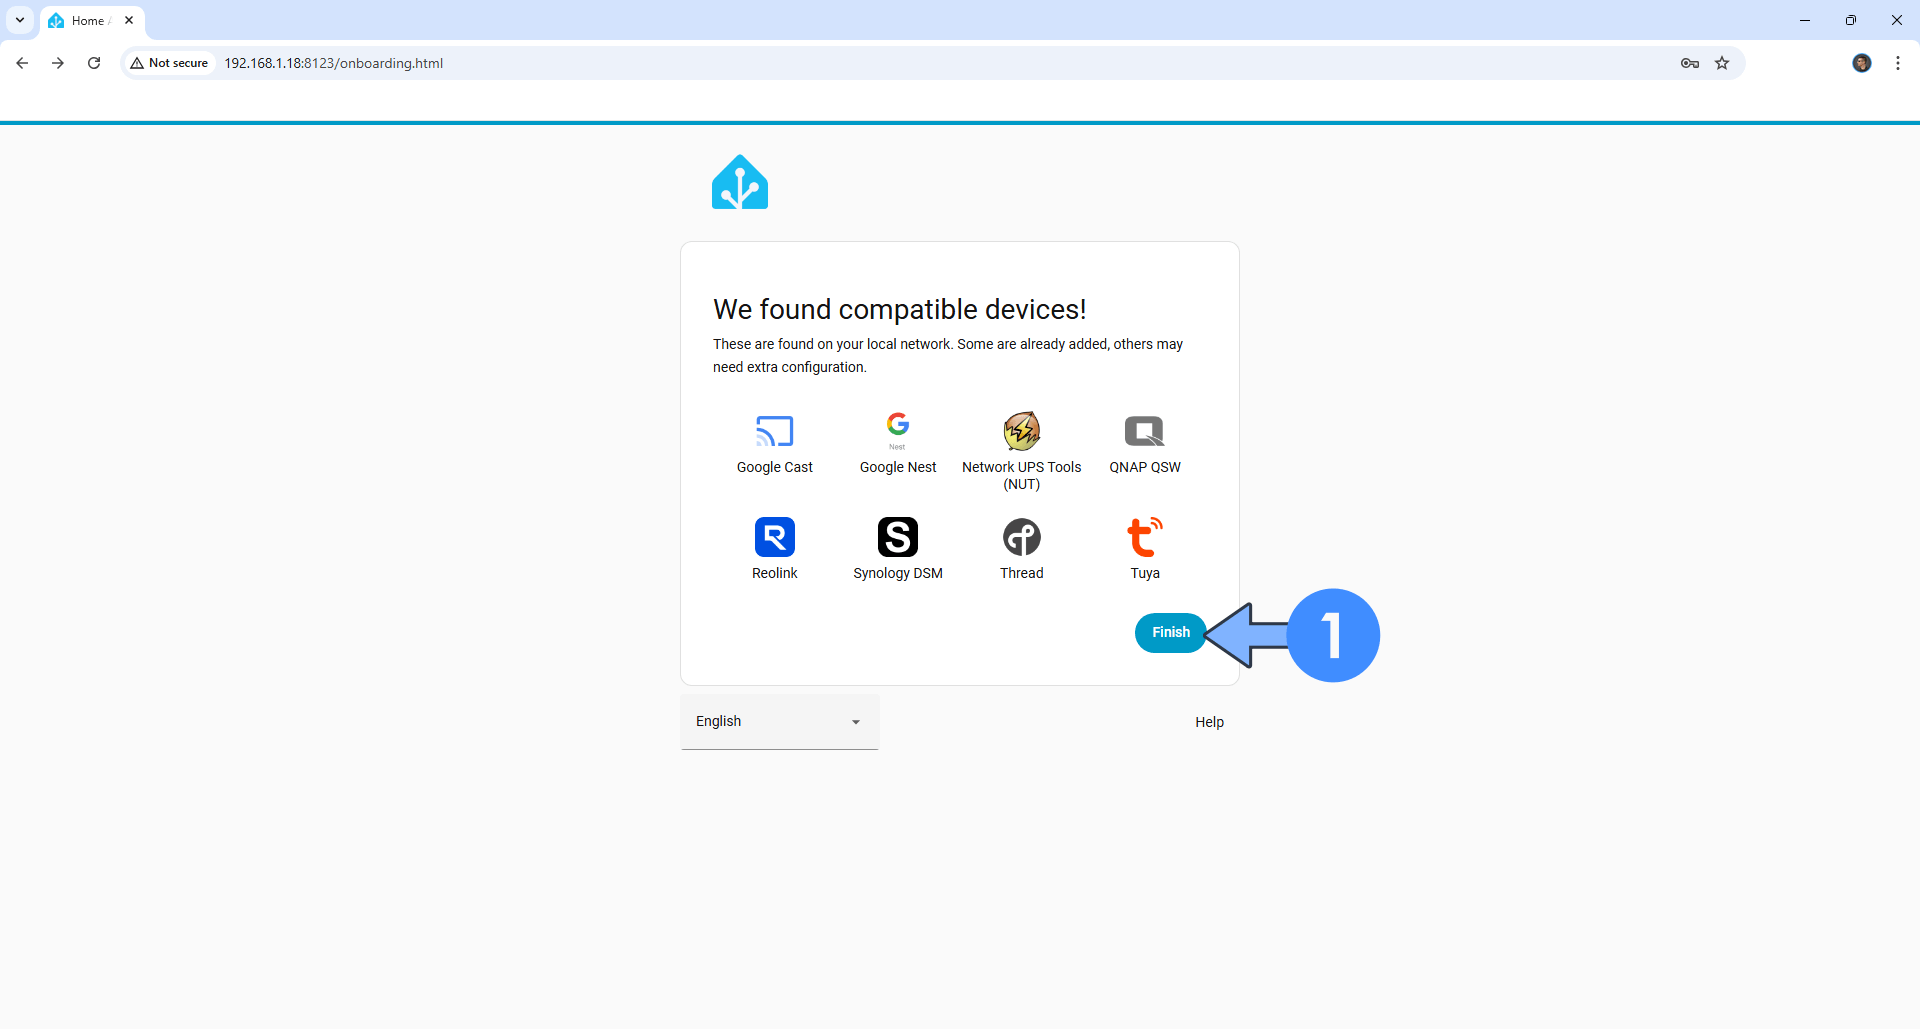
Click Finish. Follow the instructions in the image below.
STEP 16
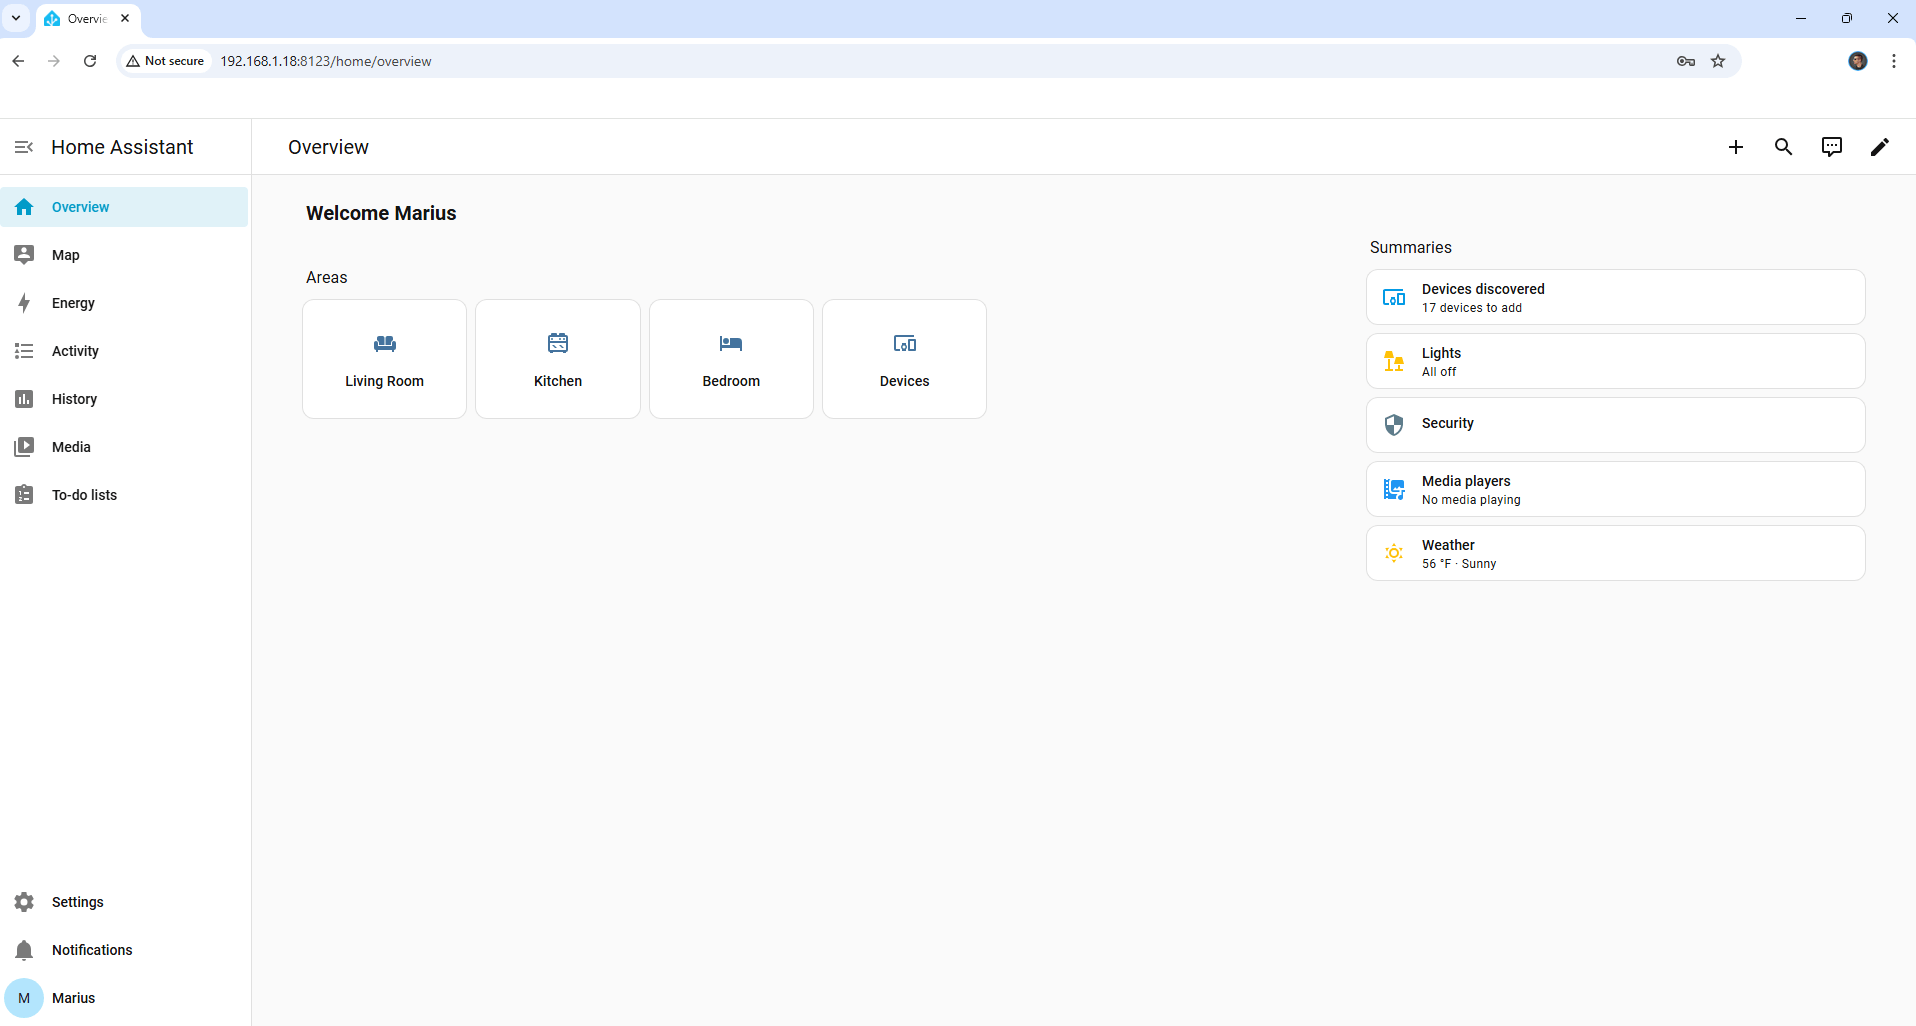
Welcome to your Home Assistant Supervisor Dashboard! ⚠️ Warning: If you get notifications that say “system unsupported“, just ignore them and delete them. This happens because the Docker daemon engine from Synology is at version 24.0.2 instead of version 26.
STEP 17
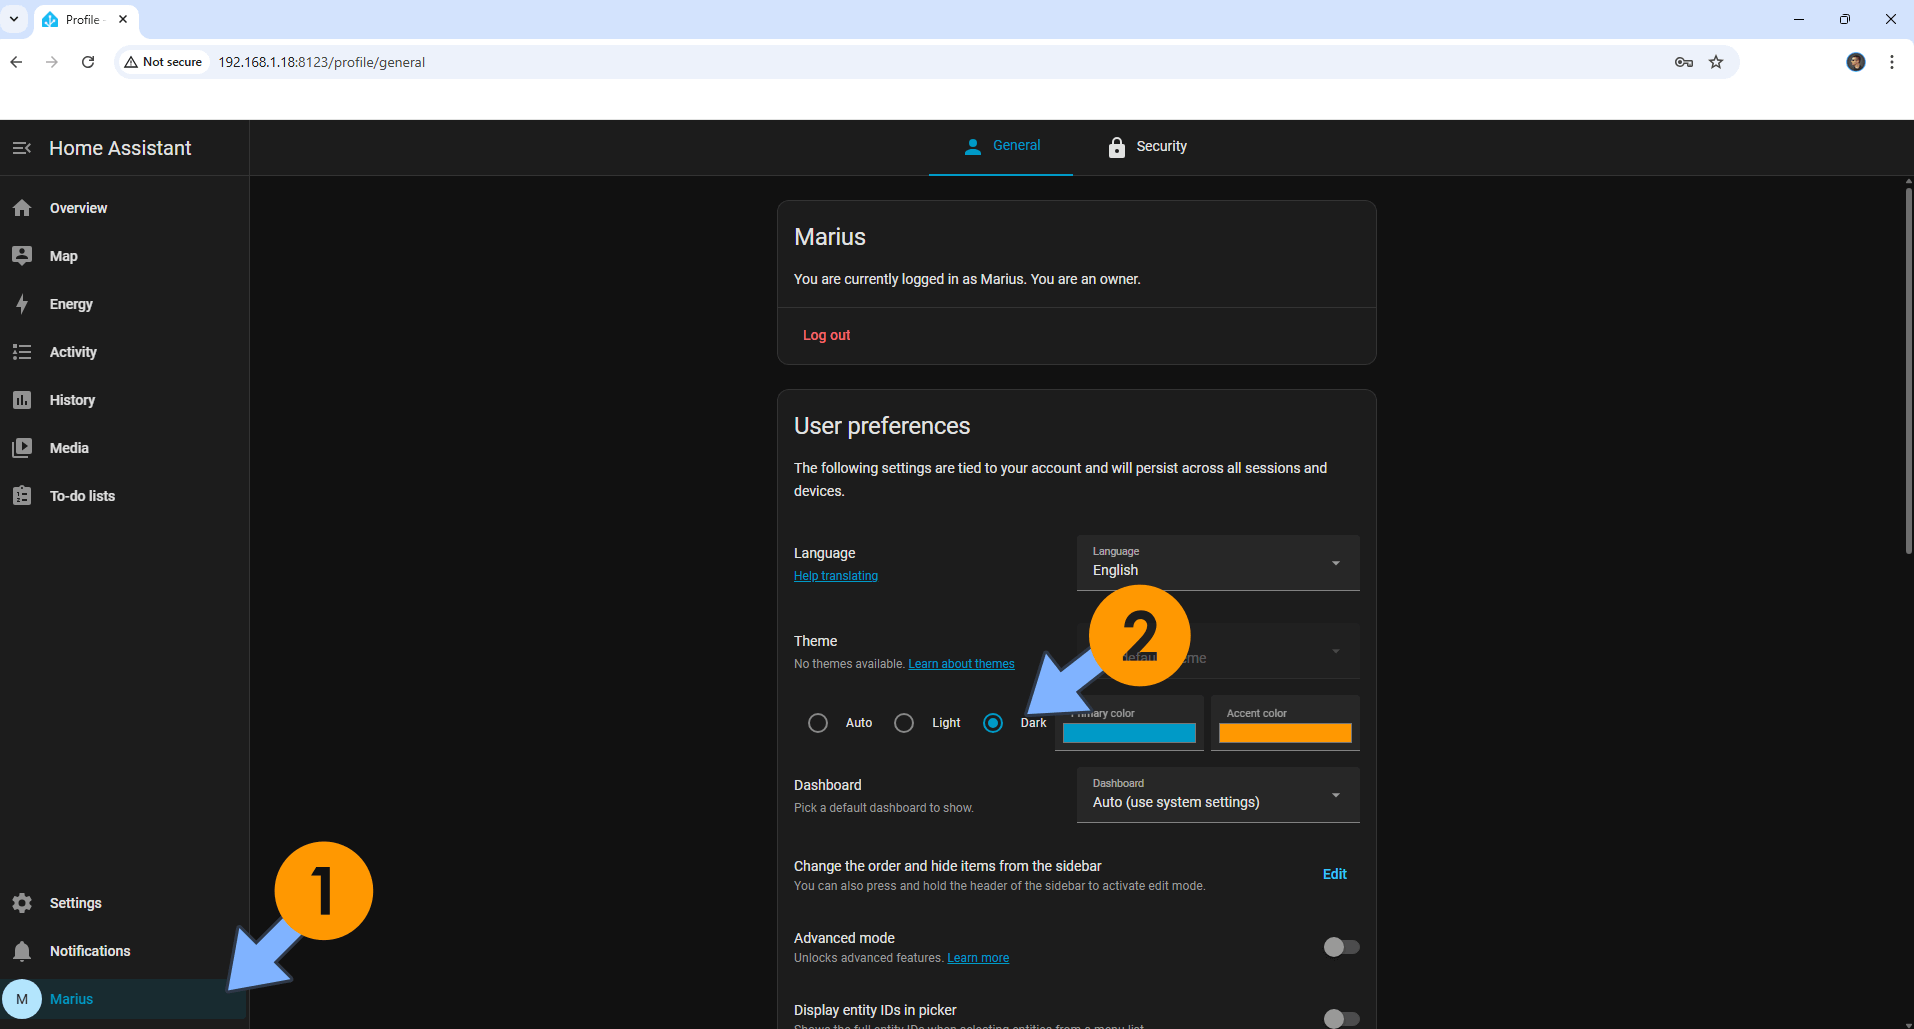
You can also use Dark Mode theme for your Home Assistant Supervisor Dashboard!
STEP 18
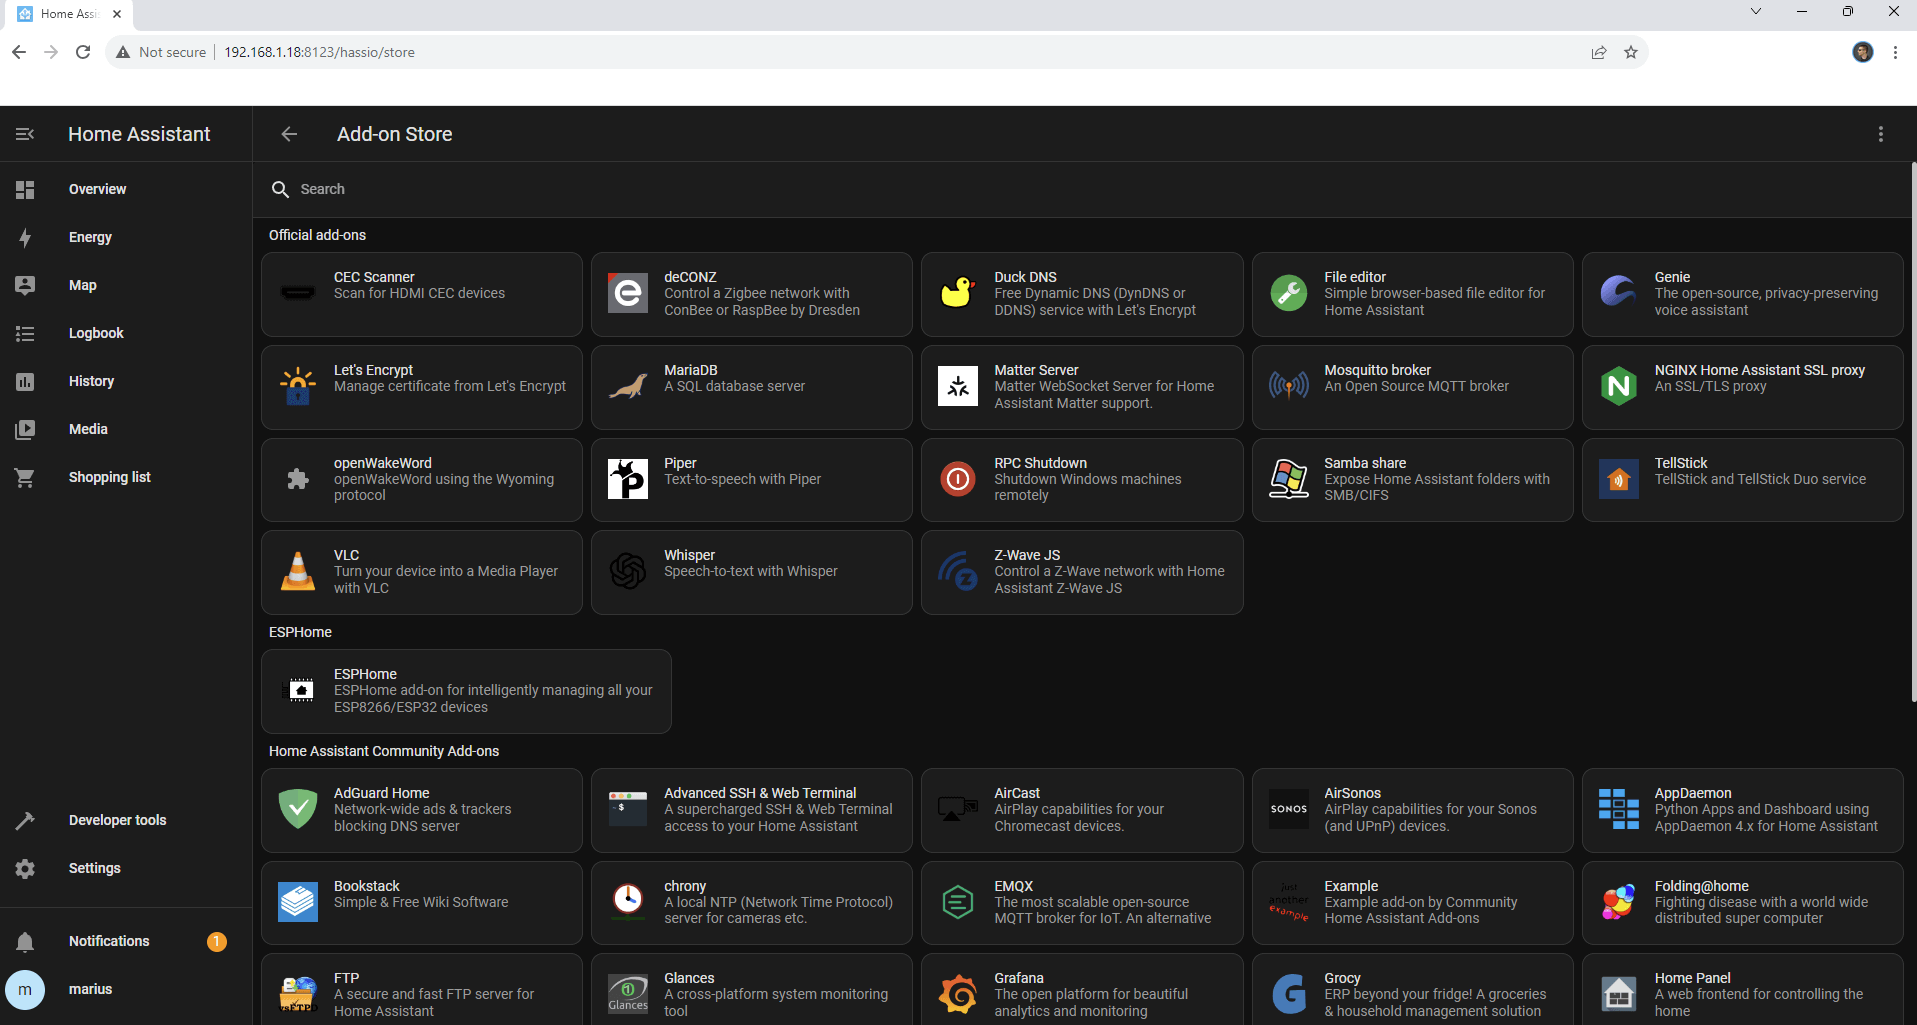
Install multiple Add-ons thanks to the Supervisor!
STEP 19
Note: If you want to run Home Assistant container over HTTPS check How to Run Docker Containers Over HTTPS. In order to make Home Assistant Supervisor work via HTTPS, it’s mandatory to activate WebSocket.
STEP 20
Read how to solve 400: Bad Request error.
STEP 21
Every time you restart your NAS, you will notice that your Home Assistant Supervisor will have stopped working. To solve this, you need to mount the slave folder again.
Go to Control Panel / Task Scheduler / Create / Scheduled Task / User-defined script. Follow the instructions in the images below. Once you click on User-defined script a new window will open. Follow the instructions below:
- General: In the Task field type in Supervisor Slave Folder. Uncheck “Enabled” option. Select root User.
- Schedule: Select Run on the following date then select “Do not repeat“.
- Task Settings: Check “Send run details by email“, add your email then copy paste the code below in the Run command area. After that click OK.
mount --make-shared /volume1/
STEP 22
You can also create boot-up triggered task (instead of scheduled) which can run the mount on start, before Docker starts.
Go to Control Panel / Task Scheduler / Create / Triggered Task / User-defined script. Follow the instructions in the images below. Once you click on User-defined script a new window will open. Follow the instructions below:
- Task: In the Task field type in Supervisor Slave Folder. Select the root User.
- Event: Boot-up.
- Task Settings: Check “Send run details by email“, add your email then copy paste the code below in the Run command area. After that click OK.
mount --make-shared /volume1/
STEP 23
To update your Home Assistant Supervisor instance to the latest version, you need to follow the following STEPS. ⚠️Warning: do NOT update from Home Assistant UI, update option.
- From Container Manager/Docker, stop and delete all the Containers related to Home Assistant Supervisor.
- From Container Manager/Docker, delete all the Images related to Home Assistant Supervisor.
- Do NOT delete any folders in File Station related to Home Assistant Supervisor.
- Reinstall Home Assistant Supervisor via Task Scheduler by following my always-up-to-date code generated at STEP 7 of this article.
Note: Can I run Docker on my Synology NAS? See the supported models.
Note: How to Back Up Docker Containers on your Synology NAS.
Note: How to Free Disk Space on Your NAS if You Run Docker.
Note: How to Schedule Start & Stop For Docker Containers.
Note: How to Activate Email Notifications.
Note: How to Add Access Control Profile on Your NAS.
Note: How to Change Docker Containers Restart Policy.
Note: How to Use Docker Containers With VPN.
Note: Convert Docker Run Into Docker Compose.
Note: How to Clean Docker.
Note: How to Clean Docker Automatically.
Note: Best Practices When Using Docker and DDNS.
Note: Some Docker Containers Need WebSocket.
Note: Find out the Best NAS Models For Docker.
Note: Activate Gmail SMTP For Docker Containers.
This post was updated on Wednesday / July 29th, 2026 at 1:43 PM