
Reactive Resume is a free, open-source resume builder that lets you create, update and share professional resumes and cover letters with no ads, no tracking and no paid tiers. You write on one side of the screen and see the finished page update in real time on the other; then you can export as PDF, Word, Markdown or JSON, or share it with a public link via your own domain name or DDNS. With the jump from v5 to v6, the whole app has been redesigned. The separate Resumes and Cover Letters dashboards are now a single Documents library, the editor is split into three focused modes (Write / Design / Check), the old Agents system has been replaced by an in-editor AI assistant that only proposes changes you approve, and a new PDF engine (Forme) makes the live preview match the downloaded file exactly. Cover letters are now standalone documents and the job-application tracker has been rebuilt around List, Board, Insights and Calendar views. I self-host the latest version on my Synology NAS with Docker so I keep full control of my data and always have the newest features available locally. If you want and like the older version like the v5 or v4 or v3 or even v1, not the v6, you can stick with the older version too because my previous guides are already up to date. In this step by step guide I will show you how to install Reactive Resume V6 on your Synology NAS using Docker and Dockhand.
This guide works perfectly with the latest Reactive Resume v6.0.0 release.
STEP 1
Please Support My work by Making a Donation.
STEP 2
Install Dockhand using my step by step guide. If you already have Dockhand installed on your Synology NAS, skip this STEP. ⚠️Attention: Make sure you have installed the latest Dockhand version.
STEP 3
Make sure you have a synology.me Wildcard Certificate. Follow my guide to get a Wildcard Certificate. If you already have a synology.me Wildcard certificate, skip this STEP.
STEP 4
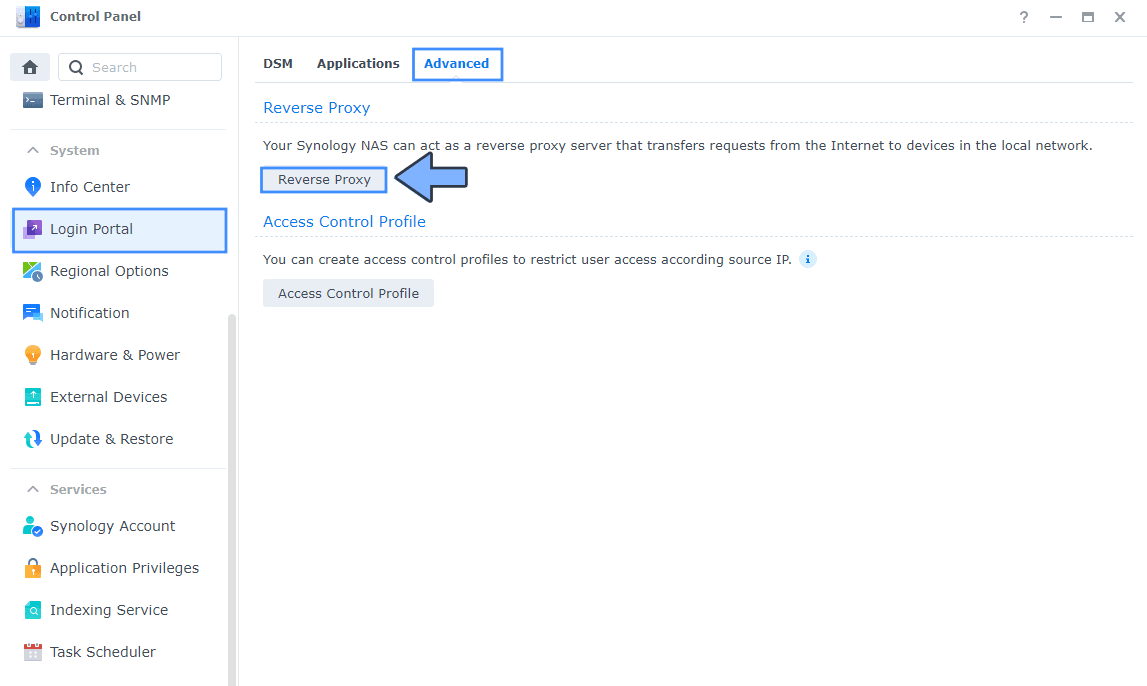
Go to Control Panel / Login Portal / Advanced Tab / click Reverse Proxy. Follow the instructions in the image below.
STEP 5
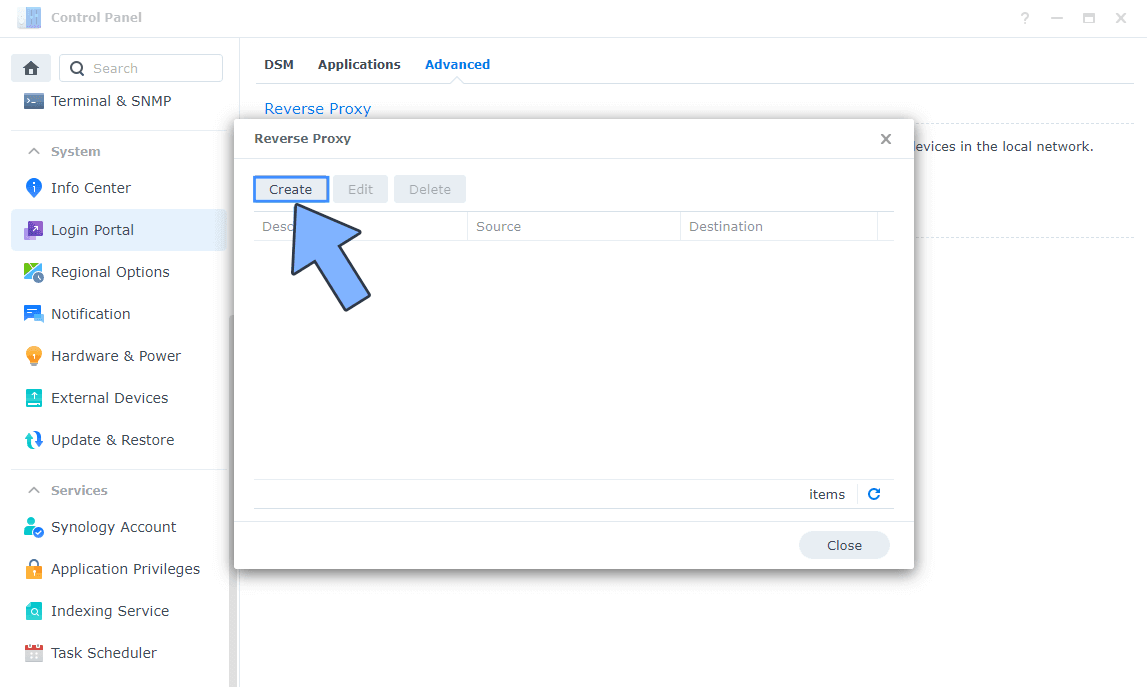
Now click the “Create” button. Follow the instructions in the image below.
STEP 6
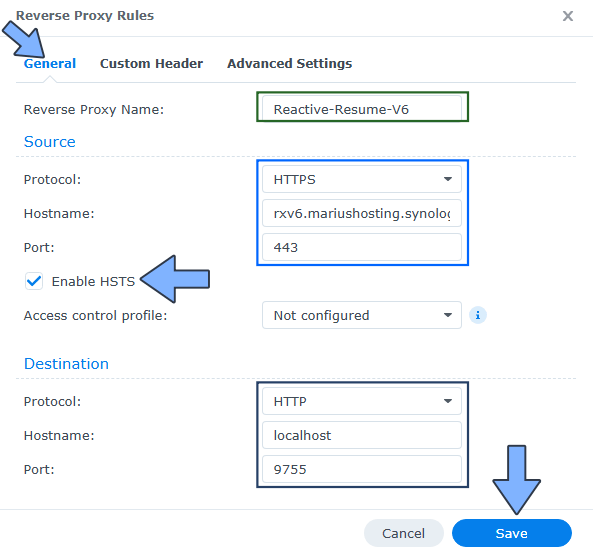
After you click the Create button, the window below will open. Follow the instructions in the image below.
On the General area, set the Reverse Proxy Name description: type in Reactive-Resume-V6. After that, add the following instructions:
Source:
Protocol: HTTPS
Hostname: rxv6.yourname.synology.me
Port: 443
Check Enable HSTS
Destination:
Protocol: HTTP
Hostname: localhost
Port: 9755
STEP 7
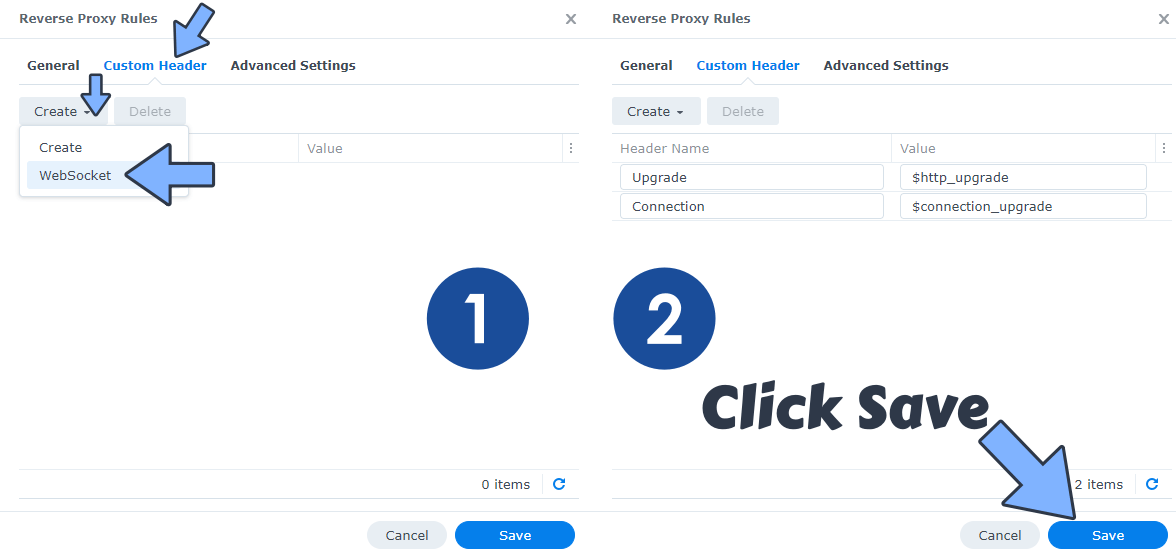
On the Reverse Proxy Rules, click the Custom Header tab. Click Create and then, from the drop-down menu, click WebSocket. After you click on WebSocket, two Header Names and two Values will be automatically added. Click Save. Follow the instructions in the image below.
STEP 8
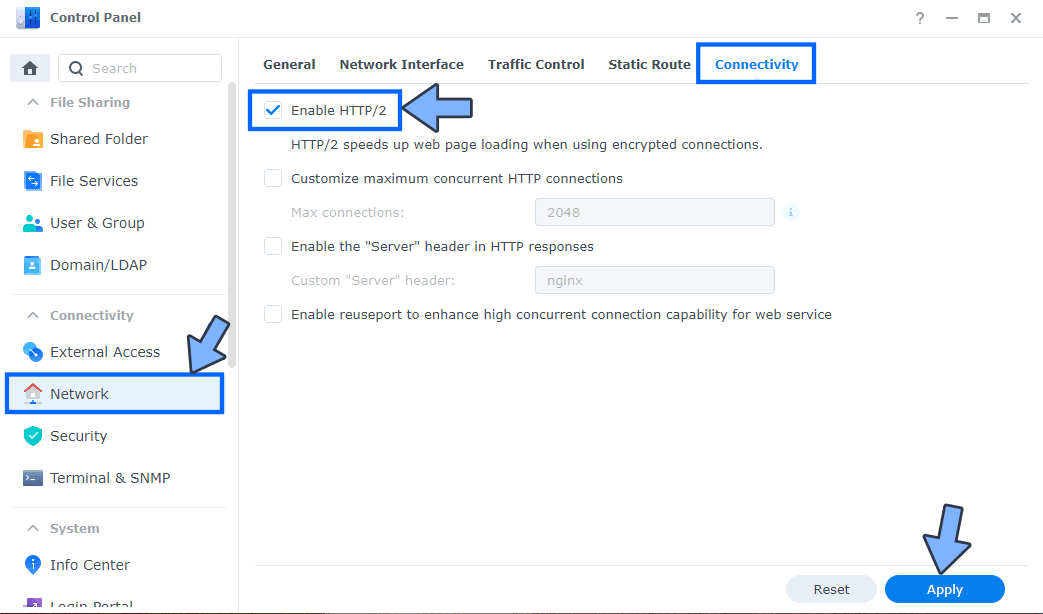
Go to Control Panel / Network / Connectivity tab/ Check Enable HTTP/2 then click Apply. Follow the instructions in the image below.
STEP 9
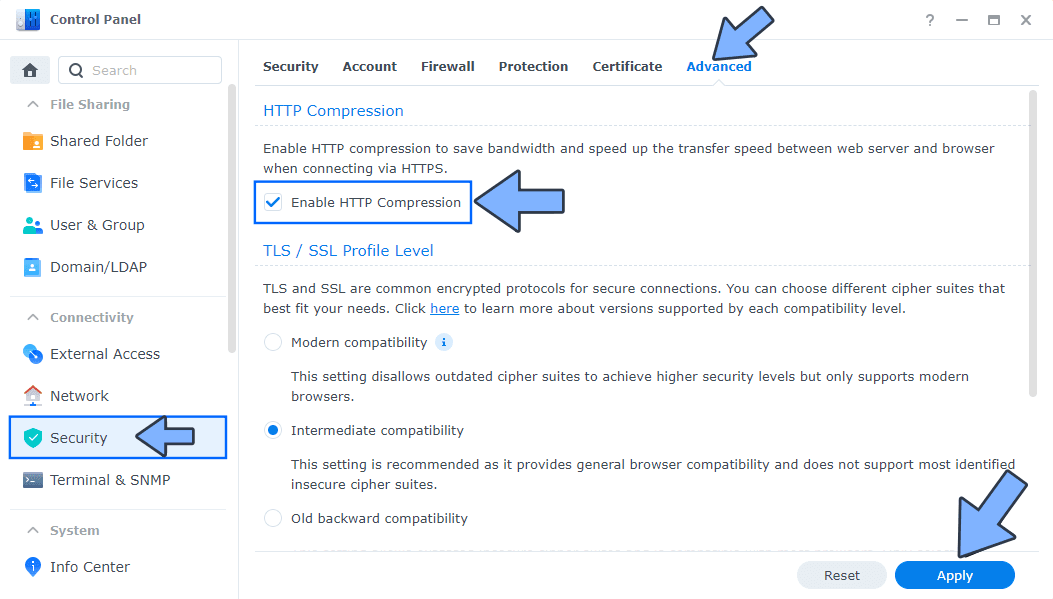
Go to Control Panel / Security / Advanced tab/ Check Enable HTTP Compression then click Apply. Follow the instructions in the image below.
STEP 10
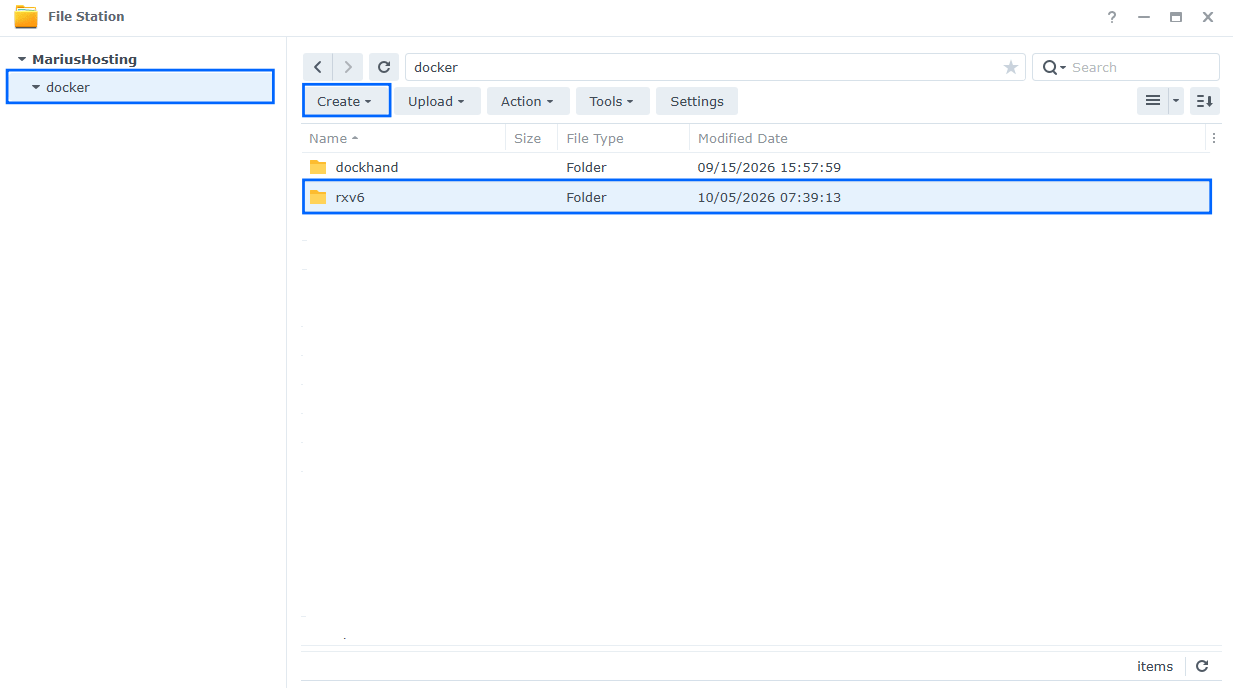
Go to File Station and open the docker folder. Inside the docker folder, create one new folder and name it antimatter. Follow the instructions in the image below.
Note: Be careful to enter only lowercase, not uppercase letters.
STEP 11
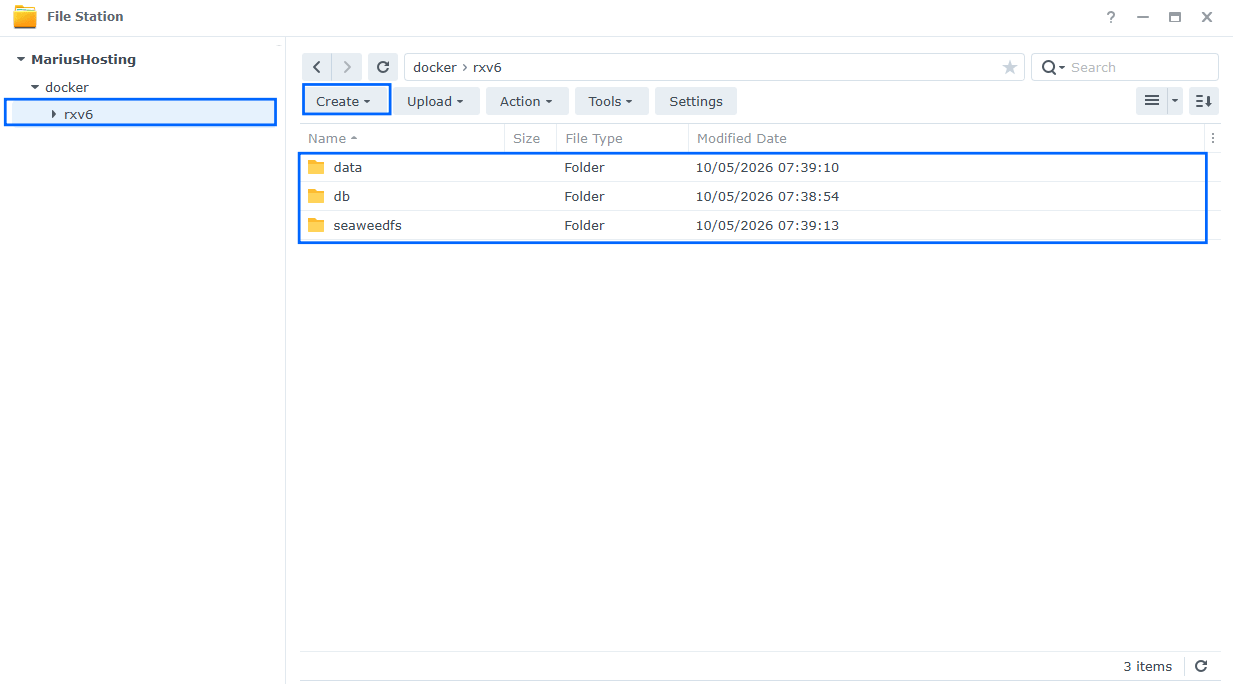
Now create three new folders inside the rxv6 folder that you have previously created at STEP 10 and name them data, db, seaweeds. Follow the instructions in the image below.
Note: Be careful to enter only lowercase, not uppercase letters.
STEP 12
Follow my step by step guide on how to activate SMTP for your Gmail account. This step is mandatory. Note: If you don’t want to use the easiest way for SMTP with Google and you already have SMTP details from your own Mail Server, you can just skip this STEP and use your personalized email SMTP details instead.
STEP 13
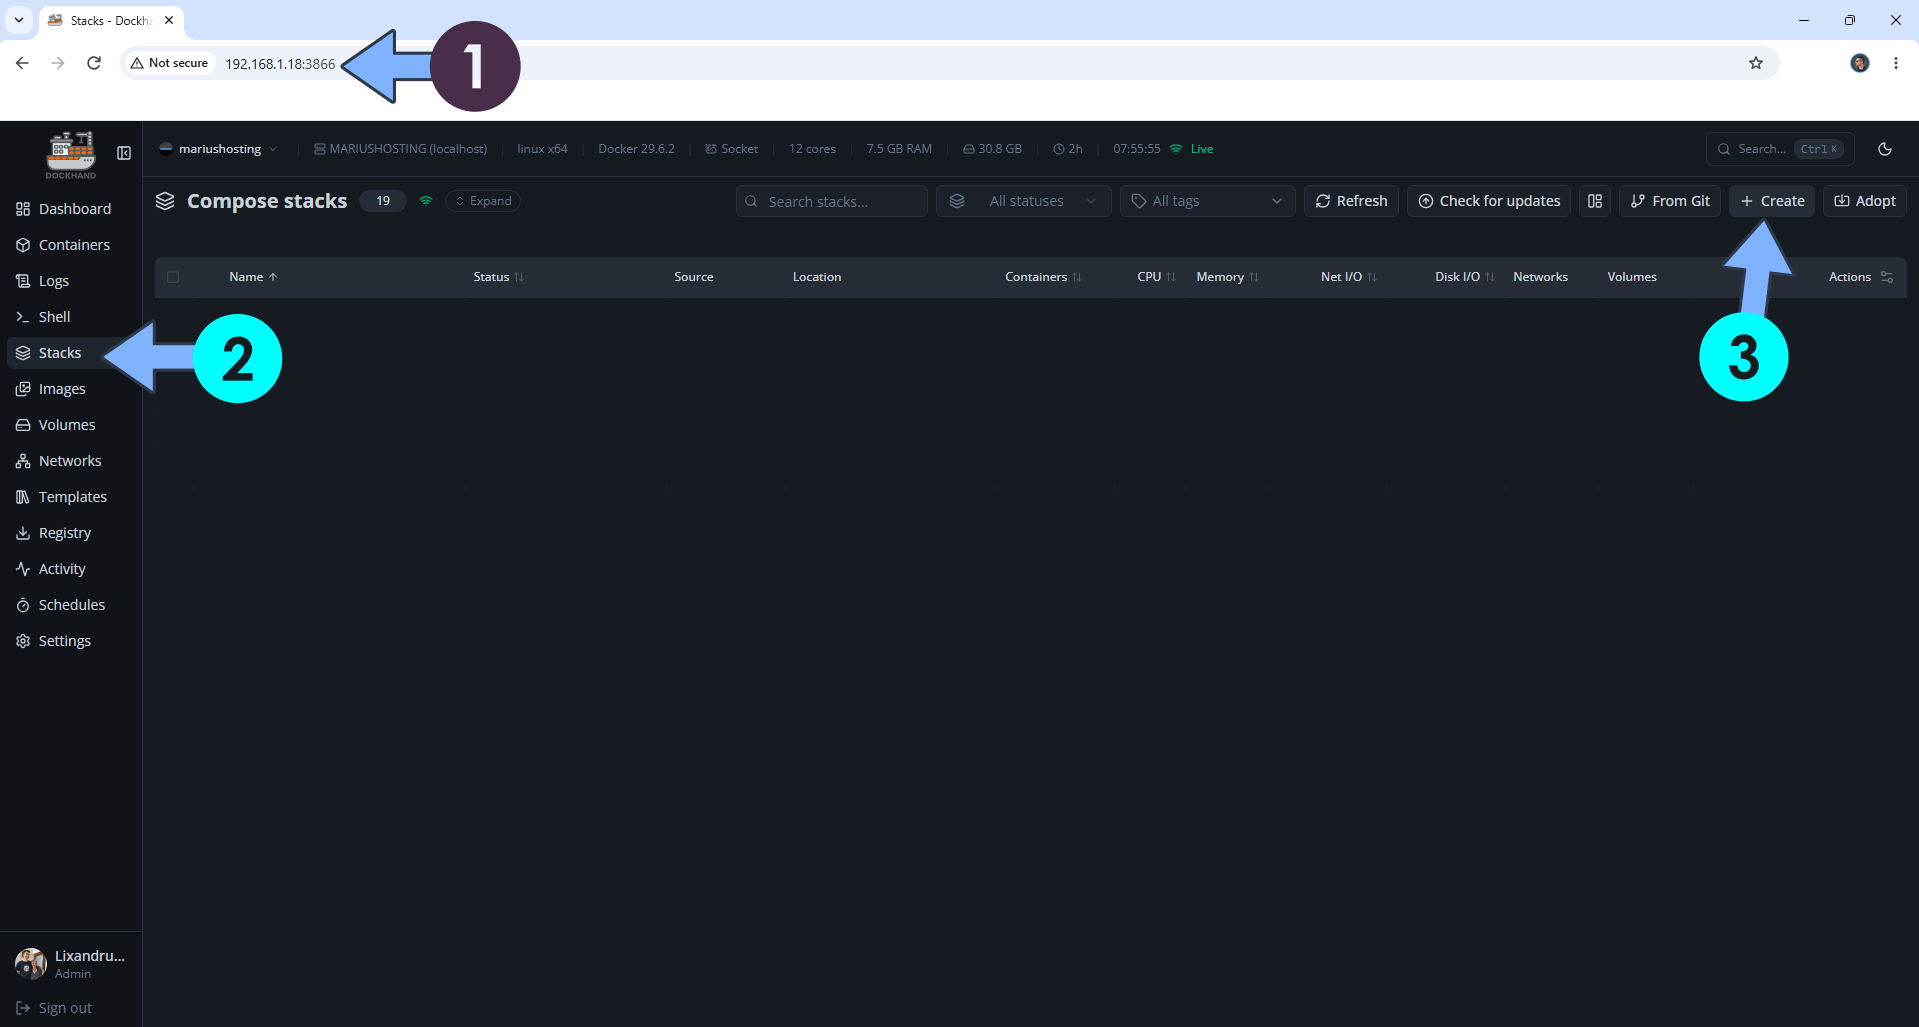
Open your browser and type in http://synology-ip-address:3866 to connect to your Dockhand container. On the left sidebar, click Stacks then + Create. Follow the instructions in the image below.
STEP 14
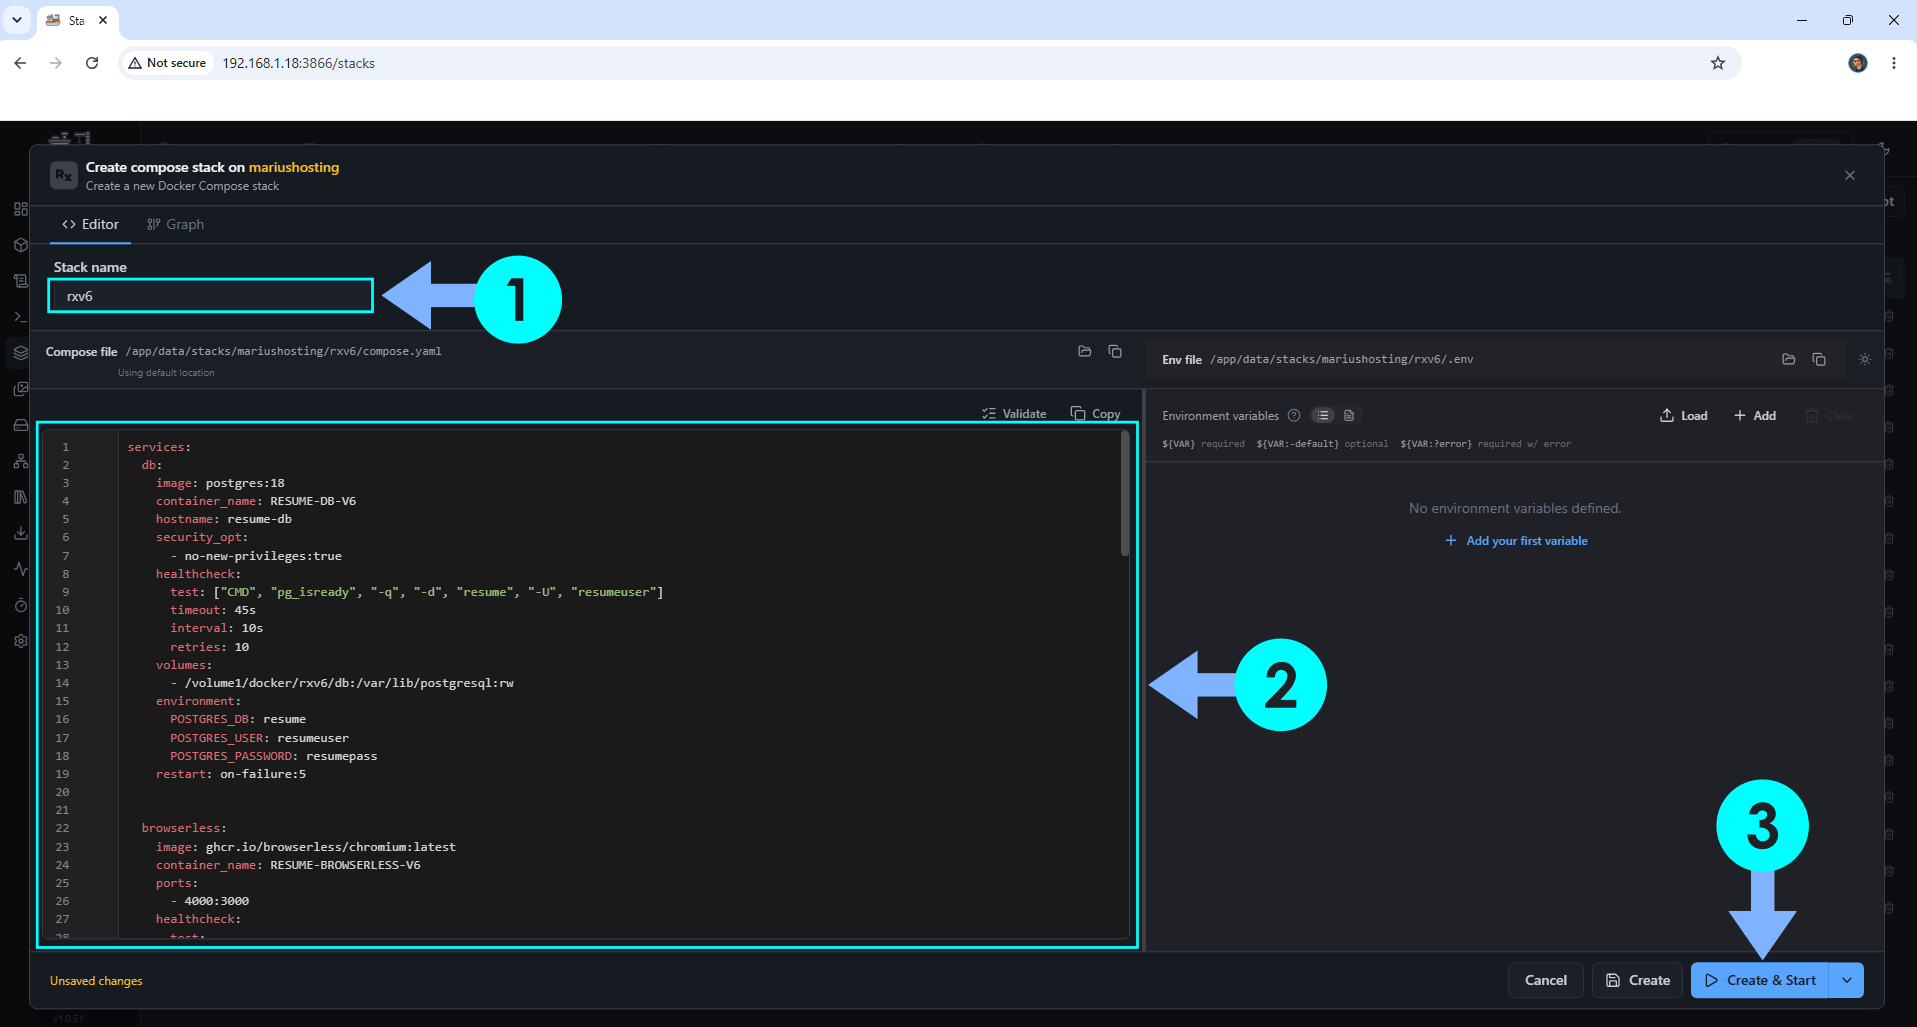
In the Stack name field, type in rxv6. ⚠️Warning: Type in the name in lowercase letters. The installation process can take up to a few seconds/minutes. It will depend on your Internet speed connection. Follow the instructions in the image below.
services:
  db:
    image: postgres:18
    container_name: RESUME-DB-V6
    hostname: resume-db
    security_opt:
      - no-new-privileges:true
    healthcheck:
      test: ["CMD", "pg_isready", "-q", "-d", "resume", "-U", "resumeuser"]
      timeout: 45s
      interval: 10s
      retries: 10
    volumes:
      - /volume1/docker/rxv6/db:/var/lib/postgresql:rw
    environment:
      POSTGRES_DB: resume
      POSTGRES_USER: resumeuser
      POSTGRES_PASSWORD: resumepass
    restart: on-failure:5


  browserless:
    image: ghcr.io/browserless/chromium:latest
    container_name: RESUME-BROWSERLESS-V6
    ports:
      - 4000:3000
    healthcheck:
      test:
       ["CMD", "curl", "-f", "http://localhost:3000/pressure?token=1234567890"]
      interval: 10s
      timeout: 5s
      retries: 10
    environment:
       QUEUED: 30
       HEALTH: true
       CONCURRENT: 20
       TOKEN: 1234567890
    restart: on-failure:5

  seaweedfs:
    image: chrislusf/seaweedfs:latest
    container_name: RESUME-SEAWEEDFS-V6
    healthcheck:
      test: ["CMD", "wget", "-q", "-O", "/dev/null", "http://localhost:8888"]
      start_period: 10s
      interval: 30s
      timeout: 10s
      retries: 3
    command: server -s3 -filer -dir=/data -ip=0.0.0.0
    environment:
       AWS_ACCESS_KEY_ID: seaweedfs
       AWS_SECRET_ACCESS_KEY: seaweedfs
    volumes:
      - /volume1/docker/rxv6/seaweedfs:/data:rw
    restart: on-failure:5

  seaweedfs-create-bucket:
    image: chainguard/minio-client:latest
    container_name: RESUME-BUCKET-V6-EXITED
    environment:
       MC_HOST_seaweedfs: http://seaweedfs:seaweedfs@seaweedfs:8333
    entrypoint: ["mc"]
    command:
      - "mb"
      - "--ignore-existing"
      - "seaweedfs/reactive-resume"
    depends_on:
      seaweedfs:
        condition: service_healthy
    restart: on-failure:5

  resume:
    image: amruthpillai/reactive-resume:v6
    container_name: RESUME-ACCESS-V6
    hostname: resume
    security_opt:
      - no-new-privileges:true
    ports:
      - 9755:3000
    environment:
      PORT: 3000
      FLAG_DISABLE_SIGNUPS: false
      NODE_ENV: production
      PRINTER_APP_URL: http://resume:3000
      #TRUSTED_PROXIES:
      APP_URL: https://rxv6.yourname.synology.me
      DATABASE_URL: postgresql://resumeuser:resumepass@resume-db:5432/resume
      AUTH_SECRET: dOxZYTTZgXKMHkqLBIQVImayQXAVWdzGBPuFJKggzcgvgPJPXpWzqzKaUOIOGGIr
      PRINTER_ENDPOINT: ws://browserless:3000?token=1234567890
      S3_ACCESS_KEY_ID: seaweedfs
      S3_SECRET_ACCESS_KEY: seaweedfs
      S3_ENDPOINT: http://seaweedfs:8333
      S3_BUCKET: reactive-resume
      S3_FORCE_PATH_STYLE: true
      STORAGE_USE_SSL: false
      SMTP_HOST: smtp.gmail.com
      SMTP_PORT: 465
      SMTP_USER: Your-own-gmail-address
      SMTP_PASS: Your-own-app-password
      SMTP_FROM: Your-own-gmail-address
      SMTP_SECURE: true
      FLAG_DISABLE_EMAIL_AUTH: false
    volumes:
      - /volume1/docker/rxv6/data:/app/data:rw
    depends_on:
      db:
        condition: service_healthy
      seaweedfs:
        condition: service_healthy
      seaweedfs-create-bucket:
        condition: service_started
    restart: on-failure:5
Note: Before you paste the code above in the Stack editor area below, change the value for APP_URL and type in your own synology.me DDNS with https:// at the beginning that you have previously created at STEP 6.
Note: Before you paste the code above in the Stack editor area below, change the value for AUTH_SECRET. (Generate your own Random 64 length AUTH_SECRET.)
Note: Before you paste the code above in the Stack editor area below, change the value for SMTP_USER and type in your own Gmail address. STEP 12.
Note: Before you paste the code above in the Stack editor area below, change the value for SMTP_PASS and type in your own Gmail App Password. STEP 12. ⚠️Warning: Do NOT confuse with your own Gmail password. This is the Gmail APP password.
Note: Before you paste the code above in the Stack editor area below, change the value for SMTP_FROM and type in your own Gmail address. STEP 12.
STEP 15
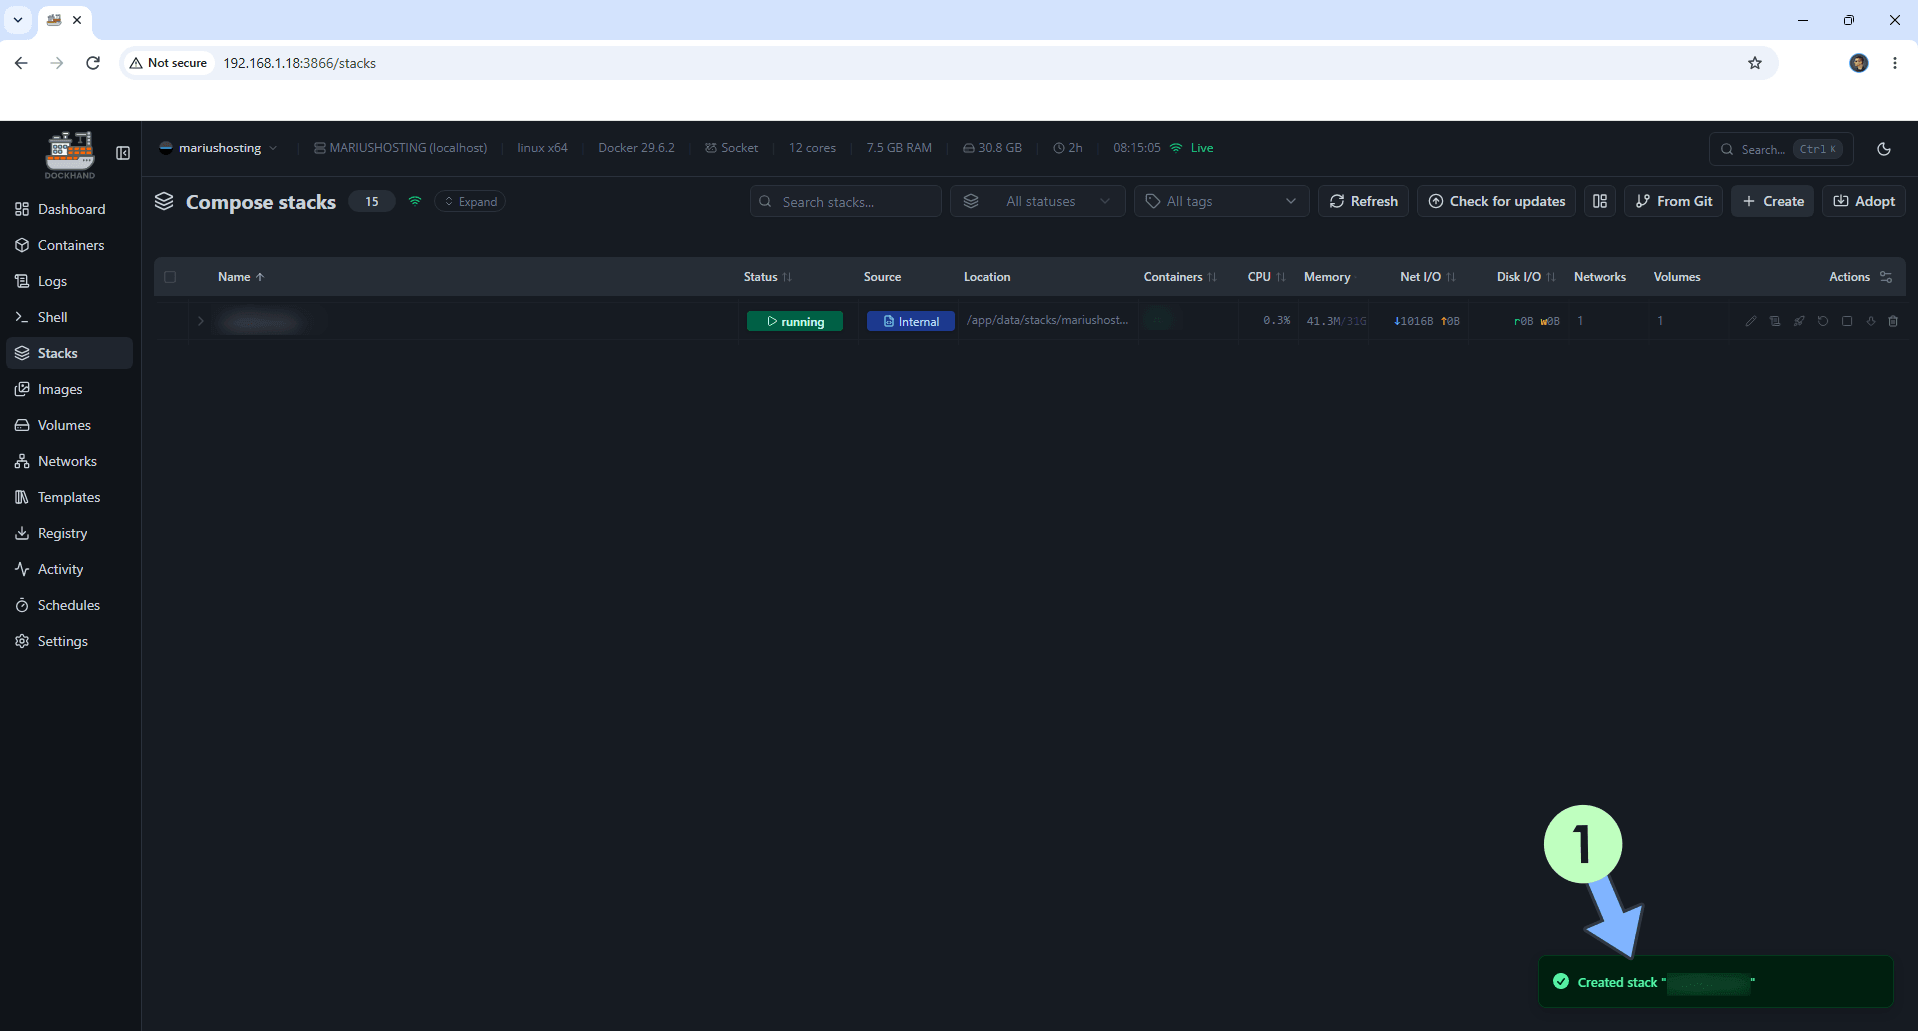
If everything goes right, you will see the following message at the bottom right of your screen: “Created stack “rxv6”“.
STEP 16
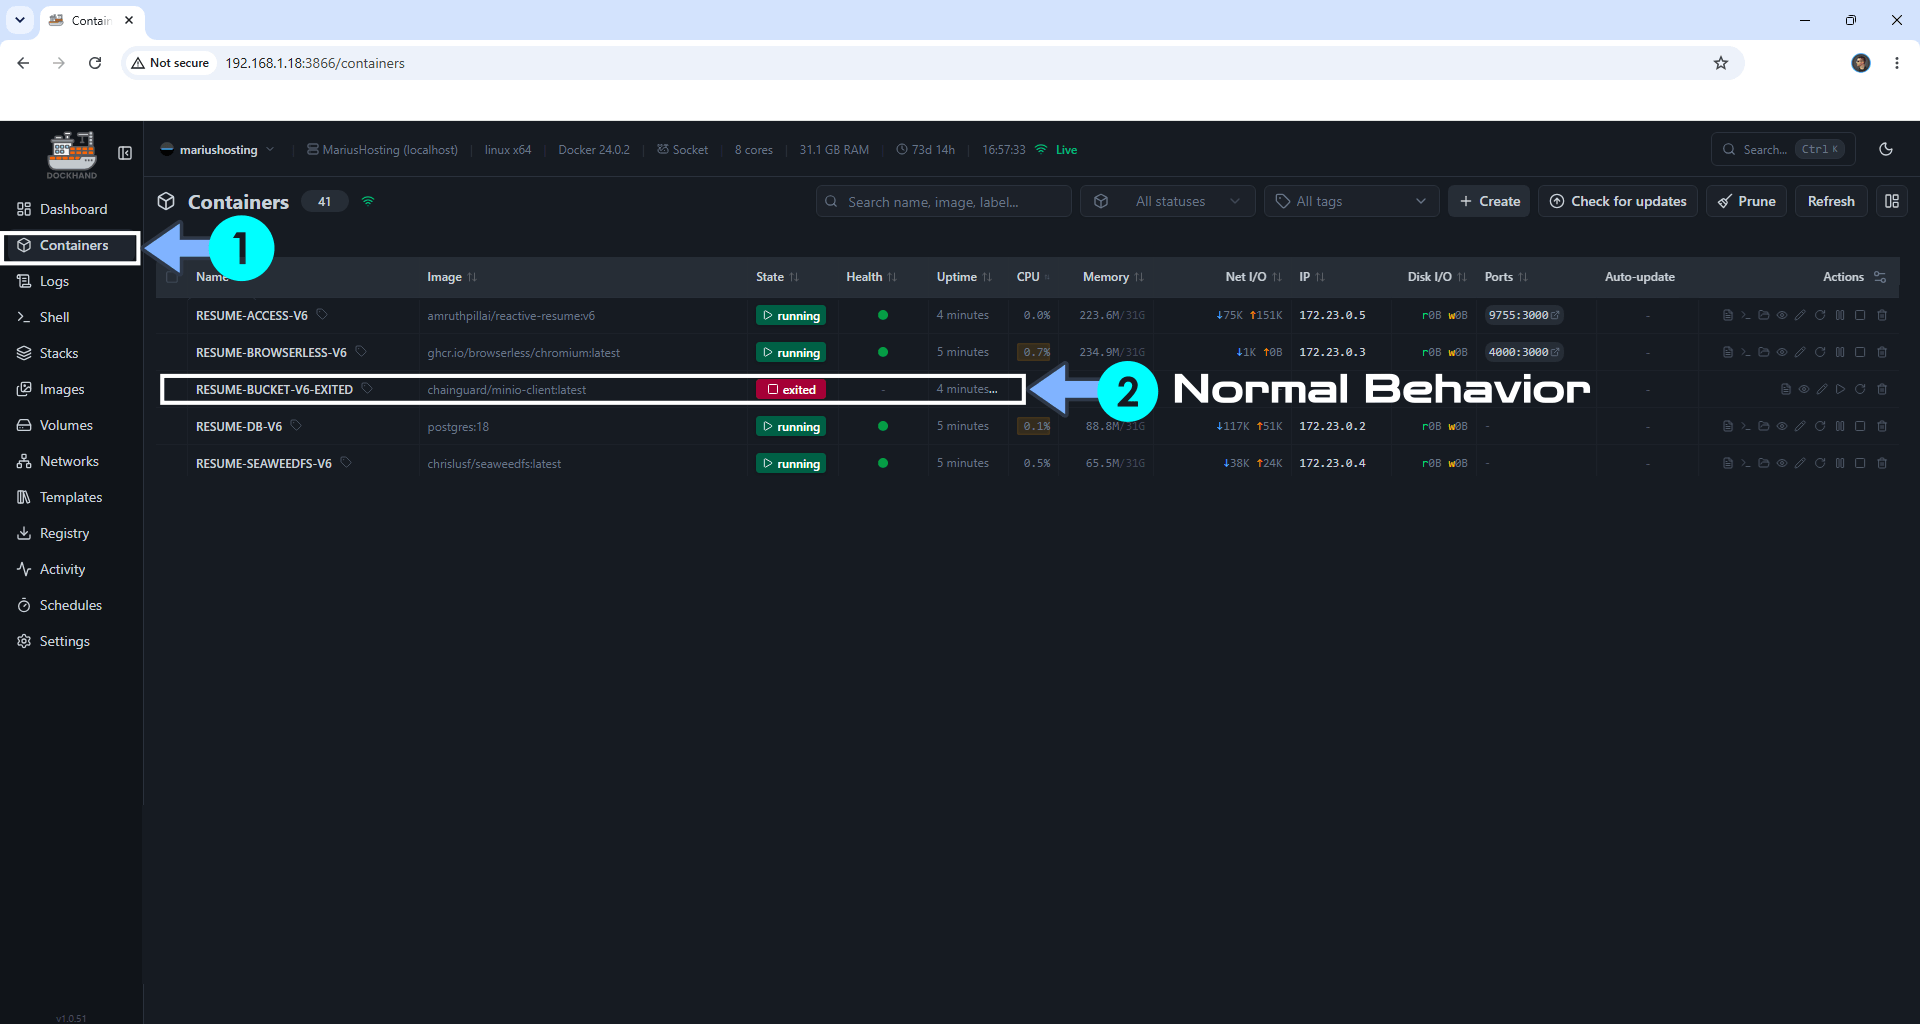
On the left sidebar, click Containers. You will see the RESUME-BUCKET-V6-EXITED container marked as exited. This is a normal behavior. Go straight to the next step.
STEP 17
🟢Please Support My work by Making a Donation. Almost 99,9% of the people that install something using my guides forget to support my work, or just ignore STEP 1. I’ve been very honest about this aspect of my work since the beginning: I don’t run any ADS, I don’t require subscriptions, paid or otherwise, I don’t collect IPs, emails, and I don’t have any referral links from Amazon or other merchants. I also don’t have any POP-UPs or COOKIES. I have repeatedly been told over the years how much I have contributed to the community. It’s something I love doing and have been honest about my passion since the beginning. But I also Need The Community to Support me Back to be able to continue doing this work.
STEP 18
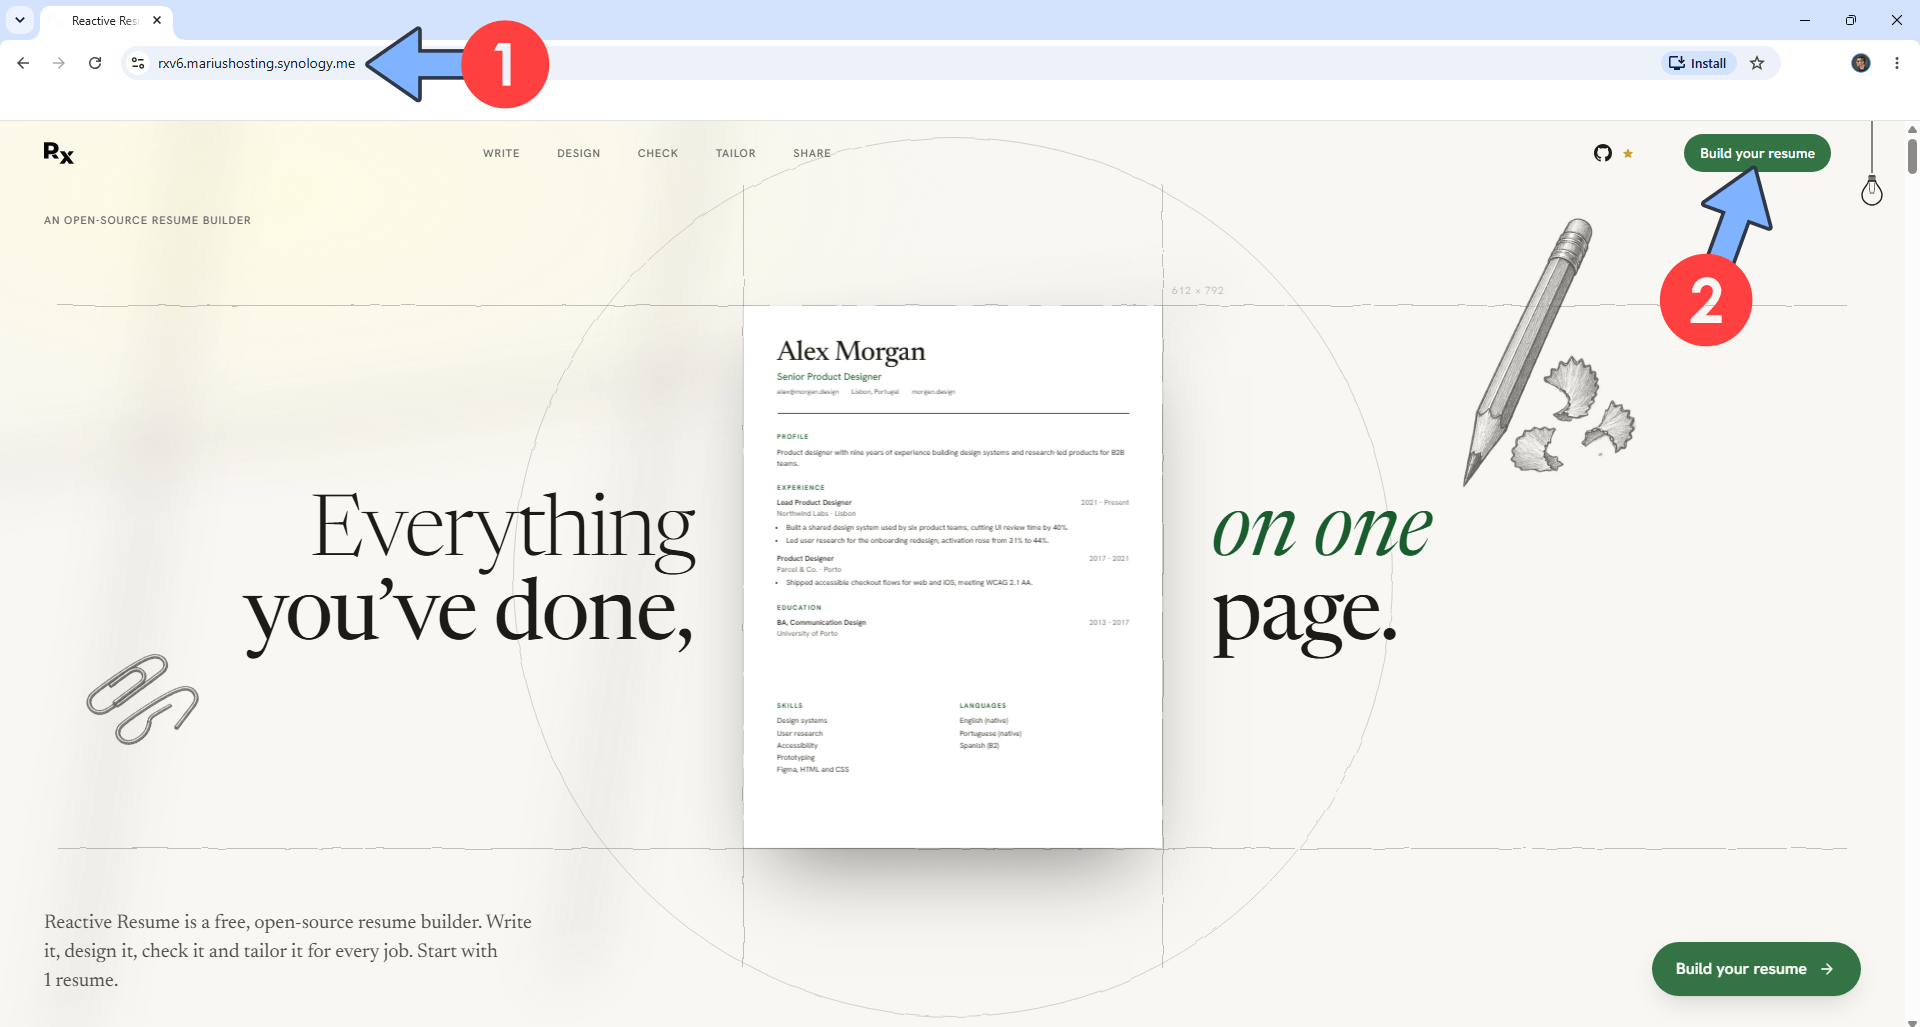
Now open your browser and type in your HTTPS/SSL certificate like this https://rxv6.yourname.synology.me that you have previously created at STEP 6. In my case it’s https://rxv6.mariushosting.synology.me If everything goes right, you will see the Reactive Resume V6 main page. At the top right of the page, click Build your resume. Follow the instructions in the image below.
STEP 19
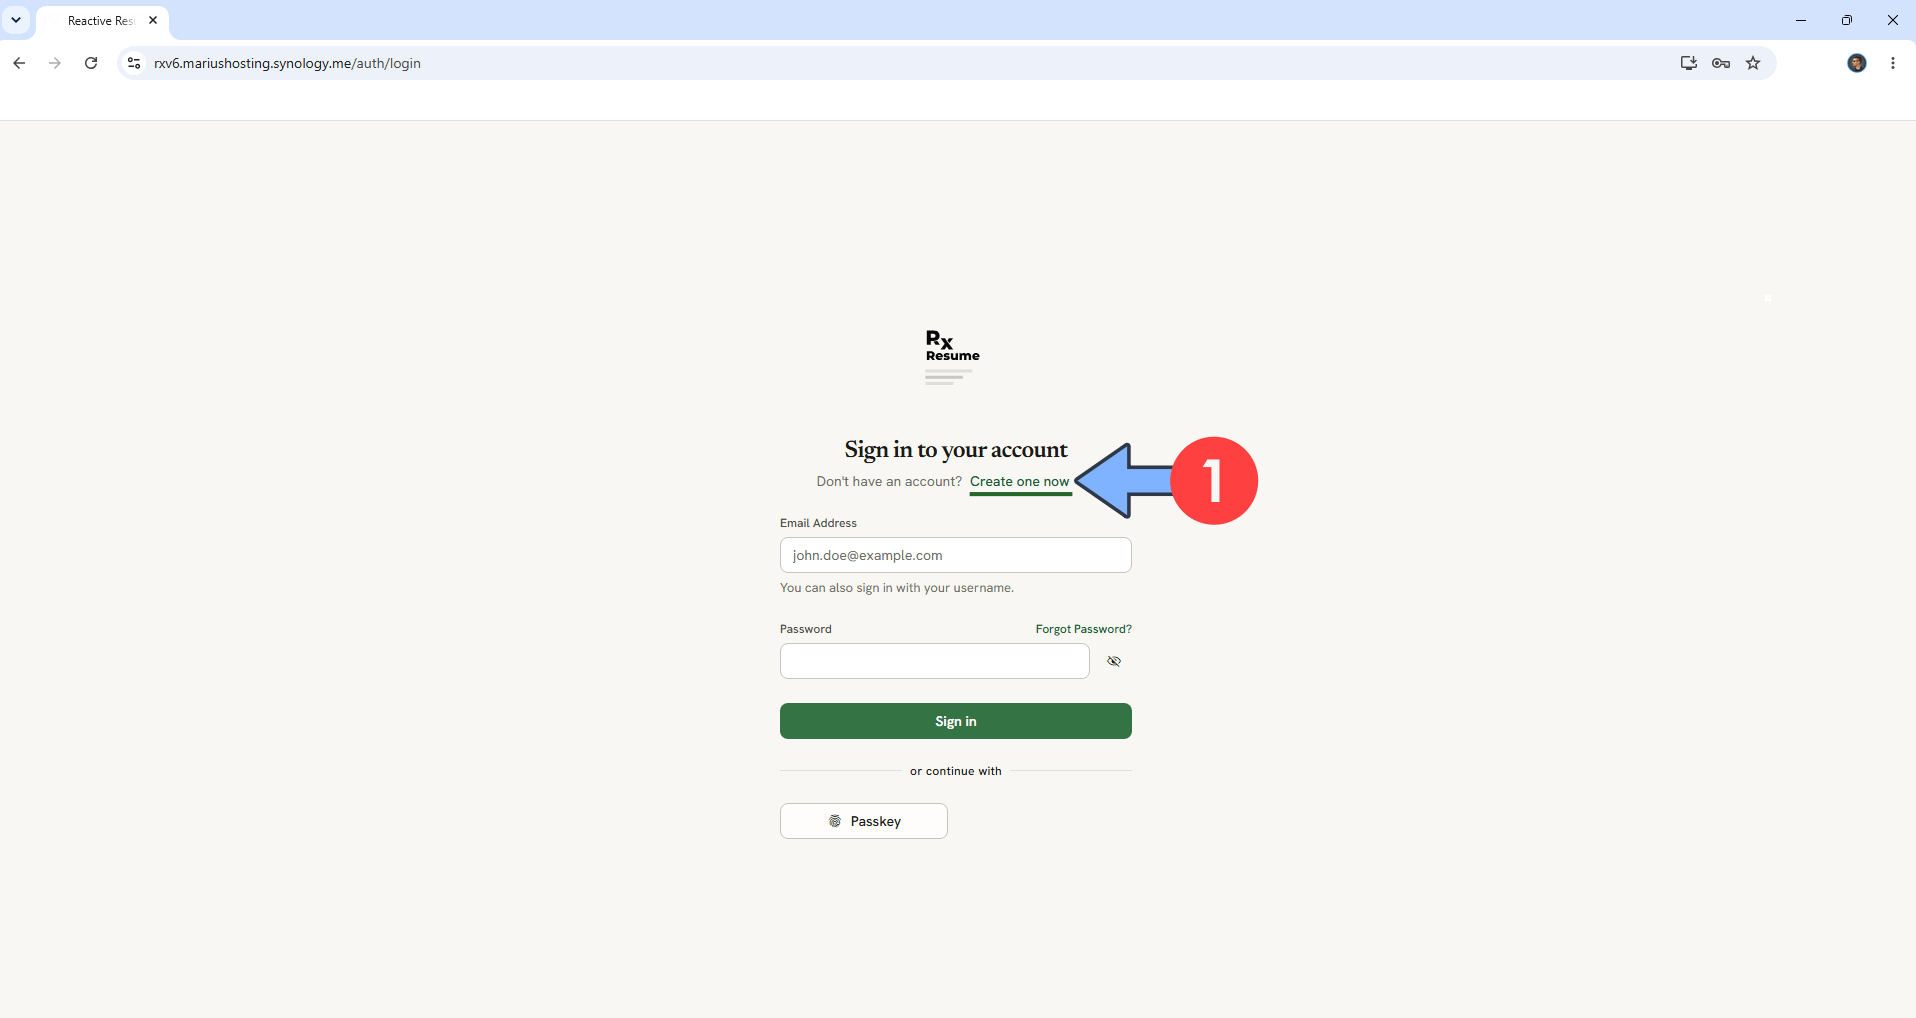
Click Create one now. Follow the instructions in the image below.
STEP 20
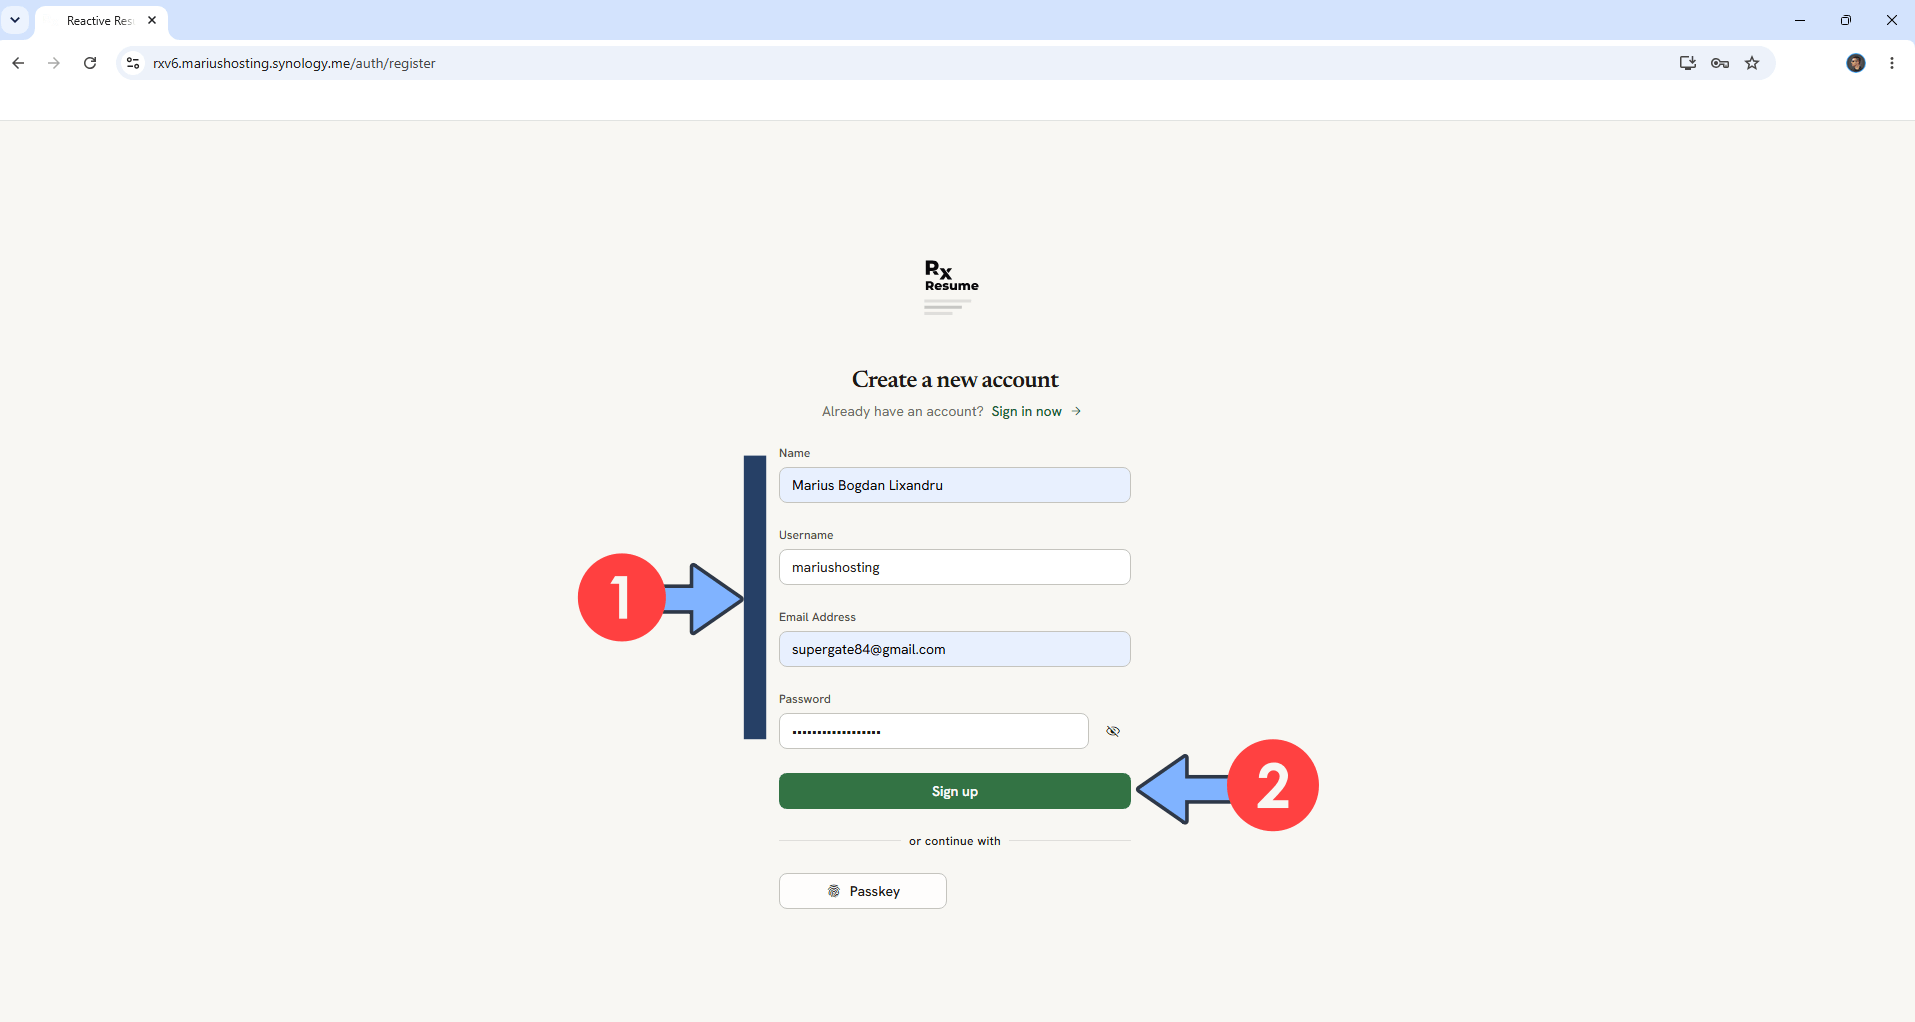
Type in your own details then click Sign up. Follow the instructions in the image below.
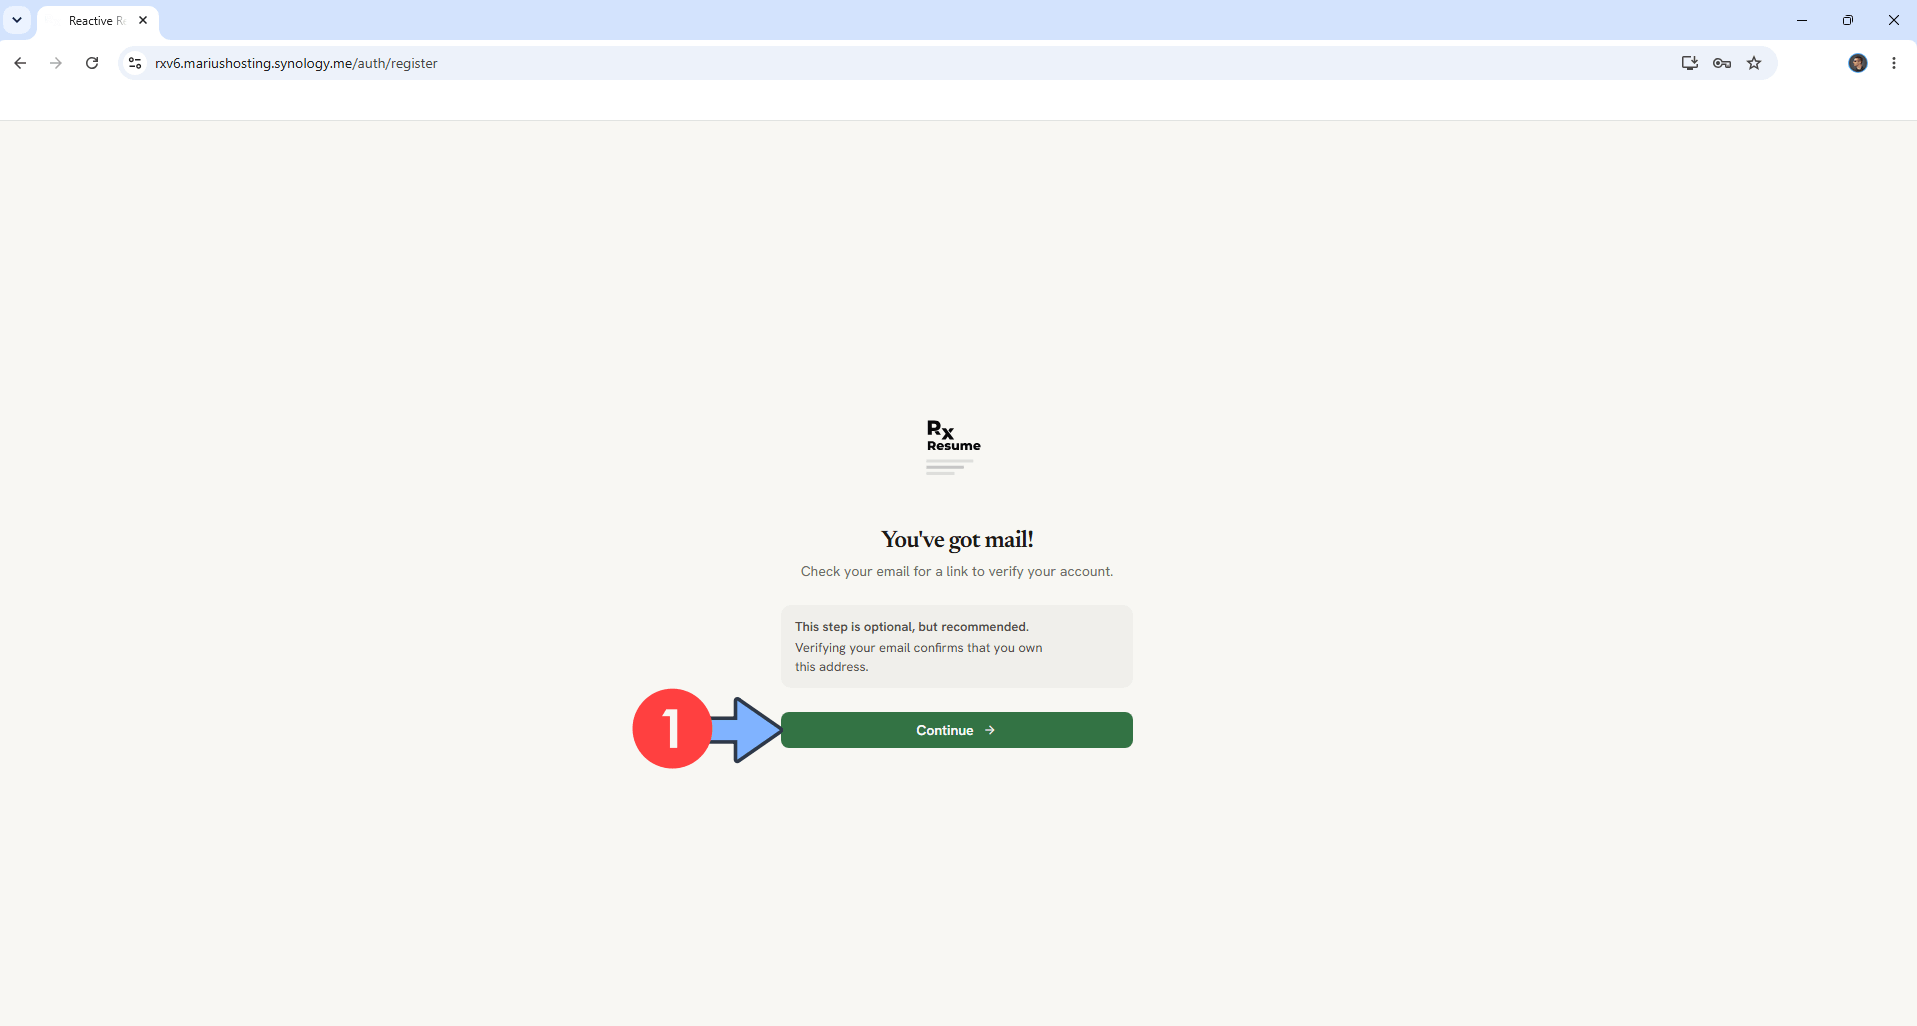
STEP 21
Click Continue. Follow the instructions in the image below.
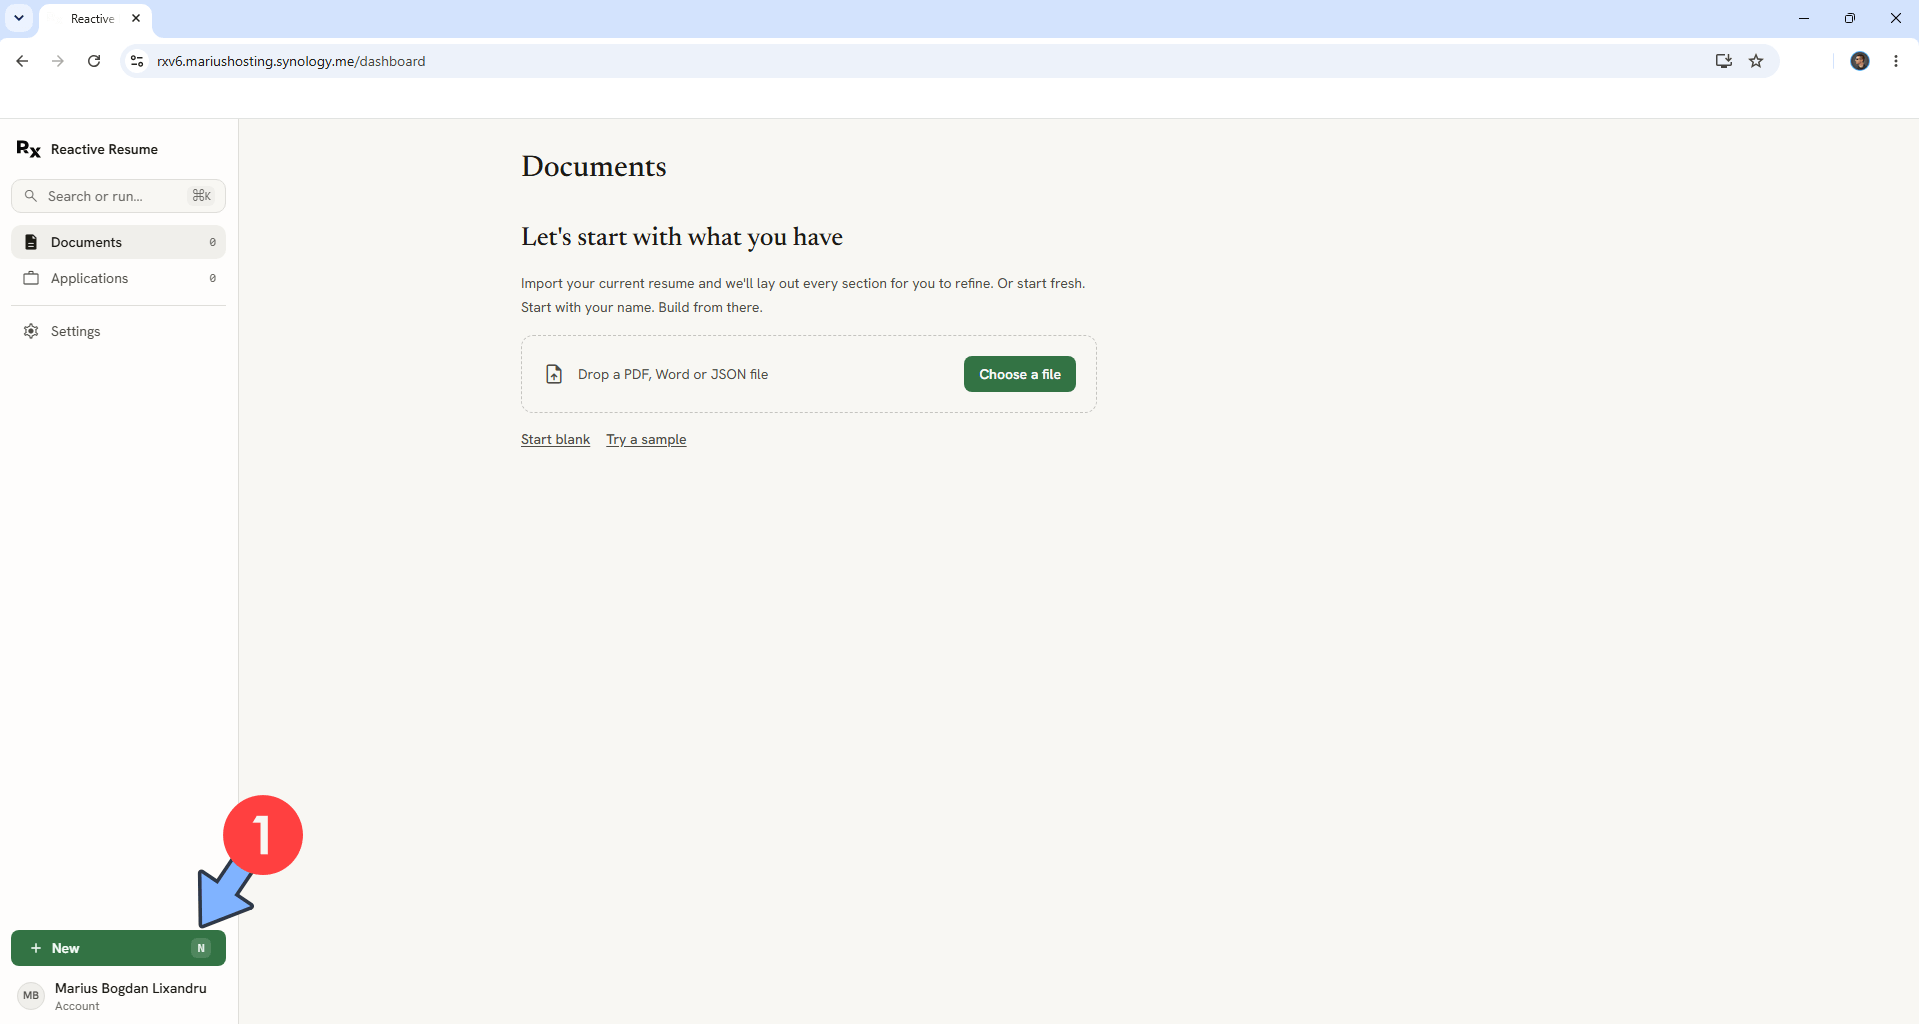
STEP 22
At the bottom left of the page, click + New to create your new Resume. Follow the instructions in the image below.
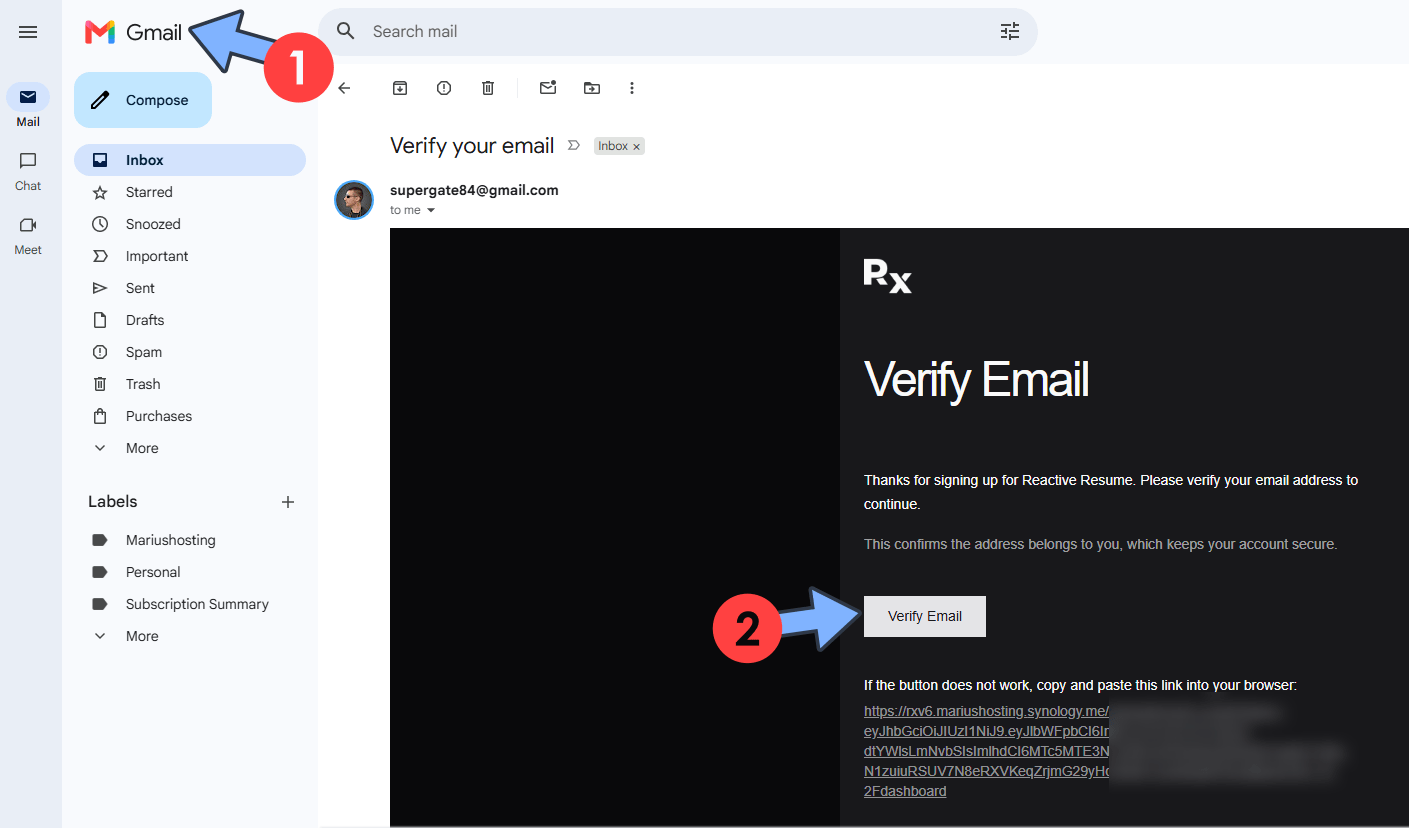
STEP 23
If you have correctly added your SMTP details at STEP 12 and STEP 14 respectively, you can also check your email and confirm your Reactive Resume instance by clicking Verify Email. Follow the instructions in the image below.
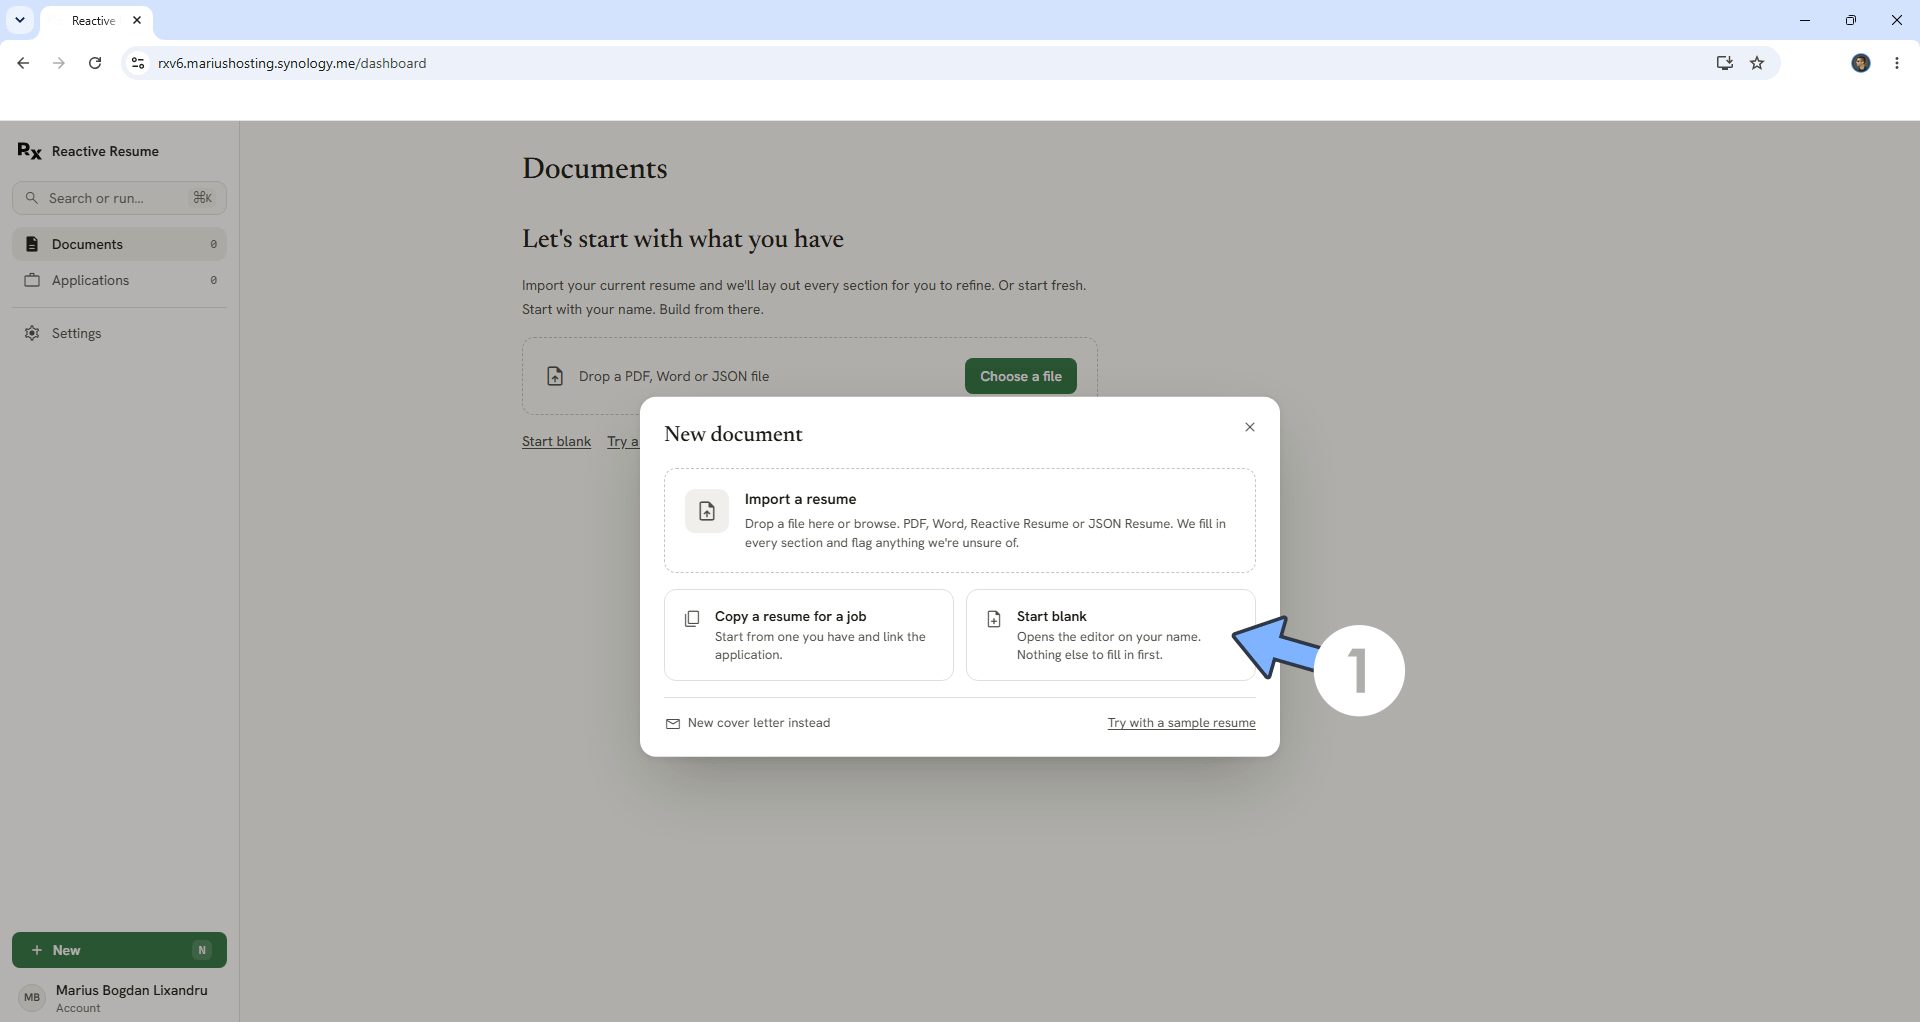
STEP 24
After you have clicked + New at STEP 22, a new pop up window will open. Click Start blank to create your first Resume. Follow the instructions in the image below.
STEP 25
Your Resume at a glance! You can share it or Download as PDF. Follow the instructions in the image below.
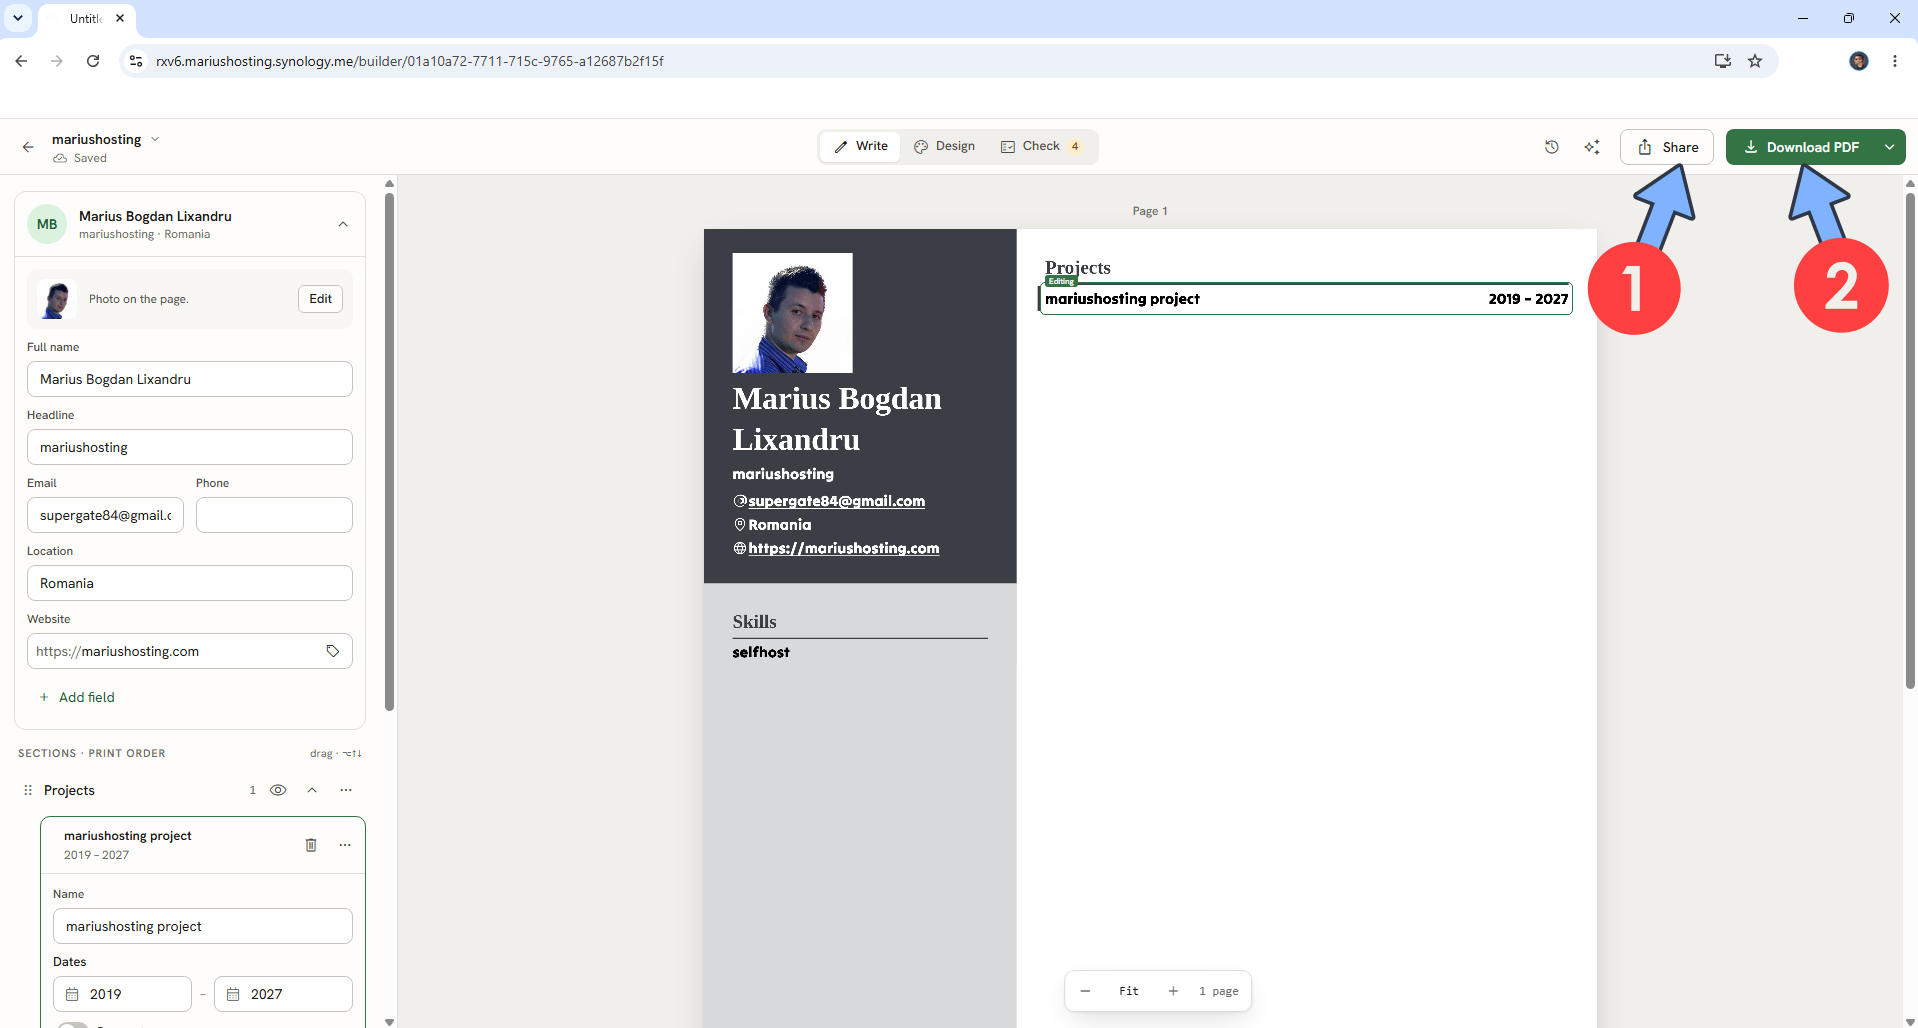
STEP 26
On the left sidebar in Reactive Resume V6, click Settings. Follow the instructions in the image below.
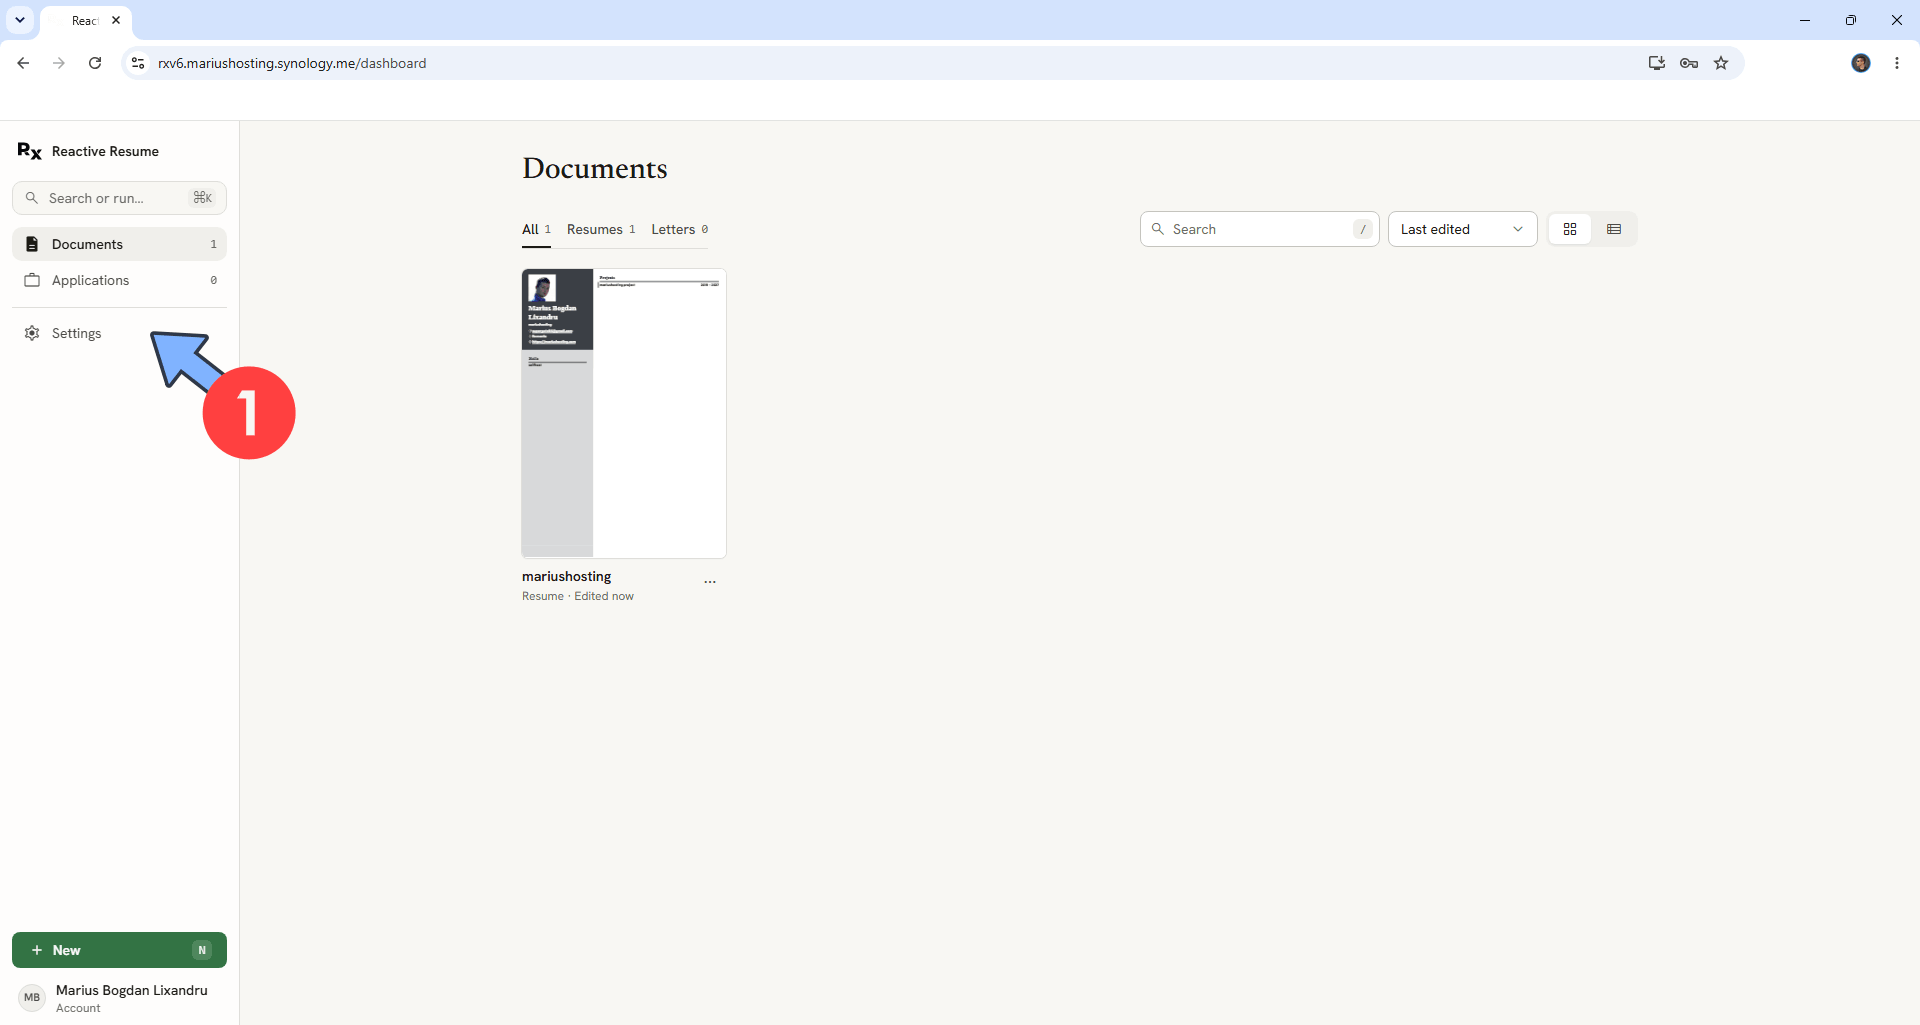
STEP 27
Under Preferences / Appearance, switch the theme to Dark. Follow the instructions in the image below.
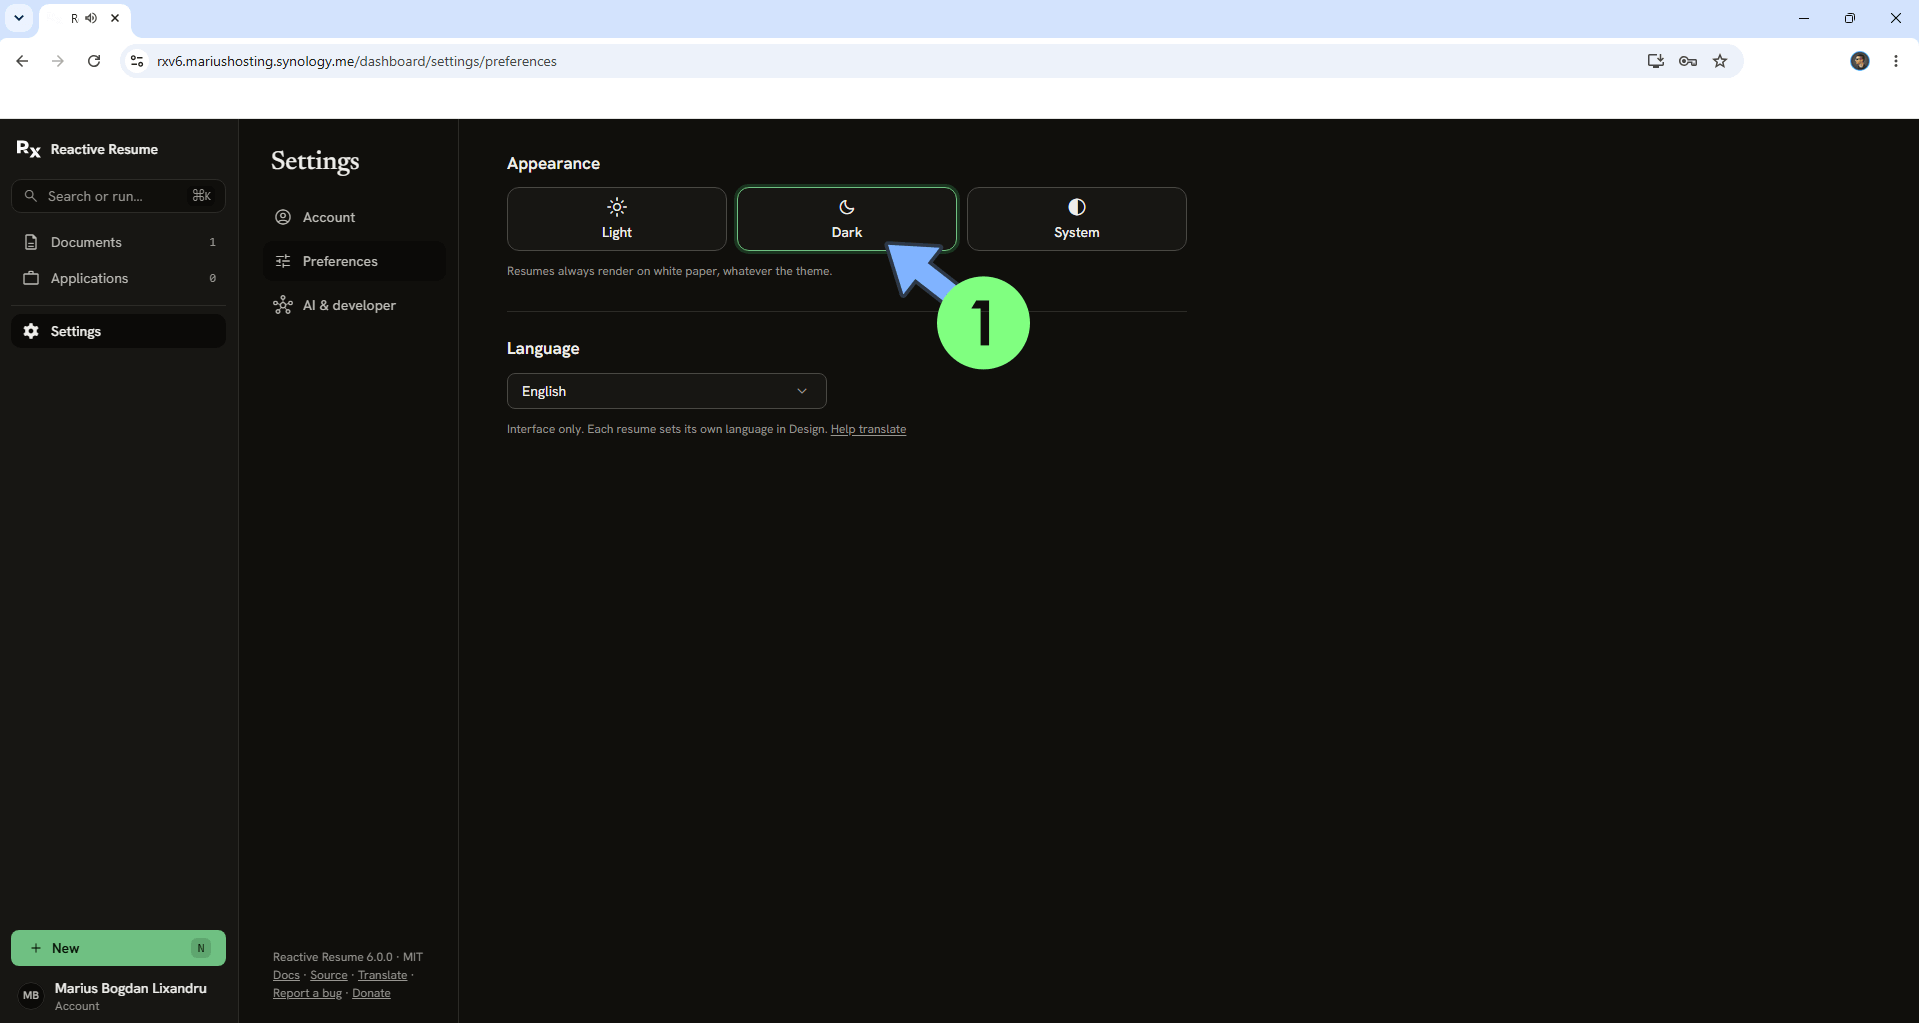
STEP 28
Your Reactive Resume V6 dashboard at a glance!
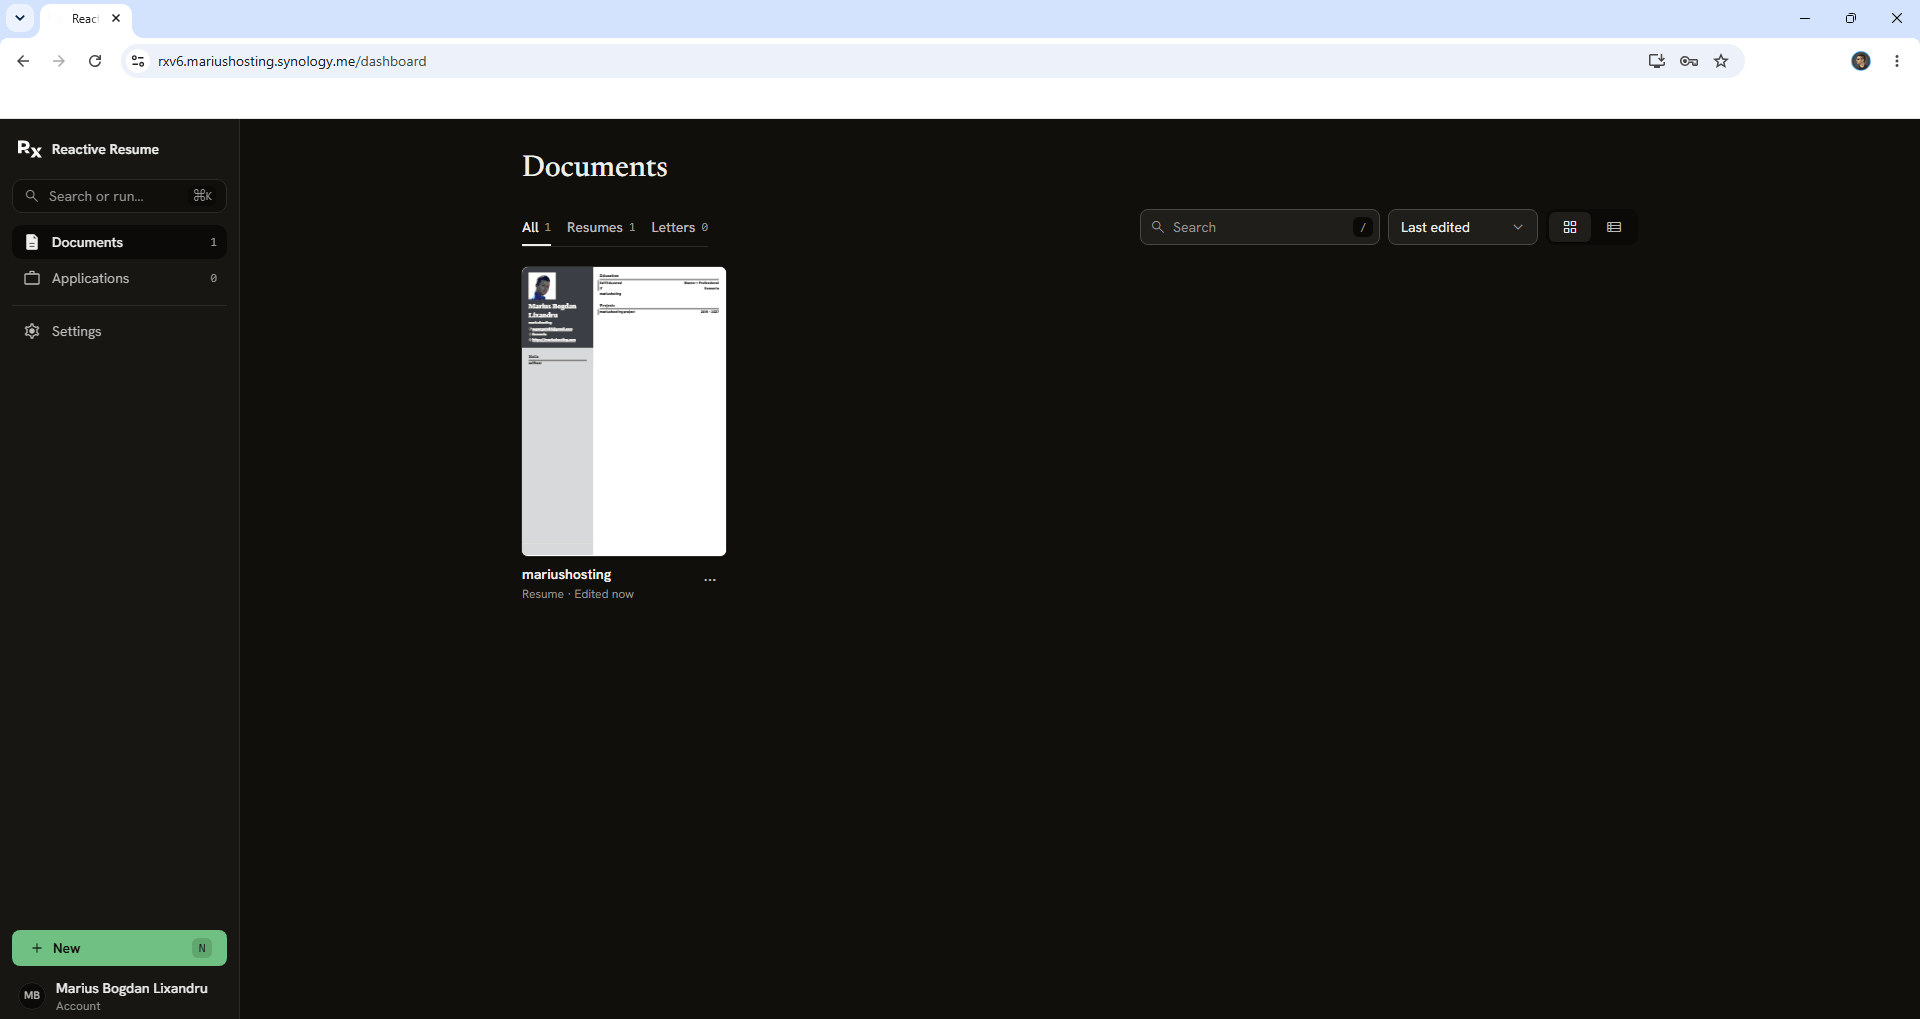
STEP 29
If you want to disable user registration in Reactive Resume V5 after registering the first user, just change the following line in the compose at STEP 14:
FLAG_DISABLE_SIGNUPS: falsewith the following one:
FLAG_DISABLE_SIGNUPS: trueIn Dockhand, go to stack and click on your rxv6 stack. Modify the above line from false to true then click Save & Redeploy. From this point on, any user that will try to register a new account in Reactive Resume V6 will be rejected.
Enjoy Reactive Resume V6!
If you encounter issues by using this container, make sure to check out the Common Docker issues article.
Note: Can I run Docker on my Synology NAS? See the supported models.
Note: How to Back Up Docker Containers on your Synology NAS.
Note: Find out how to update the Reactive Resume V6 container with the latest image.
Note: How to Free Disk Space on Your NAS if You Run Docker.
Note: How to Schedule Start & Stop For Docker Containers.
Note: How to Activate Email Notifications.
Note: How to Add Access Control Profile on Your NAS.
Note: How to Change Docker Containers Restart Policy.
Note: How to Use Docker Containers With VPN.
Note: Convert Docker Run Into Docker Compose.
Note: How to Clean Docker.
Note: How to Clean Docker Automatically.
Note: Best Practices When Using Docker and DDNS.
Note: Some Docker Containers Need WebSocket.
Note: Find out the Best NAS Models For Docker.
Note: Activate Gmail SMTP For Docker Containers.
This post was updated on Monday / October 5th, 2026 at 7:00 PM