In computer networking, a Wildcard Certificate is a public key certificate which can be used with multiple sub-domains of a domain. The principal use is for securing web sites with HTTPS, but there are also applications in many other fields. All Synology DDNS hostnames like synology.me support Wildcard. Wildcard settings allow you to reach the same Synology products or https Docker Containers using a different combination of subdomains. Ultimately you will have only one certificate to renew every 3 months instead of dozens or hundreds. In this step by step guide I will show you how to apply a Wildcard certificate if you already have a synology.me DDNS certificate.
Remember this is a premium article and your support is appreciated.
STEP 1
Please Support My work by Making a Donation.
STEP 2
Follow my step by step guide on how to activate your synology.me DDNS on DSM 7
Follow my step by step guide on how to activate your synology.me DDNS on DSM 6.2.4
Note: If you already own a synology.me DDNS, skip this STEP.
STEP 3
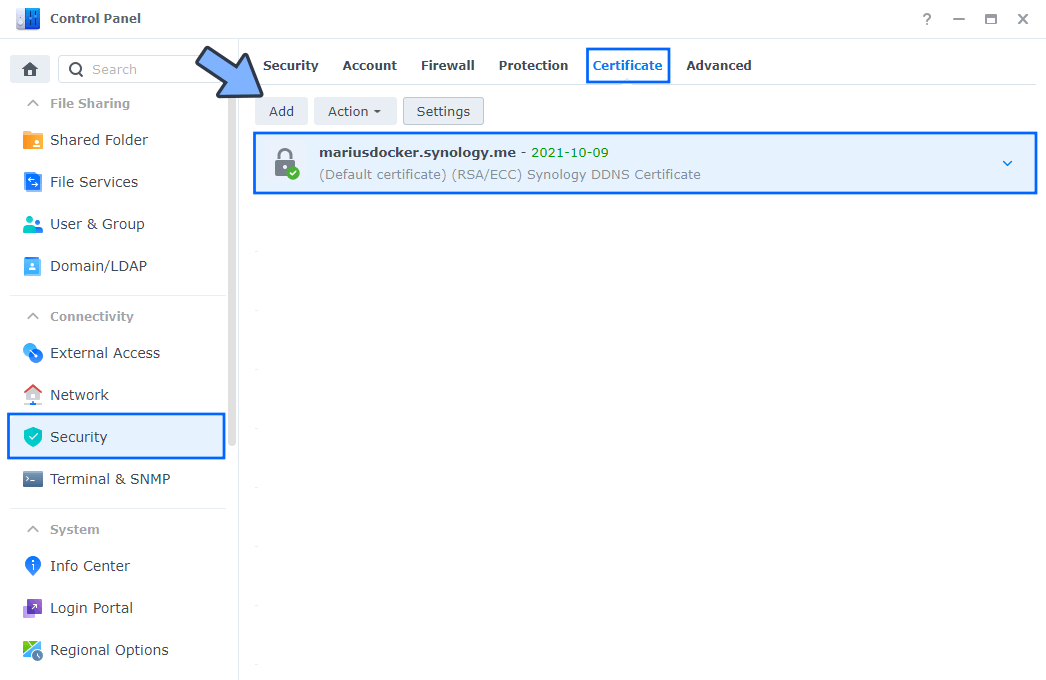
Go to Control Panel / Security / Certificate tab. Click Add. Follow the instructions in the image below.
STEP 4
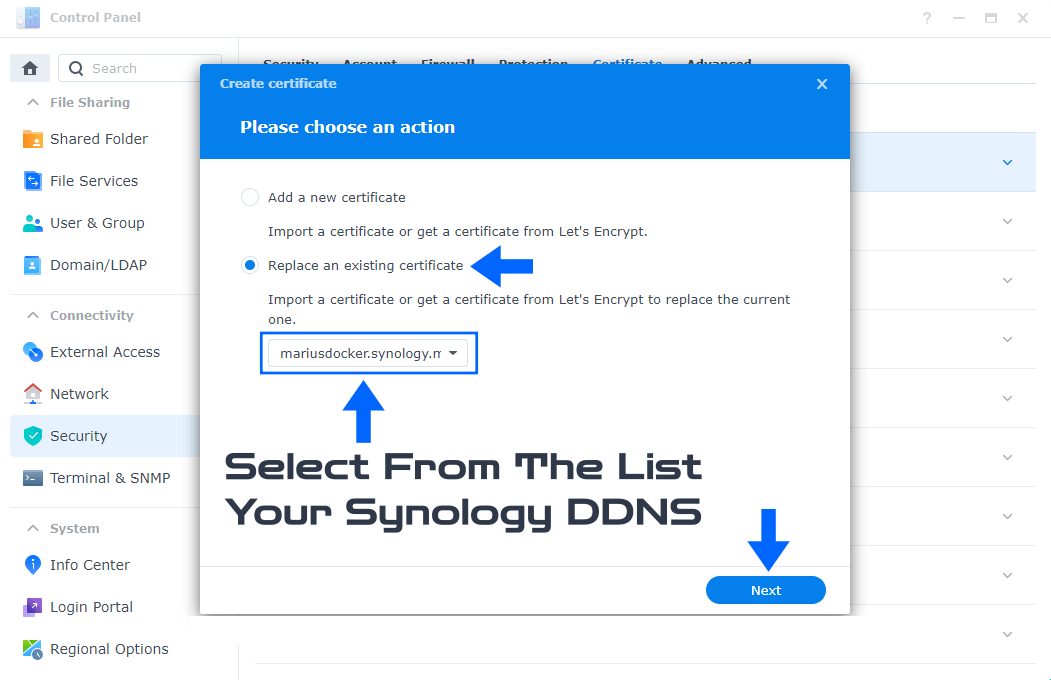
After you click Add on STEP 3, a new pop up window will open. Select Replace an existing certificate then select your Synology DDNS certificate from the list. Click Next. Follow the instructions in the image below.
STEP 5
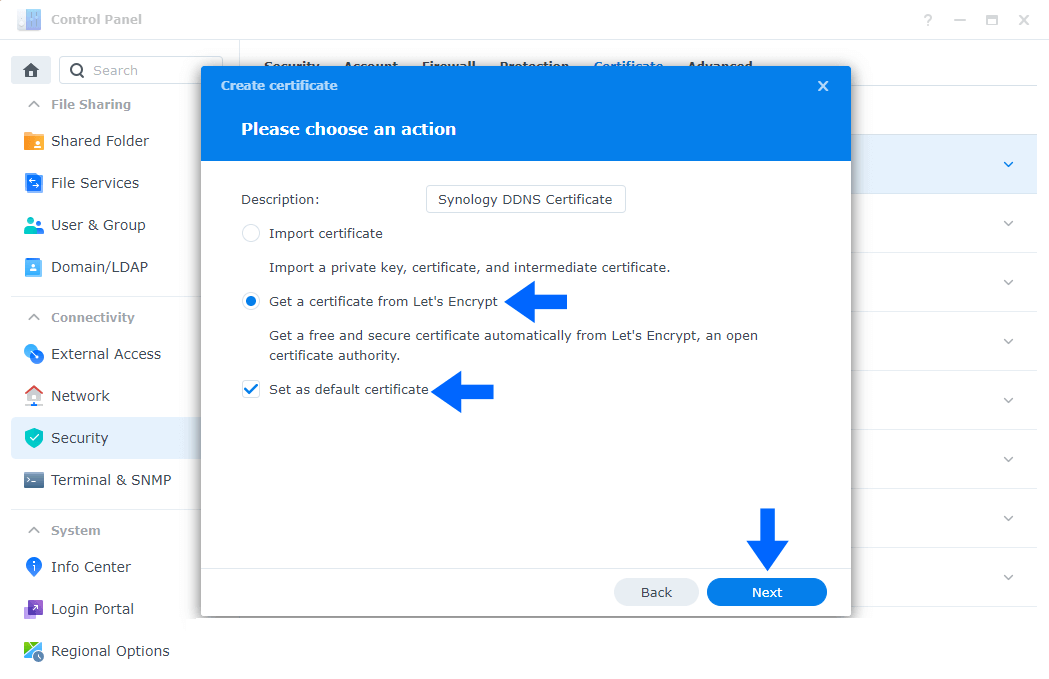
Select Get a certificate from Let’s Encrypt then Set as default certificate. Click Next. Follow the instructions in the image below.
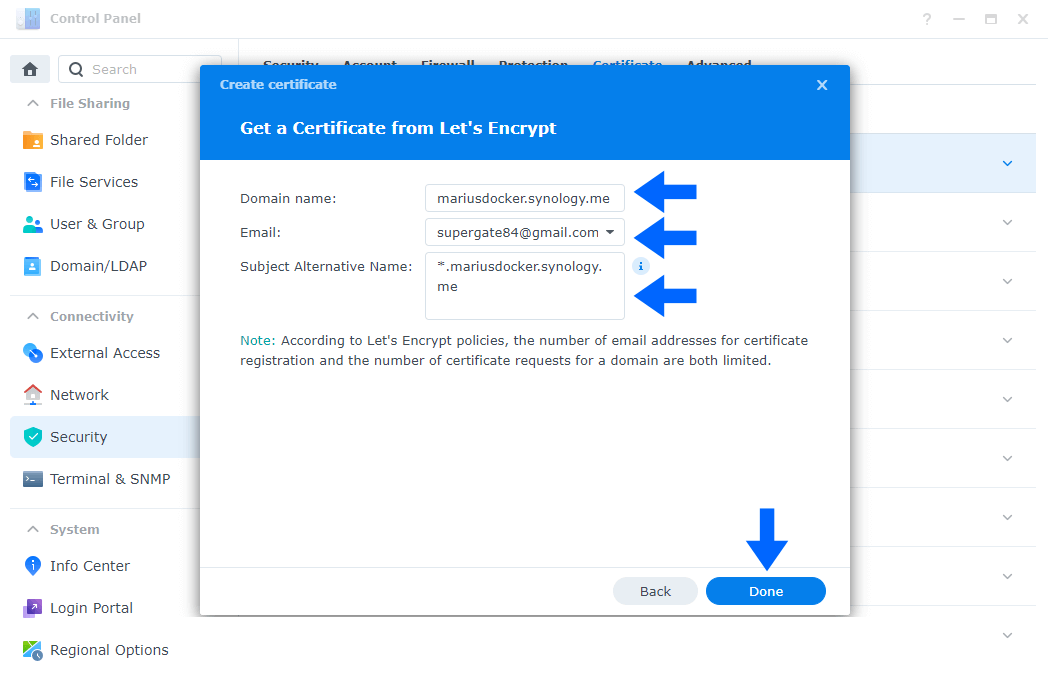
STEP 6
- On the Domain name area type in your DDNS. In my case it’s mariusdocker.synology.me In your case yourname.synology.me
- On the email area type in your email.
- On the Subject Alternative Name, before your DDNS, type in:
*.
In my case *.mariusdocker.synology.me In your case *.yourname.synology.me
Click Done. Follow the instructions in the image below.
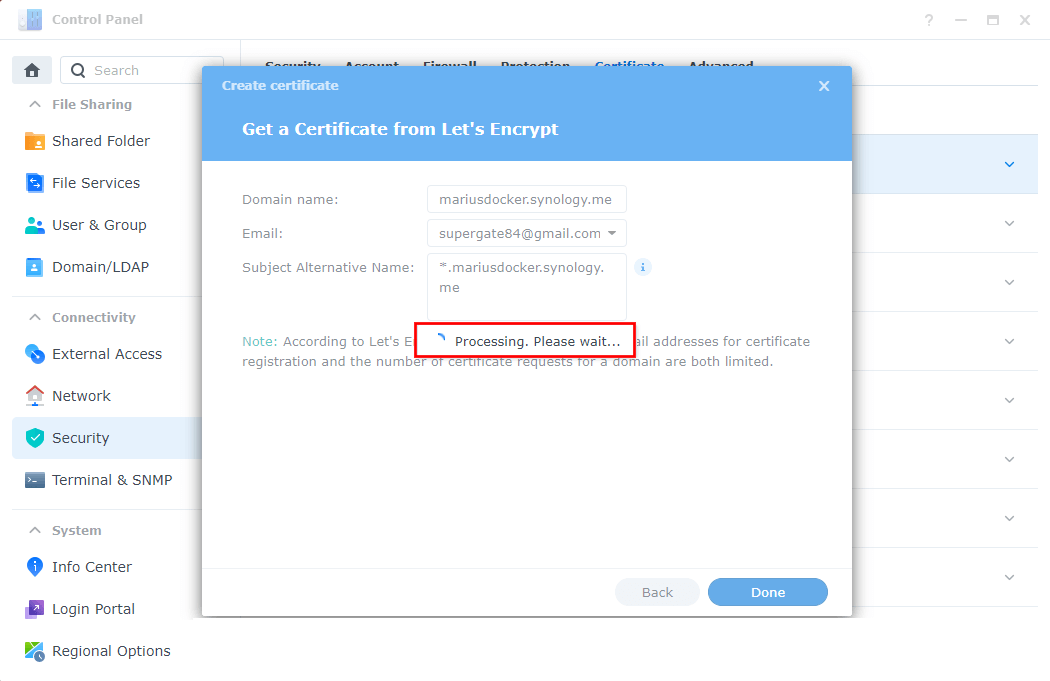
STEP 7
After you click Done on STEP 6 you should wait a few seconds until the Wildcard certificate is applied to your DDNS.
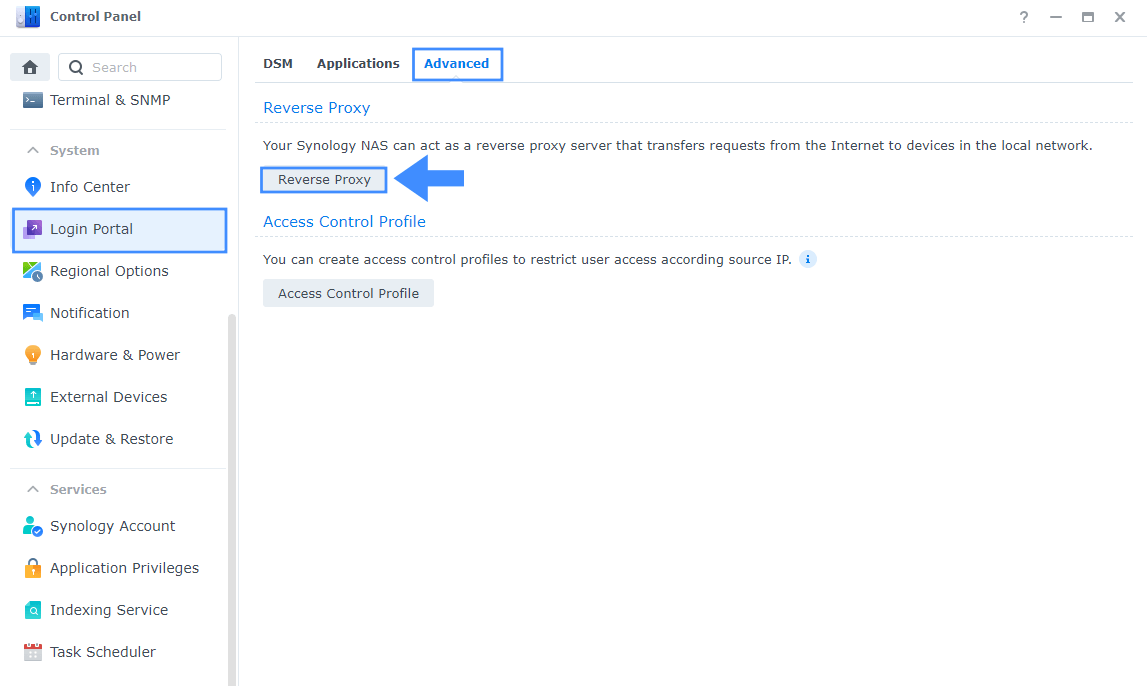
STEP 8
Check to see if the Wildcard certificate works. Go to Control Panel / Login Portal / Advanced Tab / click Reverse Proxy. Follow the instructions in the image below.
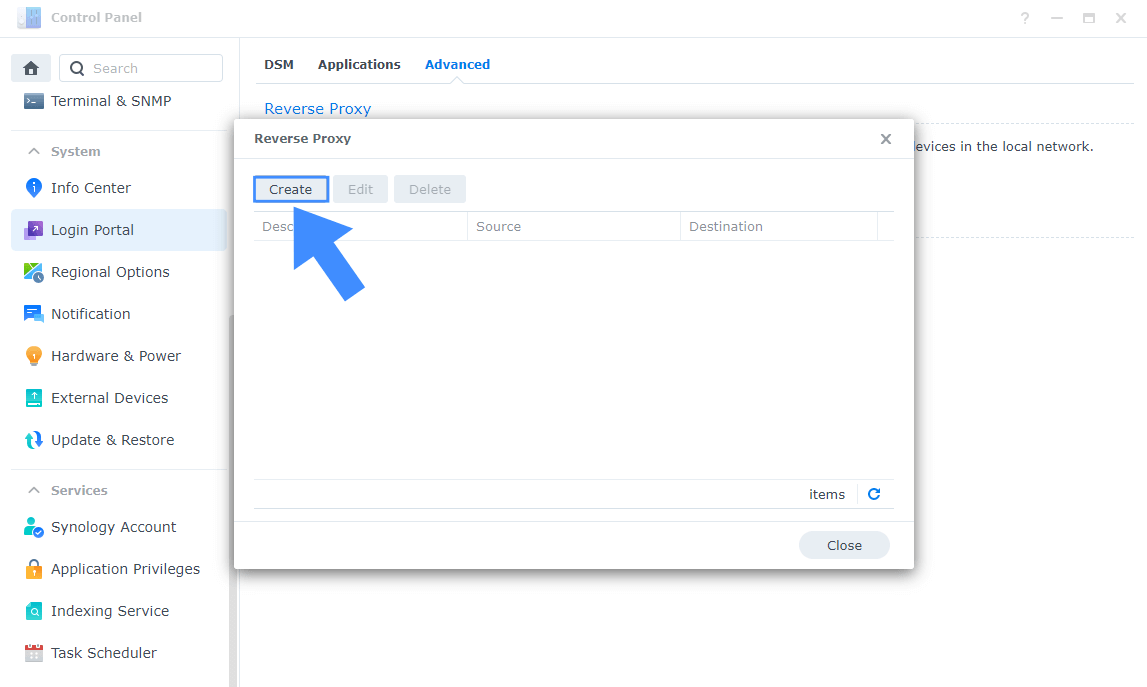
STEP 9
Now click the “Create” button. Follow the instructions in the image below.
STEP 10
Let’s take a random Docker Container you have installed using my guides. In this case I will use YouTube Downloader to show you how the Wildcard certificate works.
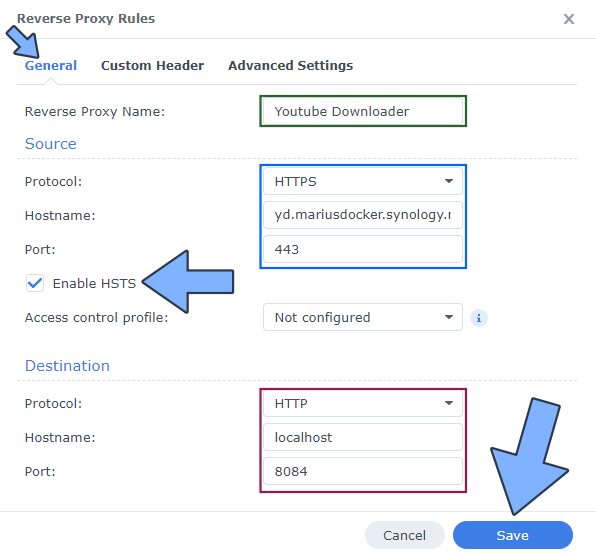
On the General area, set the Reverse Proxy Name description: type in what you want, in my case Youtube Downloader. After that, add the following instructions:
Source:
Protocol: HTTPS
Hostname: yd.yourname.synology.me Note: I have chosen to add yd before mariusdocker.synology.me You can choose any name before .yourname.synology.me
Port: 443
Check Enable HSTS
Destination:
Protocol: HTTP
Hostname: localhost
Port: 8084 (the localhost port of the YouTube Downloader container)
Click Save. Follow the instructions in the image below.
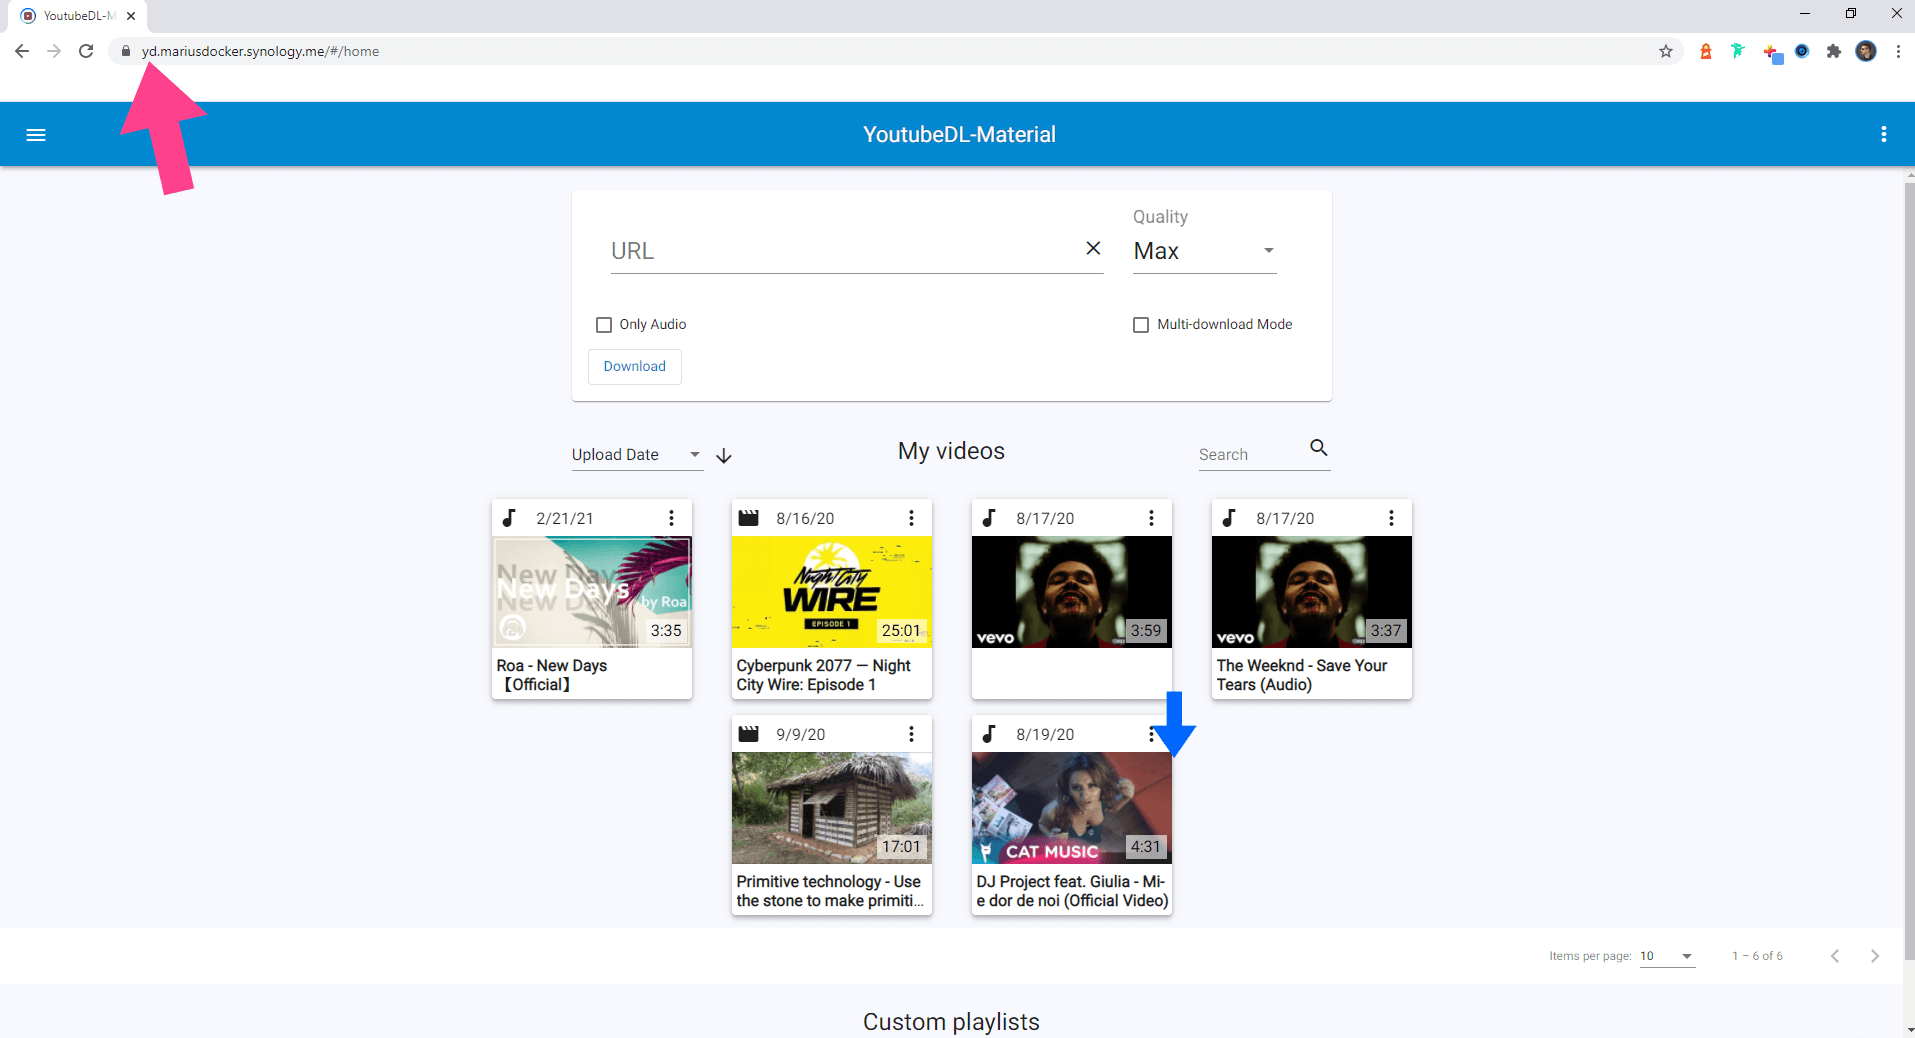
STEP 11
The Wildcard certificate is working perfectly!
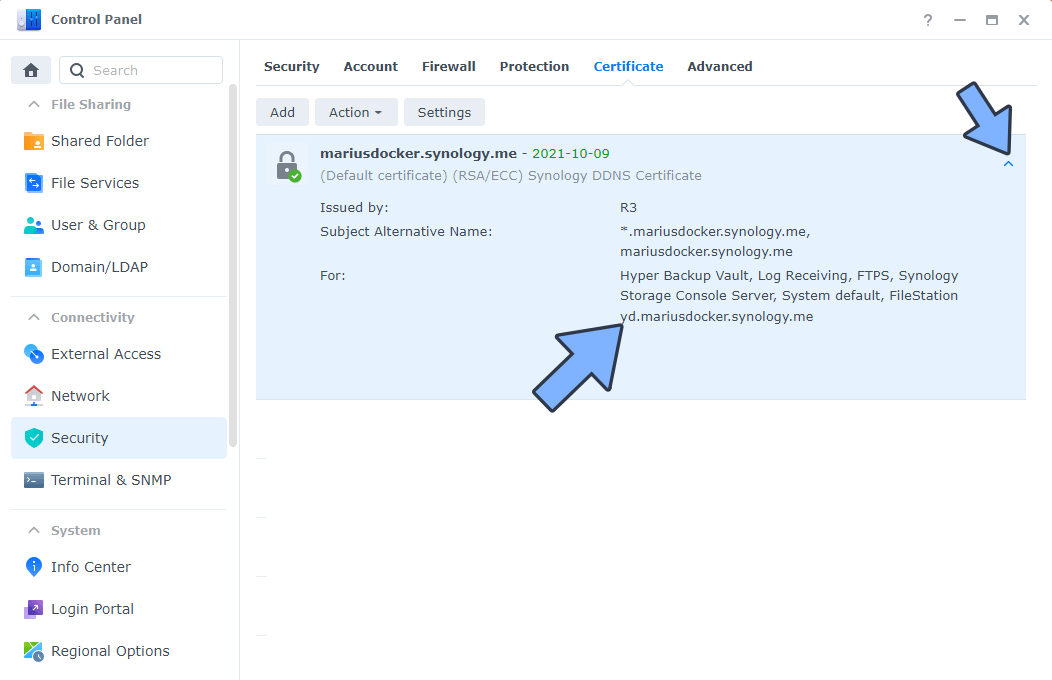
STEP 12
You can use the instructions at STEP 10 to add HTTPS access to all of your docker containers using just one Certificate. You only have to choose a new subdomain name before your .yourname.synology.me – You will see all of your subdomains under the first Synology DDNS certificate in Control Panel / Security / Certificate tab.
STEP 13
Best Practices When Using Docker and DDNS.
STEP 14
Synology DSM 7xx: Access synology.me without Port :5001
Note: When you renew your certificate, you will only have to renew the yourname.synology.me certificate and all subdomains will be automatically updated.
Note: You can choose a different Synology hostname for your DDNS. All Synology hostnames support the Wildcard certificate.
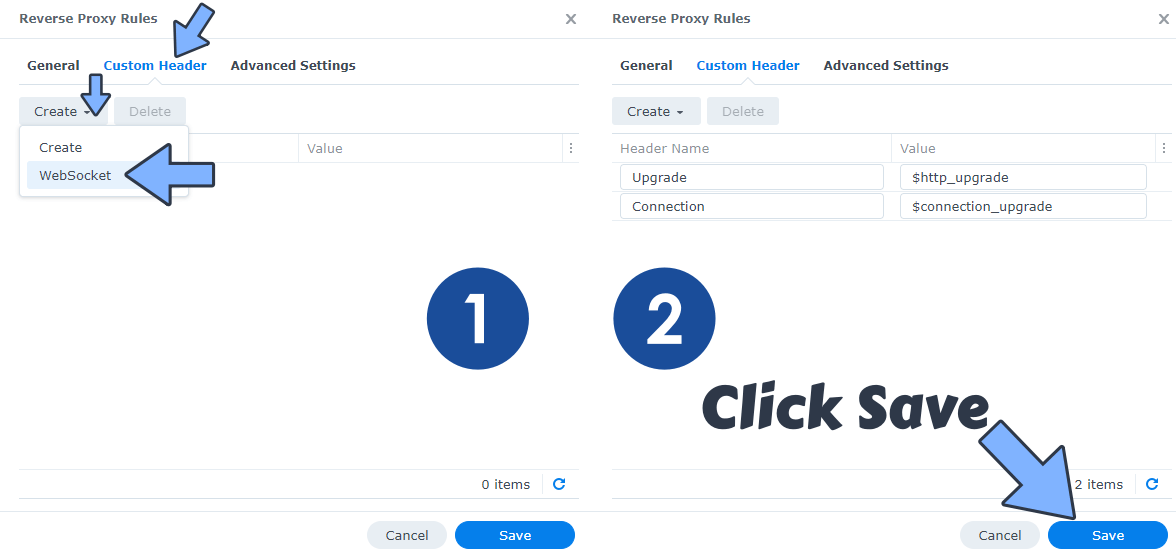
Note: Some Docker containers need WebSocket activation in order to work over an HTTPS connection (Reverse Proxy). To do this, go to Control Panel / Login Portal / select your Reverse Proxy then click the Custom Header tab. Click Create and then, from the drop-down menu, click WebSocket. After you click on WebSocket, two Header Names and two Values will be automatically added. Click Save. Follow the instructions in the image below.
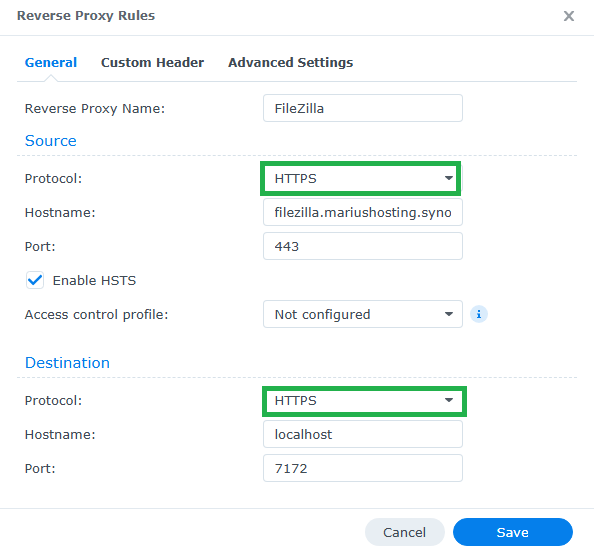
If you encounter the following issue, 400 Bad Request The plain HTTP request was sent to HTTPS port, once you run a container via https, you will need to use HTTPS on the Protocol part in both areas in the Reverse Proxy Rules, like in the example below.
This post was updated on Wednesday / July 30th, 2025 at 3:36 AM