
BookOrbit is a self-hosted, open-source library and reading platform for ebooks, audiobooks, and comics. It offers built-in multi-format readers, automated metadata management, Kobo and KOReader sync, multi-user support with SSO, private OPDS catalogs, and rich reading analytics, all with simple Docker deployment and no subscription. In this step by step guide I will show you how to install BookOrbit on your Synology NAS using Docker & Portainer.
This guide works perfectly with the latest BookOrbit v2.10.0 release.
STEP 1
Please Support My work by Making a Donation.
STEP 2
Install Portainer using my step by step guide. If you already have Portainer installed on your Synology NAS, skip this STEP. Attention: Make sure you have installed the latest Portainer version.
STEP 3
Make sure you have a synology.me Wildcard Certificate. Follow my guide to get a Wildcard Certificate. If you already have a synology.me Wildcard certificate, skip this STEP.
STEP 4
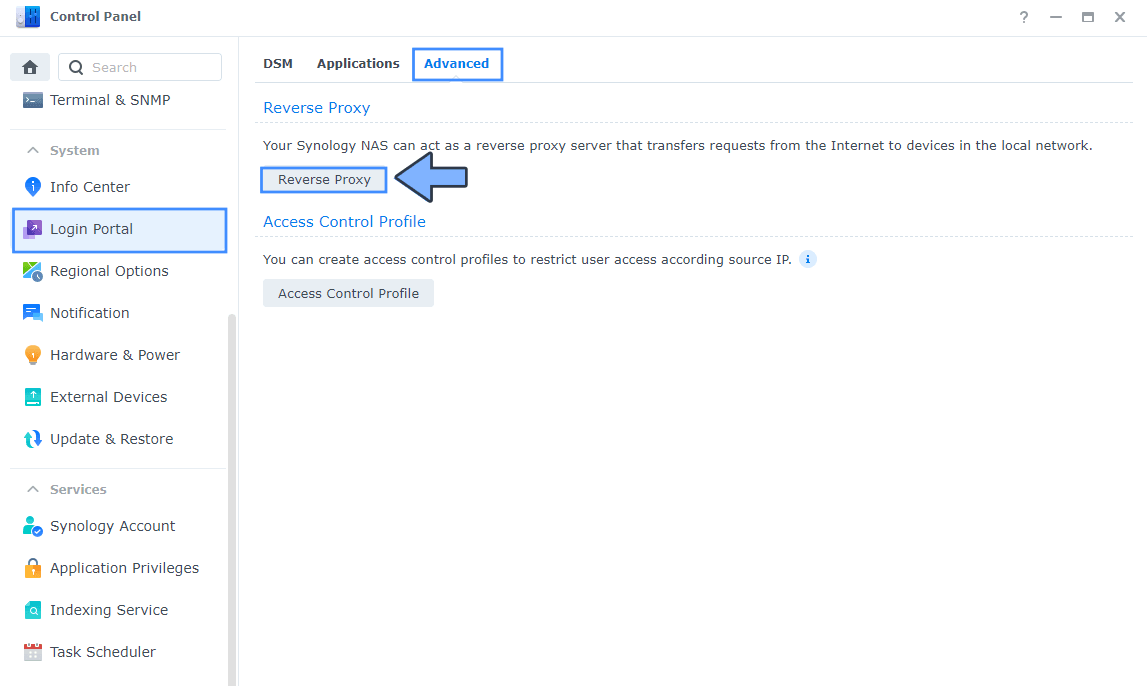
Go to Control Panel / Login Portal / Advanced Tab / click Reverse Proxy. Follow the instructions in the image below.
STEP 5
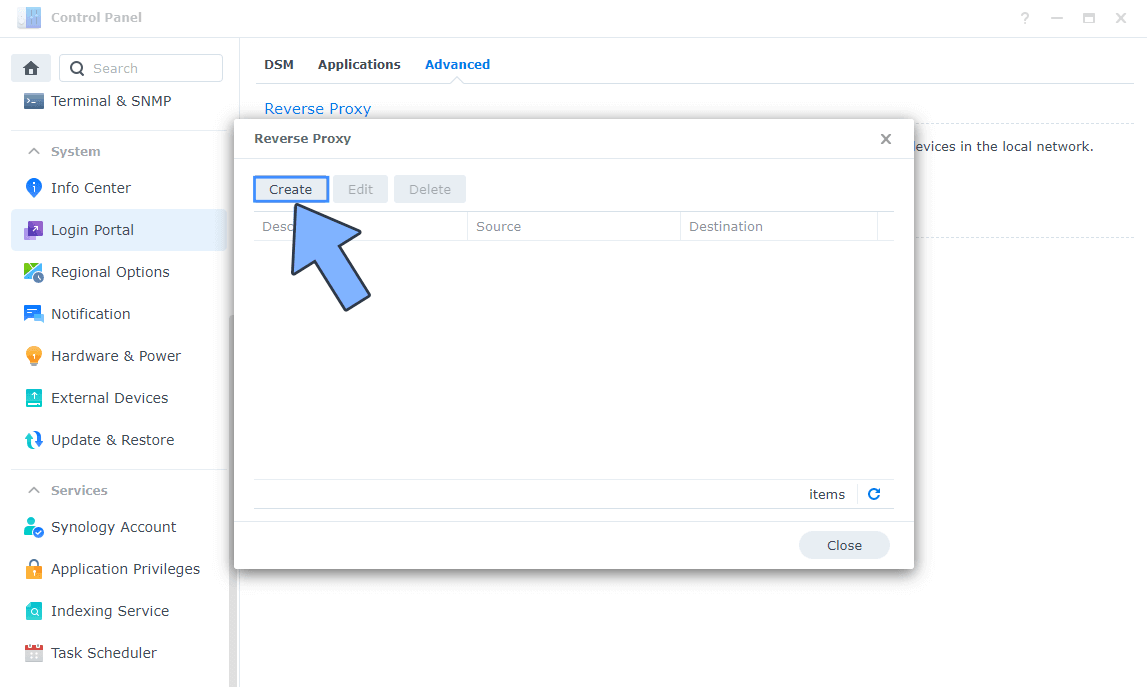
Now click the “Create” button. Follow the instructions in the image below.
STEP 6
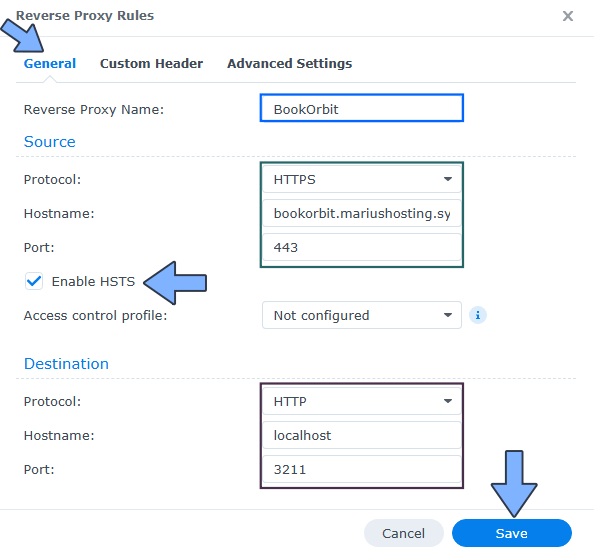
After you click the Create button, the window below will open. Follow the instructions in the image below.
On the General area, set the Reverse Proxy Name description: type in BookOrbit. After that, add the following instructions:
Source:
Protocol: HTTPS
Hostname: bookorbit.yourname.synology.me
Port: 443
Check Enable HSTS
Destination:
Protocol: HTTP
Hostname: localhost
Port: 3211
STEP 7
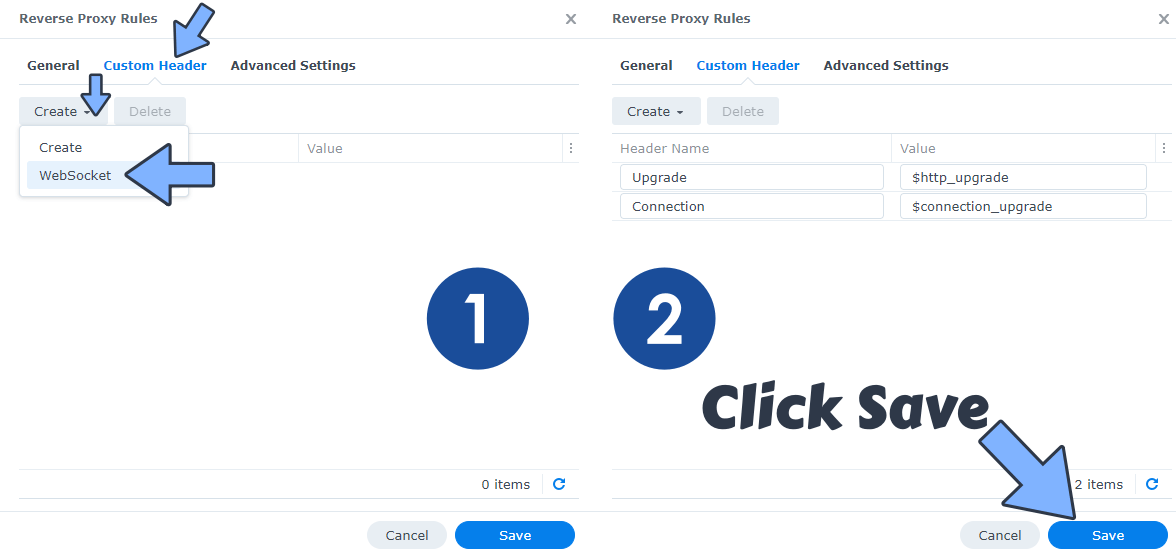
On the Reverse Proxy Rules click the Custom Header tab. Click Create and then, from the drop-down menu, click WebSocket. After you click on WebSocket, two Header Names and two Values will be automatically added. Click Save. Follow the instructions in the image below.
STEP 8
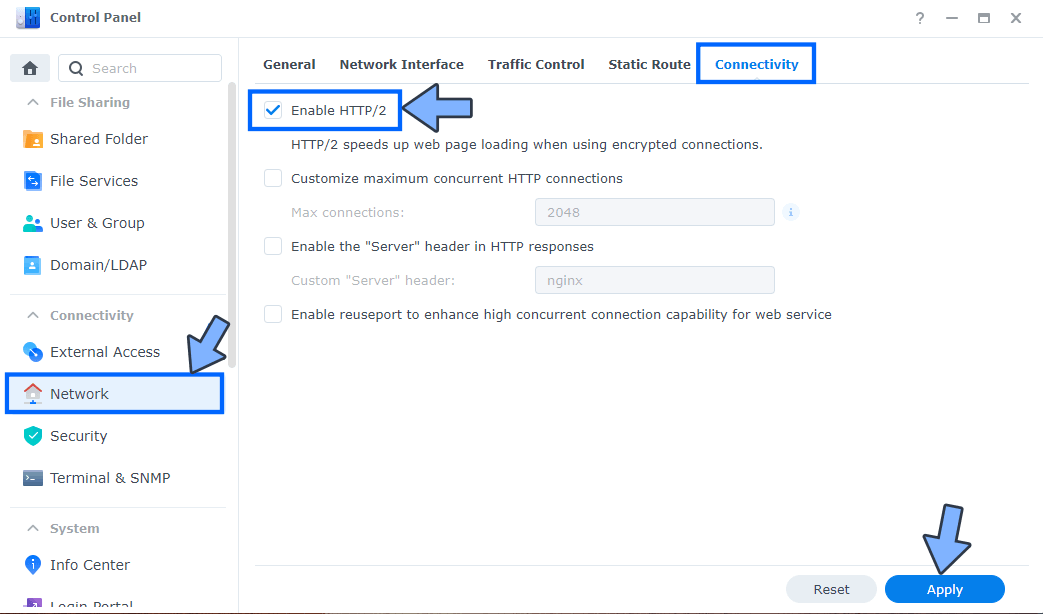
Go to Control Panel / Network / Connectivity tab/ Check Enable HTTP/2 then click Apply. Follow the instructions in the image below.
STEP 9
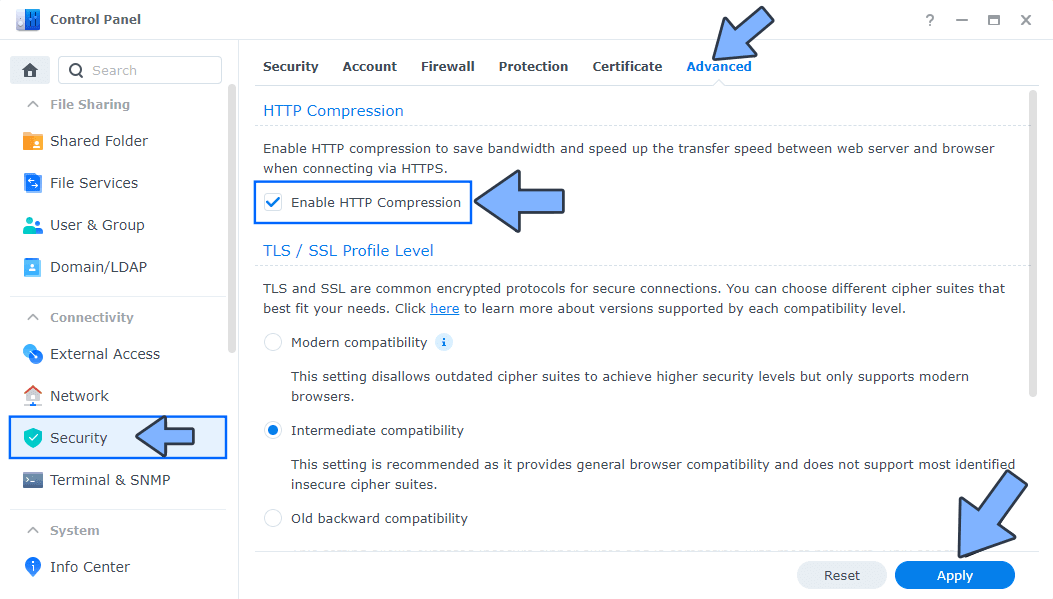
Go to Control Panel / Security / Advanced tab/ Check Enable HTTP Compression then click Apply. Follow the instructions in the image below.
STEP 10
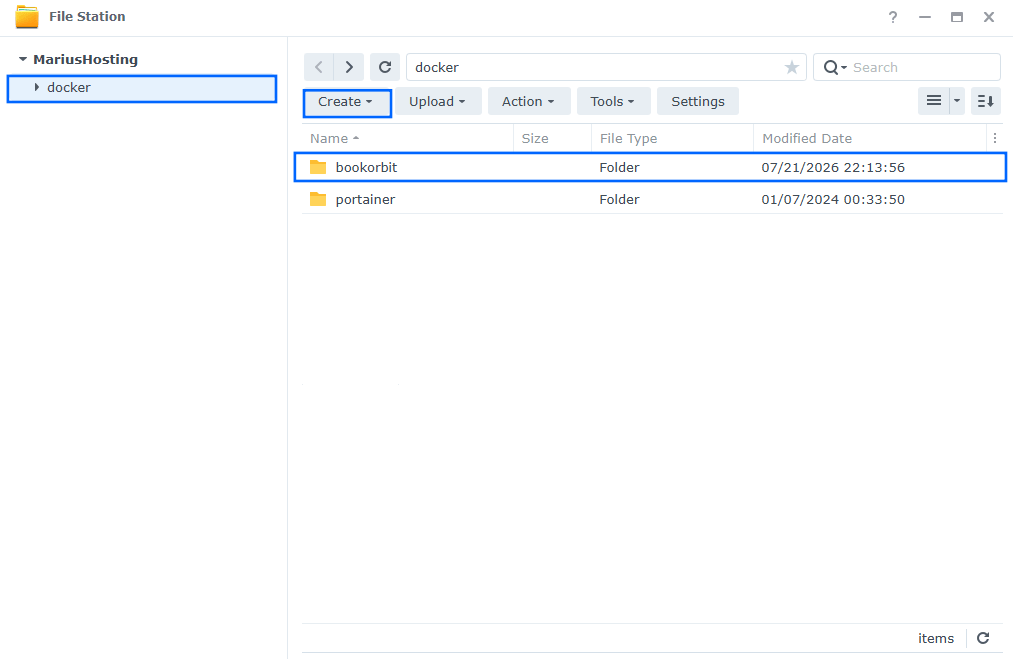
Go to File Station and open the docker folder. Inside the docker folder, create one new folder and name it bookorbit. Follow the instructions in the image below.
Note: Be careful to enter only lowercase, not uppercase letters.
STEP 11
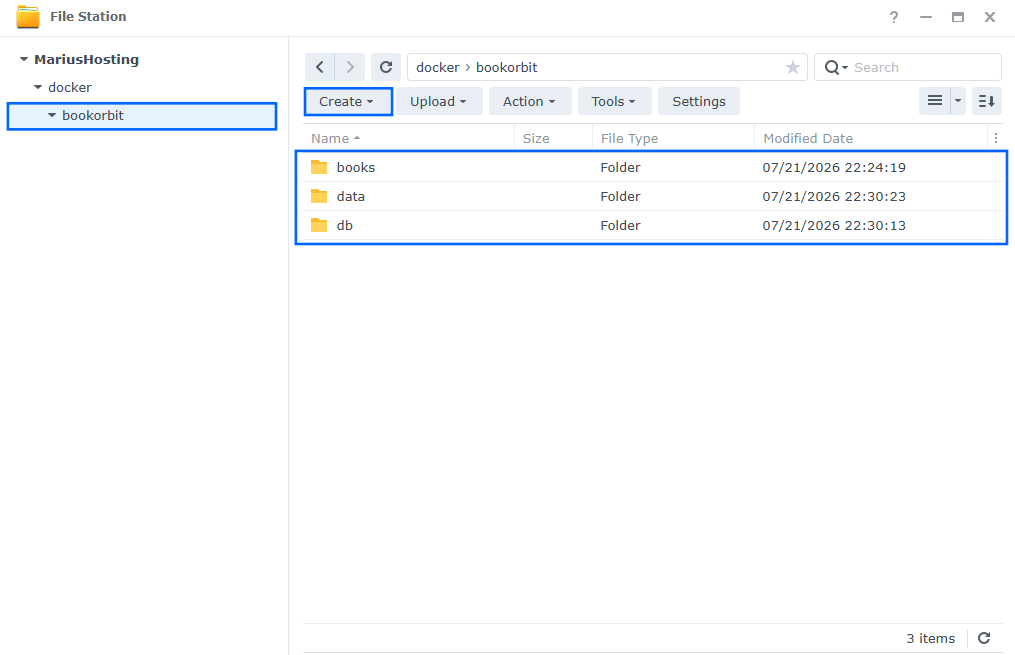
Now create three new folders inside the bookorbit folder that you have previously created at STEP 10. Name them books, data, db. Follow the instructions in the image below.
Note: Be careful to enter only lowercase, not uppercase letters.
STEP 12
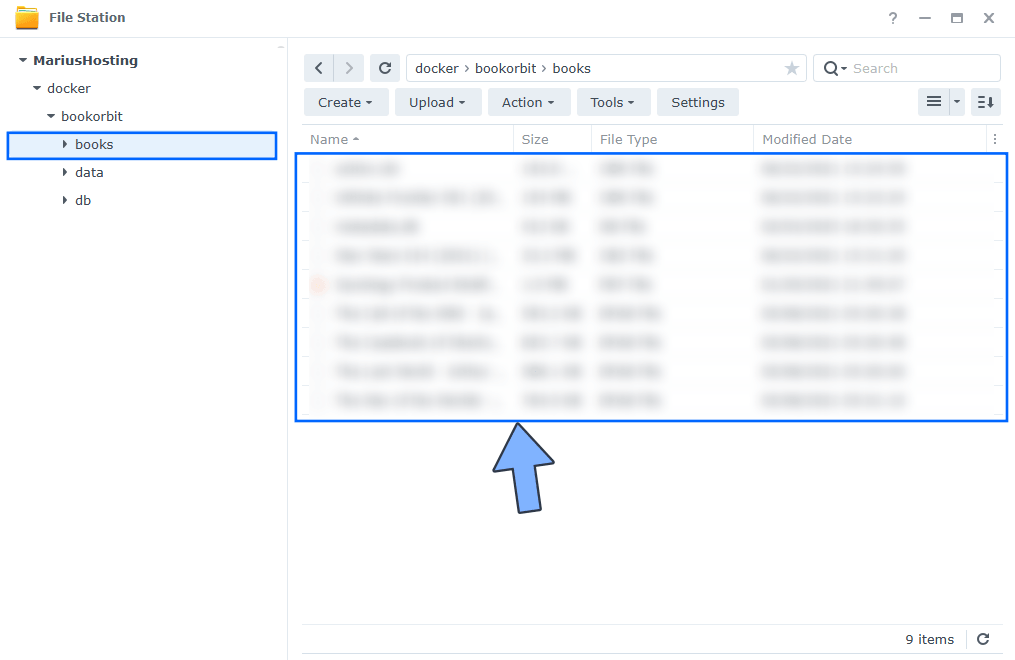
Populate your books folder that you have previously created at STEP 11 with your books. Follow the instructions in the image below.
STEP 13
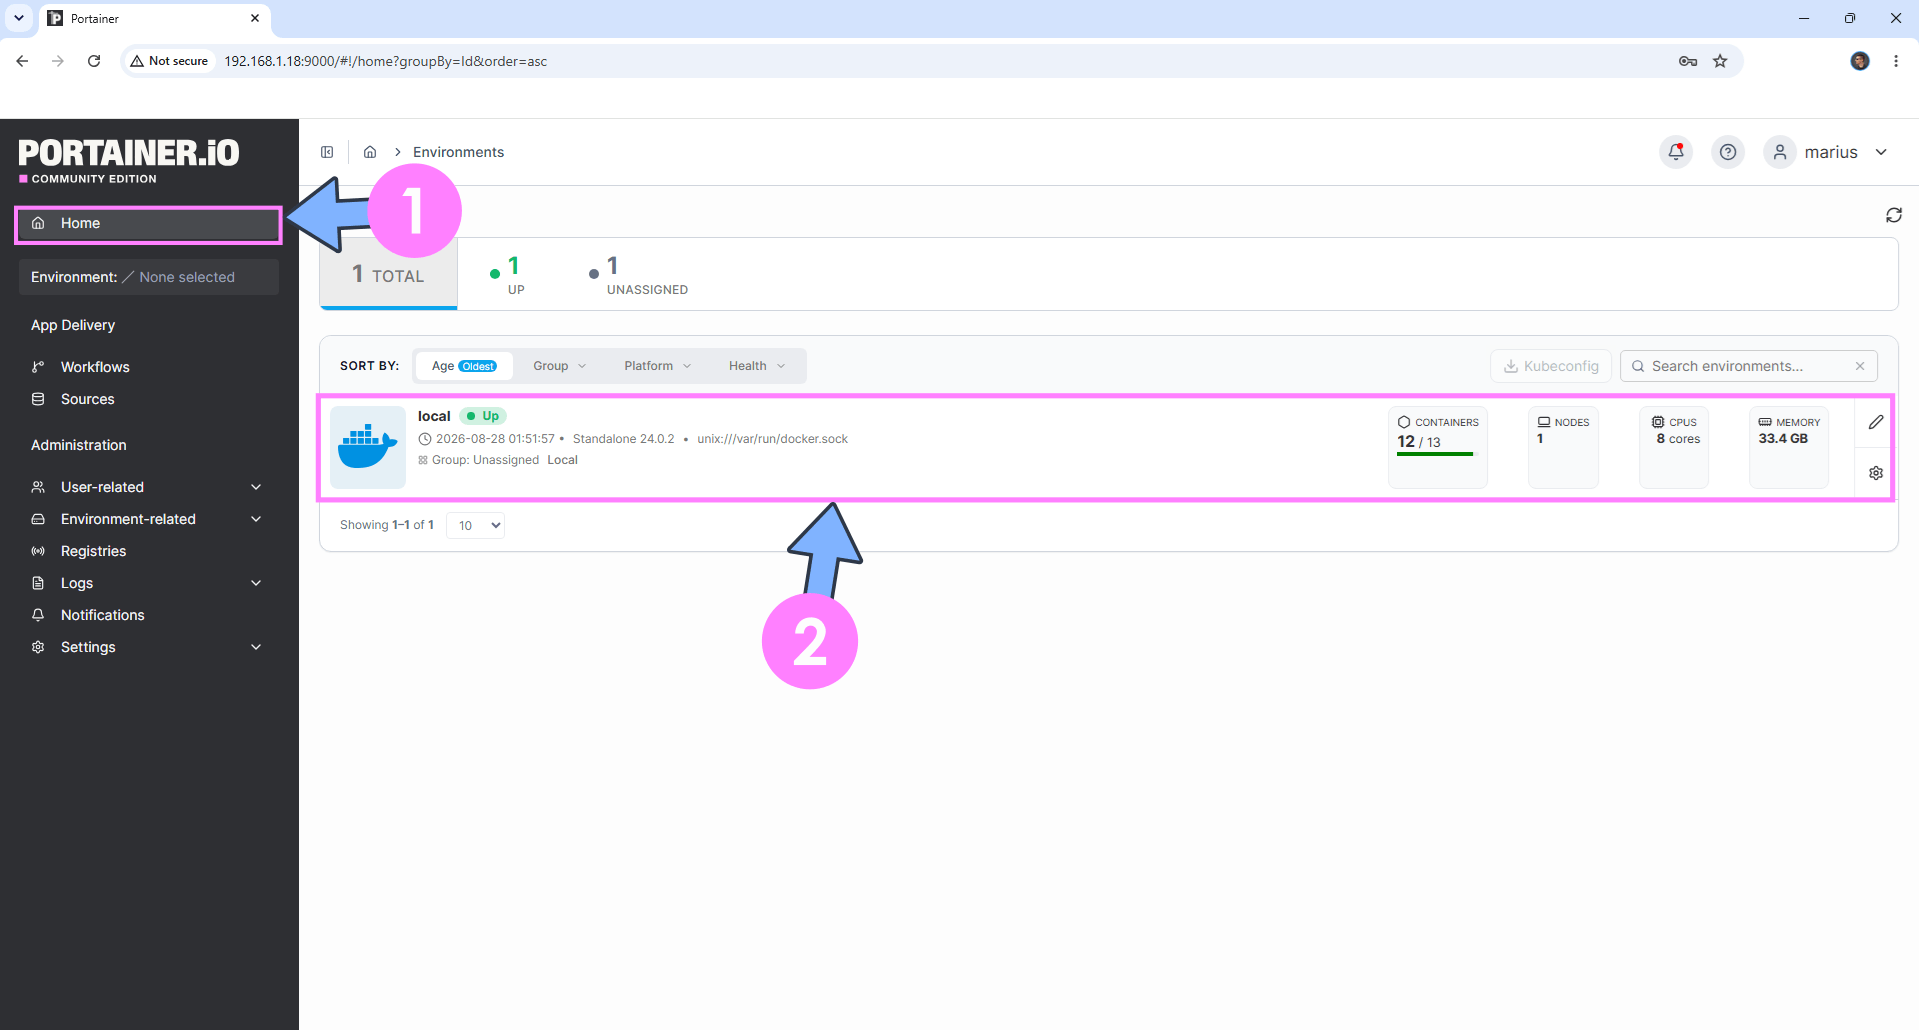
Log into Portainer using your username and password. On the left sidebar in Portainer, click on Home then click inside the local rectangle. Follow the instructions in the image below.
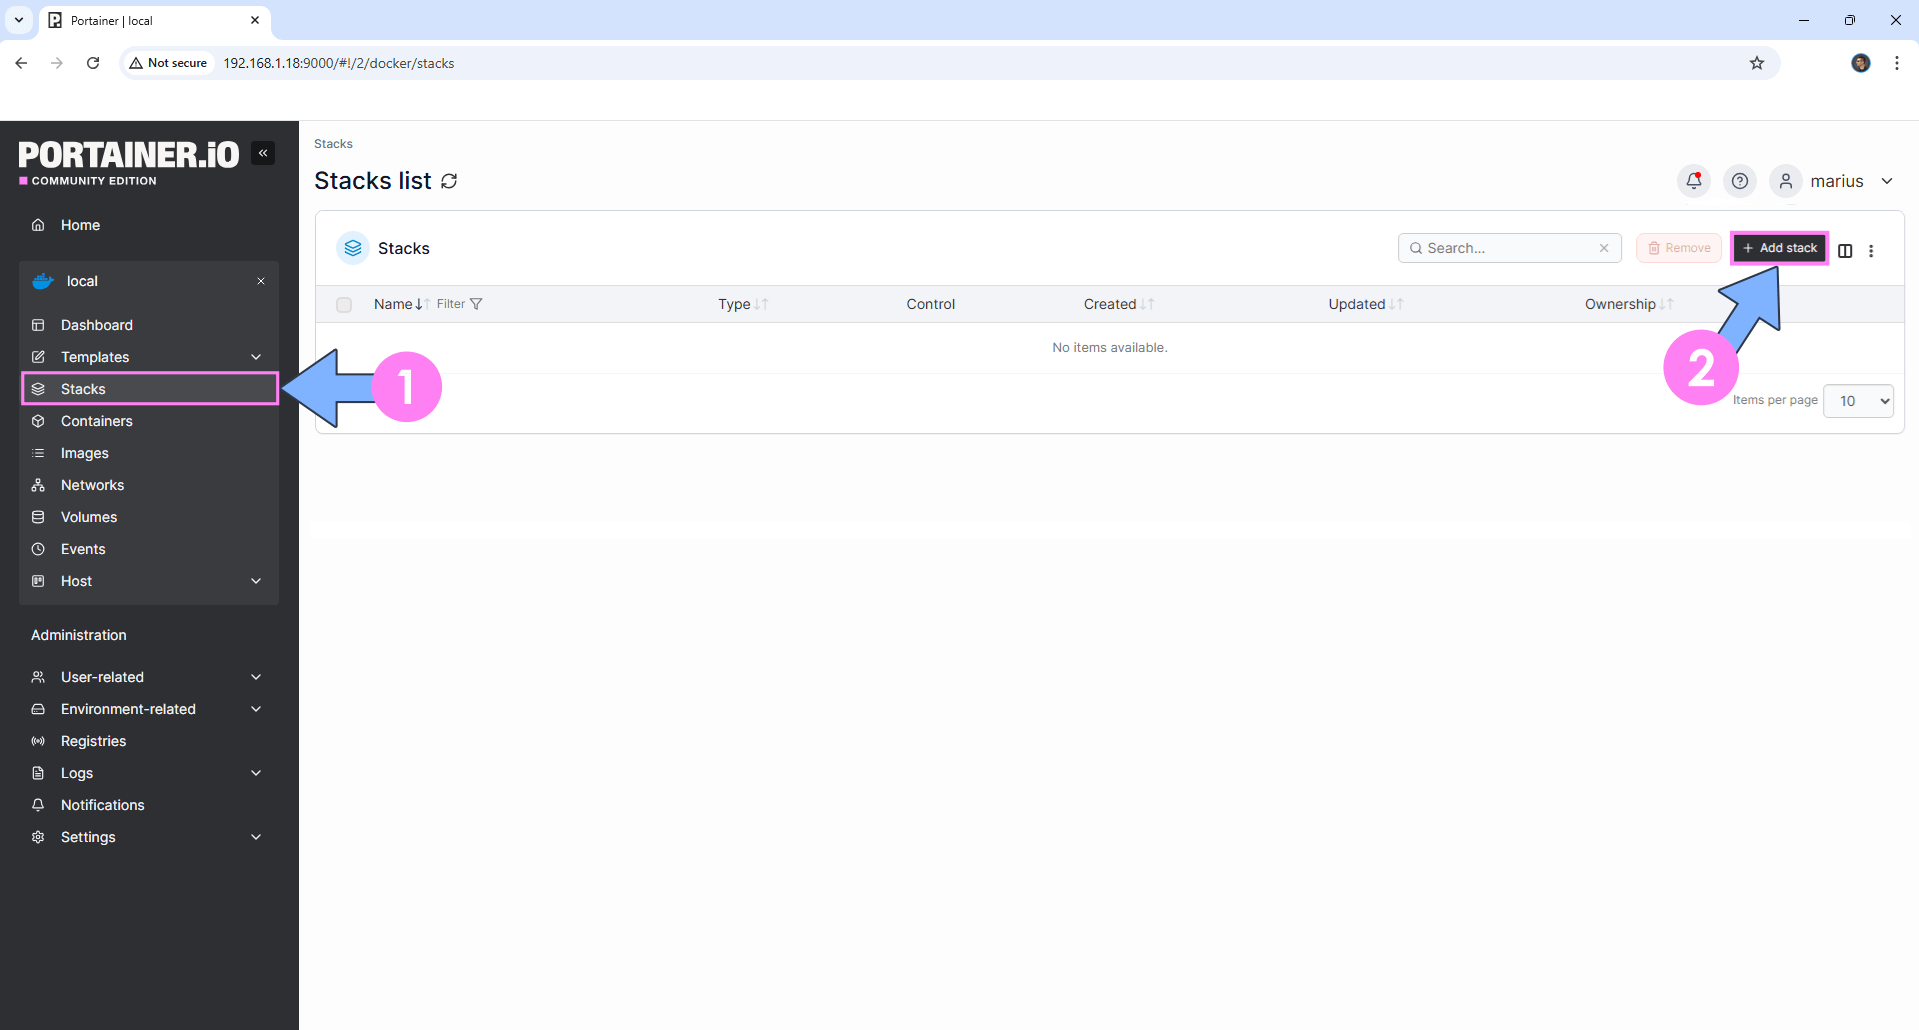
On the left sidebar in Portainer, click on Stacks then + Add stack. Follow the instructions in the image below.
STEP 14
In the Name field type in bookorbit. Follow the instructions in the image below.
services:
  bookorbit:
    image: ghcr.io/bookorbit/bookorbit:latest
    container_name: Bookorbit
    healthcheck:
      test: ["CMD", "node", "-e", "const p=process.env.PORT||3211;fetch('http://127.0.0.1:'+p+'/api/v1/health').then(r=>process.exit(r.ok?0:1)).catch(()=>process.exit(1))"]
      interval: 30s
      timeout: 5s
      retries: 3
      start_period: 20s
    init: true
    ports:
      - 3211:3211
    environment:
      NODE_ENV: production
      PORT: 3211
      POSTGRES_HOST: bookorbit_db
      POSTGRES_PORT: 5432
      POSTGRES_USER: bookorbituser
      POSTGRES_PASSWORD: bookorbitpass
      POSTGRES_DB: bookorbit
      JWT_SECRET: dOxZYTTZgXKMHkqLBIQVImayQXAVWdzGBPuFJKggzcgvgPJPXpWzqzKaUOIOGGIr
      SETUP_BOOTSTRAP_TOKEN: dUTVUFgUlvbLBRyLtPMIsfFoCCvfwtgcDqfYPWqxHKGXLmdjWxTRTwtcVapaiMmG
      APP_URL: https://bookorbit.yourname.synology.me
      CLIENT_URL: https://bookorbit.yourname.synology.me
      PUID: 1026
      PGID: 100
      LIBRARY_BROWSE_ROOT: /books
      NODE_MAX_OLD_SPACE_SIZE: 2048
      BOOKORBIT_FIX_PERMISSIONS: true
      LOG_LEVEL: info
    volumes:
      - /volume1/docker/bookorbit/books:/books:rw
      - /volume1/docker/bookorbit/data:/data:rw
    read_only: true
    tmpfs:
      - /tmp
    cap_drop:
      - ALL
    cap_add:
      - CHOWN
      - DAC_OVERRIDE
      - FOWNER
      - SETGID
      - SETUID
    security_opt:
      - no-new-privileges:true
    stop_grace_period: 30s
    depends_on:
      db:
        condition: service_healthy
    restart: on-failure:5

  db:
    image: pgvector/pgvector:pg18
    container_name: Bookorbit-DB
    hostname: bookorbit_db
    healthcheck:
      test: ["CMD-SHELL", 'pg_isready -U "bookorbituser" -d "bookorbit"']
      interval: 10s
      timeout: 5s
      retries: 10
      start_period: 20s
    environment:
      POSTGRES_USER: bookorbituser
      POSTGRES_PASSWORD: bookorbitpass
      POSTGRES_DB: bookorbit
      PGDATA: /var/lib/postgresql/
    volumes:
      - /volume1/docker/bookorbit/db:/var/lib/postgresql:rw
    restart: on-failure:5
Note: Before you paste the code above in the Web editor area below, change the value for JWT_SECRET. (Generate your own Random 64 length JWT_SECRET.)
Note: Before you paste the code above in the Web editor area below, change the value for SETUP_BOOTSTRAP_TOKEN. (Generate your own Random 64 length SETUP_BOOTSTRAP_TOKEN.) ⚠️Note: You will need this Token later at STEP 18.
Note: Before you paste the code above in the Web editor area below, change the value for APP_URL and type in your own synology.me DDNS with https:// at the beginning that you have previously created at STEP 6.
Note: Before you paste the code above in the Web editor area below, change the value for CLIENT_URL and type in your own synology.me DDNS with https:// at the beginning that you have previously created at STEP 6.
Note: Before you paste the code above in the Web editor area below, change the value numbers for PUID and PGID with your own values. (Follow my step by step guide on how to do this.)
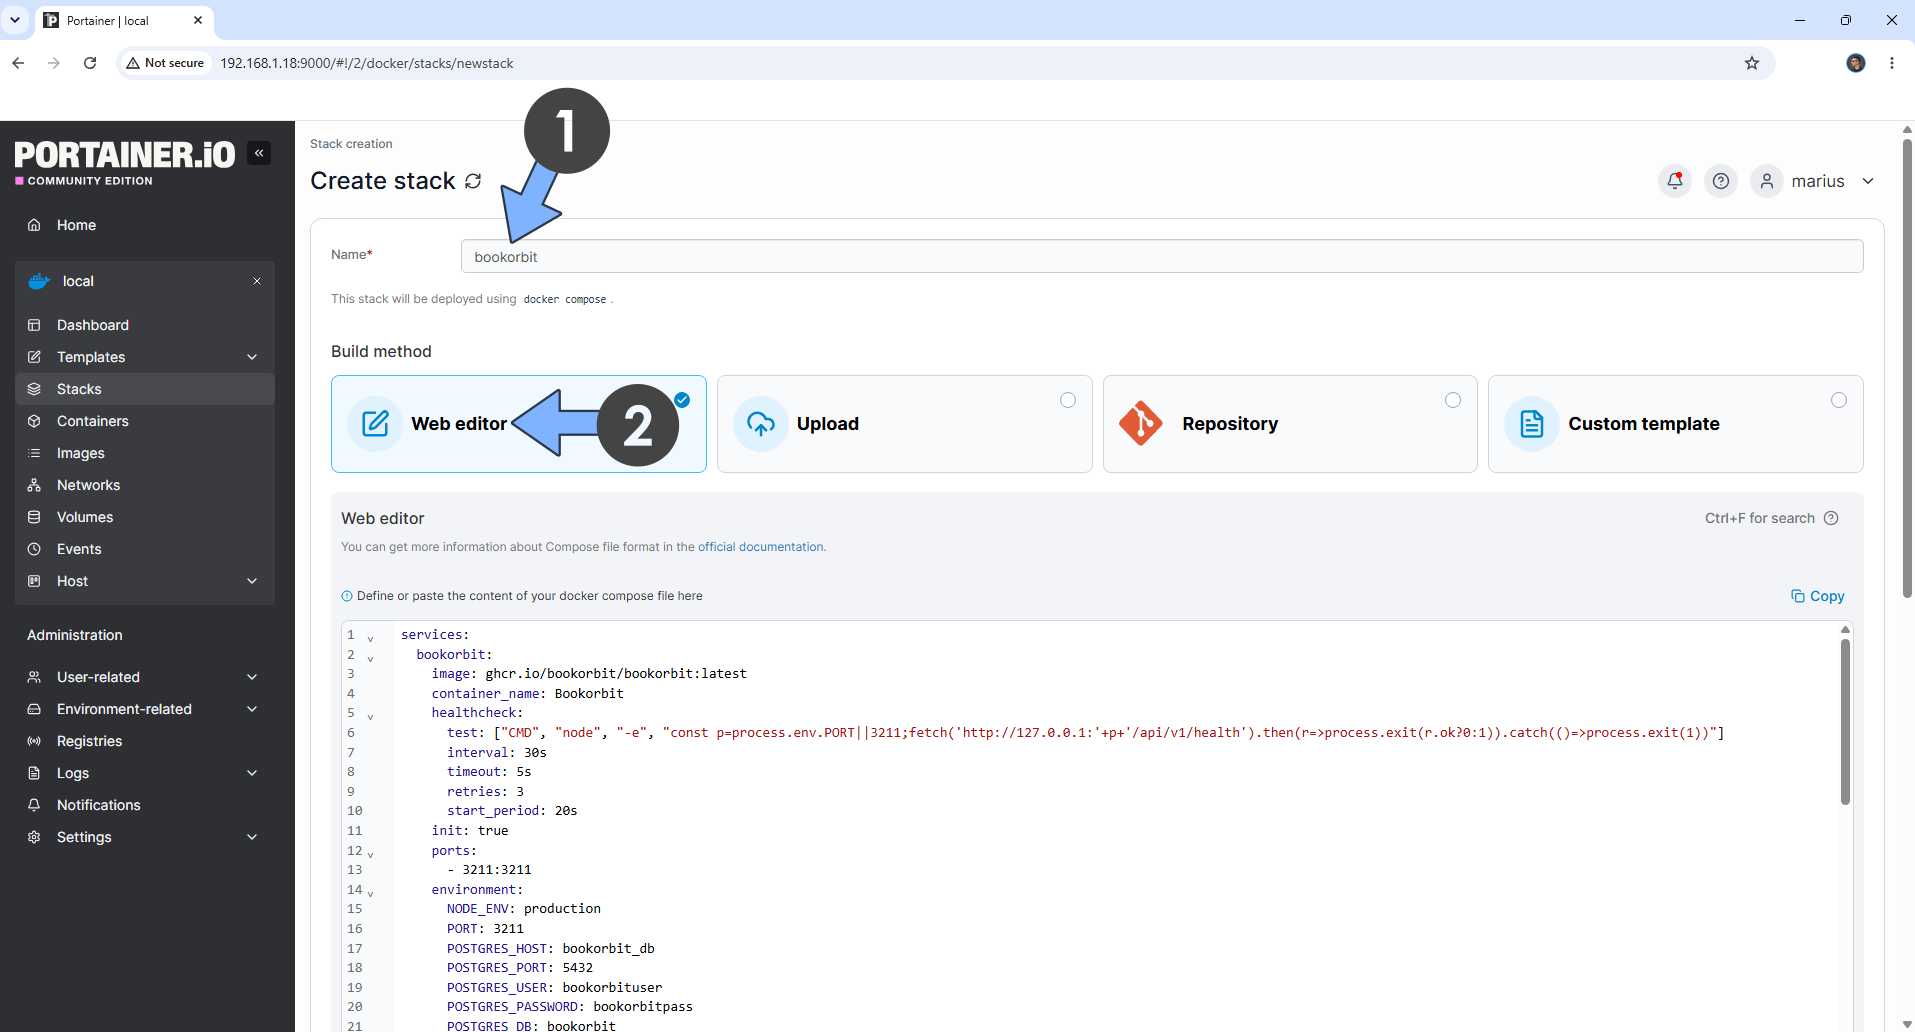
STEP 15
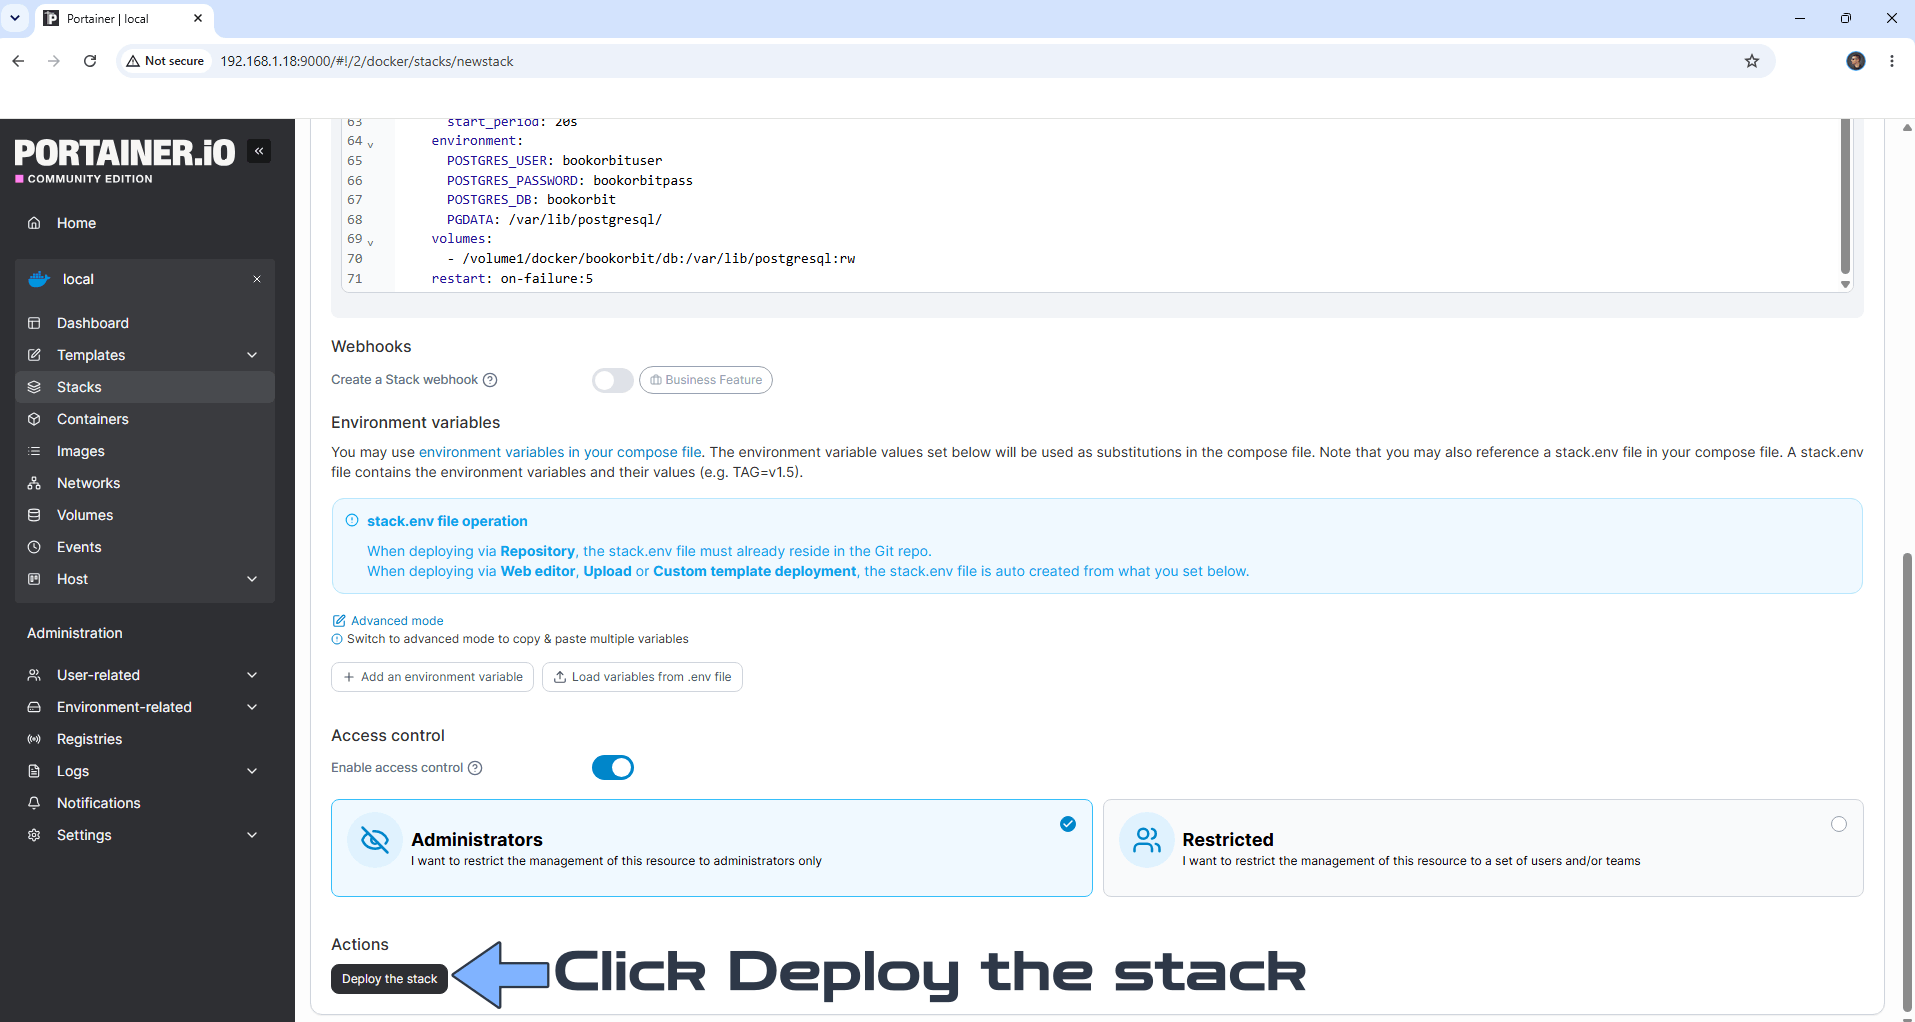
Scroll down on the page until you see a button named Deploy the stack. Click on it. Follow the instructions in the image below. The installation process can take up to a few minutes. It will depend on your Internet speed connection.
STEP 16
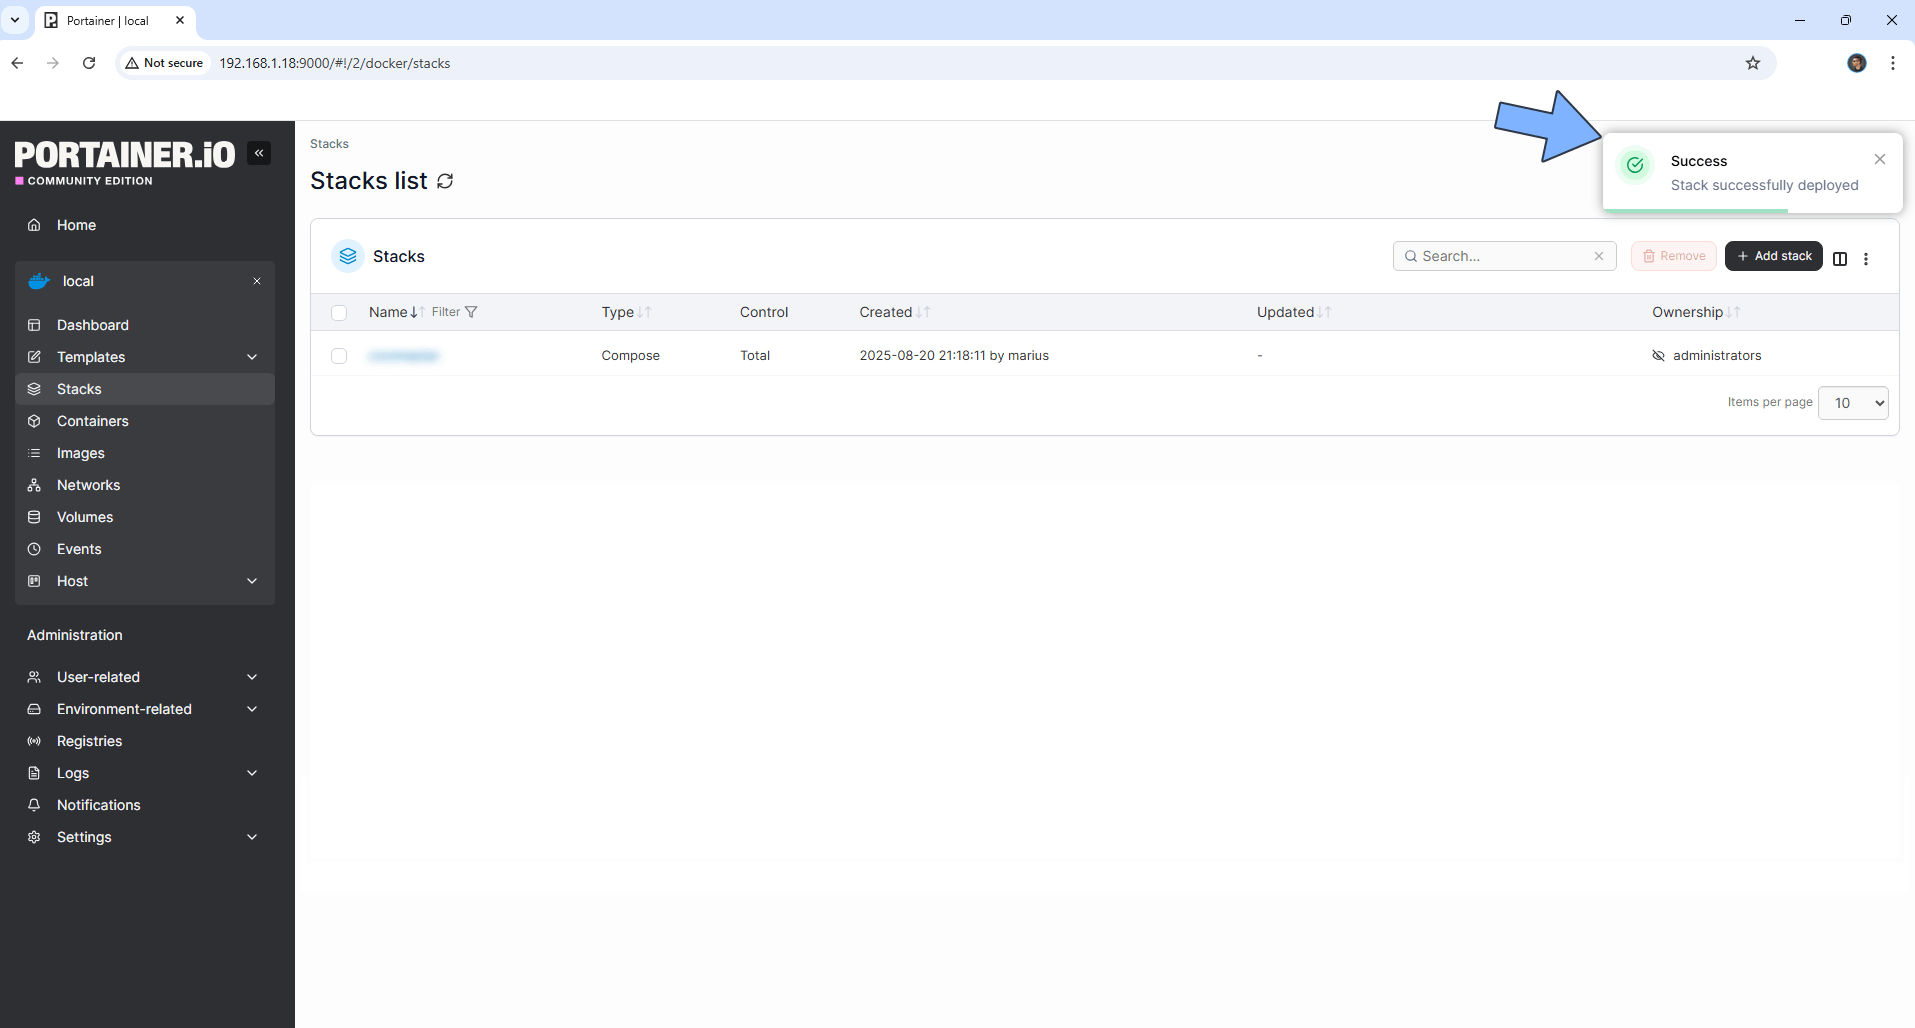
If everything goes right, you will see the following message at the top right of your screen: “Success Stack successfully deployed“.
STEP 17
🟢Please Support My work by Making a Donation. Almost 99,9% of the people that install something using my guides forget to support my work, or just ignore STEP 1. I’ve been very honest about this aspect of my work since the beginning: I don’t run any ADS, I don’t require subscriptions, paid or otherwise, I don’t collect IPs, emails, and I don’t have any referral links from Amazon or other merchants. I also don’t have any POP-UPs or COOKIES. I have repeatedly been told over the years how much I have contributed to the community. It’s something I love doing and have been honest about my passion since the beginning. But I also Need The Community to Support me Back to be able to continue doing this work.
STEP 18
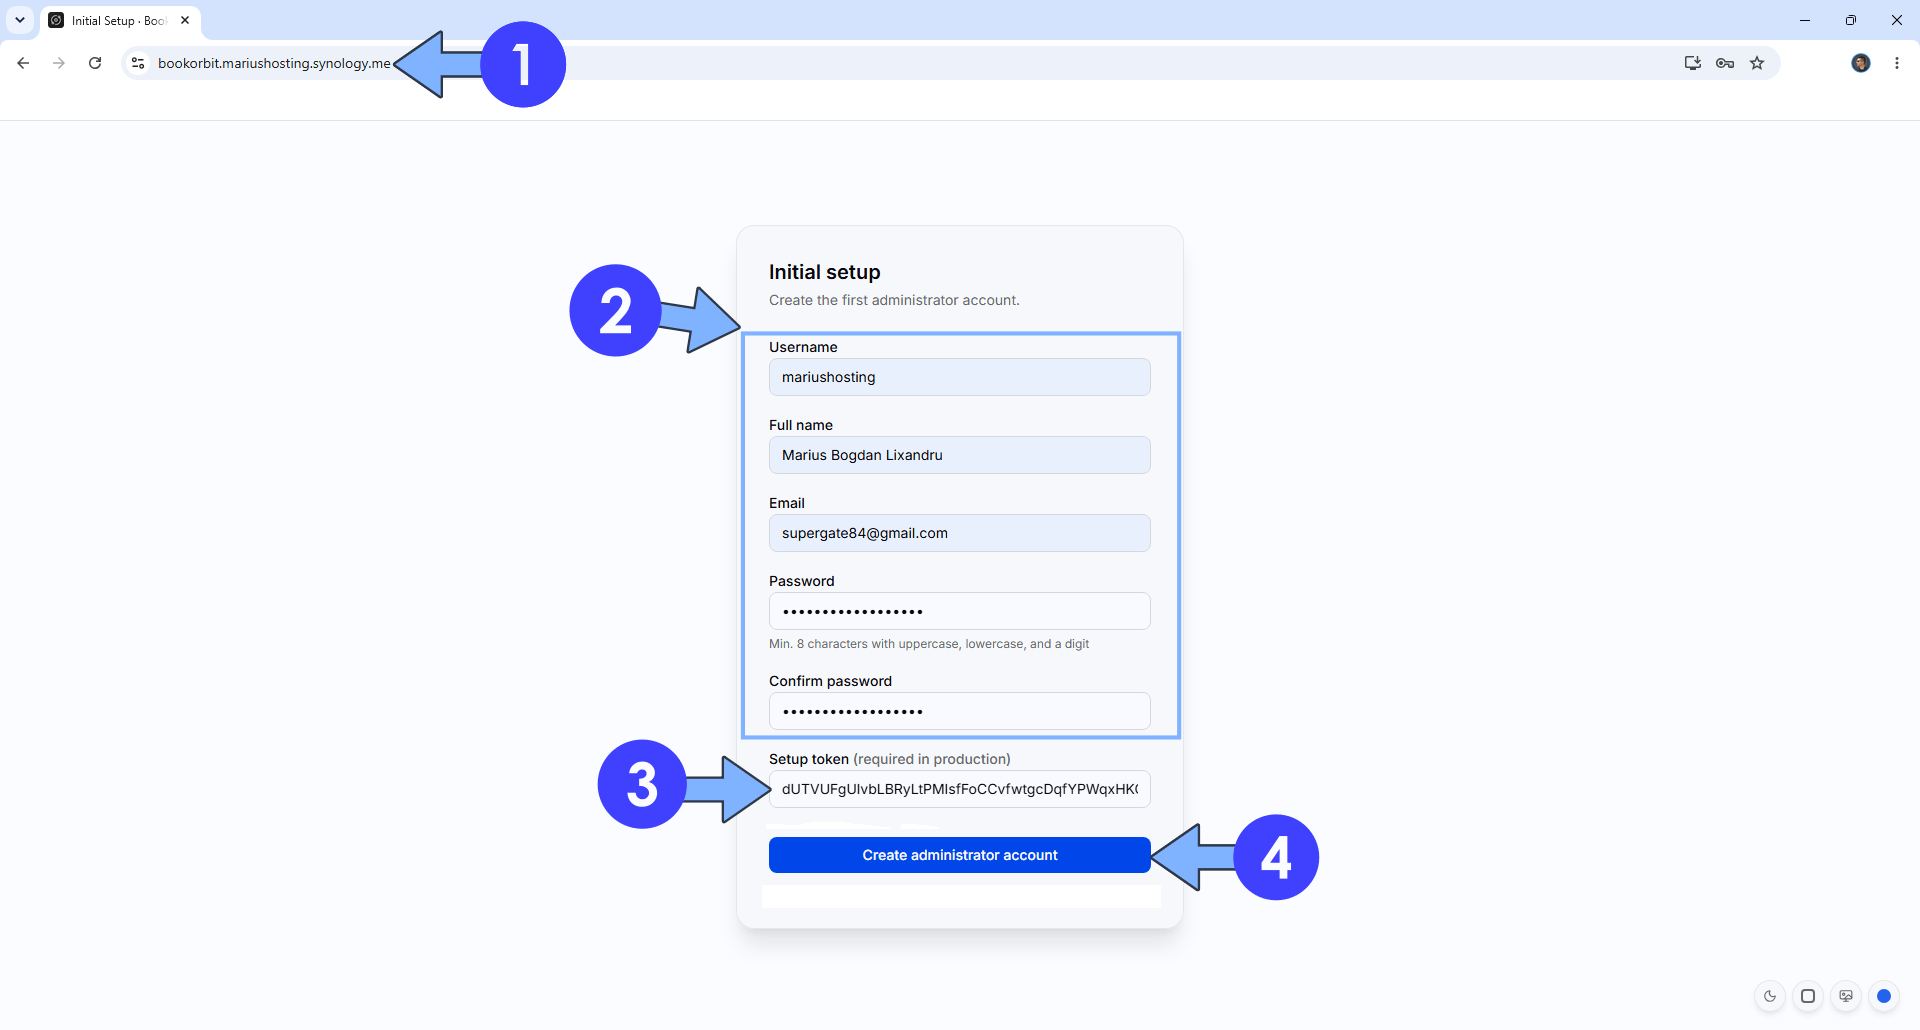
Now open your browser and type in your HTTPS/SSL certificate like this https://bookorbit.yourname.synology.me that you have previously created at STEP 6. In my case it’s https://bookorbit.mariushosting.synology.me If everything goes right, you will see the BookOrbit admin creation page. Type in your own details. Type in your Setup Token (SETUP_BOOTSTRAP_TOKEN) that you have previously added at STEP 14. Click Create administrator account. Follow the instructions in the image below.
STEP 19
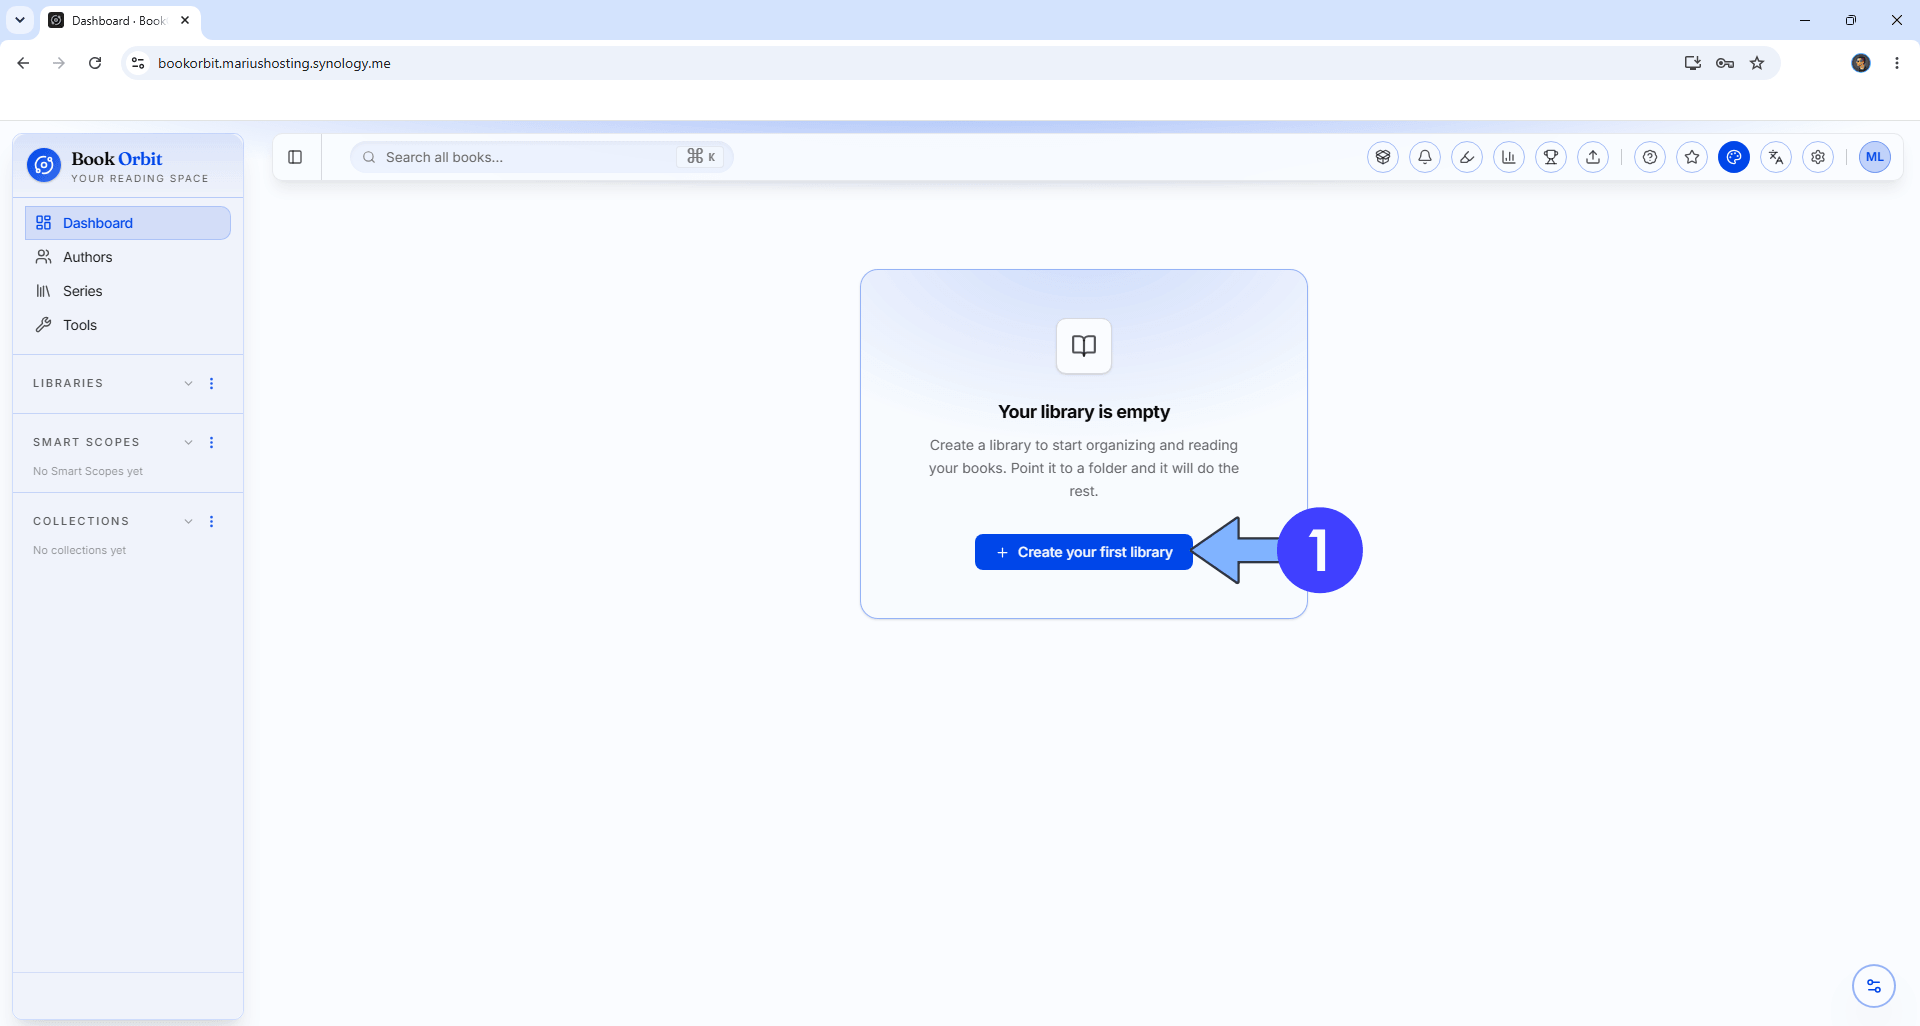
Click + Create your first library. Follow the instructions in the image below.
STEP 20
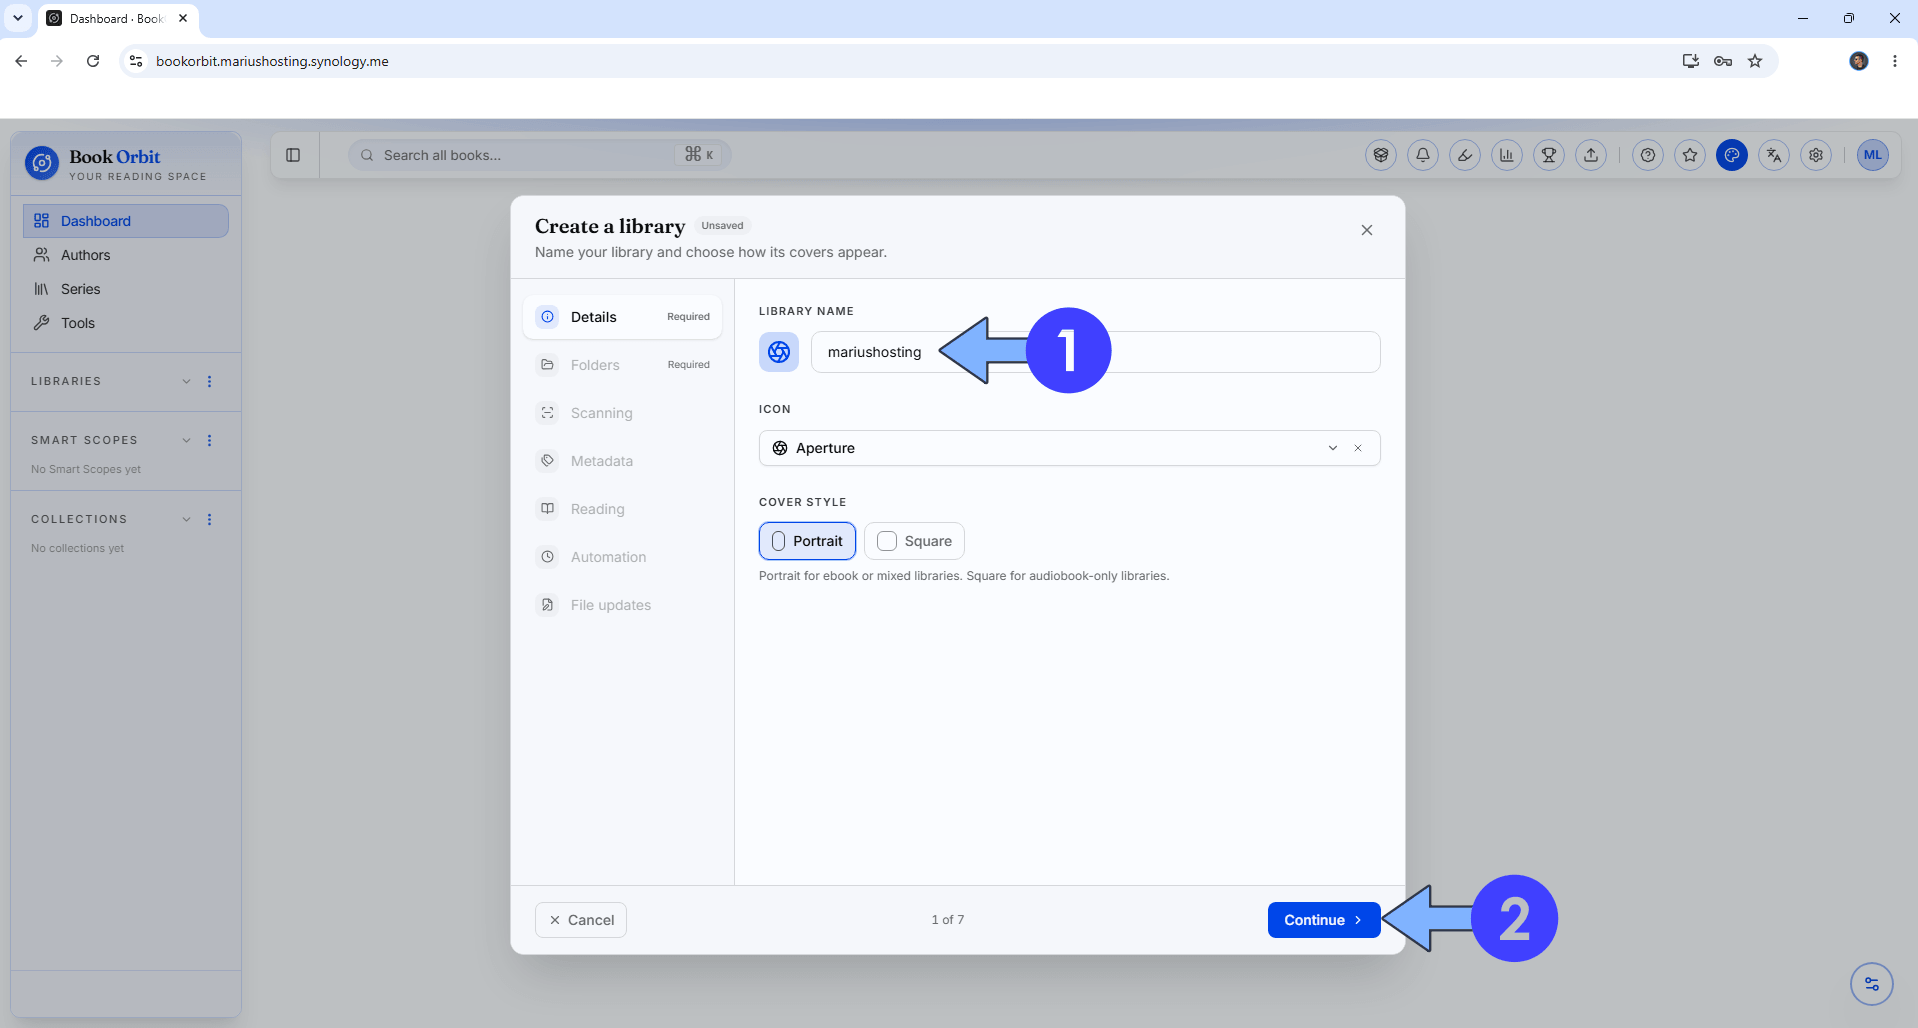
Type in the name for your library. Click Continue. Follow the instructions in the image below.
STEP 21
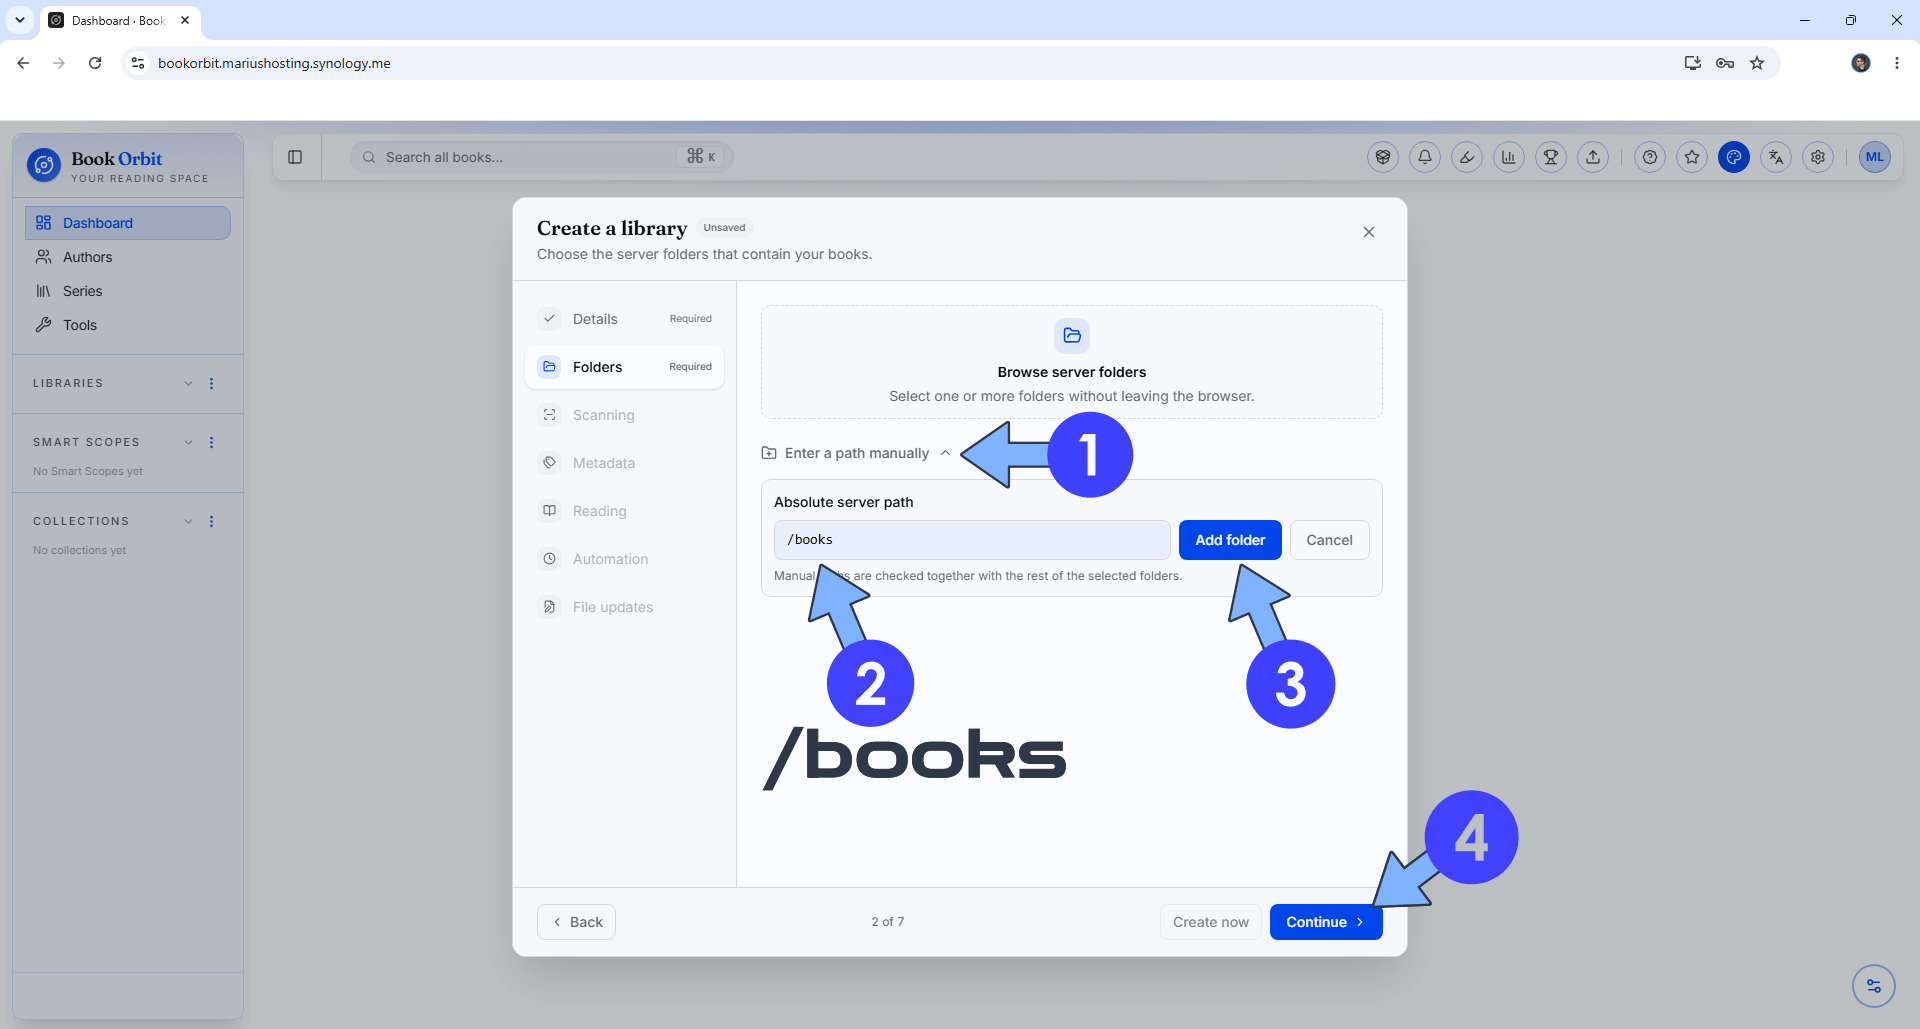
Click Enter a path manually. Type in /books
Click Add Folder. Click Continue. Follow the instructions in the image below.
STEP 22
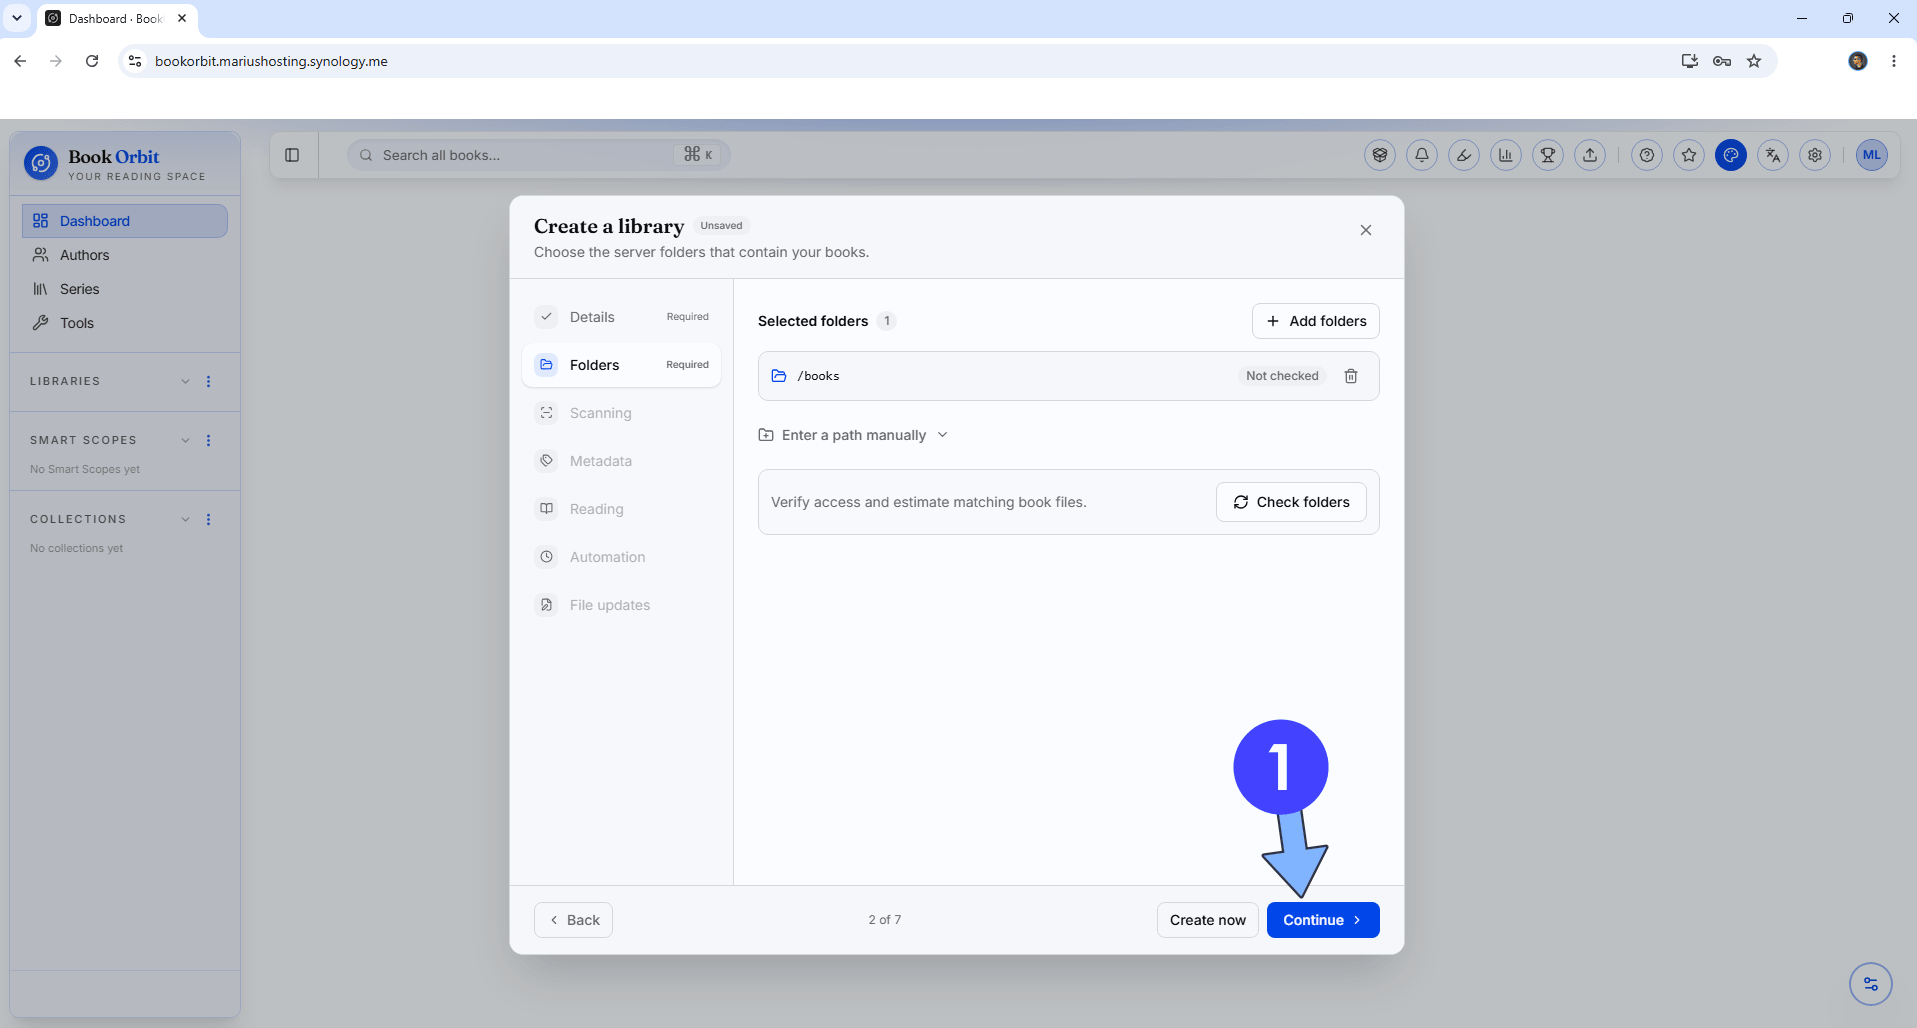
Click Continue. Follow the instructions in the image below.
STEP 23
Select your favorite scan method. Click Continue. Follow the instructions in the image below.
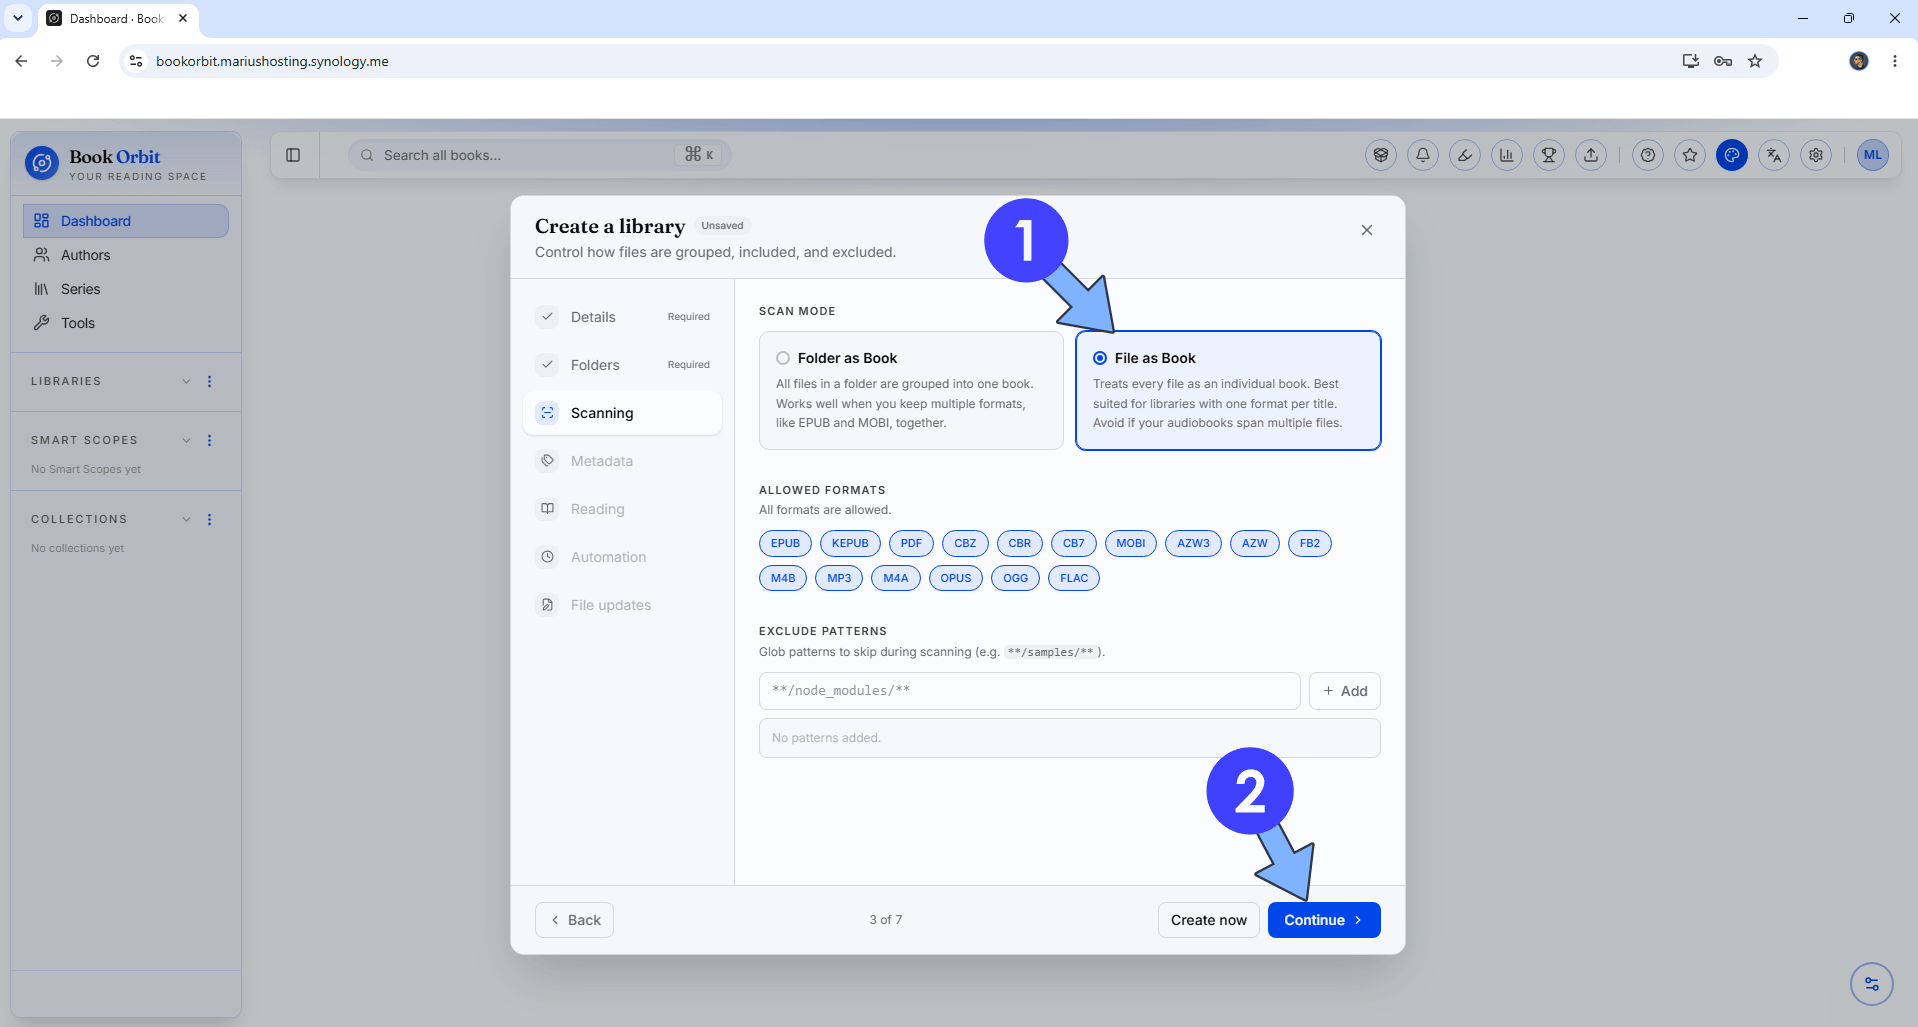
STEP 24
Click Continue. Follow the instructions in the image below.
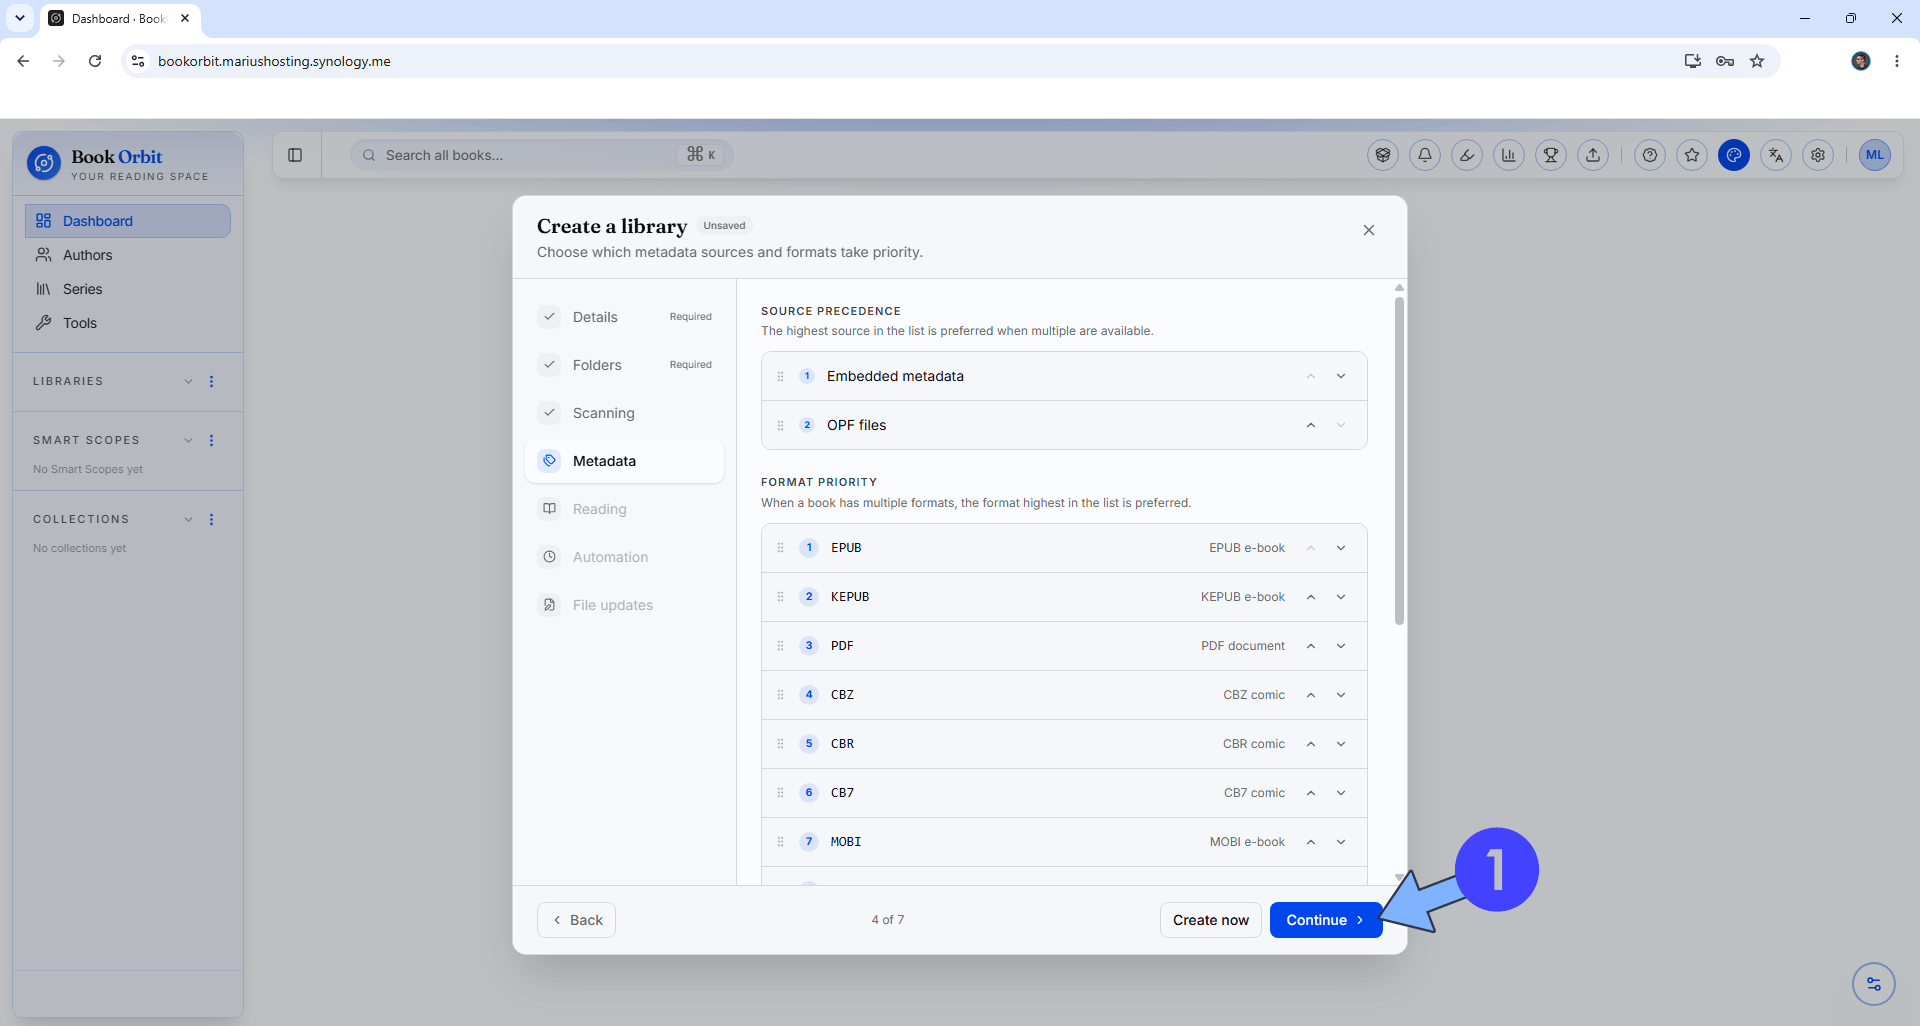
STEP 25
Choose your favorite reading states. Click Continue. Follow the instructions in the image below.
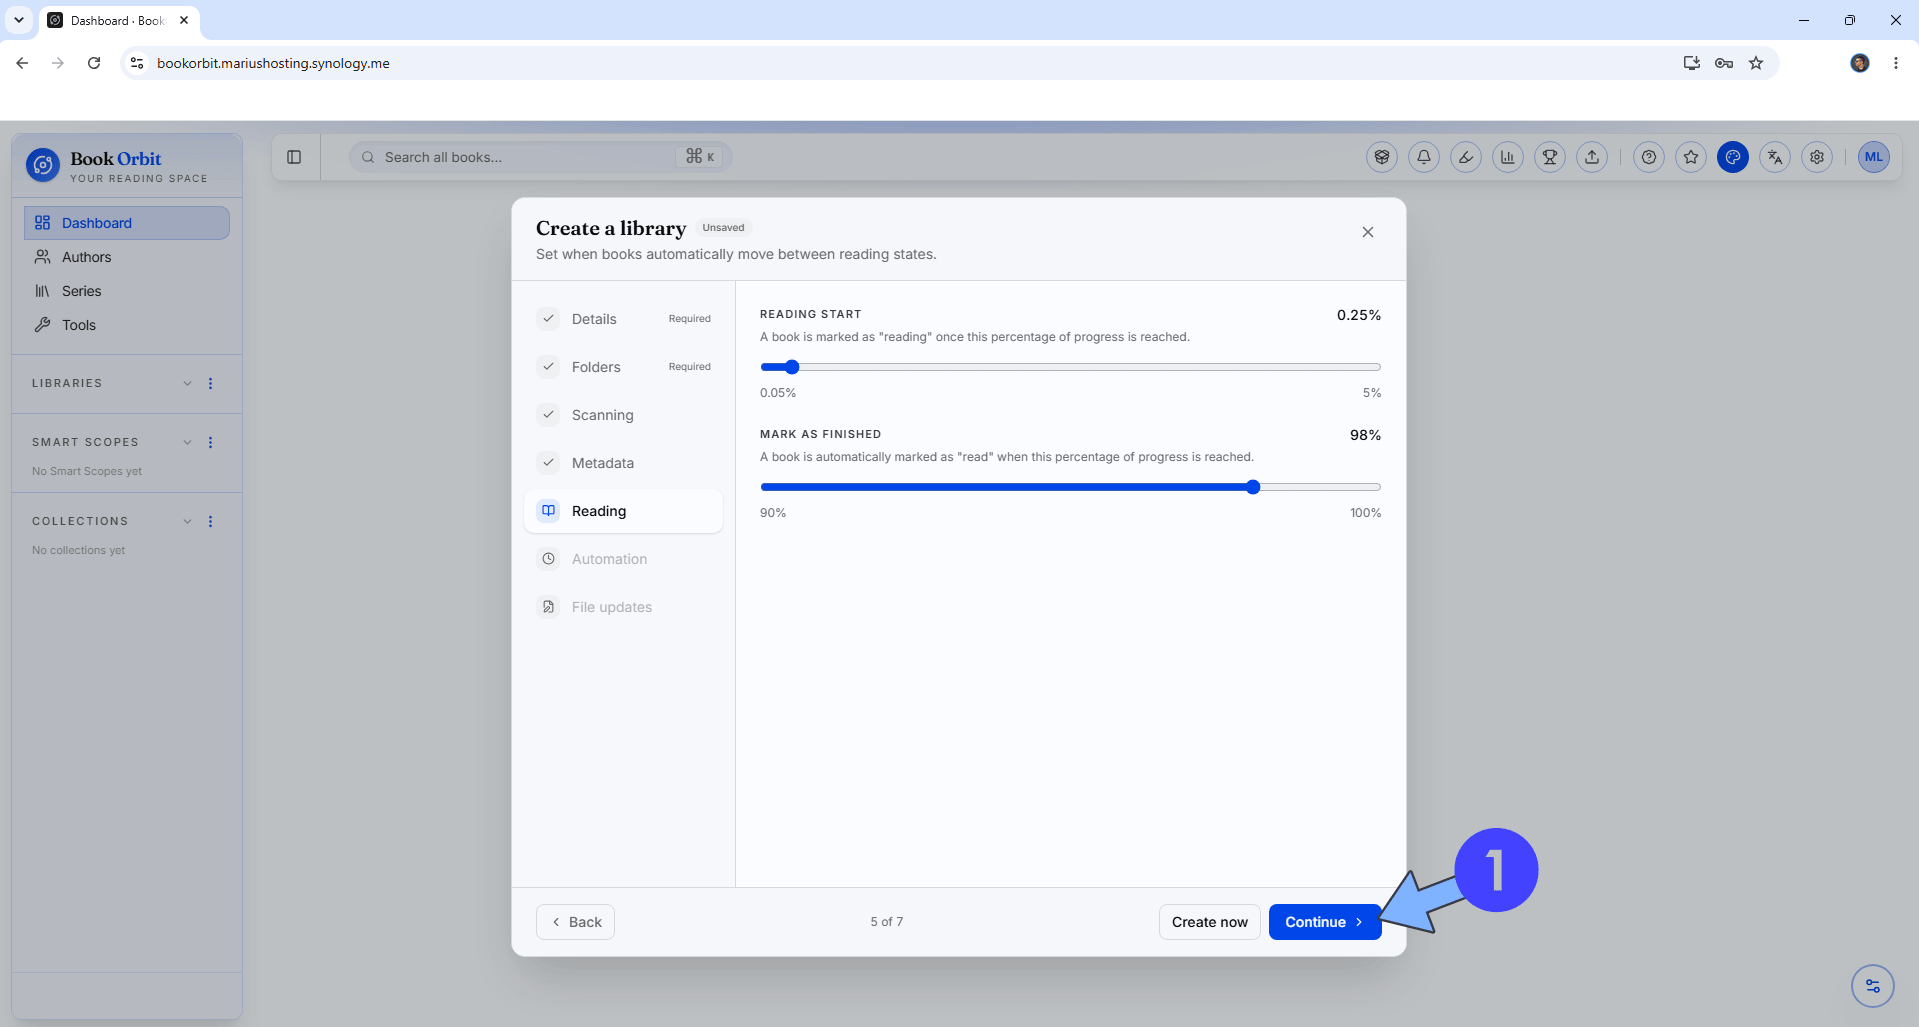
STEP 26
Select your recurring library scans schedule. Click Continue. Follow the instructions in the image below.
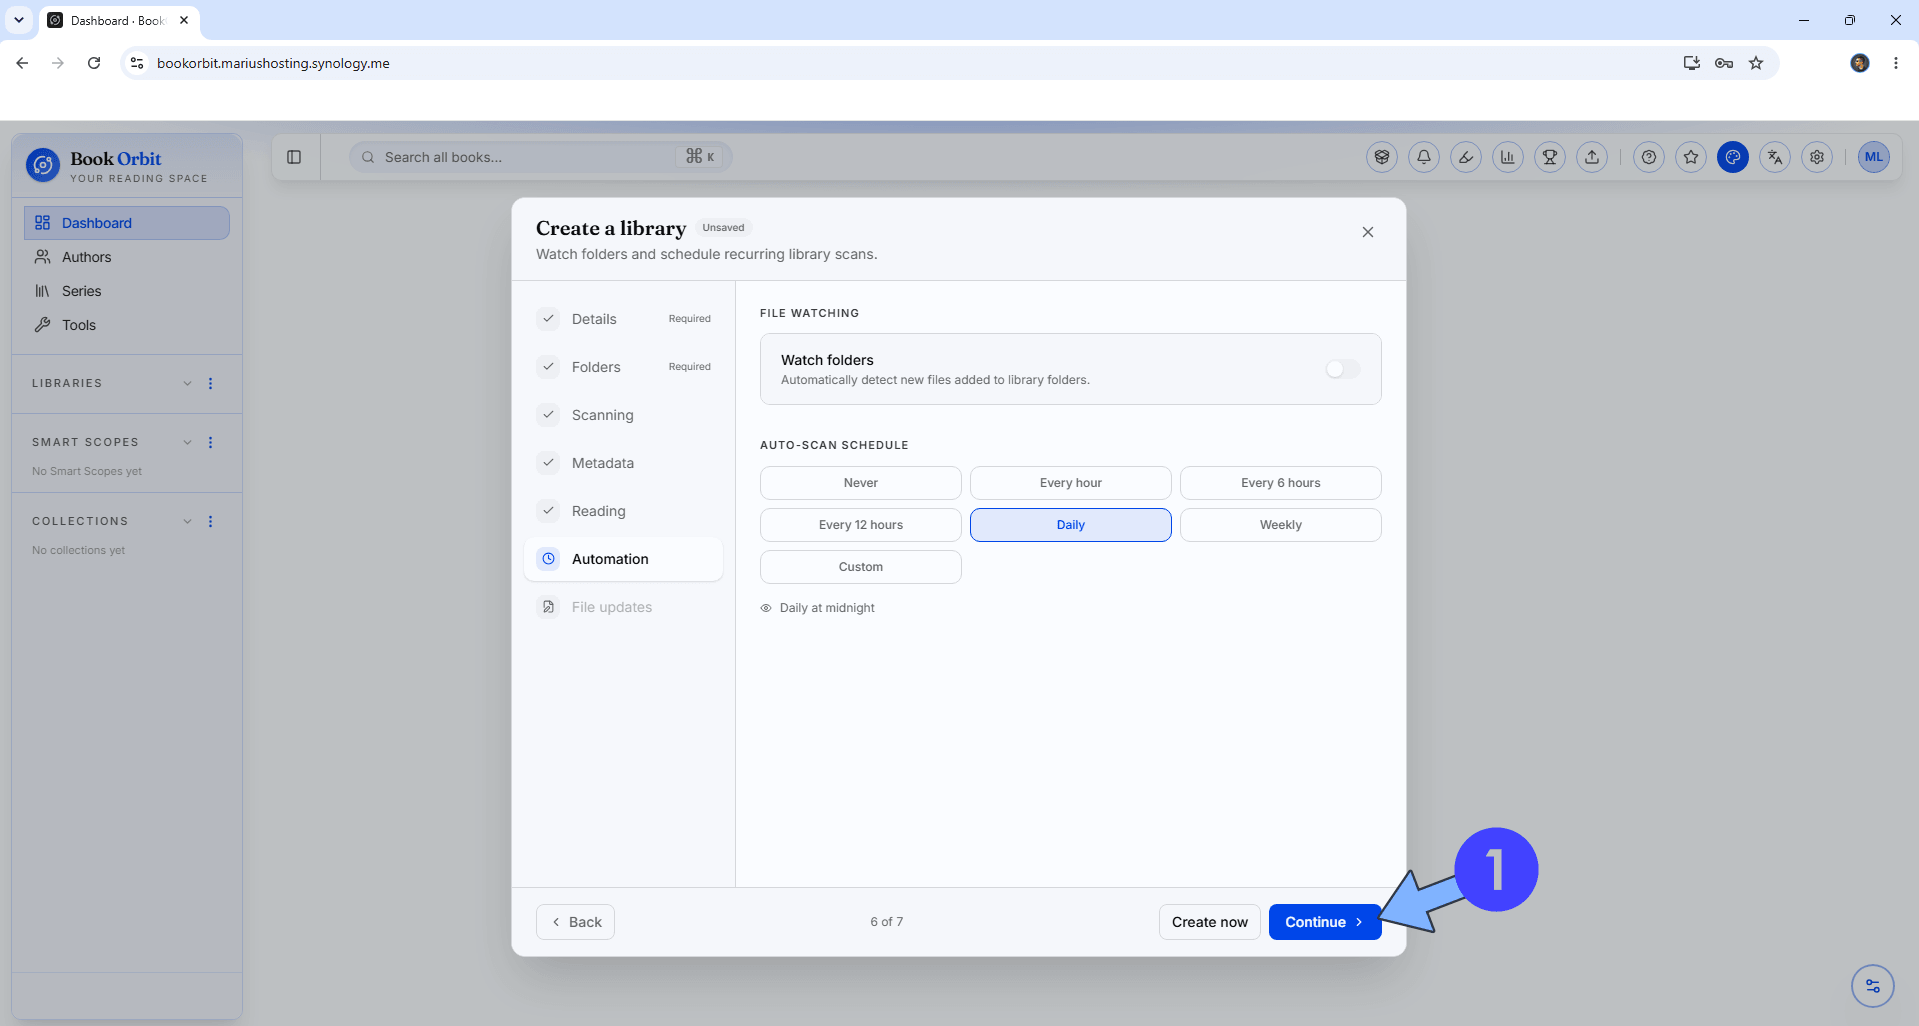
STEP 27
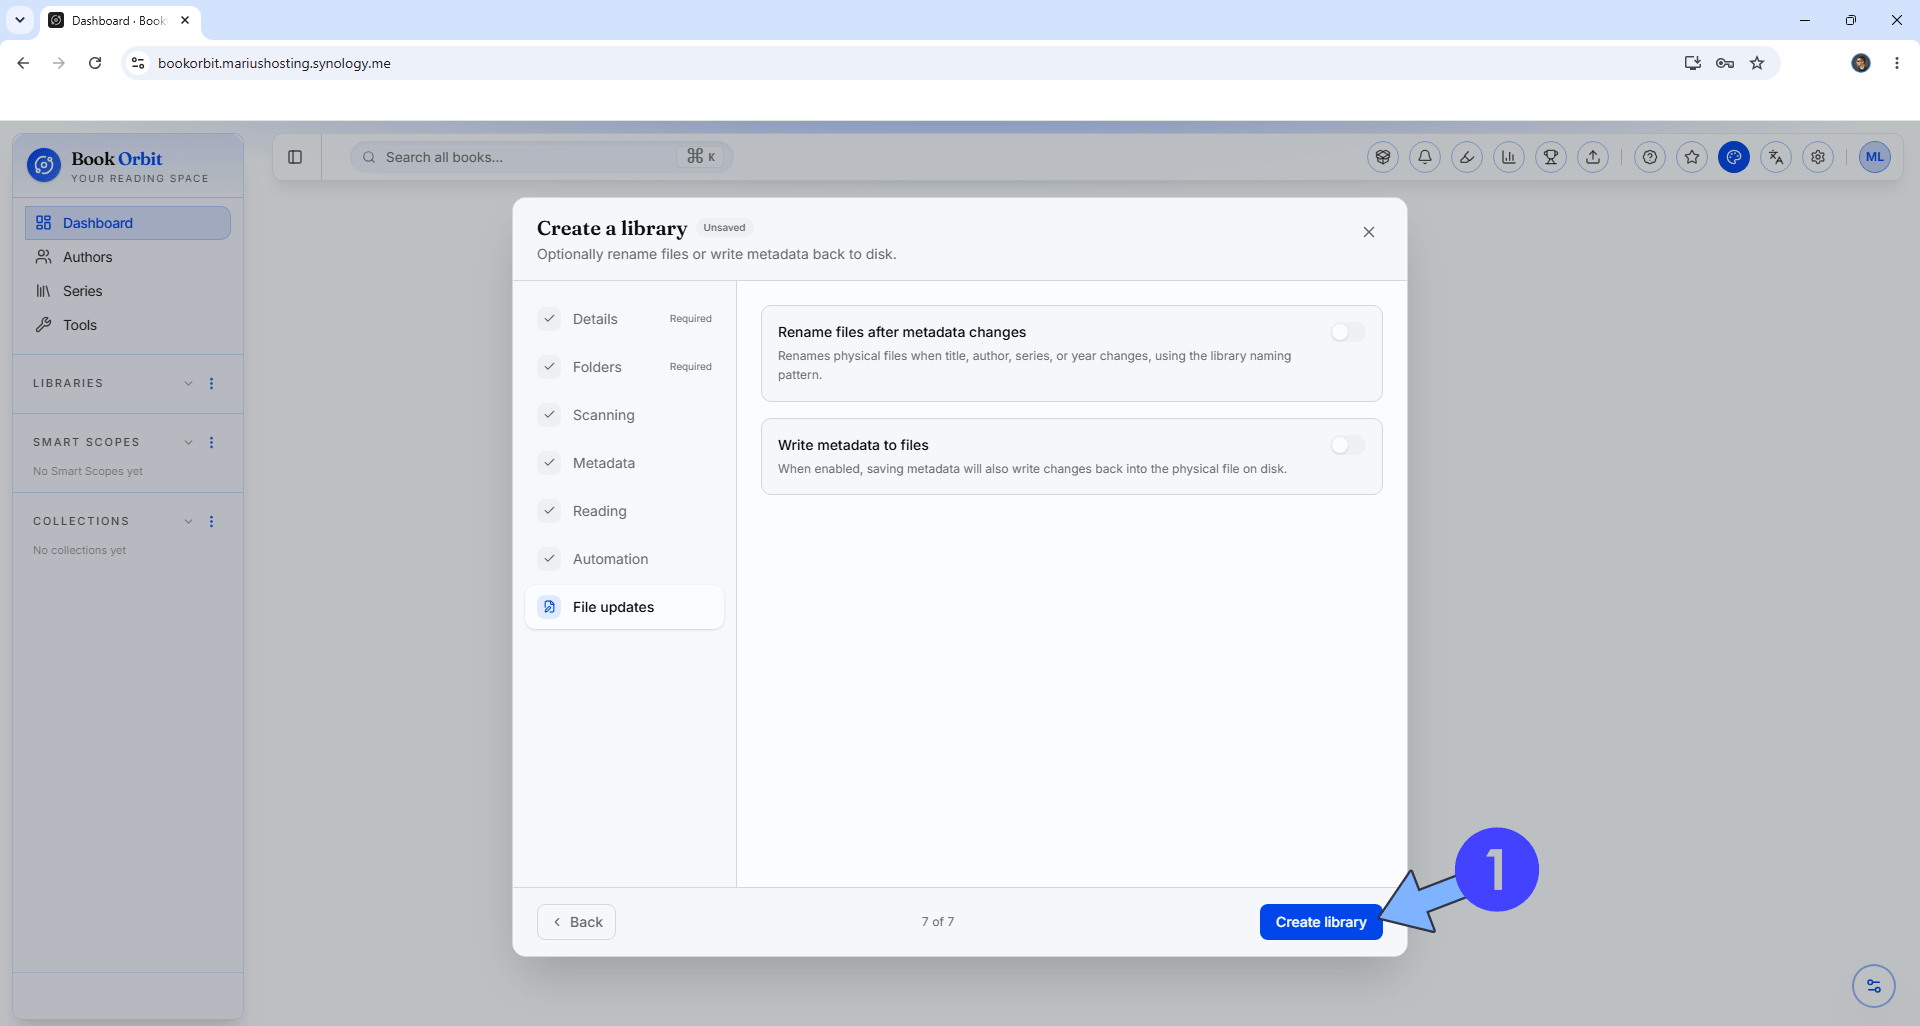
Click Create library. Follow the instructions in the image below.
STEP 28
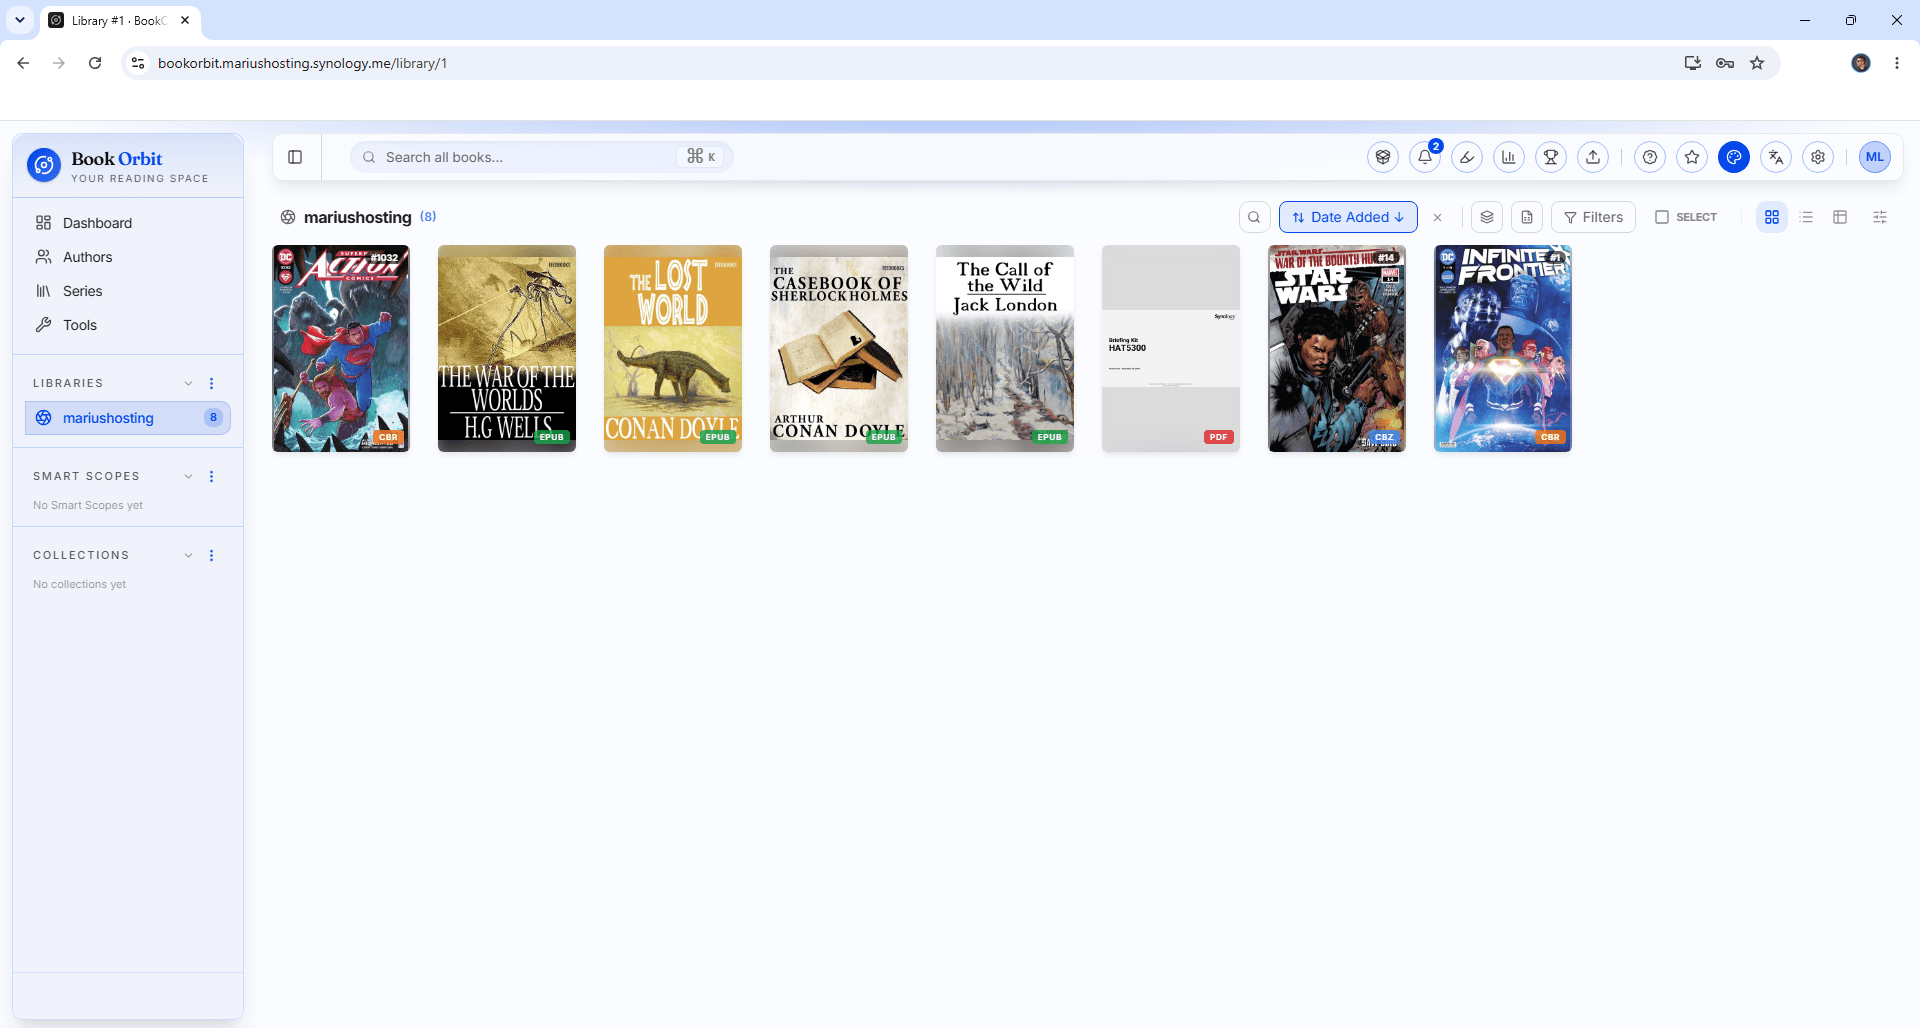
Your library at a glance!
STEP 29
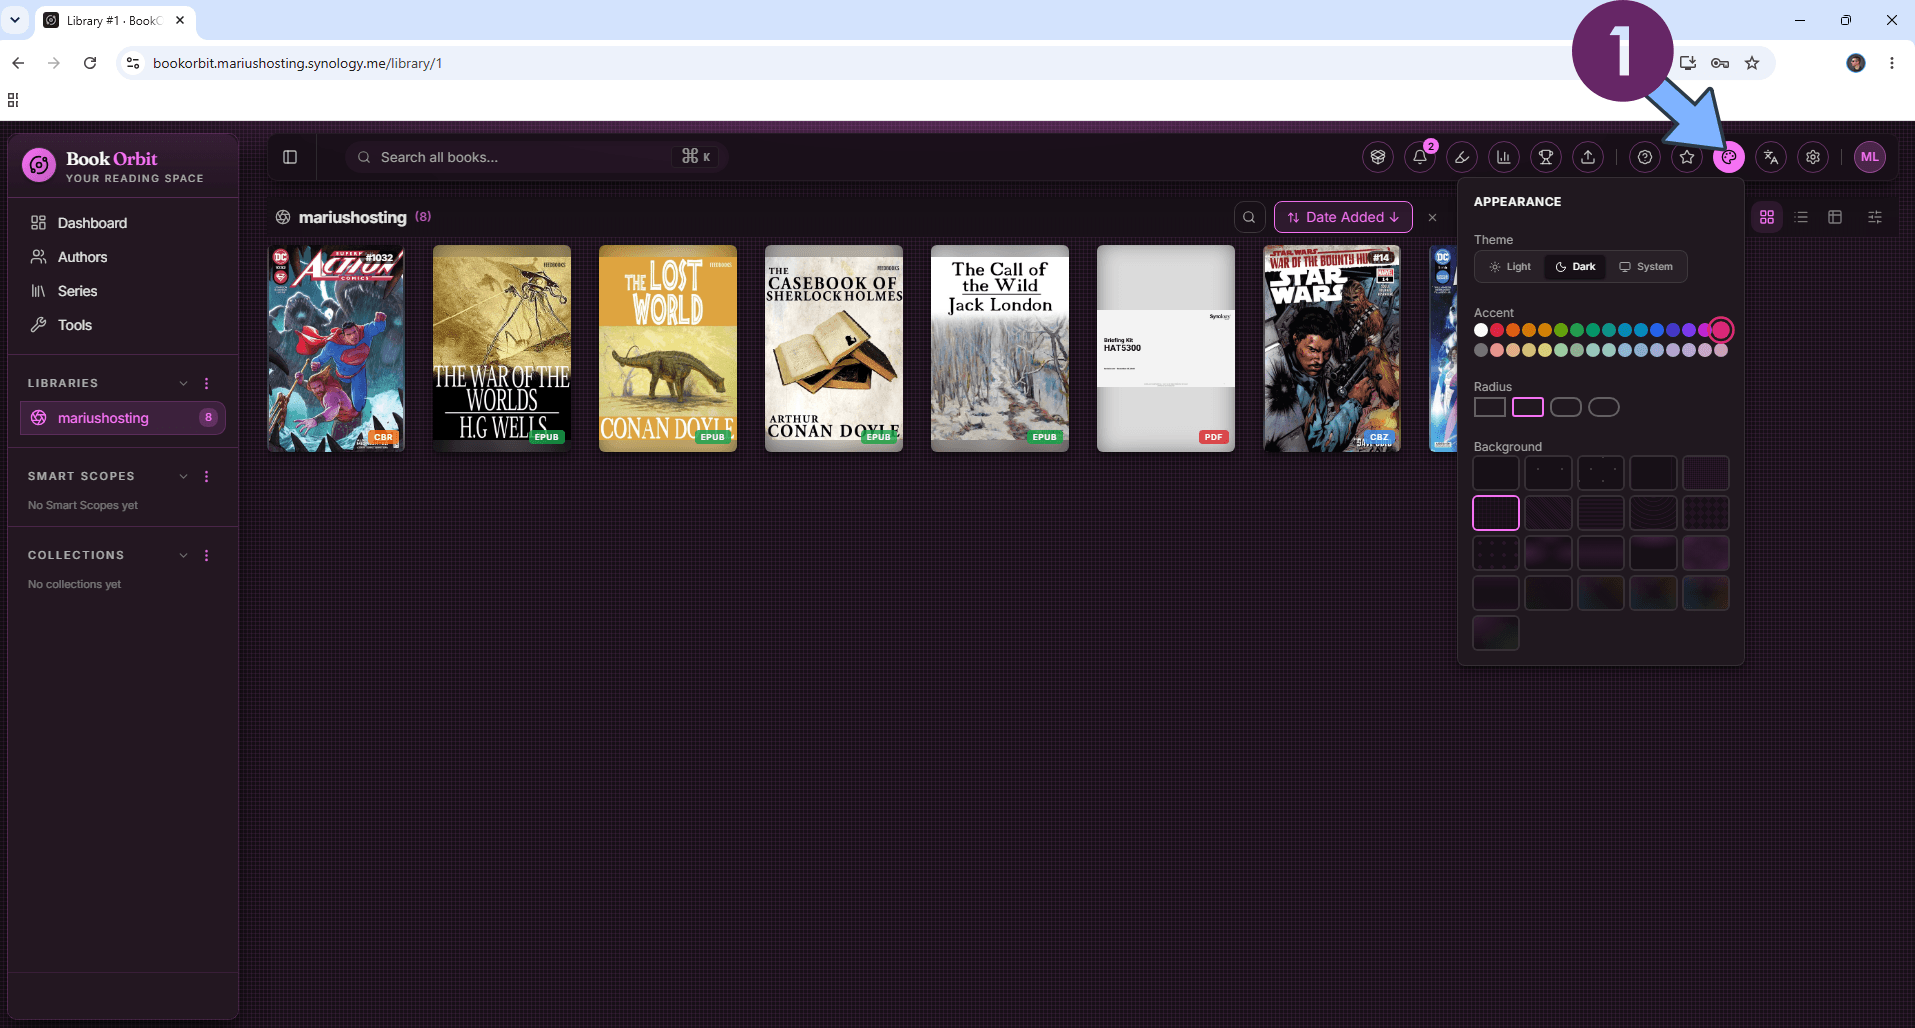
At the top right of the page, click the palette icon to change your theme. Follow the instructions in the image below.
STEP 30
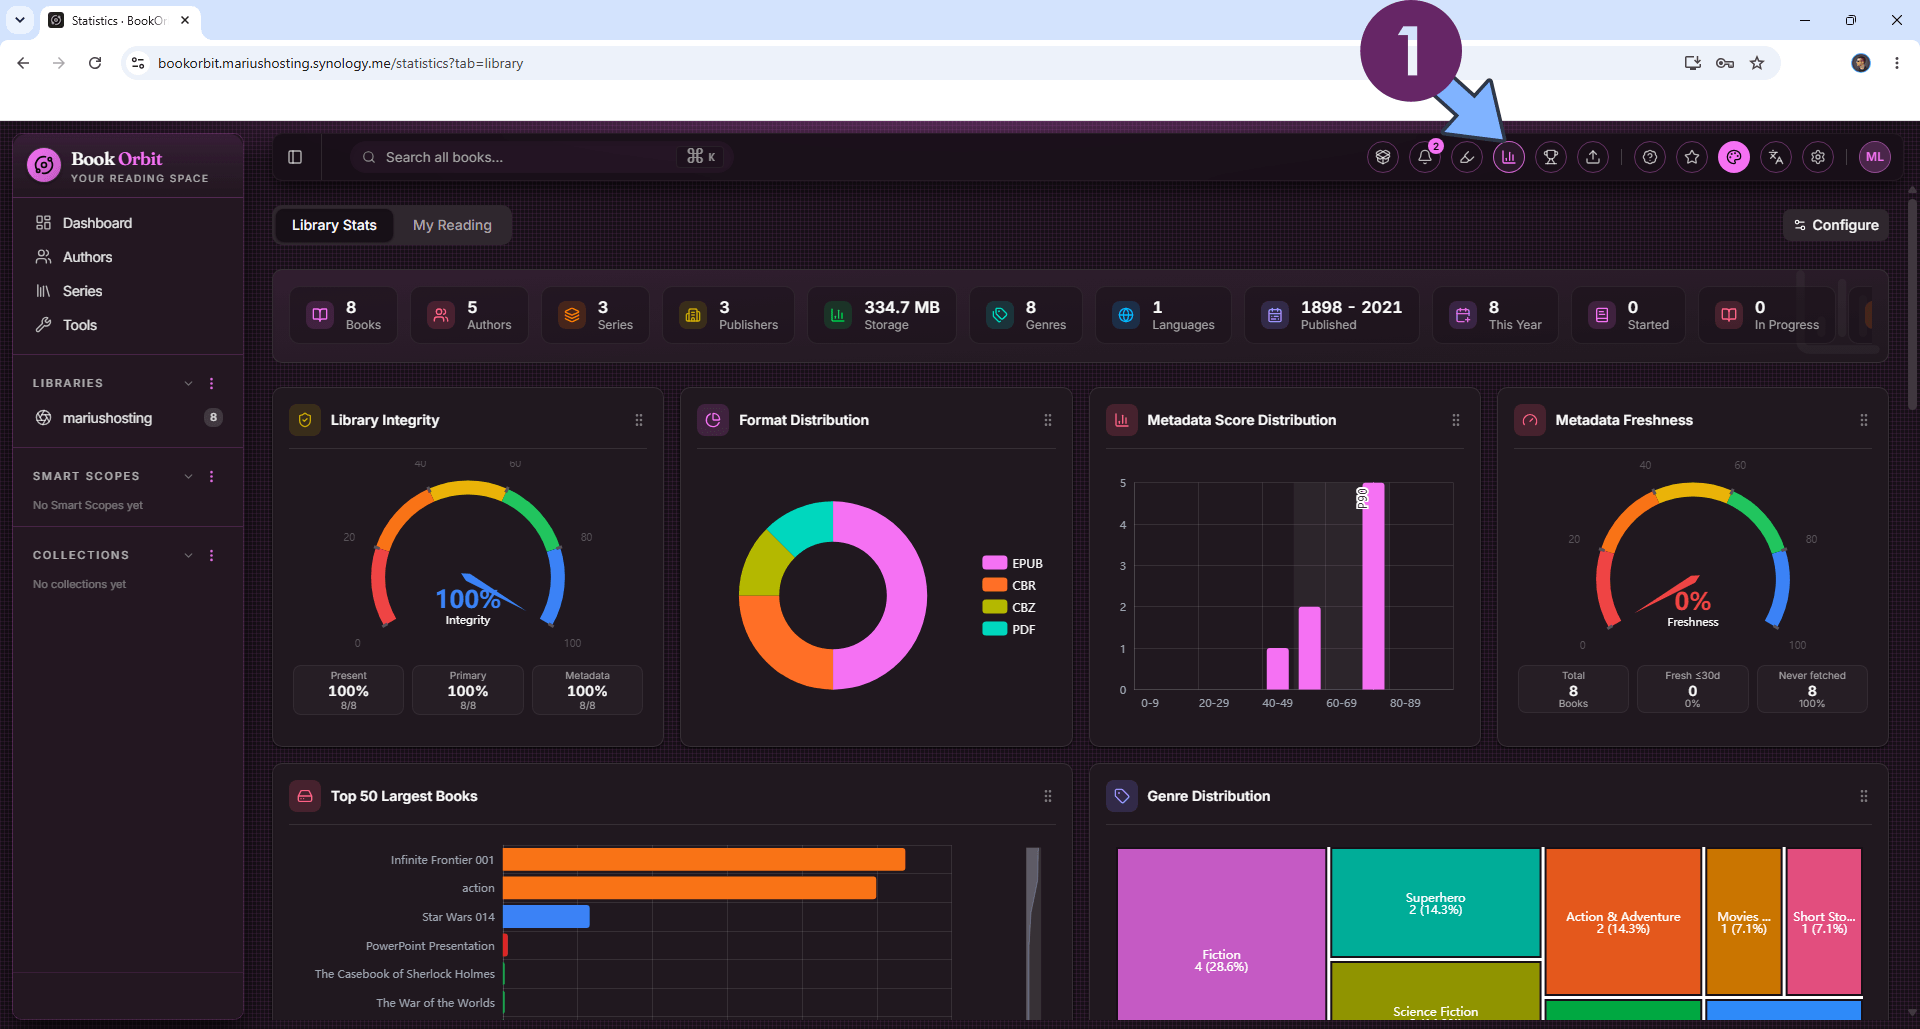
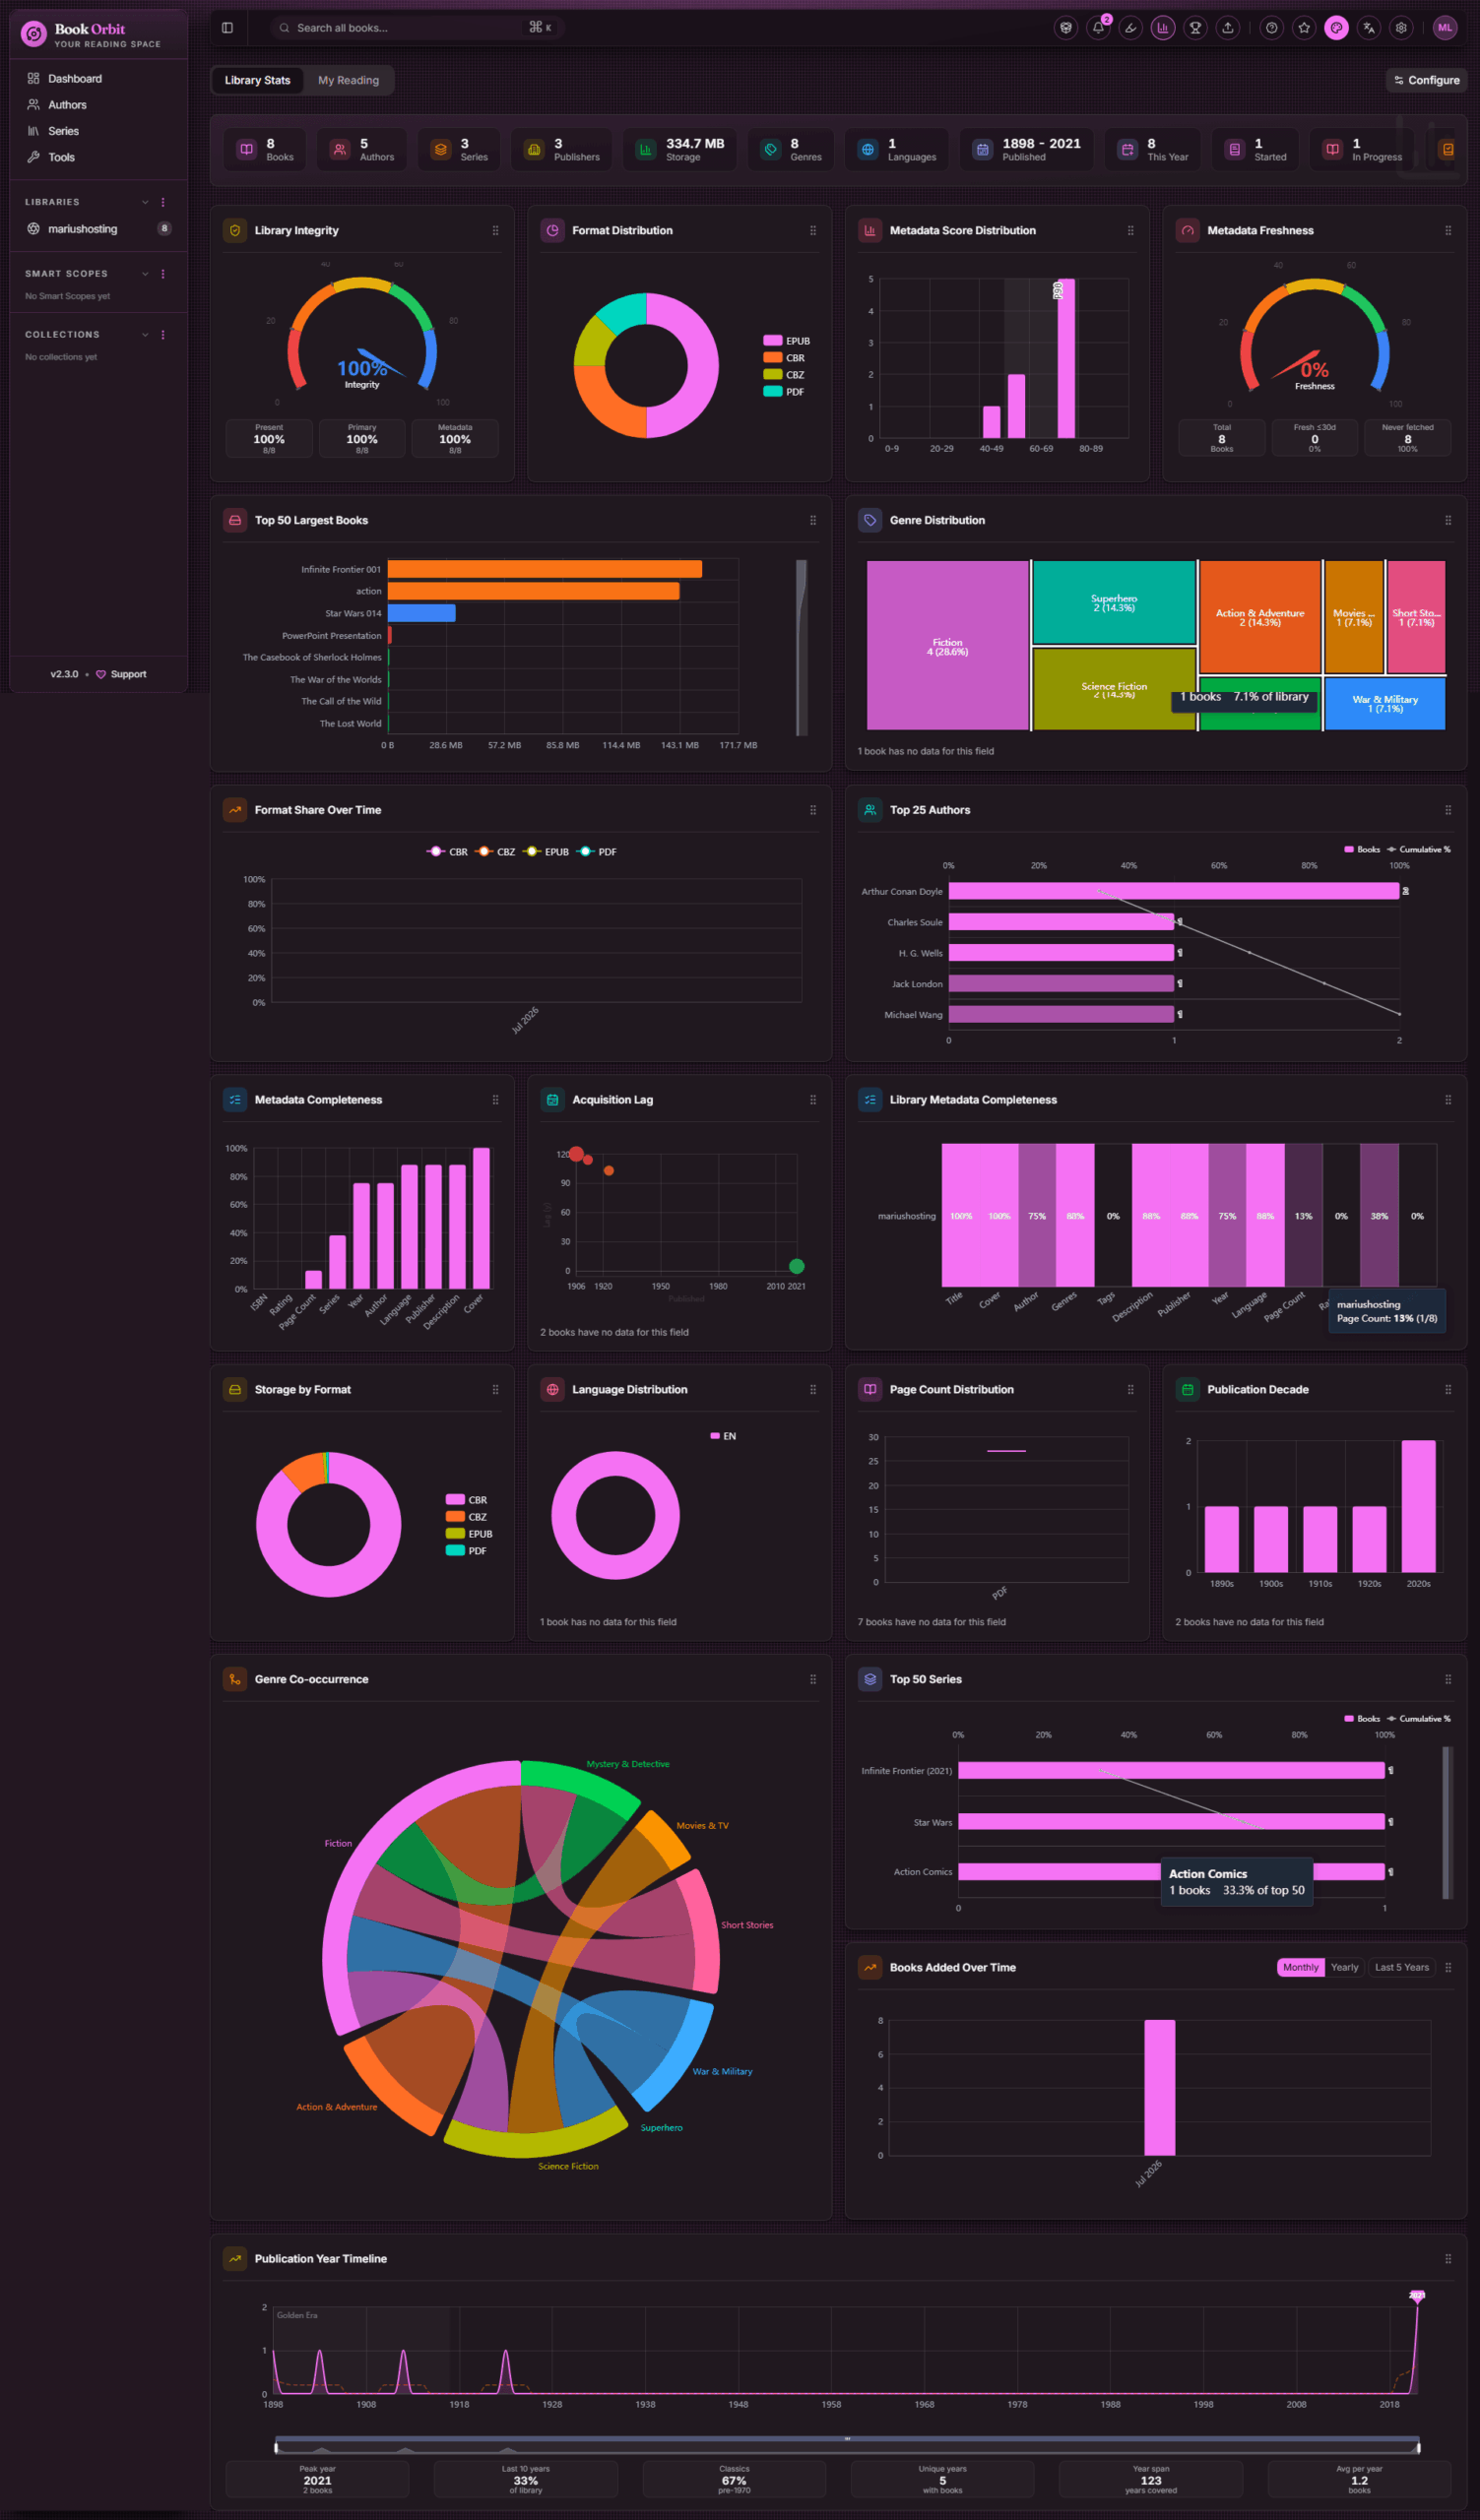
At the top right of the page, click the stats icon to see your BookOrbit application stats. Follow the instructions in the image below.
STEP 31
Your full stats at a glance!
Enjoy BookOrbit!
If you encounter issues by using this container, make sure to check out the Common Docker issues article.
Note: Can I run Docker on my Synology NAS? See the supported models.
Note: How to Back Up Docker Containers on your Synology NAS.
Note: Find out how to update the BookOrbit container with the latest image.
Note: How to Free Disk Space on Your NAS if You Run Docker.
Note: How to Schedule Start & Stop For Docker Containers.
Note: How to Activate Email Notifications.
Note: How to Add Access Control Profile on Your NAS.
Note: How to Change Docker Containers Restart Policy.
Note: How to Use Docker Containers With VPN.
Note: Convert Docker Run Into Docker Compose.
Note: How to Clean Docker.
Note: How to Clean Docker Automatically.
Note: Best Practices When Using Docker and DDNS.
Note: Some Docker Containers Need WebSocket.
Note: Find out the Best NAS Models For Docker.
Note: Activate Gmail SMTP For Docker Containers.
This post was updated on Wednesday / September 16th, 2026 at 4:07 PM