My previous guide for Whoogle involved the use of Task Scheduler. Today I’m offering a recommended and excellent alternative for installing the latest Whoogle version via Portainer. Get Google search results, but without any ads, JavaScript, AMP links, cookies, or IP address tracking. Quick and simple to implement as a primary search engine replacement on both desktop and mobile. This is Whoogle! In this step by step guide I will show you how to install Whoogle on your Synology NAS using Docker & Portainer.
- No ads or sponsored content.
- No JavaScript.
- No cookies.
- No tracking/linking of your personal IP address.
- No AMP links.
- No URL tracking tags (i.e. utm=%s).
- No referrer header.
- POST request search queries (when possible).
- View images at full res without site redirect (currently mobile only).
- Dark mode option.
- Randomly generated User Agent.
- Easy to install/deploy.
- Optional location-based searching (i.e. results near <city>).
- Optional NoJS mode to disable all JavaScript in results.
STEP 1
Please Support My work by Making a Donation.
STEP 2
Install Portainer using my step by step guide. If you already have Portainer installed on your Synology NAS, skip this STEP. Attention: Make sure you have installed the latest Portainer version.
STEP 3
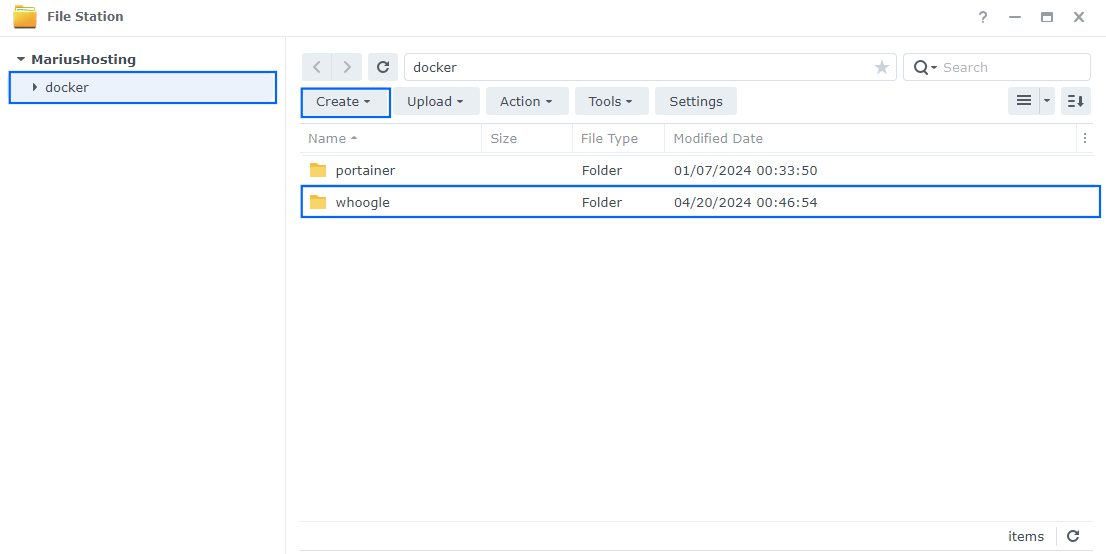
Go to File Station and open the docker folder. Inside the docker folder, create one new folder and name it whoogle. Follow the instructions in the image below.
Note: Be careful to enter only lowercase, not uppercase letters.
STEP 4
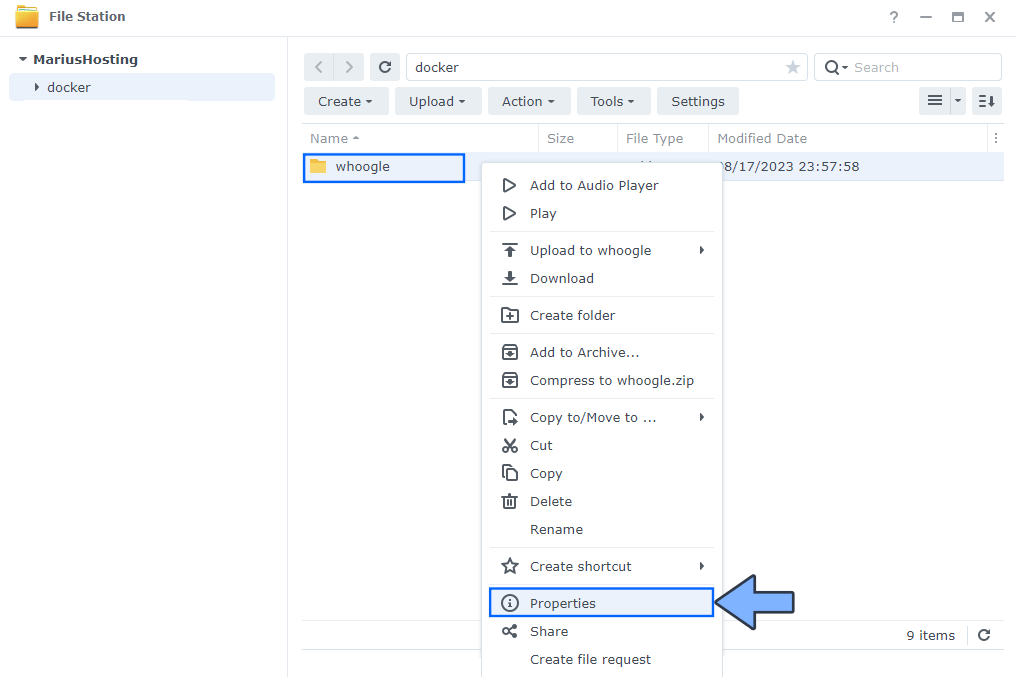
Right click on the whoogle folder that you have previously created at STEP 3 then click Properties. Follow the instructions in the image below.
STEP 5
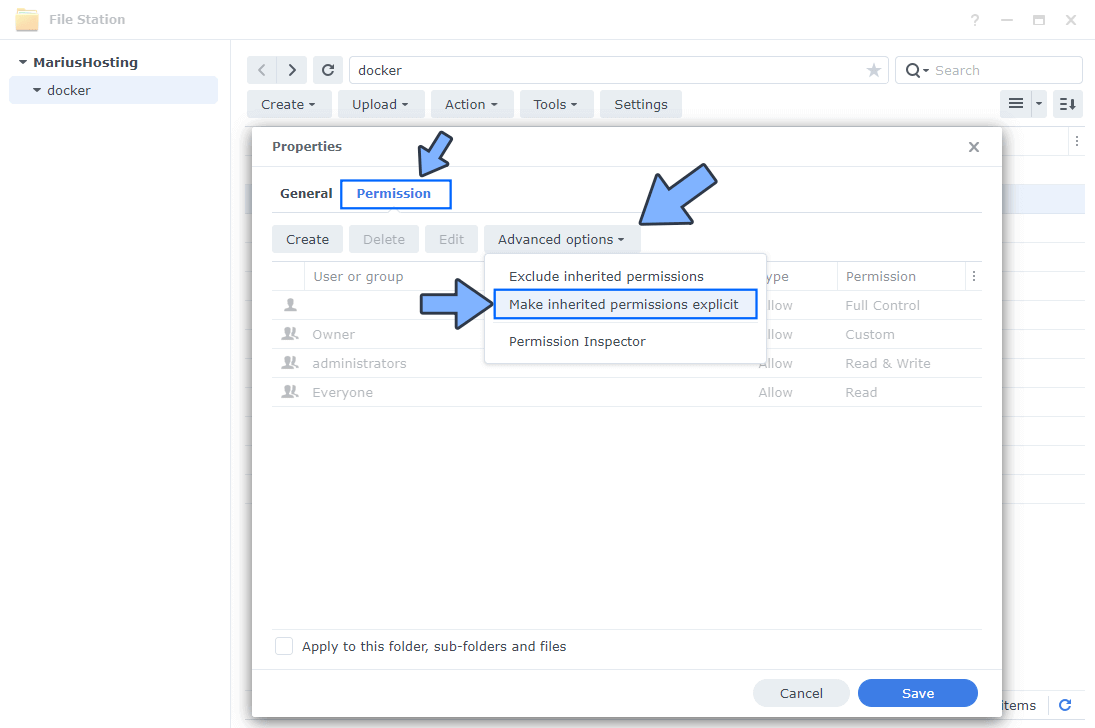
Go to the Permission tab then click Advanced options. From the drop-down menu choose “Make inherited permissions explicit“. Follow the instructions in the image below.
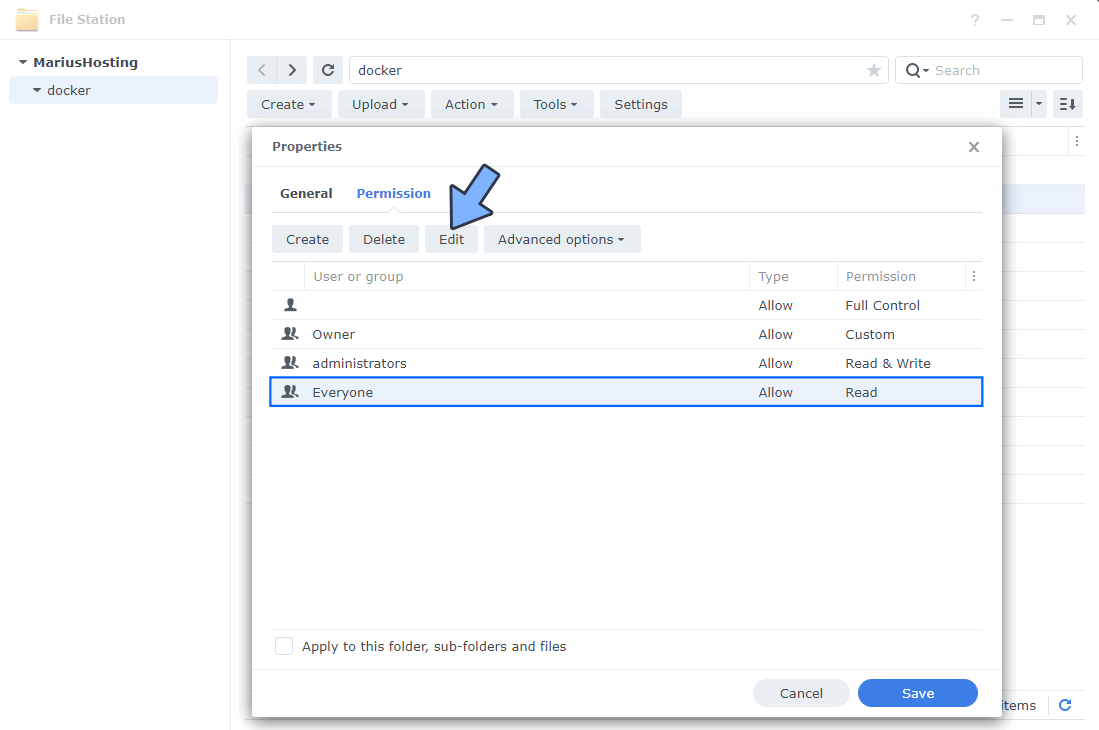
STEP 6
Select Everyone then click the Edit tab. Follow the instructions in the image below.
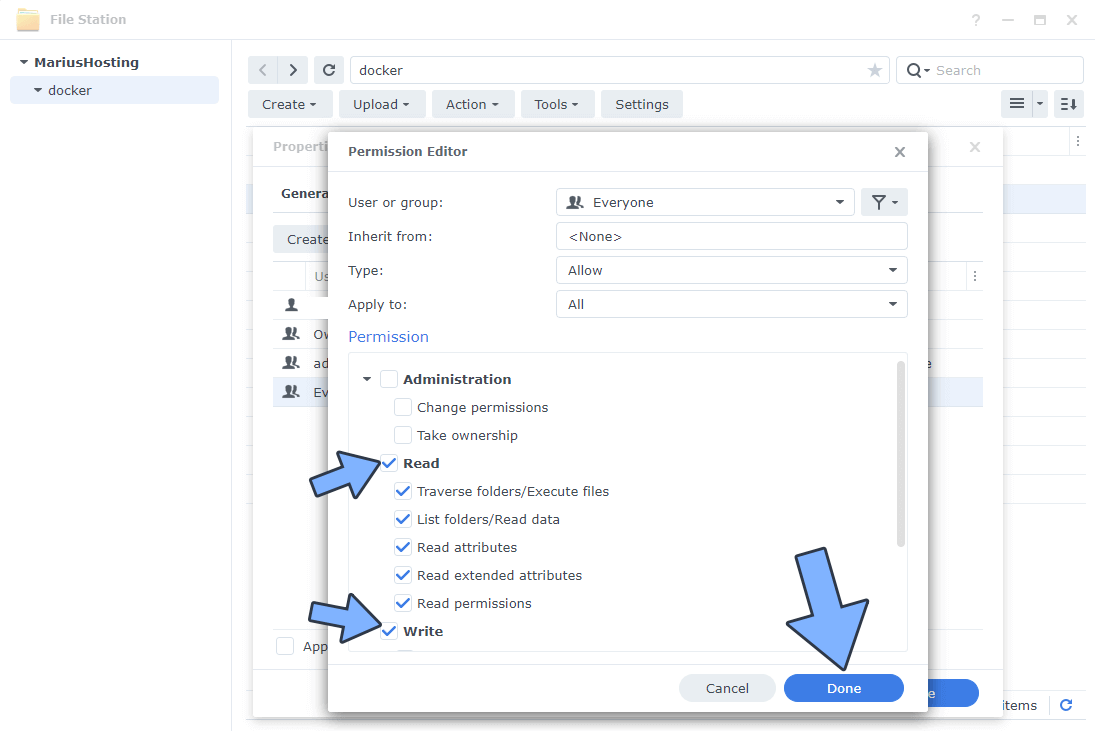
STEP 7
Check all Read and Write Permissions. Click Done. Follow the instructions in the image below.
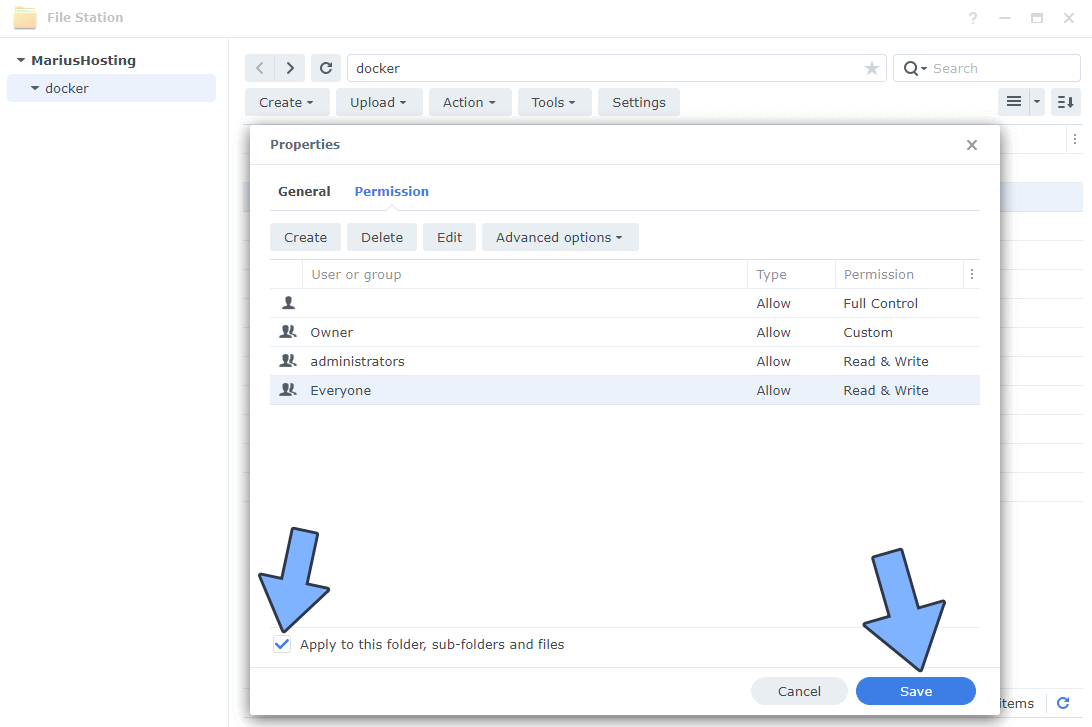
STEP 8
After you click Done on STEP 7, check “Apply to this folder, sub-folders and files“. Click Save. Follow the instructions in the image below.
STEP 9
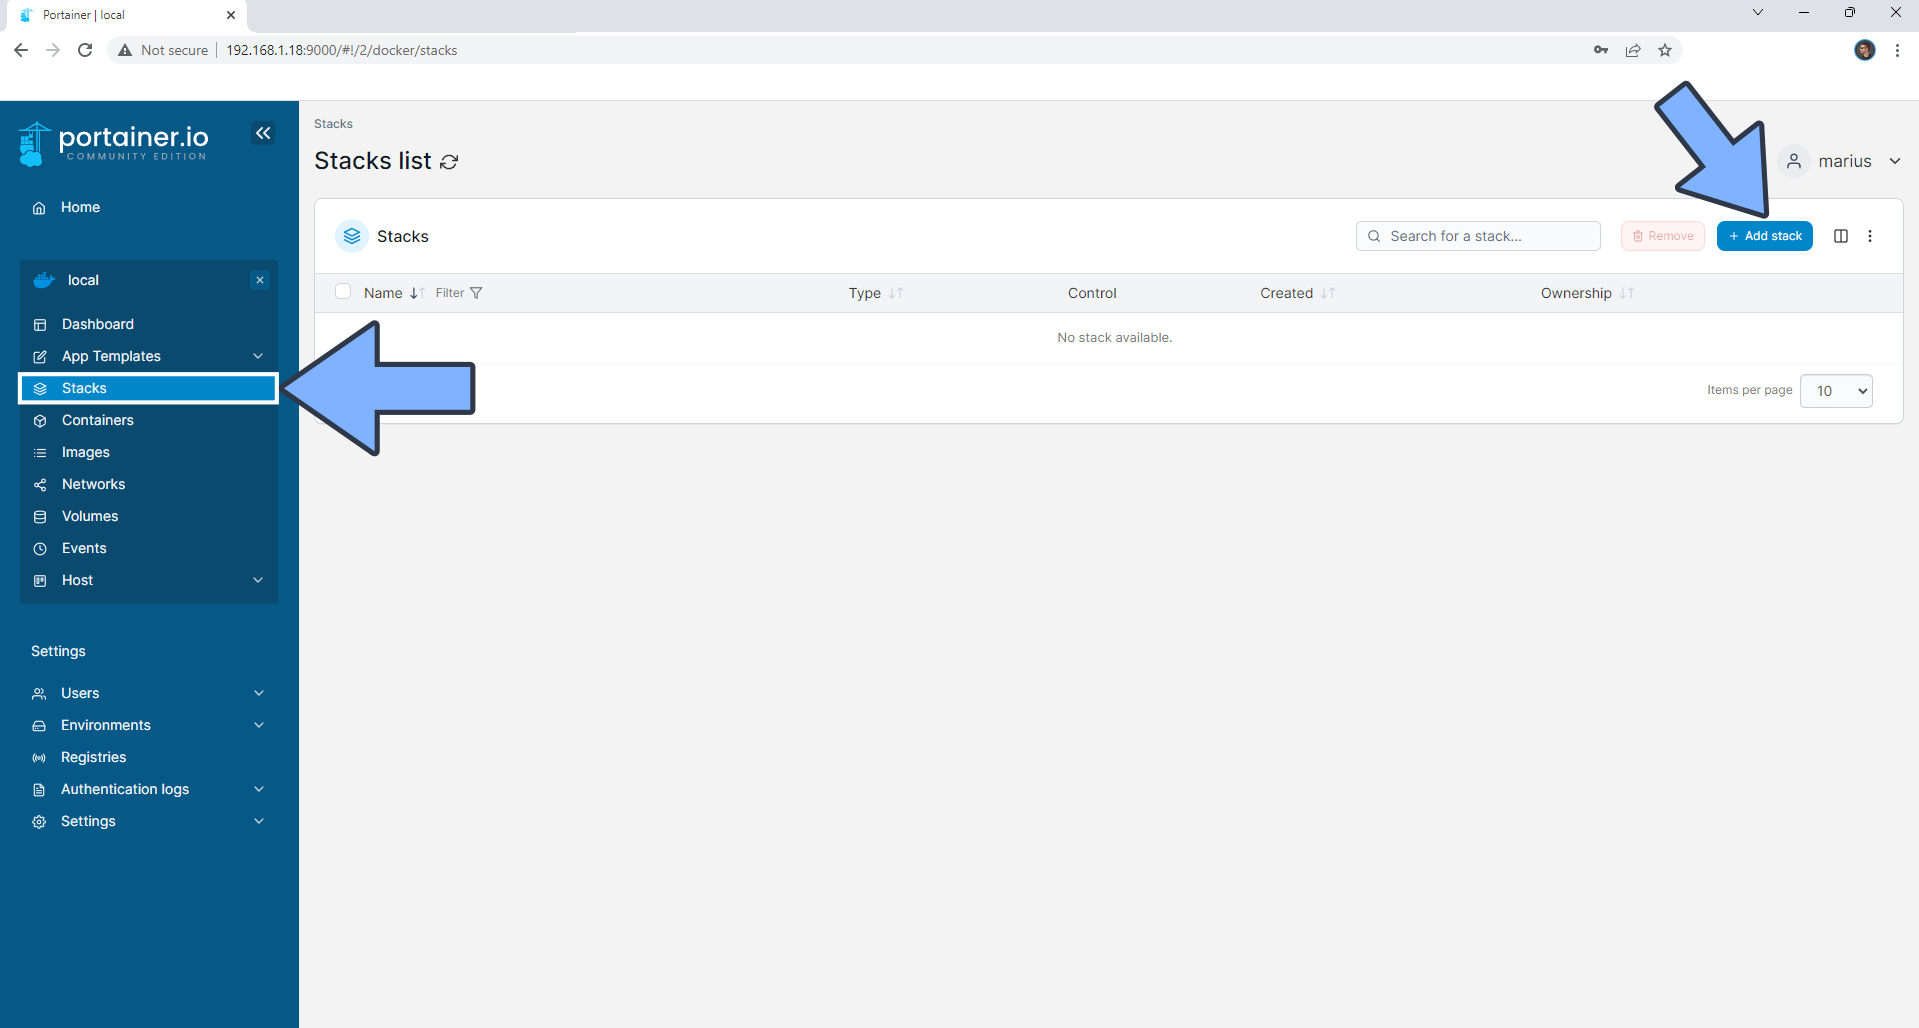
Log into Portainer using your username and password. On the left sidebar in Portainer, click on Stacks then + Add stack. Follow the instructions in the image below.
STEP 10
In the Name field type in whoogle. Follow the instructions in the image below.
version: "3.9"
services:
  whoogle:
    container_name: Whoogle
    image: benbusby/whoogle-search
    security_opt:
      - no-new-privileges:false
    environment:
     WHOOGLE_USER: marius
     WHOOGLE_PASS: mariushosting
    volumes:
      - /volume1/docker/whoogle:/config:rw
    ports:
      - 5105:5000
    restart: on-failure:5
Note: Before you paste the code above in the Web editor area below, change the value for WHOOGLE_USER. Type in your own username. marius is an example for a username.
Note: Before you paste the code above in the Web editor area below, change the value for WHOOGLE_PASS. Type in your own password. mariushosting is an example for a password.

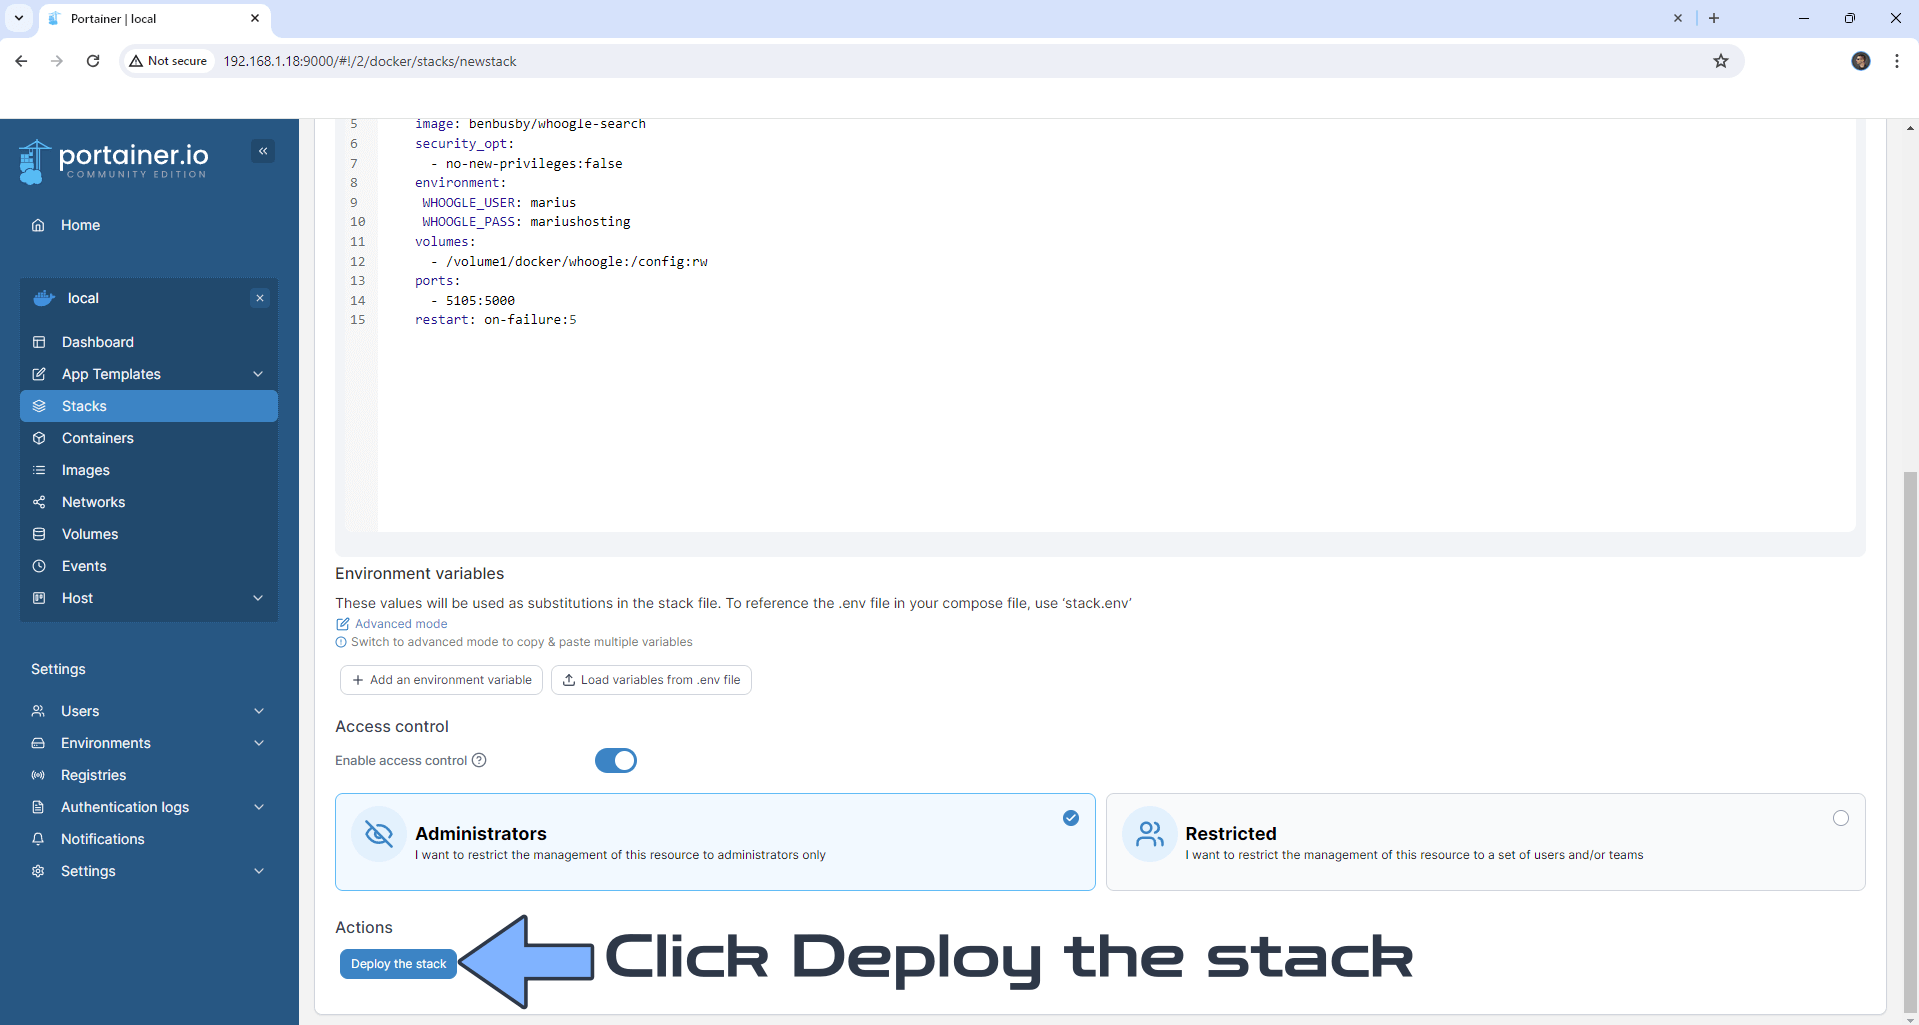
STEP 11
Scroll down on the page until you see a button called Deploy the stack. Click on it. Follow the instructions in the image below. The installation process can take up to a few minutes. It will depend on your Internet speed connection.
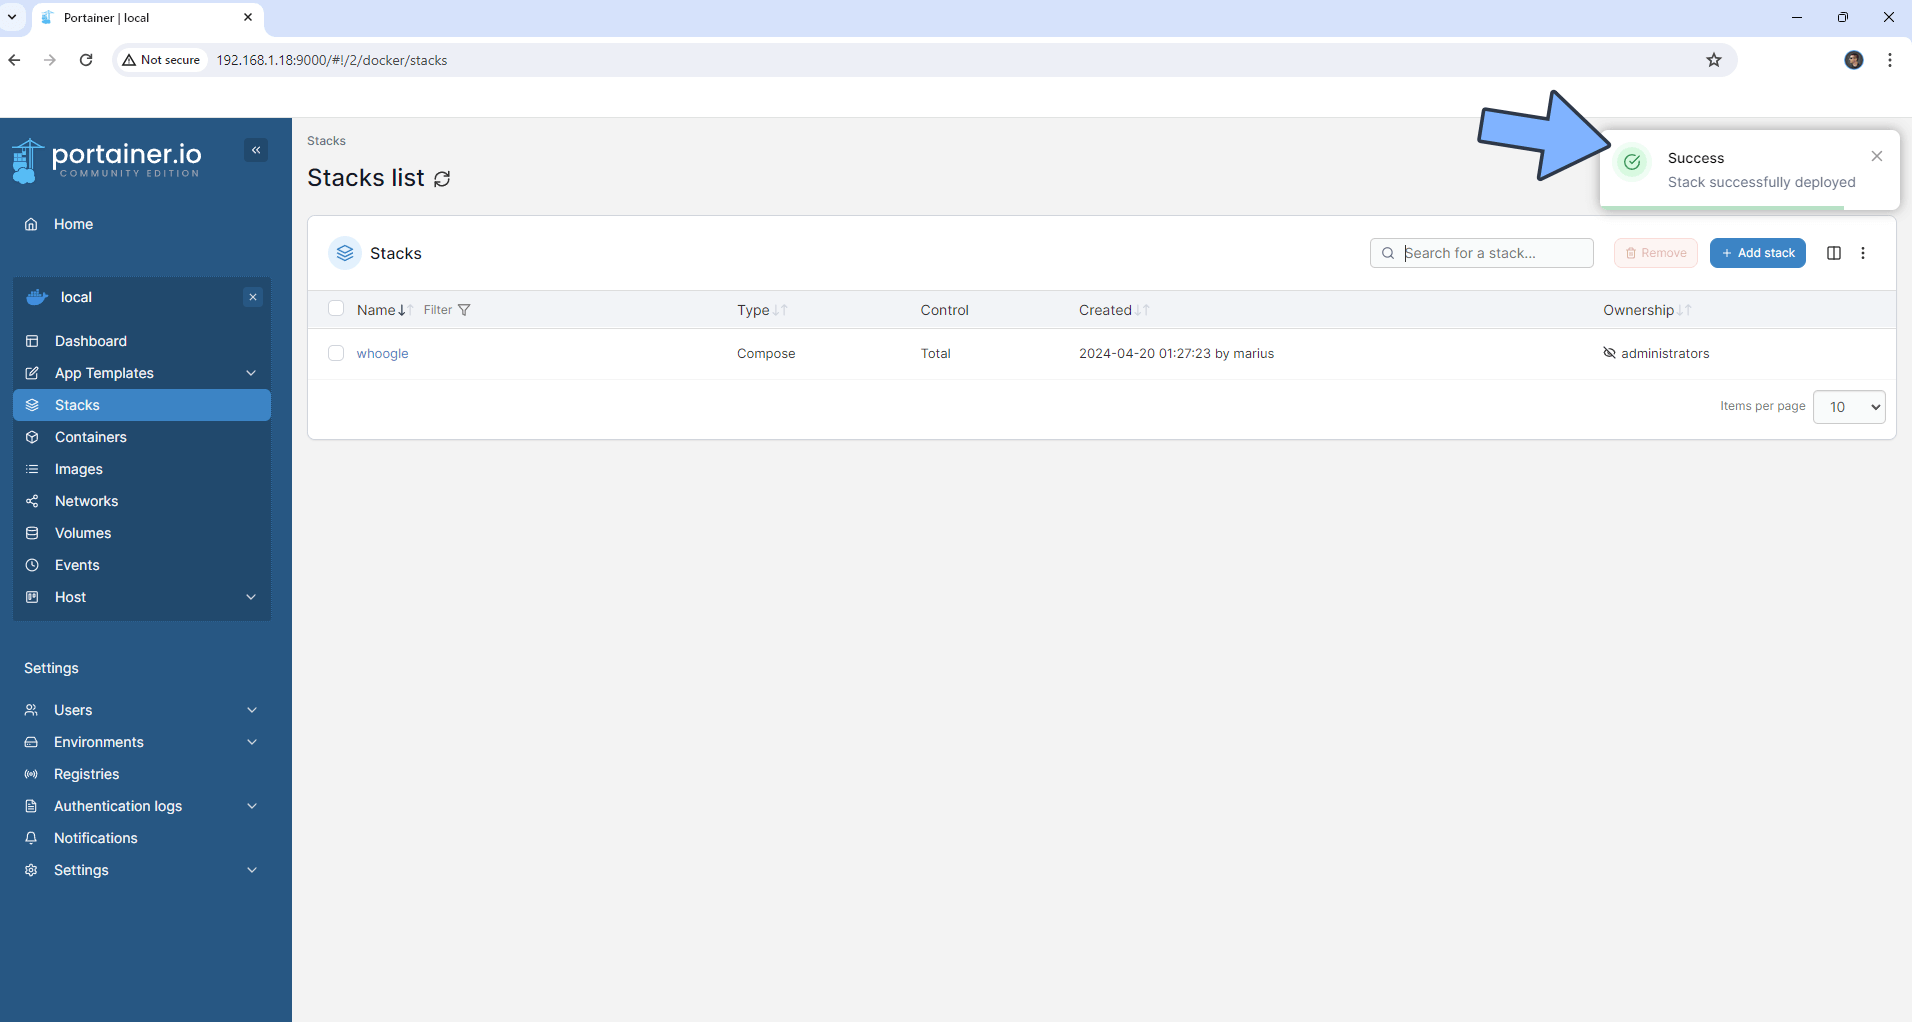
STEP 12
If everything goes right, you will see this message at the top right of your screen: “Success Stack successfully deployed“.
STEP 13
Go back to STEP 1 or you will deal with karma 🙂
STEP 14
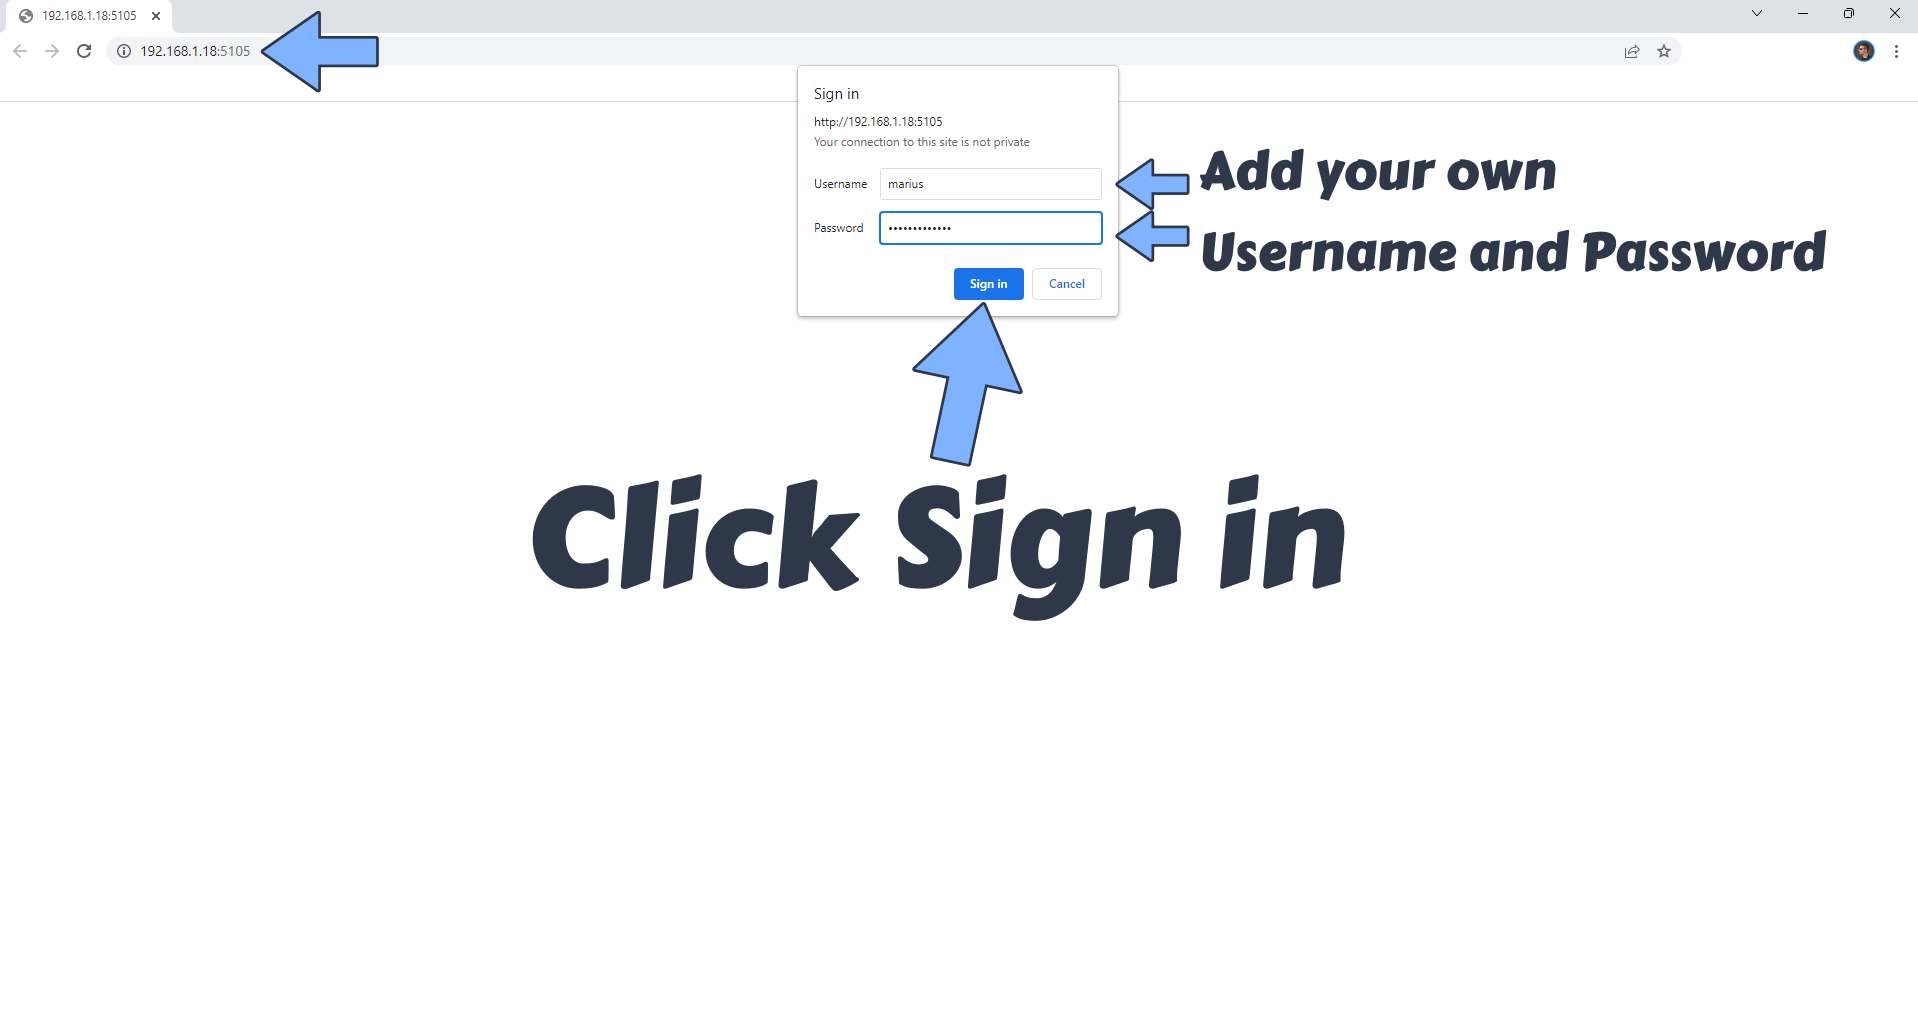
The installation process can take up to a few seconds/minutes. It will depend on your Internet speed connection. Now open your browser and type in http://Synology-ip-address:5105 and then type in your own Username and Password that you have previously added at STEP 10. Click Sign in. Follow the instructions in the image below.
STEP 15
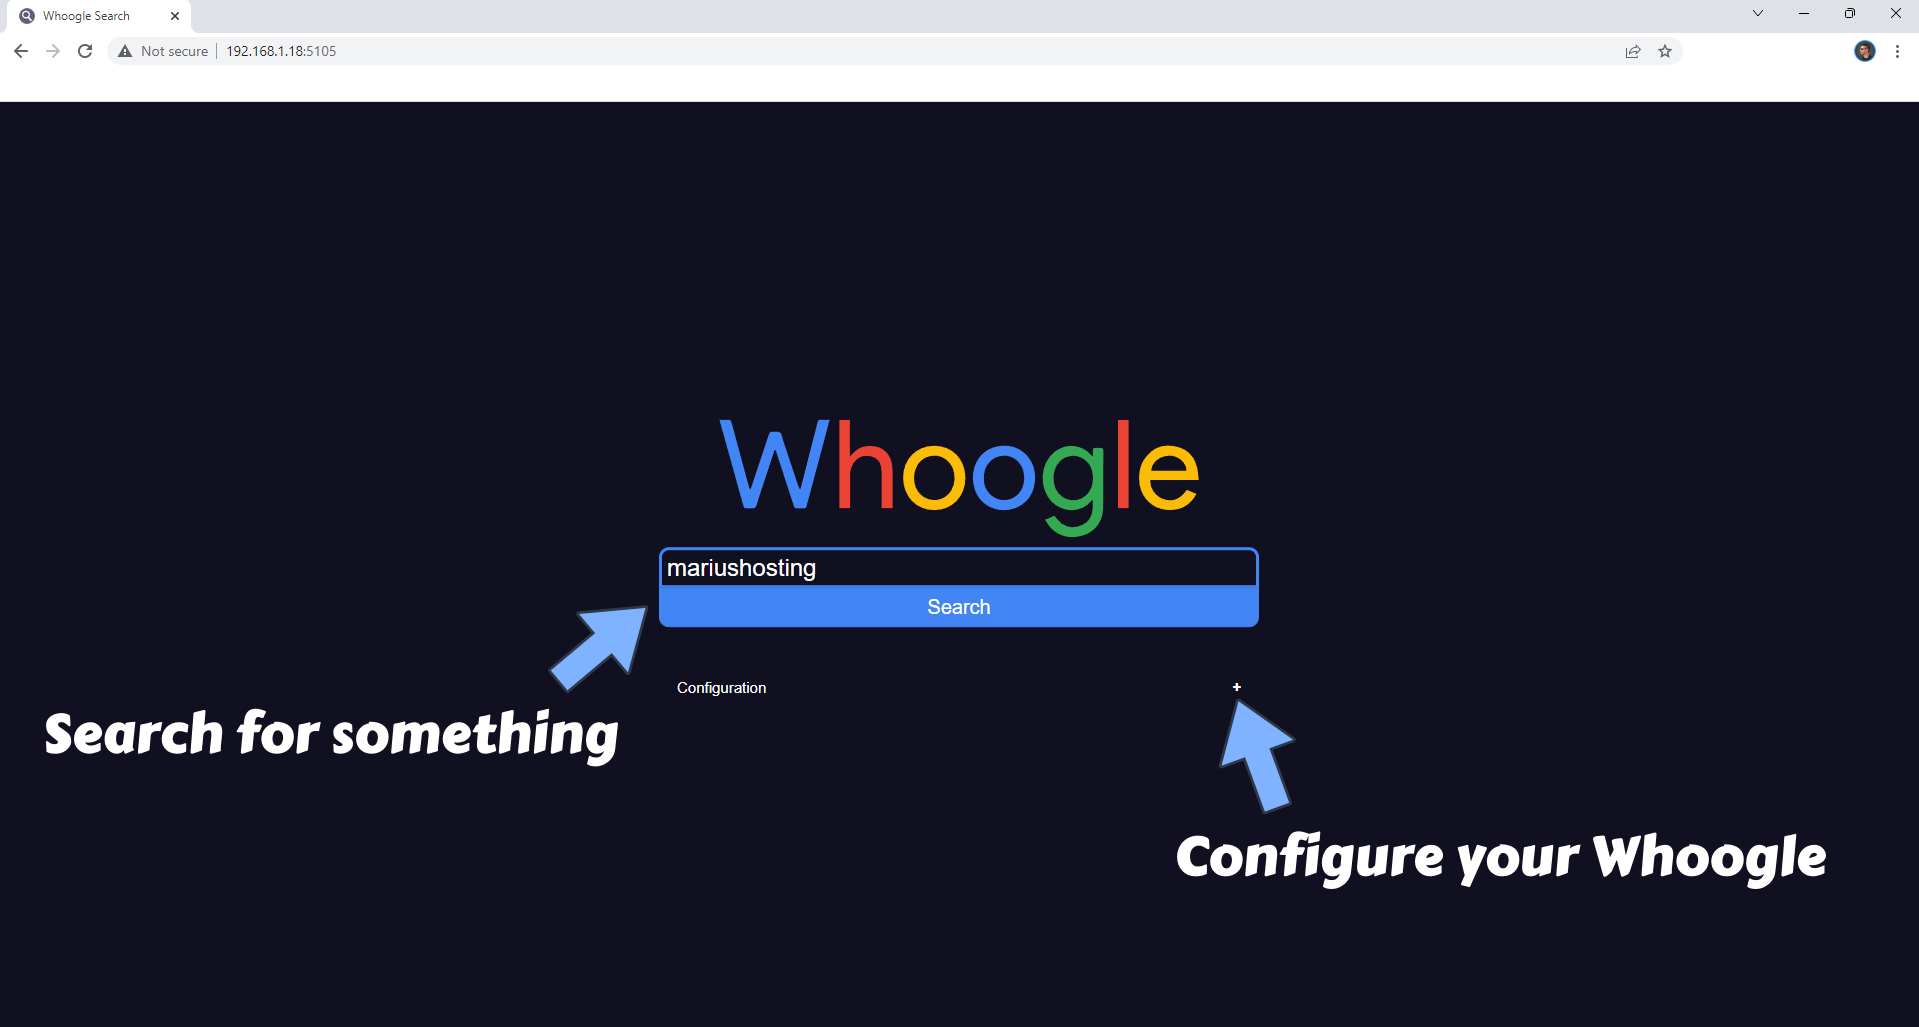
You can search for anything on your Whoogle as you used to on Google, but with privacy and without ADS. If you click on +Configuration you can make some changes to your search preferences, and you can also use Dark Mode.
STEP 1
Please Support My work by Making a Donation.
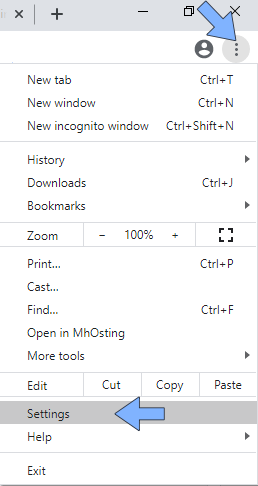
STEP 2
Click on the 3 vertical bullets in the upper right on your Chrome Browser then click Settings. Follow the instructions in the image below.
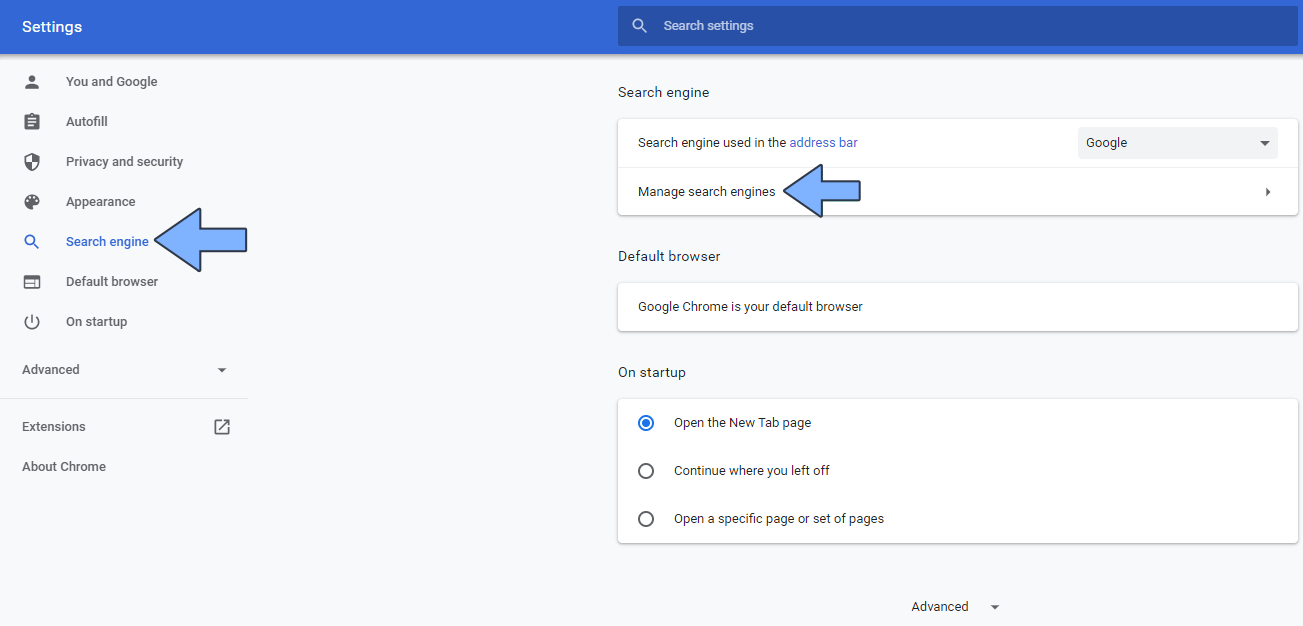
STEP 3
Once the Chrome browser Settings are open, click on the left on “Search engine” then “Manage search engines“. Follow the instructions in the image below.
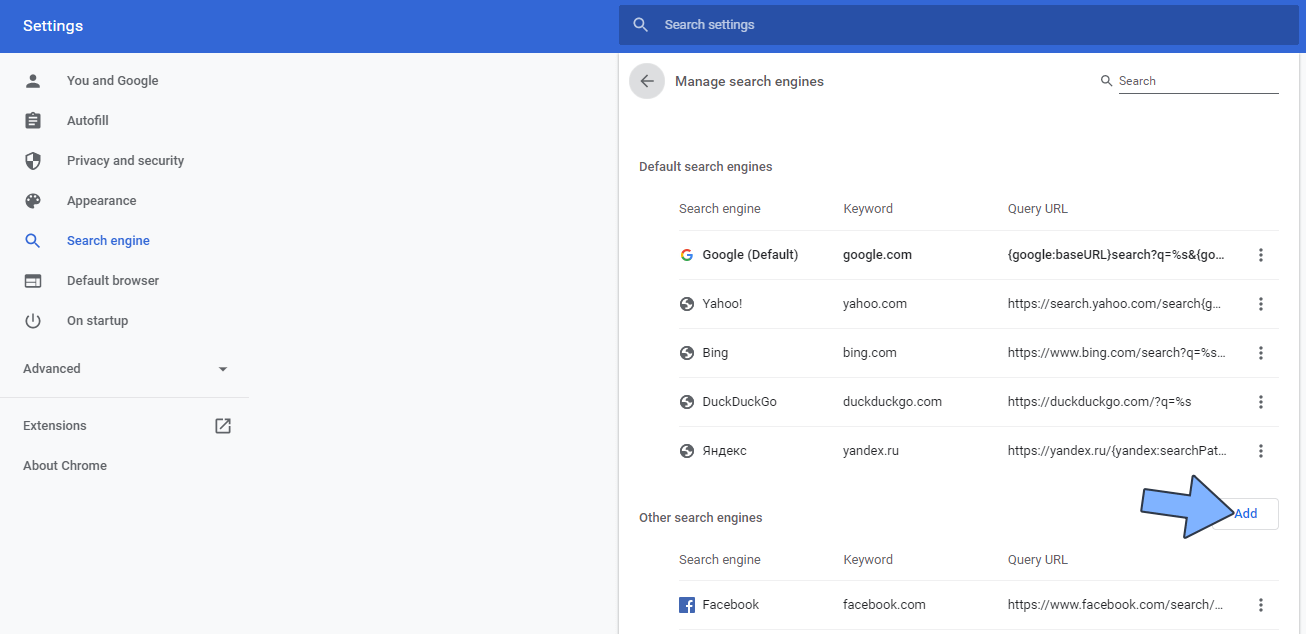
STEP 4
On default search engines, click “Add“. Follow the instructions in the image below.
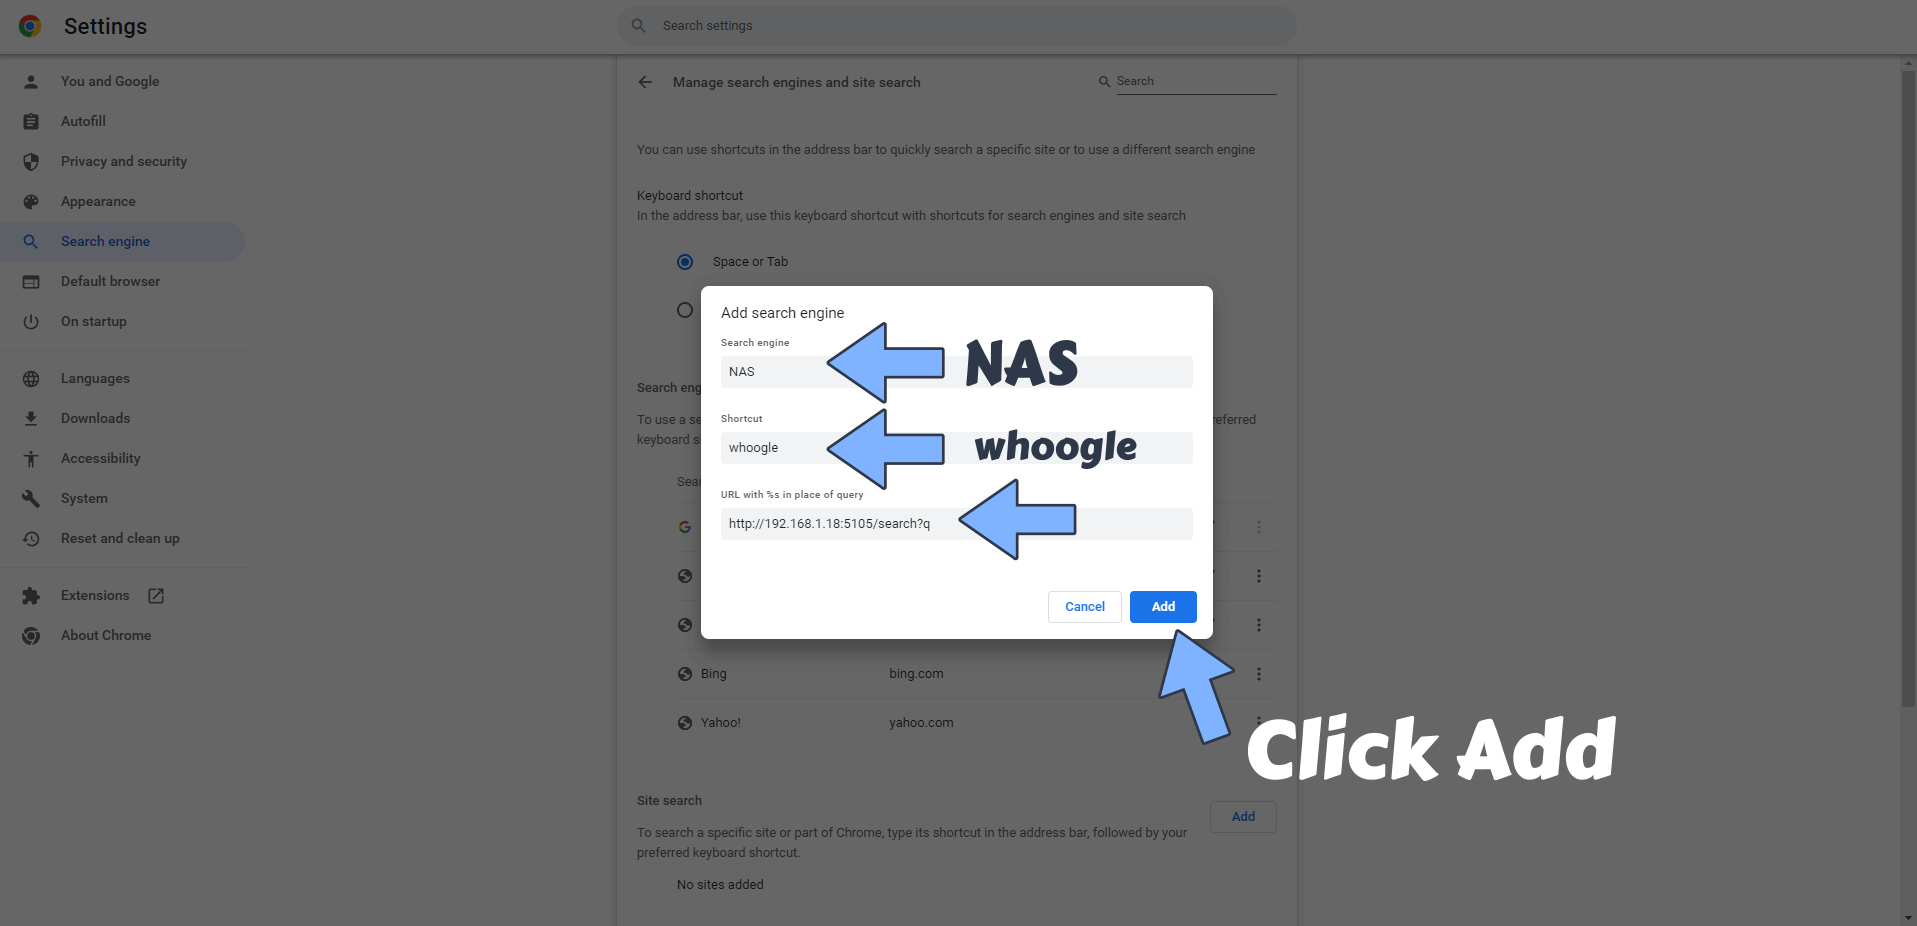
STEP 5
A new window will open. On the Search engine area type NAS, on the Keyword area type whoogle, and on the URL area type http://Synology-ip-address:5105/search?q
then click Add. Follow the instructions in the image below.
STEP 6
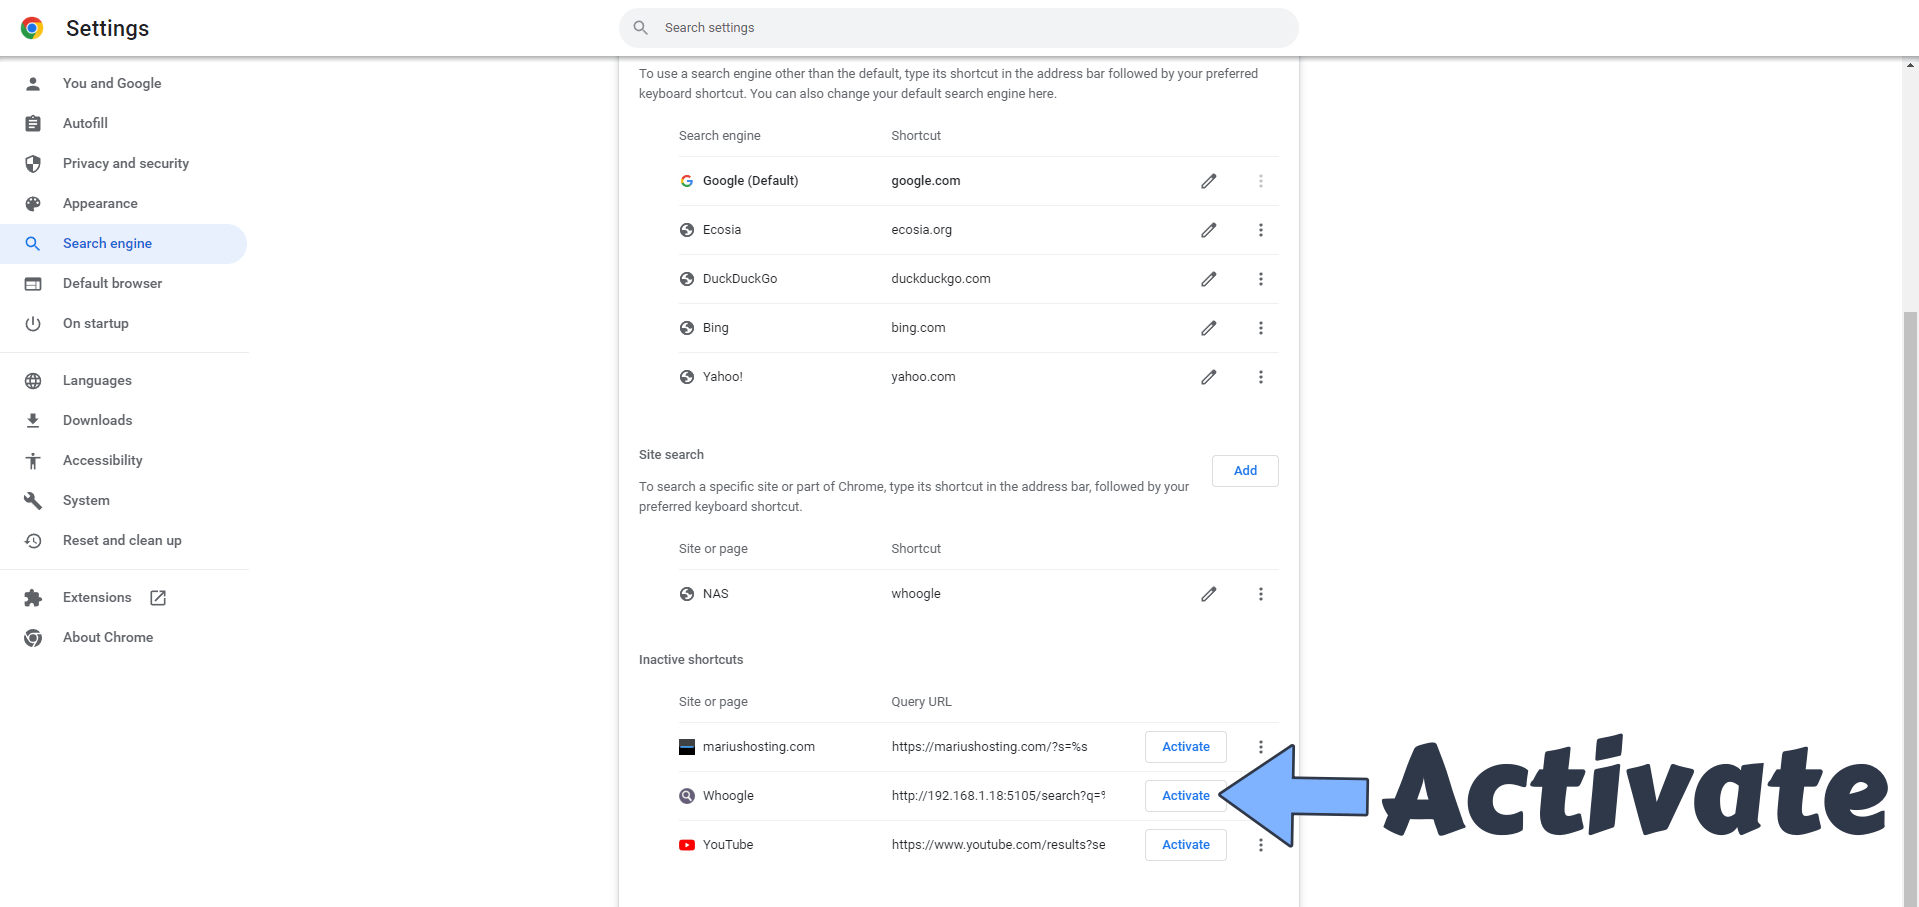
Once you have added the new Search Engine, you will find it under the “Inactive shortcuts”. Click Activate. Follow the instructions in the image below.
STEP 7
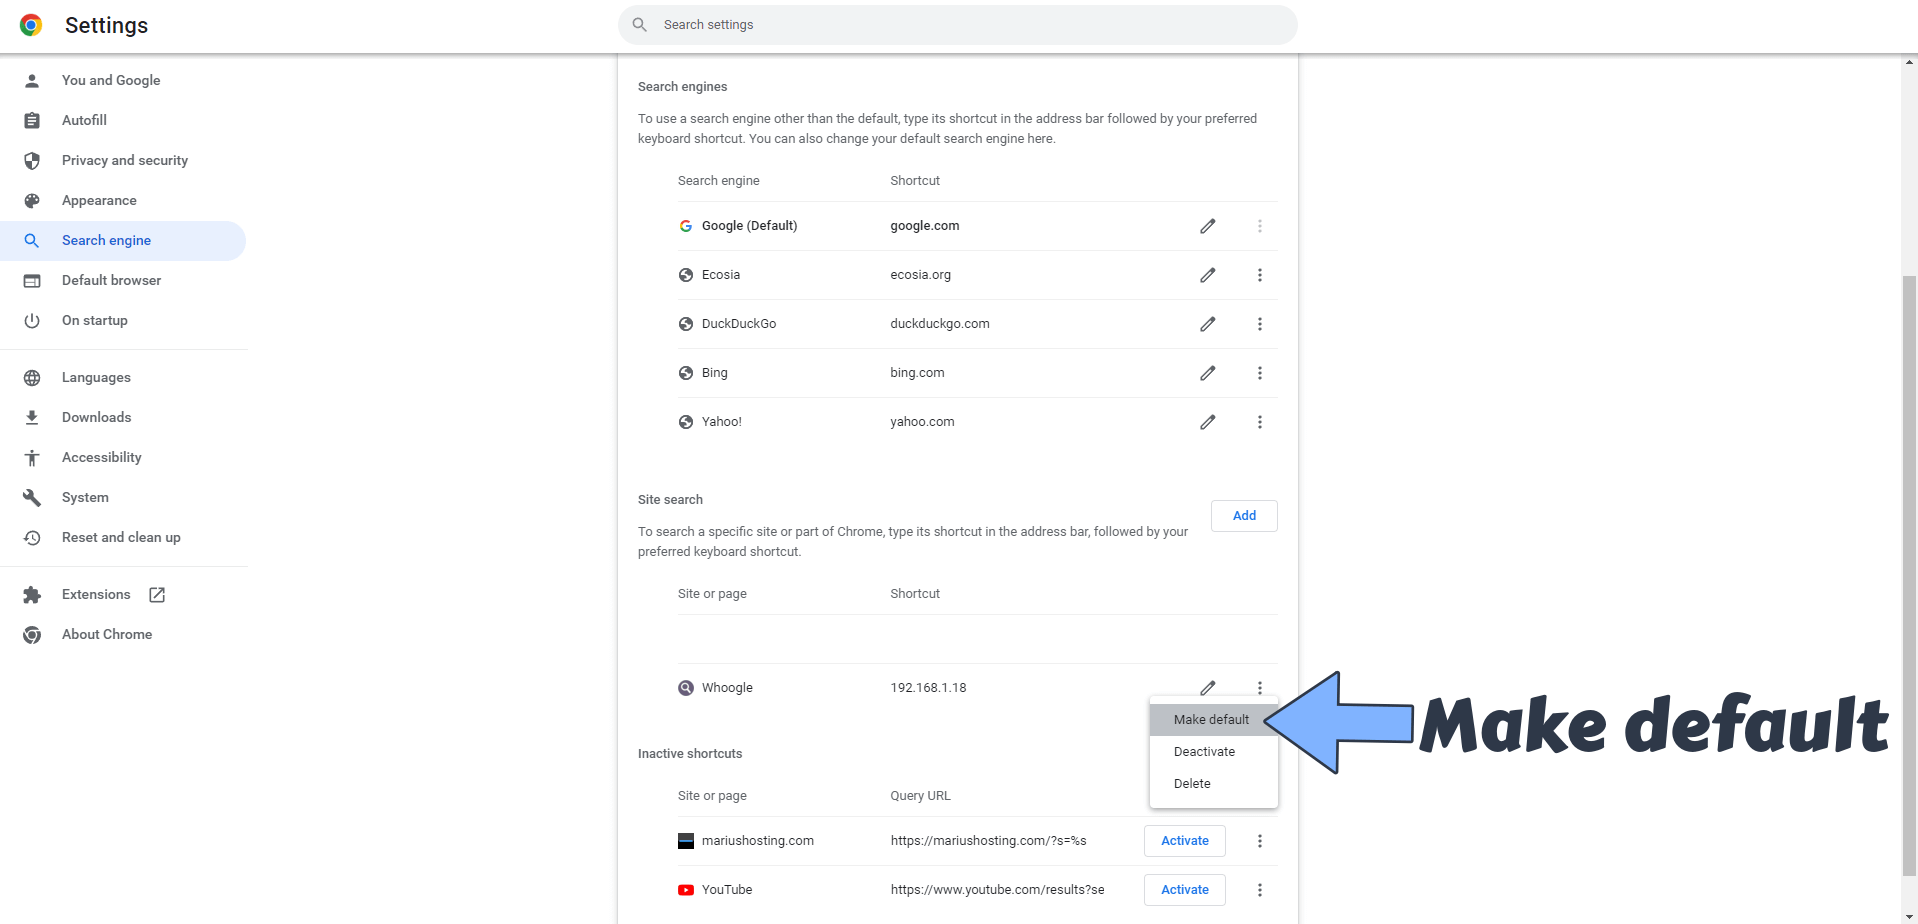
After you click Activate at STEP 6, click on the 3 vertical bullets then click “Make Default“. Follow the instructions in the image below.
Now you have a powerful self-hosted search browser on your Synology NAS.
Enjoy Whoogle!
If you encounter issues by using this container, make sure to check out the Common Docker issues article.
Note: If you want to run the Whoogle container over HTTPS, check How to Run Docker Containers Over HTTPS. In order to make Whoogle work via HTTPS, it’s mandatory to activate WebSocket.
Note: Find out how to update the Whoogle container with the latest image.
Note: How to Back Up Docker Containers on your Synology NAS.
Note: Can I run Docker on my Synology NAS? See the supported models.
Note: How to Free Disk Space on Your NAS if You Run Docker.
Note: A Whoogle alternative is SearX.
Note: How to Schedule Start & Stop For Docker Containers.
Note: How to Activate Email Notifications.
Note: How to Add Access Control Profile on Your NAS.
Note: How to Change Docker Containers Restart Policy.
Note: How to Use Docker Containers With VPN.
Note: Convert Docker Run Into Docker Compose.
Note: How to Clean Docker.
Note: How to Clean Docker Automatically.
Note: Best Practices When Using Docker and DDNS.
Note: Some Docker Containers Need WebSocket.
Note: Find out the Best NAS Models For Docker.
Note: Activate Gmail SMTP For Docker Containers.
This post was updated on Saturday / April 20th, 2024 at 10:21 PM