Dozzle is a simple and responsive application that provides you with a web based interface to monitor your Docker container logs live. It doesn’t store log information, it is for live monitoring of your container logs only. Well today I will teach you how to install Dozzle on your Synology NAS in less than 30 seconds directly through the Task Scheduler option. It’ll be over in a couple of seconds and it’s essentially child’s play.
This guide works perfectly with the latest Dozzle 8.13.4 release.
STEP 1
Please Support My work by Making a Donation.
STEP 2
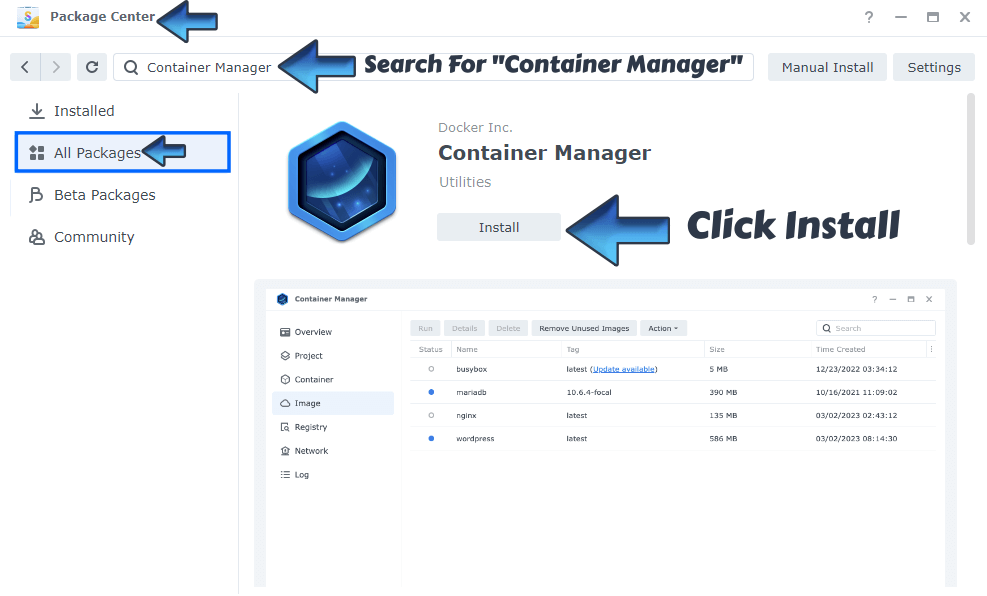
Install Container Manager via Synology “Package Center”. If you run an older DSM version (under 7.2), search for Docker instead of Container Manager.
STEP 3
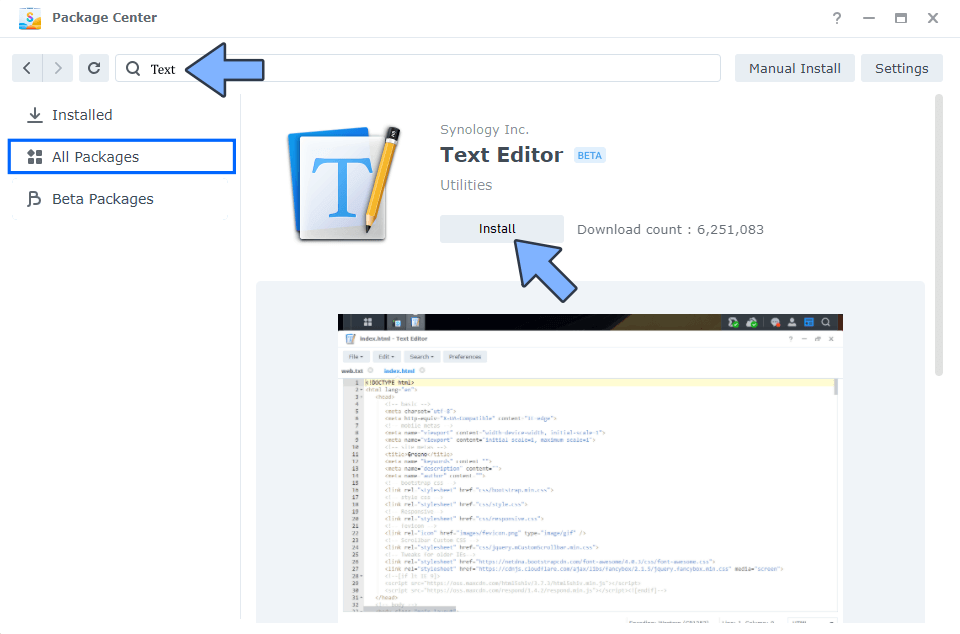
Install Text Editor via Synology “Package Center”. (Mandatory STEP.) If you already have Text Editor installed on your Synology NAS, skip this STEP.
STEP 4
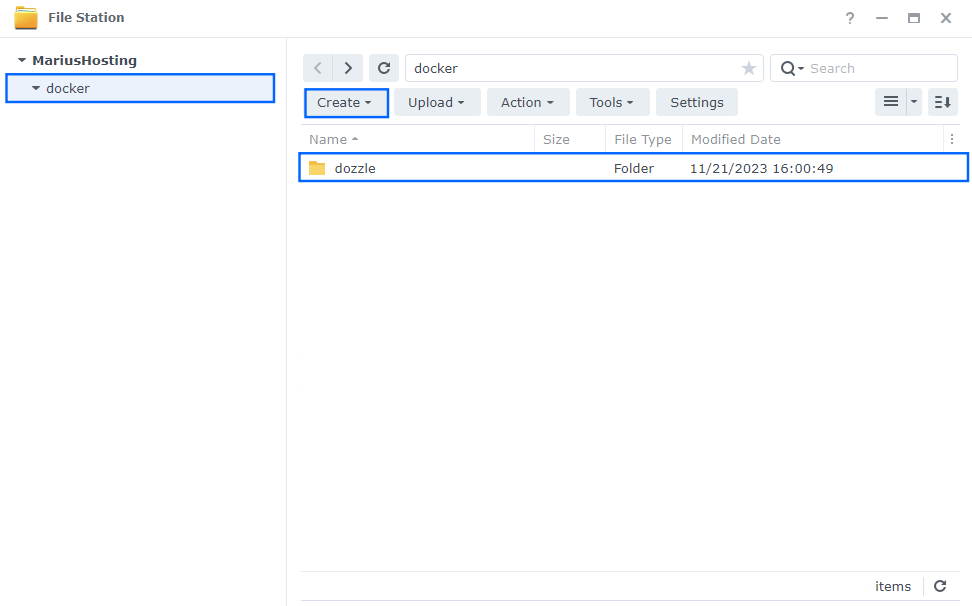
Go to File Station and open the docker folder. Inside the docker folder, create one new folder and name it dozzle. Follow the instructions in the image below.
Note: Be careful to enter only lowercase, not uppercase letters.
STEP 5
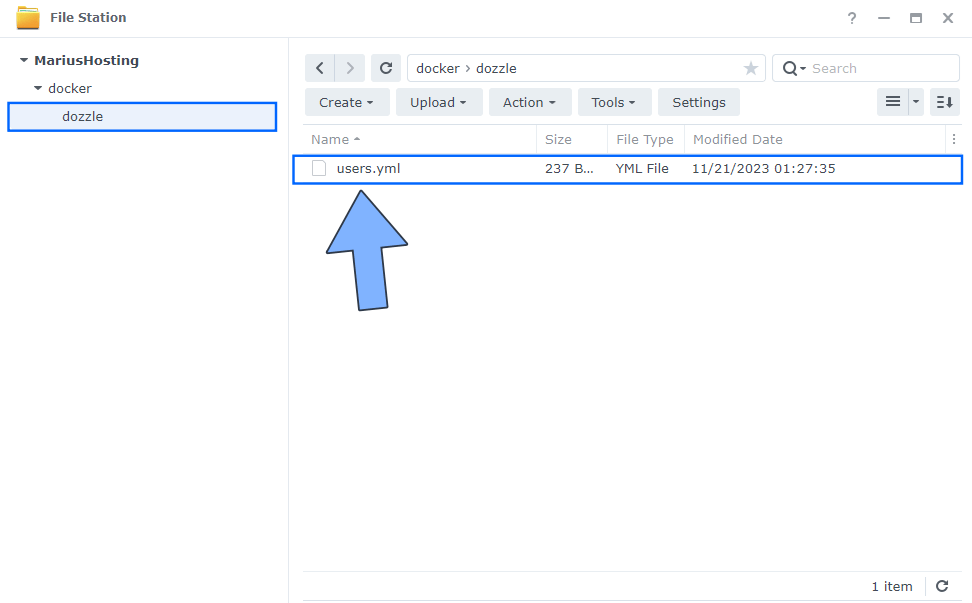
Download (click on the blue link below) and upload the users.yml file below in the dozzle folder that you have previously created at STEP 4. Follow the instructions in the image below. 🔒Note: Support my work to unlock the password. You can use this password to download any file on mariushosting forever!
STEP 6
Launch your browser, then go to the IT-TOOLS website by clicking on the blue link below.
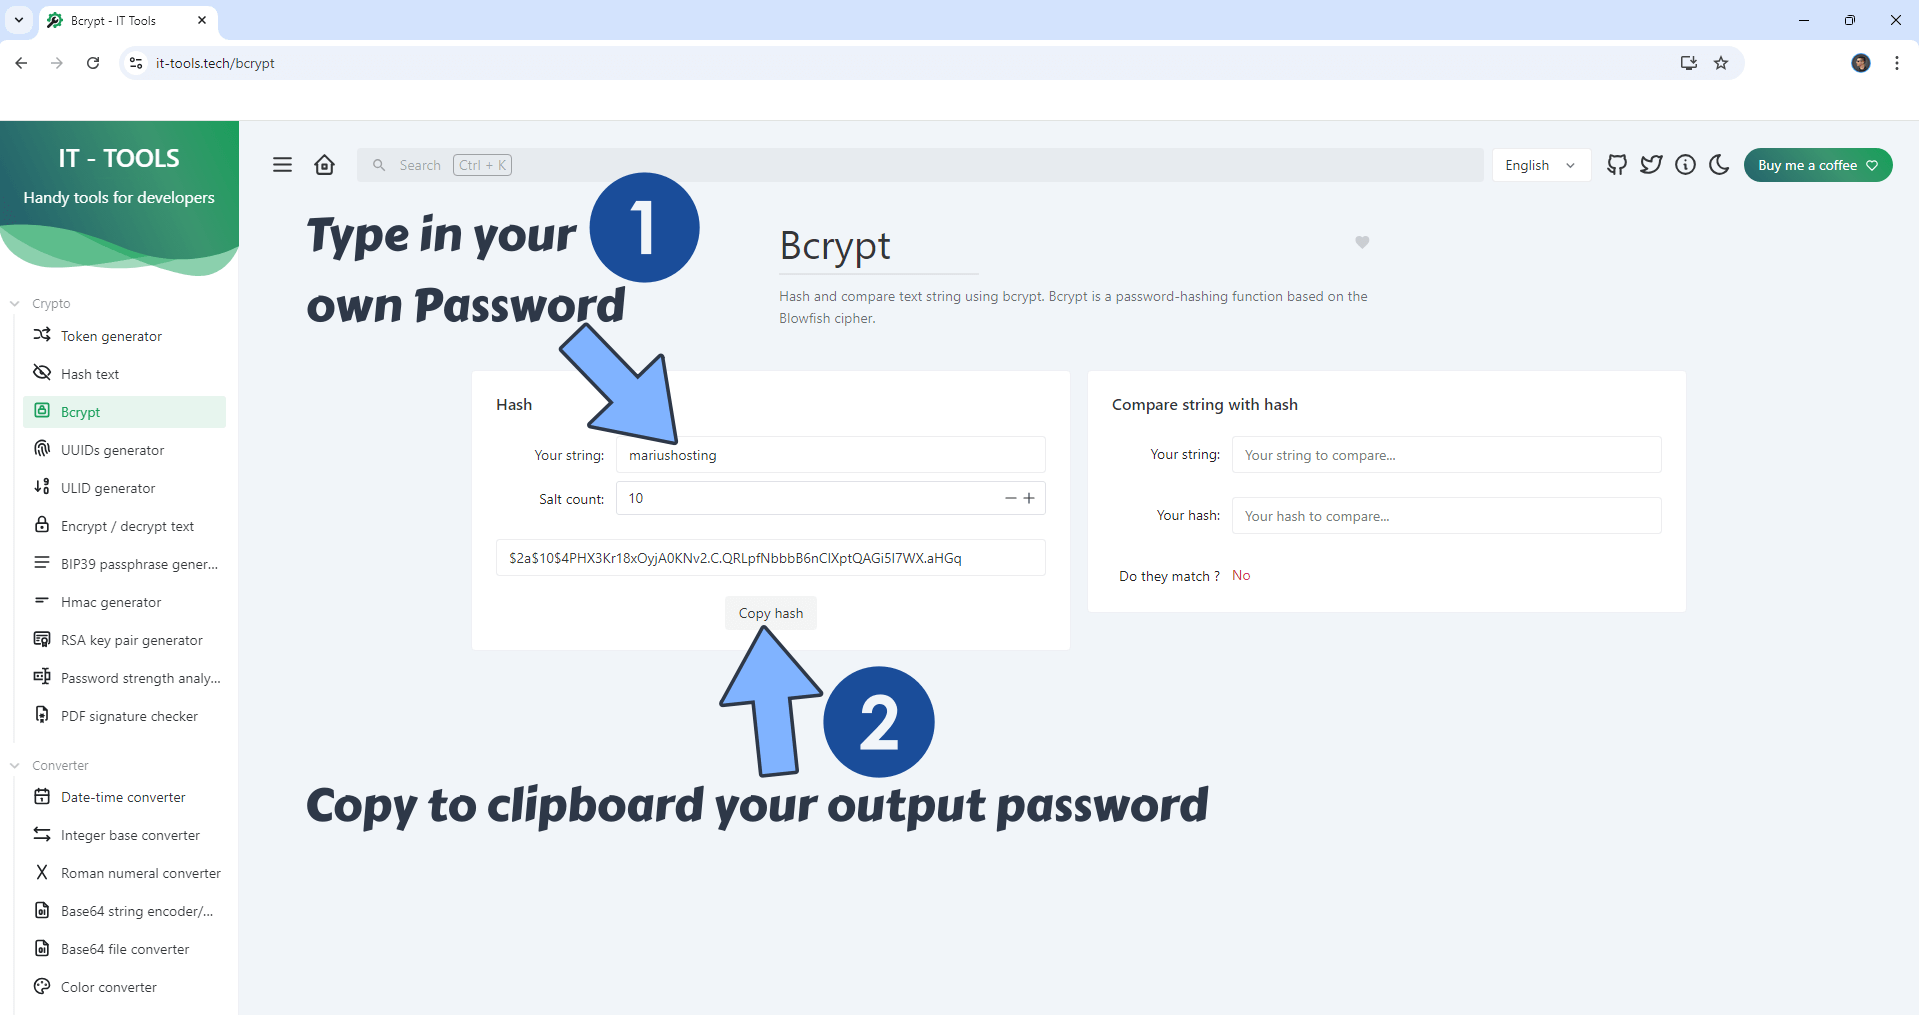
Type in your password in the apposite area (Your string). Copy to clipboard your Bcrypt Hash output password. Follow the instructions in the image below.
STEP 7
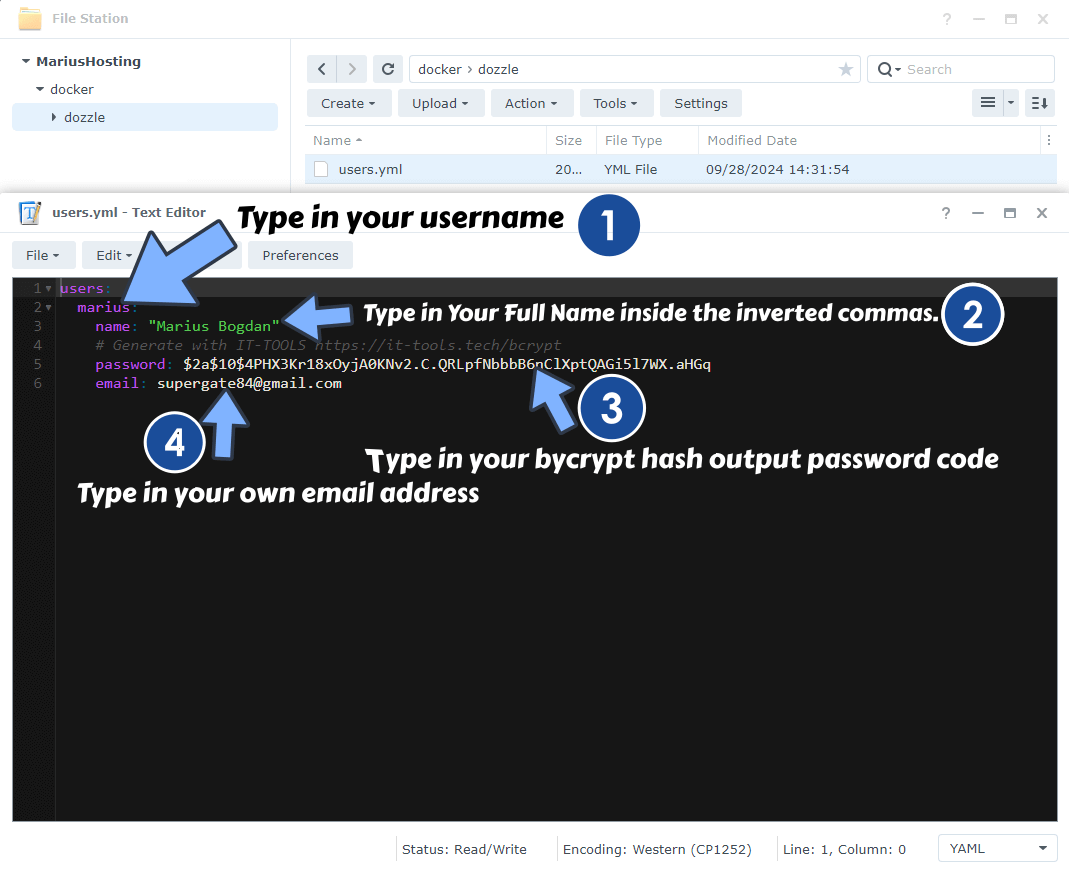
- Open the users.yml file that you have previously uploaded at STEP 5. Follow the instructions in the image below.
- Type in your Username.
- Type in Your Full Name inside the inverted commas.
- Type in your Bcrypt Hash output password code that you have previously generated at STEP 6.
- Type in your own email.
STEP 8
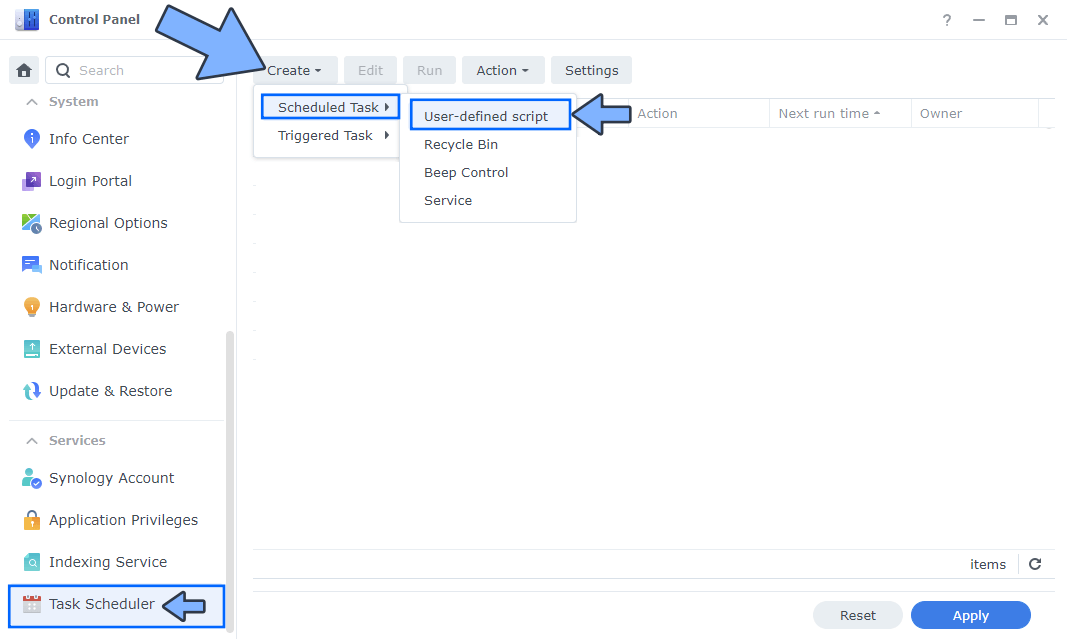
Go to Control Panel / Task Scheduler / Create / Scheduled Task / User-defined script. Follow the instructions in the image below.
STEP 9
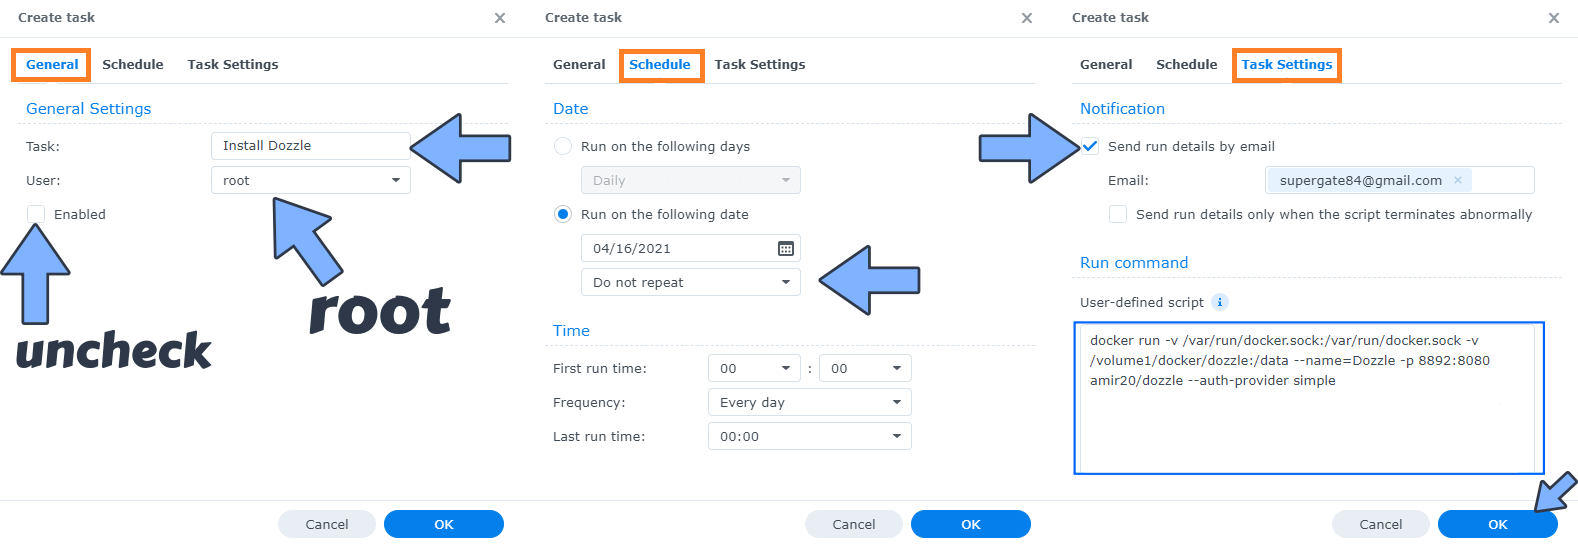
Once you click on User-defined script a new window will open. Follow the instructions below:
- General: In the Task field type in “Install Dozzle“. Uncheck the “Enabled” option. Select root User.
- Schedule: Select Run on the following date then select “Do not repeat“.
- Task Settings: Check “Send run details by email“, add your email then copy paste the code below in the Run command area. After that click OK.
docker run -v /var/run/docker.sock:/var/run/docker.sock -v /volume1/docker/dozzle:/data --name Dozzle -p 8892:8080 amir20/dozzle --auth-provider simple
STEP 10
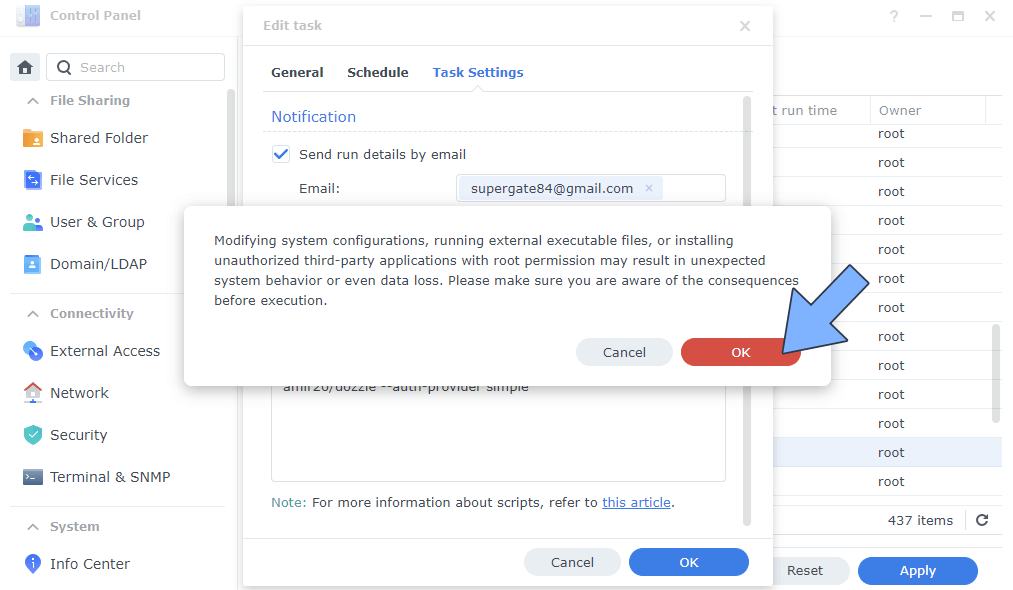
After you click OK on STEP 9 a new warning pop up window will open. Click OK.
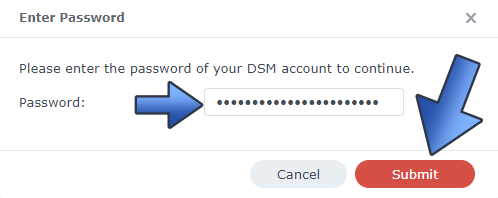
After you click OK, type in your DSM Password then click Submit. Follow the instructions in the image below.
STEP 11
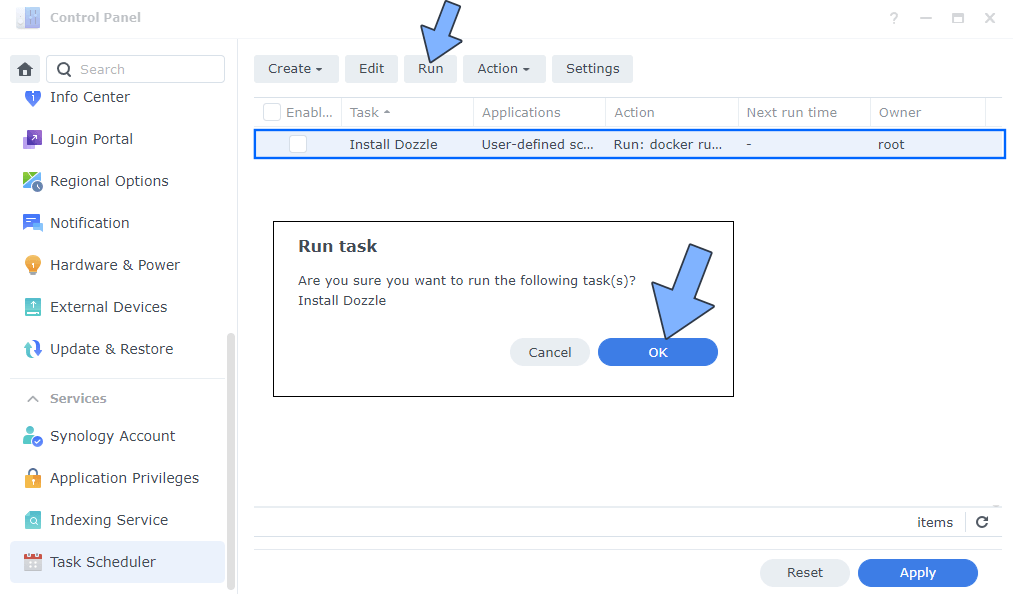
After you click Submit on STEP 10, select your “Install Dozzle” Task then click the “Run” tab. You will be asked to run Install Dozzle – click OK. Follow the instructions in the image below.
STEP 12
Go back to STEP 1 or you will deal with karma 🙂
STEP 13
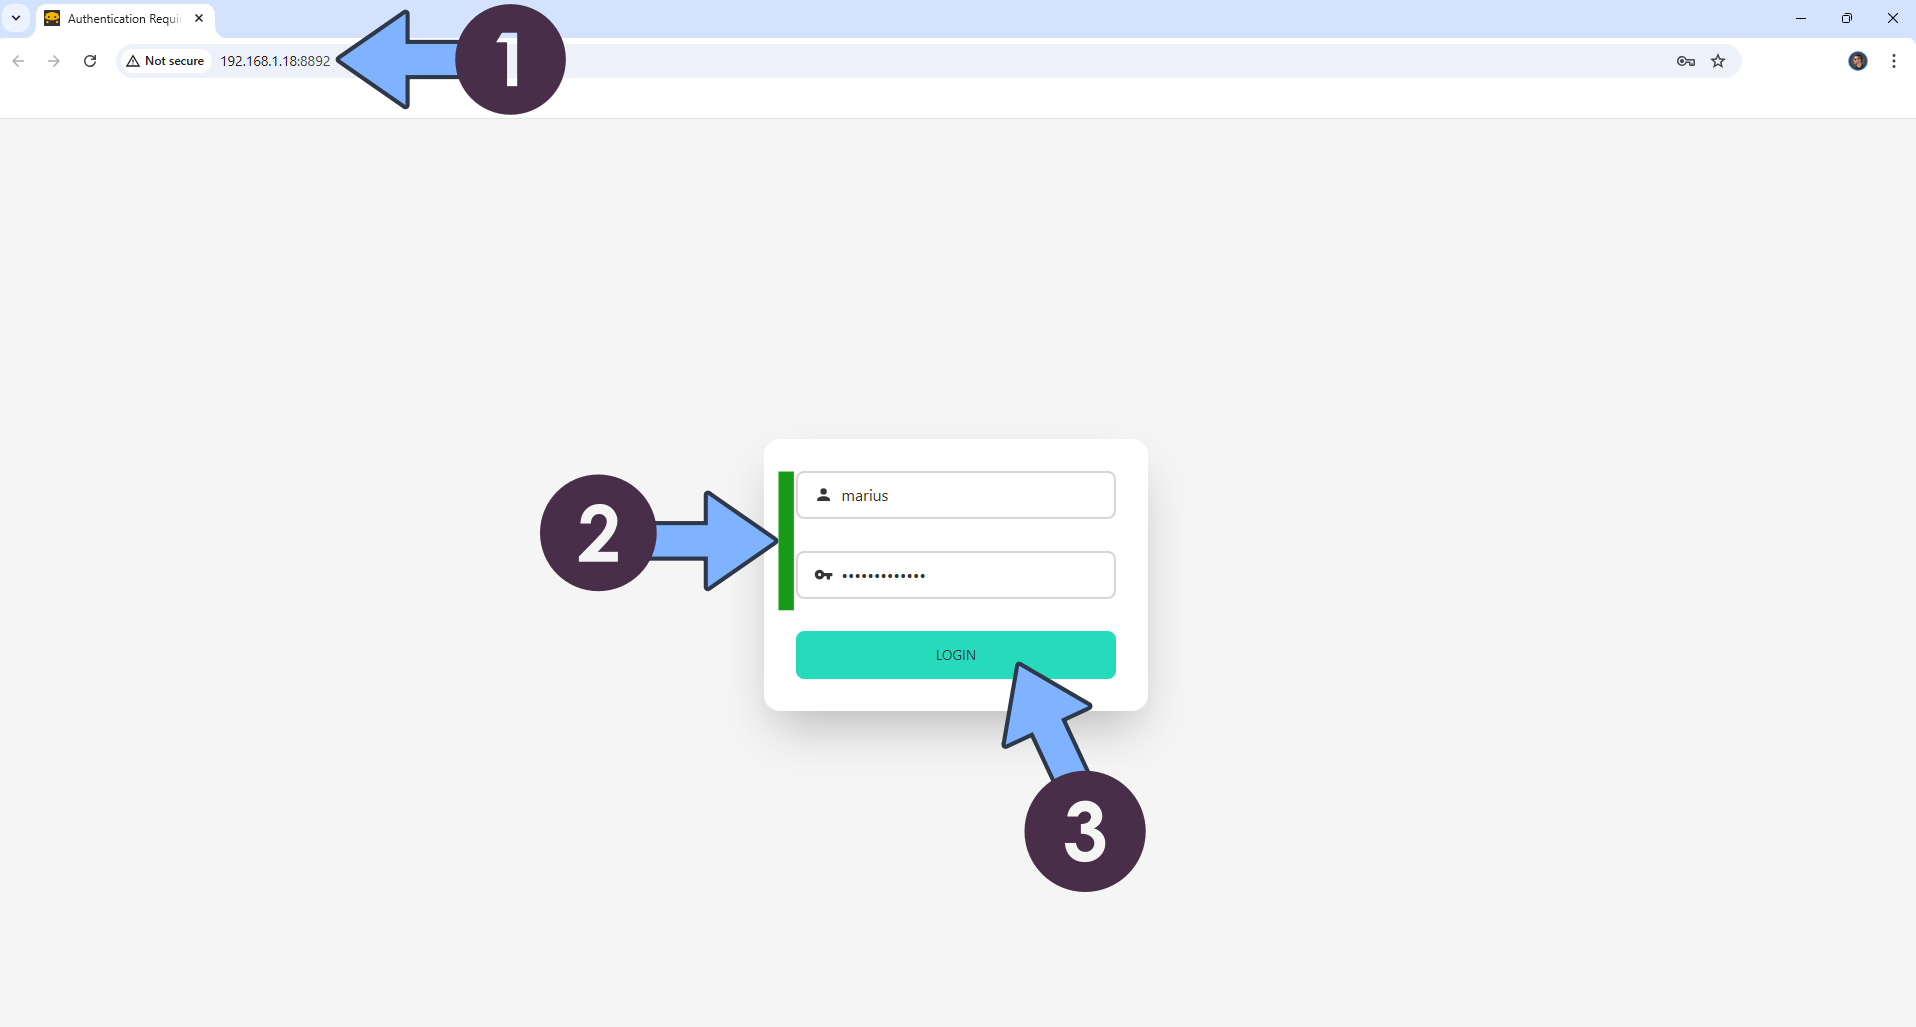
The installation process can take up to a few minutes or less, seconds. It will depend on your Internet speed connection. Now open your browser and type in http://Synology-ip-address:8892 If everything goes right, you will see the Dozzle Login page. Type in your own USERNAME, in my case marius, as per the example at STEP 7, and your PASSWORD that you have chosen at STEP 6 Point 1 (NOT the Bcrypt Hash output password). Click Login. Follow the instructions in the image below.
STEP 14
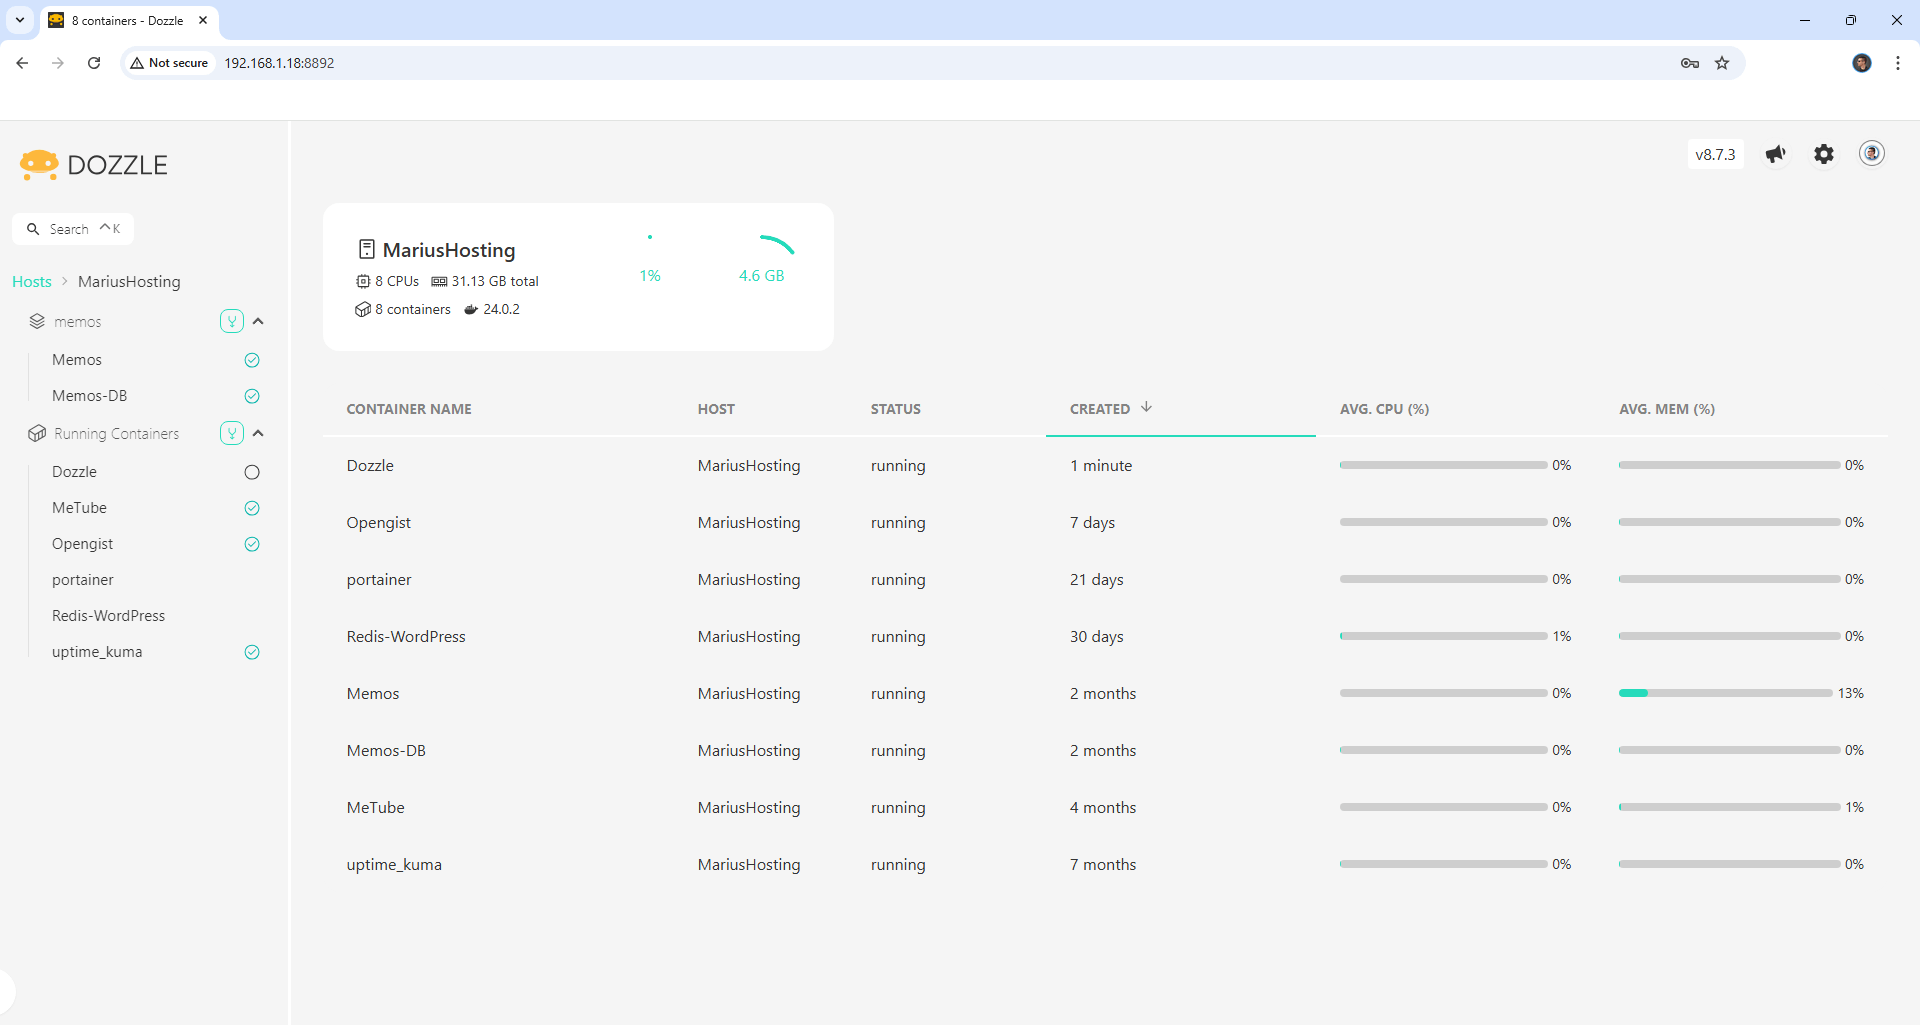
Your Dozzle dashboard at a glance!
STEP 15
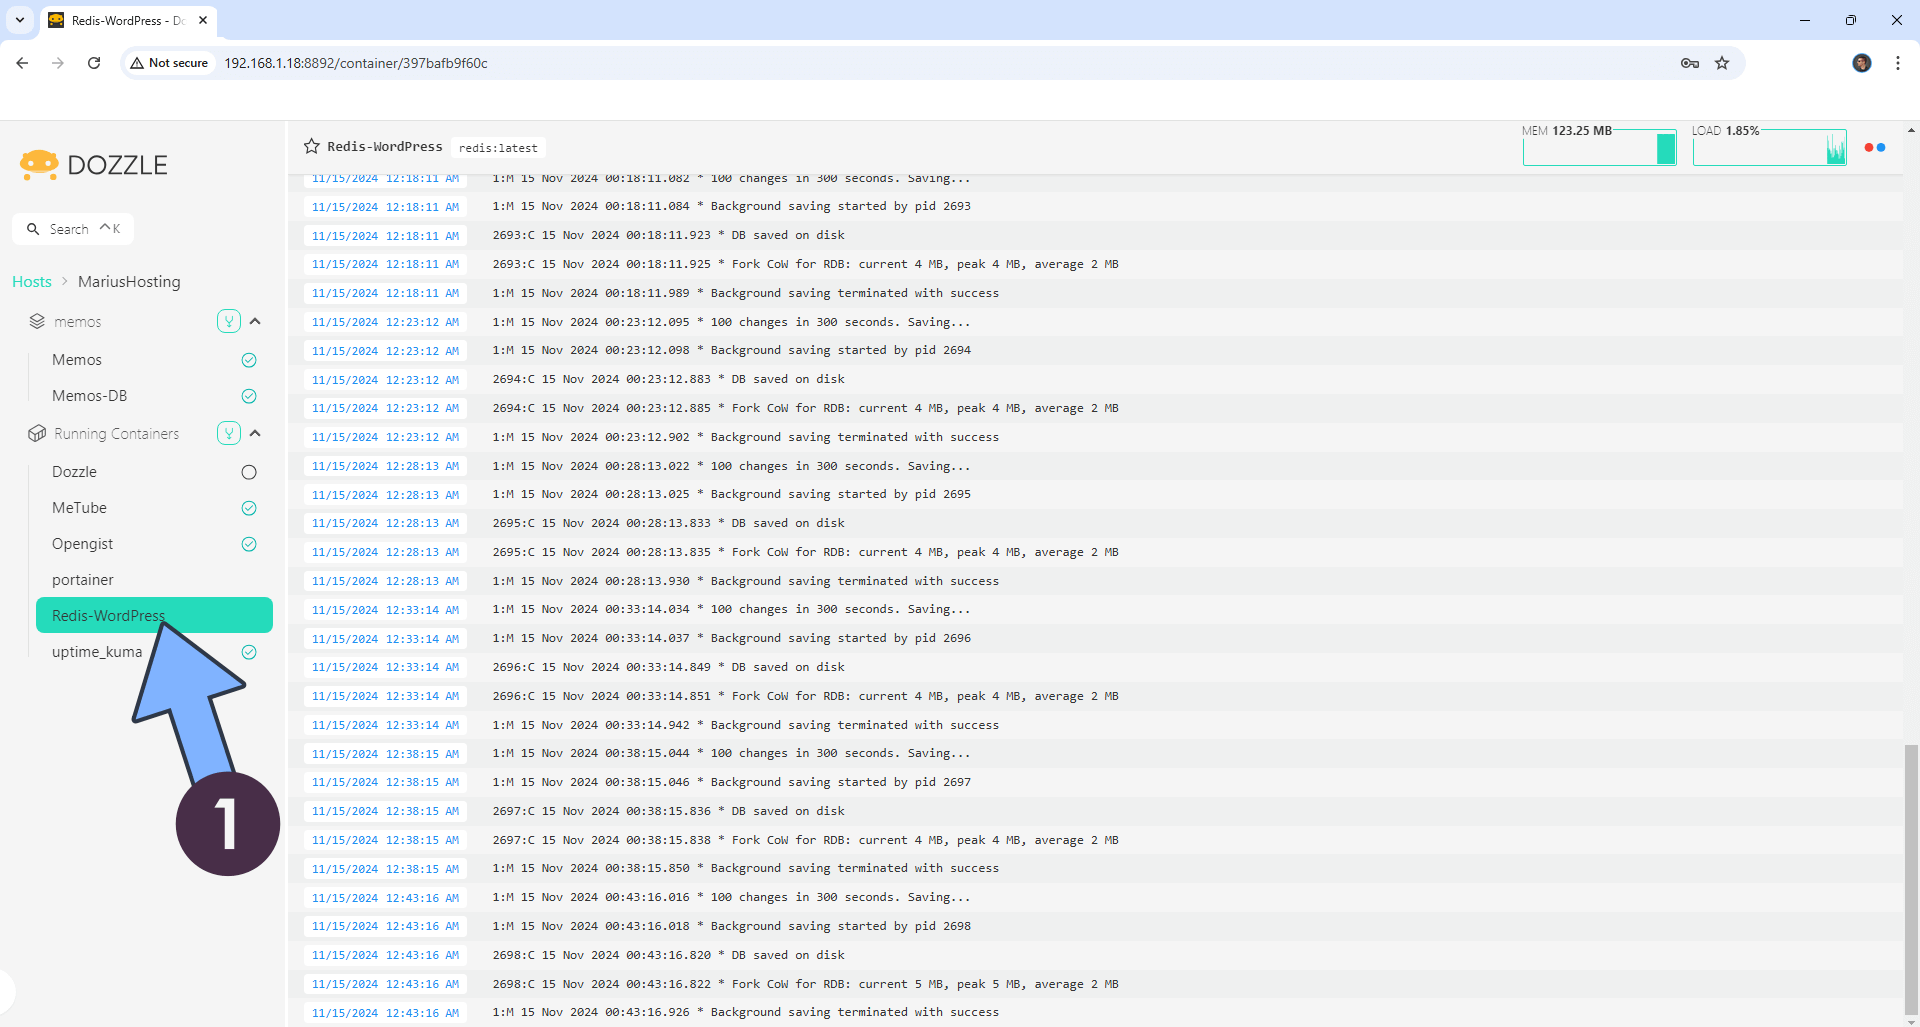
Real-Time Docker logs monitor. Click on the container whose log you want to see. Follow the instructions in the image below.
STEP 16
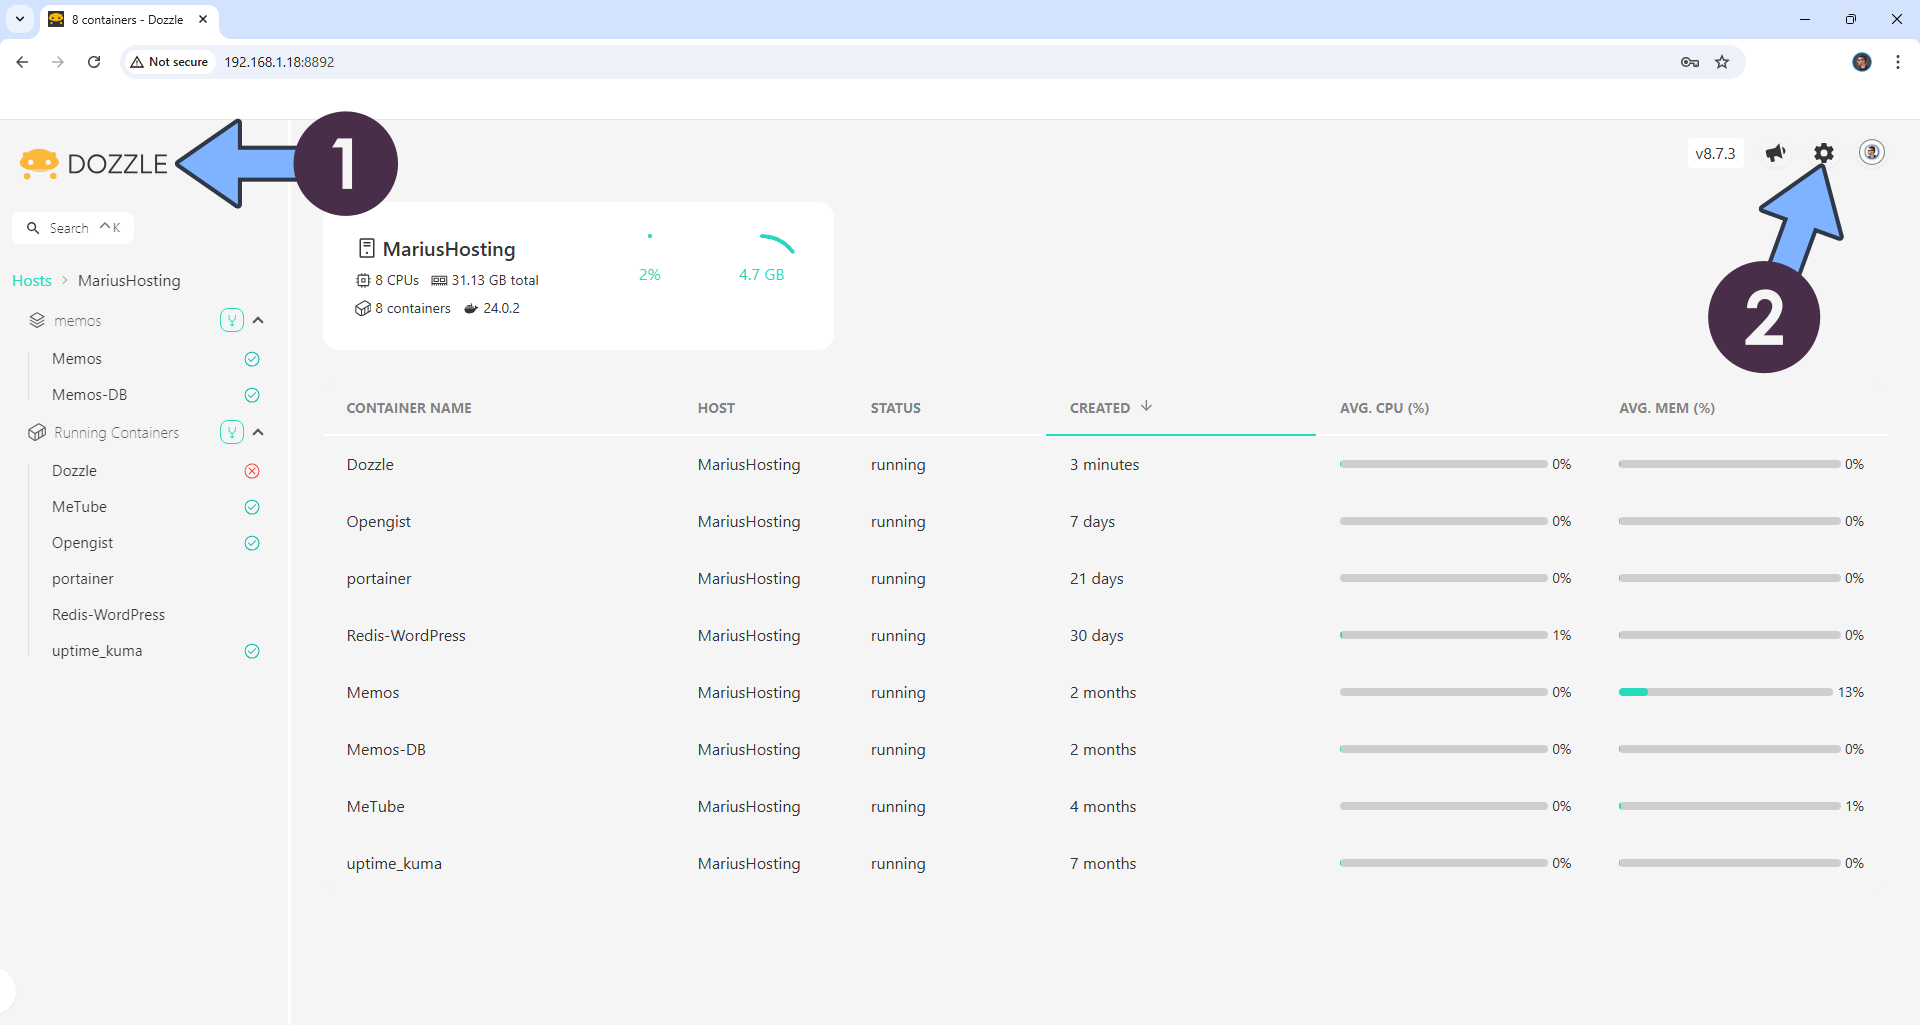
At the top left of the page, click on the Dozzle logo, then the settings gear icon. Follow the instructions in the image below.
STEP 17
You can easily change some Display options and use different themes. Follow the instructions in the image below.
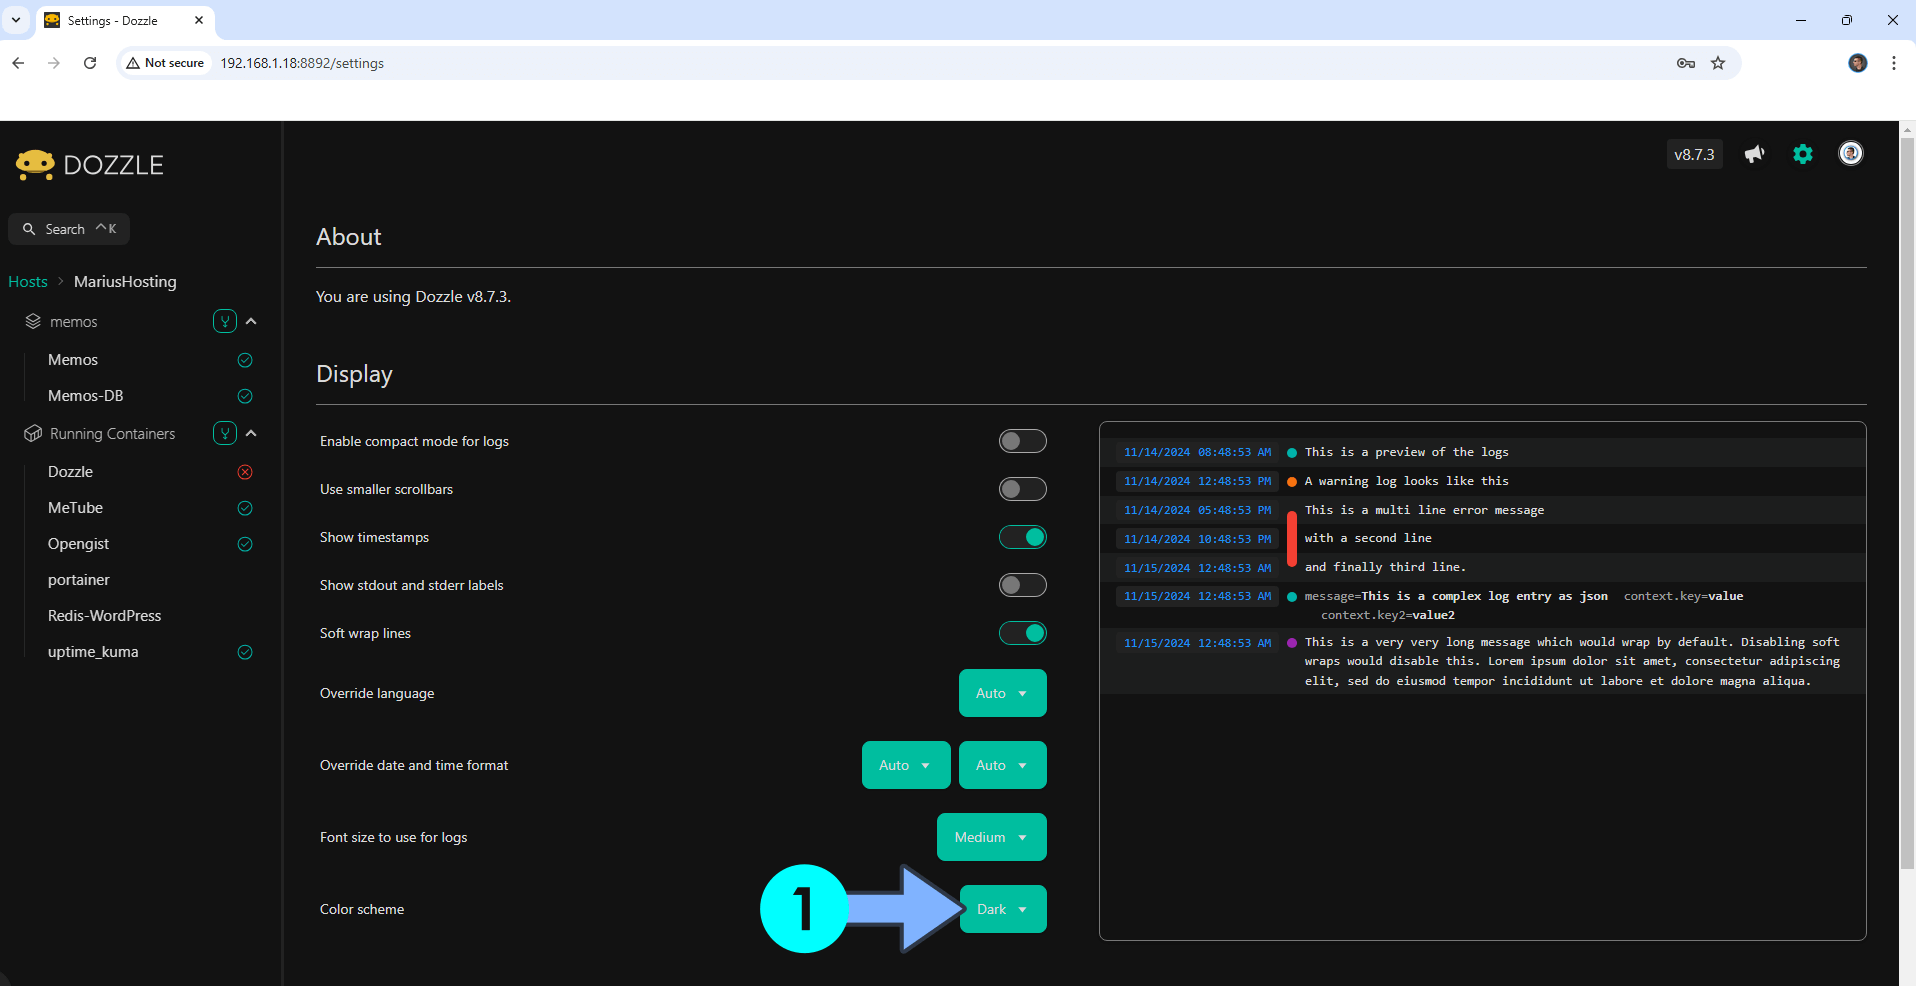
Enjoy Dozzle!
If you encounter issues by using this container, make sure to check out the Common Docker issues article.
Note: If you want to run the Dozzle container over HTTPS, check How to Run Docker Containers Over HTTPS. In order to make Dozzle work via HTTPS, it’s mandatory to activate WebSocket.
Note: Can I run Docker on my Synology NAS? See the supported models.
Note: Find out how to update the Dozzle container with the latest image.
Note: How to Back Up Docker Containers on your Synology NAS.
Note: How to Free Disk Space on Your NAS if You Run Docker.
Note: How to Schedule Start & Stop For Docker Containers.
Note: How to Activate Email Notifications.
Note: How to Add Access Control Profile on Your NAS.
Note: How to Change Docker Containers Restart Policy.
Note: How to Use Docker Containers With VPN.
Note: Convert Docker Run Into Docker Compose.
Note: How to Clean Docker.
Note: How to Clean Docker Automatically.
Note: Best Practices When Using Docker and DDNS.
Note: Some Docker Containers Need WebSocket.
Note: Find out the Best NAS Models For Docker.
Note: Activate Gmail SMTP For Docker Containers.
This post was updated on Monday / June 30th, 2025 at 10:23 PM
