Immich Power Tools is an unofficial yet powerful companion web application built to enhance organization and management of your self-hosted Immich photo and video library, especially after importing large collections like those from Google Photos. Running as a lightweight Next.js-based interface, it connects to your existing Immich instance through the official API. In this step by step guide I will show you how to install Immich Power Tools on your Synology NAS using Docker and Portainer.
This guide works perfectly with the latest Immich Power Tools v0.21.1 release.
STEP 1
Please Support My work by Making a Donation.
STEP 2
⚠️Mandatory: Install Immich on Your Synology NAS using my guide. Skip this step if Immich is already installed on your Synology NAS device.
STEP 3
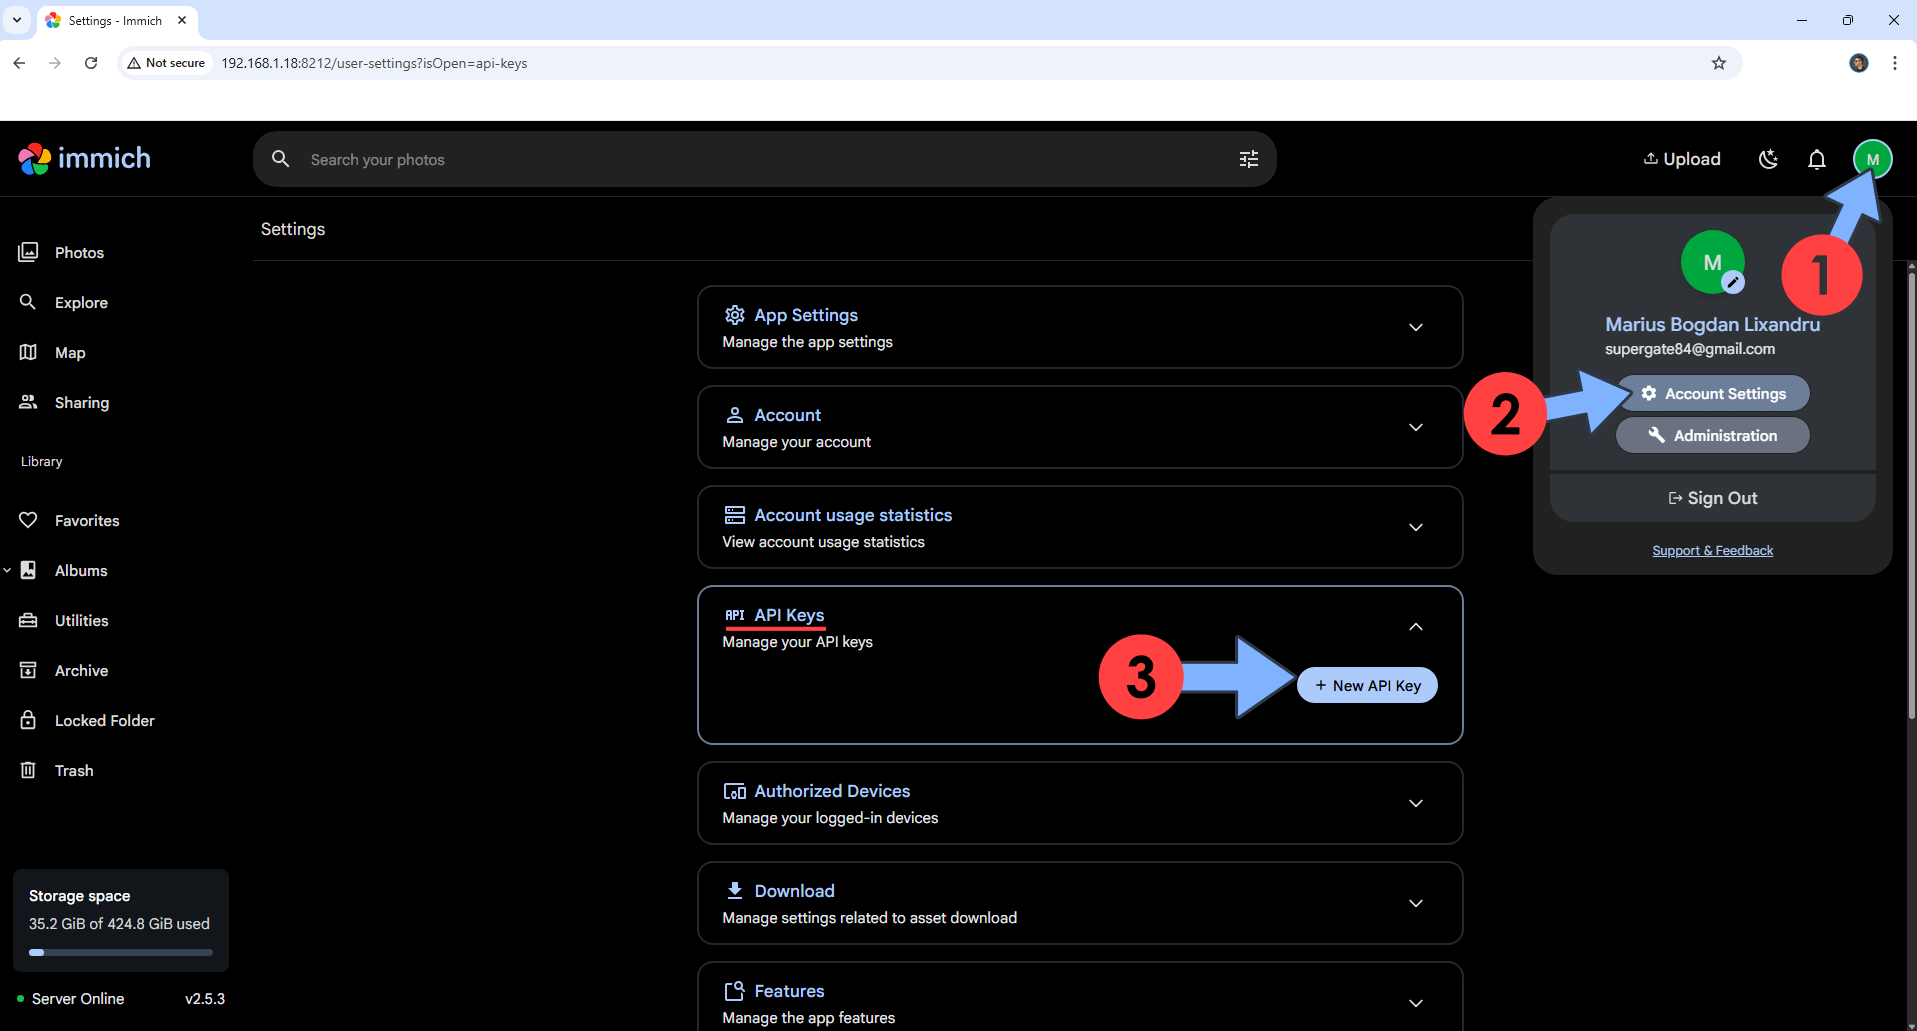
Open Immich. Click the user icon, then Account Settings. Find the API Keys. Click + New API Key. Follow the instructions in the image below.
STEP 4
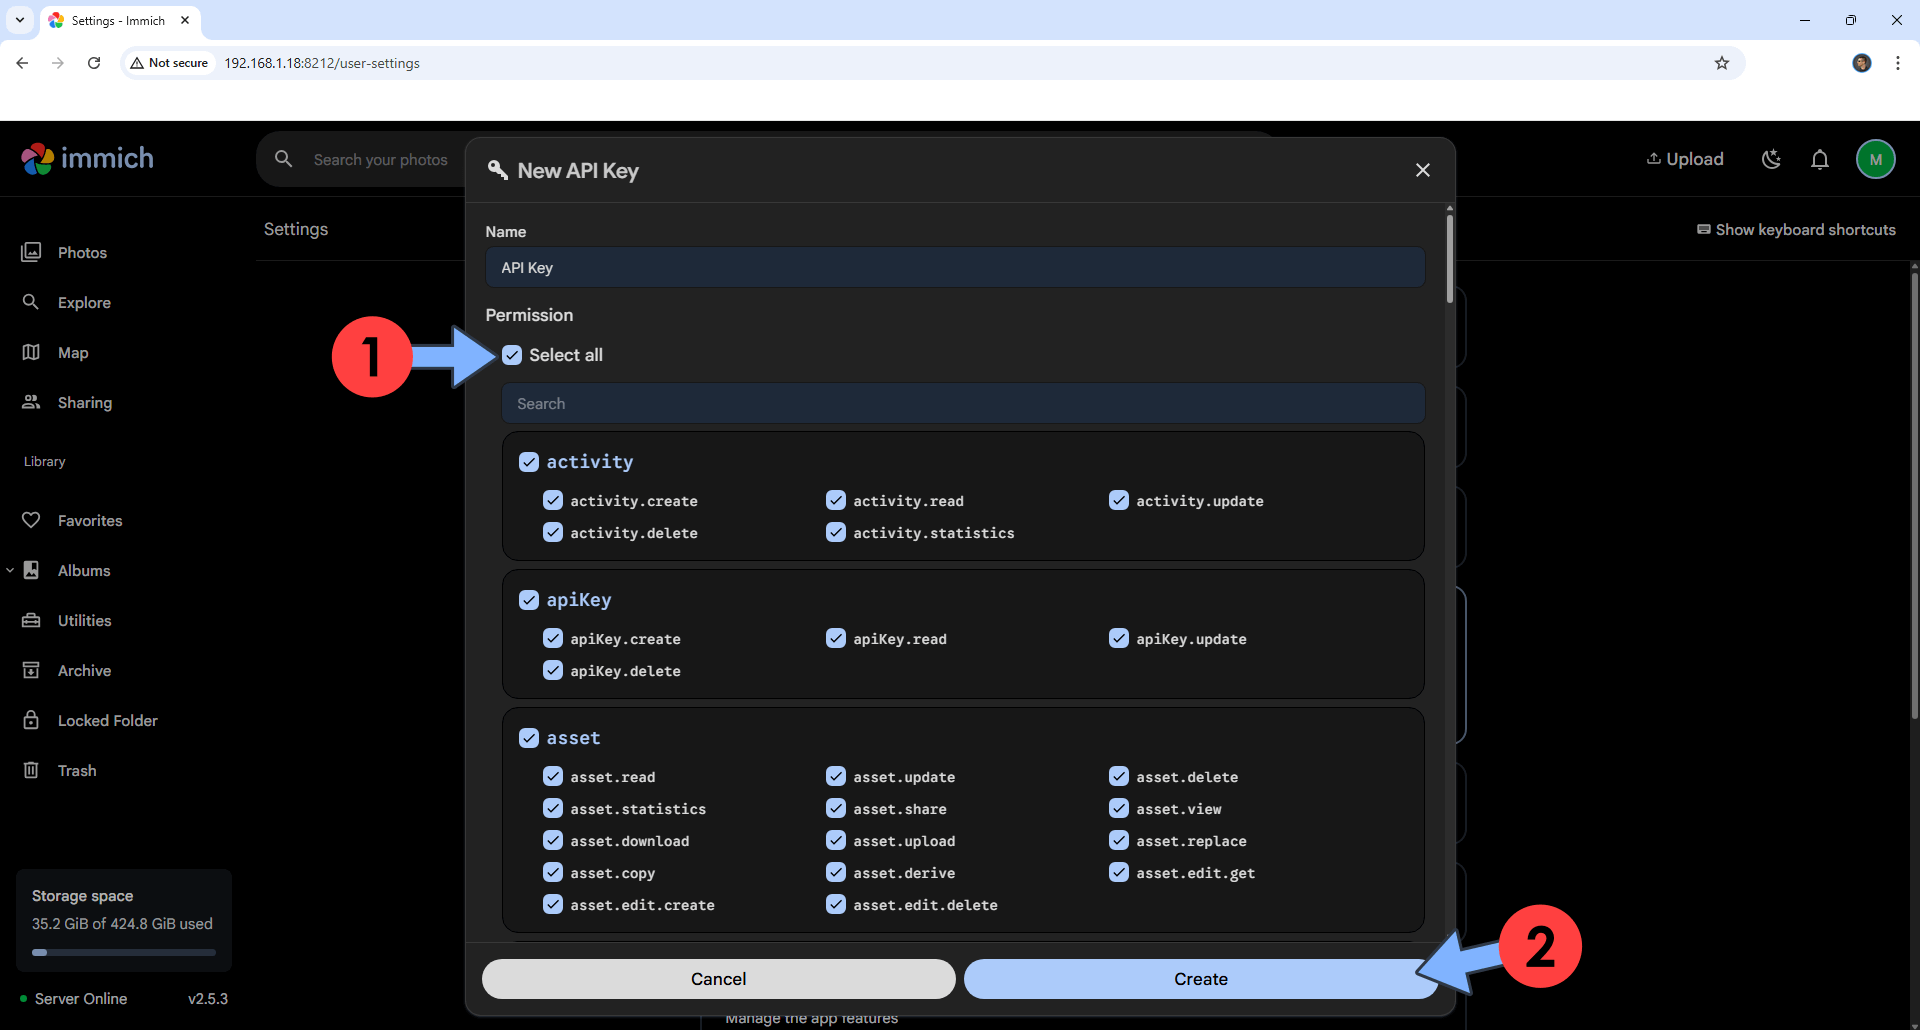
Select all the permissions. Click Create. Follow the instructions in the image below.
STEP 5
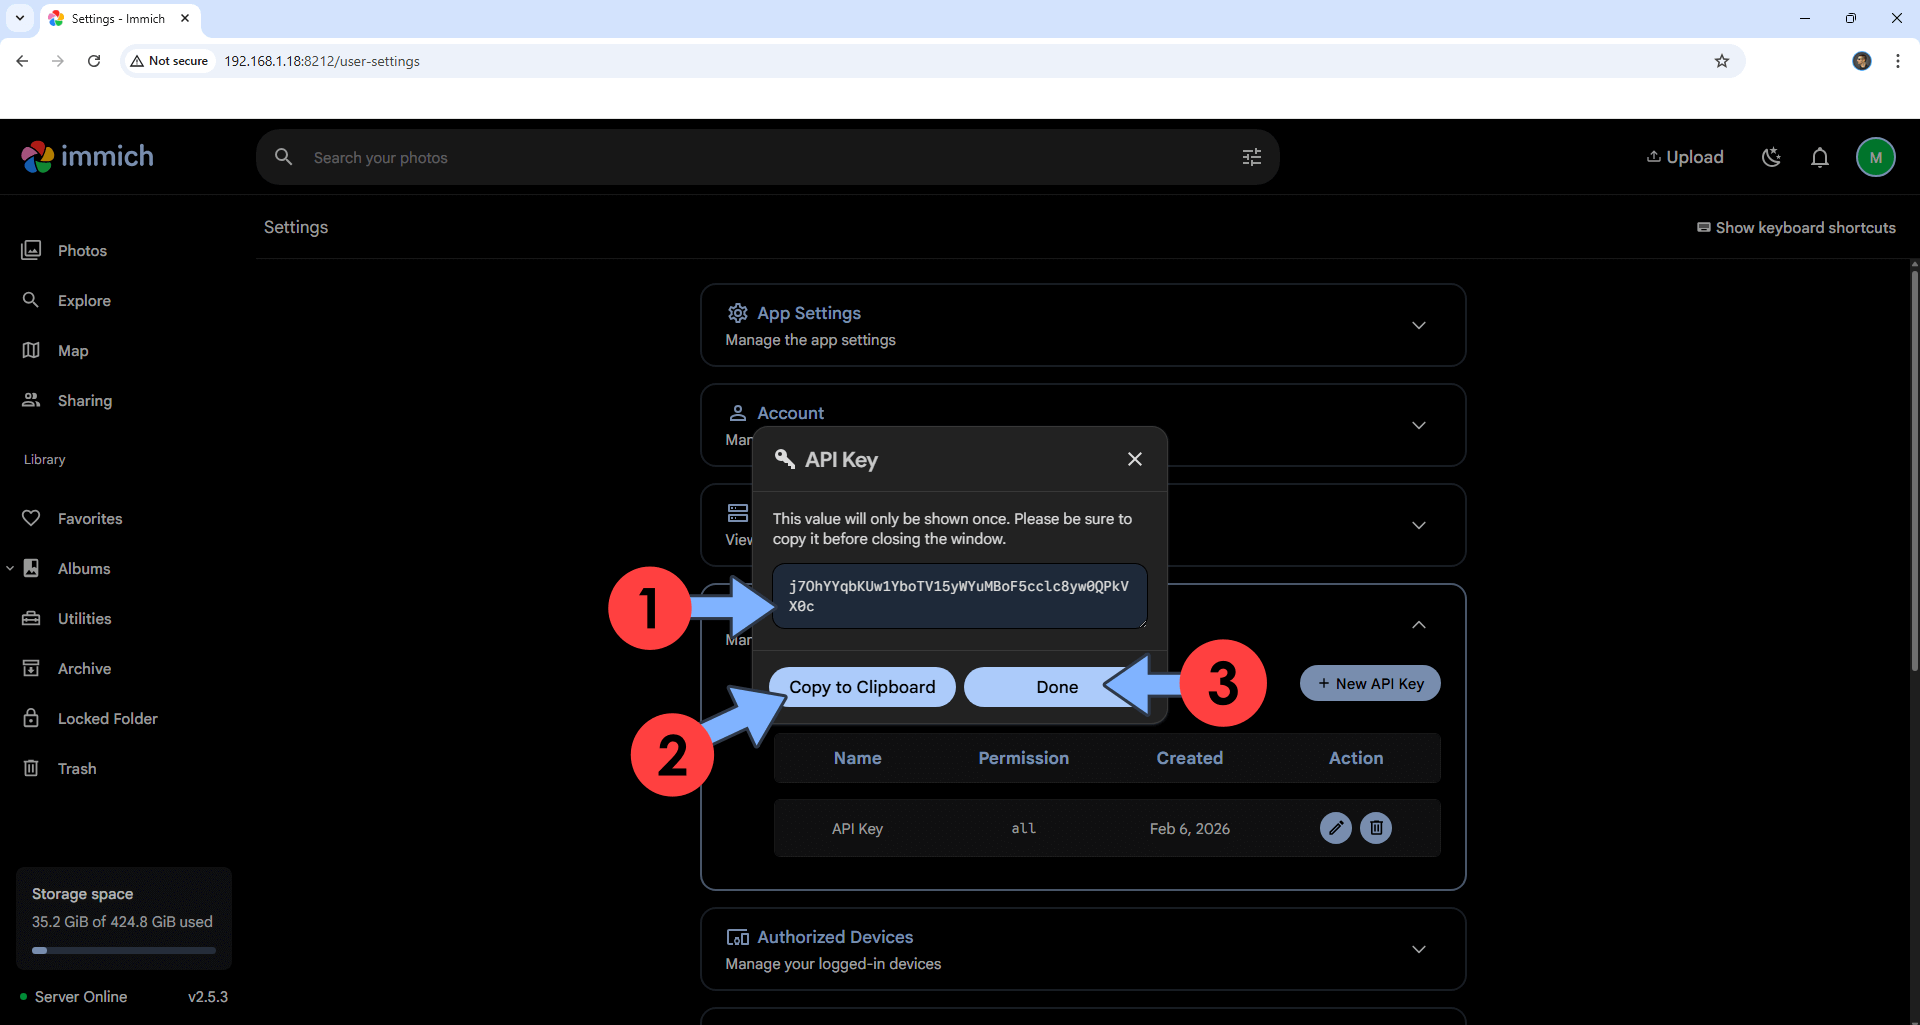
Write down the API KEY. Click Done. You will need this API KEY later at STEP 9. Follow the instructions in the image below.
STEP 6
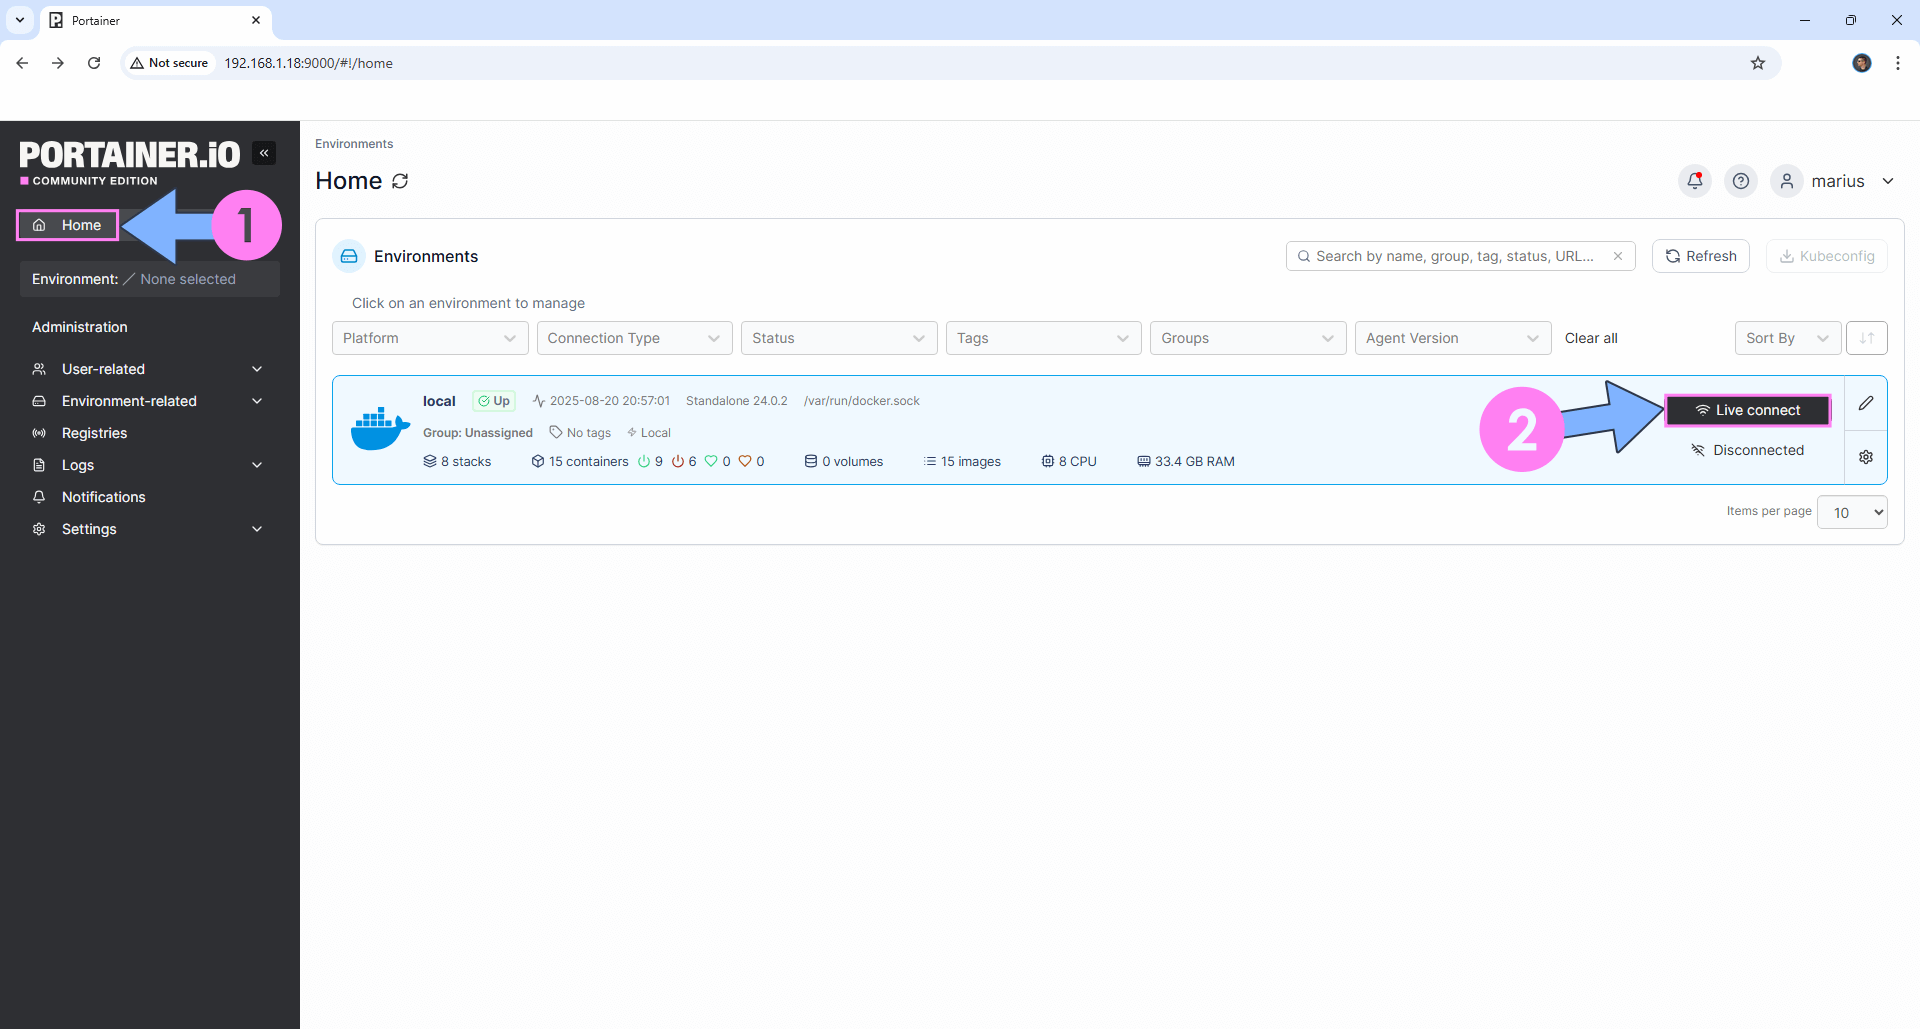
Log into Portainer using your username and password. On the left sidebar in Portainer, click on Home then Live connect. Follow the instructions in the image below.
STEP 7
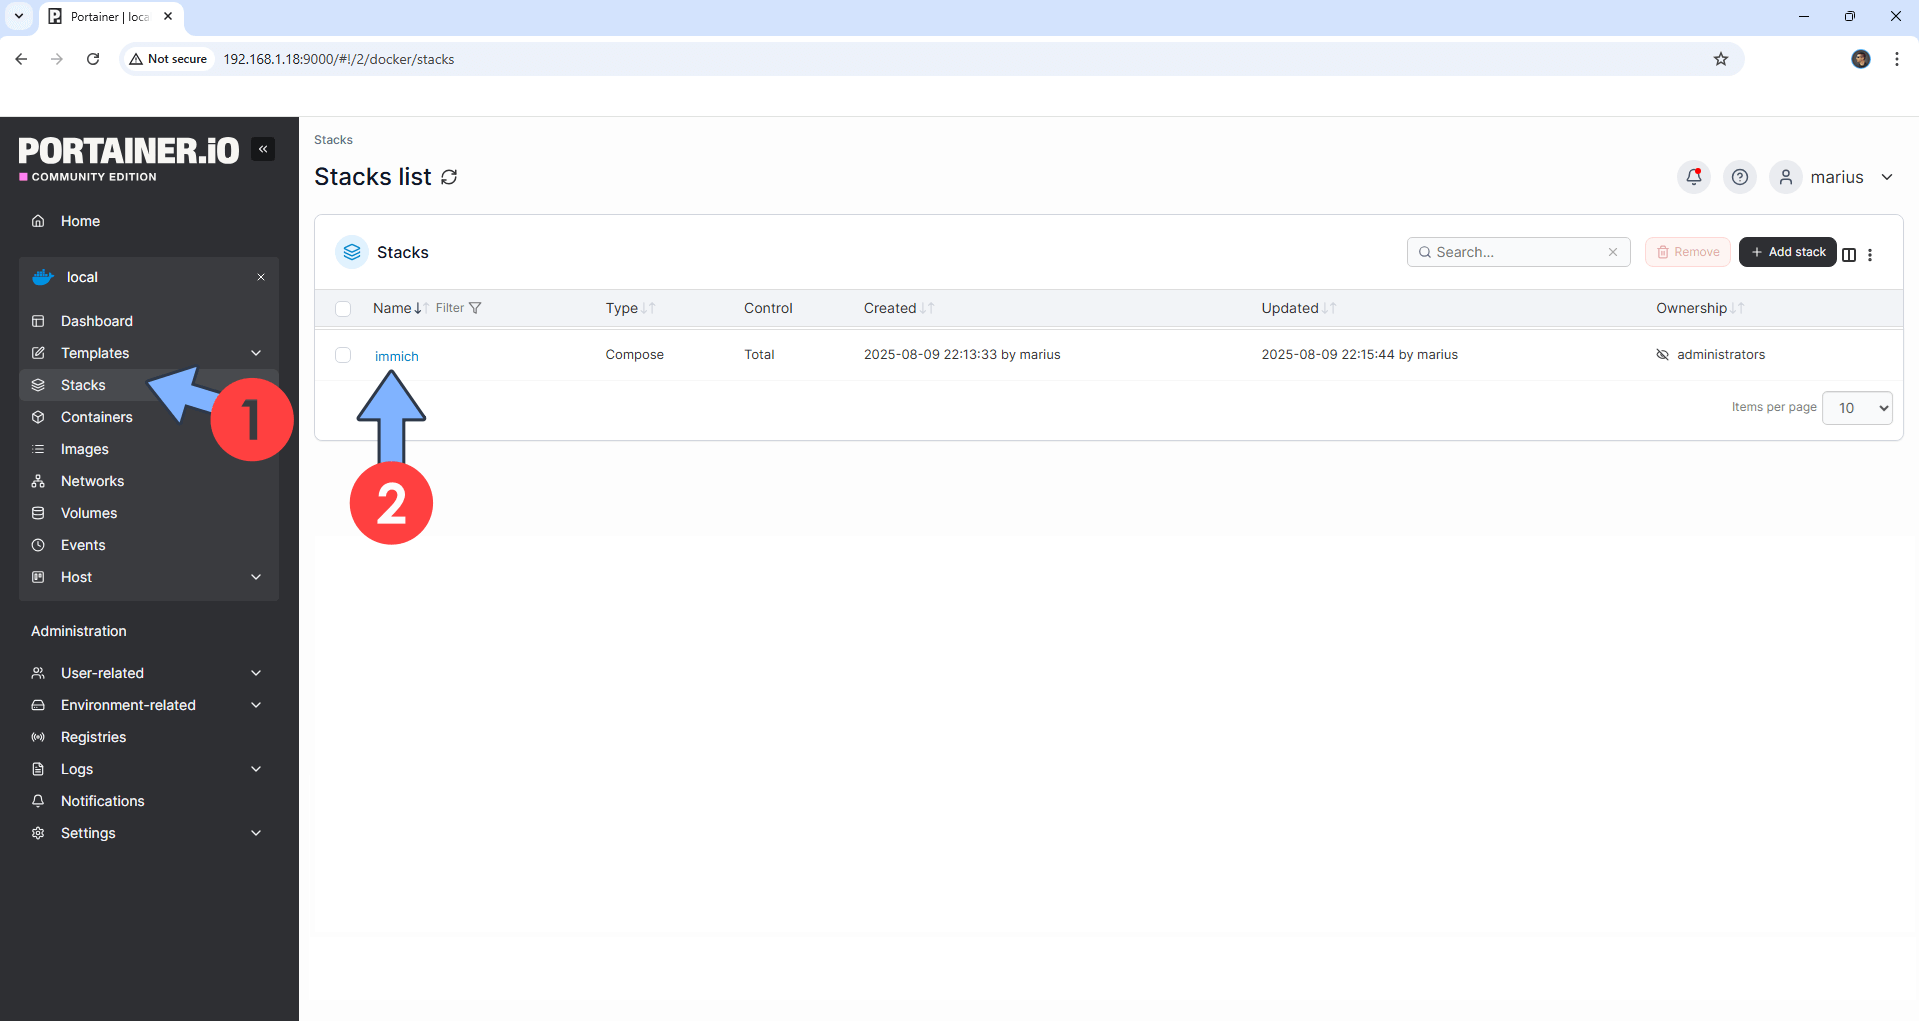
On the left sidebar, click Stacks. Click immich. Follow the instructions in the image below.
STEP 8
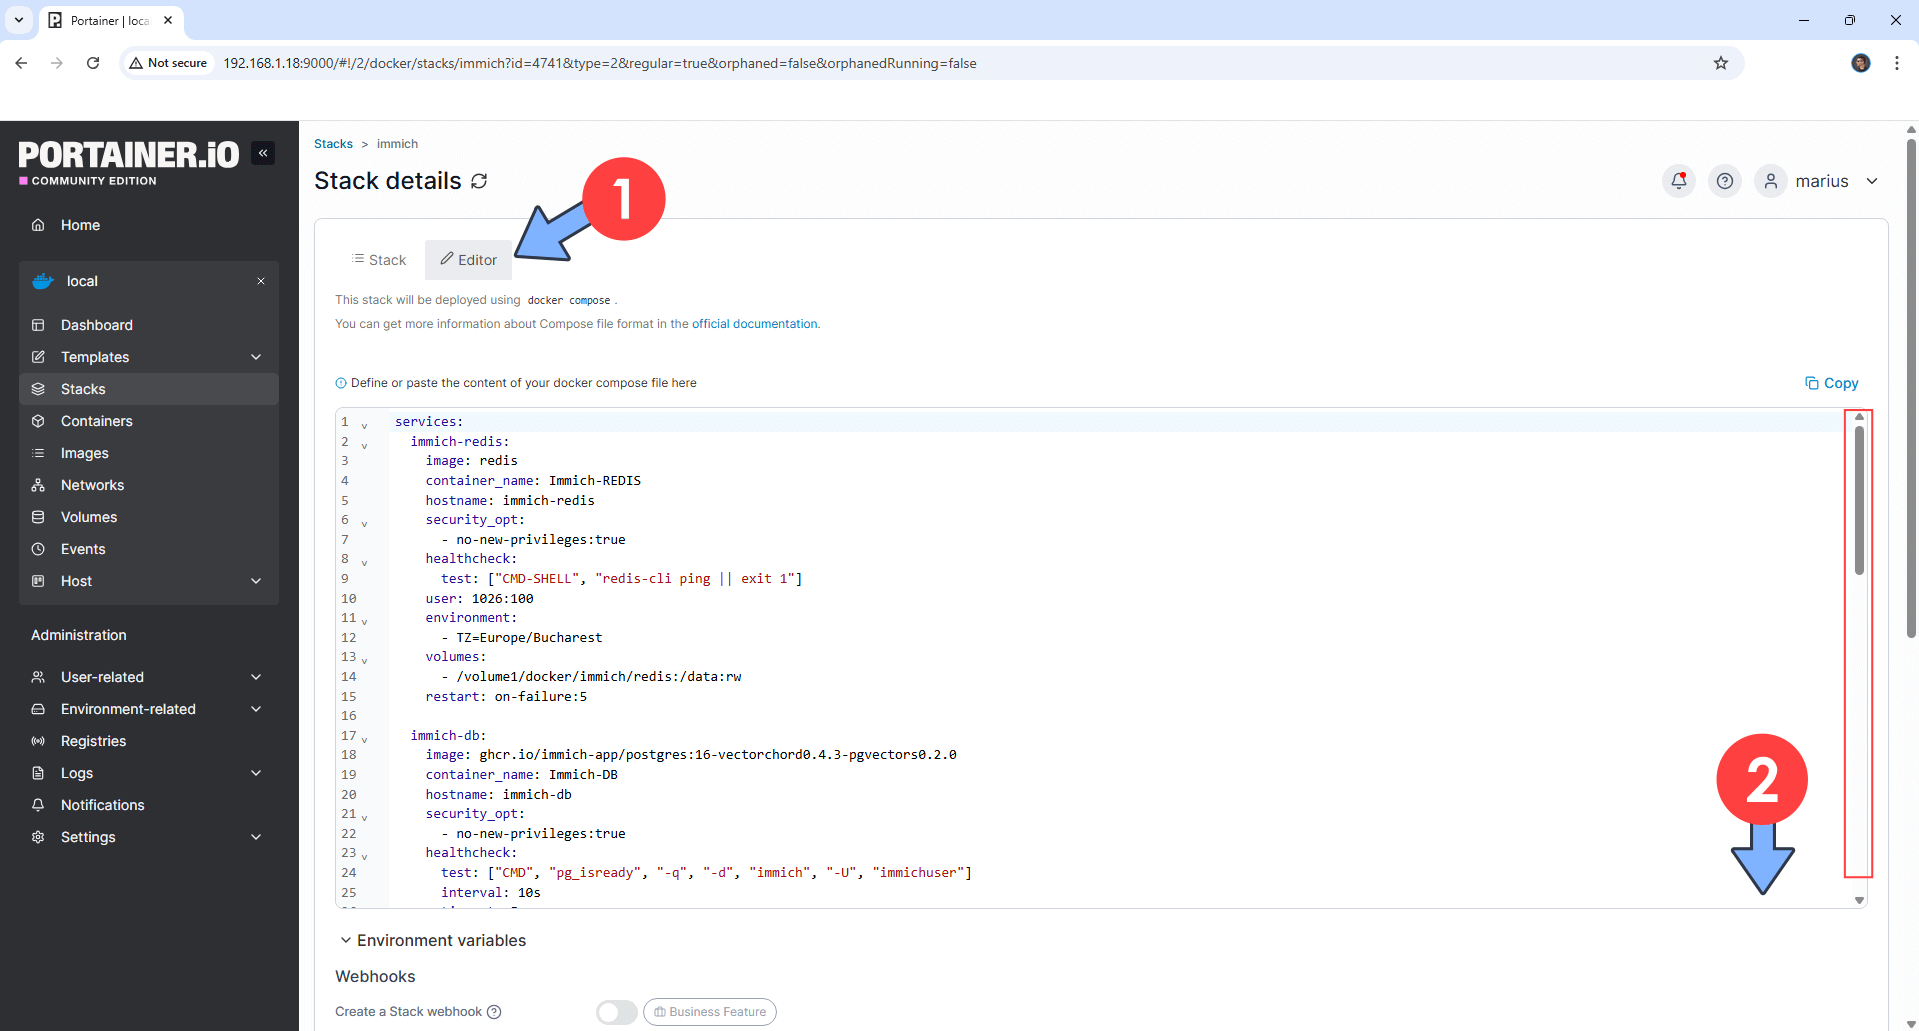
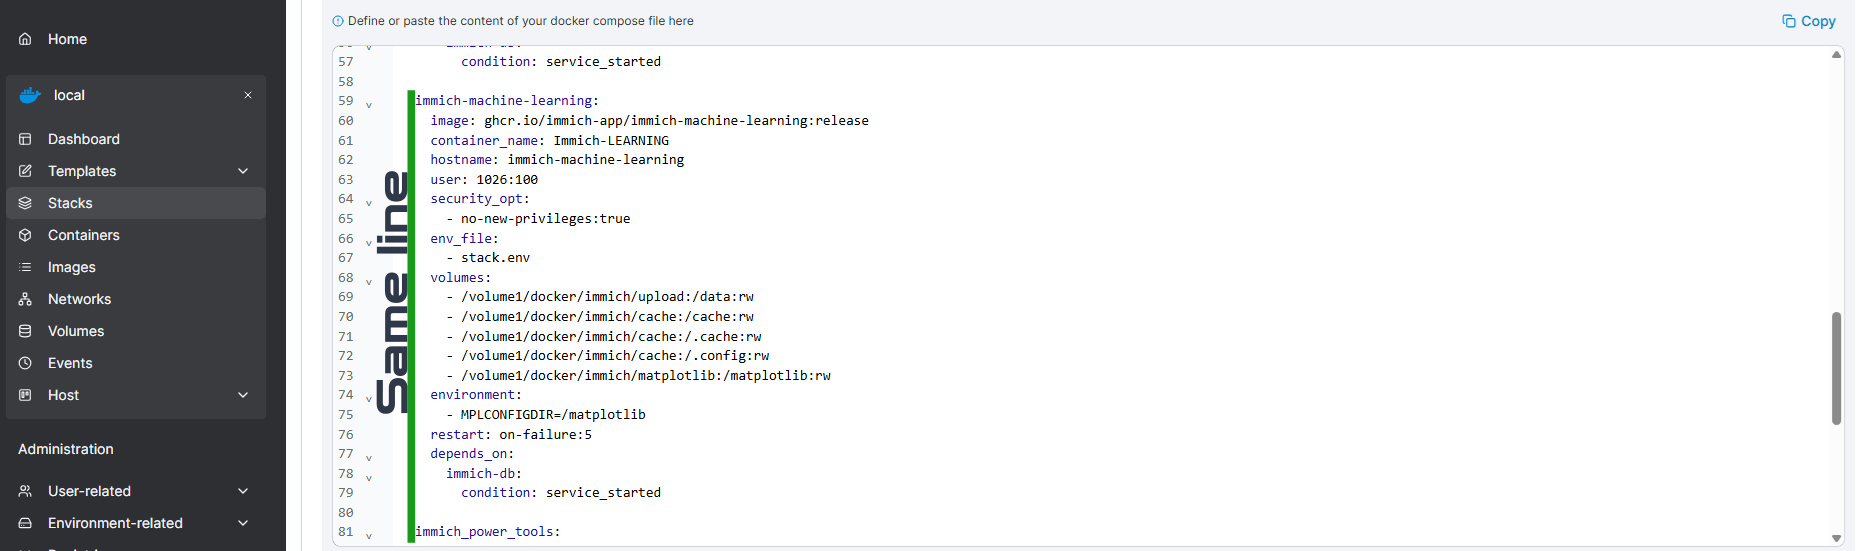
Click the Editor tab. Scroll down to the bottom of the immich compose stack. Follow the instructions in the image below.
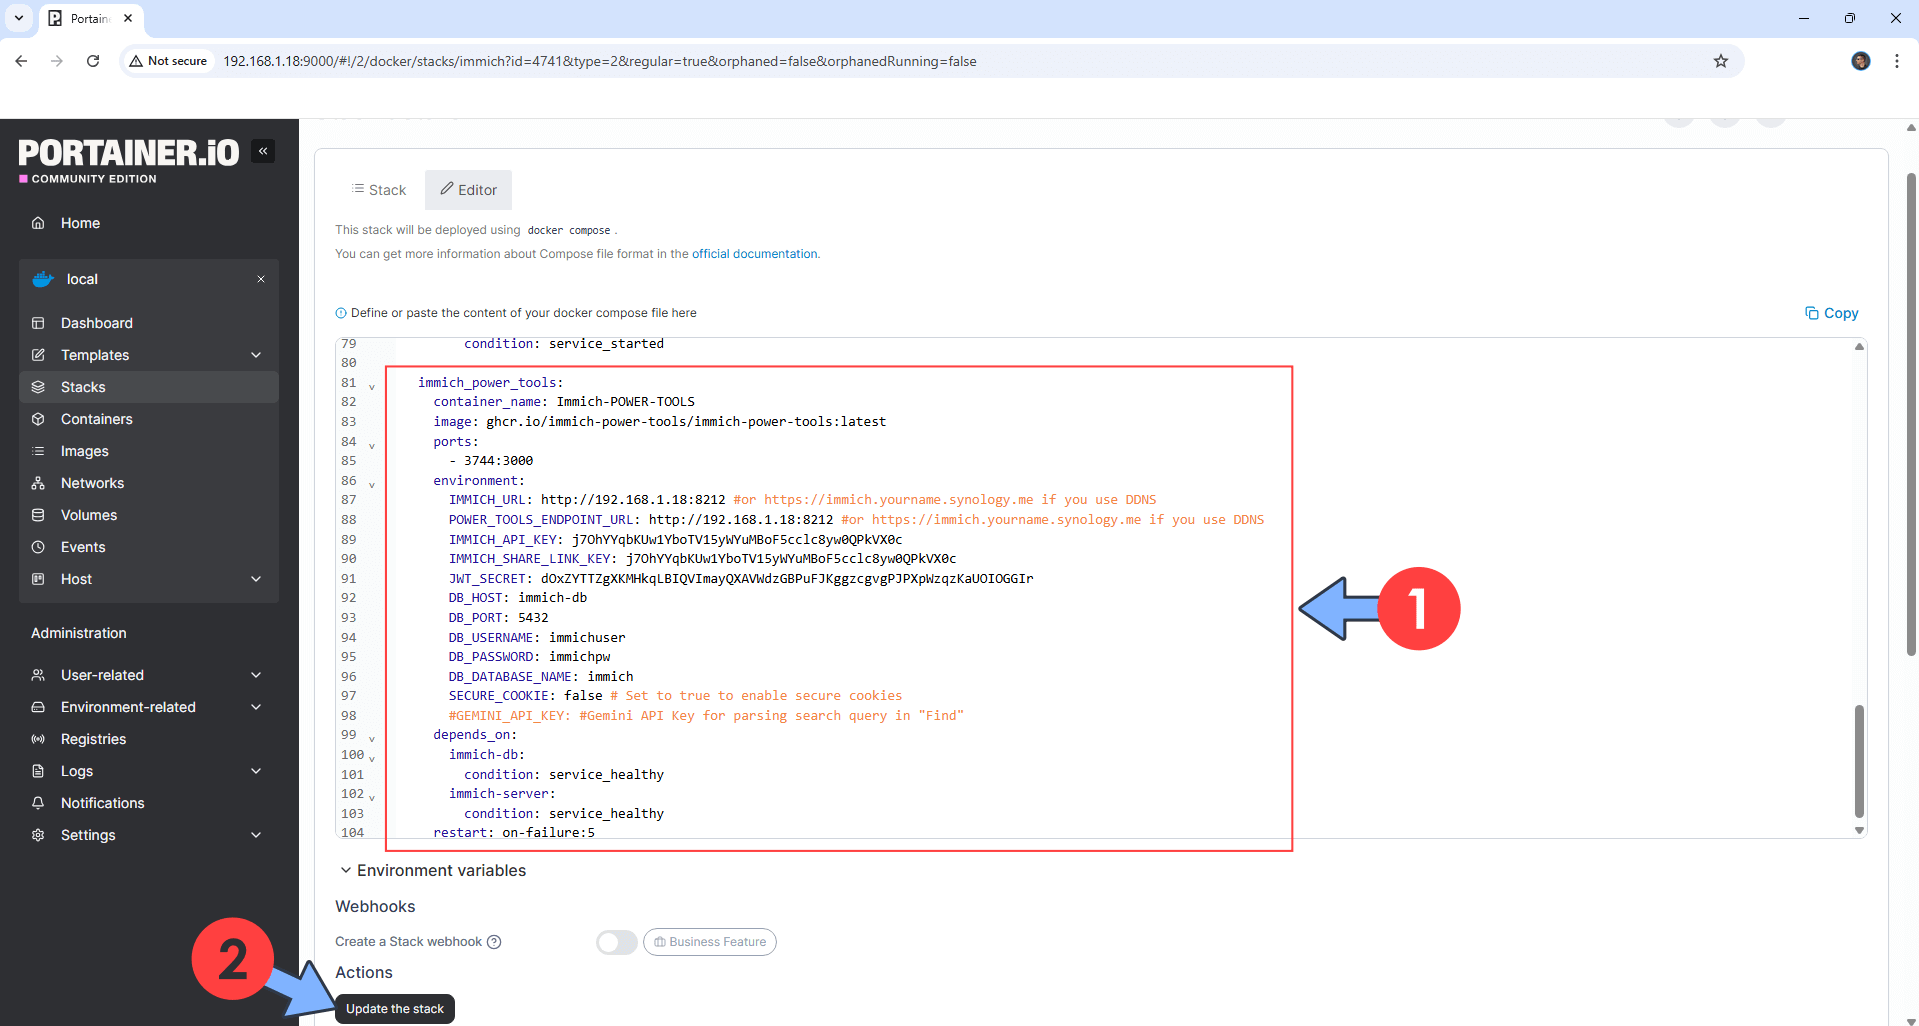
STEP 9
immich_power_tools:
    container_name: Immich-POWER-TOOLS
    image: ghcr.io/immich-power-tools/immich-power-tools:latest
    ports:
      - 3744:3000
    environment:
      IMMICH_URL: http://192.168.1.18:8212 #or https://immich.yourname.synology.me if you use DDNS
      POWER_TOOLS_ENDPOINT_URL: http://192.168.1.18:8212 #or https://immich.yourname.synology.me if you use DDNS
      IMMICH_API_KEY: j7OhYYqbKUw1YboTV15yWYuMBoF5cclc8yw0QPkVX0c
      IMMICH_SHARE_LINK_KEY: j7OhYYqbKUw1YboTV15yWYuMBoF5cclc8yw0QPkVX0c
      JWT_SECRET: dOxZYTTZgXKMHkqLBIQVImayQXAVWdzGBPuFJKggzcgvgPJPXpWzqzKaUOIOGGIr
      DB_HOST: immich-db
      DB_PORT: 5432
      DB_USERNAME: immichuser
      DB_PASSWORD: immichpw
      DB_DATABASE_NAME: immich
      SECURE_COOKIE: false # Set to true to enable secure cookies
      #GEMINI_API_KEY: #Gemini API Key for parsing search query in "Find"
    depends_on:
      immich-db:
        condition: service_healthy
      immich-server:
        condition: service_healthy
    restart: on-failure:5
Note: Before you paste the code above in the Web editor area below, change the value for IMMICH_URL. Type in your own NAS local IP with http:// at the beginning and :8212 at the end. 192.168.1.18 is my own NAS local IP. You should add your own NAS local IP. Note: ⚠️This address is practically your immich local address on your NAS.
Note: Before you paste the code above in the Web editor area below, change the value for POWER_TOOLS_ENDPOINT_URL. Type in your own NAS local IP with http:// at the beginning and :8212 at the end. 192.168.1.18 is my own NAS local IP. You should add your own NAS local IP. Note: ⚠️This address is practically your immich local address on your NAS.
Note: Before you paste the code above in the Web editor area below, change the value for IMMICH_API_KEY and type in your own Immich API KEY that you have previously generated at STEP 5.
Note: Before you paste the code above in the Web editor area below, change the value for IMMICH_SHARE_LINK_KEY and type in your own Immich API KEY that you have previously generated at STEP 5.
Note: Before you paste the code above in the Web editor area below, change the value for JWT_SECRET. (Generate your own Random 64 length JWT_SECRET.)
STEP 10
Click Update. Follow the instructions in the image below.

⚠️Warning: if you get an error when trying to deploy immich power tools, check out if immich_power_tools: is on the same line as immich-machine learning:
STEP 11
Please Support My work by Making a Donation. Almost 99,9% of the people that install something using my guides forget to support my work, or just ignore STEP 1. I’ve been very honest about this aspect of my work since the beginning: I don’t run any ADS, I don’t require subscriptions, paid or otherwise, I don’t collect IPs, emails, and I don’t have any referral links from Amazon or other merchants. I also don’t have any POP-UPs or COOKIES. I have repeatedly been told over the years how much I have contributed to the community. It’s something I love doing and have been honest about my passion since the beginning. But I also Need The Community to Support me Back to be able to continue doing this work.
STEP 12
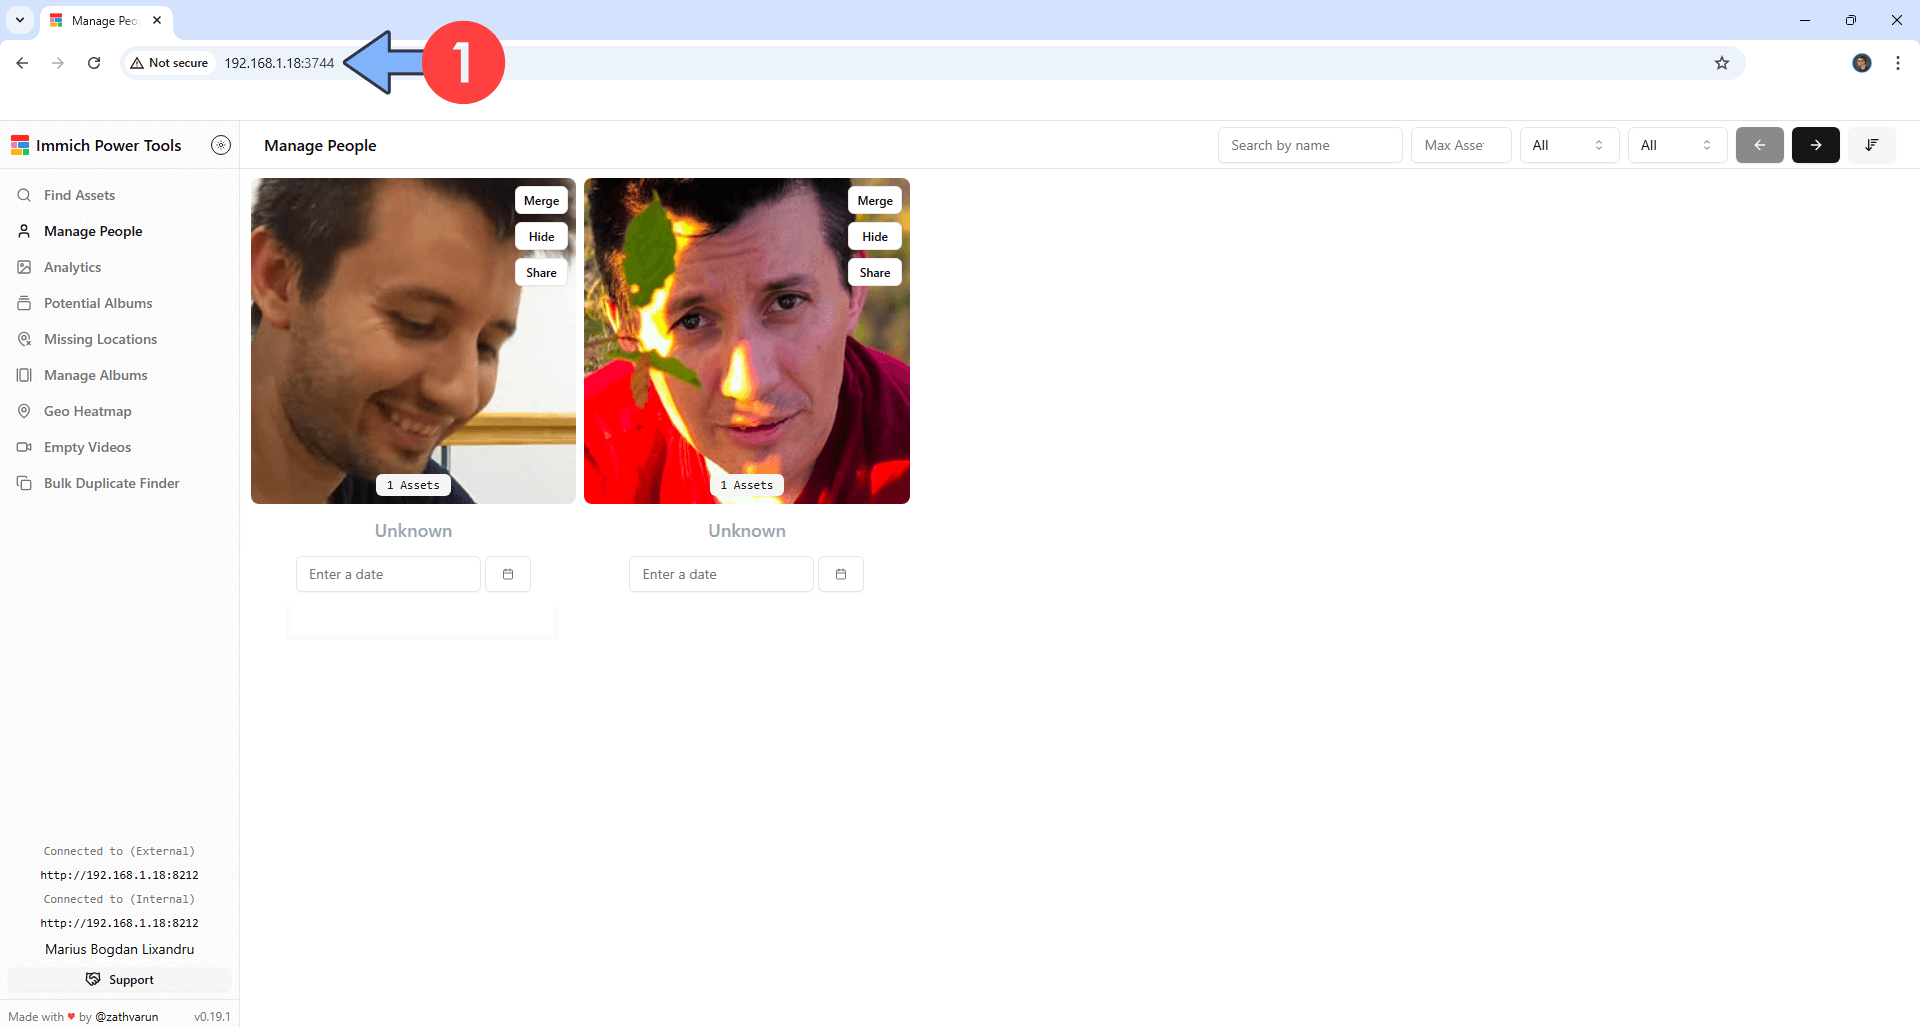
Please wait approximately 1 minute for the installation to be completed or you will get a blank page if you try to connect too soon. The installation process can take up to a few seconds/minutes. It will depend on your Internet speed connection. Now open your browser and type in http://Synology-ip-address:3744 Follow the instructions in the image below.
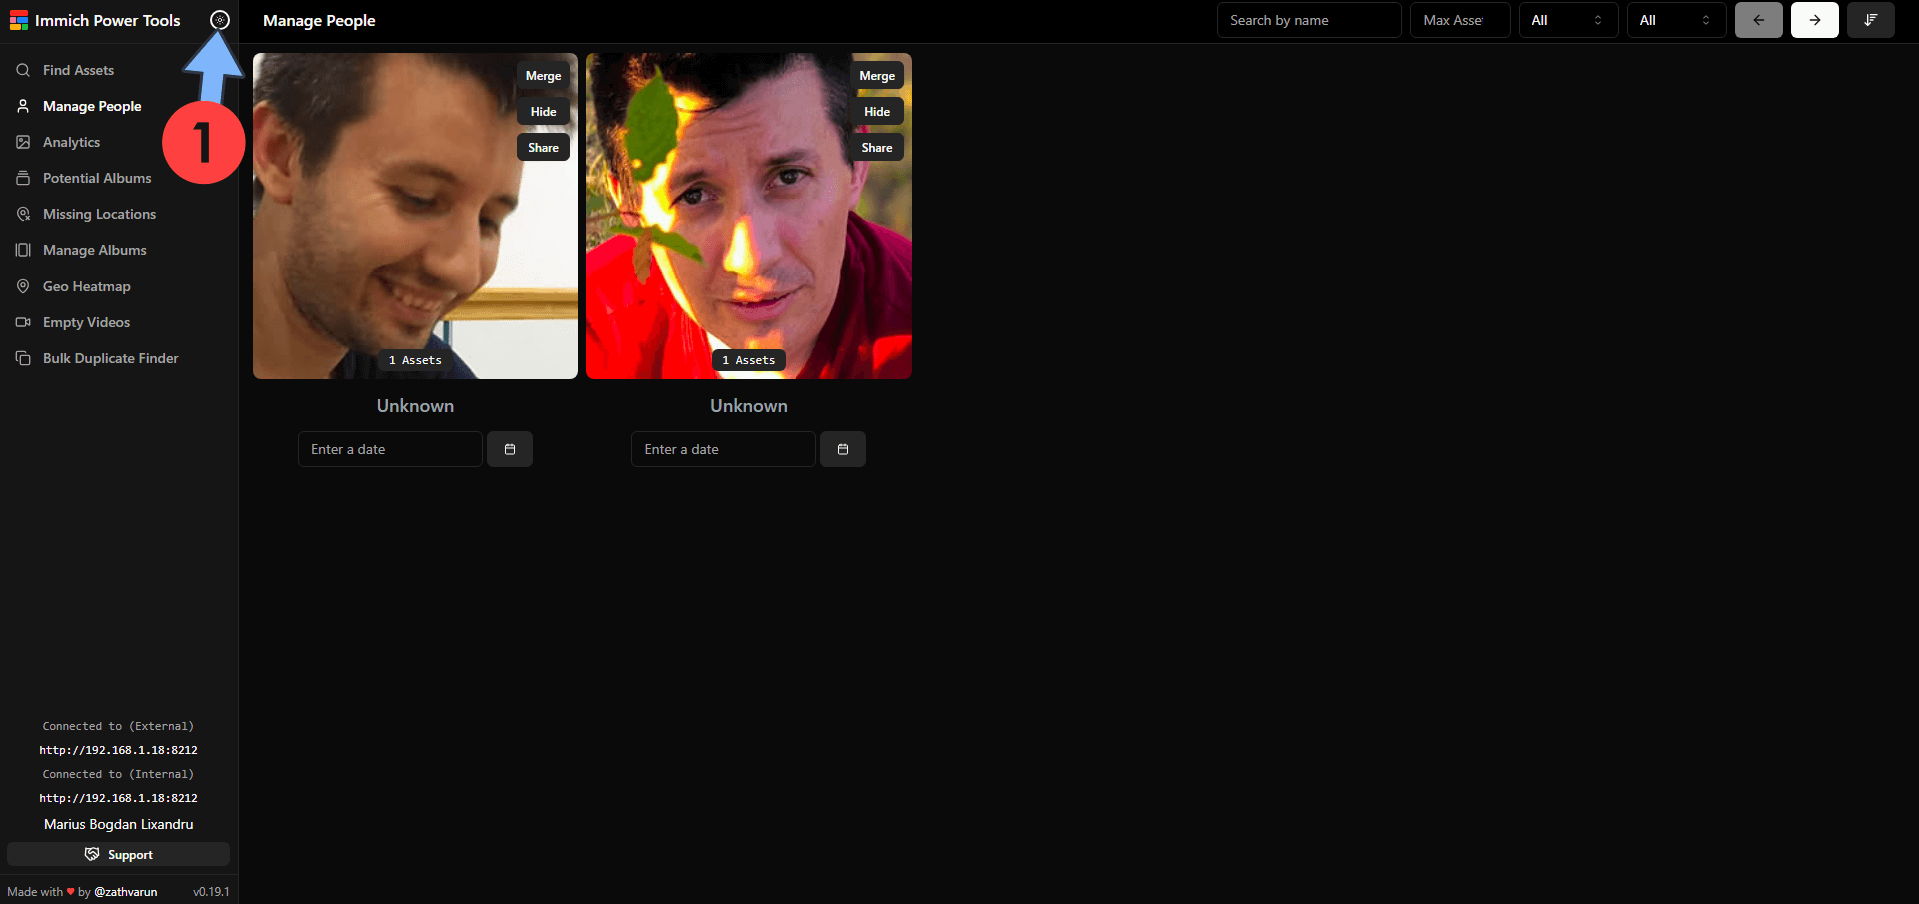
You can also switch the theme from Light to Dark. Follow the instructions in the image below.
Enjoy Immich Power Tools!
If you encounter issues by using this container, make sure to check out the Common Docker issues article.
Note: If you want to run the Immich Power Tools container over HTTPS, check How to Run Docker Containers Over HTTPS. In order to make Immich Power tools work via HTTPS, it’s mandatory to activate WebSocket.
Note: Can I run Docker on my Synology NAS? See the supported models.
Note: How to Back Up Docker Containers on your Synology NAS.
Note: Find out how to update the Immich Power Tools container with the latest image.
Note: How to Free Disk Space on Your NAS if You Run Docker.
Note: How to Schedule Start & Stop For Docker Containers.
Note: How to Activate Email Notifications.
Note: How to Add Access Control Profile on Your NAS.
Note: How to Change Docker Containers Restart Policy.
Note: How to Use Docker Containers With VPN.
Note: Convert Docker Run Into Docker Compose.
Note: How to Clean Docker.
Note: How to Clean Docker Automatically.
Note: Best Practices When Using Docker and DDNS.
Note: Some Docker Containers Need WebSocket.
Note: Find out the Best NAS Models For Docker.
Note: Activate Gmail SMTP For Docker Containers.
This post was updated on Friday / April 10th, 2026 at 7:55 AM