Finding Calm in the Chaos. In the relentless hustle of modern life, where every tick of the clock feels like a push to achieve more and move faster, stress wraps around you like a tightrope you can’t escape. The constant pressure to keep up and outdo yesterday’s self can turn each day into a high-stakes game of survival. But here’s your chance to pause the whirlwind. Take a deliberate step back, hit the pause button on your endless to-do list, and just breathe. Let your breath cut through the noise, gently pushing away the weight of your worries. Inhale calm and exhale the chaos, finding a brief, serene space where it’s okay to simply be. Enjoy Calmness, a breathing exercises tool from Maze, the author of Moodist. In this step by step guide I will show you how to install Calmness on your Synology NAS using Docker & Portainer.
STEP 1
Please Support My work by Making a Donation.
STEP 2
Install Portainer using my step by step guide. If you already have Portainer installed on your Synology NAS, skip this STEP. Attention: Make sure you have installed the latest Portainer version.
STEP 3
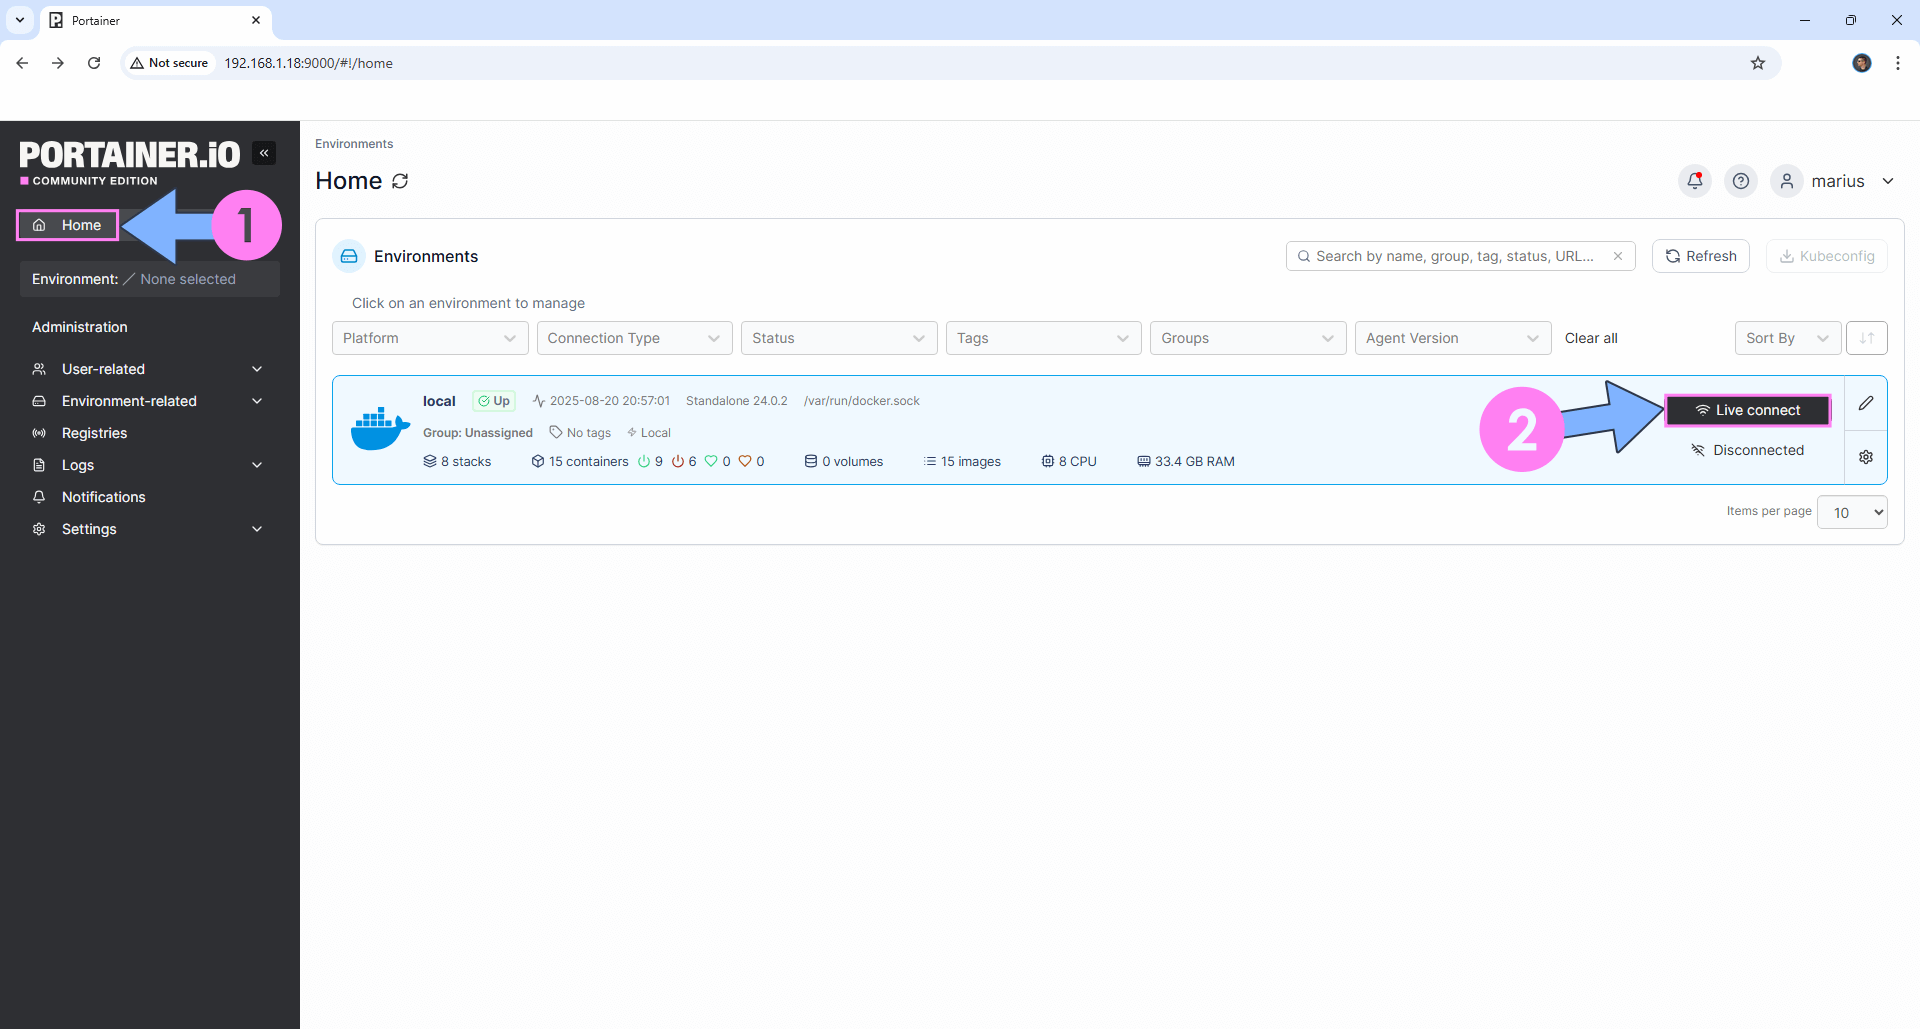
Log into Portainer using your username and password. On the left sidebar in Portainer, click on Home then Live connect. Follow the instructions in the image below.
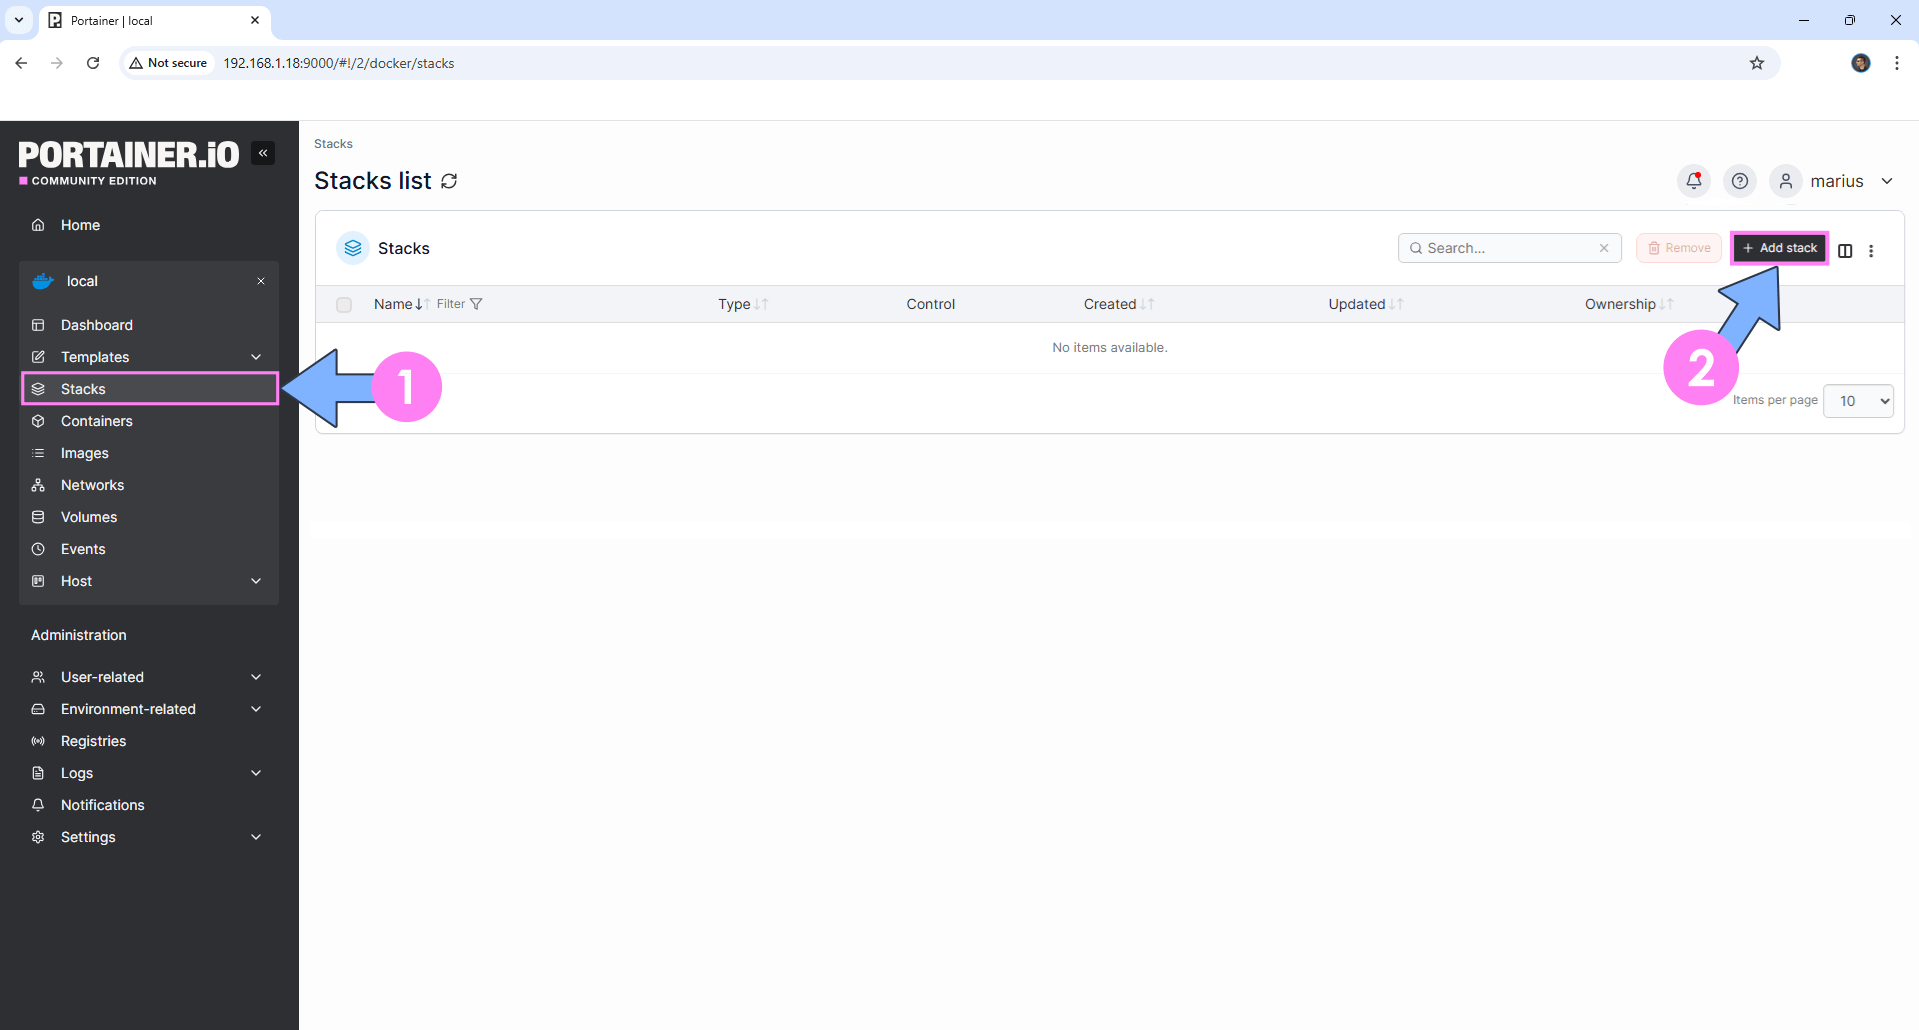
On the left sidebar in Portainer, click on Stacks then + Add stack. Follow the instructions in the image below.
STEP 4
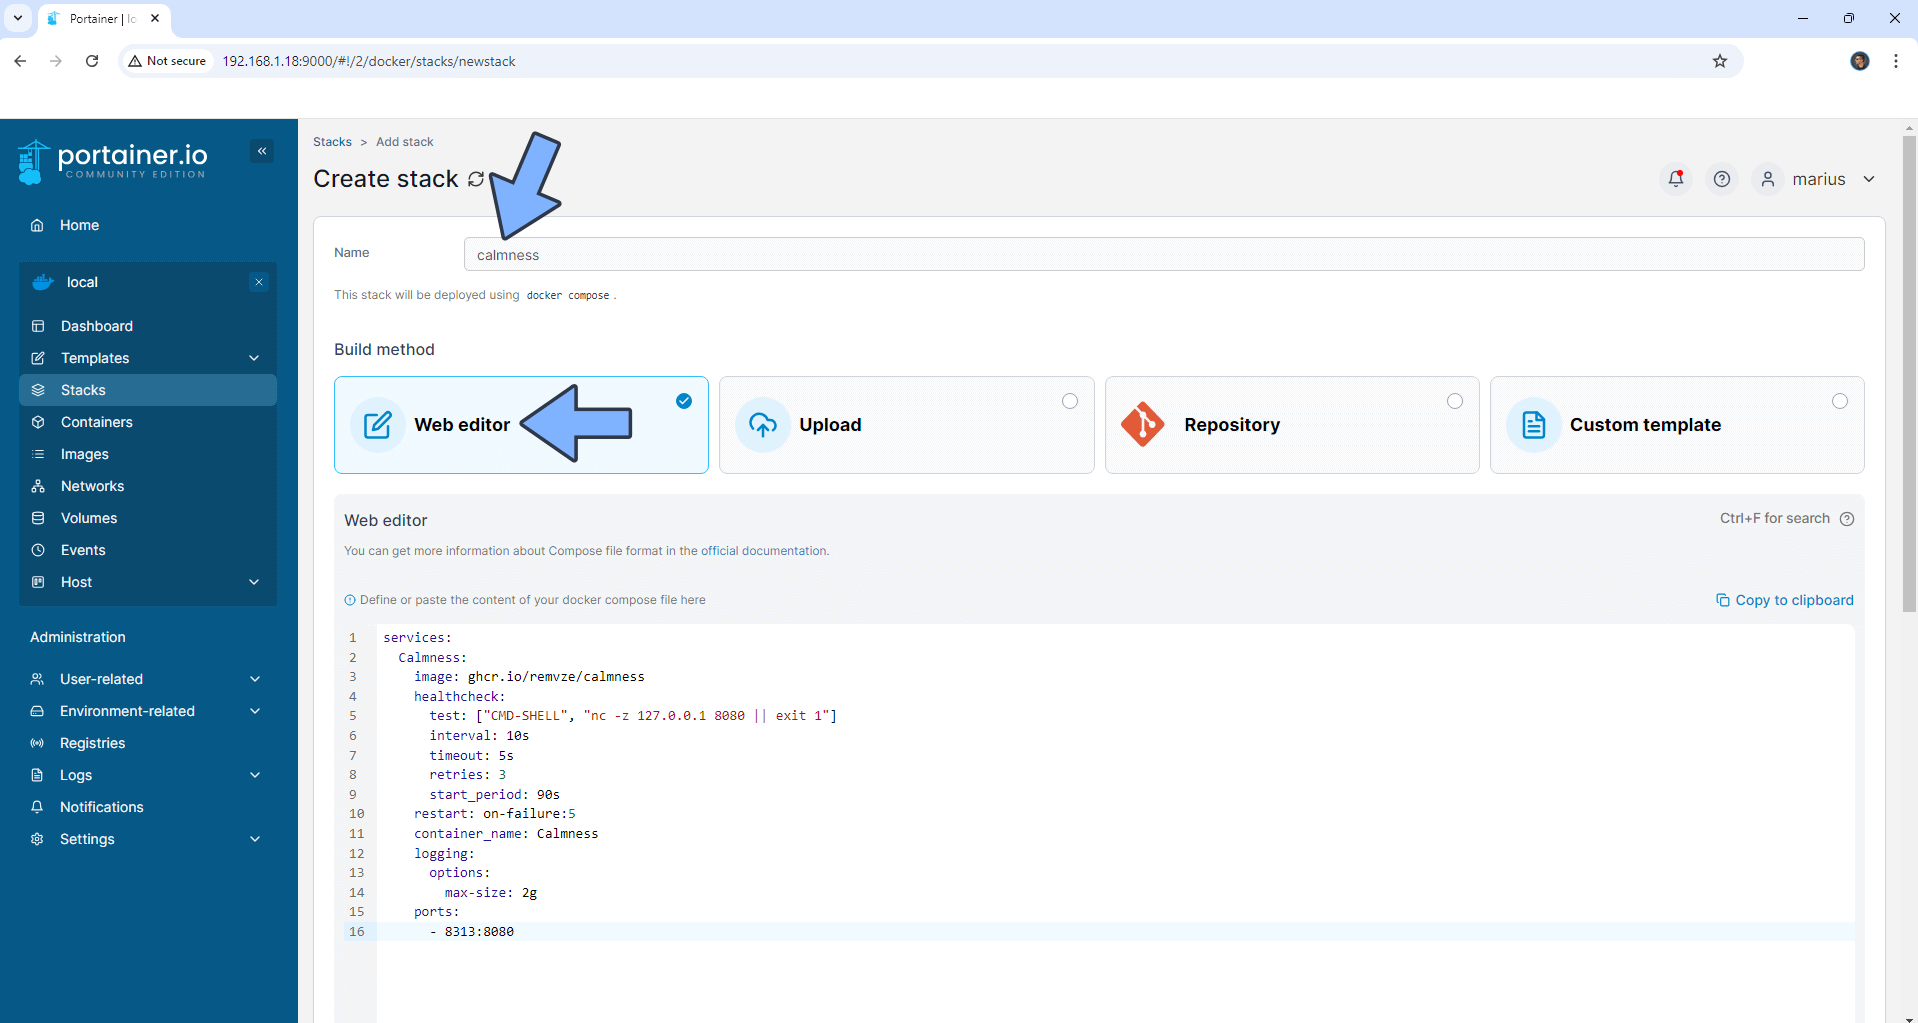
In the Name field type in calmness. Follow the instructions in the image below.
services:
  Calmness:
    image: ghcr.io/remvze/calmness
    healthcheck:
      test: ["CMD-SHELL", "nc -z 127.0.0.1 8080 || exit 1"]
      interval: 10s
      timeout: 5s
      retries: 3
      start_period: 90s
    restart: on-failure:5
    container_name: Calmness
    logging:
      options:
        max-size: 2g
    ports:
      - 8313:8080
STEP 5
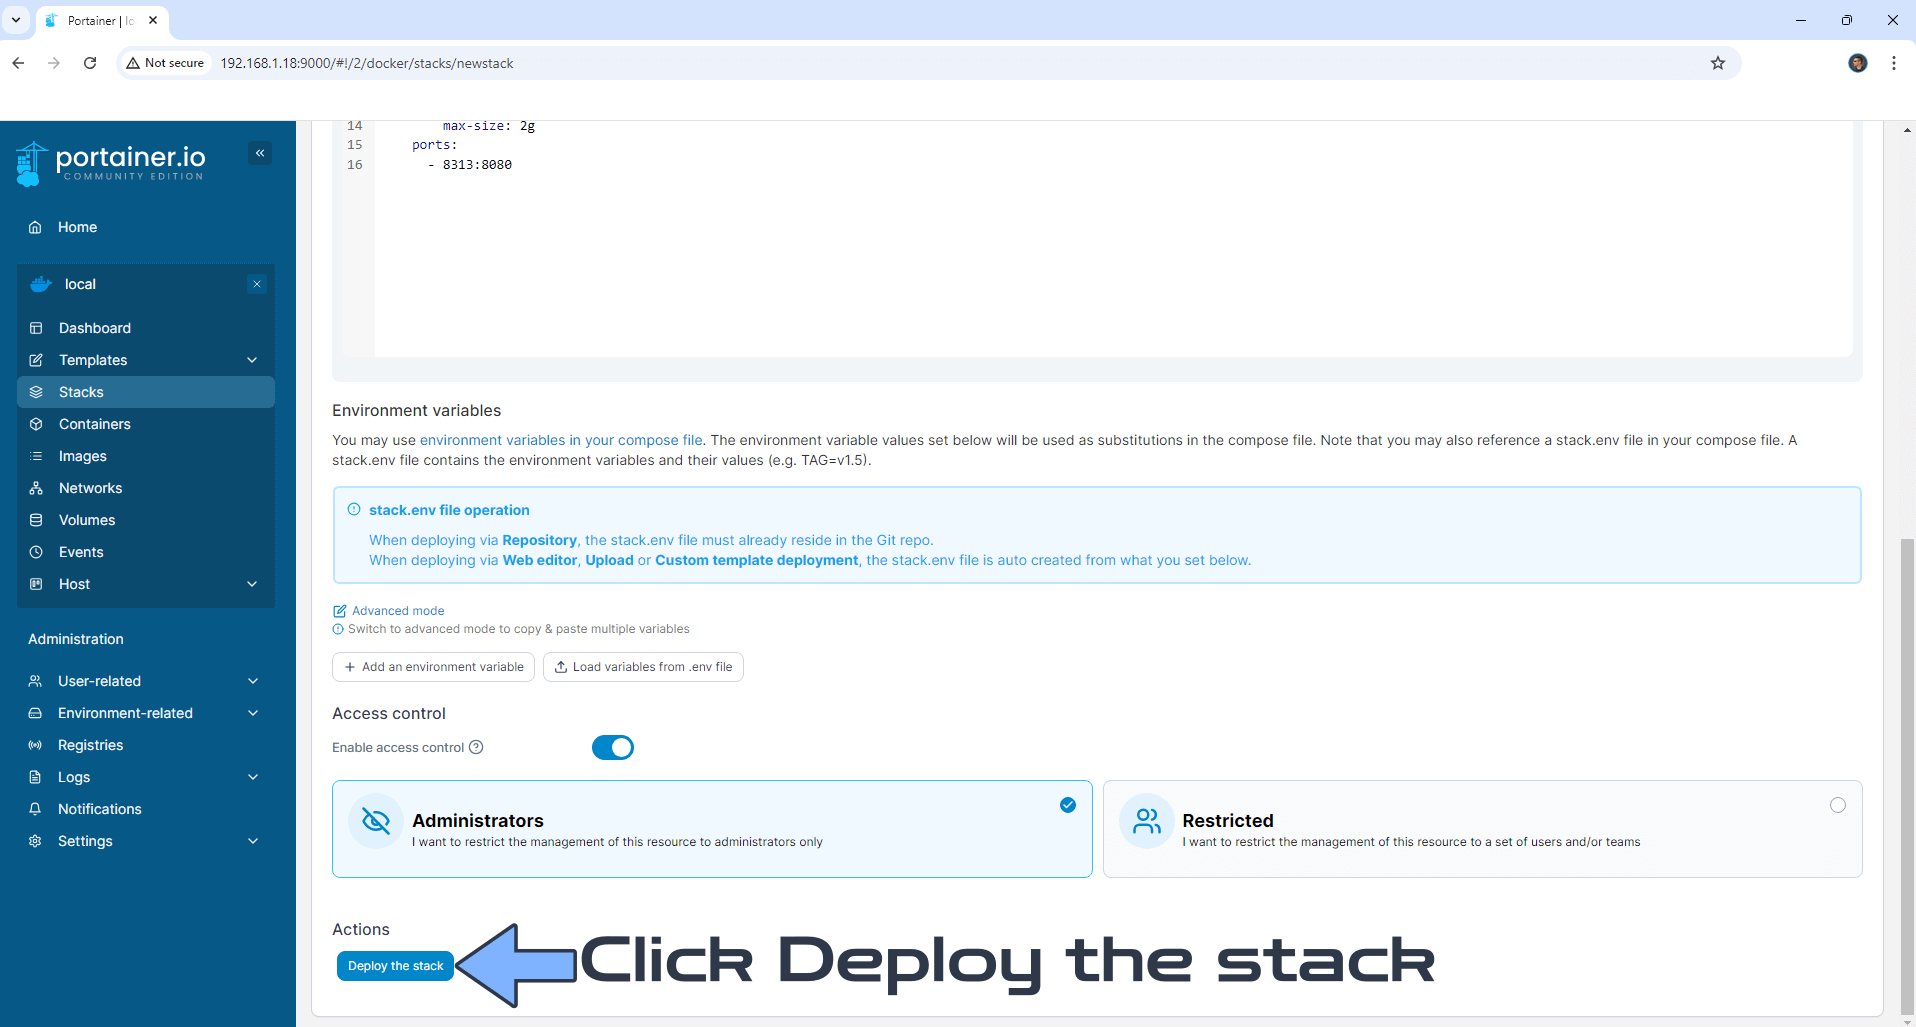
Scroll down on the page until you see a button called Deploy the stack. Click on it. Follow the instructions in the image below. The installation process can take up to a few minutes. It will depend on your Internet speed connection.
STEP 6
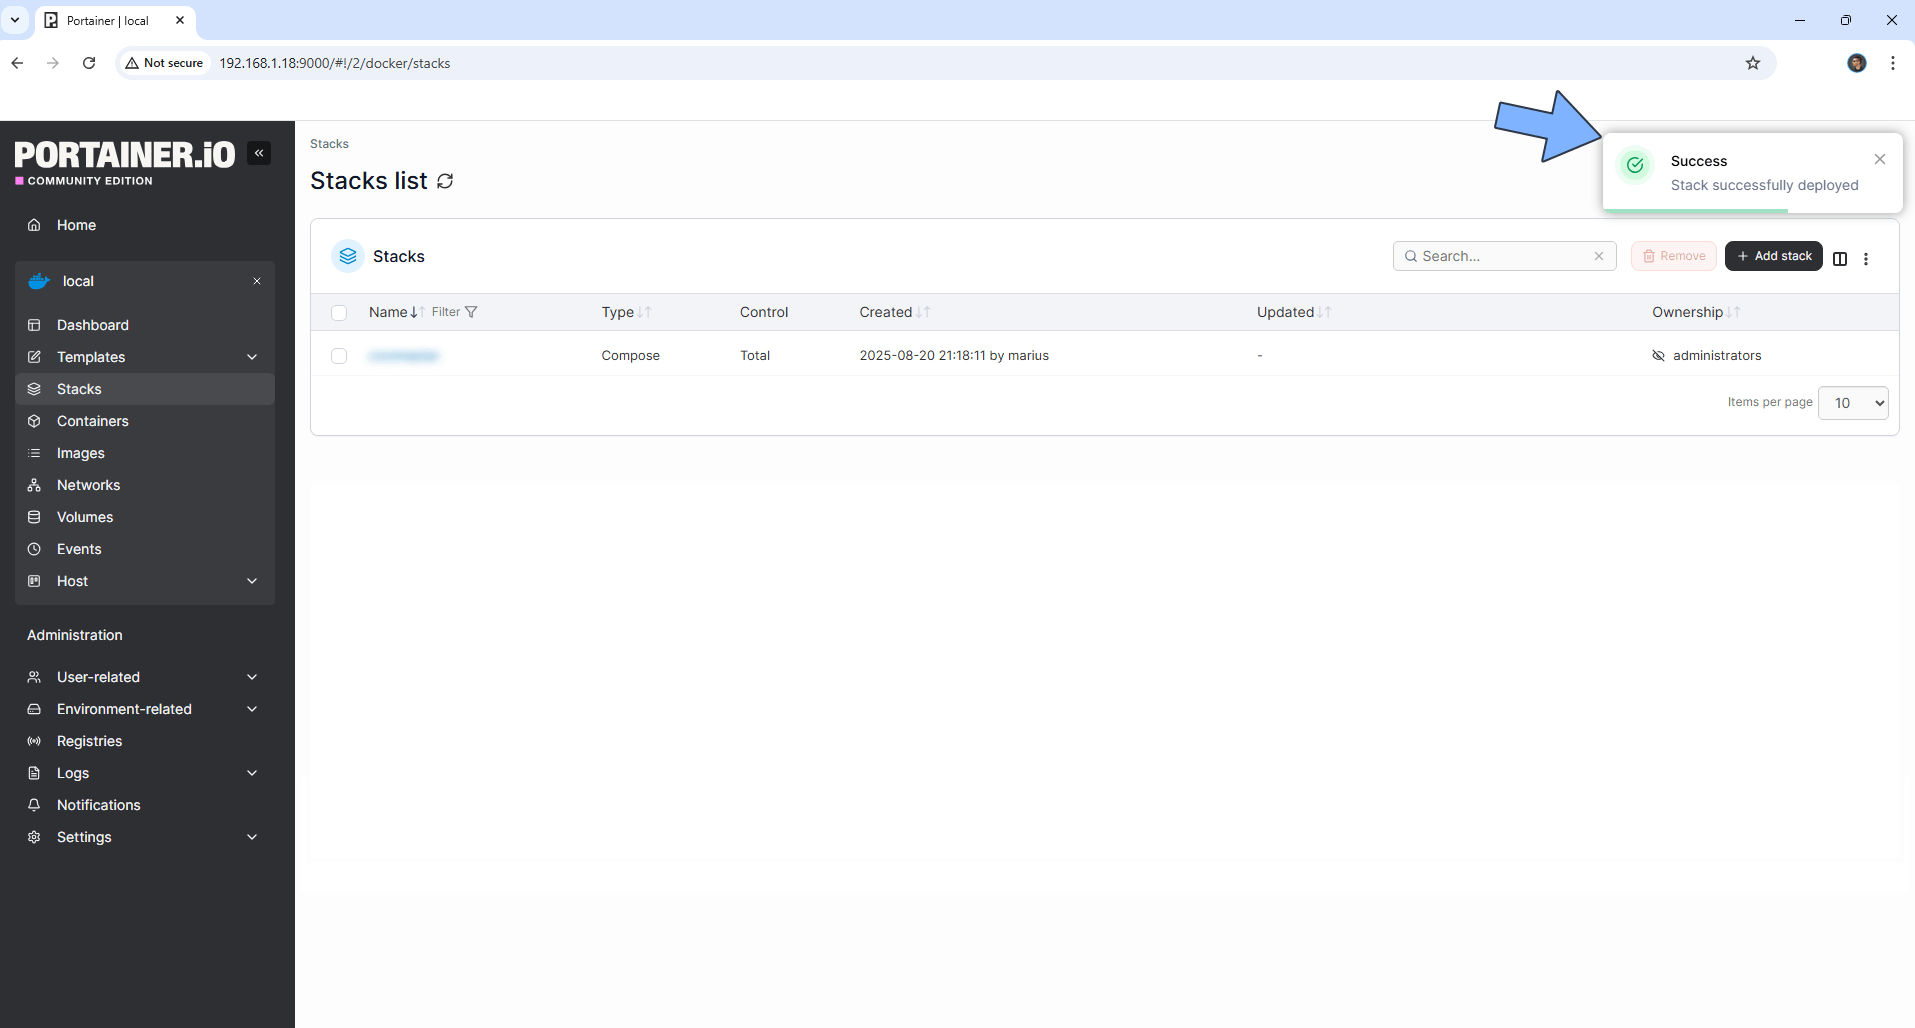
If everything goes right, you will see this message at the top right of your screen: “Success Stack successfully deployed“.
STEP 7
🟢Please Support My work by Making a Donation. Almost 99,9% of the people that install something using my guides forget to support my work, or just ignore STEP 1. I’ve been very honest about this aspect of my work since the beginning: I don’t run any ADS, I don’t require subscriptions, paid or otherwise, I don’t collect IPs, emails, and I don’t have any referral links from Amazon or other merchants. I also don’t have any POP-UPs or COOKIES. I have repeatedly been told over the years how much I have contributed to the community. It’s something I love doing and have been honest about my passion since the beginning. But I also Need The Community to Support me Back to be able to continue doing this work.
STEP 8
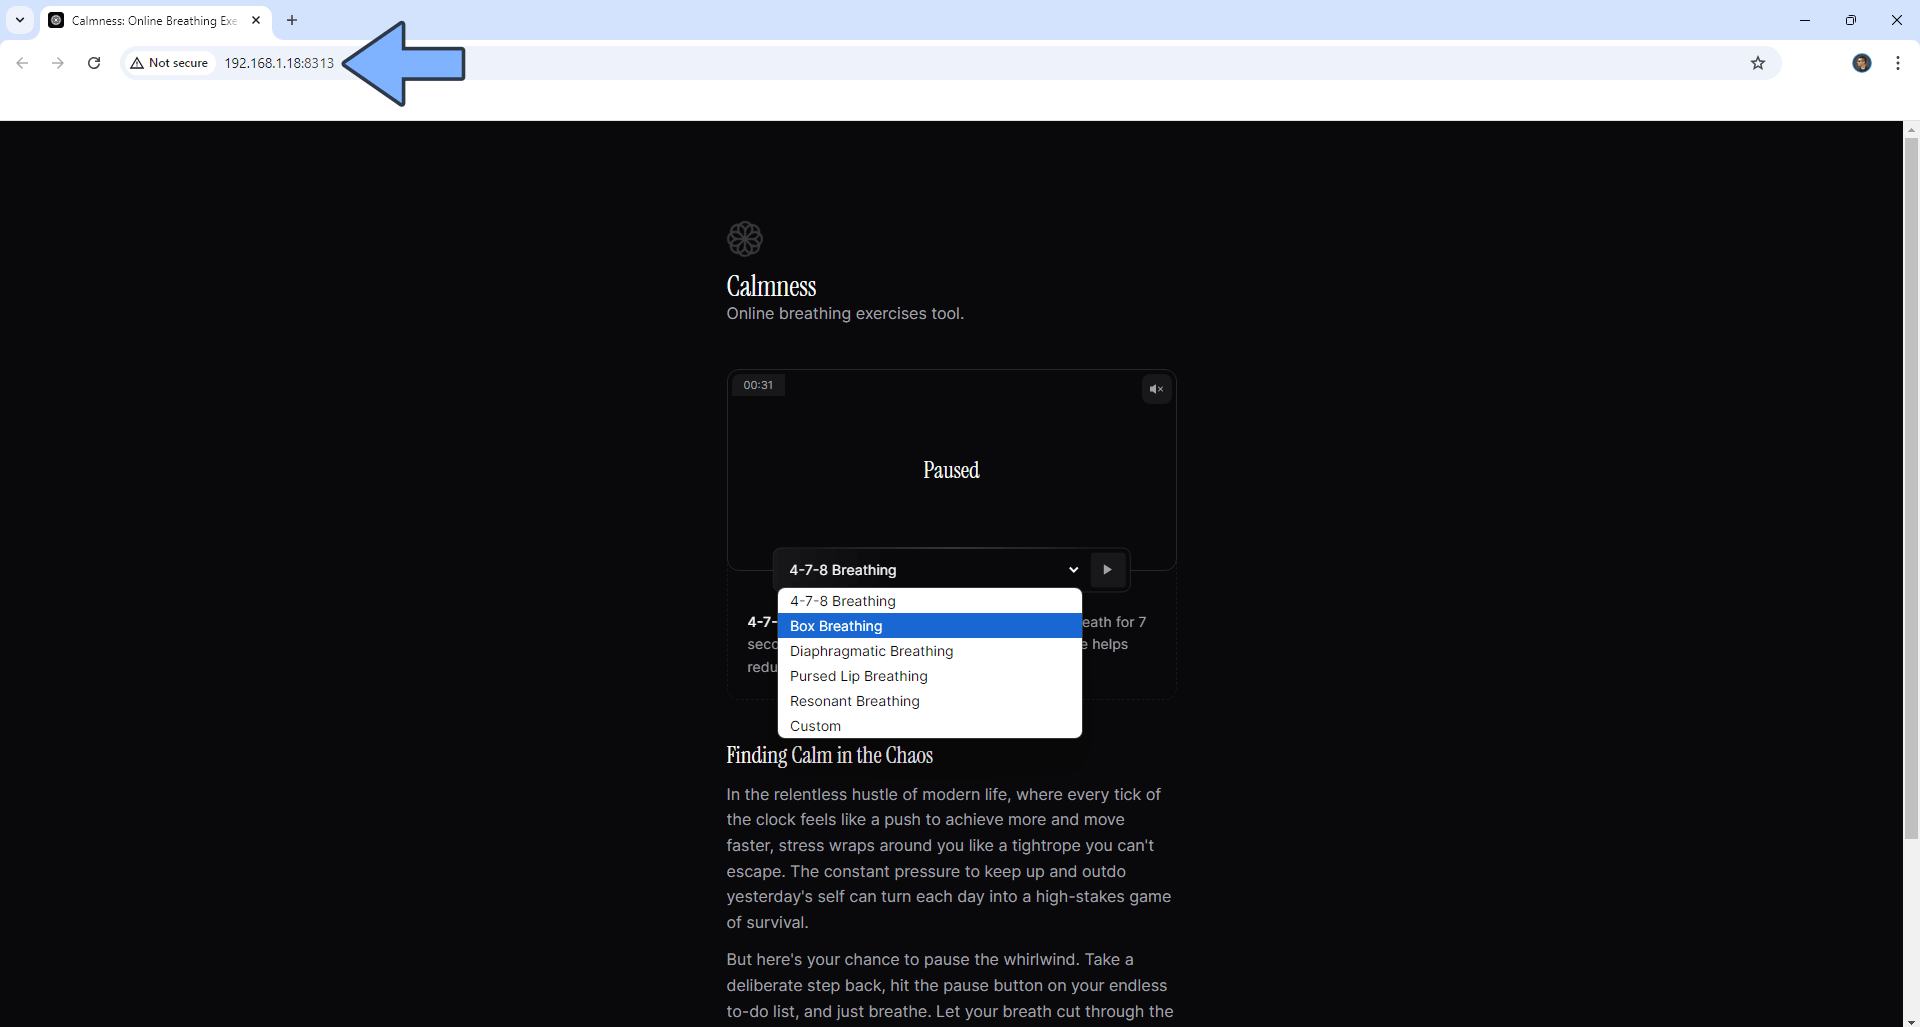
The installation process can take up to a few seconds/minutes. It will depend on your Internet speed connection. Now open your browser and type in http://Synology-ip-address:8313 Select the breathing exercise that you are interested in, then click Play. Follow the instructions in the image below.
Enjoy Calmness!
If you encounter issues by using this container, make sure to check out the Common Docker issues article.
Note: If you want to run the Calmness container over HTTPS, check How to Run Docker Containers Over HTTPS. In order to make Calmness work via HTTPS, it’s mandatory to activate WebSocket.
Note: Can I run Docker on my Synology NAS? See the supported models.
Note: How to Back Up Docker Containers on your Synology NAS.
Note: Find out how to update the Calmness container with the latest image.
Note: How to Free Disk Space on Your NAS if You Run Docker.
Note: How to Schedule Start & Stop For Docker Containers.
Note: How to Activate Email Notifications.
Note: How to Add Access Control Profile on Your NAS.
Note: How to Change Docker Containers Restart Policy.
Note: How to Use Docker Containers With VPN.
Note: Convert Docker Run Into Docker Compose.
Note: How to Clean Docker.
Note: How to Clean Docker Automatically.
Note: Best Practices When Using Docker and DDNS.
Note: Some Docker Containers Need WebSocket.
Note: Find out the Best NAS Models For Docker.
Note: Activate Gmail SMTP For Docker Containers.
This post was updated on Friday / January 9th, 2026 at 1:31 PM
