EzBookkeeping is a lightweight personal bookkeeping app hosted by yourself. Key features include support for multiple currencies, time zones, and languages, as well as advanced functionalities such as scheduled transactions, transaction imports from formats like OFX, QFX, QIF, and CSV, and trend analysis by month, quarter, or year. Open-source and actively maintained, ezBookkeeping provides a fast, customizable solution for individuals seeking to manage their finances efficiently on their own terms. In this step by step guide I will show you how to install ezBookkeeping on your Synology NAS using Docker & Portainer.
STEP 1
Please Support My work by Making a Donation.
STEP 2
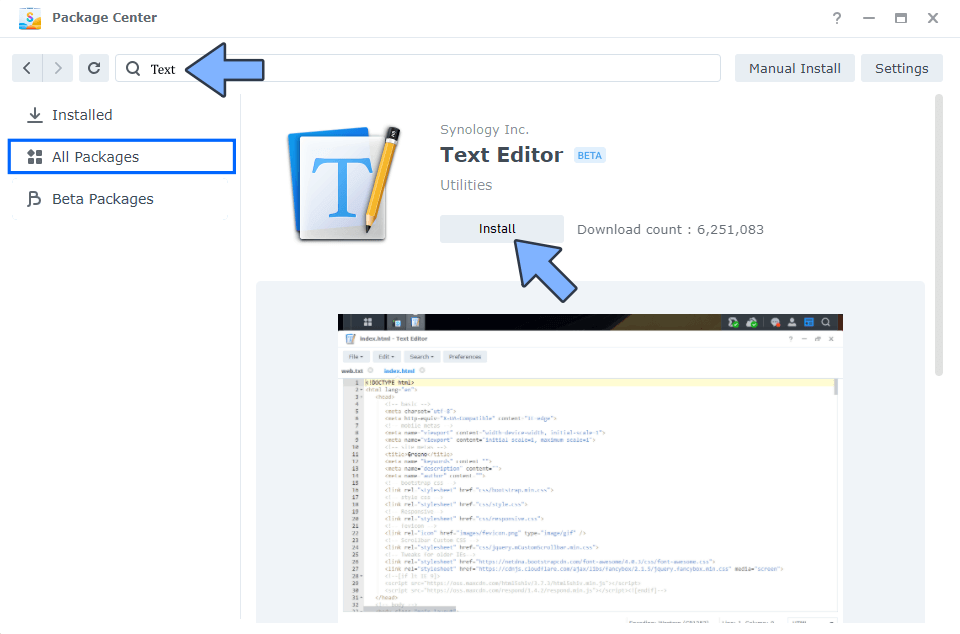
Install Text Editor via Synology “Package Center”. (Mandatory STEP.) If you already have Text Editor installed on your Synology NAS, skip this STEP.
STEP 3
Install Portainer using my step by step guide. If you already have Portainer installed on your Synology NAS, skip this STEP. Attention: Make sure you have installed the latest Portainer version.
STEP 4
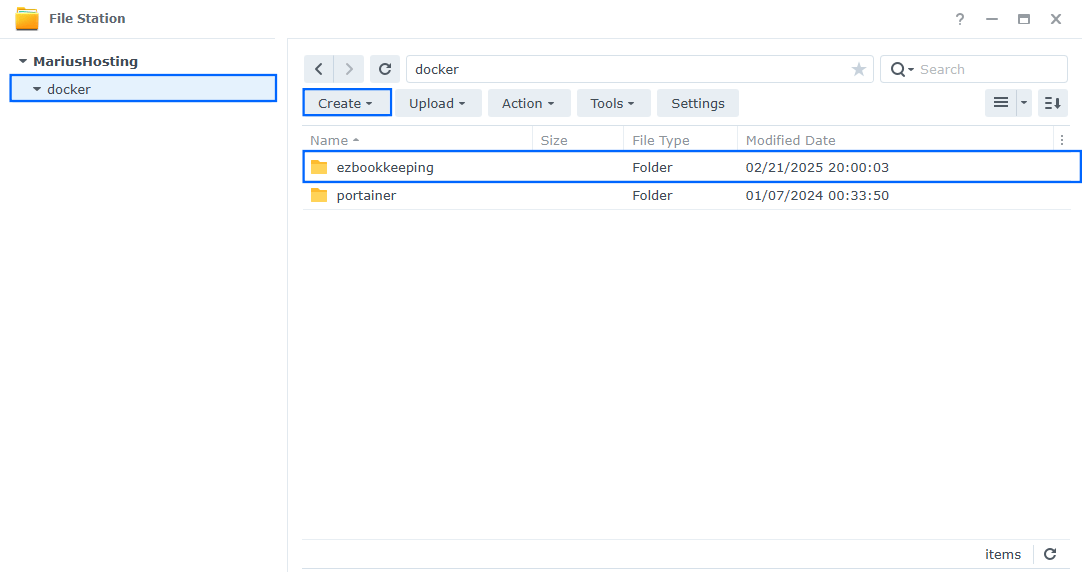
Go to File Station and open the docker folder. Inside the docker folder, create one new folder and name it ezbookkeeping. Follow the instructions in the image below.
Note: Be careful to enter only lowercase, not uppercase letters.
STEP 5
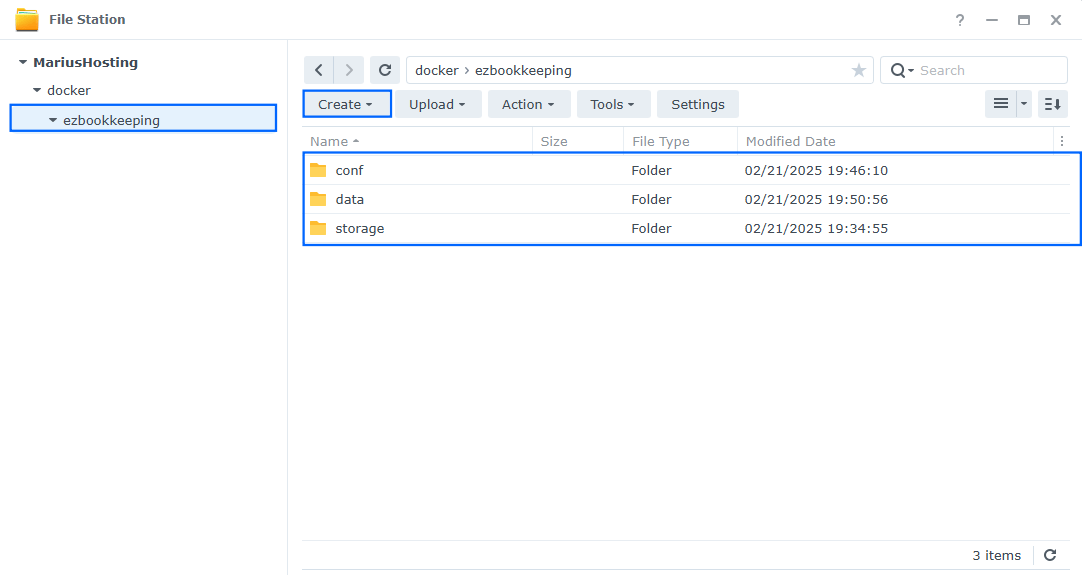
Now create three new folders inside the ezbookkeeping folder that you created at STEP 4 and name them conf, data, storage. Follow the instructions in the image below.
Note: Be careful to enter only lowercase, not uppercase letters.
STEP 6
Download (click on the blue link below) then unzip and upload the ezbookkeeping.ini file below in the conf folder that you have previously created at STEP 5. Follow the instructions in the image below. 🔒Note: Support my work to unlock the password. You can use this password to download any file on mariushosting forever!

STEP 7
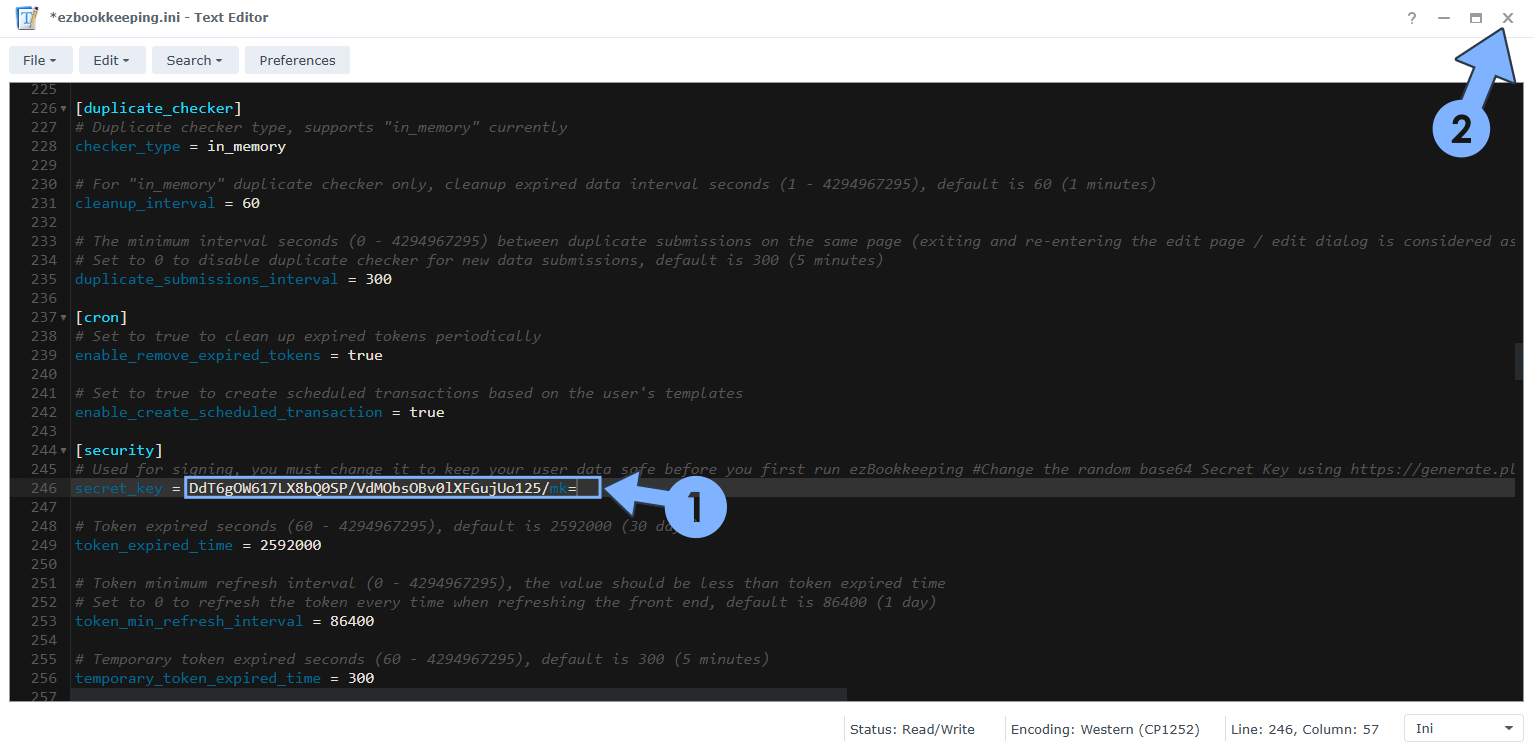
- Open the ezbookkeeping.ini file that you have previously uploaded at STEP 7. Follow the instructions in the image below.
- Scroll down in the file until you find the secret_key value under security.
- (Generate your free Random 32 byte base 64 secret_key.) ⚠️Warning: Check the example in the following screenshot: EXAMPLE. When you go to the link to generate your secret_key, make sure you change the default 16 byte code to 32, as per the example in the EXAMPLE screenshot.
- Save the file.
STEP 8
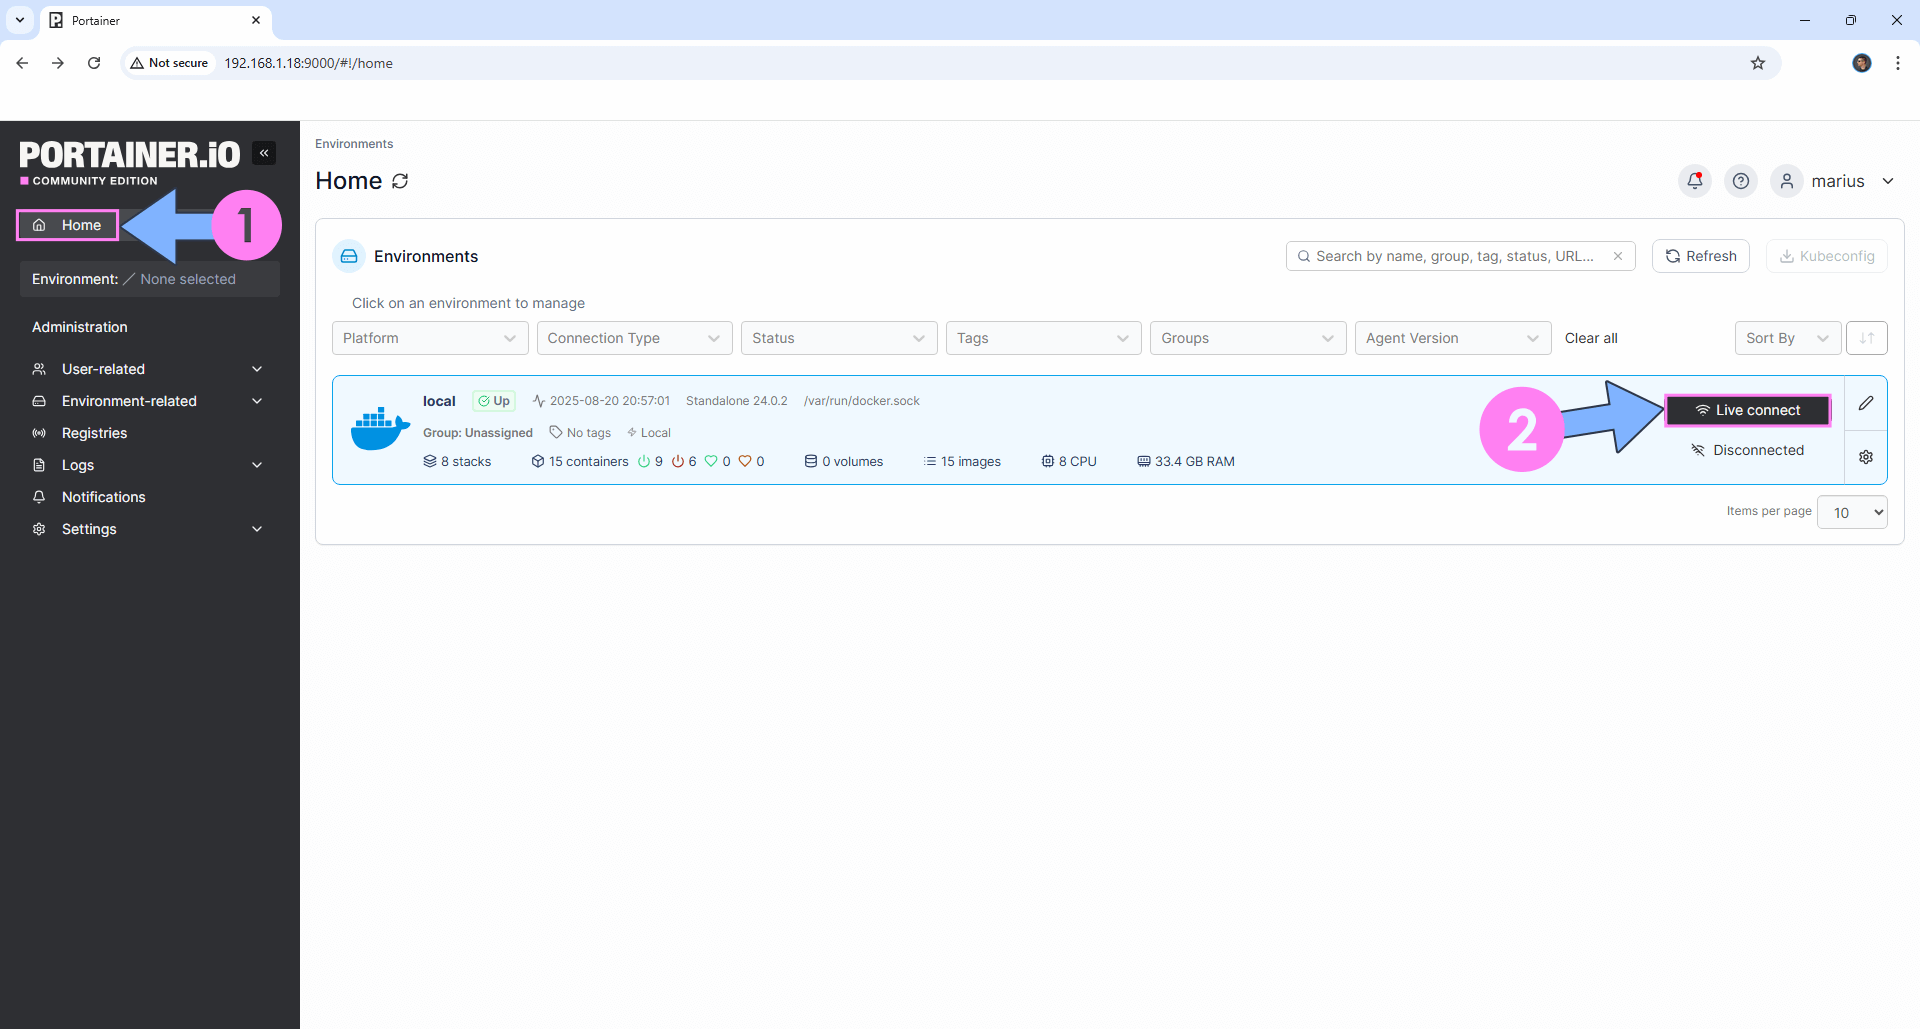
Log into Portainer using your username and password. On the left sidebar in Portainer, click on Home then Live connect. Follow the instructions in the image below.
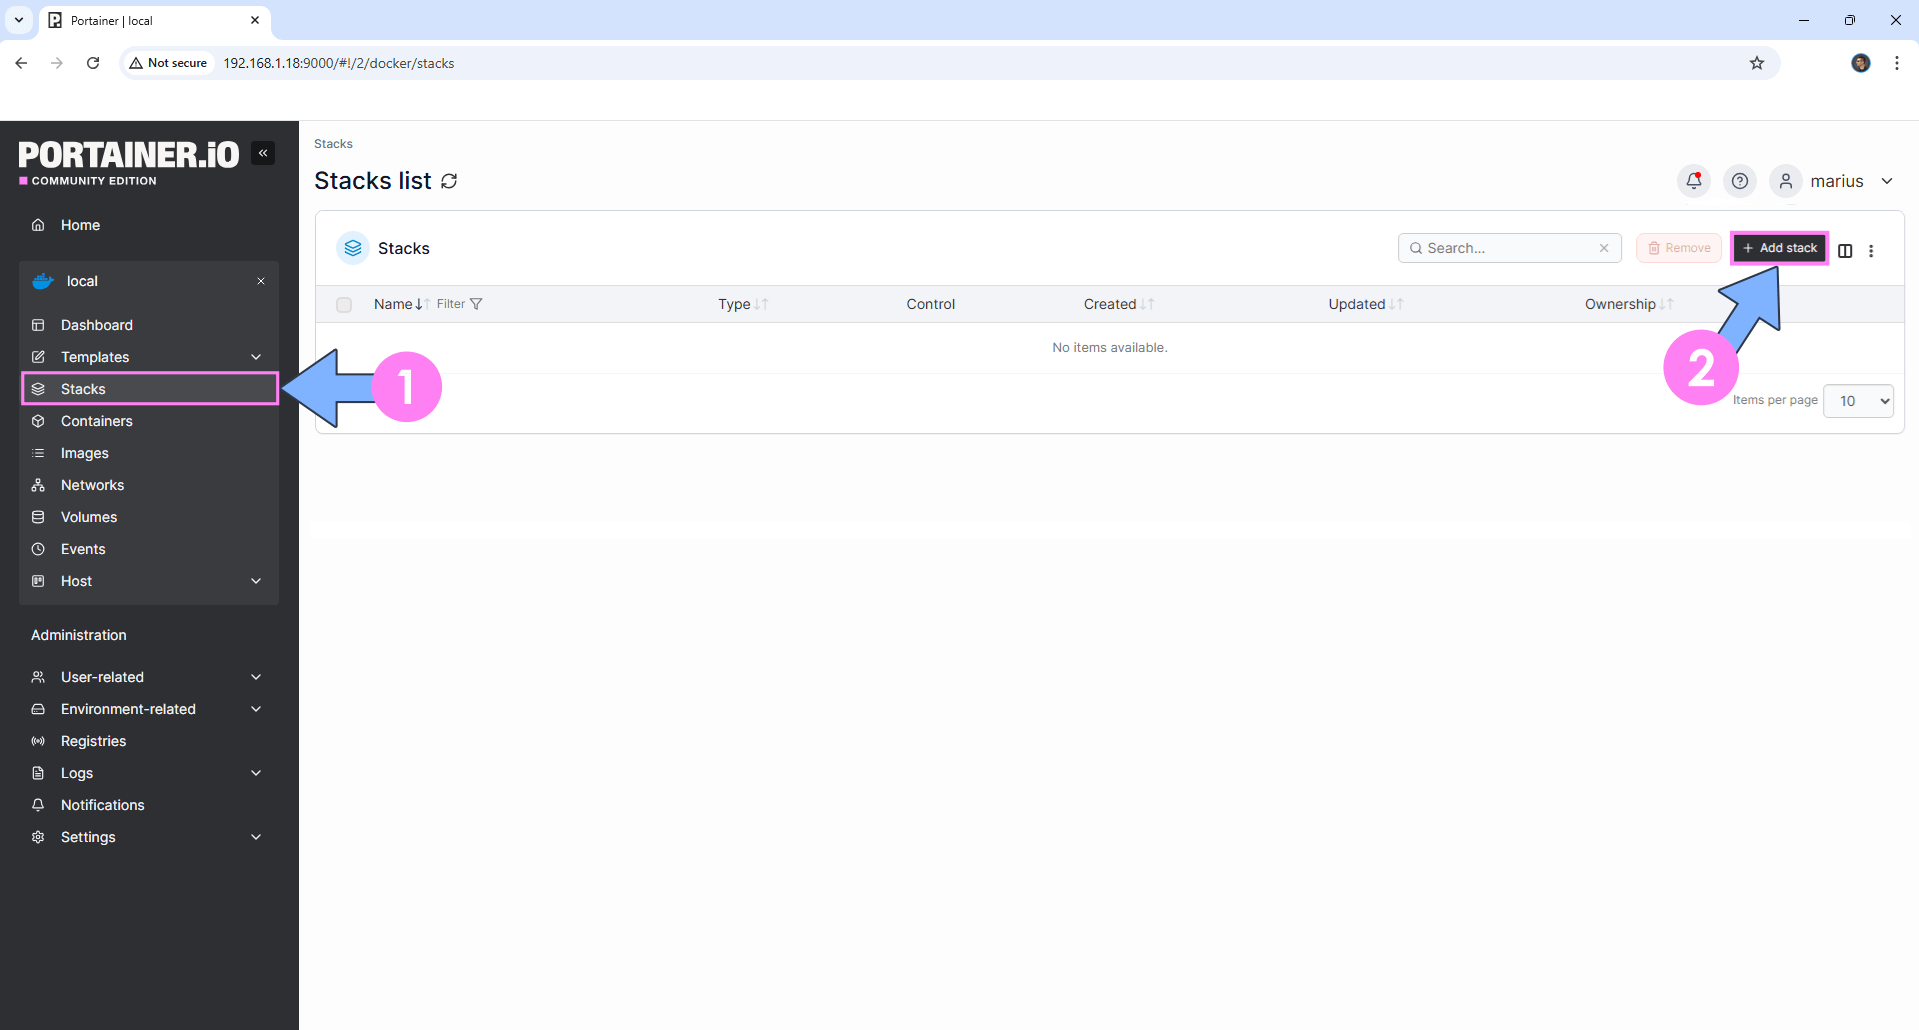
On the left sidebar in Portainer, click on Stacks then + Add stack. Follow the instructions in the image below.
STEP 9
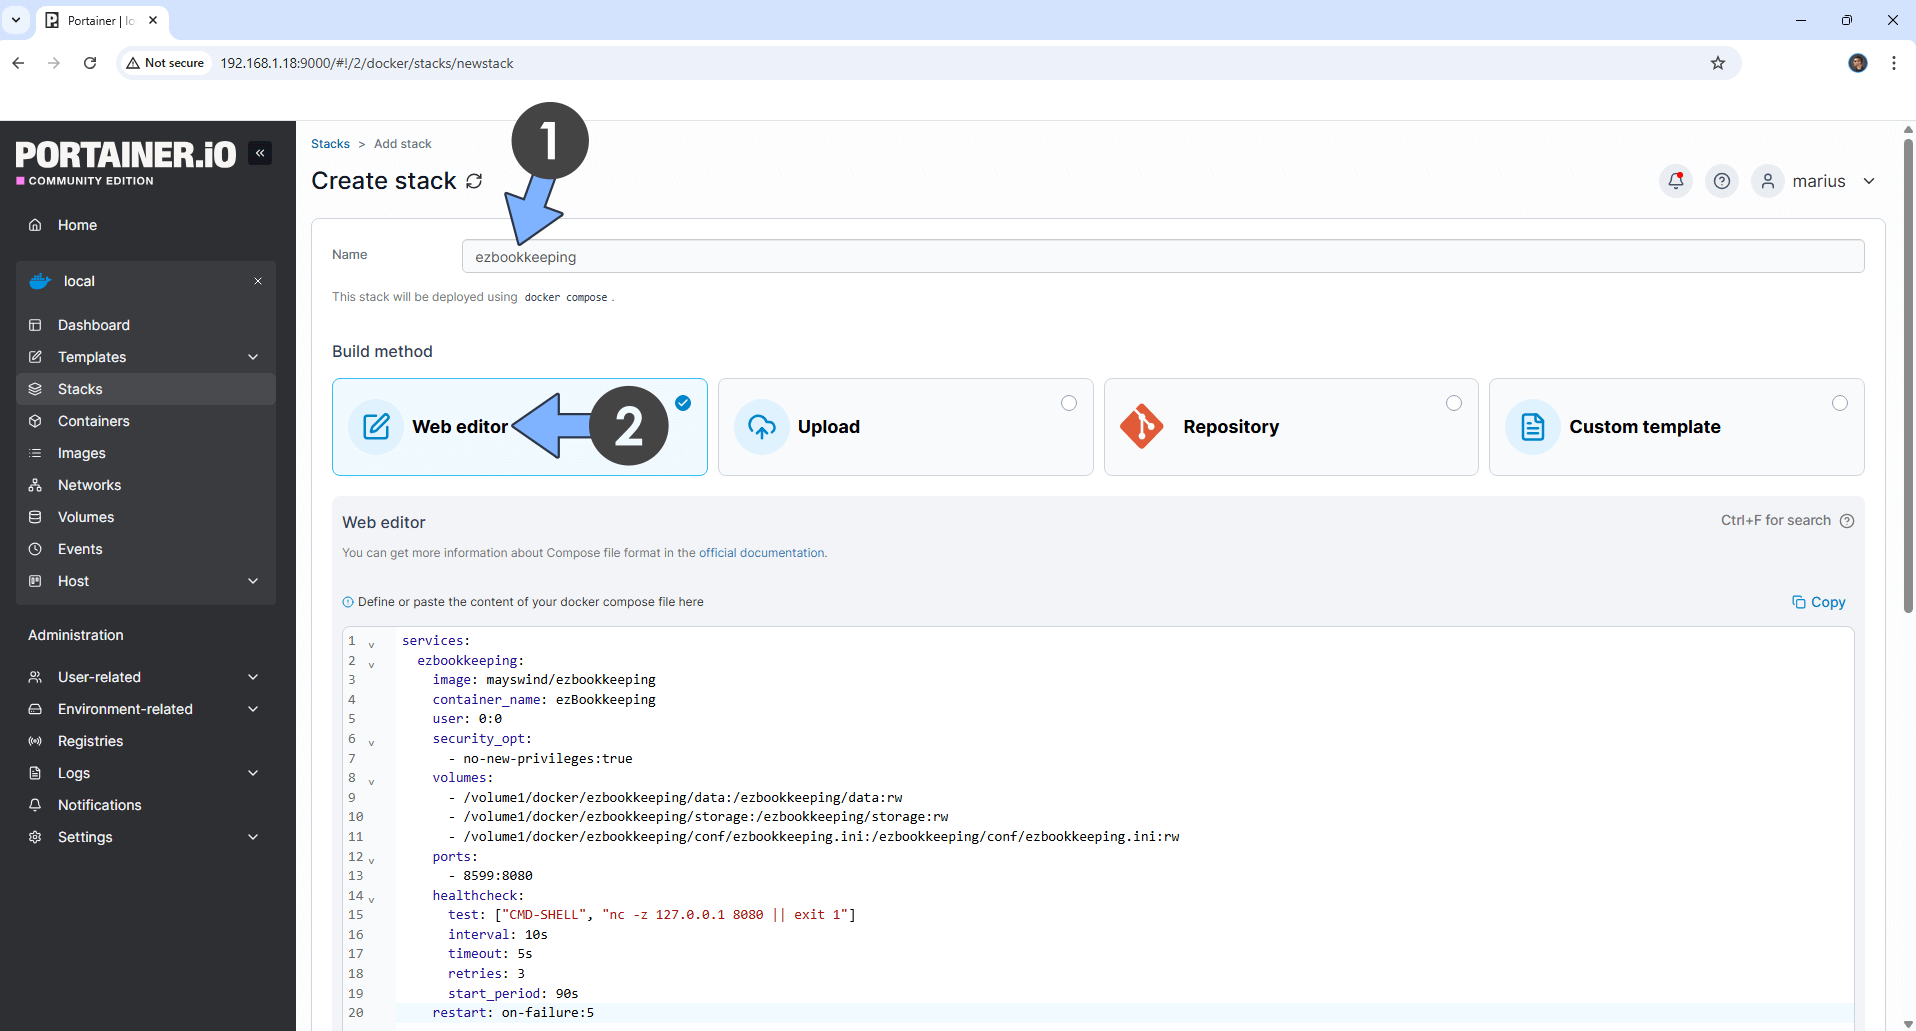
In the Name field type in ezbookkeeping. Follow the instructions in the image below.
services:
  ezbookkeeping:
    image: mayswind/ezbookkeeping
    container_name: ezBookkeeping
    user: 0:0
    security_opt:
      - no-new-privileges:true
    volumes:
      - /volume1/docker/ezbookkeeping/data:/ezbookkeeping/data:rw
      - /volume1/docker/ezbookkeeping/storage:/ezbookkeeping/storage:rw
      - /volume1/docker/ezbookkeeping/conf/ezbookkeeping.ini:/ezbookkeeping/conf/ezbookkeeping.ini:rw
    ports:
      - 8599:8080
    healthcheck:
      test: ["CMD-SHELL", "nc -z 127.0.0.1 8080 || exit 1"]
      interval: 10s
      timeout: 5s
      retries: 3
      start_period: 90s
    restart: on-failure:5
STEP 10
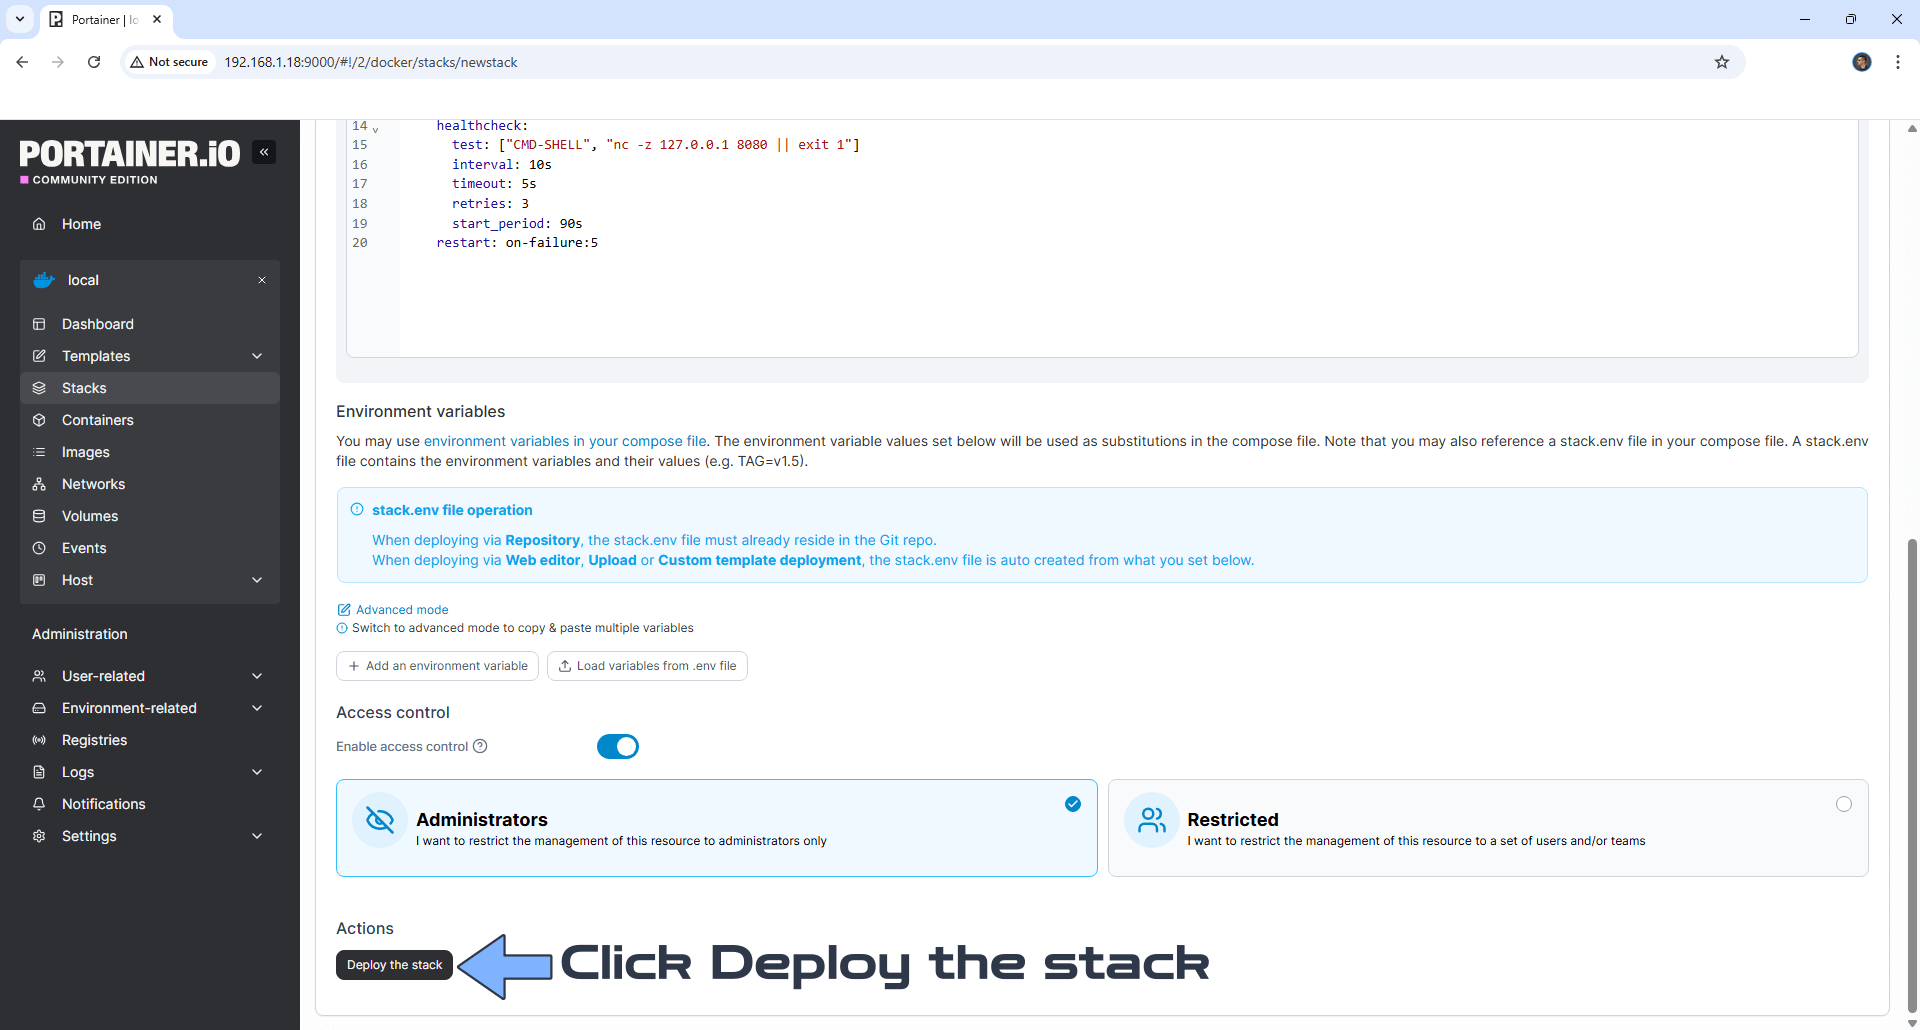
Scroll down on the page until you see a button named Deploy the stack. Click on it. Follow the instructions in the image below. The installation process can take up to a few minutes. It will depend on your Internet speed connection.
STEP 11
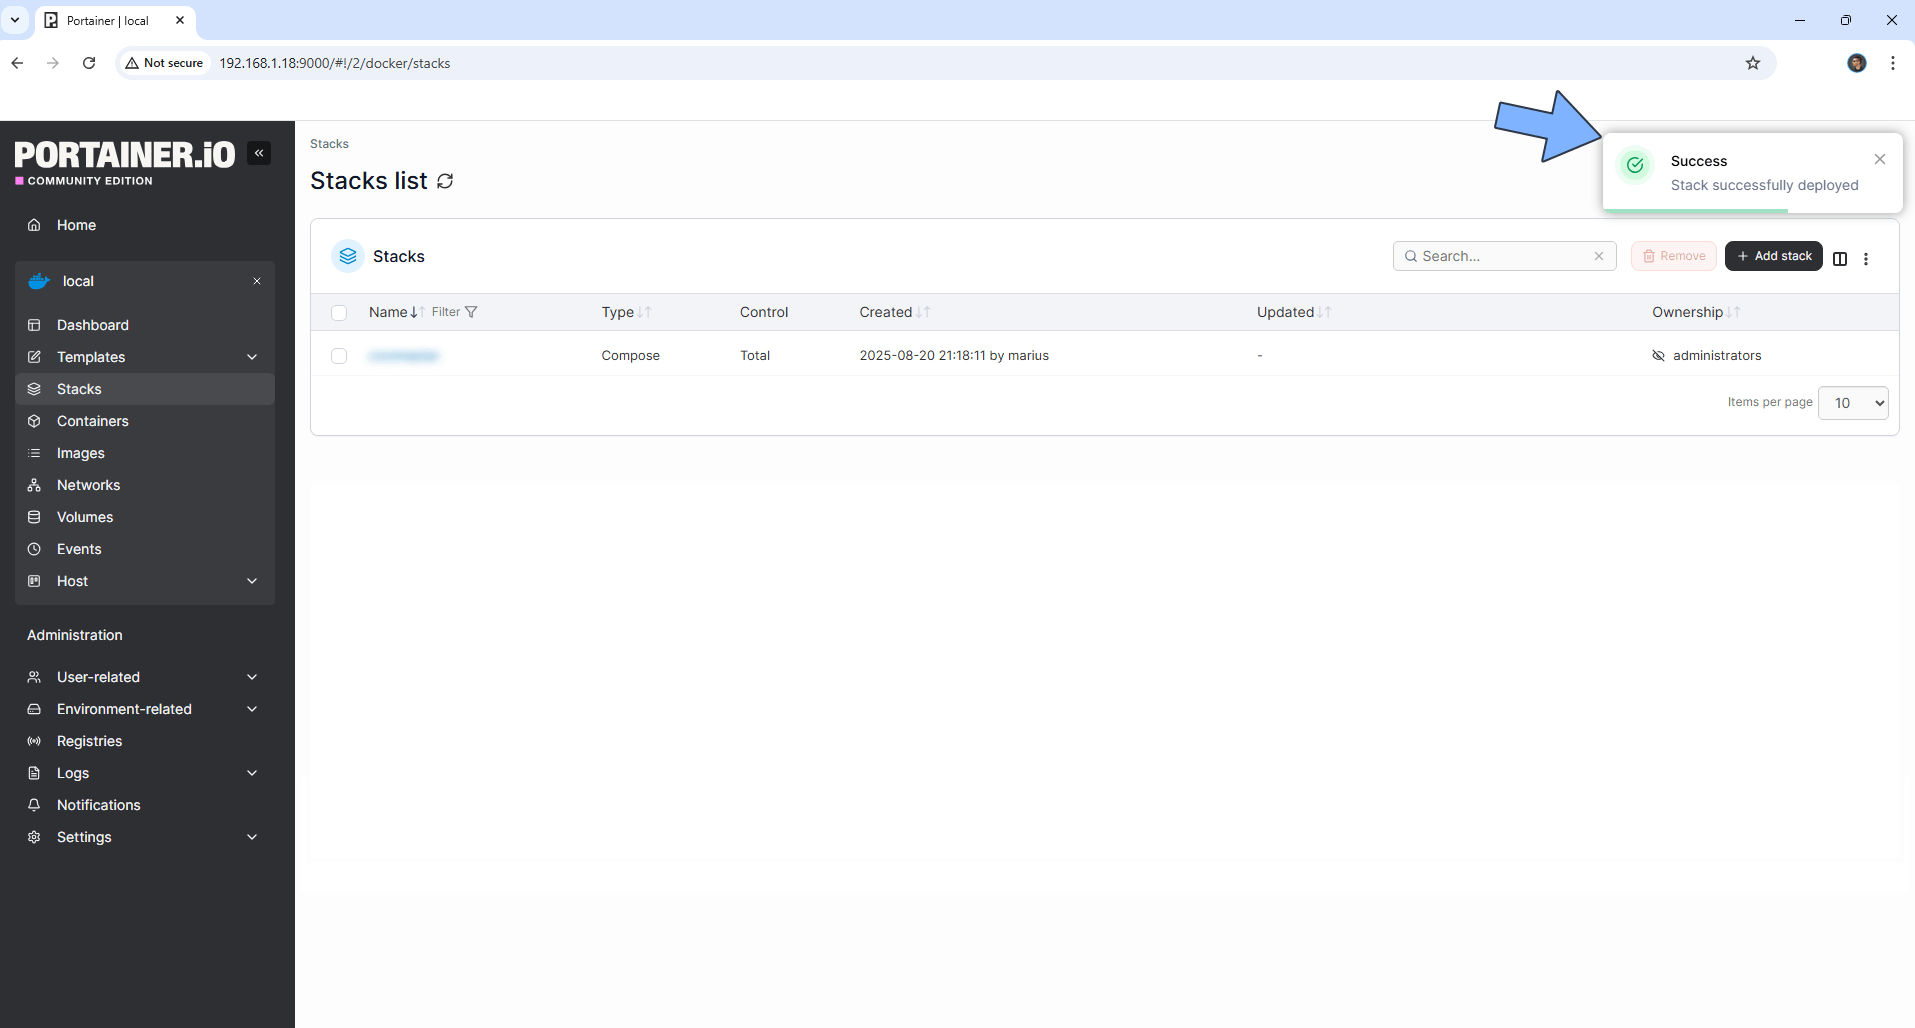
If everything goes right, you will see the following message at the top right of your screen: “Success Stack successfully deployed“.
STEP 12
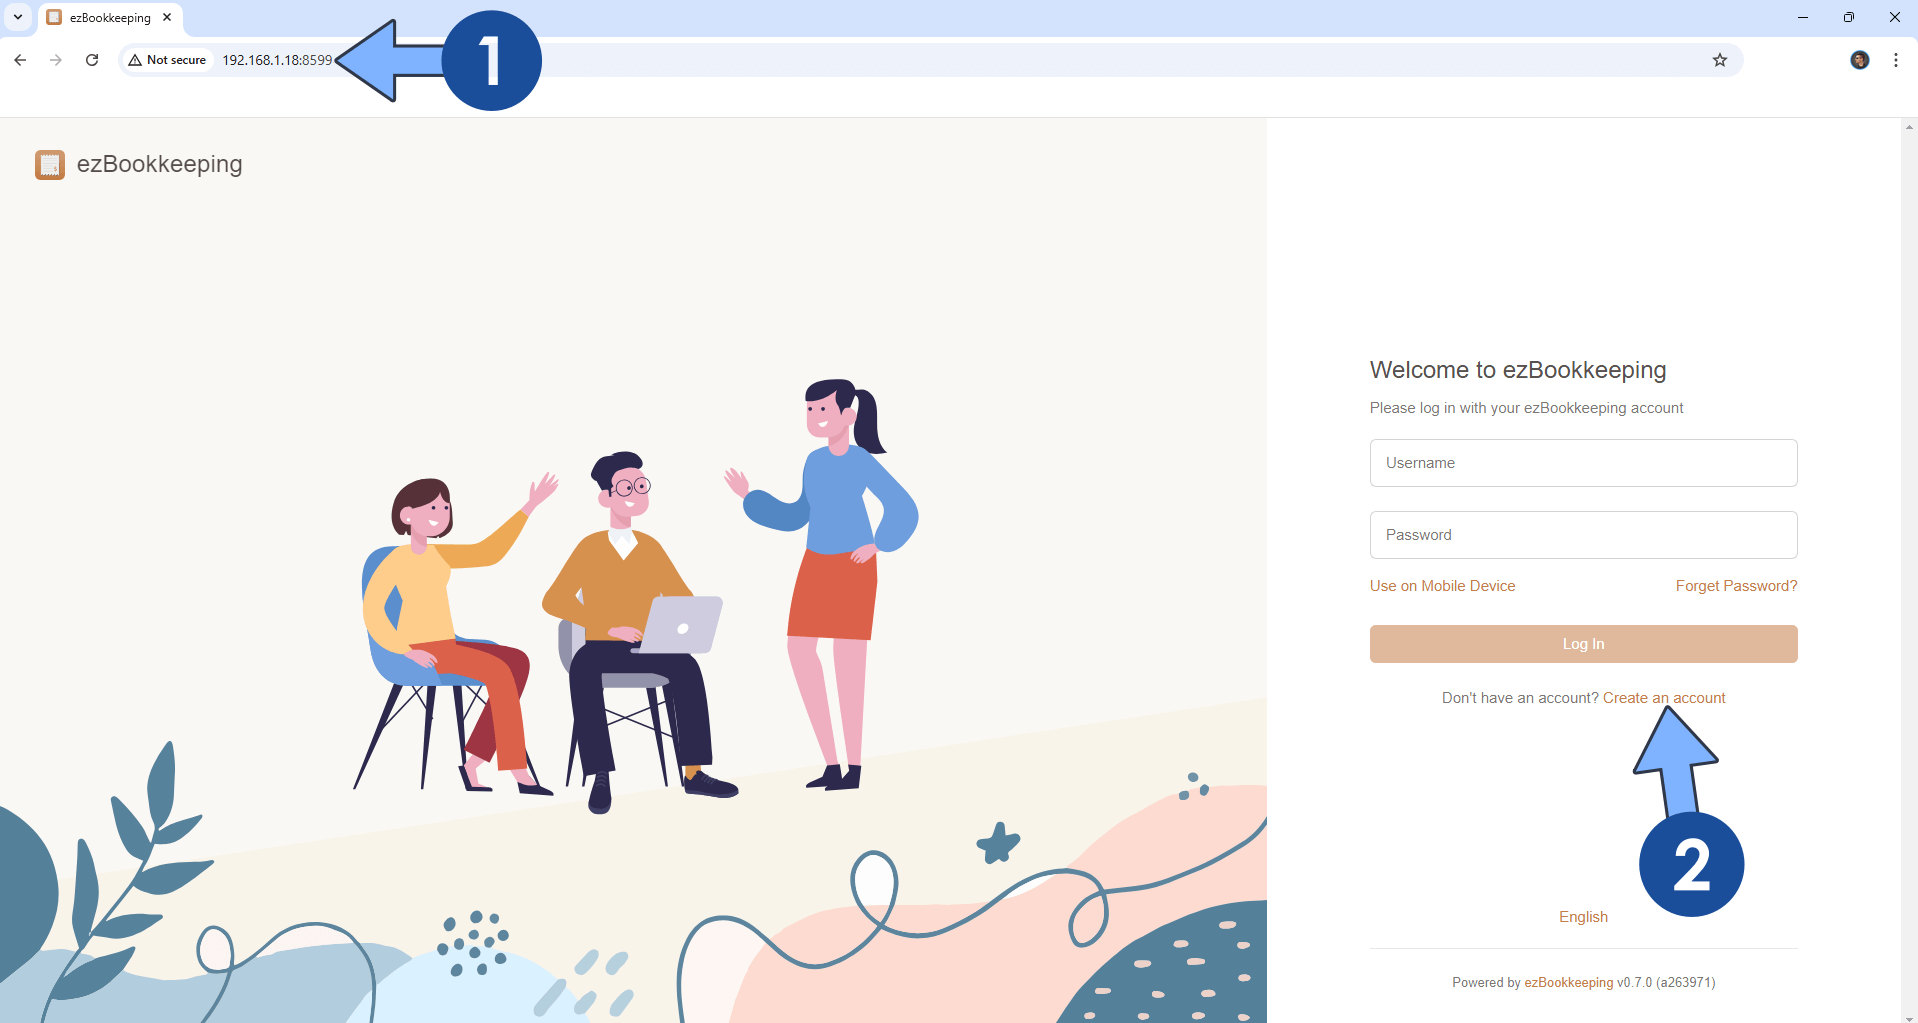
The installation process can take up to a few seconds/minutes. It will depend on your Internet speed connection. Now open your browser and type in http://Synology-ip-address:8599 click Create Account. Follow the instructions in the image below.
STEP 13
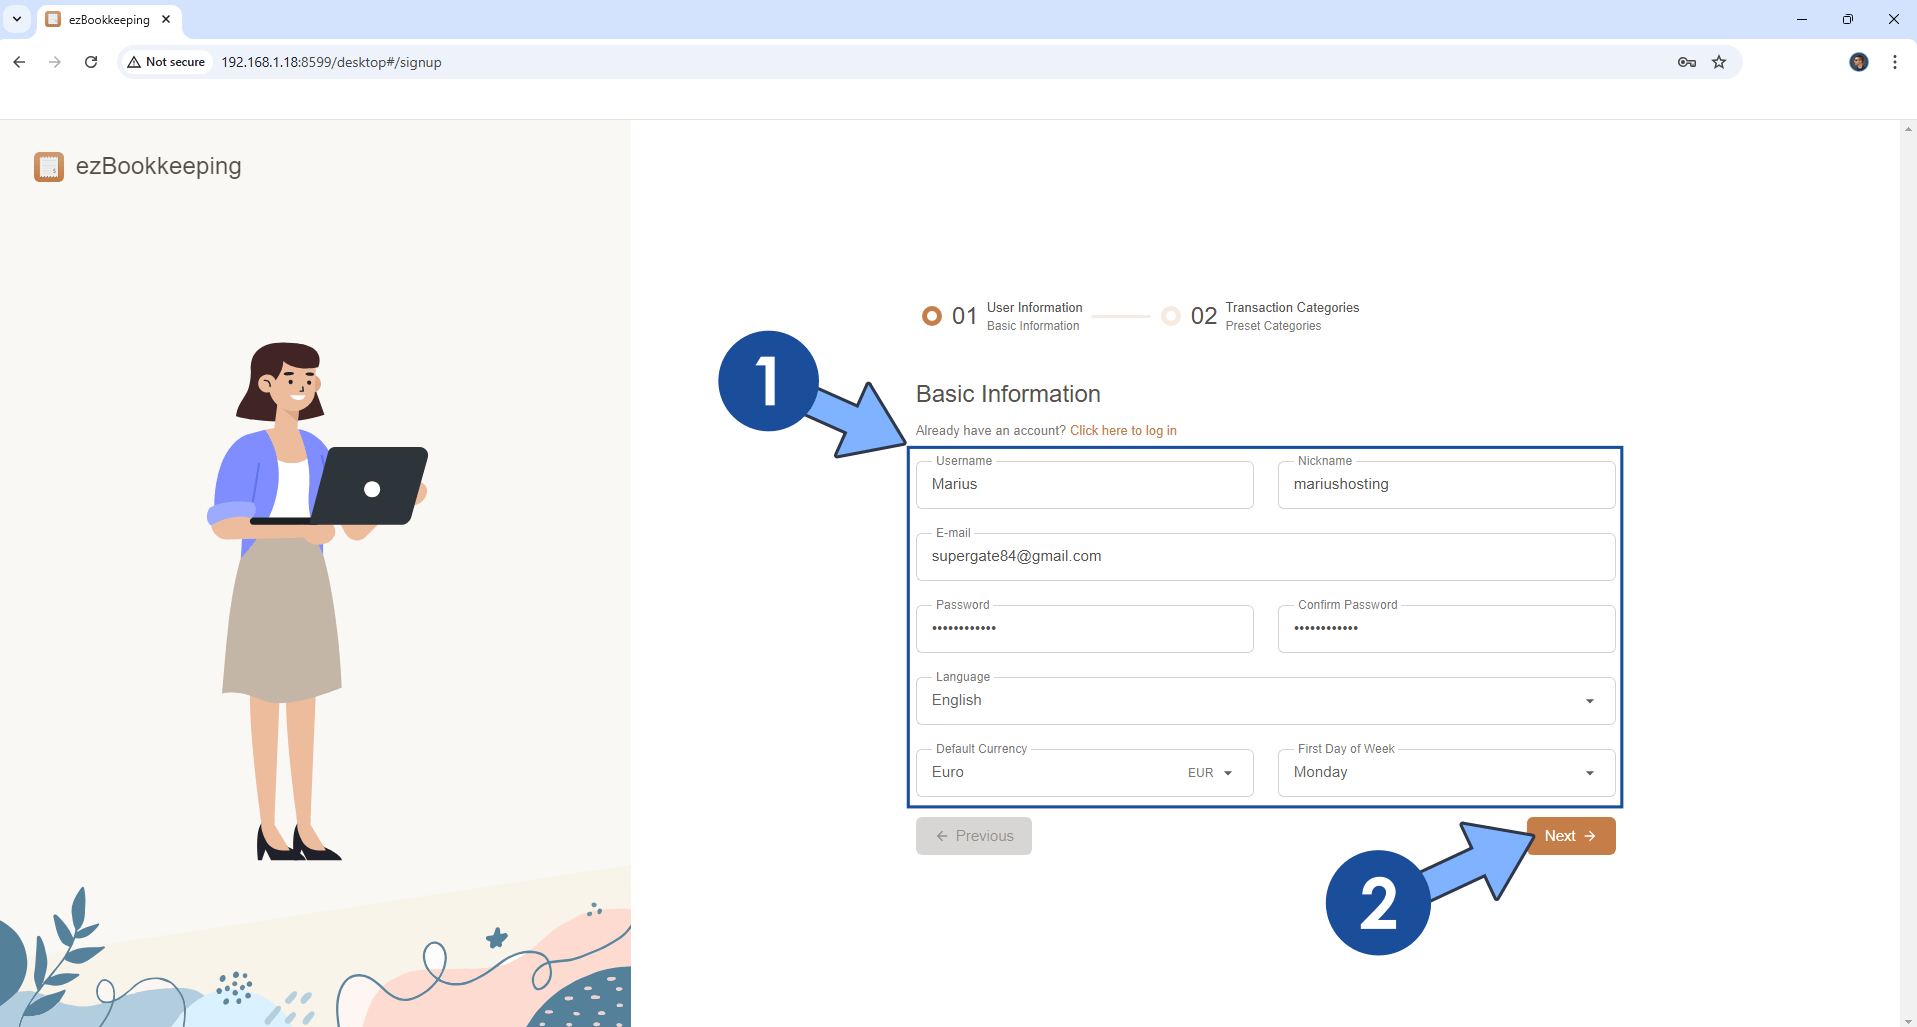
Type in your own details, then click Next. Follow the instructions in the image below.
STEP 14
Check Use Preset Transaction Categories, then click Submit. Follow the instructions in the image below.

STEP 15
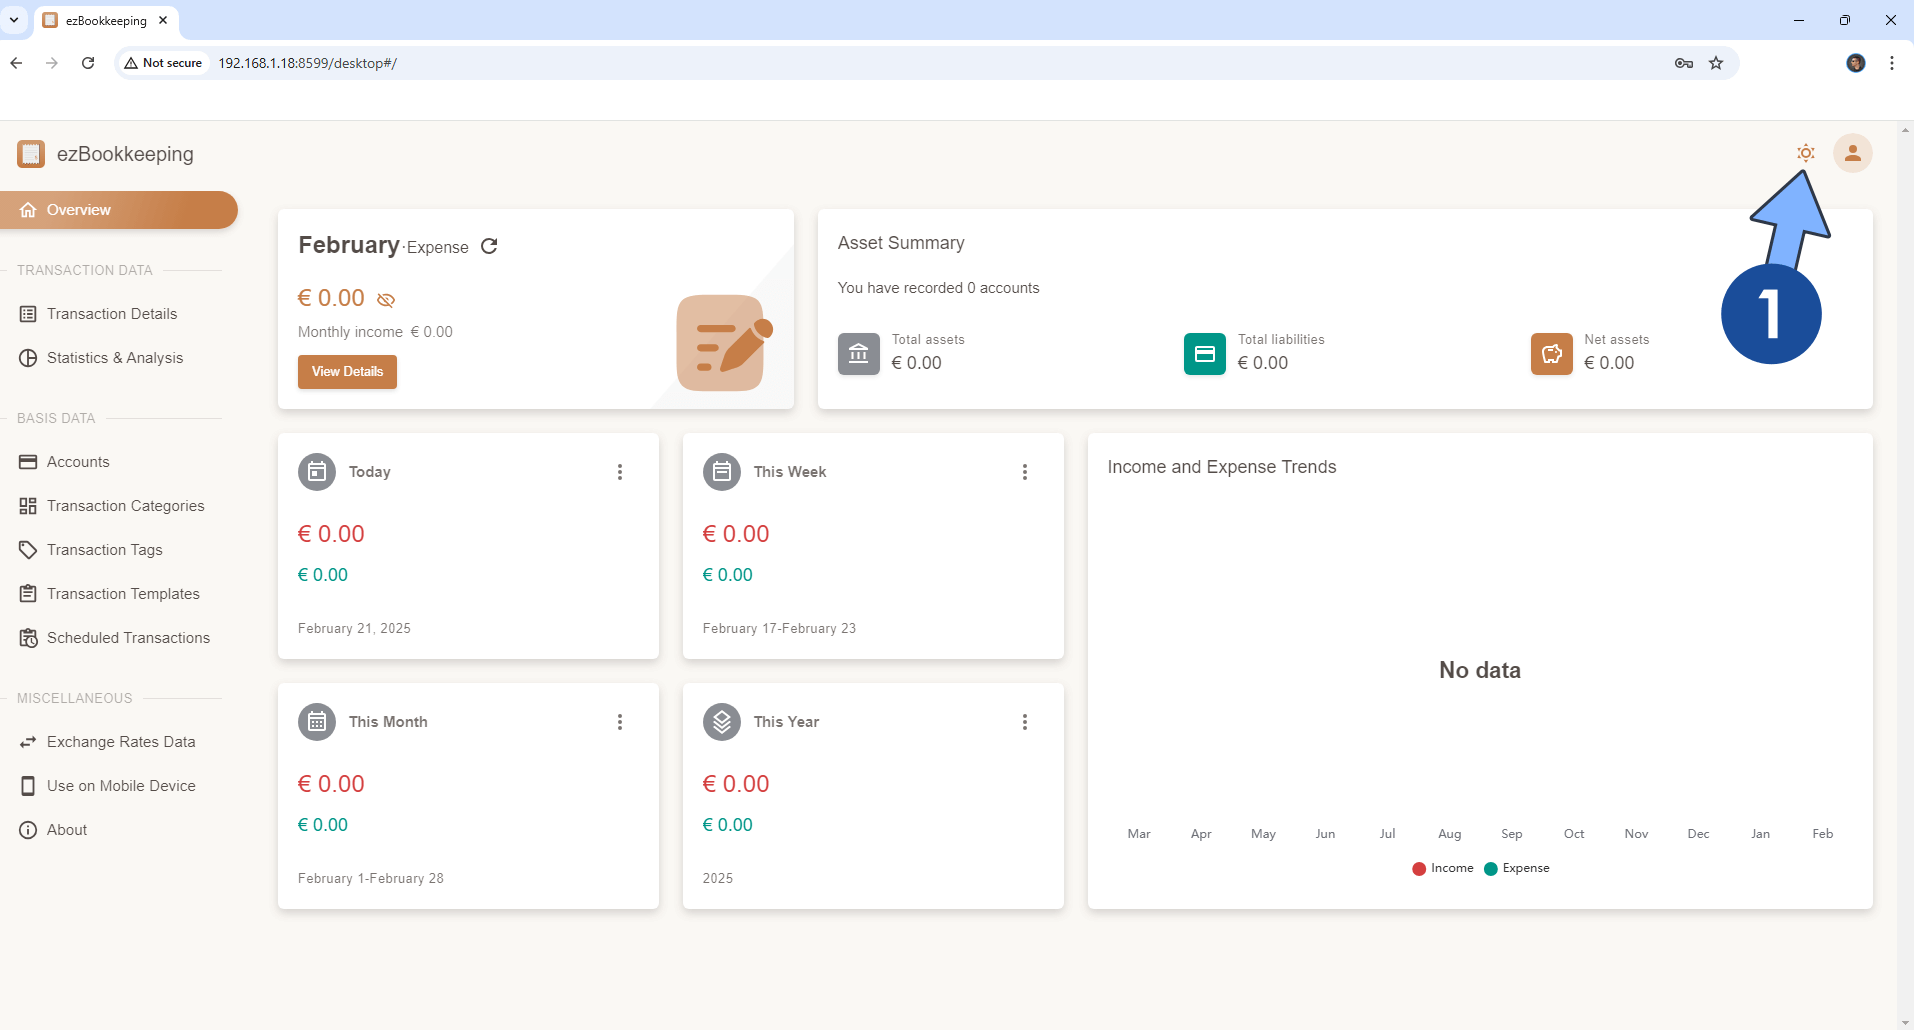
You can easily switch the theme to Dark. Follow the instructions in the image below.
STEP 16
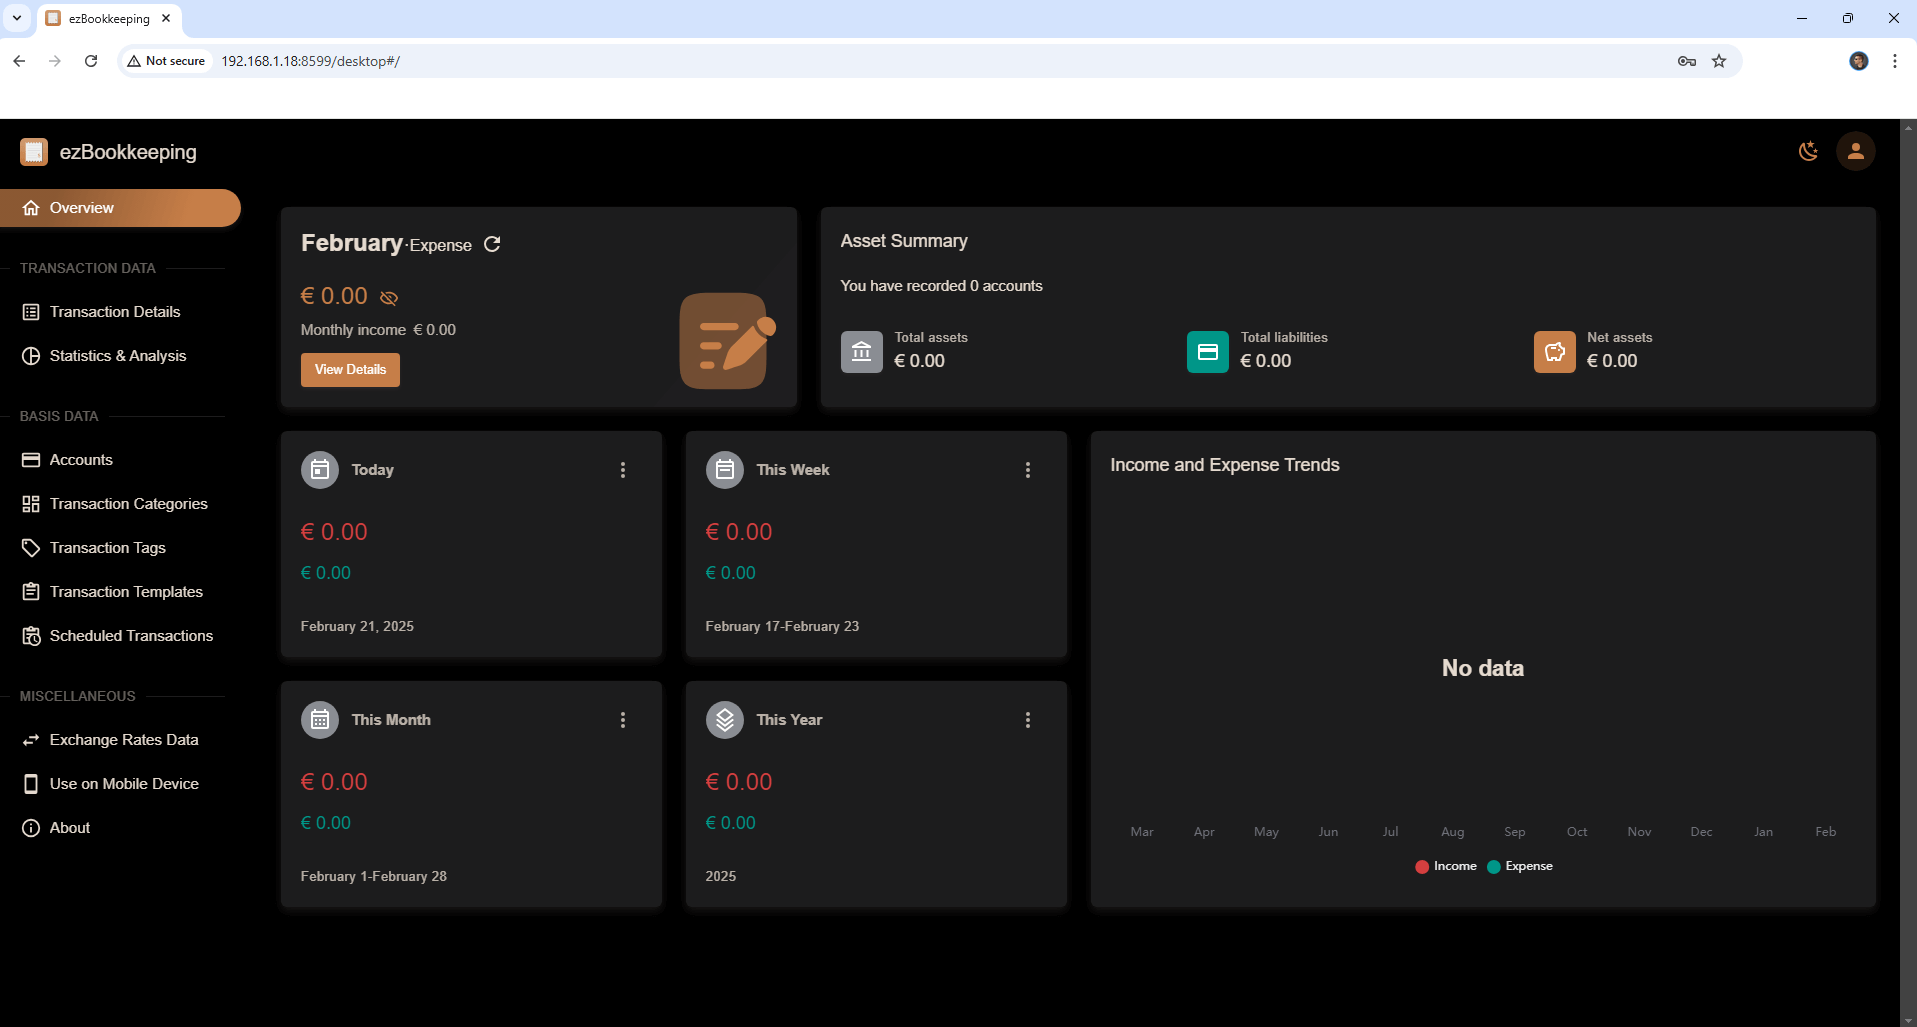
Your theme is now set to Dark.
STEP 17
On the left sidebar, add your first Account by clicking Accounts, then enjoy the ezBookkeeping app!
Enjoy ezBookkeeping!
If you encounter issues by using this container, make sure to check out the Common Docker issues article.
Note: If you want to run the ezBookkeeping container over HTTPS, check How to Run Docker Containers Over HTTPS. In order to make ezBookkeeping work via HTTPS, it’s mandatory to activate WebSocket and adjust the ezbookkeeping.ini file that you have previously downloaded at STEP 7 with your own domain name or DDNS and the https protocol.
Note: Can I run Docker on my Synology NAS? See the supported models.
Note: How to Back Up Docker Containers on your Synology NAS.
Note: Find out how to update the ezBookkeeping container with the latest image.
Note: How to Free Disk Space on Your NAS if You Run Docker.
Note: How to Schedule Start & Stop For Docker Containers.
Note: How to Activate Email Notifications.
Note: How to Add Access Control Profile on Your NAS.
Note: How to Change Docker Containers Restart Policy.
Note: How to Use Docker Containers With VPN.
Note: Convert Docker Run Into Docker Compose.
Note: How to Clean Docker.
Note: How to Clean Docker Automatically.
Note: Best Practices When Using Docker and DDNS.
Note: Some Docker Containers Need WebSocket.
Note: Find out the Best NAS Models For Docker.
Note: Activate Gmail SMTP For Docker Containers.
This post was updated on Thursday / May 14th, 2026 at 11:55 PM