Paperless-ngx is a document management system that transforms your physical documents into a searchable online archive so you can keep, well, less paper. Paperless-ngx forked from paperless-ng to continue the great work and distribute responsibility of supporting and advancing the project among a team of people. The paperless-ng and paperless-ngx Unraid templates will coexist in the community application store. That allows existing users to still rely on the mature paperless-ng for their productive environment and make the change to paperless-ngx once they feel comfortable. NG stands for both Angular (the framework used for the Frontend) and next-gen. Publishing this project under a different name also avoids confusion between paperless and paperless-ngx. In this step by step guide I will show you how to install Paperless-ngx on your Synology NAS using Docker & Portainer. If what you are looking for is to be able to also upload Office documents such as .docx, I recommend you install Paperless-NGX with Office Files Support and enjoy a complete product.
STEP 1
Please Support My work by Making a Donation.
STEP 2
Install Portainer using my step by step guide. If you already have Portainer installed on your Synology NAS, skip this STEP. Attention: Make sure you have installed the latest Portainer version.
STEP 3
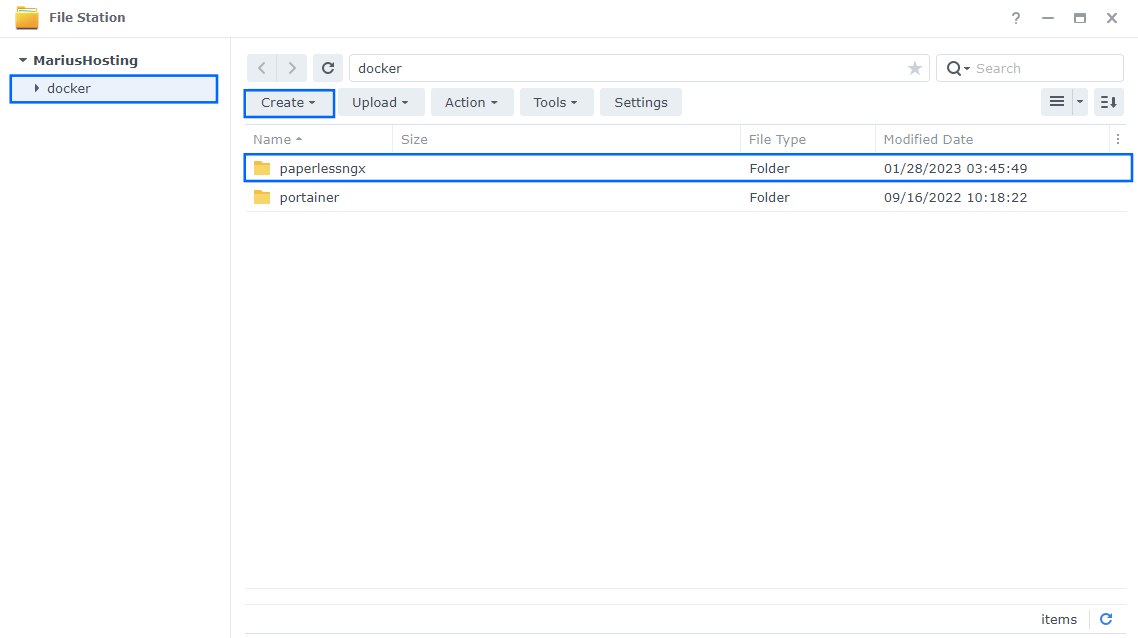
Go to File Station and open the docker folder. Inside the docker folder, create one new folder and name it paperlessngx. Follow the instructions in the image below.
Note: Be careful to enter only lowercase, not uppercase letters.
STEP 4
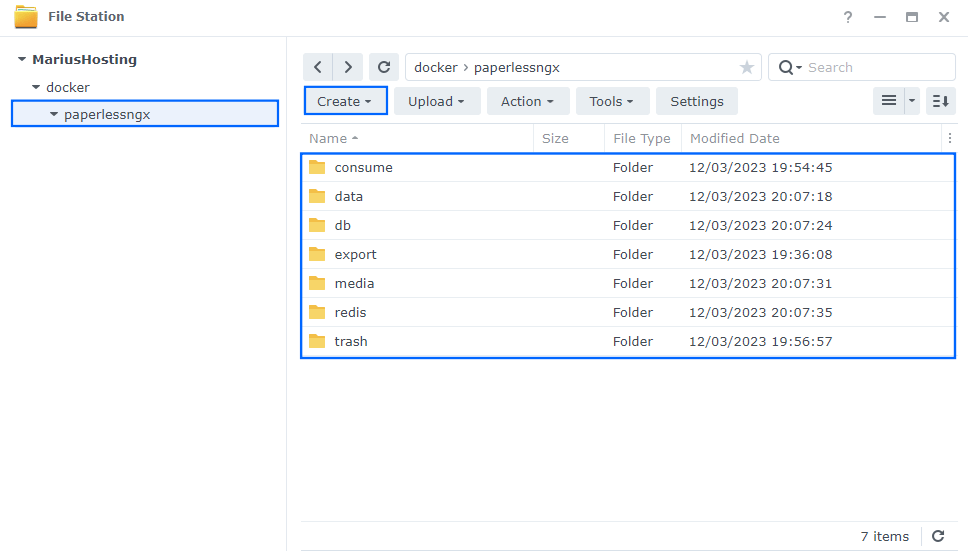
Now create seven new folders inside the paperlessngx folder that you created at STEP 3 and name them consume, data, db, export, media, redis, trash. Follow the instructions in the image below.
Note: Be careful to enter only lowercase, not uppercase letters.
STEP 5
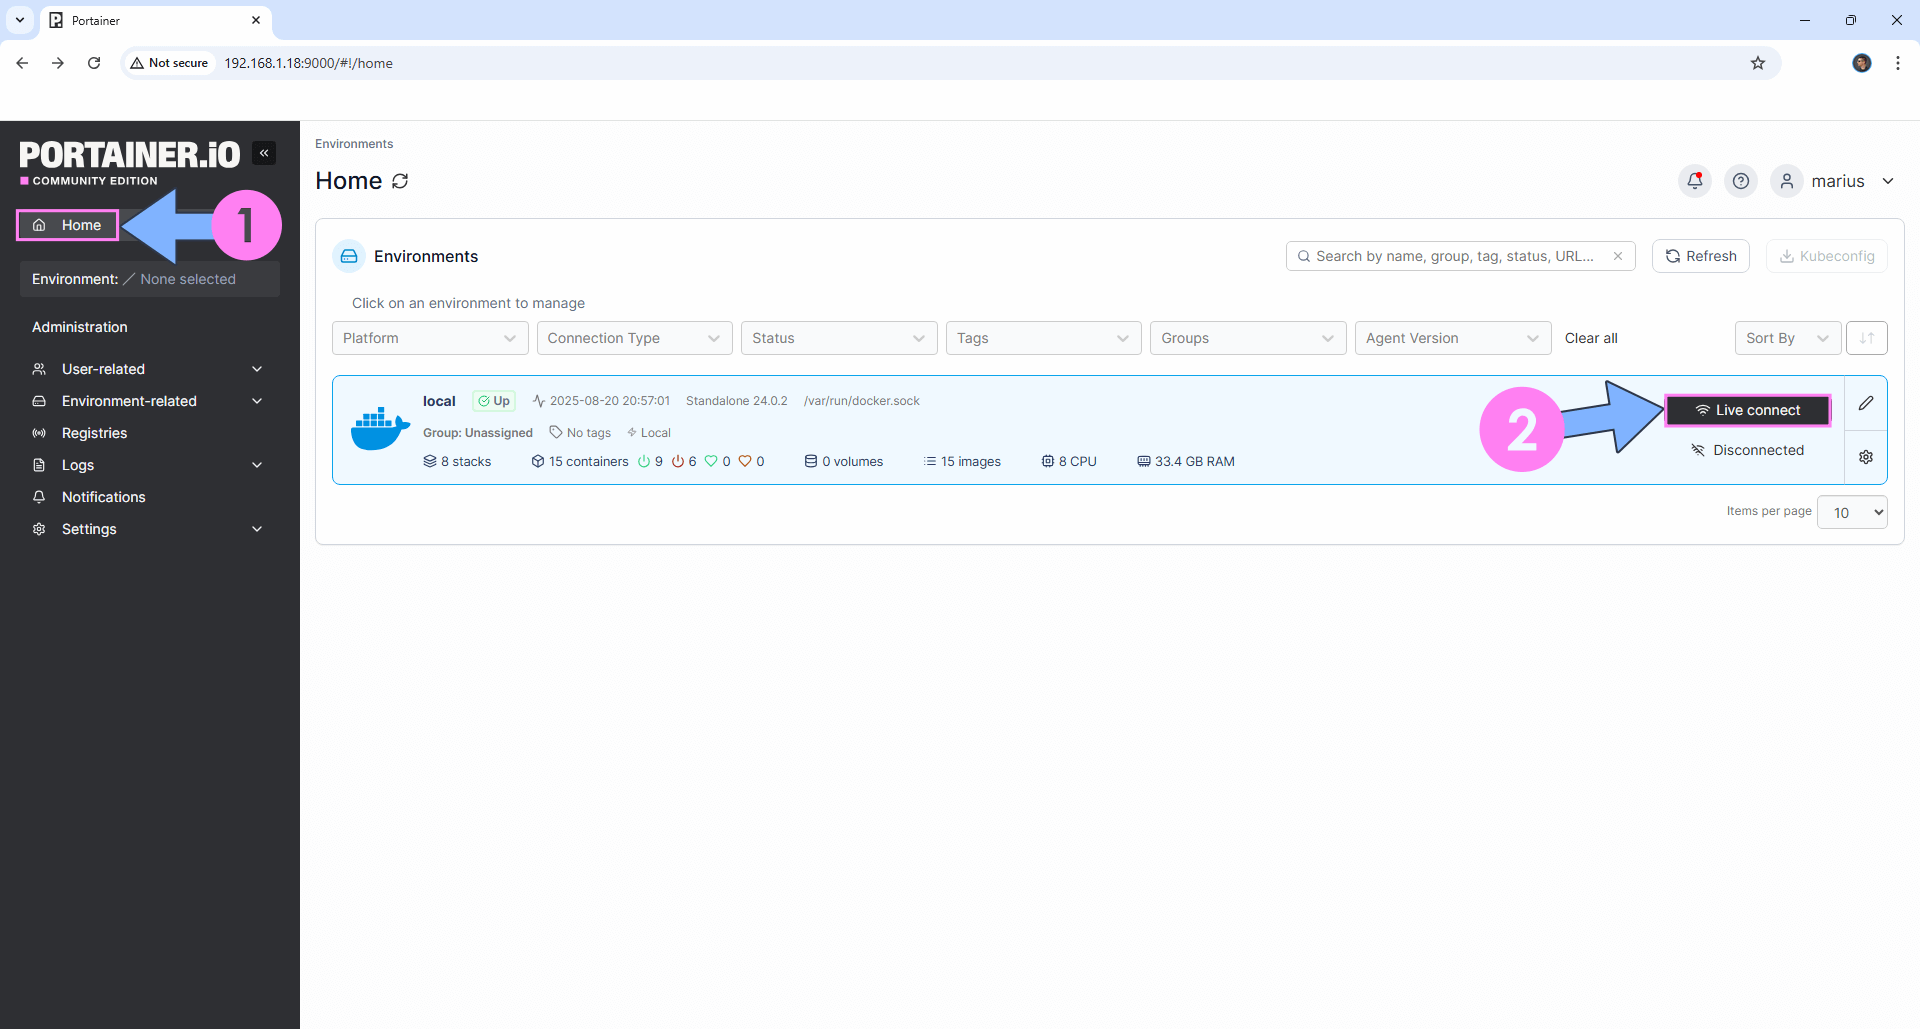
Log into Portainer using your username and password. On the left sidebar in Portainer, click on Home then Live connect. Follow the instructions in the image below.
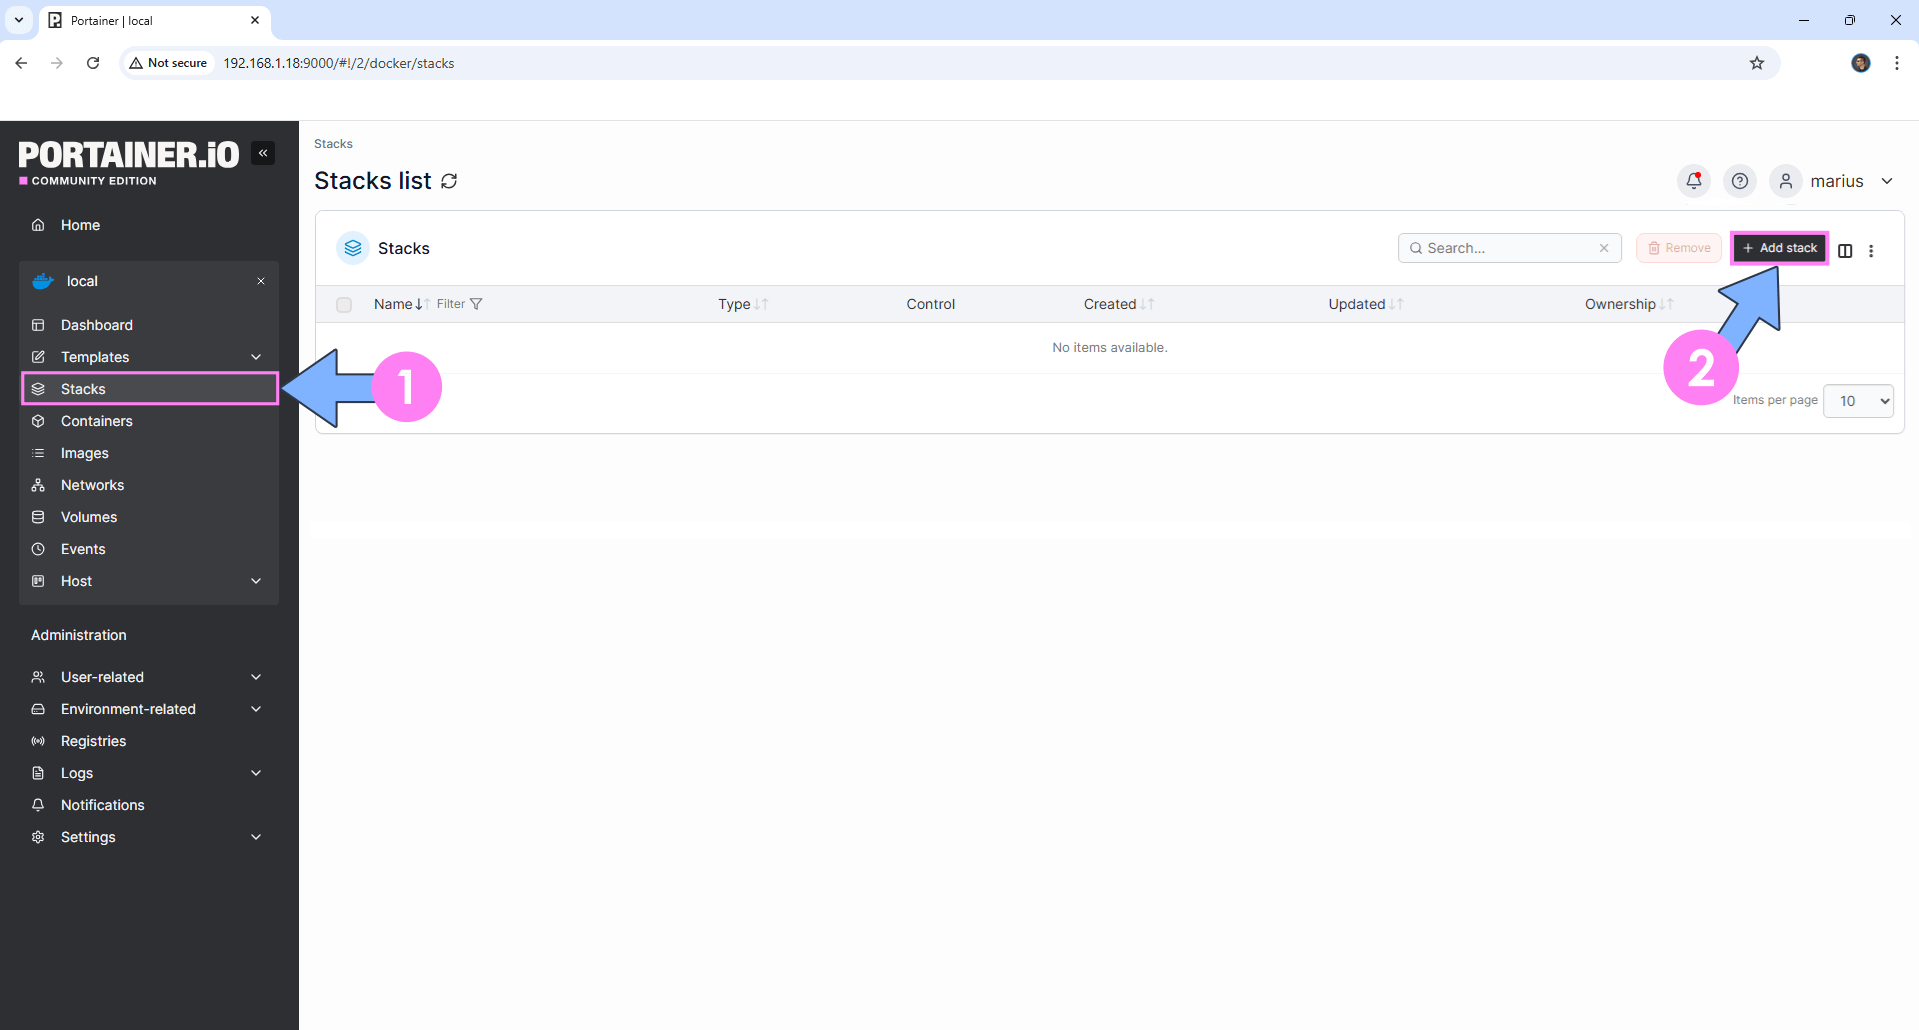
On the left sidebar in Portainer, click on Stacks then + Add stack. Follow the instructions in the image below.
STEP 6
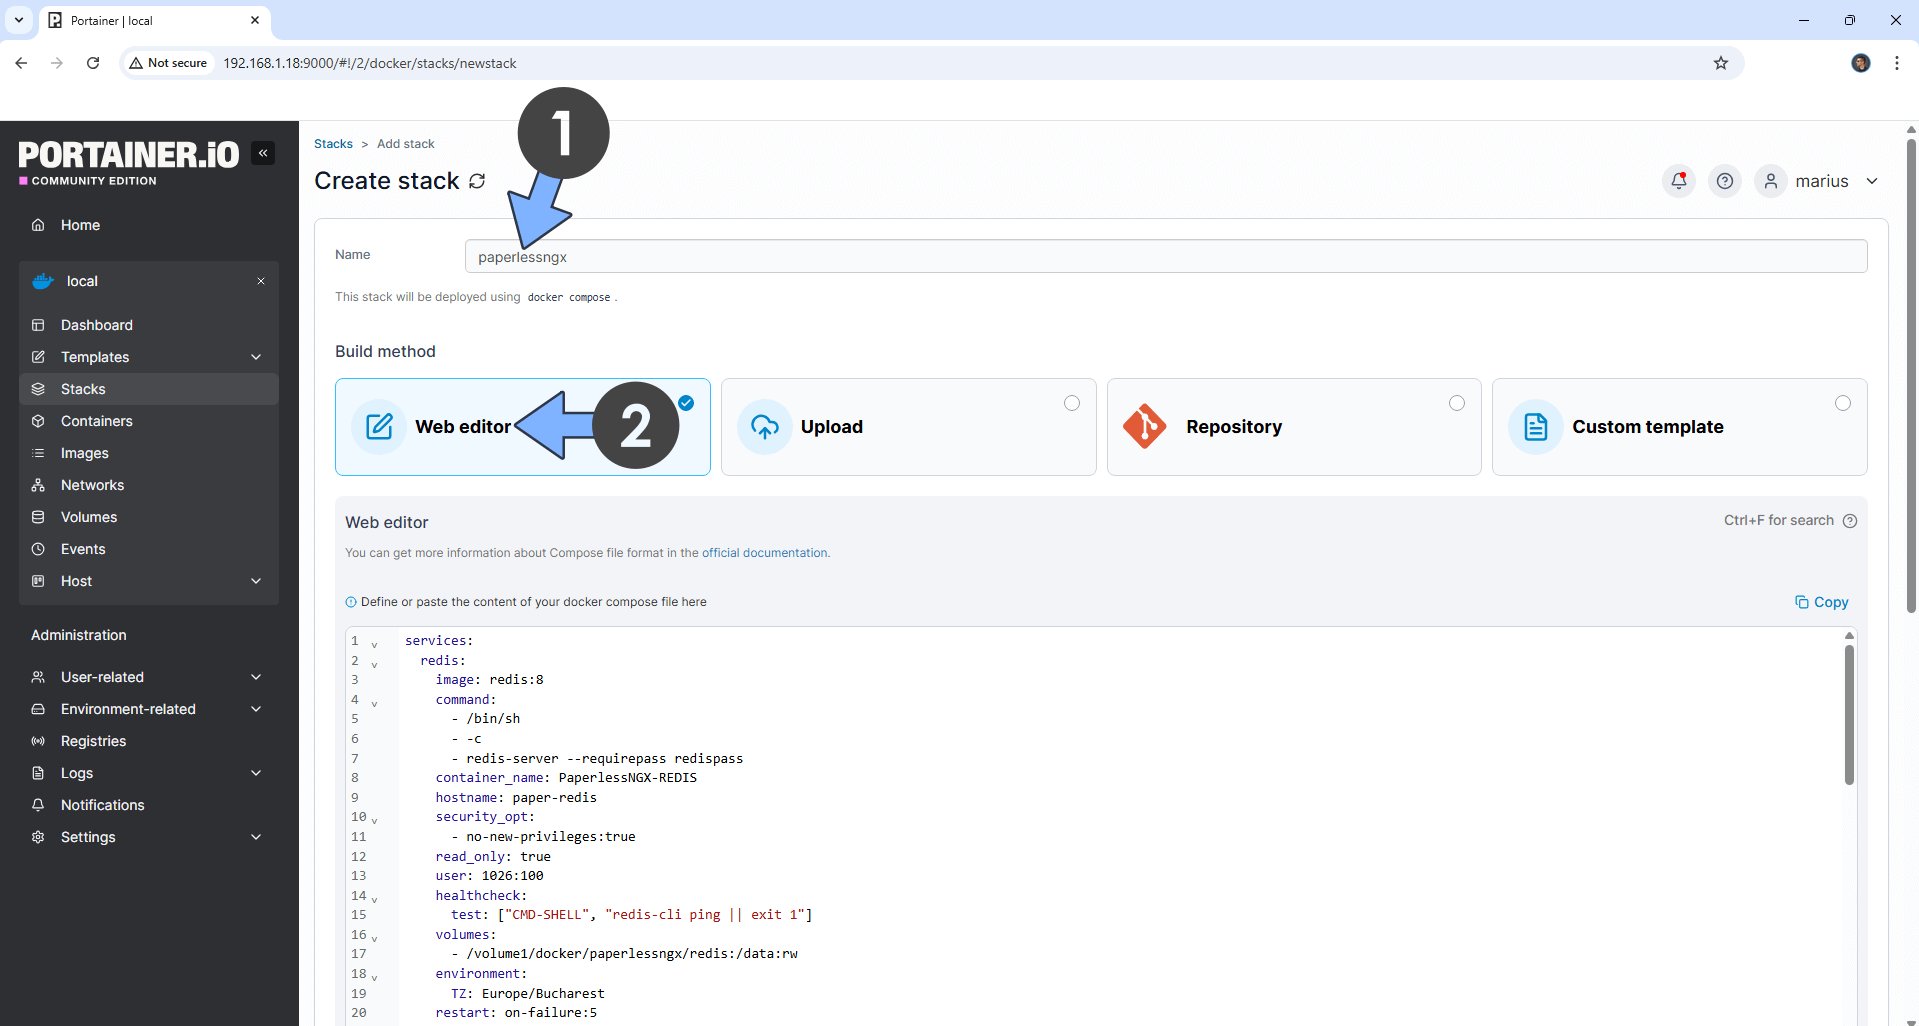
In the Name field type in paperlessngx. Follow the instructions in the image below.
services:
  redis:
    image: redis:8
    command:
      - /bin/sh
      - -c
      - redis-server --requirepass redispass
    container_name: PaperlessNGX-REDIS
    hostname: paper-redis
    security_opt:
      - no-new-privileges:true
    read_only: true
    user: 1026:100
    healthcheck:
      test: ["CMD-SHELL", "redis-cli ping || exit 1"]
    volumes:
      - /volume1/docker/paperlessngx/redis:/data:rw
    environment:
      TZ: Europe/Bucharest
    restart: on-failure:5

  db:
    image: postgres:18
    container_name: PaperlessNGX-DB
    hostname: paper-db
    security_opt:
      - no-new-privileges:true
    healthcheck:
      test: ["CMD", "pg_isready", "-q", "-d", "paperless", "-U", "paperlessuser"]
      timeout: 45s
      interval: 10s
      retries: 10
    volumes:
      - /volume1/docker/paperlessngx/db:/var/lib/postgresql:rw
    environment:
      POSTGRES_DB: paperless
      POSTGRES_USER: paperlessuser
      POSTGRES_PASSWORD: paperlesspass
    restart: on-failure:5

  paperless:
    image: ghcr.io/paperless-ngx/paperless-ngx:latest
    container_name: PaperlessNGX
    hostname: paperless-ngx
    security_opt:
      - no-new-privileges:true
    healthcheck:
      test: ["CMD", "curl", "-fs", "-S", "--max-time", "2", "http://localhost:8000"]
      interval: 30s
      timeout: 10s
      retries: 5
    ports:
      - 8777:8000
    volumes:
      - /volume1/docker/paperlessngx/data:/usr/src/paperless/data:rw
      - /volume1/docker/paperlessngx/media:/usr/src/paperless/media:rw
      - /volume1/docker/paperlessngx/export:/usr/src/paperless/export:rw
      - /volume1/docker/paperlessngx/consume:/usr/src/paperless/consume:rw
      - /volume1/docker/paperlessngx/trash:/usr/src/paperless/trash:rw
    environment:
      PAPERLESS_REDIS: redis://:redispass@paper-redis:6379
      PAPERLESS_DBENGINE: postgresql
      PAPERLESS_DBHOST: paper-db
      PAPERLESS_DBNAME: paperless
      PAPERLESS_DBUSER: paperlessuser
      PAPERLESS_DBPASS: paperlesspass
      PAPERLESS_EMPTY_TRASH_DIR: ../trash
      PAPERLESS_FILENAME_FORMAT: '{{ created_year }}/{{ correspondent }}/{{ document_type }}/{{ title }}'
      PAPERLESS_OCR_ROTATE_PAGES_THRESHOLD: 6
      PAPERLESS_TASK_WORKERS: 1
      USERMAP_UID: 1026
      USERMAP_GID: 100
      PAPERLESS_TIME_ZONE: Europe/Bucharest
      PAPERLESS_ADMIN_USER: marius
      PAPERLESS_ADMIN_PASSWORD: mariushosting
      PAPERLESS_URL: http://192.168.1.18
      PAPERLESS_CSRF_TRUSTED_ORIGINS: http://192.168.1.18
      PAPERLESS_OCR_LANGUAGE: deu+eng
    restart: on-failure:5
    depends_on:
      db:
        condition: service_healthy
      redis:
        condition: service_healthy
Note: Before you paste the code above in the Web editor area below, change the value numbers for user with your own UID and GID values. (Follow my step by step guide on how to do this.) 1026 is my personal UID value and 100 is my personal GID value. You have to type in your own values.
Note: Before you paste the code above in the Web editor area, change the value for TZ with your own time zone value. (Select your current Time Zone from this list.)
Note: Before you paste the code above in the Web editor area, change the values for USERMAP_UID and USERMAP_GID with your own number values. (Follow my step by step guide on how to do this.)
Note: Before you paste the code above in the Web editor area, change the value for PAPERLESS_TIME_ZONE with your own time zone value. (Select your current Time Zone from this list.)
Note: Before you paste the code above in the Web editor area, change the value for PAPERLESS_ADMIN_USER and add your own username. marius is an example of a username. You have to insert your own username.
Note: Before you paste the code above in the Web editor area, change the value for PAPERLESS_ADMIN_PASSWORD and add your own password. mariushosting is an example of a password. You have to insert your own password.
Note: Before you paste the code above in the Web editor area below, change the value for PAPERLESS_URL and type in your own local NAS IP with http:// at the beginning.
Note: Before you paste the code above in the Web editor area below, change the value for PAPERLESS_CSRF_TRUSTED_ORIGINS and type in your own local NAS IP with http:// at the beginning.
Note: Before you paste the code above in the Web editor area below, change the value for PAPERLESS_OCR_LANGUAGE and type in your own OCR language. deu+eng is for German and English. nld+eng is for Dutch and English. It’s important to understand that you need to add your own language firs AND then +eng for English. +eng is always mandatory. If you only add your OCR language, like deu, but not +eng, then paperless won’t work.
STEP 7
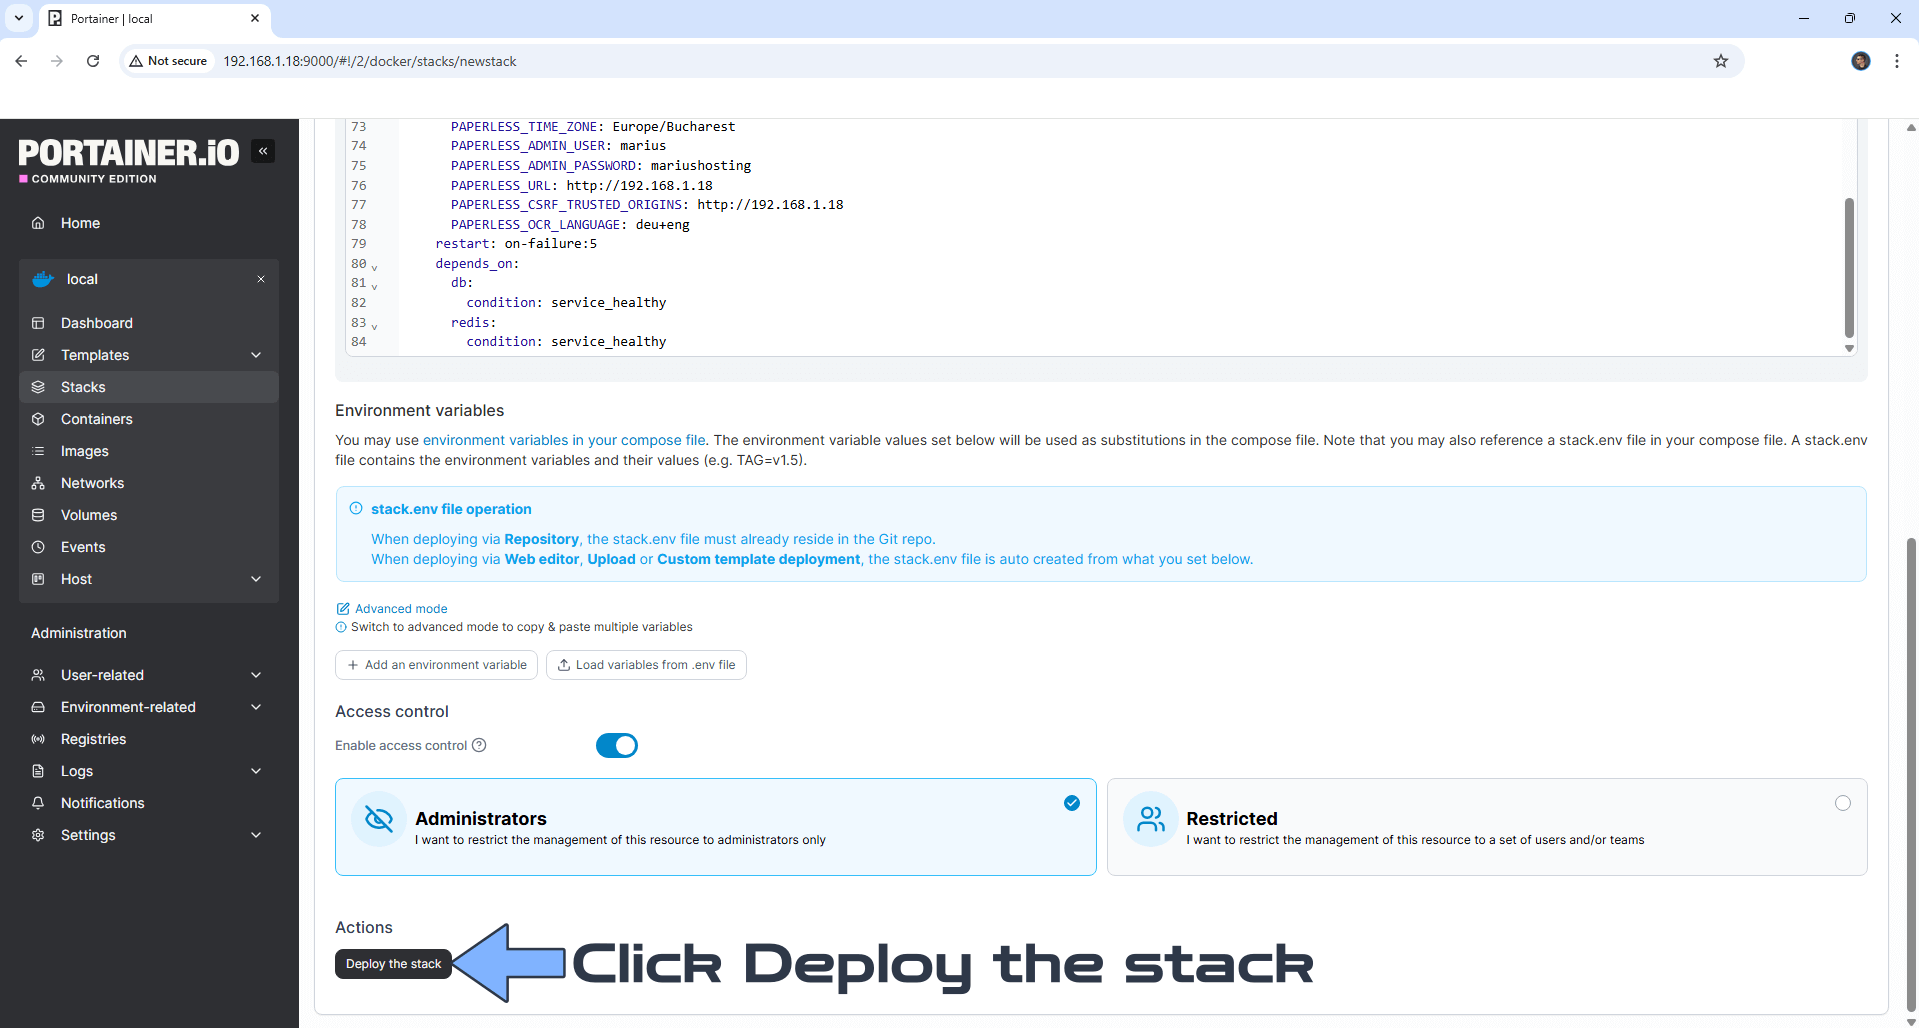
Scroll down on the page until you see a button named Deploy the stack. Click on it. Follow the instructions in the image below. The installation process can take up to a few minutes. It will depend on your Internet speed connection.
STEP 8
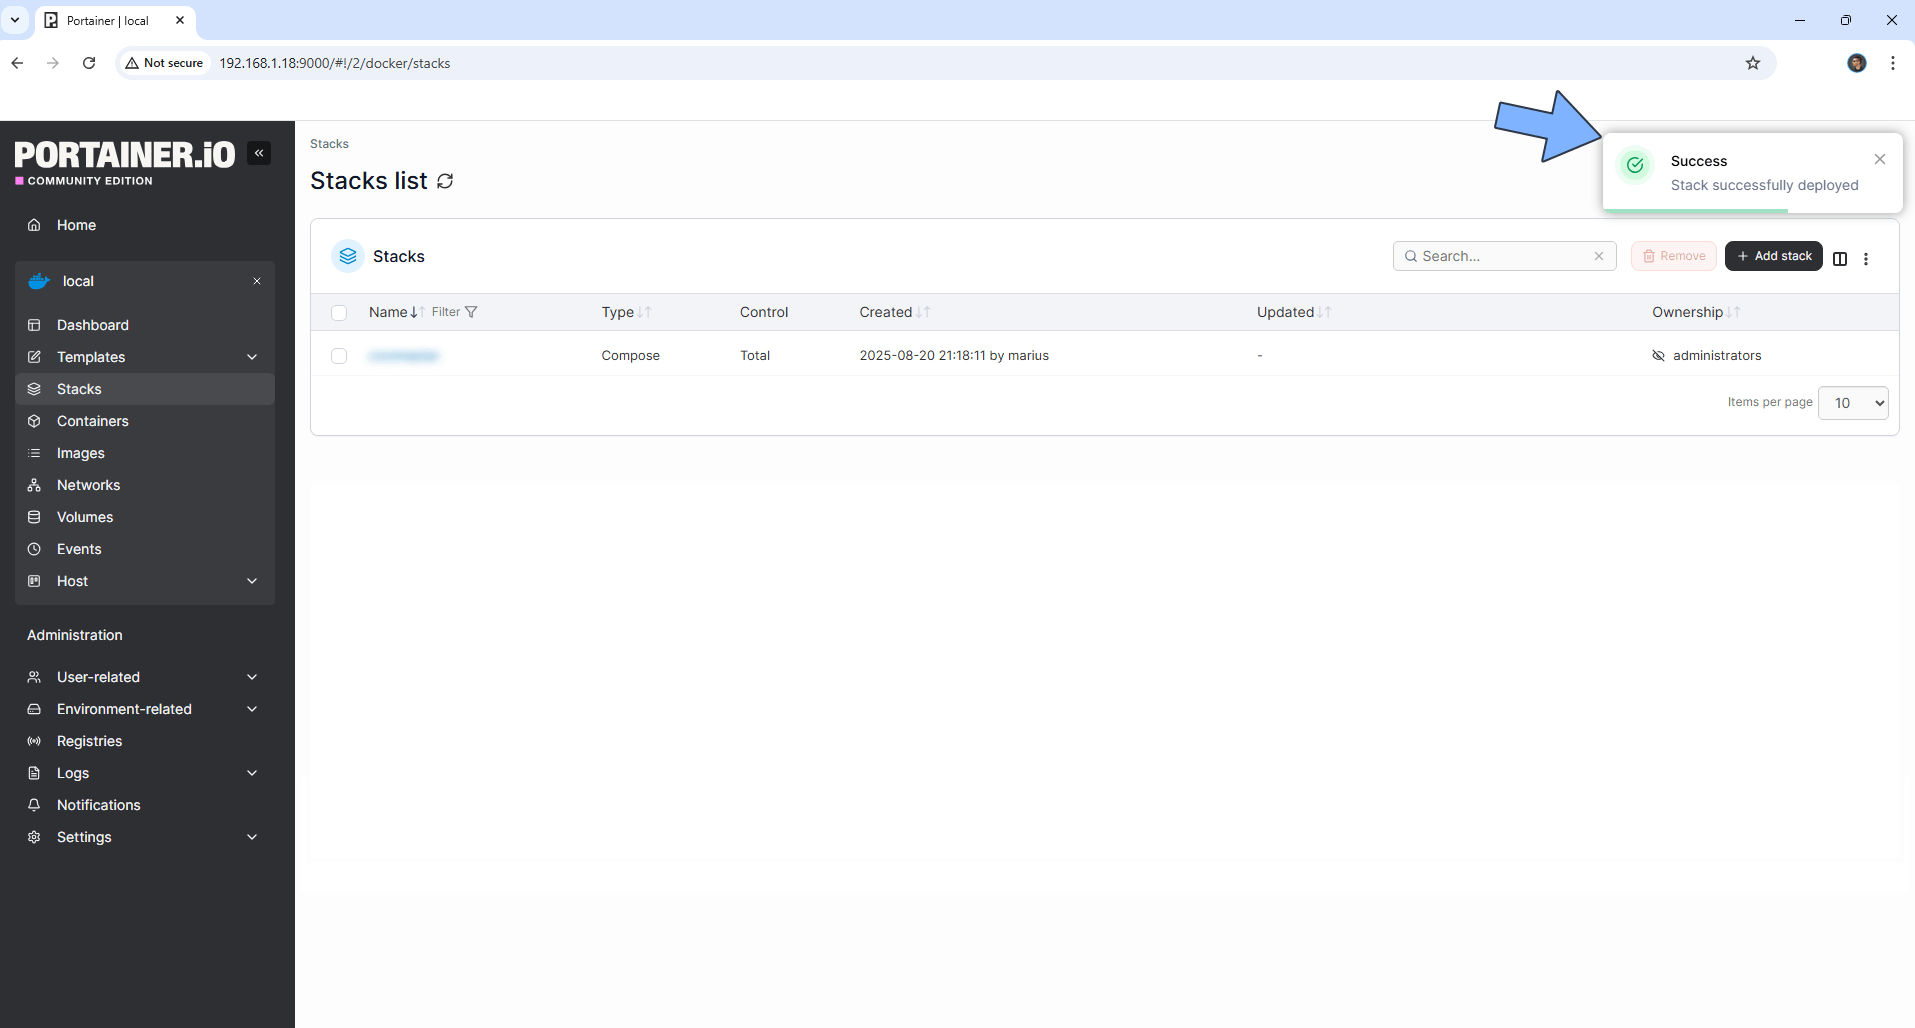
If everything goes right, you will see the following message at the top right of your screen: “Success Stack successfully deployed“.
STEP 9
🟢Please Support My work by Making a Donation. Almost 99,9% of the people that install something using my guides forget to support my work, or just ignore STEP 1. I’ve been very honest about this aspect of my work since the beginning: I don’t run any ADS, I don’t require subscriptions, paid or otherwise, I don’t collect IPs, emails, and I don’t have any referral links from Amazon or other merchants. I also don’t have any POP-UPs or COOKIES. I have repeatedly been told over the years how much I have contributed to the community. It’s something I love doing and have been honest about my passion since the beginning. But I also Need The Community to Support me Back to be able to continue doing this work.
STEP 10
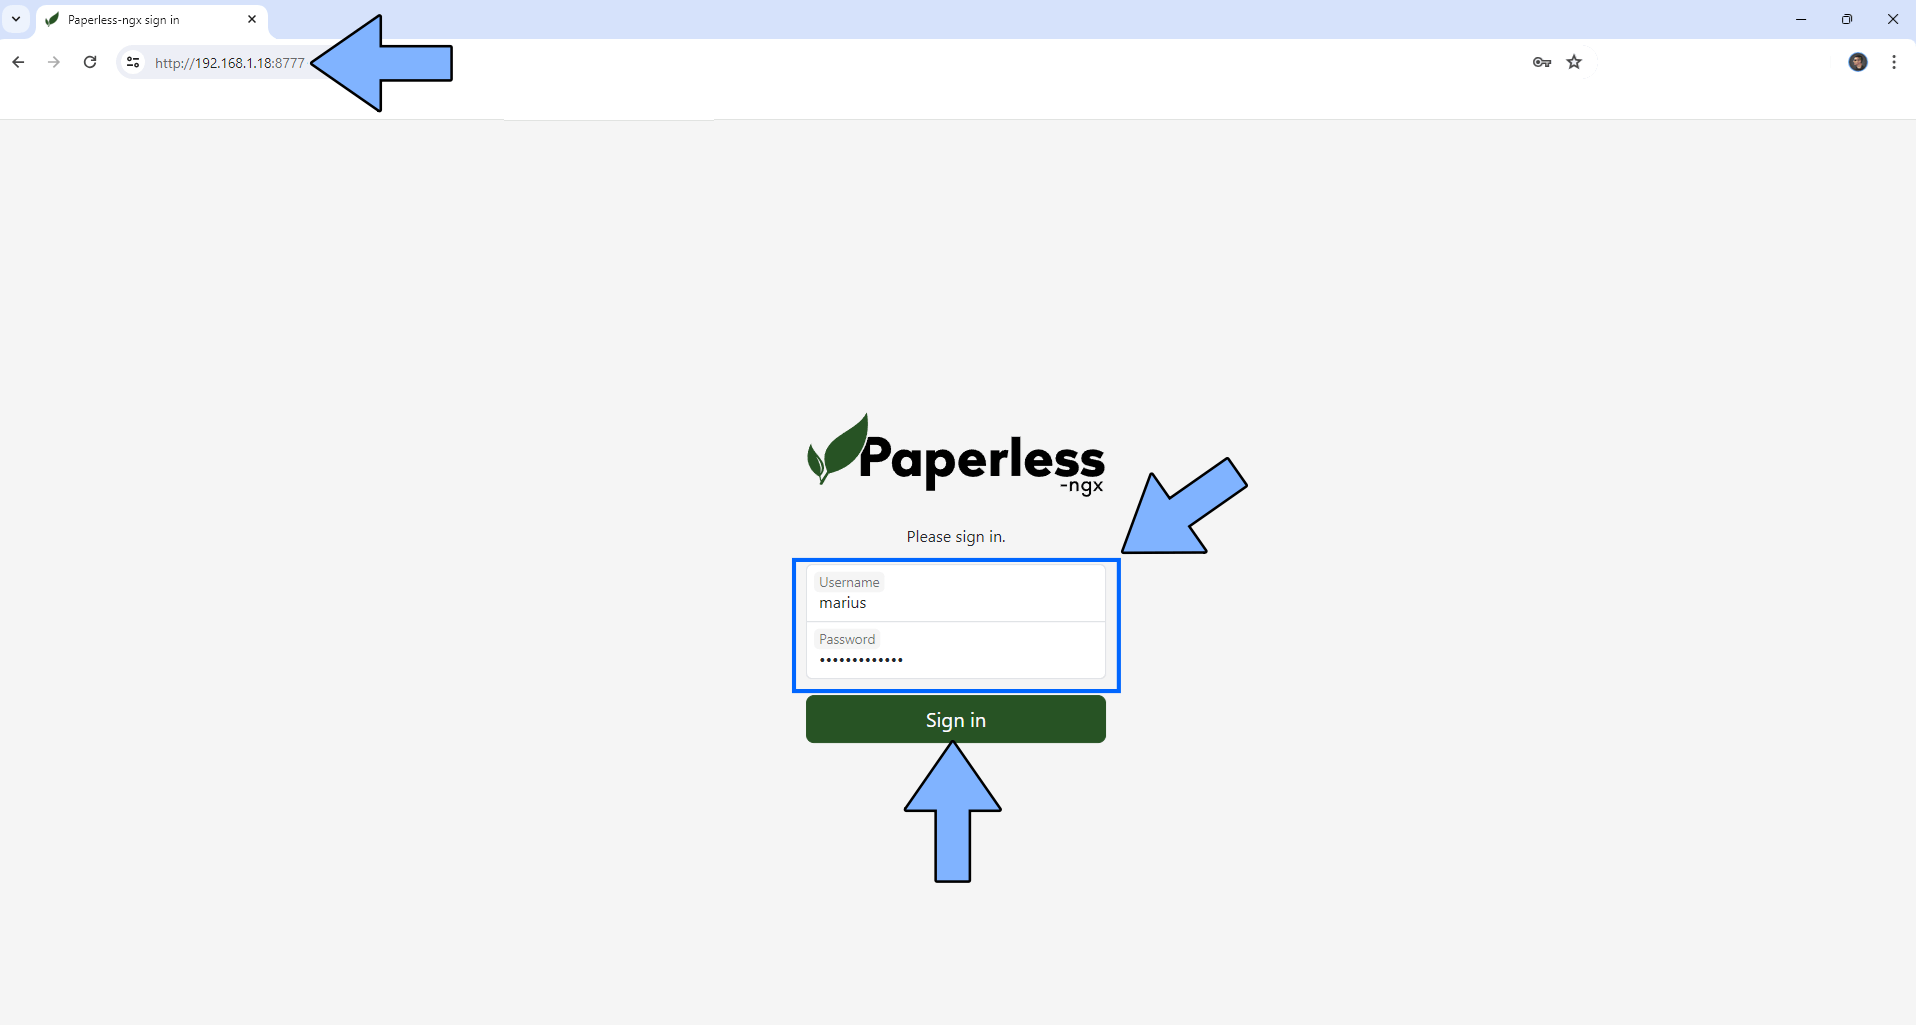
Now open your browser and type in http://Synology-ip-address:8777 Type in your own Username and Password that you have previously created at STEP 6 then click Sign in. Follow the instructions in the image below. ⚠️Warning: if you get an error message that says Username and/or password incorrect, this means your NAS is slow and didn’t create the superadmin user. You need to wait 2-3 minutes longer and try to log in again. Don’t rush to change the password or reinstall everything from scratch, just wait.
STEP 11
Start uploading your documents!
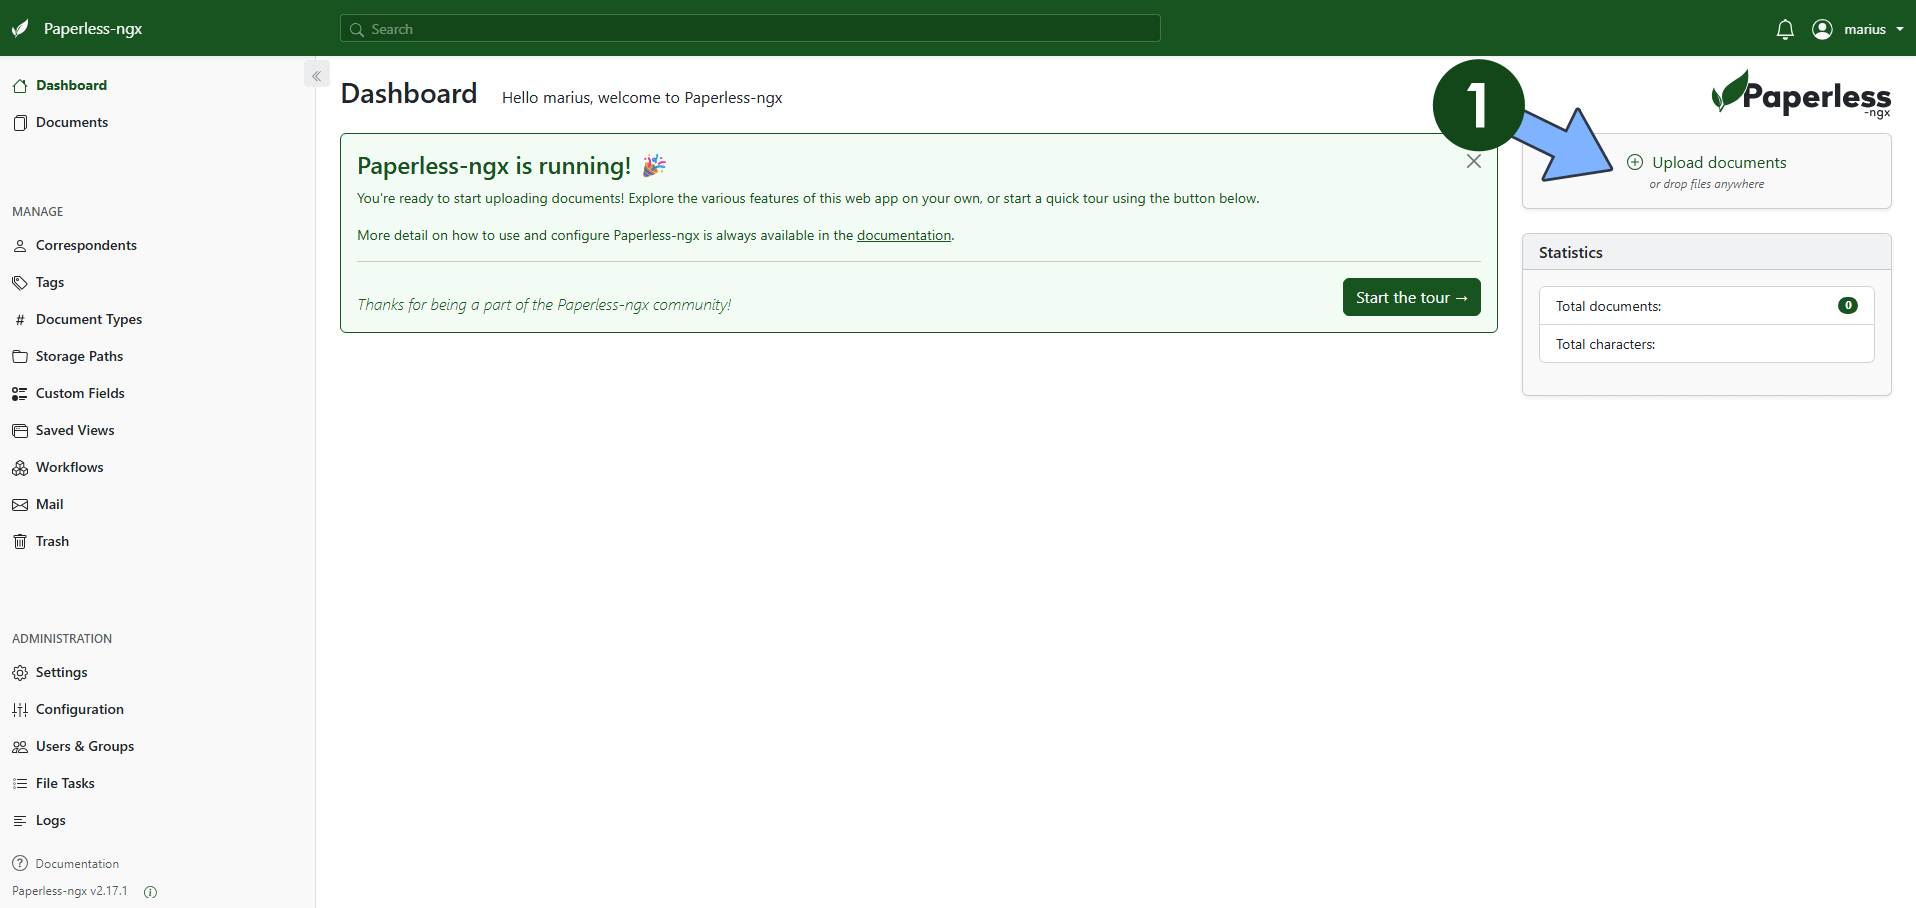
STEP 12
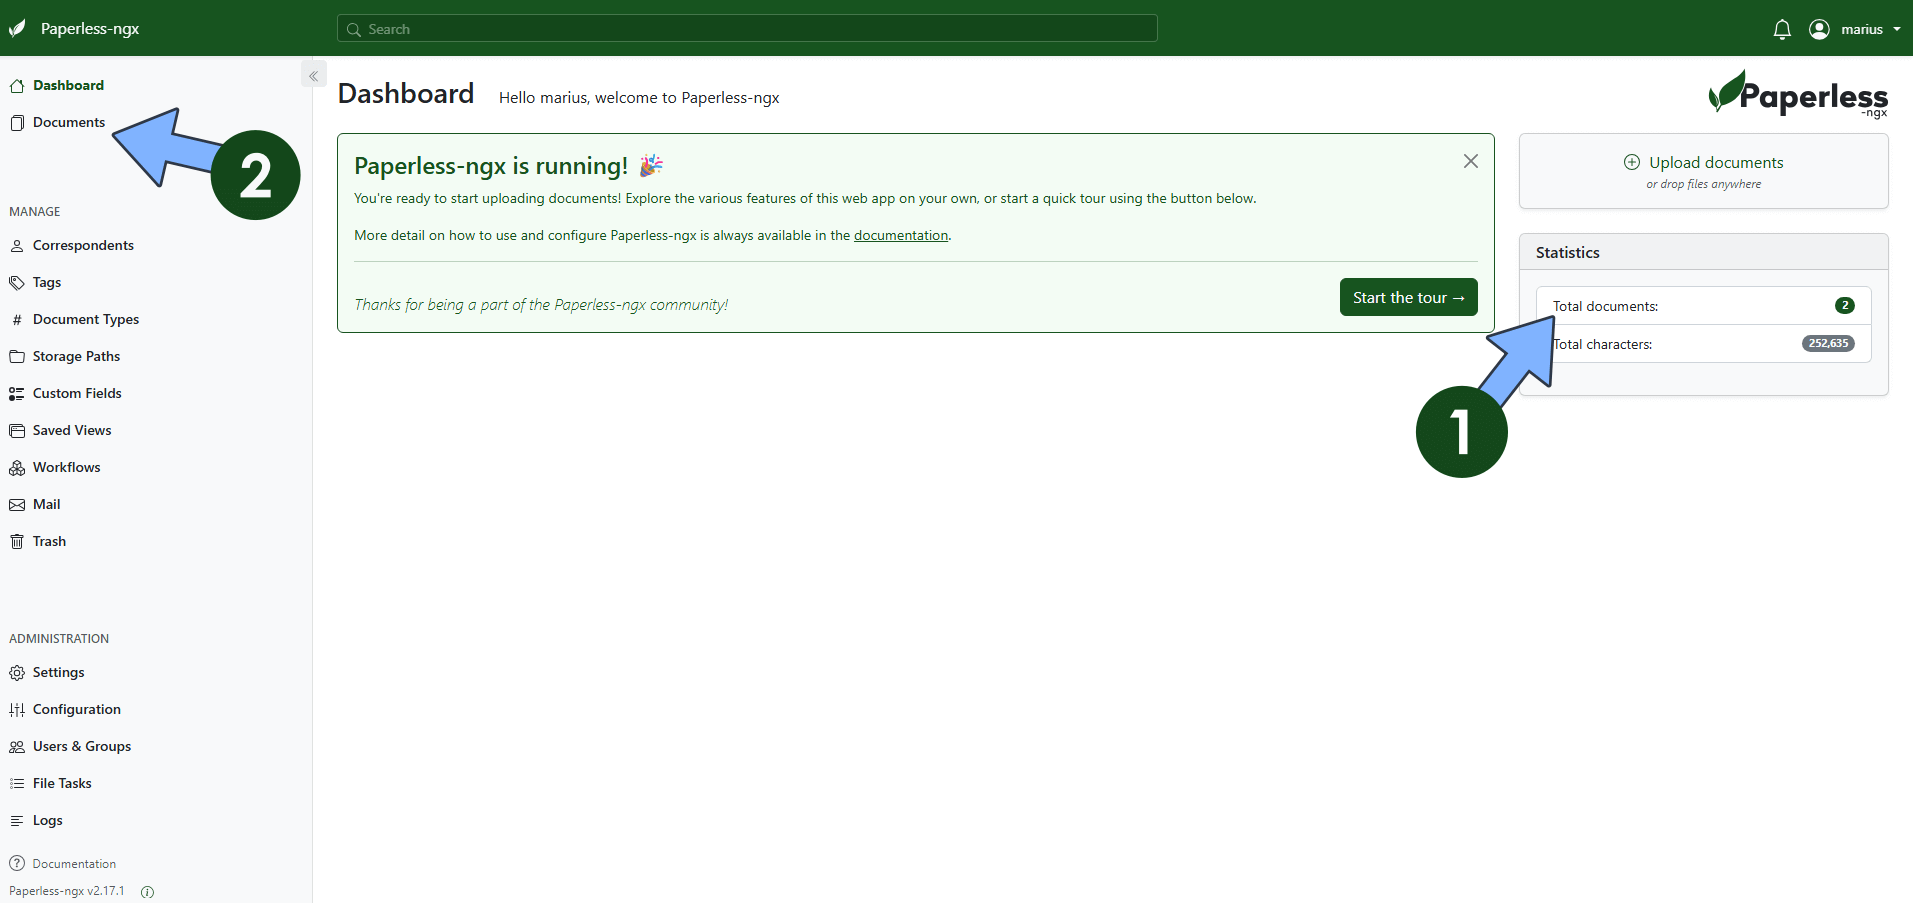
Click Documents. Follow the instructions in the image below.
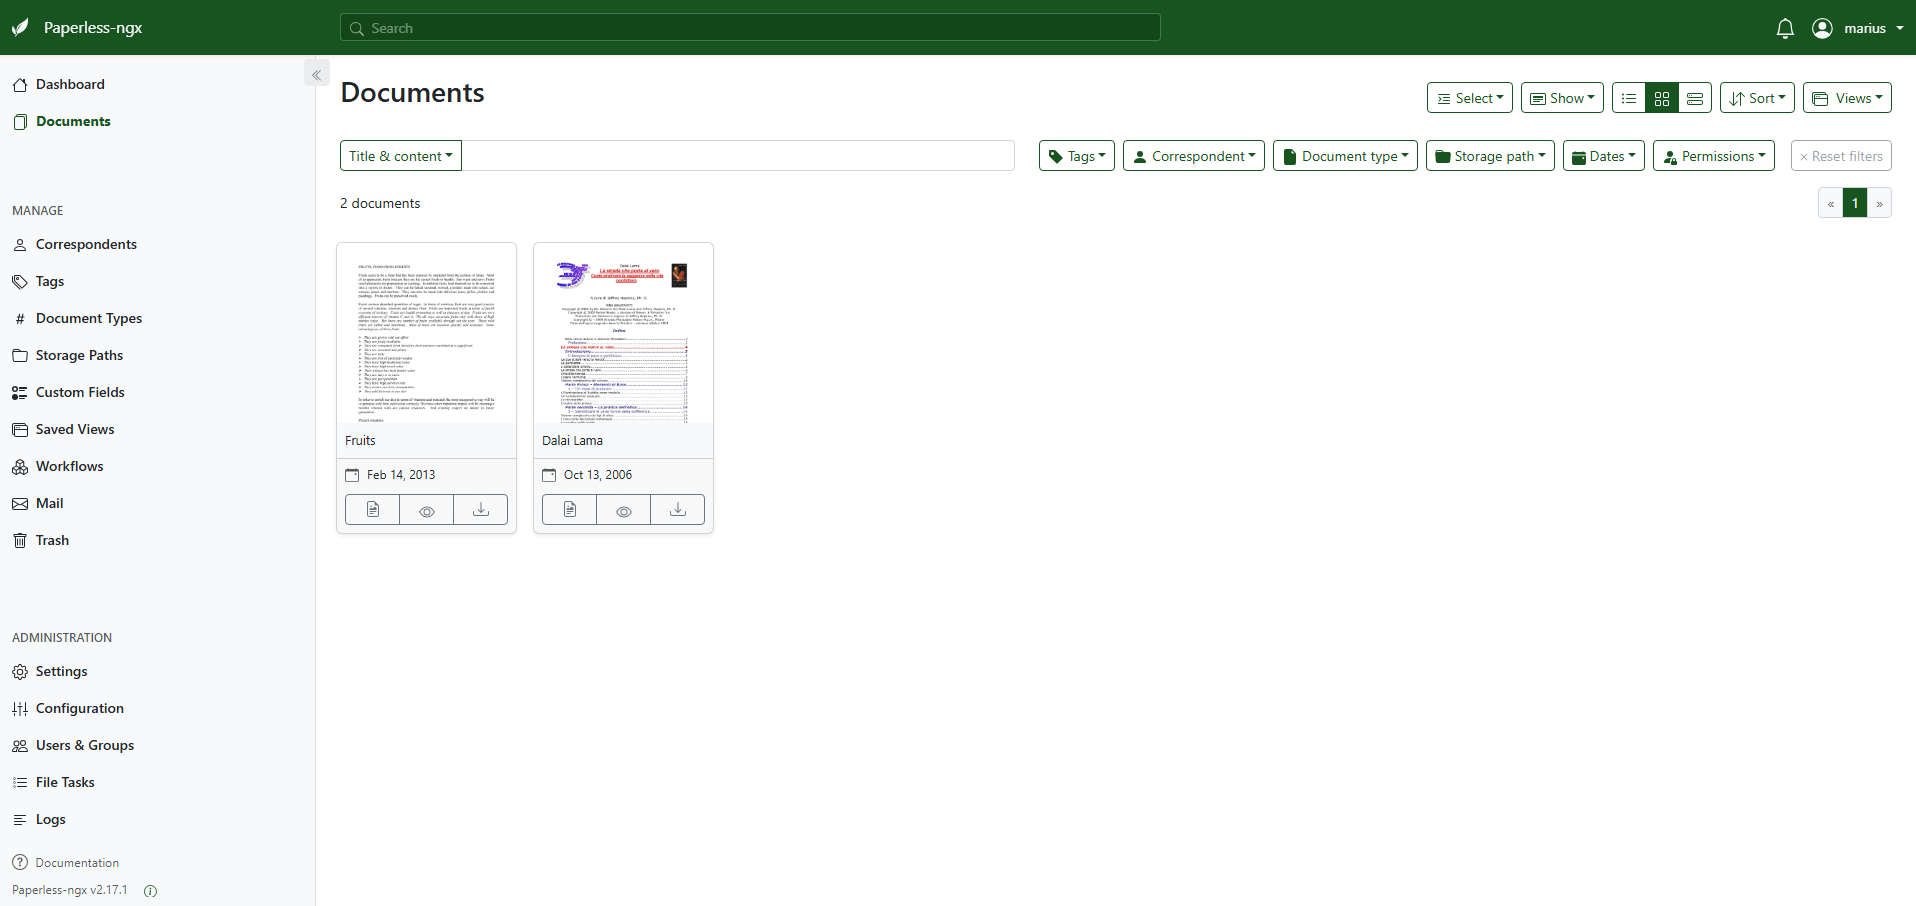
Your Paperless-ngx documents at a glance!
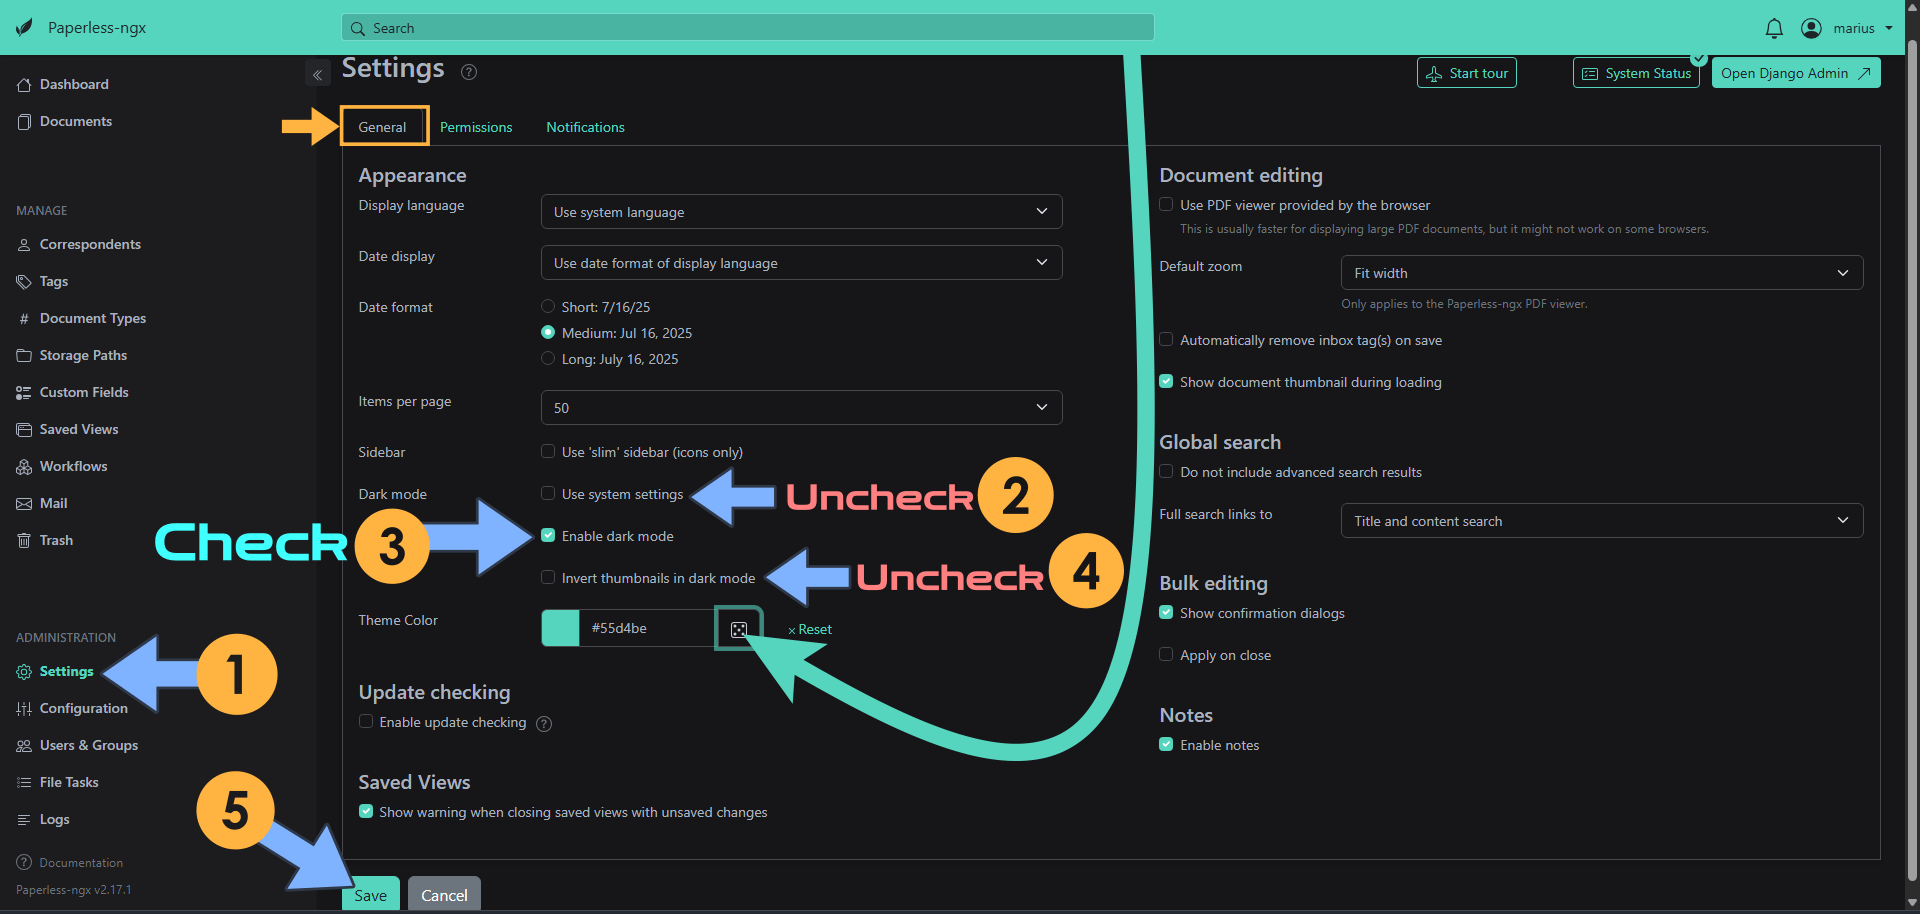
You can also enable Dark Mode and change the Sidebar Color Theme. On the left sidebar, click on Settings – General tab, then follow the instructions below.
Uncheck Use system settings
Check Enable dark mode.
Uncheck Invert thumbnails in dark mode.
Change your Theme Color then click Save. Follow the instructions in the image below.
If you encounter issues by using this container, make sure to check out the Common Docker issues article.
🔥Troubleshoot: If you use the MDY (Month-Day-Year) format instead of the DMY (Day-Month-Year) format, add the following line to your compose file at STEP 6:
PAPERLESS_DATE_ORDER: MDY
just after
PAPERLESS_TIME_ZONE: Europe/Bucharest🍀Note: If you want to run the Paperless-ngx container over HTTPS, check my guide on How to Run Docker Containers Over HTTPS. If you want to use reverse proxy to access Paperless-ngx over HTTPS, in the code at STEP 6 you also need to add the environment PAPERLESS_URL: https://paperless.yourname.synology.me and PAPERLESS_CSRF_TRUSTED_ORIGINS: https://paperless.yourname.synology.me just after PAPERLESS_ADMIN_PASSWORD:
🔥Troubleshoot: In case you get the following error message: Error occurred while consuming document invoice.pdf: DigitalSignatureError: Input PDF has a digital signature. OCR would alter the document, invalidating the signature, just add the following Environment variable in the compose at STEP 6:
PAPERLESS_OCR_USER_ARGS: '{"invalidate_digital_signatures": true}'
Add it after:
PAPERLESS_CSRF_TRUSTED_ORIGINS: https://paperlessngx.yourname.synology.me
PAPERLESS_URL: https://paperlessngx.yourname.synology.me
It should look like this:
PAPERLESS_CSRF_TRUSTED_ORIGINS: https://paperlessngx.yourname.synology.me
PAPERLESS_URL: https://paperlessngx.yourname.synology.me
PAPERLESS_OCR_USER_ARGS: '{"invalidate_digital_signatures": true}'
To connect to Paperless NGX over HTTPS and make it secure, you just need to add your own 64 random length PAPERLESS_SECRET_KEY Environment variable at STEP 6.
PAPERLESS_SECRET_KEY: dOxZYTTZgXKMHkqLBIQVImayQXAVWdzGBPuFJKggzcgvgPJPXpWzqzKaUOIOGGIrNote: Change the value for PAPERLESS_SECRET_KEY. (Generate your own Random 64 length PAPERLESS_SECRET_KEY.)
just after
PAPERLESS_TIME_ZONE: Europe/Bucharest🔥Troubleshoot: If you want to add an OCR language that is not installed by default on Paperless-NGX, you just need to add the following Environment variables (BOTH) in the compose at STEP 6:
PAPERLESS_OCR_LANGUAGES: nld nor #Install the language packages, for example nld and nor for Dutch and Norway, or just nld for Dutch or nor for Norway or a combination of both.
PAPERLESS_OCR_LANGUAGE: eng #Set default language to English. This is mandatory. Without this environment variable, the other languages like nld or nor will not be installed.
⚠️Warning: If you need to re-create the PaperlessNGX superuser again, just open the container bash shell and type in:
python manage.py createsuperuser
💡Suggestion: You can also install Stirling-PDF to better manage your documents.
💡Suggestion: You can also install Documenso that provides secure and efficient digital document signing and processing.
💡Suggestion: You can also install DocuSeal that provides secure and efficient digital document signing and processing.
💡Suggestion: You can also install Papra to manage your documents.
Note: Can I run Docker on my Synology NAS? See the supported models.
Note: Find out how to update the Paperless-ngx container with the latest image.
Note: How to Back Up Docker Containers on your Synology NAS.
Note: How to Free Disk Space on Your NAS if You Run Docker.
Note: How to Schedule Start & Stop For Docker Containers.
Note: How to Activate Email Notifications.
Note: How to Add Access Control Profile on Your NAS.
Note: How to Change Docker Containers Restart Policy.
Note: How to Use Docker Containers With VPN.
Note: Convert Docker Run Into Docker Compose.
Note: How to Clean Docker.
Note: How to Clean Docker Automatically.
Note: Best Practices When Using Docker and DDNS.
Note: Some Docker Containers Need WebSocket.
Note: Find out the Best NAS Models For Docker.
Note: Activate Gmail SMTP For Docker Containers.
This post was updated on Wednesday / July 29th, 2026 at 8:00 PM