
HolyArrs is a free, open-source, self-hosted app that replaces the usual stack of Sonarr, Radarr, Lidarr, Bazarr, Prowlarr and Seerr with a single lightweight interface. You browse movies, shows and music like a streaming service, request titles or seasons, and it searches your indexers, picks the best release according to your rules, sends it to your download client (qBittorrent, SABnzbd, Transmission, etc.) and organises everything into your library. It also handles subtitles, shows an upcoming calendar, and works with existing media servers such as Plex or Jellyfin. The Docker image is only about 15 MB, idles around 140 MB of RAM even with large libraries, and runs on amd64, arm64 and armv7 with one login and one port. I have recently been using HolyArrs on my Synology NAS and it has made managing my media library much simpler by bringing everything into one clean interface. In this step by step guide I will show you how to install HolyArrs on your Synology NAS using Docker & Dockhand.
💡Note:
This guide works perfectly with the latest HolyArrs v1.1.0 release.
STEP 1
Please Support My work by Making a Donation.
STEP 2
Install Dockhand using my step by step guide. If you already have Dockhand installed on your Synology NAS, skip this STEP. ⚠️Attention: Make sure you have installed the latest Dockhand version.
STEP 3
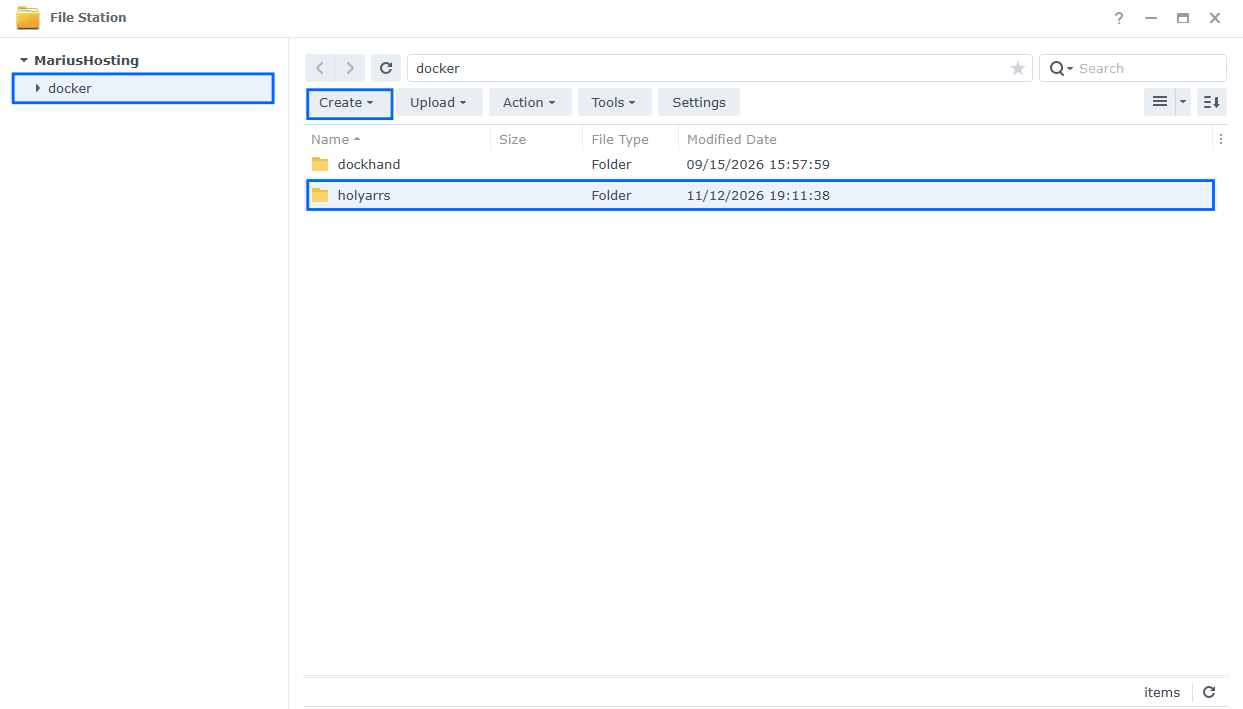
Go to File Station and open the docker folder. Inside the docker folder, create one new folder and name it holyarrs. Follow the instructions in the image below.
Note: Be careful to enter only lowercase, not uppercase letters.
STEP 4
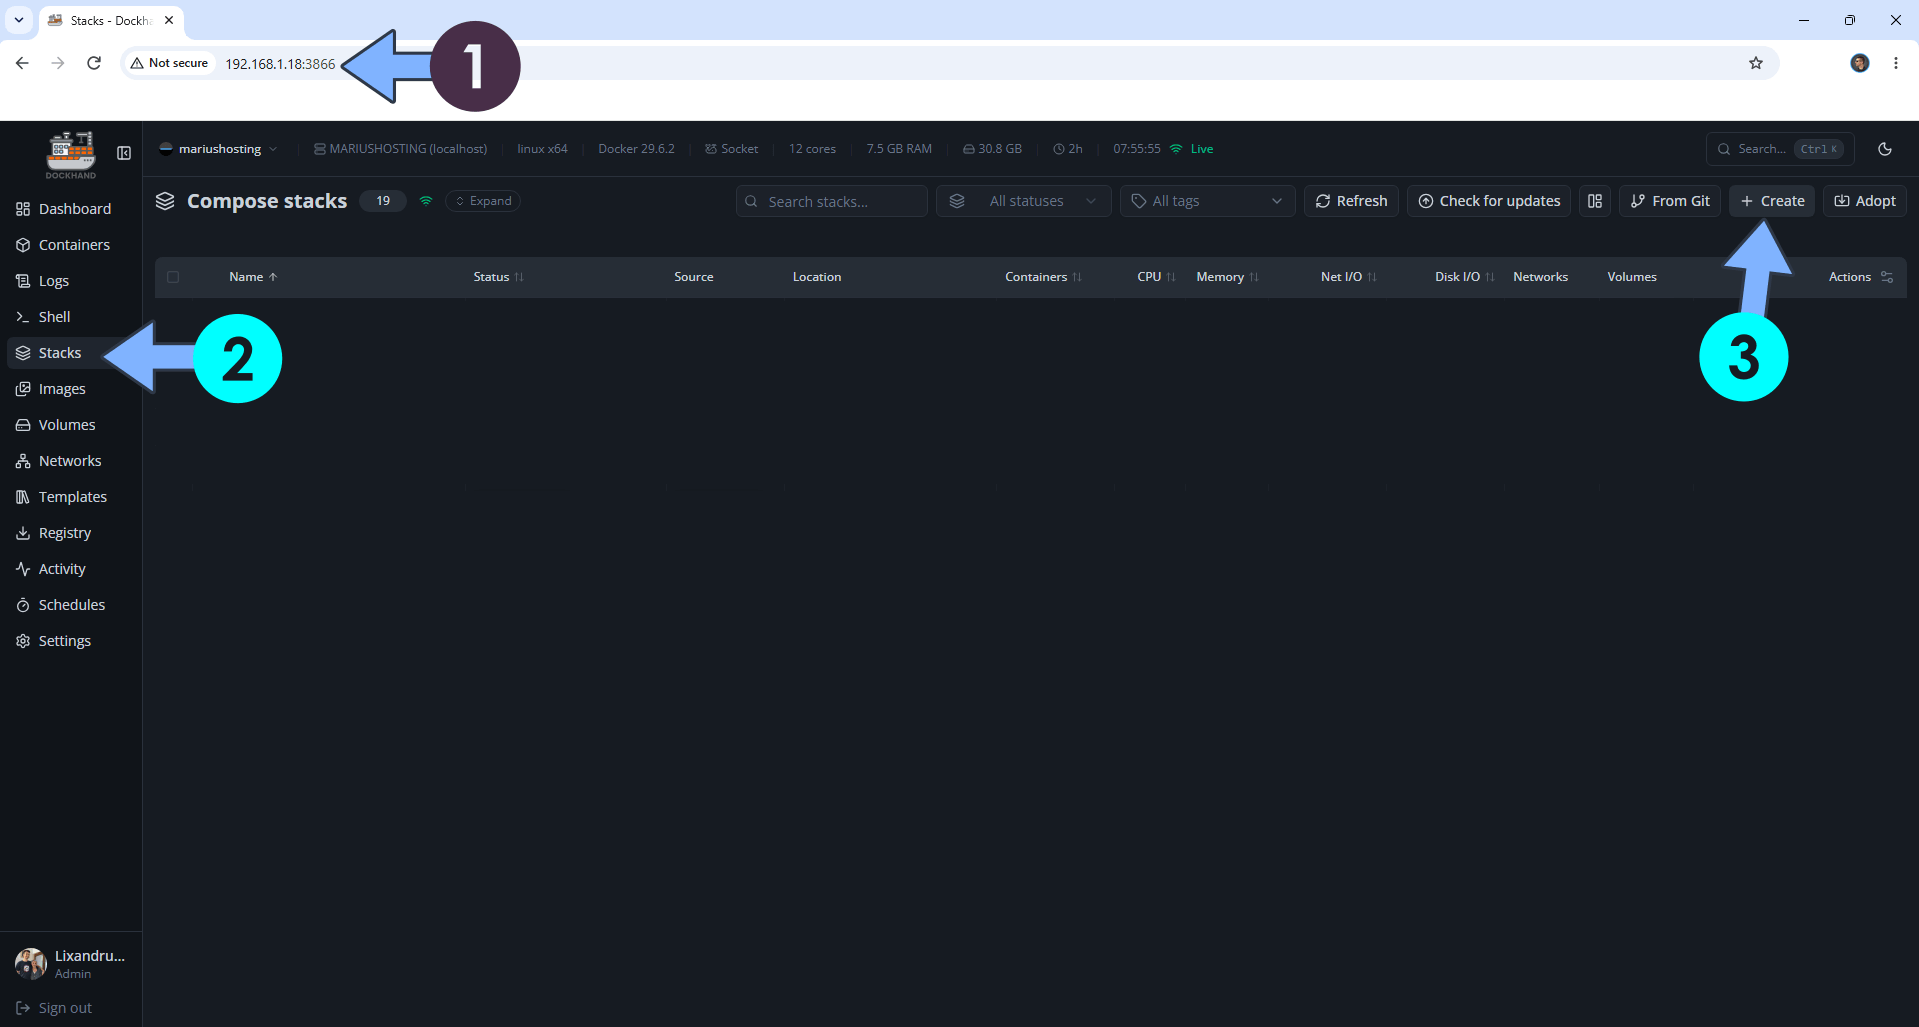
Open your browser and type in http://synology-ip-address:3866 to connect to your Dockhand container. On the left sidebar, click Stacks then + Create. Follow the instructions in the image below.
STEP 5
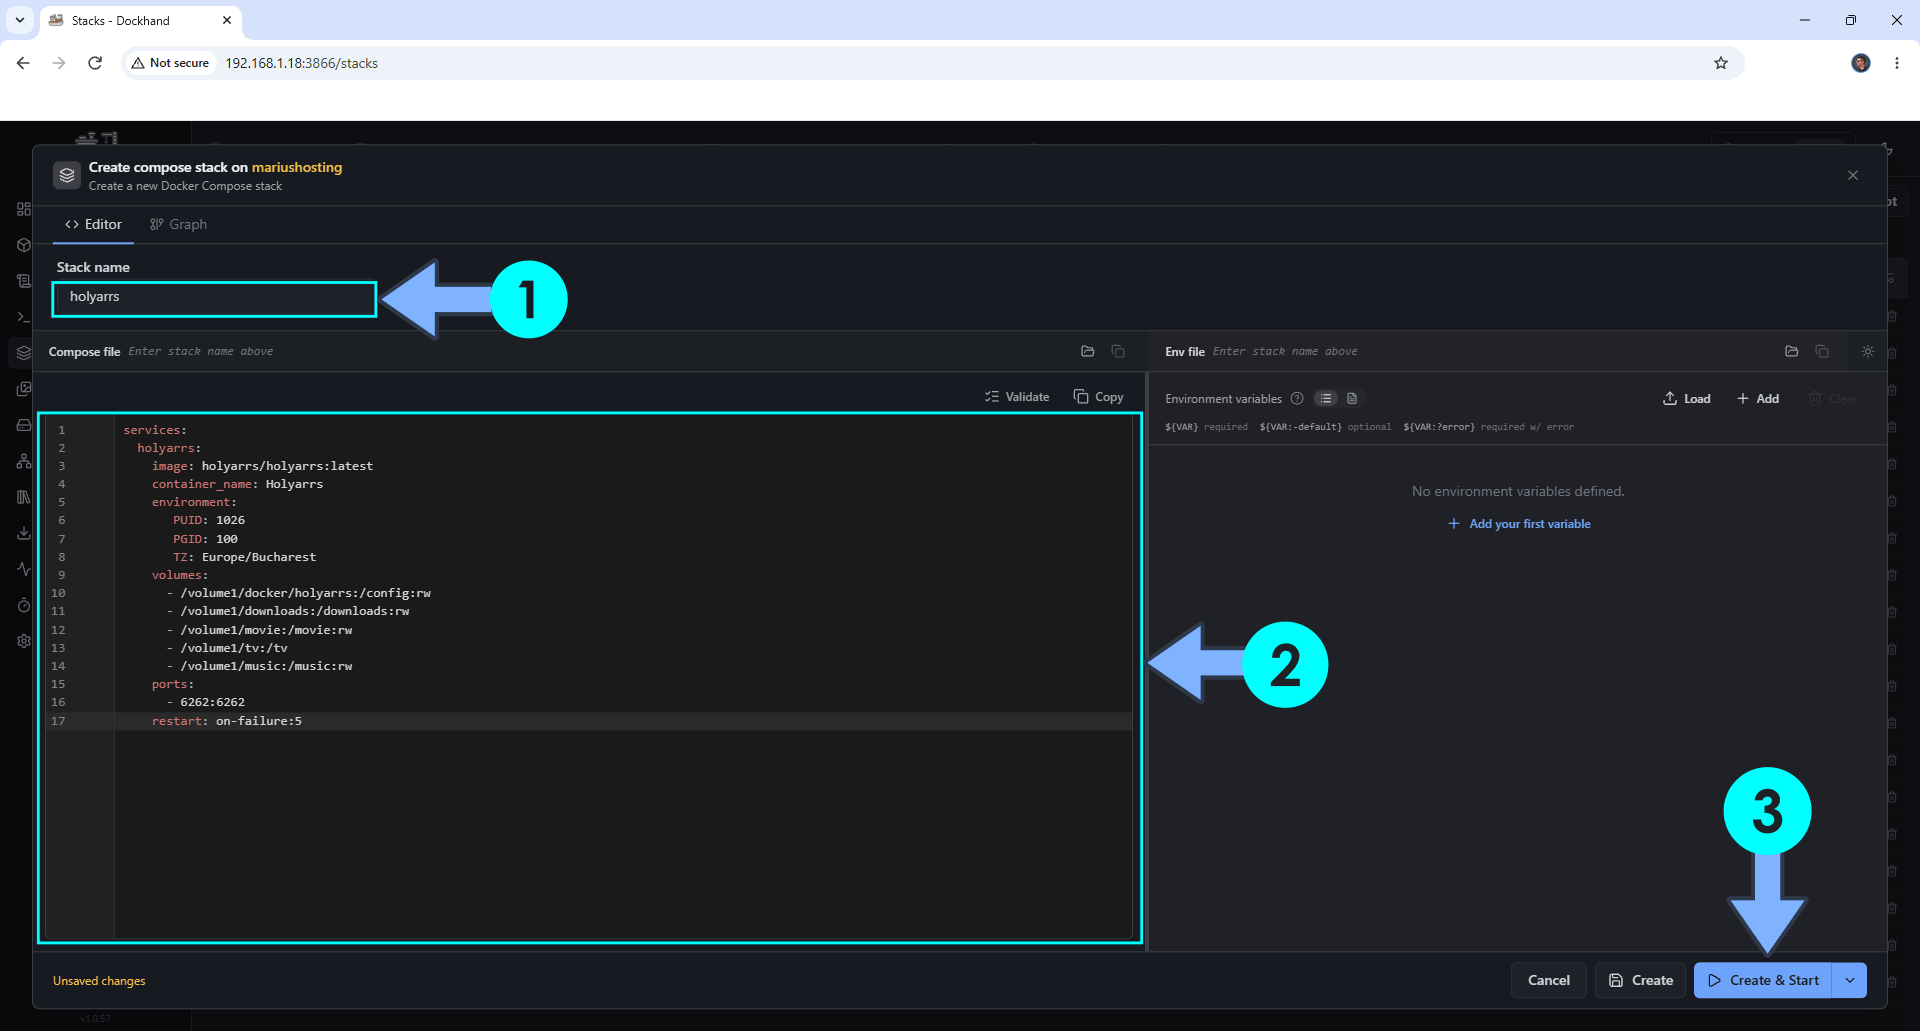
In the Stack name field, type in holyarrs. ⚠️Warning: Type in the name in lowercase letters. The installation process can take up to a few seconds/minutes. It will depend on your Internet speed connection. Follow the instructions in the image below.
Note: Copy Paste the code below in the Dockhand Compose Stack then click Create & Start.
services:
  holyarrs:
    image: holyarrs/holyarrs:latest
    container_name: Holyarrs
    environment:
       PUID: 1026
       PGID: 100
       TZ: Europe/Bucharest
    volumes:
      - /volume1/docker/holyarrs:/config:rw
      - /volume1/downloads:/downloads:rw
      - /volume1/movie:/movie:rw
      - /volume1/tv:/tv
      - /volume1/music:/music:rw
    ports:
      - 6262:6262
    restart: on-failure:5
Note: Before you paste the code above in the Stack editor area below, change the value numbers for PUID and PGID with your own values. (Follow my step by step guide on how to do this.) Make sure your PUID and PGID user has the correct read write permissions as per the Common Docker Issue Number 9.
Note: Before you paste the code above in the Stack editor area below, change the value for TZ. (Select your current Time Zone from this list.)
Note: Before pasting the code into the Stack editor below, replace only the host paths (the part before the colon) with your own folder locations for config, downloads, movies, TV shows, and music. Do not change anything after the colon (for example, keep :/downloads:rw, :/movie:rw, :/tv:rw, and :/music:rw exactly as they are). These are the internal paths the container uses and must stay the same.
STEP 6
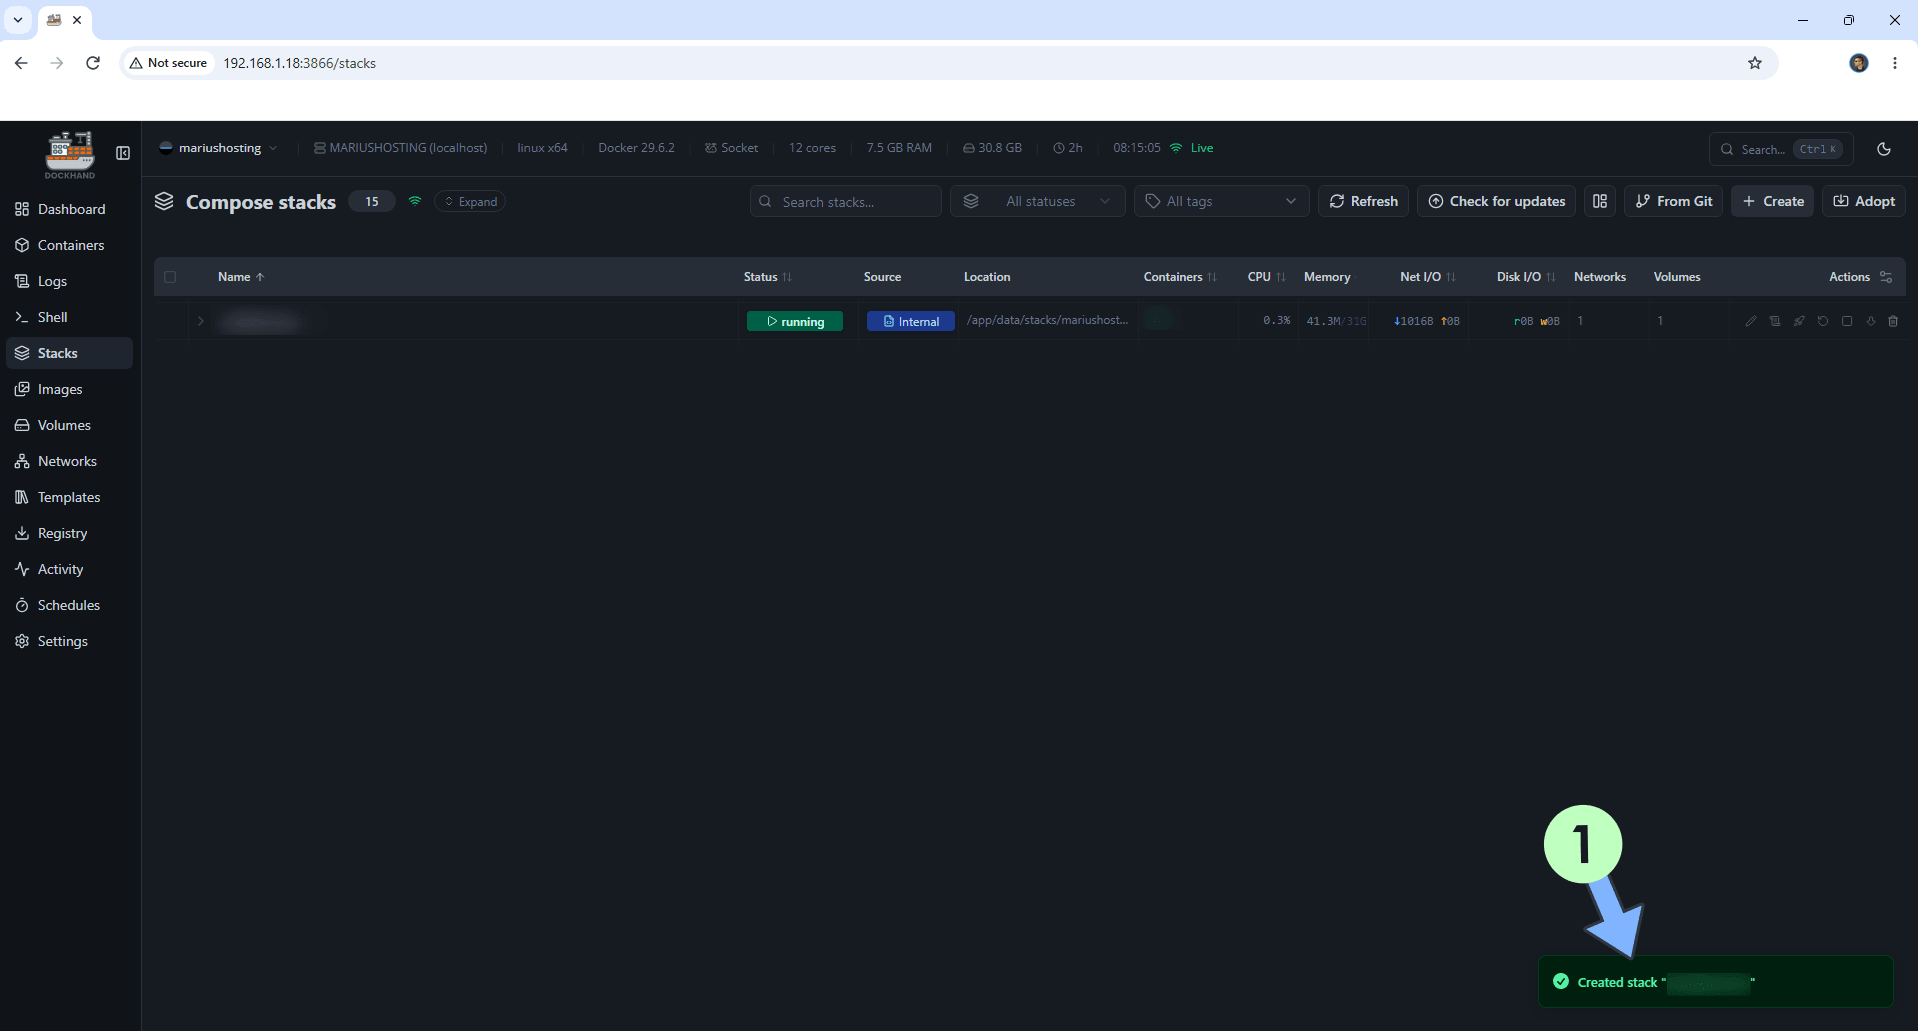
If everything goes right, you will see the following message at the bottom right of your screen: “Created stack “holyarrs”“.
STEP 7
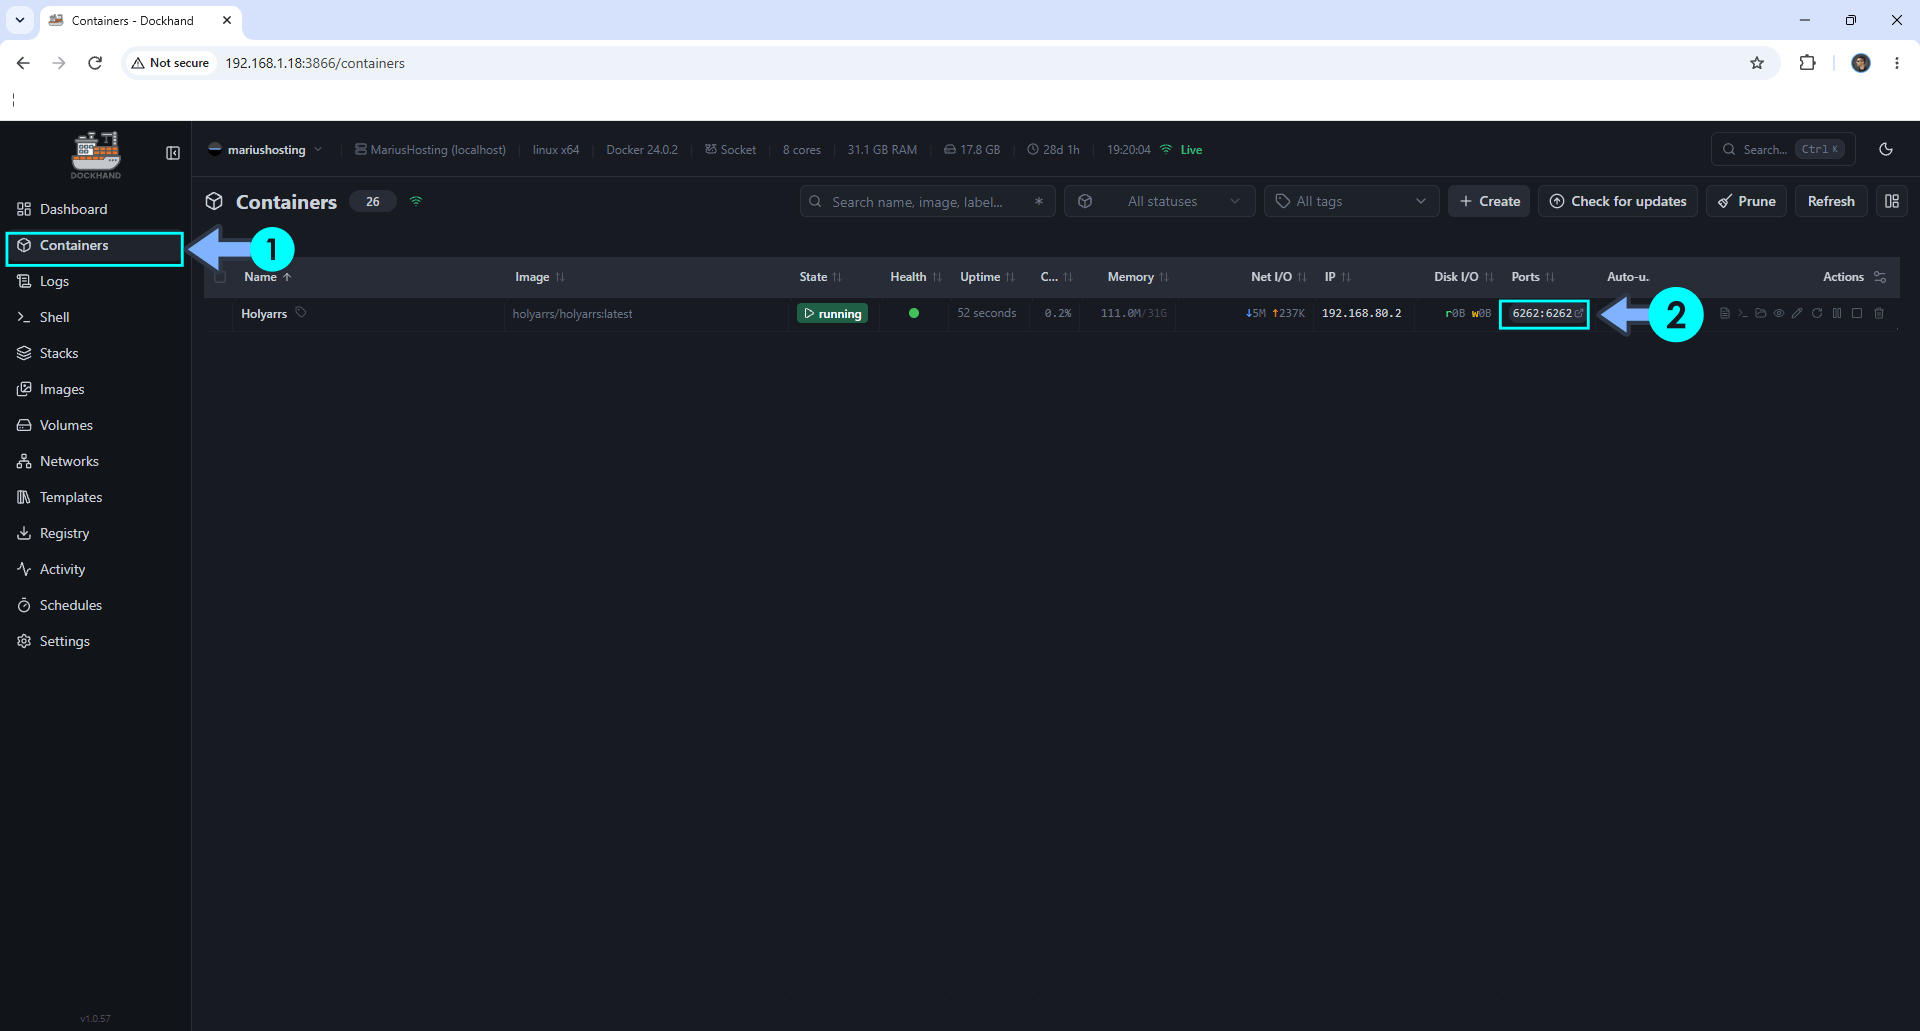
On the left sidebar, click Containers. Identify your Holyarrs container then click on ports 6262:6262. Follow the instructions in the image below.
STEP 8
🟢Please Support My work by Making a Donation. Almost 99,9% of the people that install something using my guides forget to support my work, or just ignore STEP 1. I’ve been very honest about this aspect of my work since the beginning: I don’t run any ADS, I don’t require subscriptions, paid or otherwise, I don’t collect IPs, emails, and I don’t have any referral links from Amazon or other merchants. I also don’t have any POP-UPs or COOKIES. I have repeatedly been told over the years how much I have contributed to the community. It’s something I love doing and have been honest about my passion since the beginning. But I also Need The Community to Support me Back to be able to continue doing this work.
STEP 9
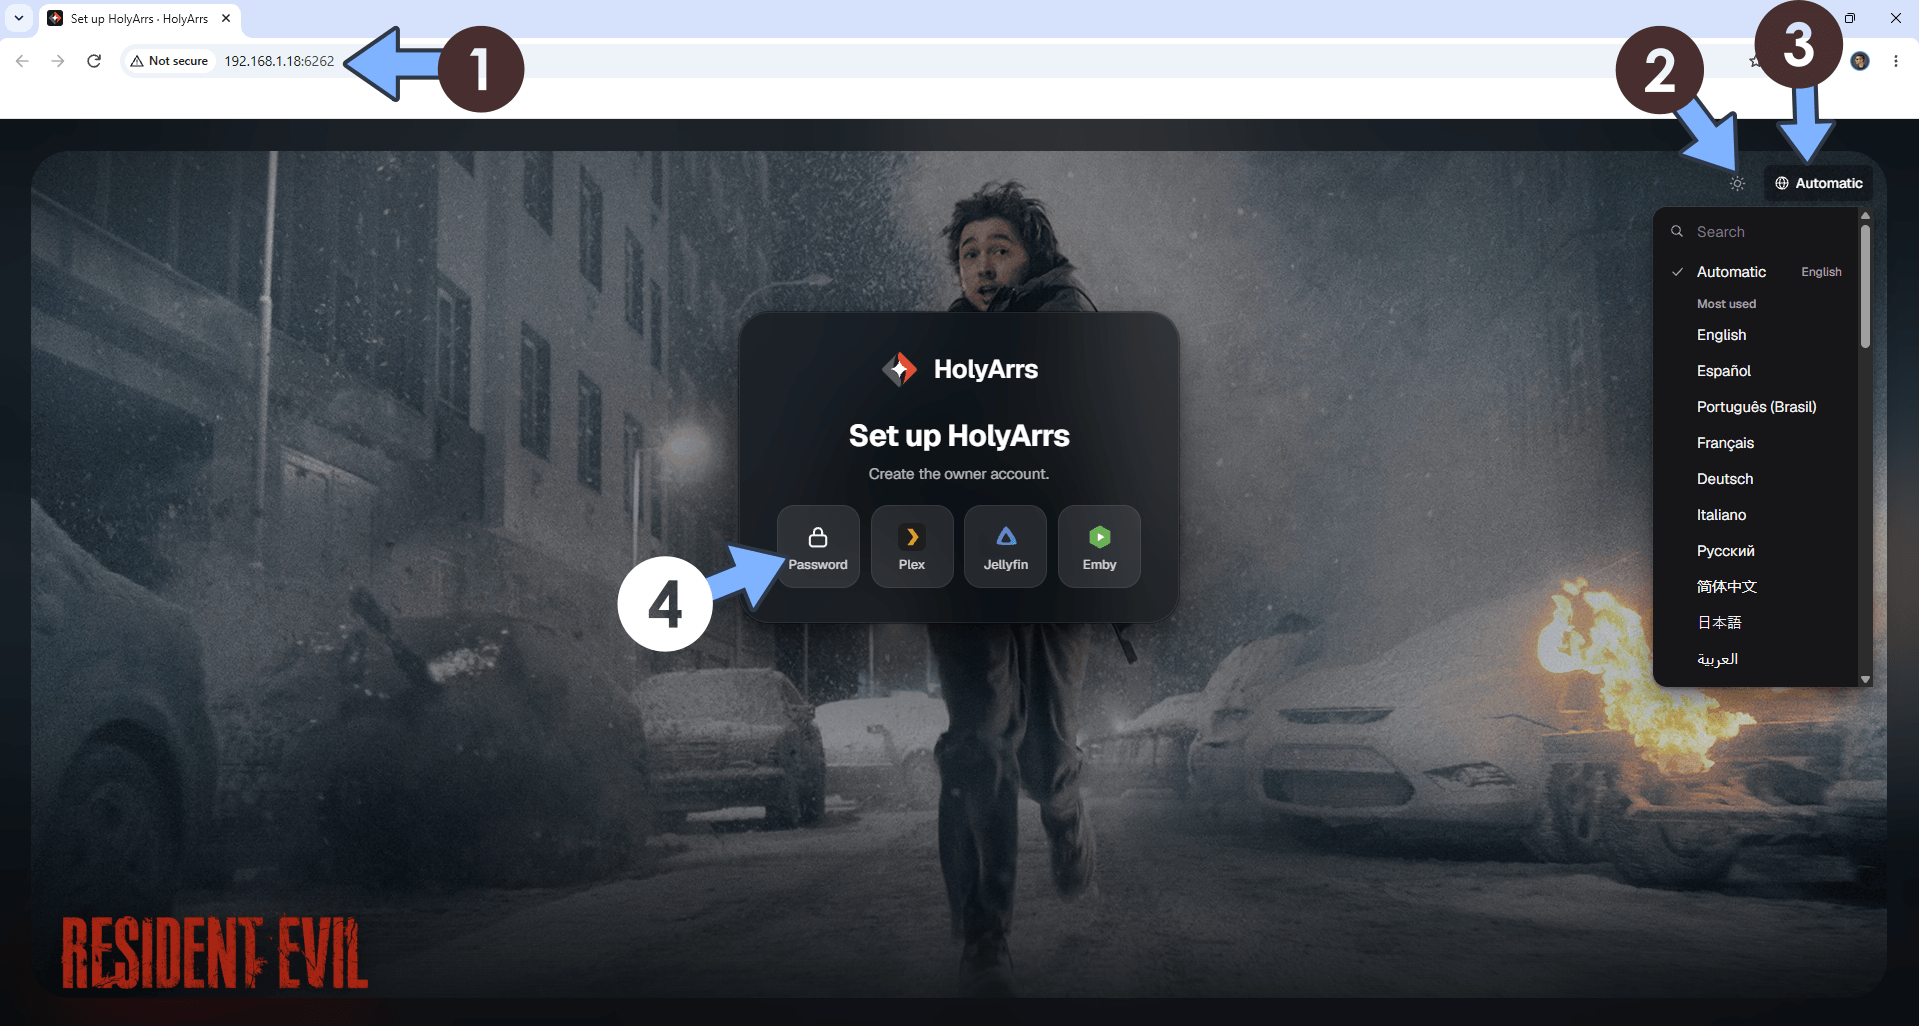
The installation process can take up to a few seconds/minutes. It will depend on your Internet speed connection. Now open your browser and type in http://synology-ip-address:6262 Switch the theme to Dark. Change the language. Click Password. Follow the instructions in the image below.
STEP 10
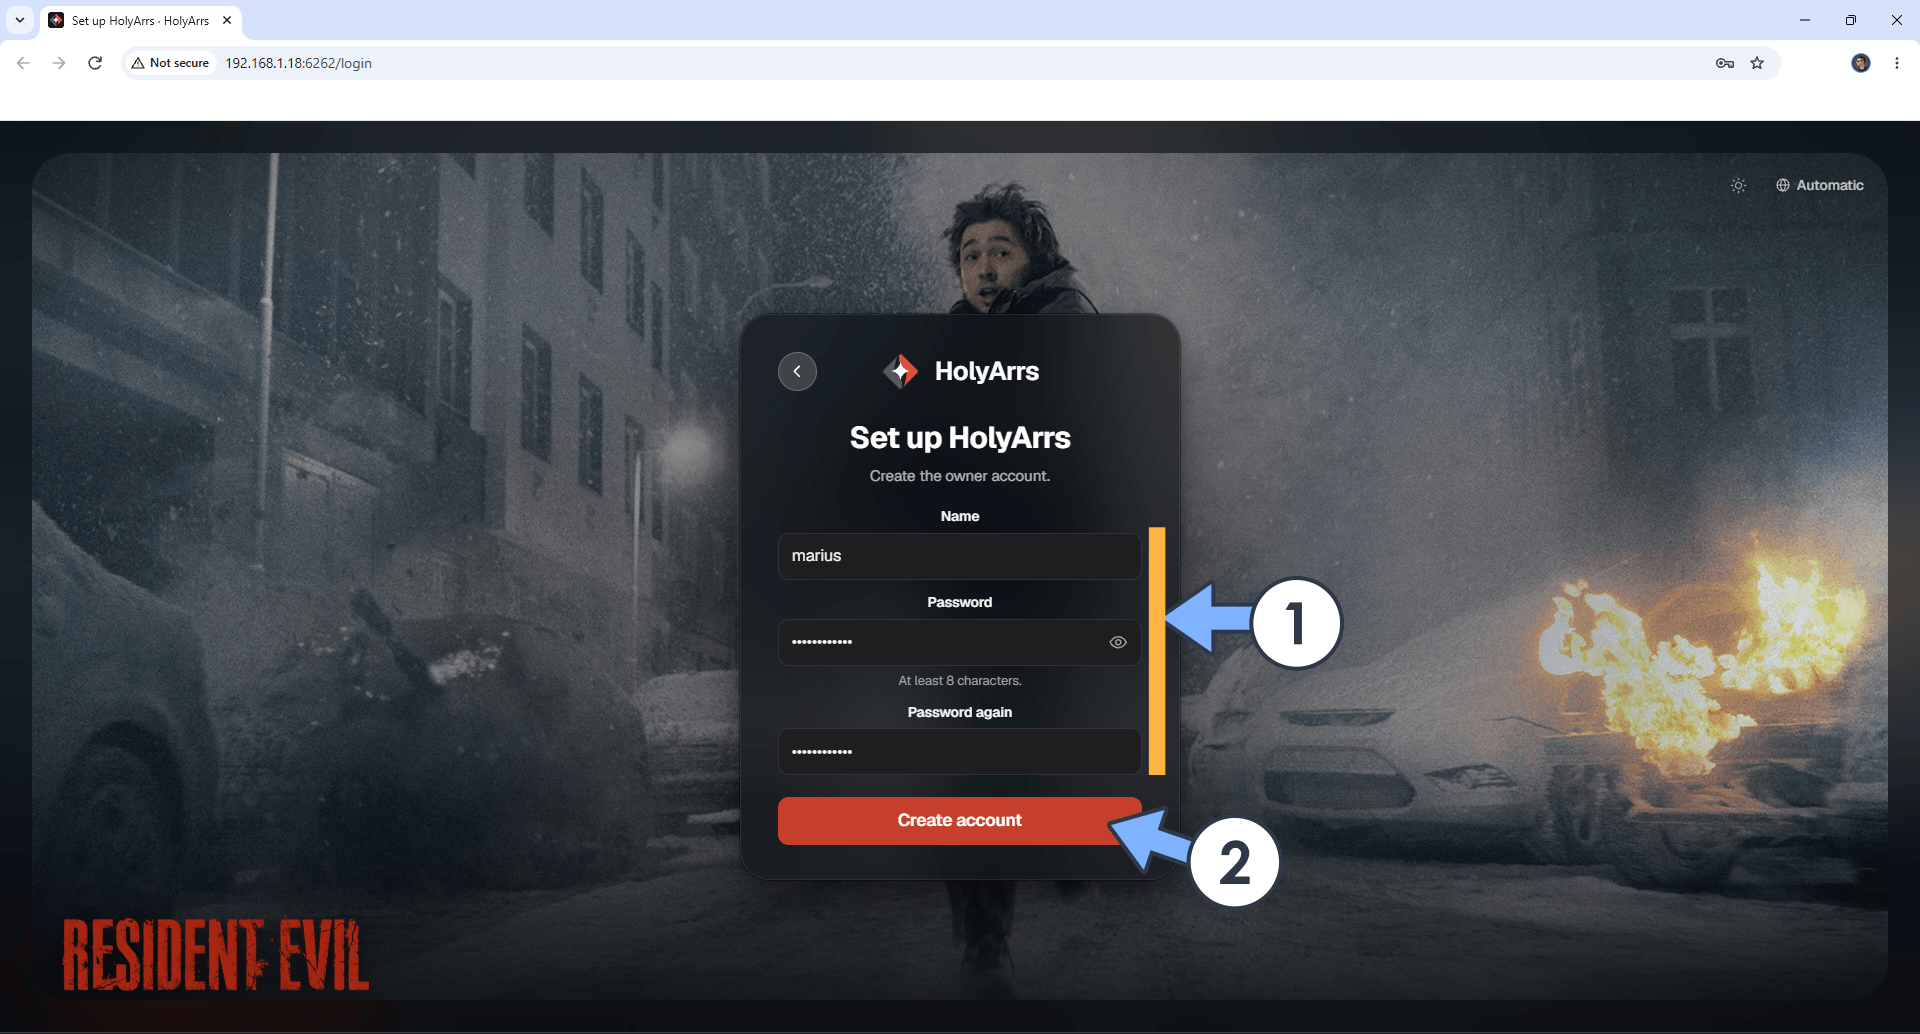
Add your own details then click Create Account. Follow the instructions in the image below.
STEP 11
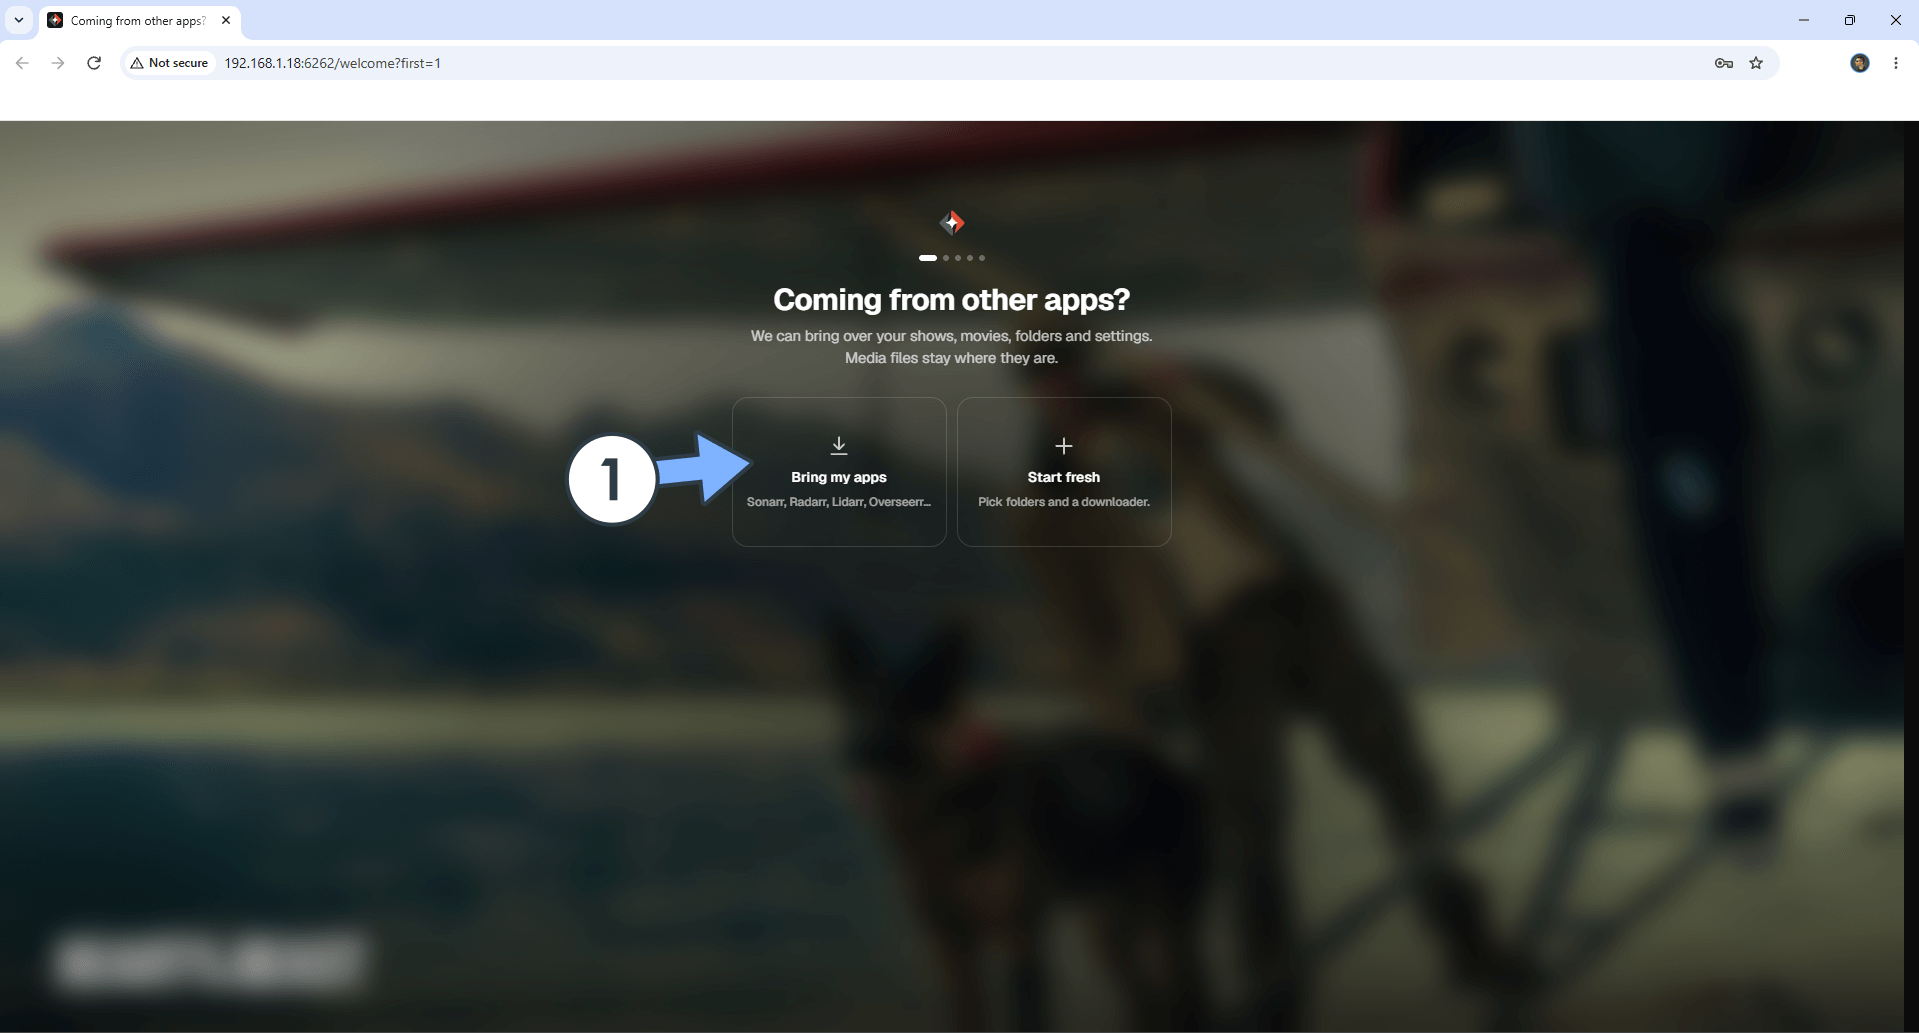
You can bring your own apps like Sonarr, Radarr, Lidarr, Seer etc. but this is not mandatory. You can Start fresh. Follow the instructions in the image below.
STEP 12
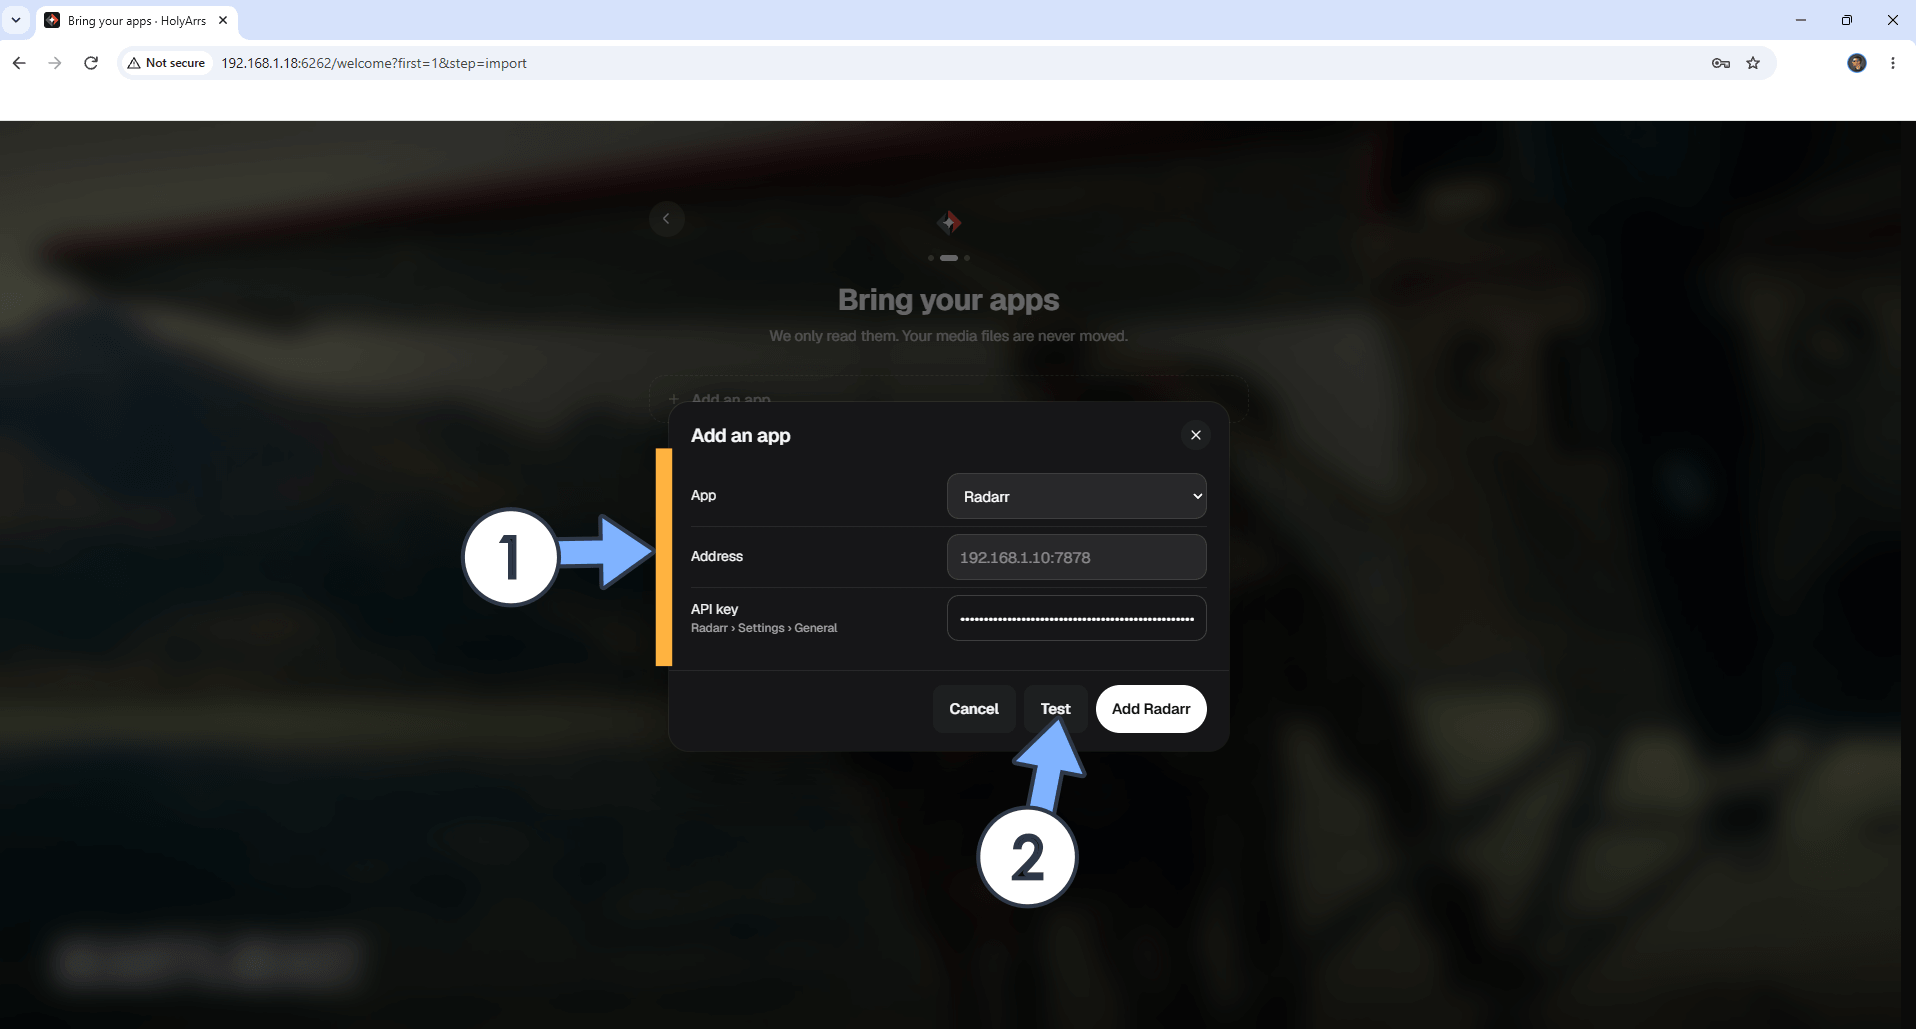
If you choose to bring your apps, you will need to add their own Address and API keys. Follow the instructions in the image below.
STEP 13
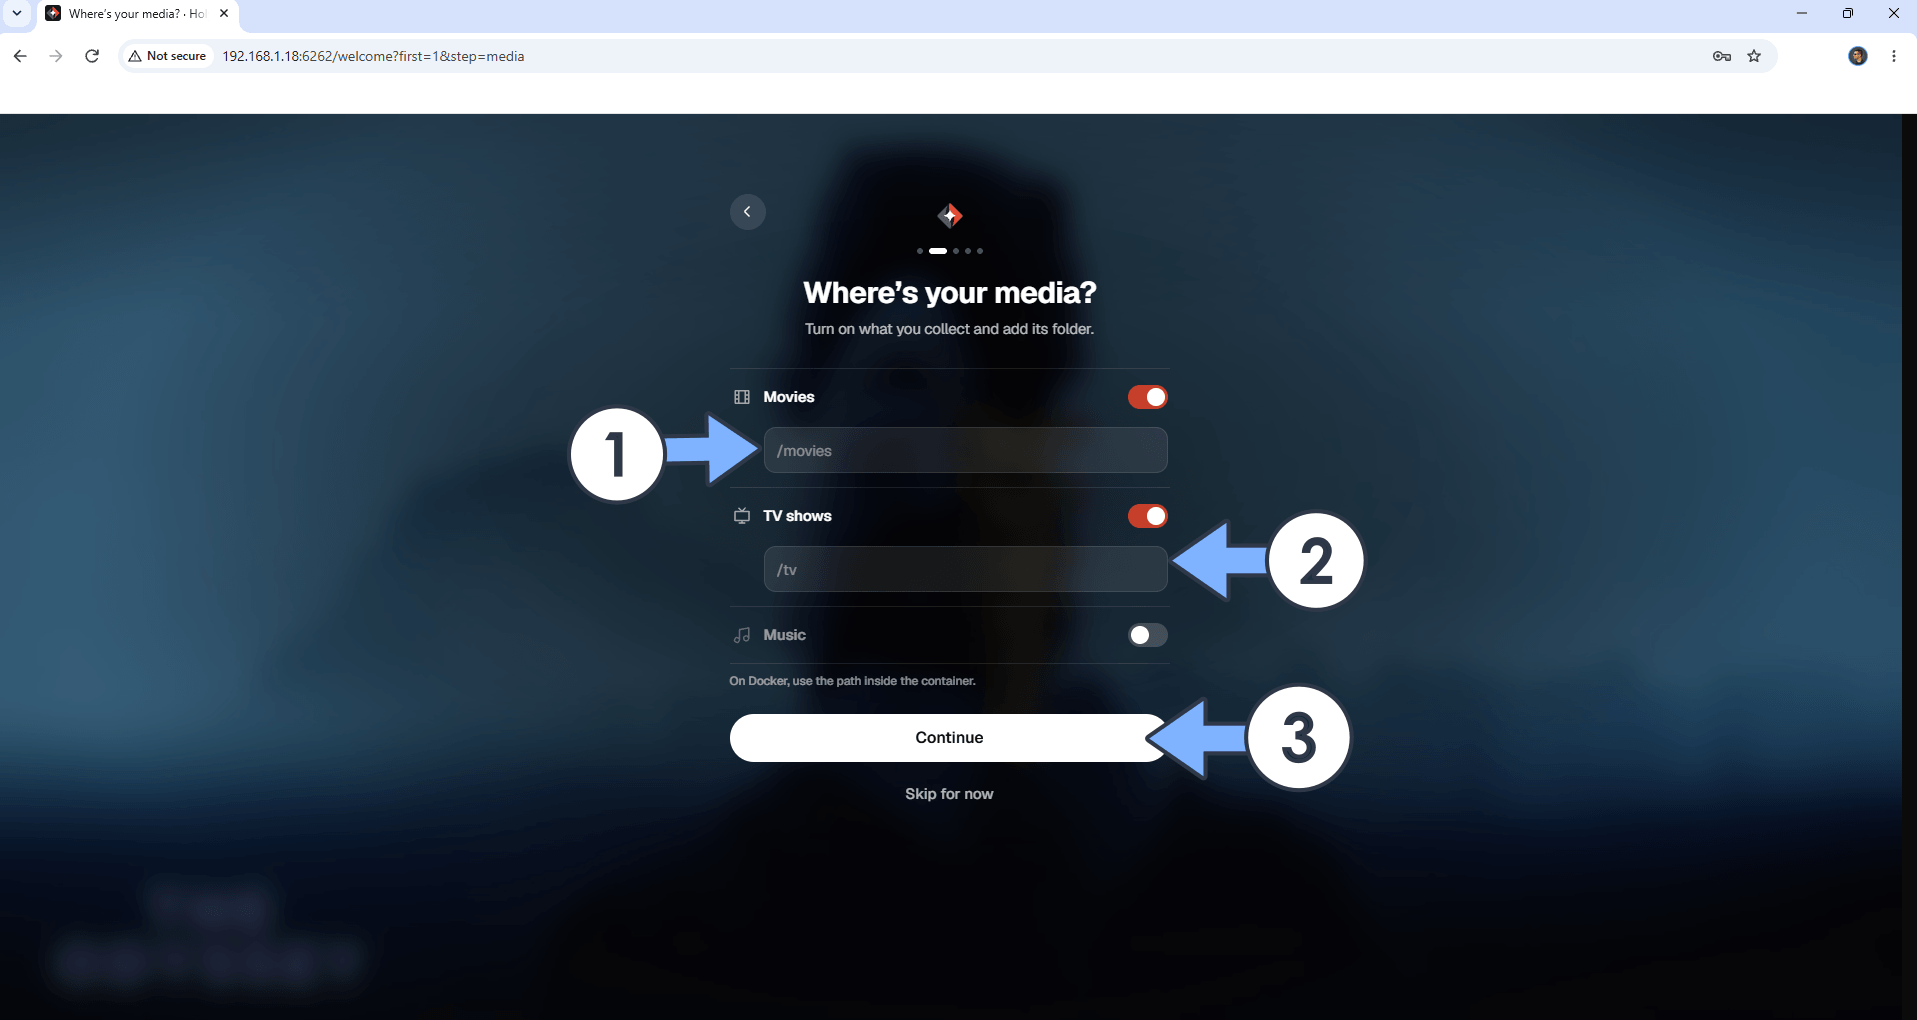
In the field, type in /movies for movies /tv for tv and /music for music then click Continue. Follow the instructions in the image below.
STEP 14
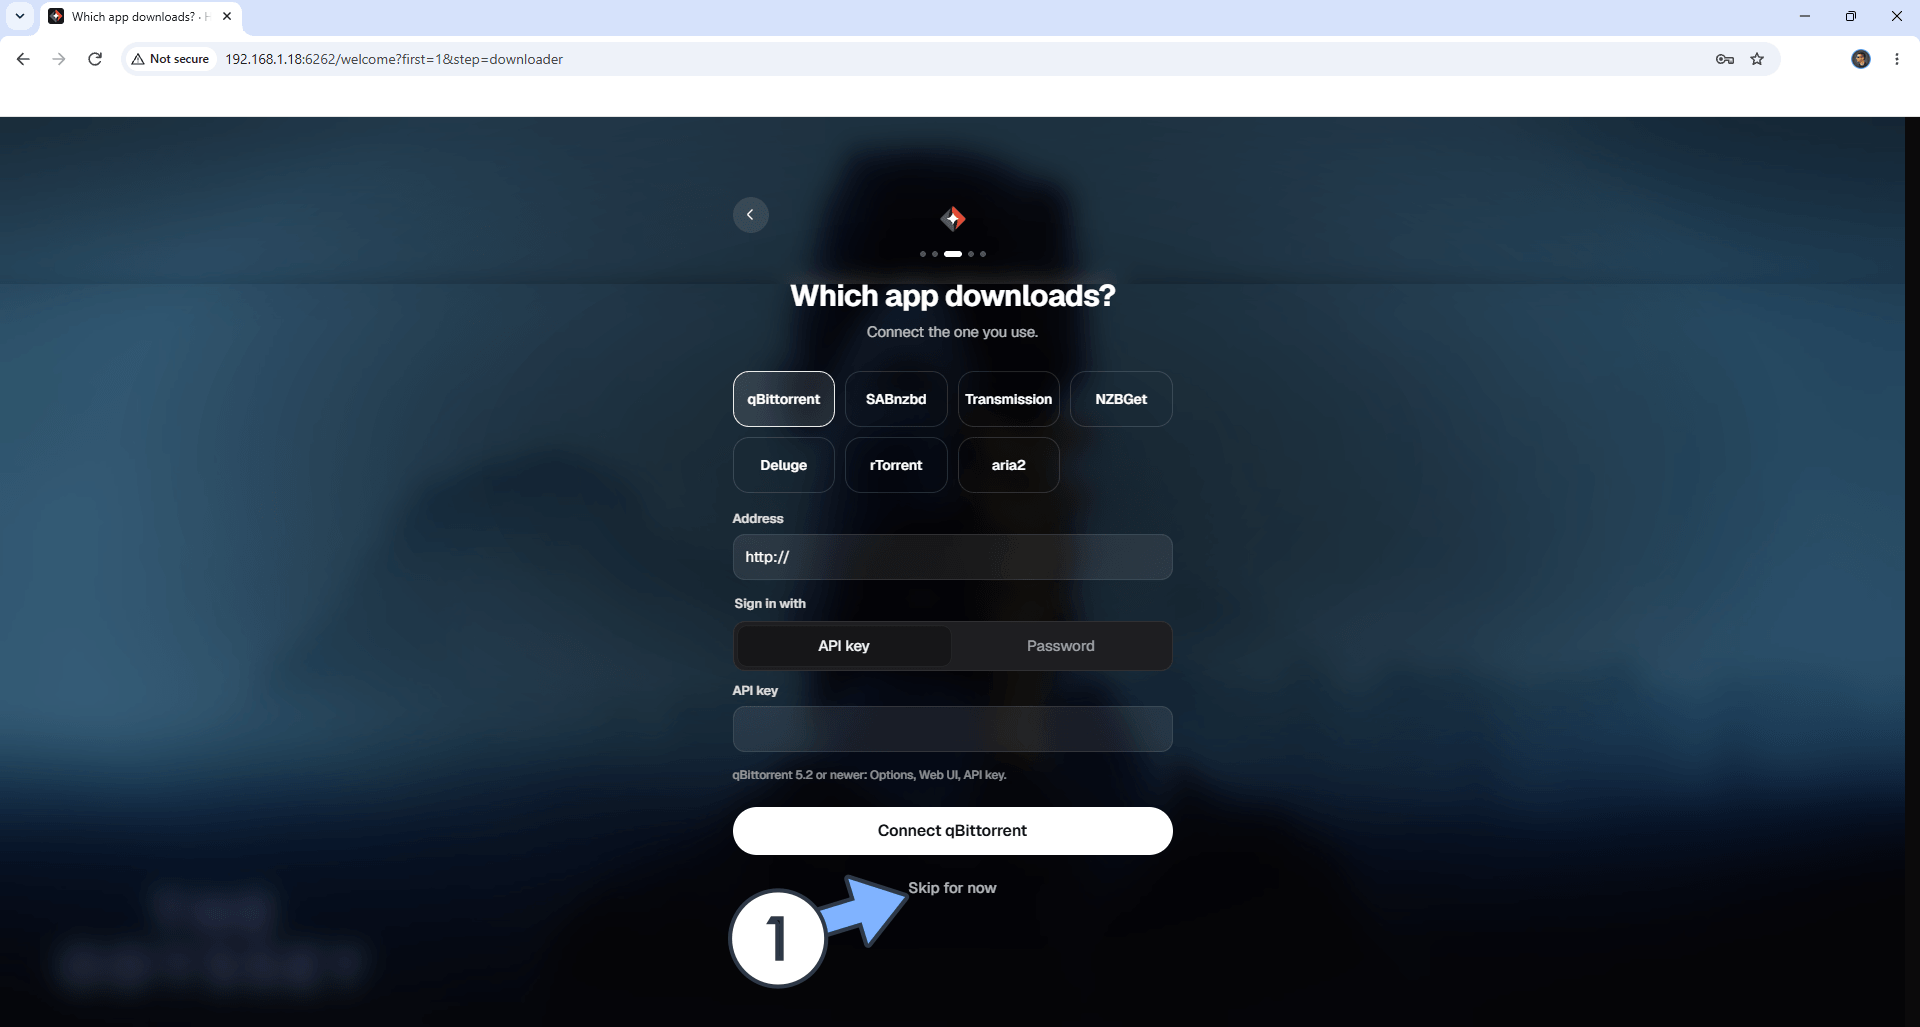
You can select your favorite app for download or Skip for now to add it later. Follow the instructions in the image below.
STEP 15
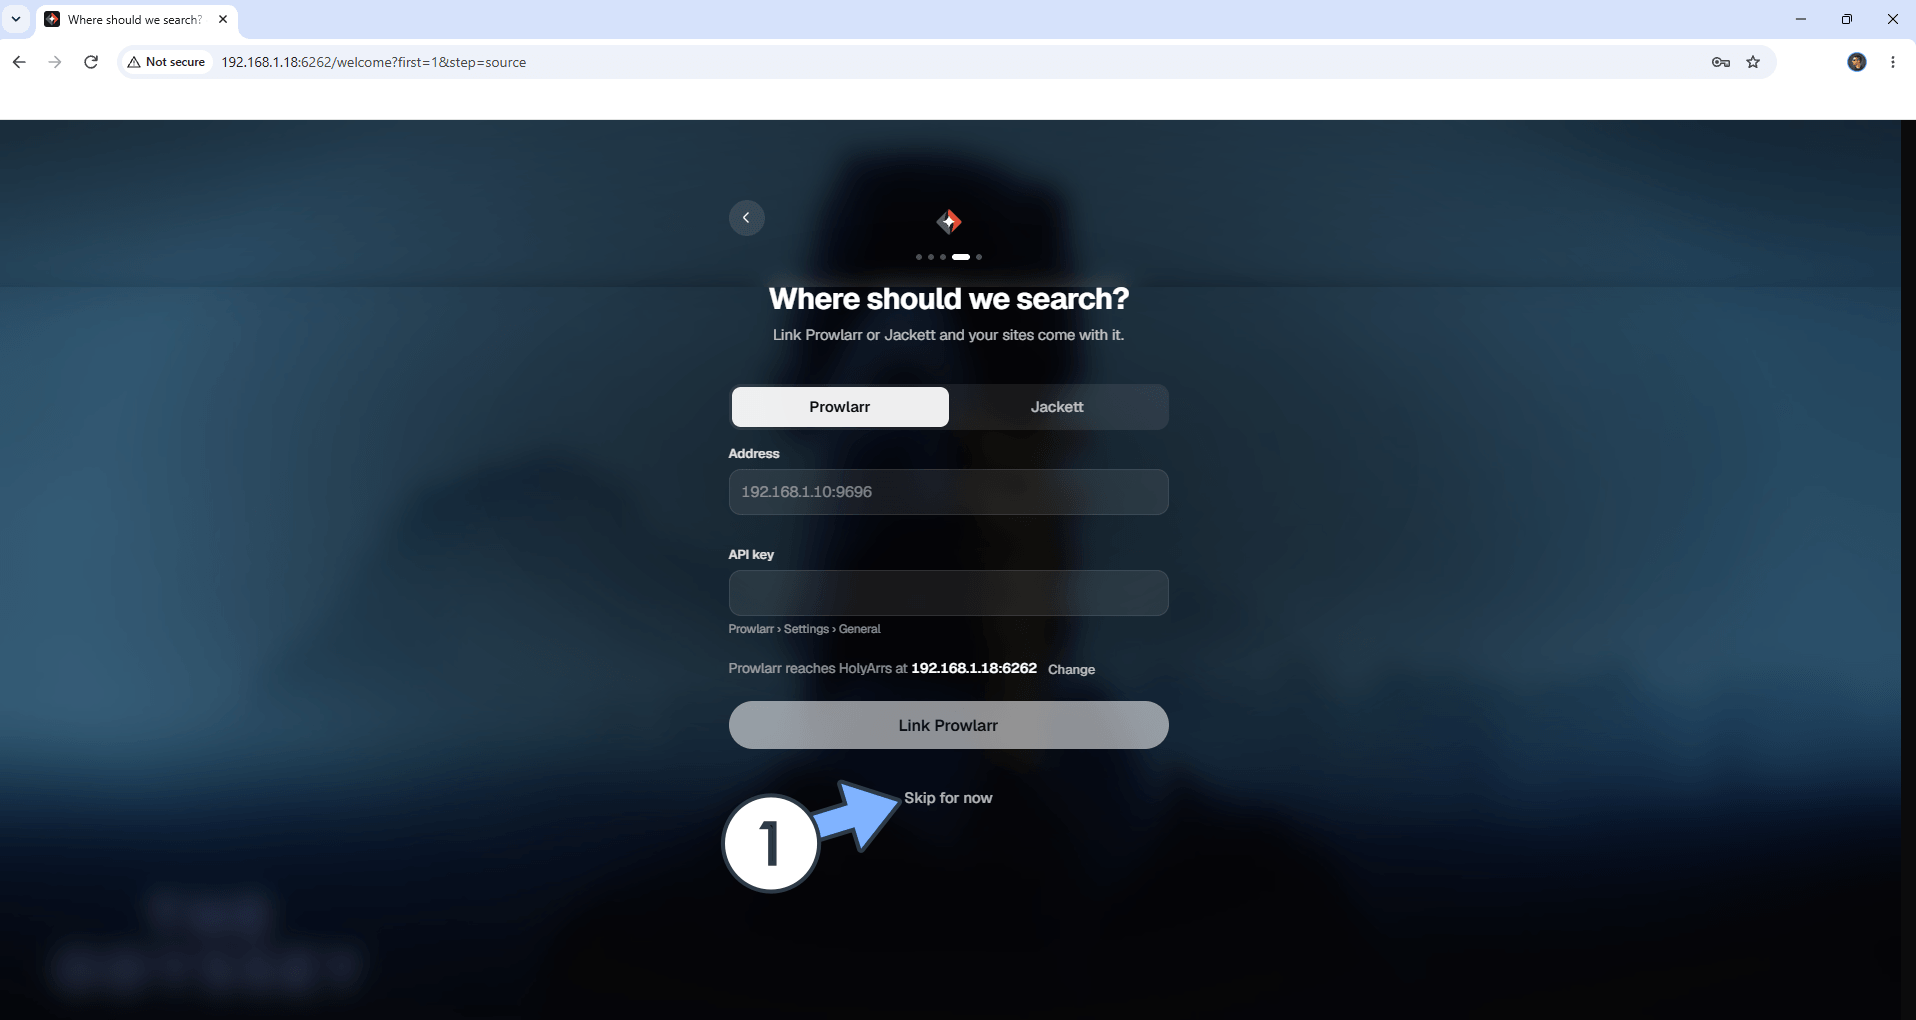
Add your link from Prowlarr or Jackett or Skip for now to add it later. Follow the instructions in the image below.
STEP 16
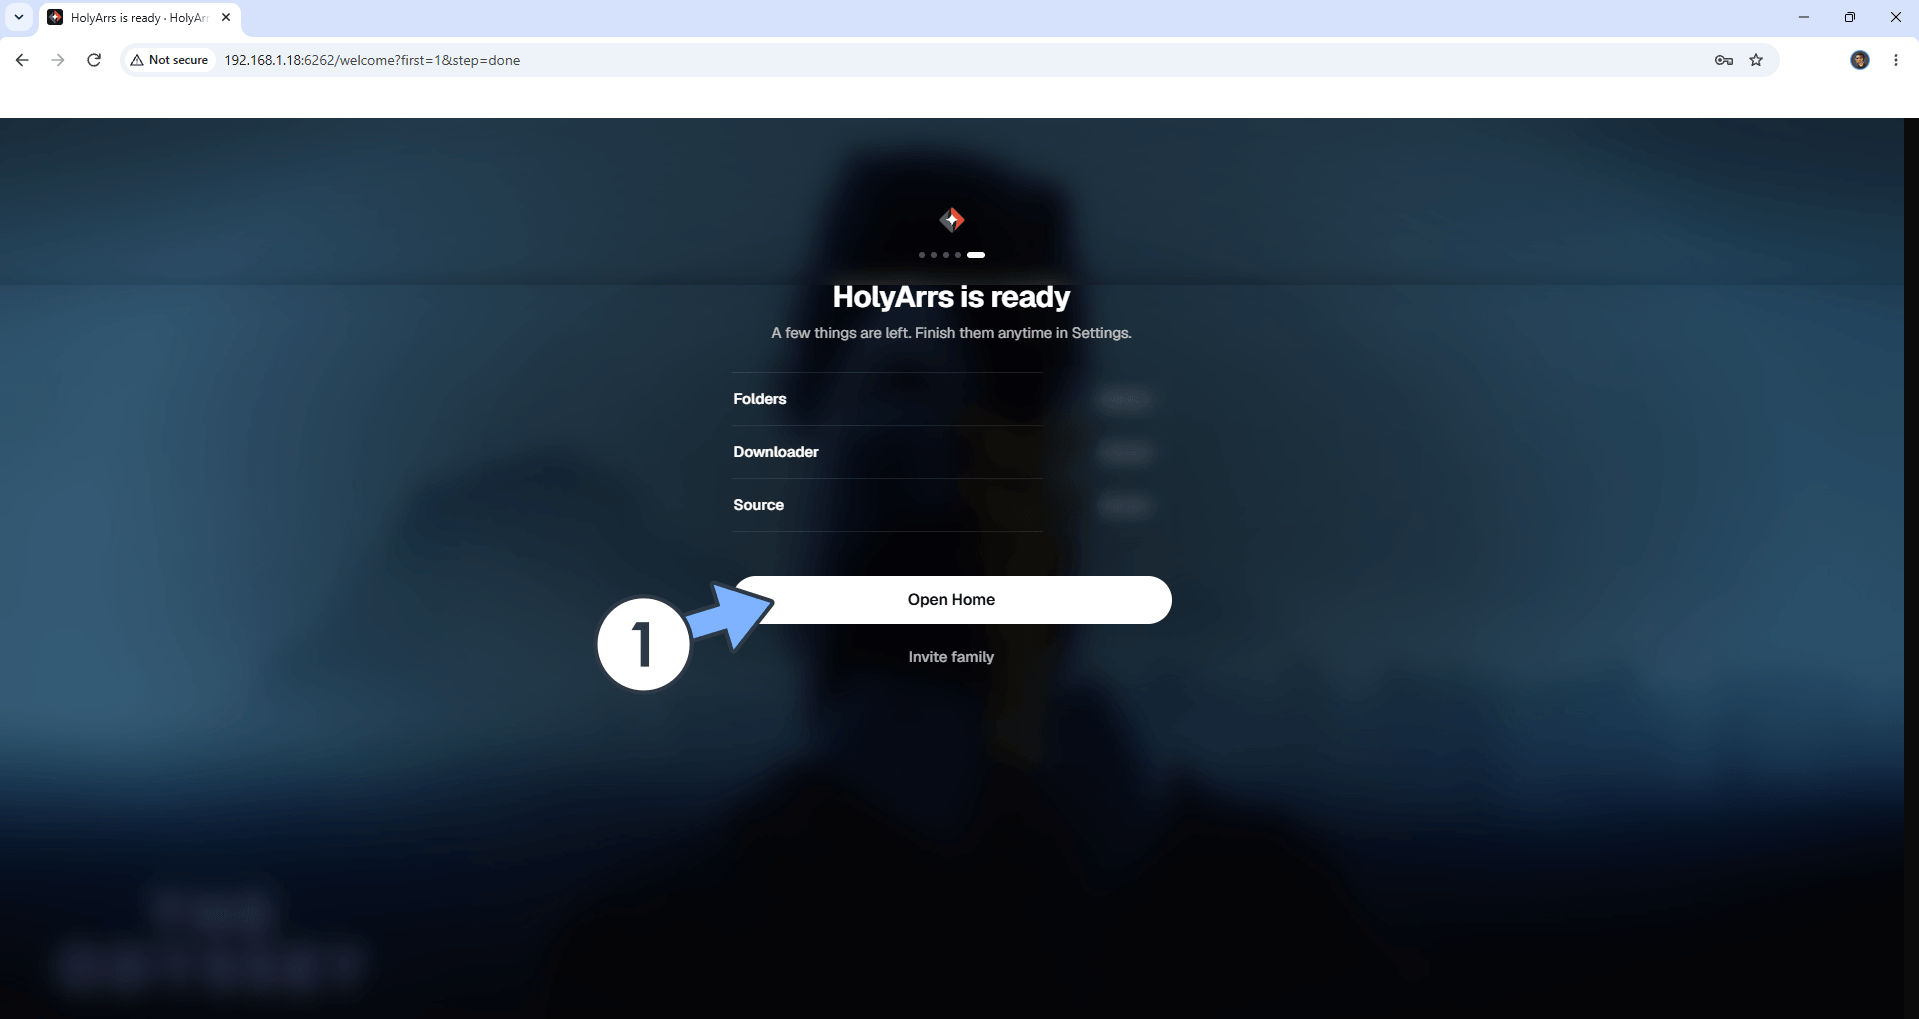
Click Open Home. Follow the instructions in the image below.
STEP 17
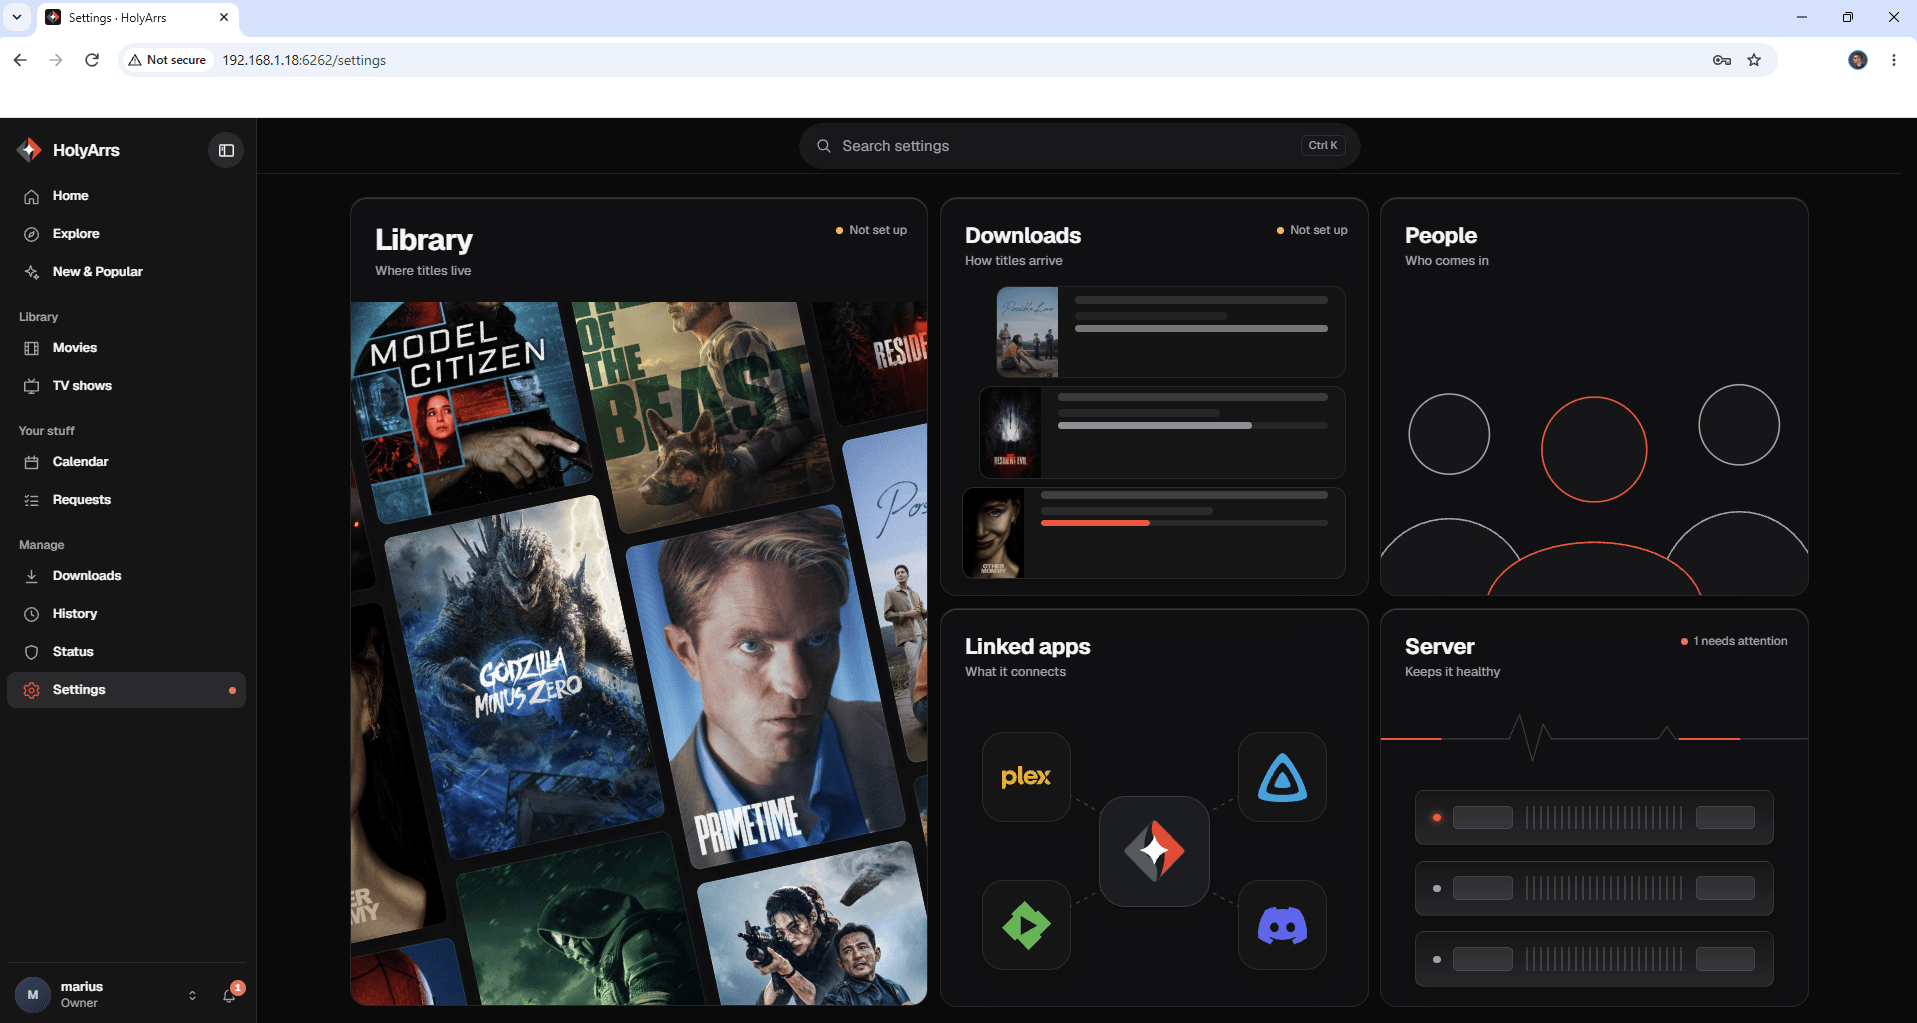
Your HolyArrs dashboard at a glance!
Enjoy HolyArrs!
🆘TROUBLESHOOTING
If you encounter issues by using this container, make sure to check out the Common Docker issues article.
Note: If you want to run the HolyArrs container over HTTPS, check How to Run Docker Containers Over HTTPS. In order to make HolyArrs work via HTTPS, it’s mandatory to activate WebSocket.
Note: Can I run Docker on my Synology NAS? See the supported models.
Note: How to Back Up Docker Containers on your Synology NAS.
Note: Find out how to update the HolyArrs container with the latest image.
Note: How to Free Disk Space on Your NAS if You Run Docker & Dockhand.
Note: How to Schedule Start & Stop For Docker Containers.
Note: How to Activate Email Notifications.
Note: How to Add Access Control Profile on Your NAS.
Note: How to Change Docker Containers Restart Policy.
Note: How to Use Docker Containers With VPN.
Note: Convert Docker Run Into Docker Compose.
Note: How to Clean Docker.
Note: How to Clean Docker Automatically.
Note: Best Practices When Using Docker and DDNS.
Note: Some Docker Containers Need WebSocket.
Note: Find out the Best NAS Models For Docker.
Note: Activate Gmail SMTP For Docker Containers.
This post was updated on Friday / November 13th, 2026 at 12:06 AM