
FileBrowser Quantum is a heavily reworked fork of the classic Filebrowser project, aimed at being the best free self-hosted web file manager available. It provides a modern, responsive web interface for browsing, uploading, editing, previewing, and sharing files on your own NAS server, with support for multiple sources, real-time indexed search, thumbnails for office documents and videos, folder sizes, WebDAV access, granular per-user and per-group permissions, and flexible login options including OIDC, LDAP, JWT, password with 2FA, and proxy authentication. Running it as a Docker container on my Synology NAS has been one of the smoothest self-hosted setups I’ve done. The real-time search across a few hundred thousand files is impressively fast. The 512 MB minimum memory requirement runs comfortably on my NAS alongside other containers, and the resource usage sits near idle when nobody is browsing. In this step by step guide I will show you how to install FileBrowser Quantum on your Synology NAS using Docker & Dockhand.
This guide works perfectly with the latest FileBrowser Quantum v2.0.0 release.
STEP 1
Please Support My work by Making a Donation.
STEP 2
Install Dockhand using my step by step guide. If you already have Dockhand installed on your Synology NAS, skip this STEP. ⚠️Attention: Make sure you have installed the latest Dockhand version.
STEP 3
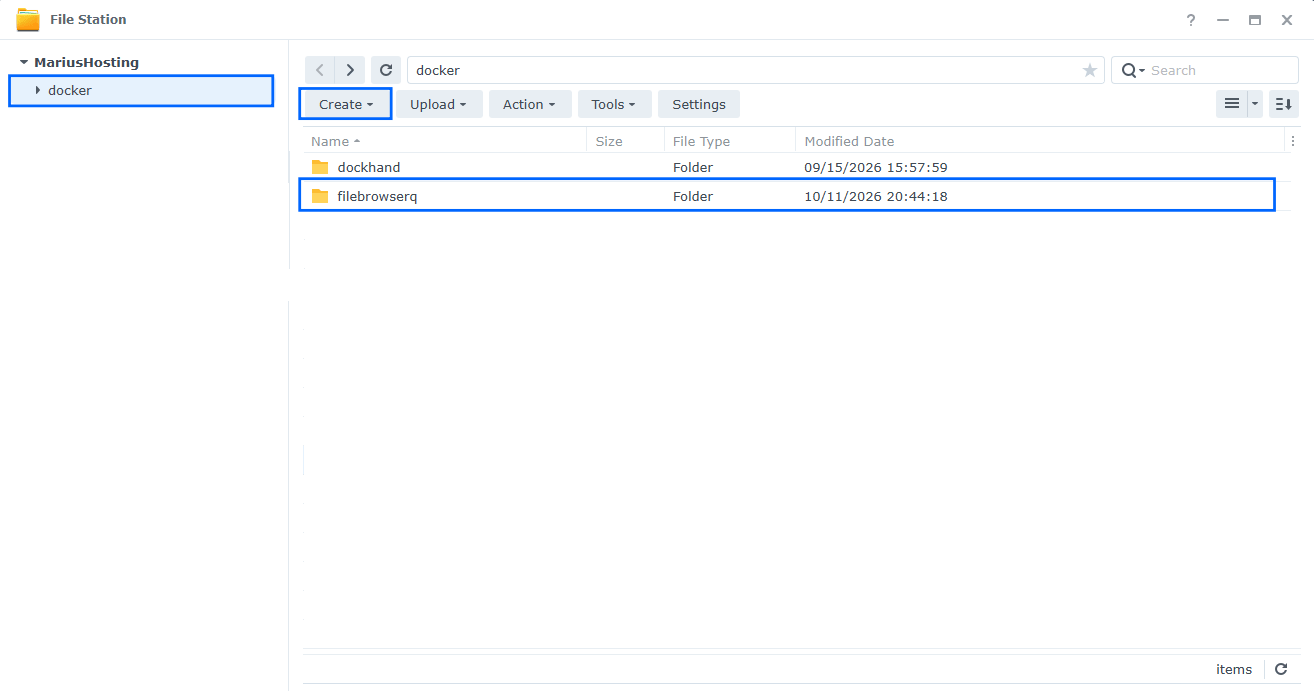
Go to File Station and open the docker folder. Inside the docker folder, create one new folder and name it filebrowserq. Follow the instructions in the image below.
Note: Be careful to enter only lowercase, not uppercase letters.
STEP 4
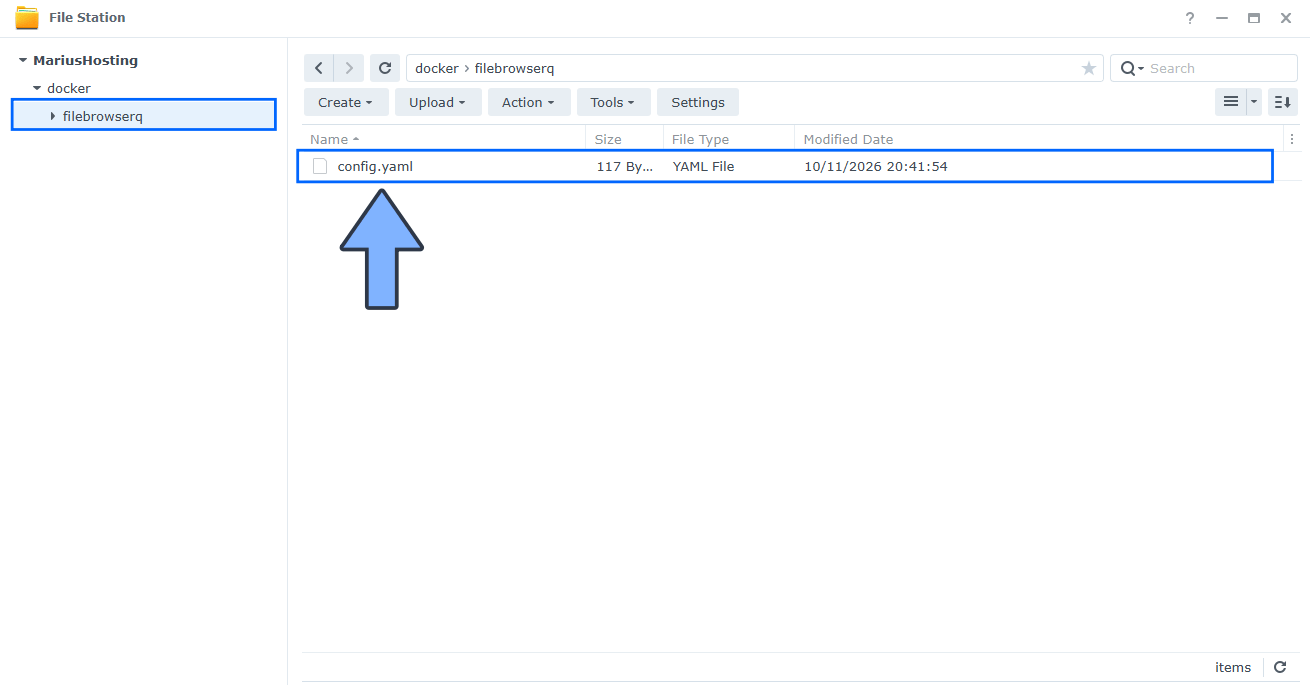
Inside the filebrowserq folder that you have previously created at STEP 4, upload the config.yaml file below. Download it from the blue button below then upload it into your filebrowserq folder. Follow the instructions in the image below. 🔒Note: Support my work to unlock the password. You can use this password to download any file on mariushosting forever!
STEP 5
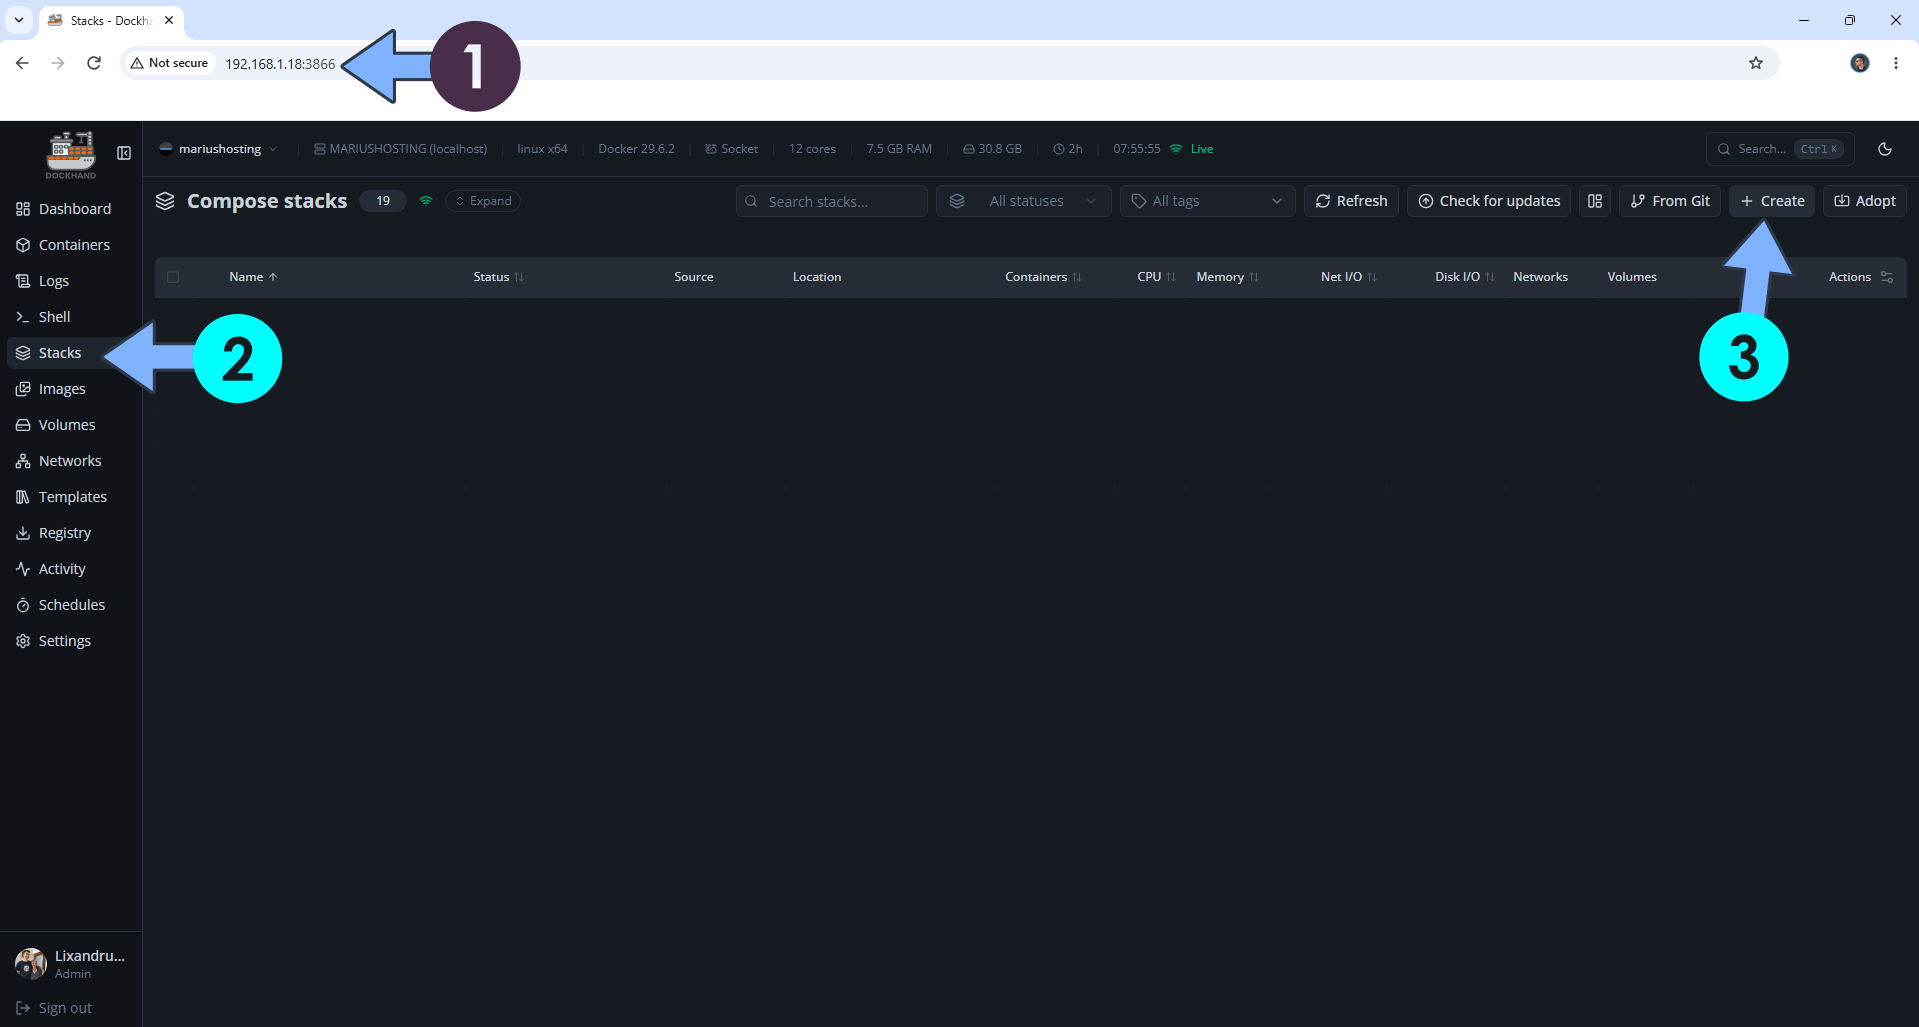
Open your browser and type in http://synology-ip-address:3866 to connect to your Dockhand container. On the left sidebar, click Stacks then + Create. Follow the instructions in the image below.
STEP 6
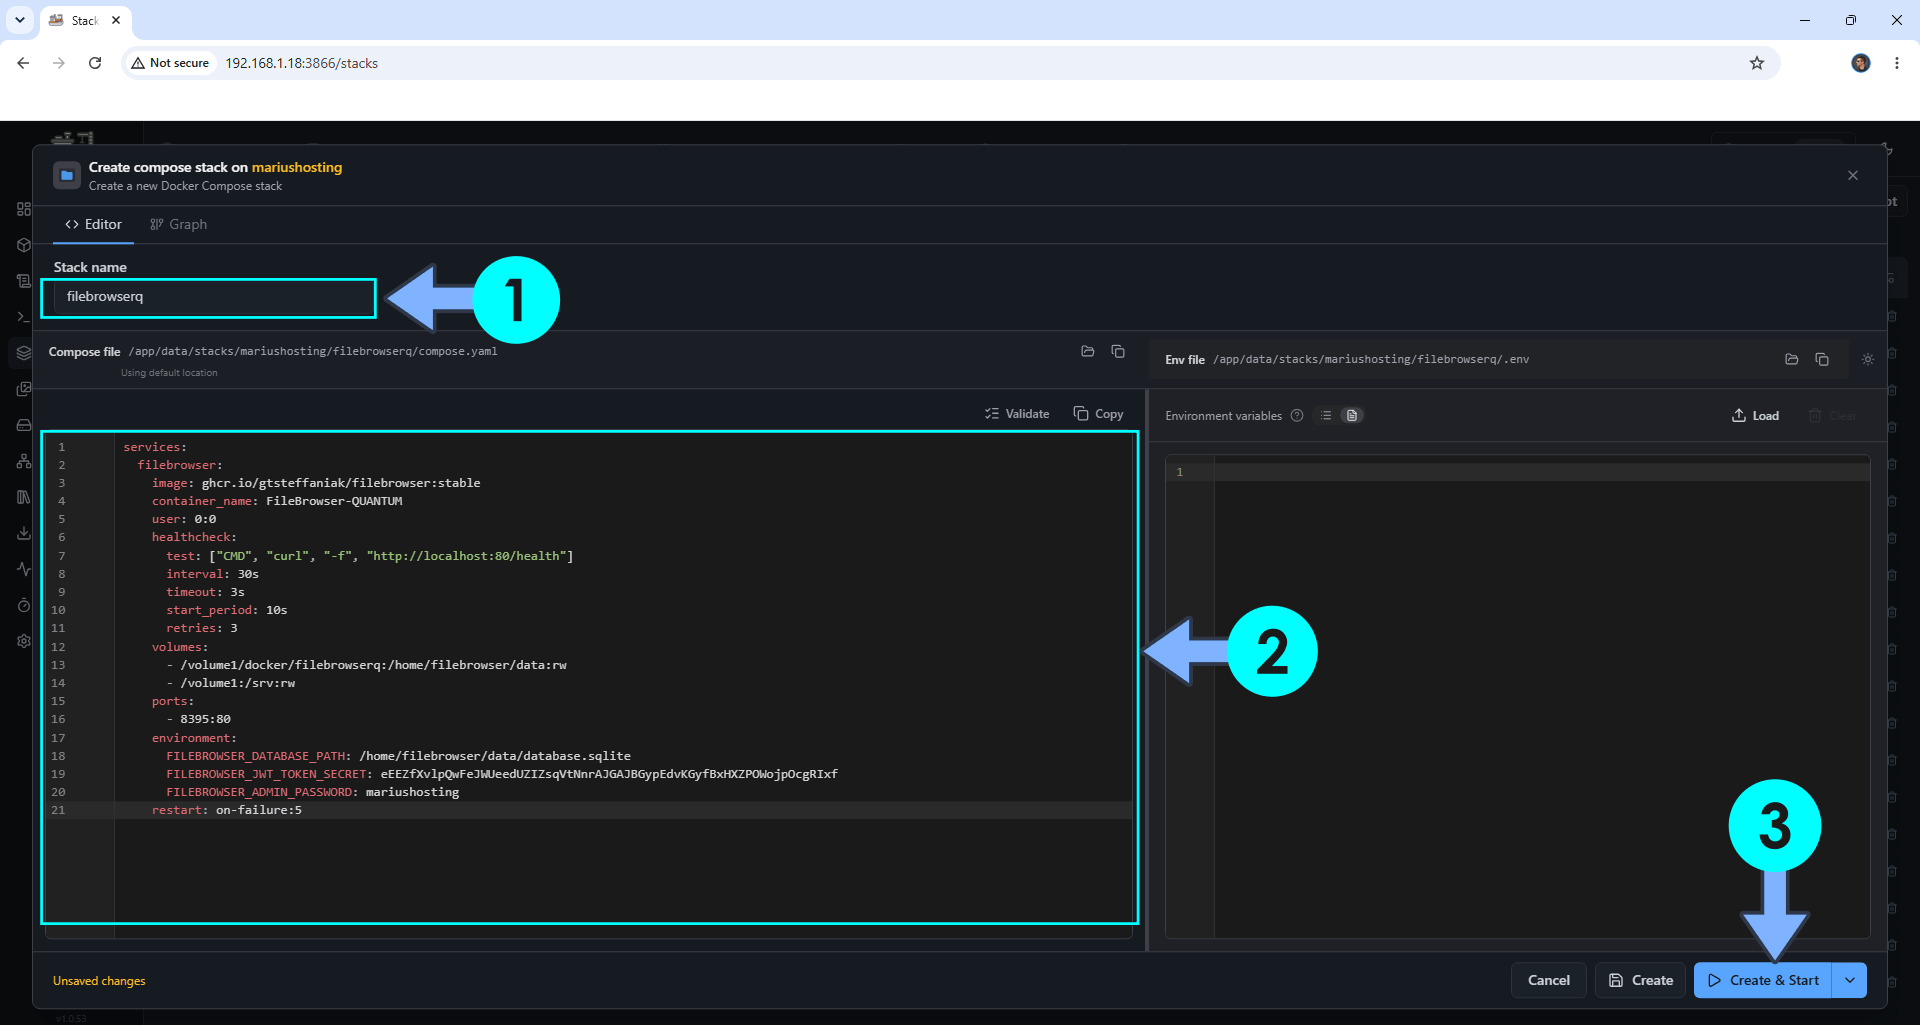
In the Stack name field, type in filebrowserq. ⚠️Warning: Type in the name in lowercase letters. The installation process can take up to a few seconds/minutes. It will depend on your Internet speed connection. Follow the instructions in the image below.
services:
  filebrowser:
    image: ghcr.io/gtsteffaniak/filebrowser:stable
    container_name: FileBrowser-QUANTUM
    user: 0:0
    healthcheck:
      test: ["CMD", "curl", "-f", "http://localhost:80/health"]
      interval: 30s
      timeout: 3s
      start_period: 10s
      retries: 3
    volumes:
      - /volume1/docker/filebrowserq:/home/filebrowser/data:rw
      - /volume1:/srv:rw
    ports:
      - 8395:80
    environment:
      FILEBROWSER_DATABASE_PATH: /home/filebrowser/data/database.sqlite
      FILEBROWSER_JWT_TOKEN_SECRET: eEEZfXvlpQwFeJWUeedUZIZsqVtNnrAJGAJBGypEdvKGyfBxHXZPOWojpOcgRIxf
      FILEBROWSER_ADMIN_PASSWORD: mariushosting
    restart: on-failure:5
Note: Before you paste the code above in the Stack editor area below, change the value for FILEBROWSER_JWT_TOKEN_SECRET. (Generate your own Random 64 length FILEBROWSER_JWT_TOKEN_SECRET.)
Note: Before you paste the code above in the Stack editor area below, change the value for FILEBROWSER_ADMIN_PASSWORD. Type in your own password. mariushosting is an example for a password. You will need this password later at STEP 10.
STEP 7
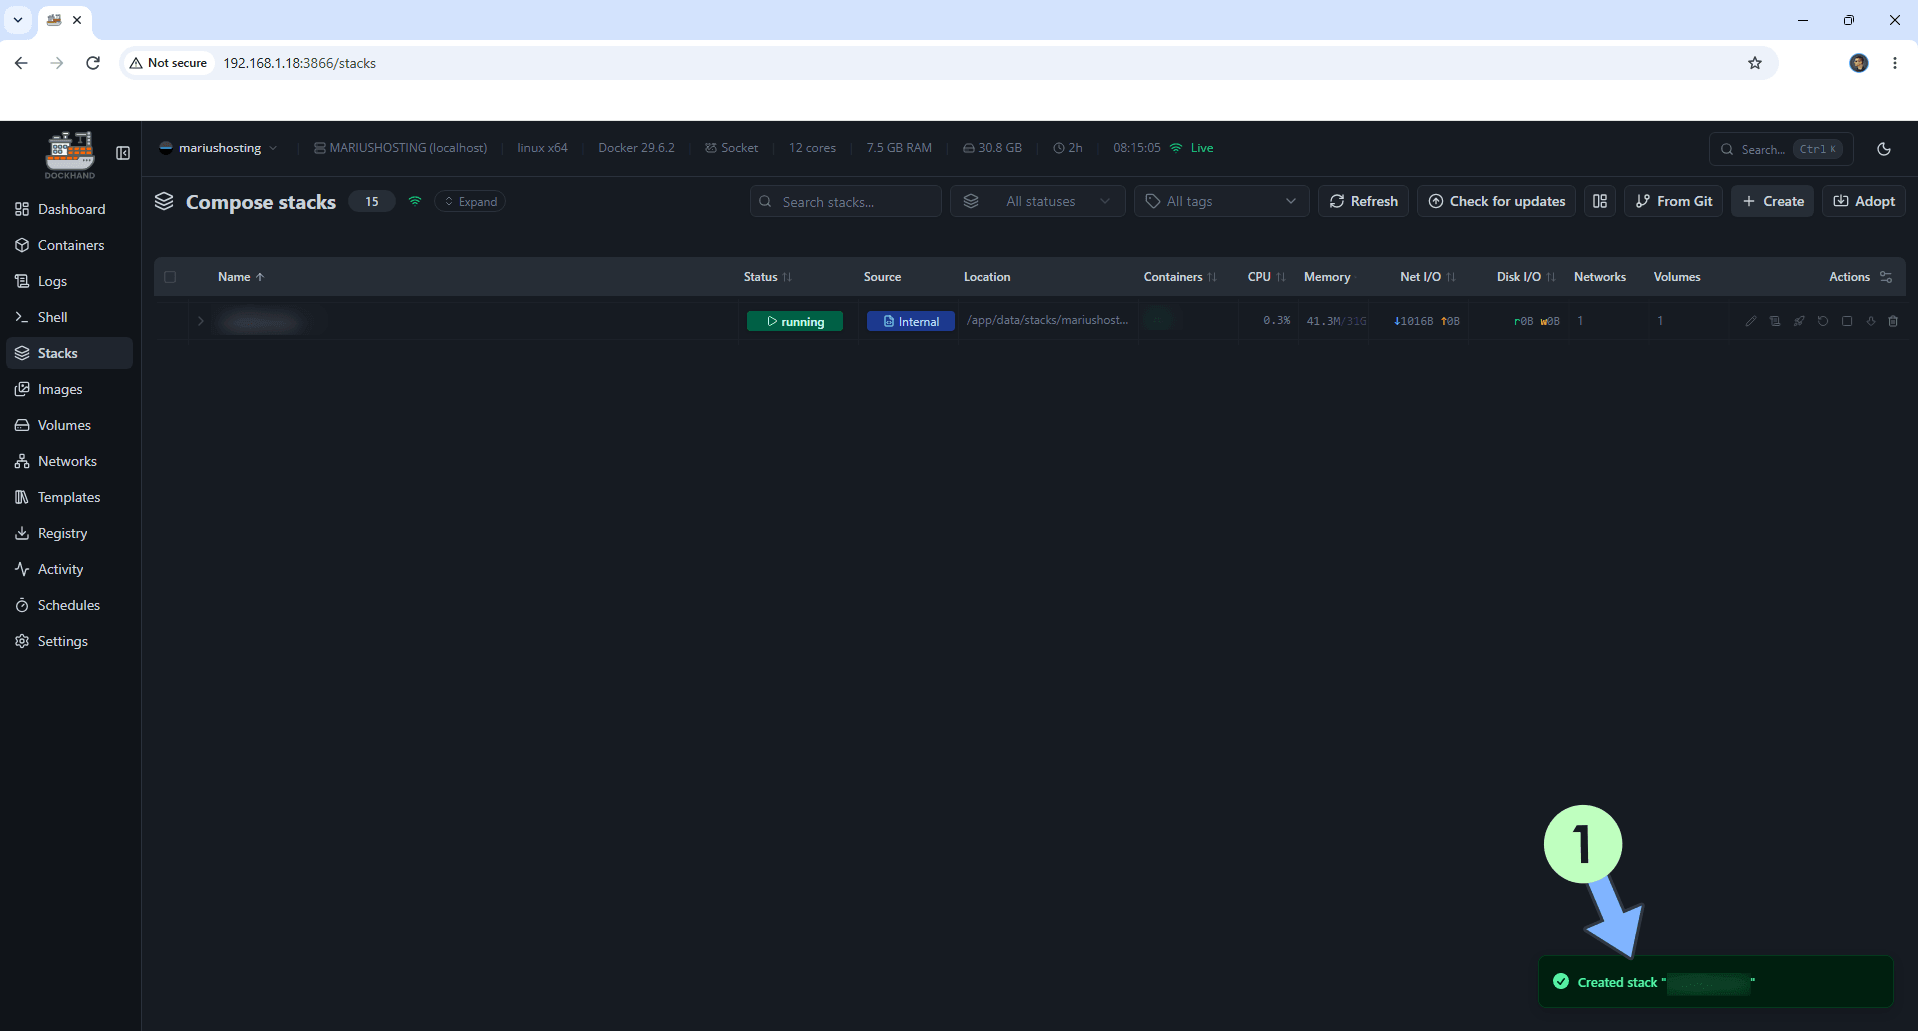
If everything goes right, you will see the following message at the bottom right of your screen: “Created stack “filebrowserq”“.
STEP 8
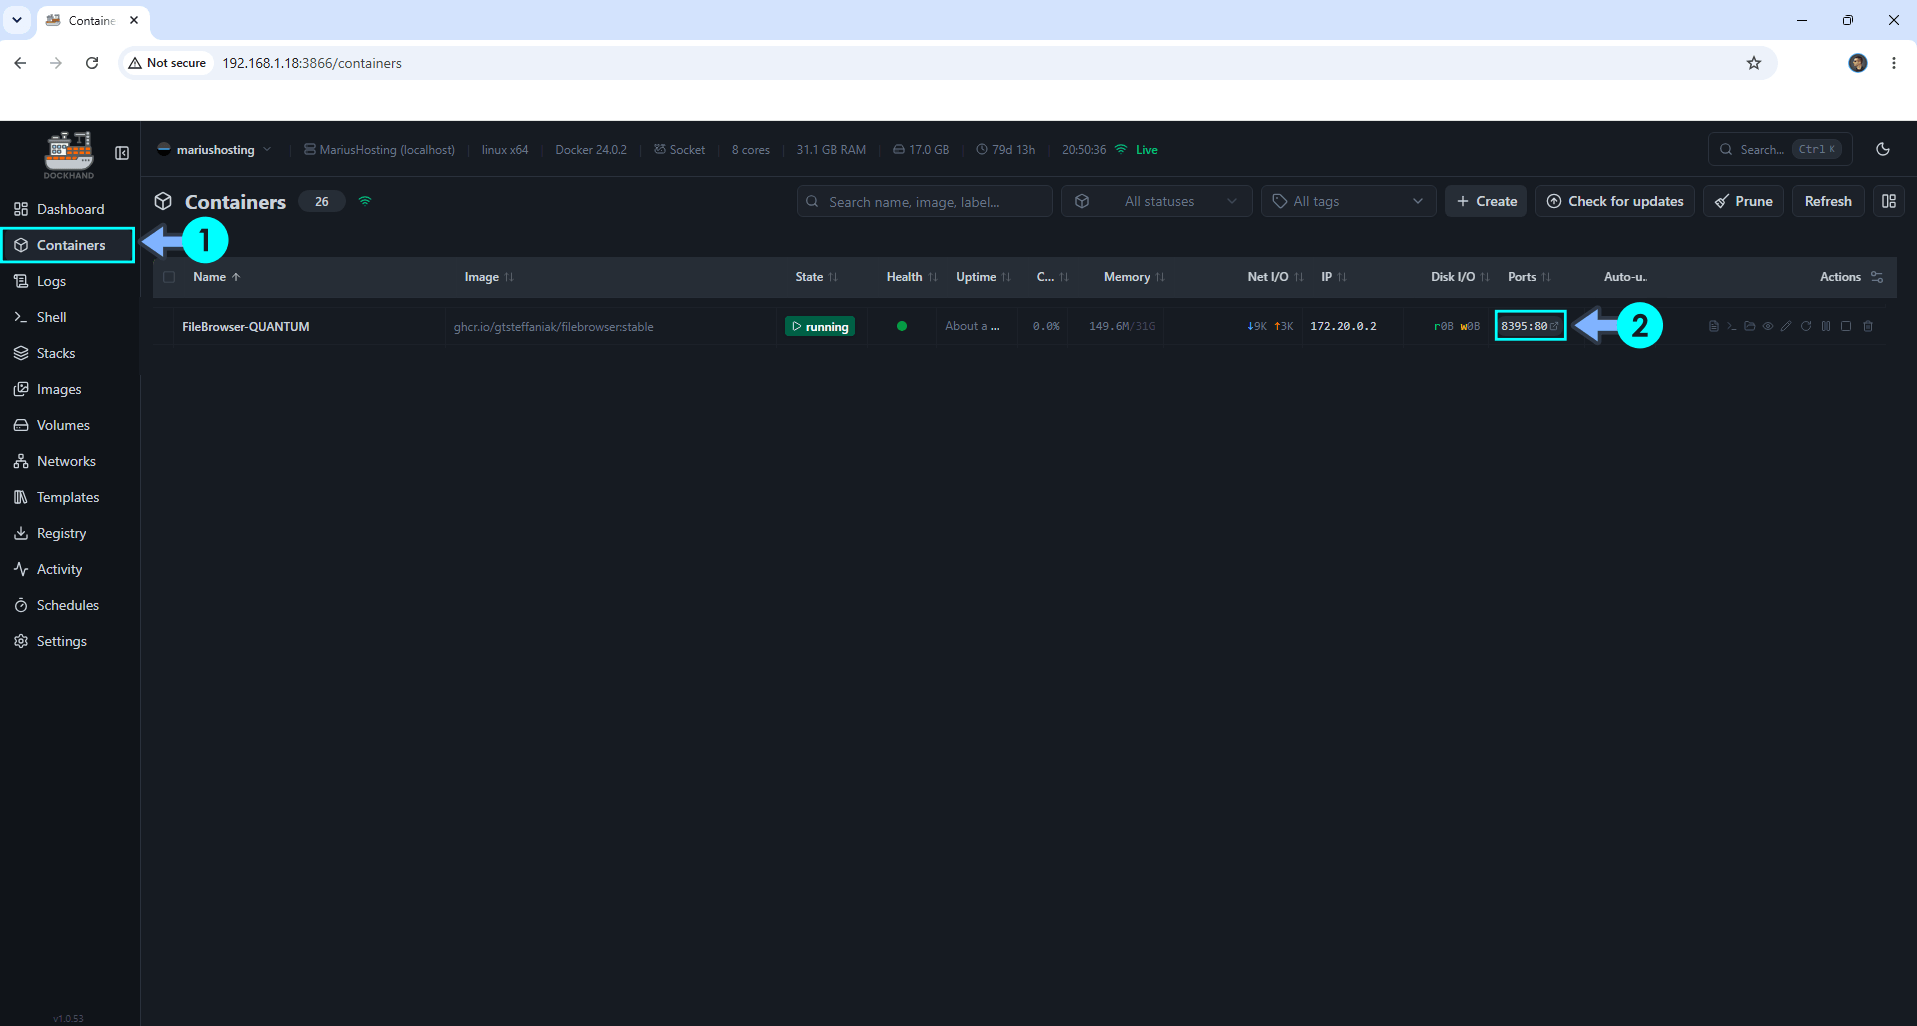
On the left sidebar, click Containers. Identify your FileBrowser-QUANTUM container then click on ports 8395:80. Follow the instructions in the image below.
STEP 9
🟢Please Support My work by Making a Donation. Almost 99,9% of the people that install something using my guides forget to support my work, or just ignore STEP 1. I’ve been very honest about this aspect of my work since the beginning: I don’t run any ADS, I don’t require subscriptions, paid or otherwise, I don’t collect IPs, emails, and I don’t have any referral links from Amazon or other merchants. I also don’t have any POP-UPs or COOKIES. I have repeatedly been told over the years how much I have contributed to the community. It’s something I love doing and have been honest about my passion since the beginning. But I also Need The Community to Support me Back to be able to continue doing this work.
STEP 10
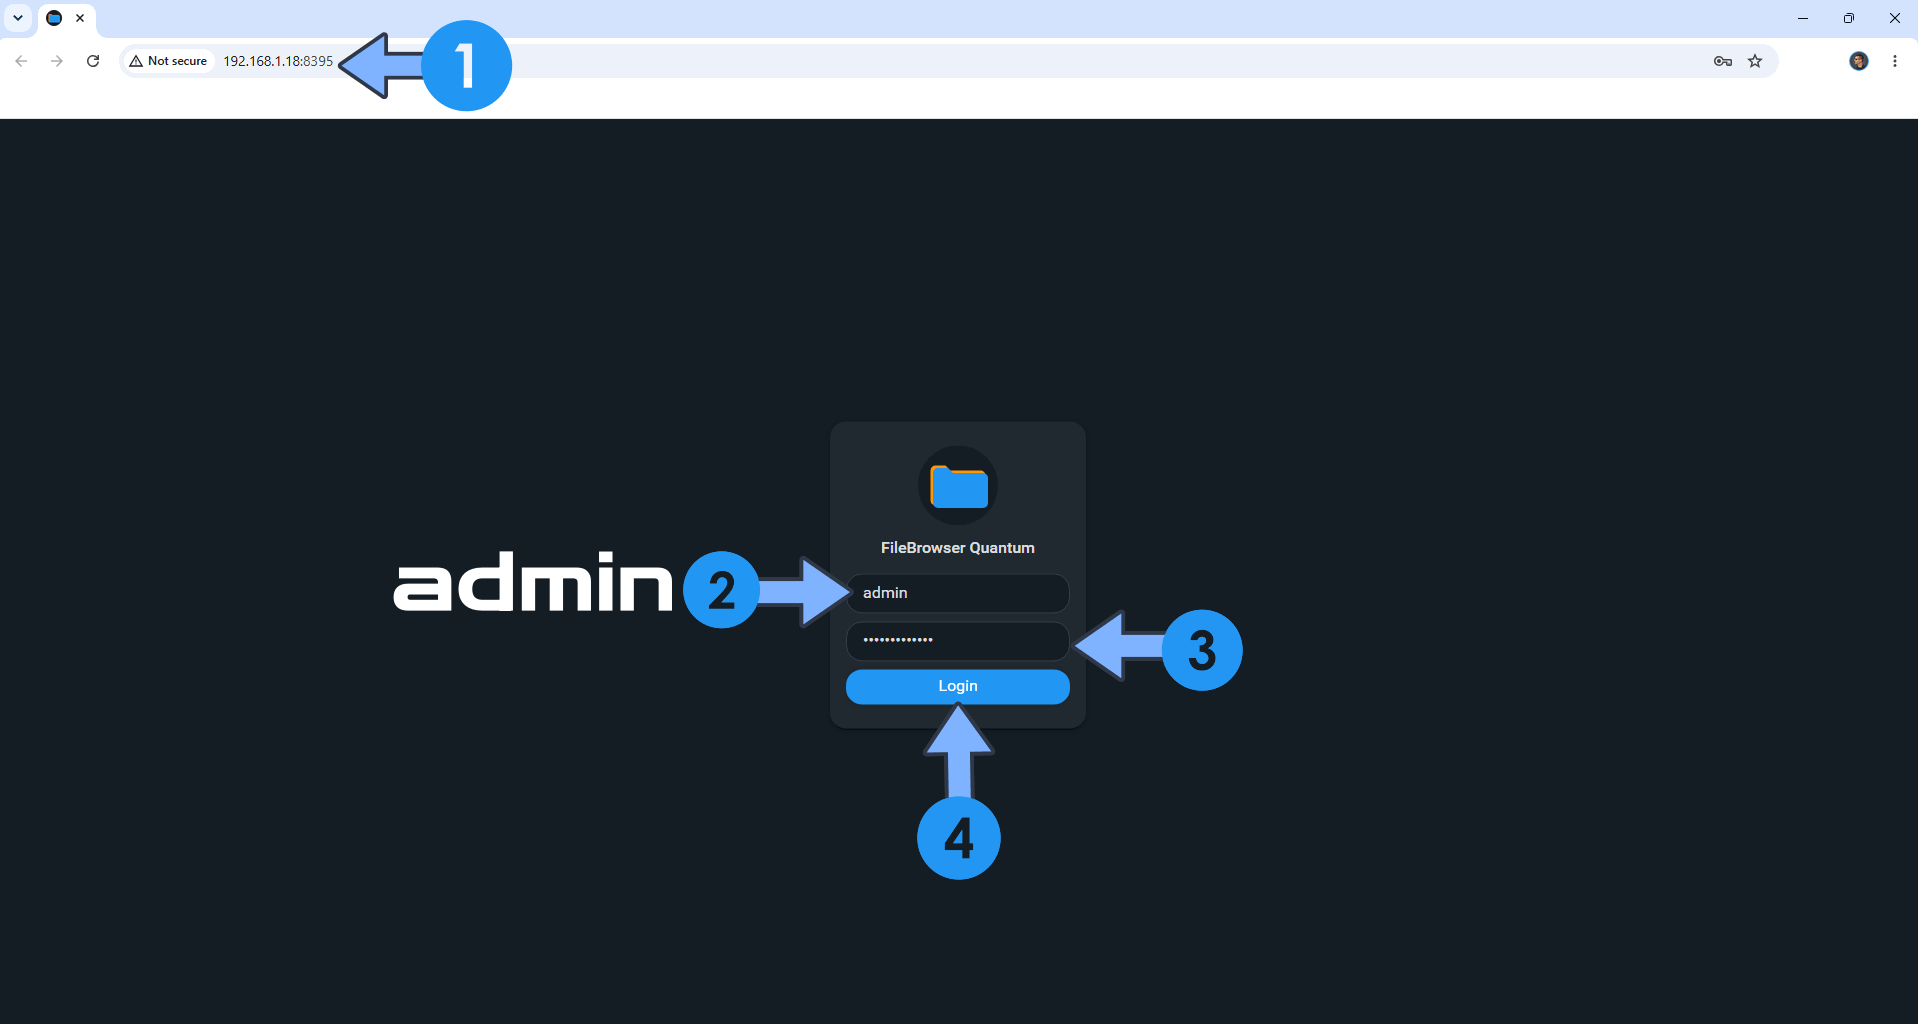
The installation process can take up to a few seconds/minutes. It will depend on your Internet speed connection. Now open your browser and type in http://synology-ip-address:8395 Type in the default username which is admin and the Password (FILEBROWSER_ADMIN_PASSWORD) that you have previously added at STEP 6. Click Login. Follow the instructions in the image below.
STEP 11
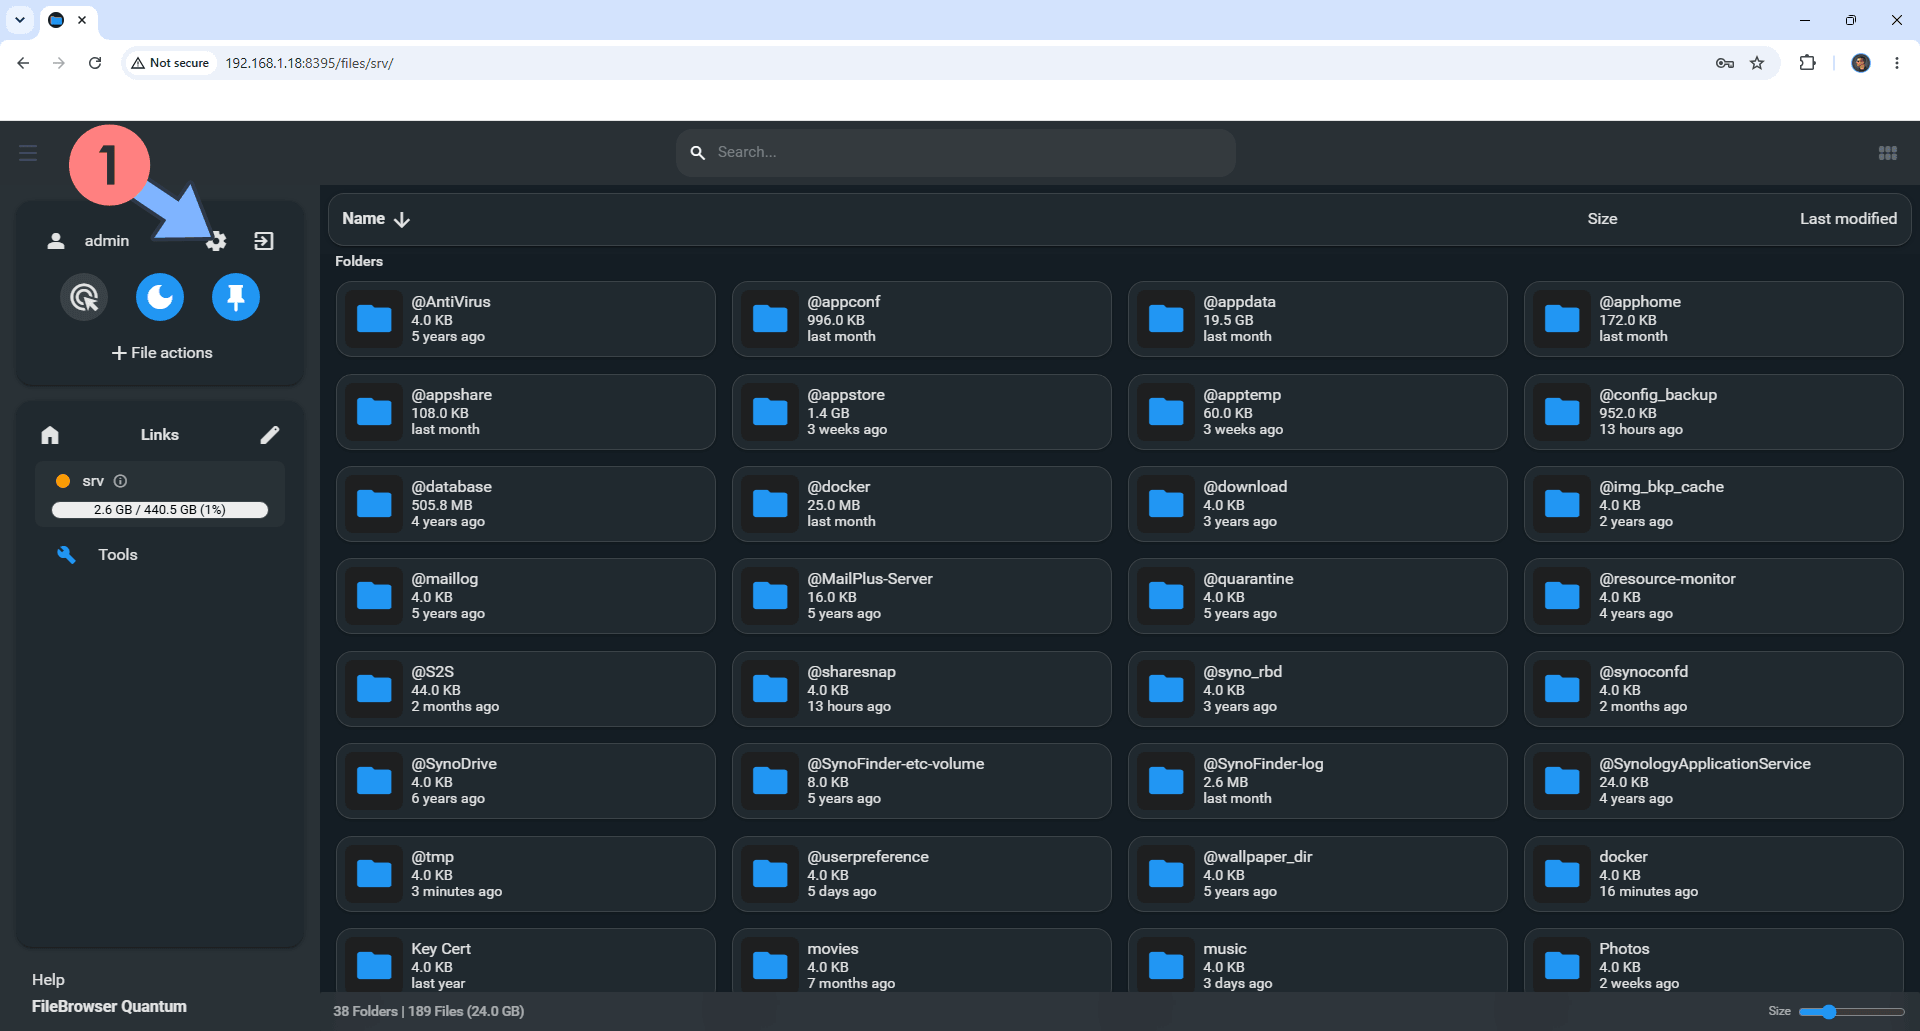
On the left sidebar, click the settings icon. Follow the instructions in the image below.
STEP 12
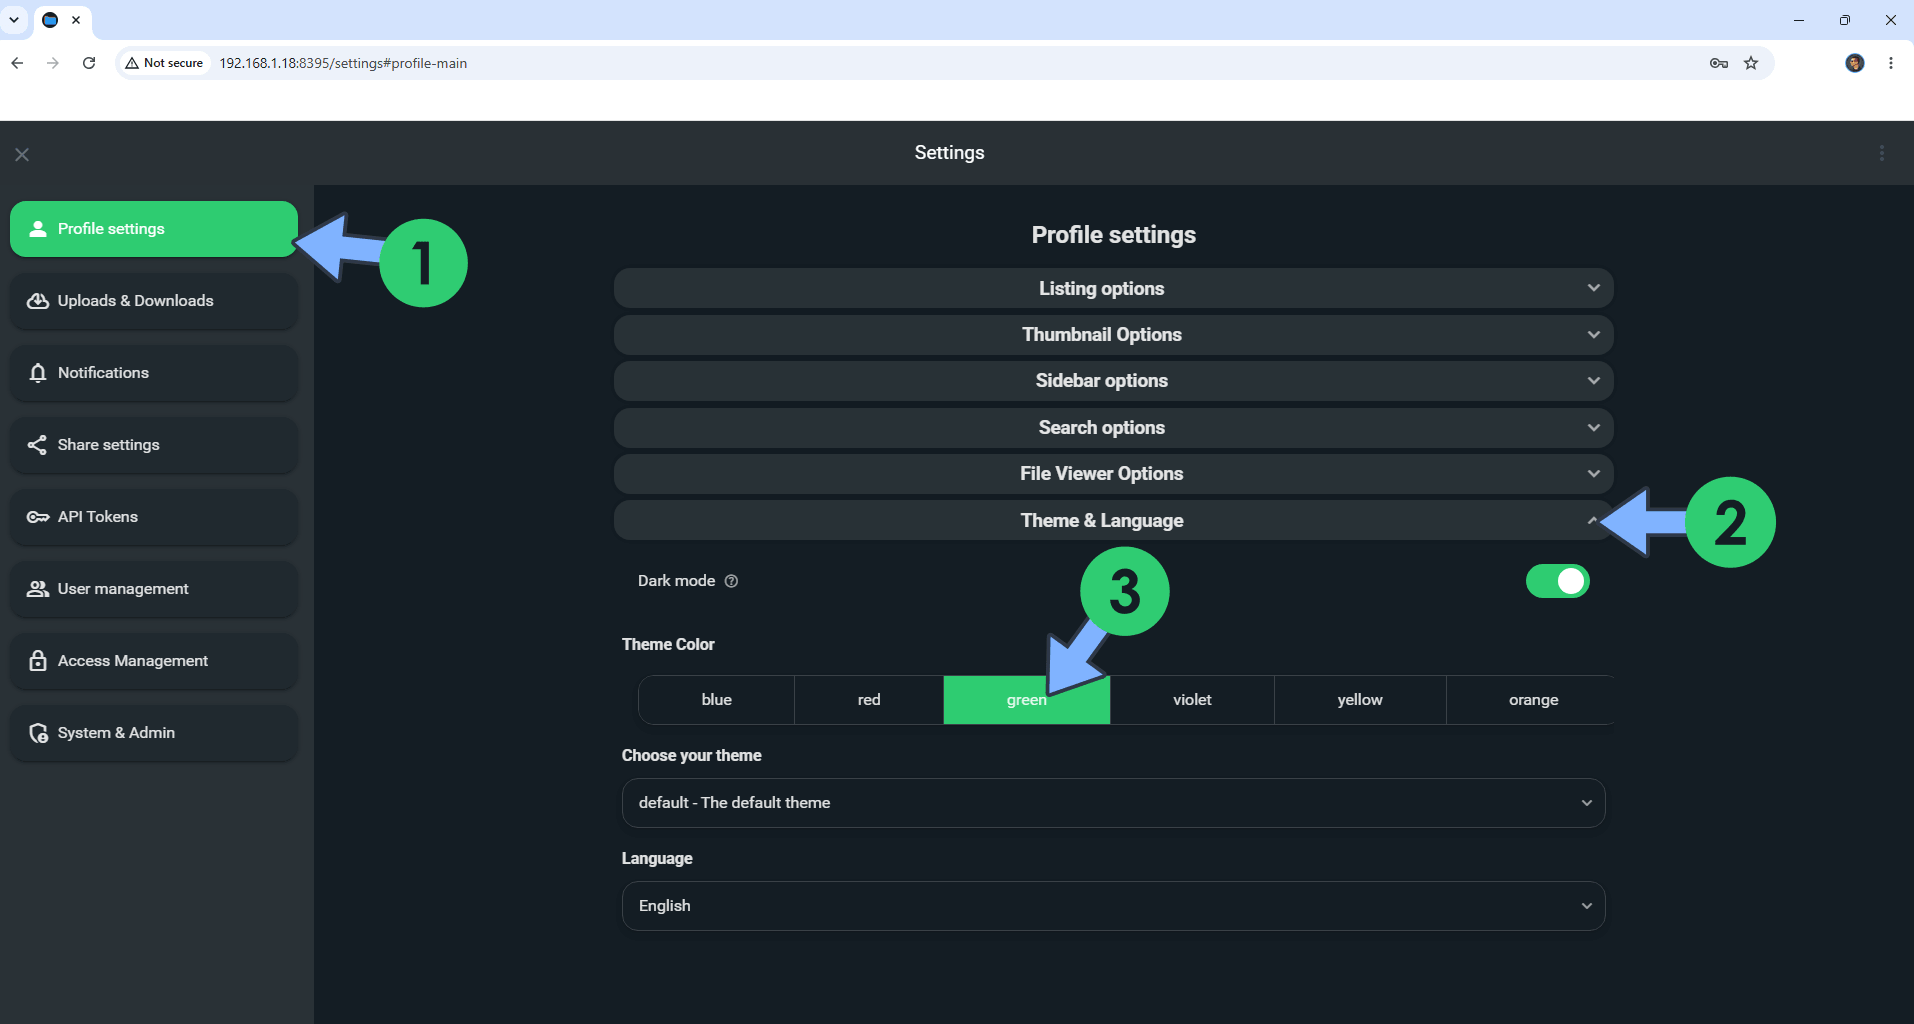
Click Profile settings. You can easily change the Theme Color. Follow the instructions in the image below.
STEP 13
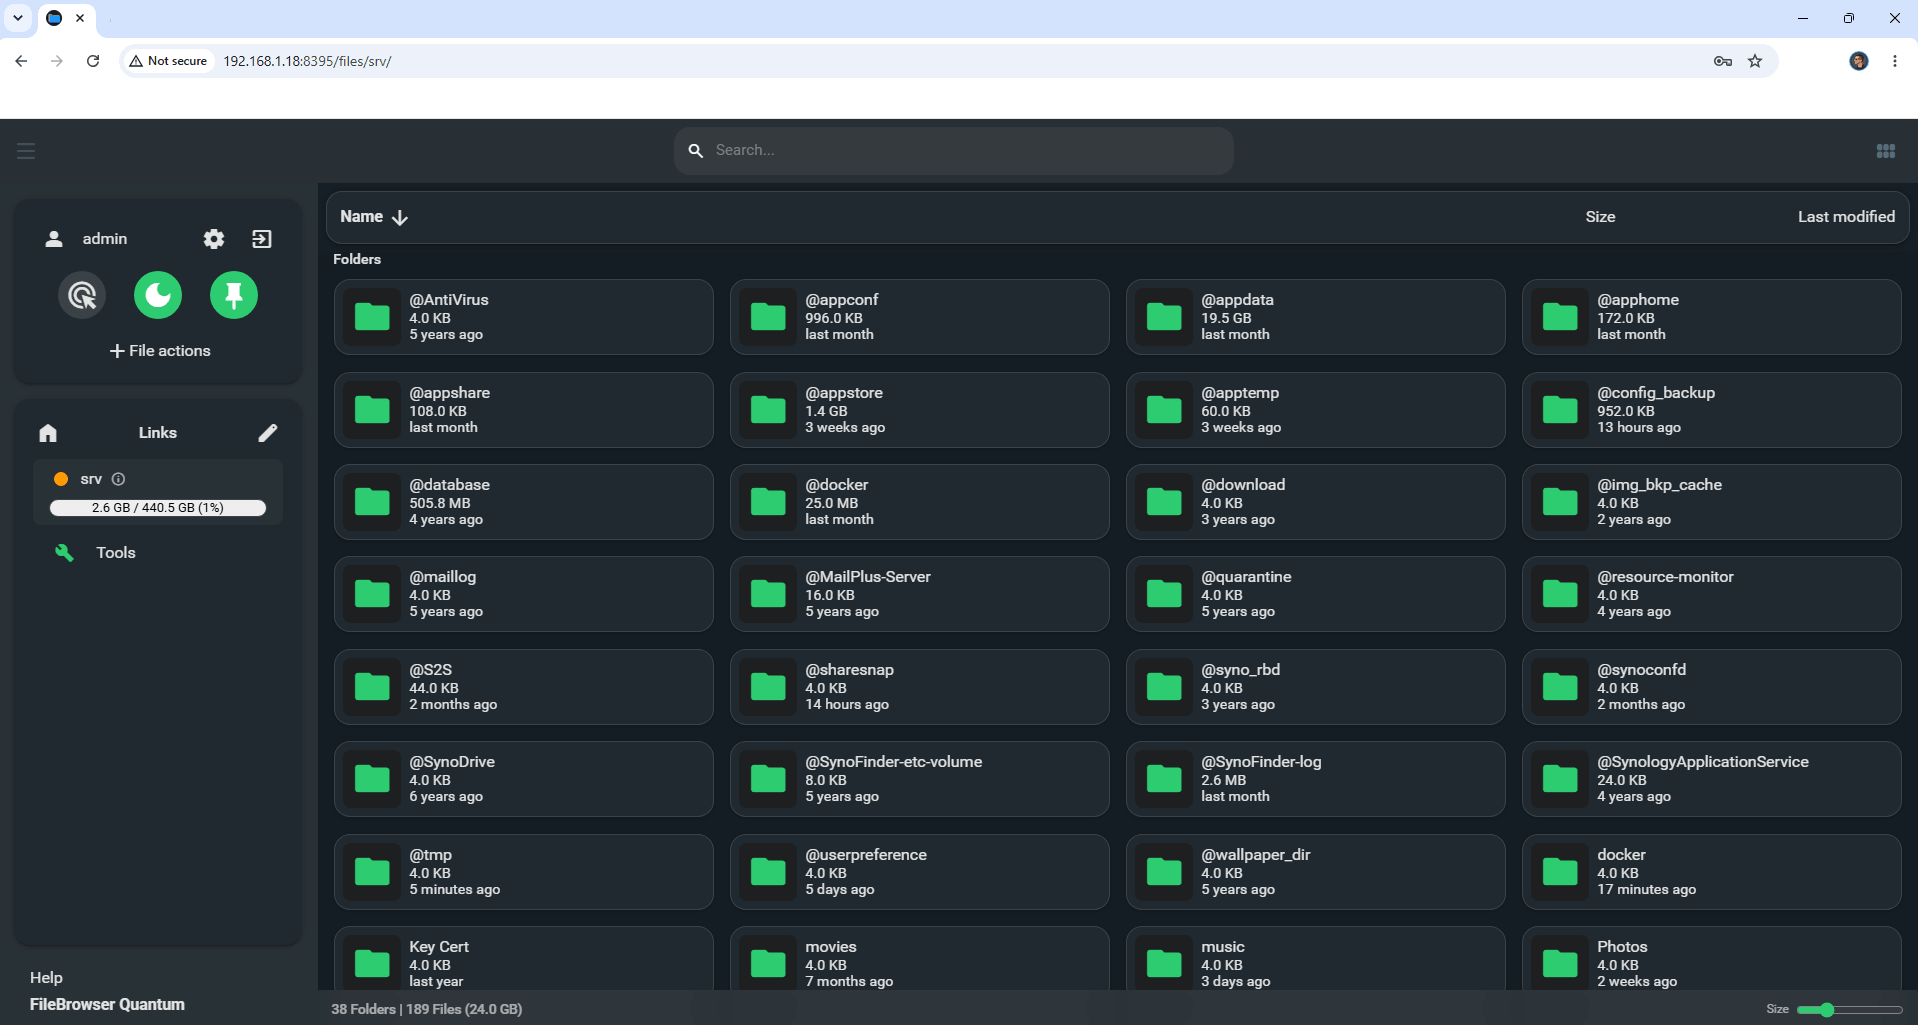
Your FileBrowser Quantum dashboard at a glance!
Enjoy FileBrowser Quantum!
If you encounter issues by using this container, make sure to check out the Common Docker issues article.
Note: If you want to run the FileBrowser Quantum container over HTTPS, check How to Run Docker Containers Over HTTPS. In order to make FileBrowser Quantum work via HTTPS, it’s mandatory to activate WebSocket.
Note: Can I run Docker on my Synology NAS? See the supported models.
Note: How to Back Up Docker Containers on your Synology NAS.
Note: Find out how to update the FileBrowser Quantum container with the latest image.
Note: How to Free Disk Space on Your NAS if You Run Docker & Dockhand.
Note: How to Schedule Start & Stop For Docker Containers.
Note: How to Activate Email Notifications.
Note: How to Add Access Control Profile on Your NAS.
Note: How to Change Docker Containers Restart Policy.
Note: How to Use Docker Containers With VPN.
Note: Convert Docker Run Into Docker Compose.
Note: How to Clean Docker.
Note: How to Clean Docker Automatically.
Note: Best Practices When Using Docker and DDNS.
Note: Some Docker Containers Need WebSocket.
Note: Find out the Best NAS Models For Docker.
Note: Activate Gmail SMTP For Docker Containers.
This post was updated on Sunday / October 11th, 2026 at 10:49 PM