
TelltaleDNS is a small, fast DNS resolver and ad blocker written in Rust that answers queries in microseconds while fully explaining every result. It identifies each device on the network, applies granular per-device rules such as blocklists, schedules, and rewrites, and logs detailed timing and reasoning for every stage of the resolution process. It supports encrypted DNS in both directions, high-availability clustering, and runs as a single lightweight binary or Docker container with a clear web interface that reveals exactly who asked what and why it was answered that way. After installing it through Docker on my Synology NAS I was struck by how little memory and CPU it used while instantly giving me clear visibility into every query from every device. The dashboard made it simple to spot noisy trackers, apply targeted rules without affecting other clients, and confirm that responses stayed consistently fast. It has become the DNS solution I leave running in the background because it is quiet, transparent, and perfectly suited to the modest resources of a NAS. In this step by step guide I will show you how to install TelltaleDNS on your Synology NAS using Docker & Dockhand.
💡Note:
This guide works perfectly with the latest TelltaleDNS v0.7.0 release.
STEP 1
Please Support My work by Making a Donation.
STEP 2
Install Dockhand using my step by step guide. If you already have Dockhand installed on your Synology NAS, skip this STEP. ⚠️Attention: Make sure you have installed the latest Dockhand version.
STEP 3
⚠️Mandatory STEP: If you have already installed the PiHole or Adguard container, remember to disable or simply stop them temporarily to be able to use TelltaleDNS since TelltaleDNS uses the same default port 53 as PiHole and Adguard.
STEP 4
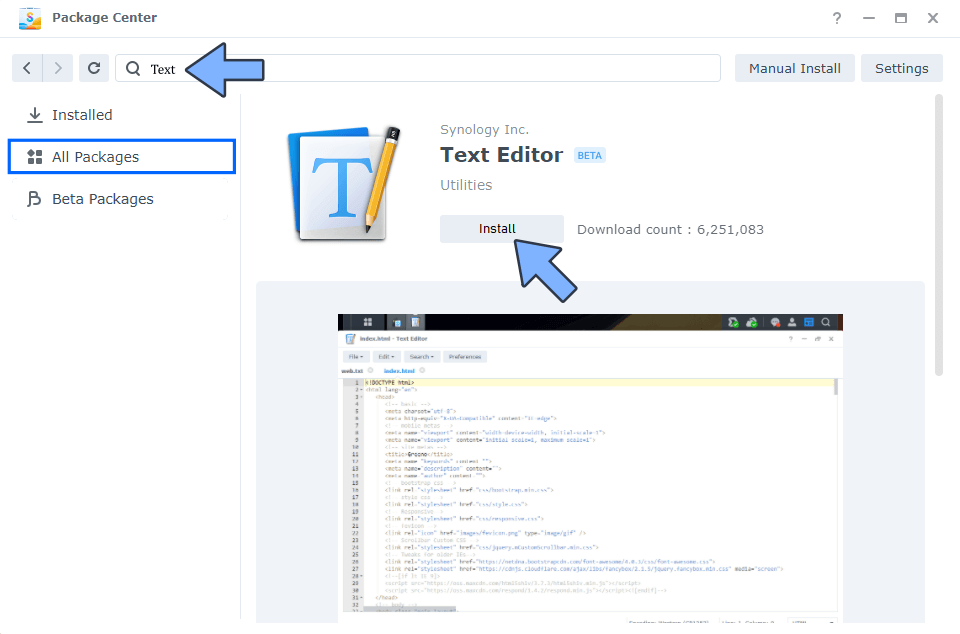
Install Text Editor via Synology “Package Center”. (Mandatory STEP.) If you already have Text Editor installed on your Synology NAS, skip this STEP.
STEP 5
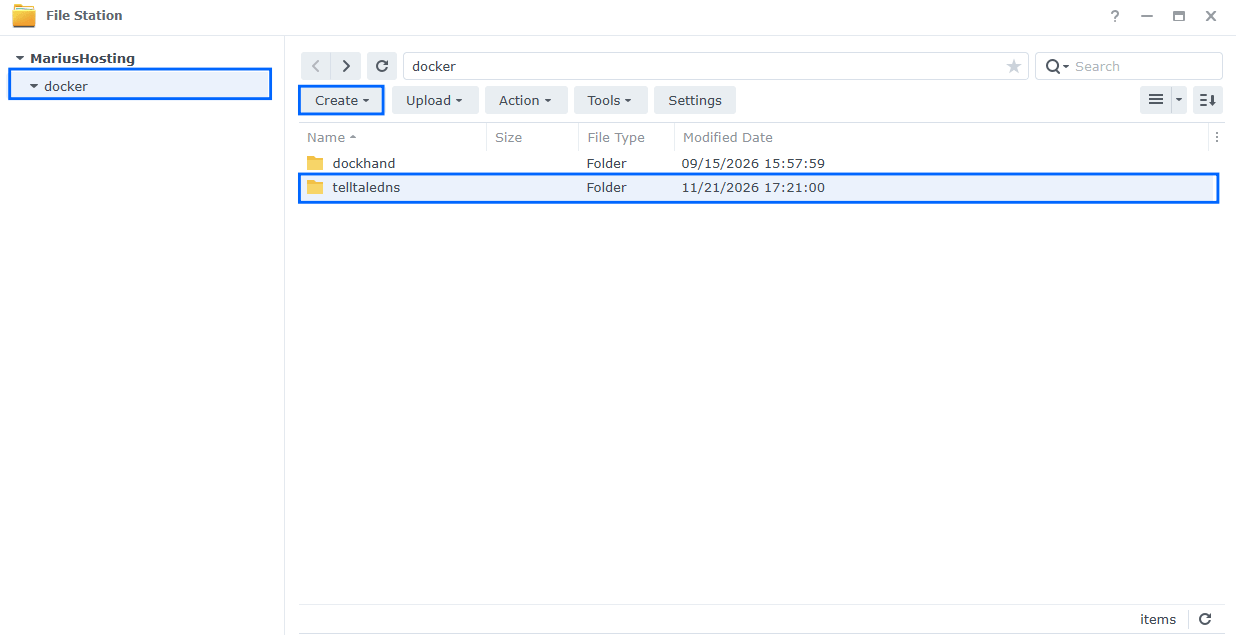
Go to File Station and open the docker folder. Inside the docker folder, create one new folder and name it telltaledns. Follow the instructions in the image below.
Note: Be careful to enter only lowercase, not uppercase letters.
STEP 6
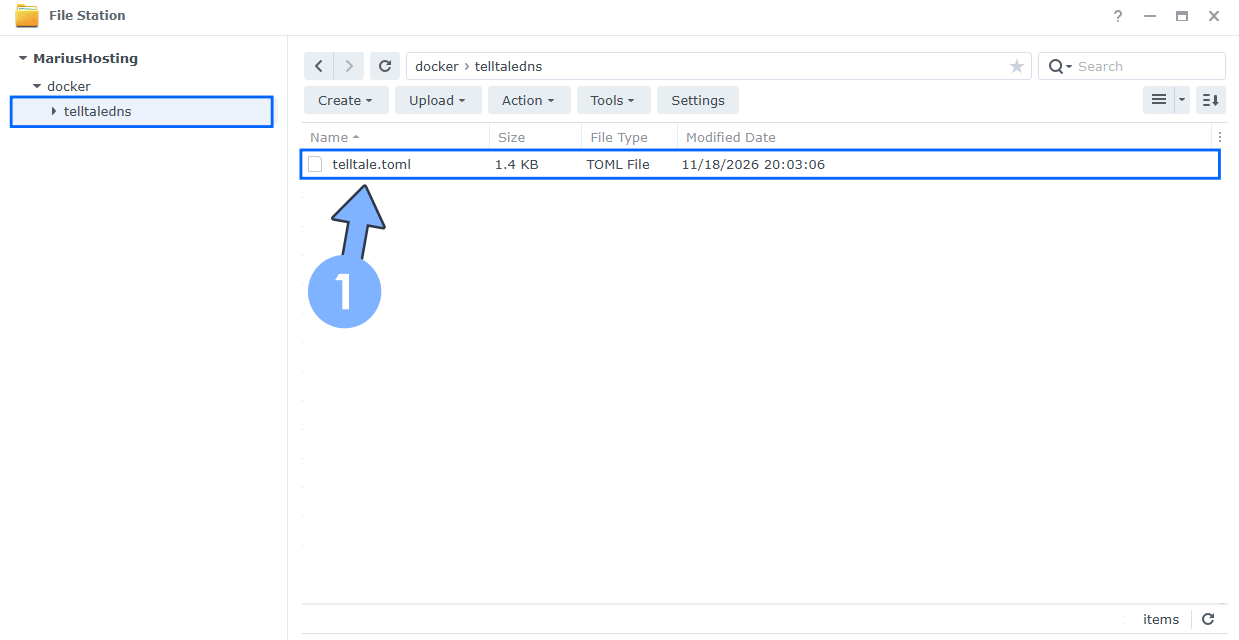
Download (click on the blue link below) and upload the telltale.toml file below in the telltaledns folder that you have previously created at STEP 5. Follow the instructions in the image below. 🔒Note: Support my work to unlock the password. You can use this password to download any file on mariushosting forever!
STEP 7
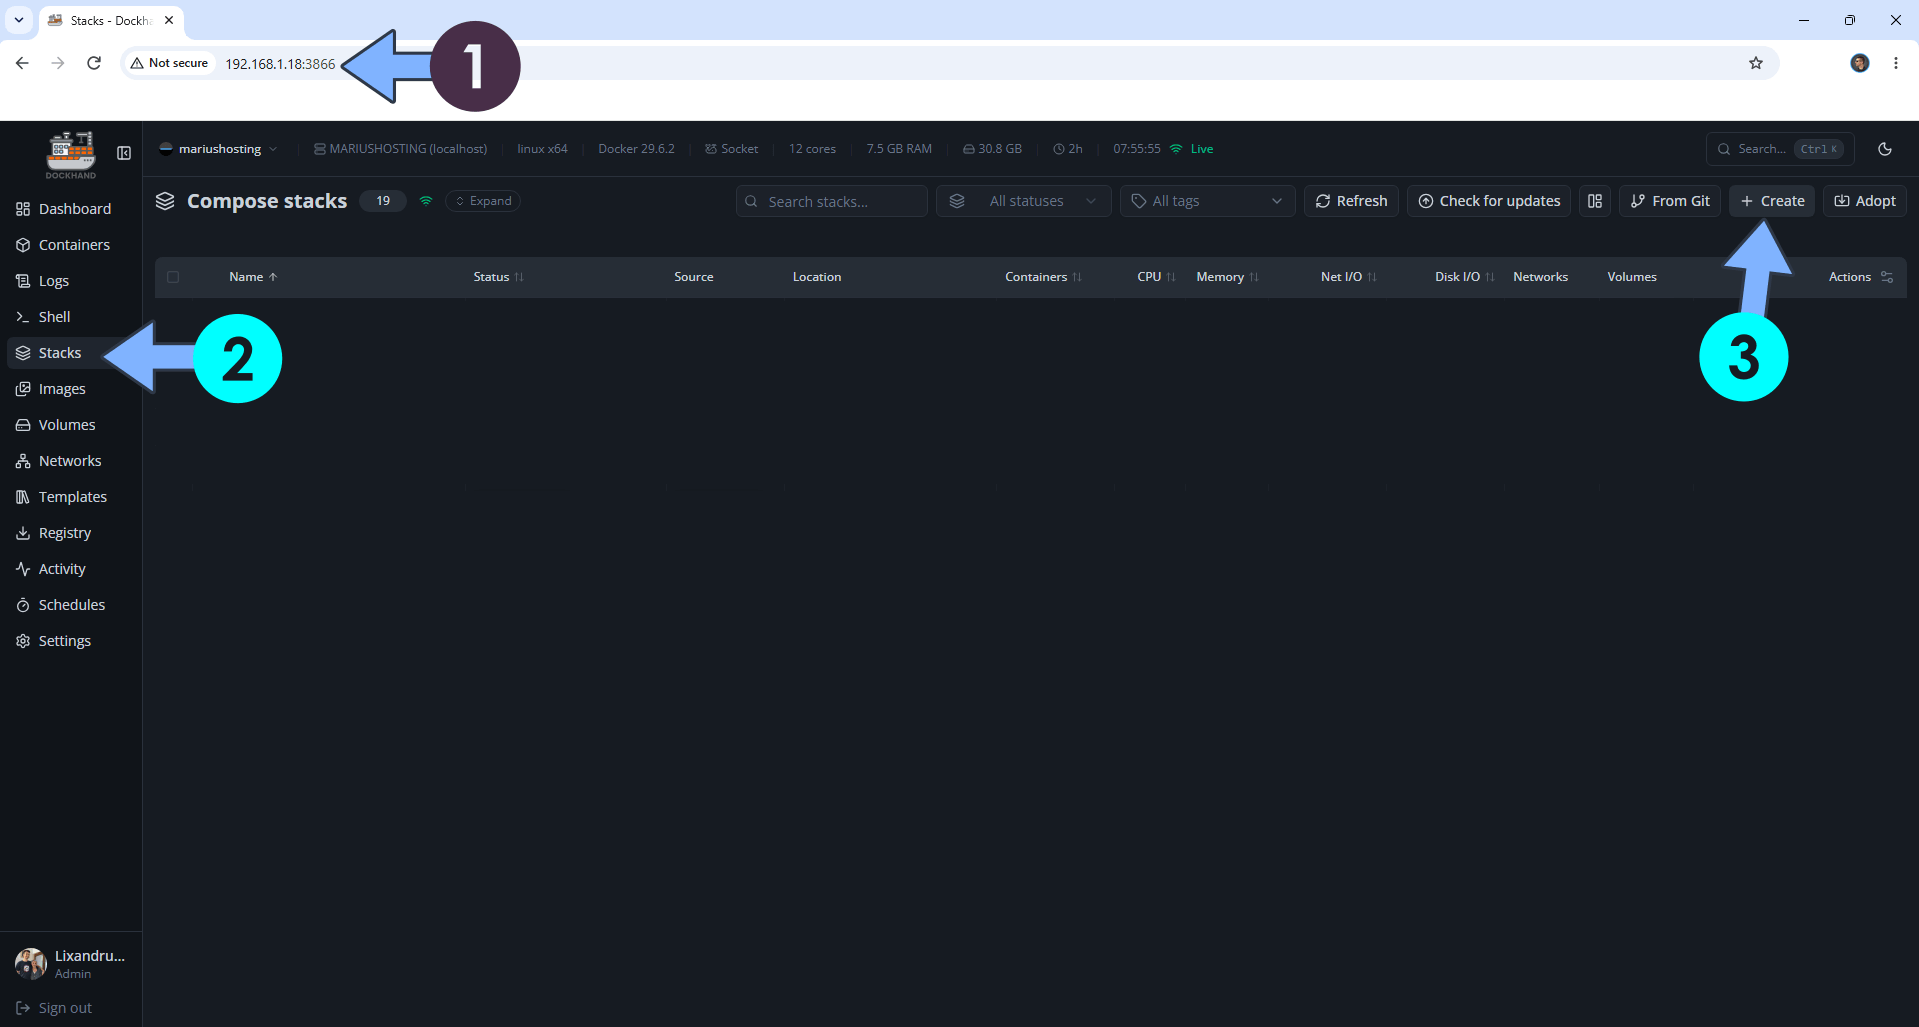
Open your browser and type in http://synology-ip-address:3866 to connect to your Dockhand container. On the left sidebar, click Stacks then + Create. Follow the instructions in the image below.
STEP 8
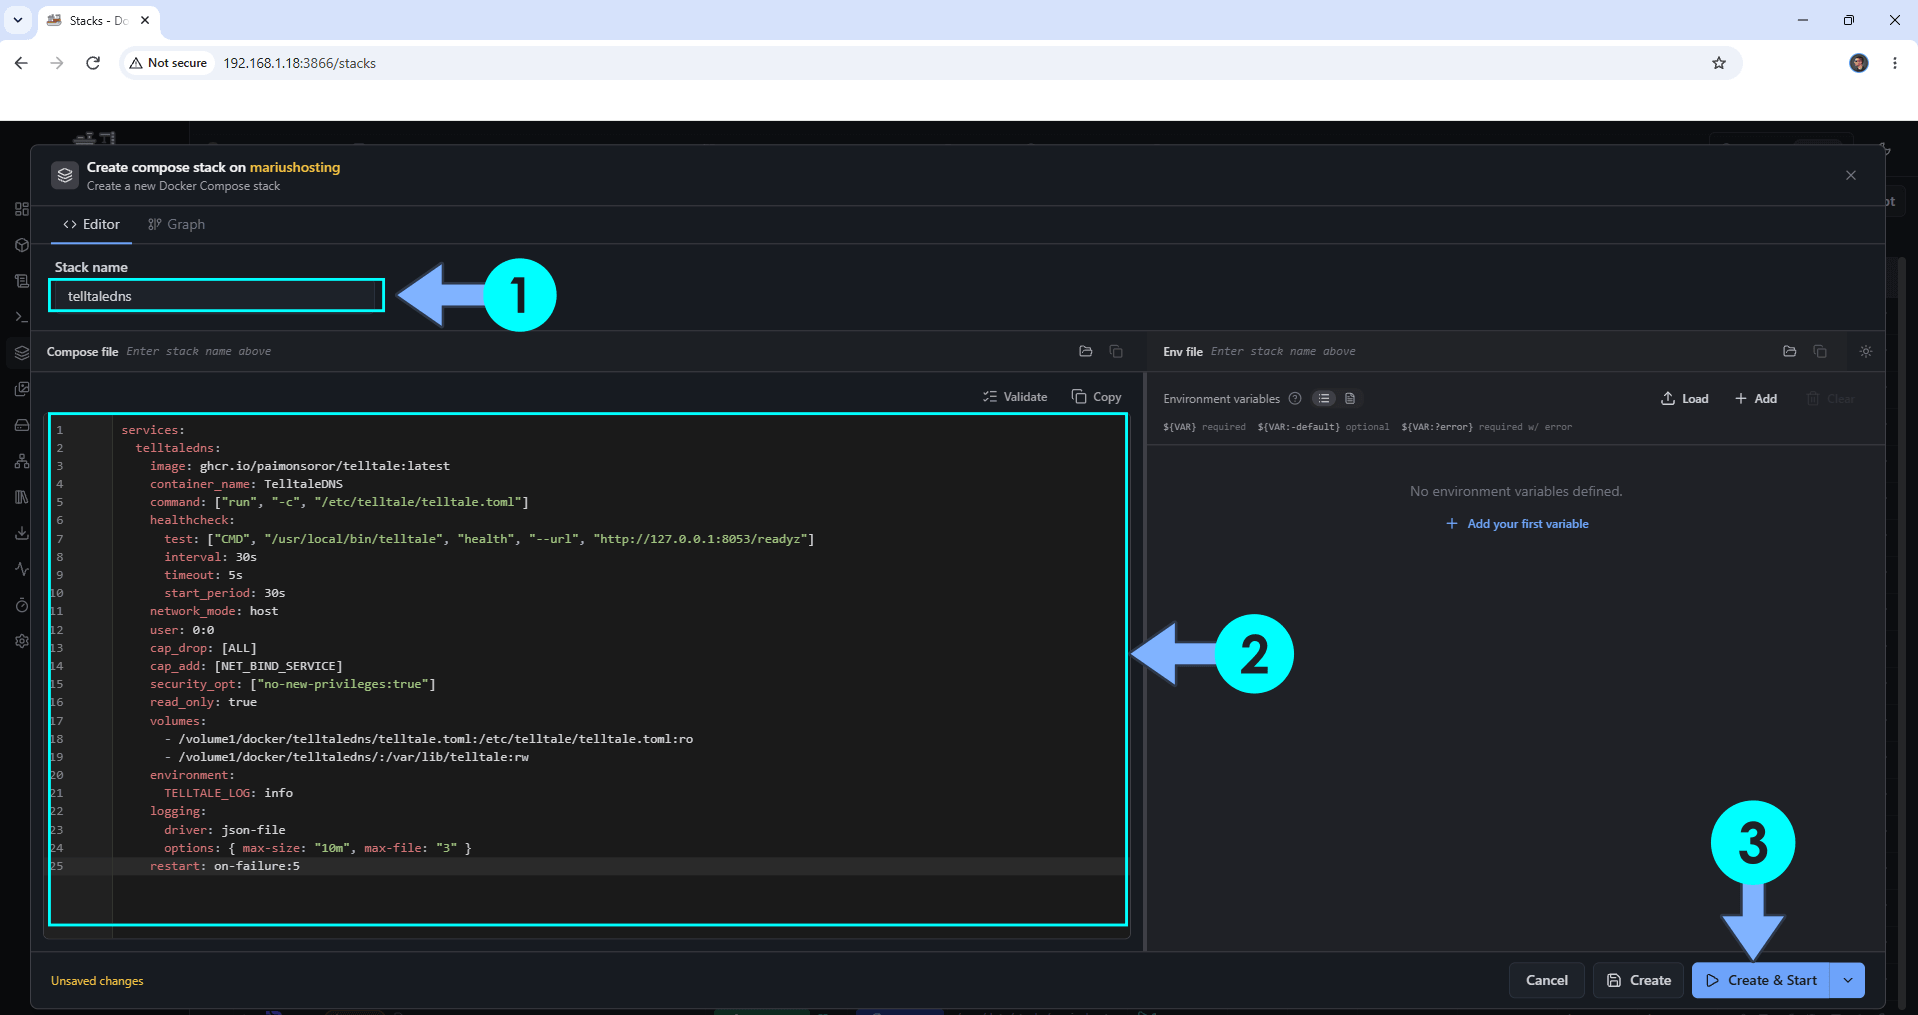
In the Stack name field, type in telltaledns. ⚠️Warning: Type in the name in lowercase letters. The installation process can take up to a few seconds/minutes. It will depend on your Internet speed connection. Follow the instructions in the image below.
Note: Copy Paste the code below in the Dockhand Compose Stack then click Create & Start.
services:
  telltaledns:
    image: ghcr.io/paimonsoror/telltale:latest
    container_name: TelltaleDNS
    command: ["run", "-c", "/etc/telltale/telltale.toml"]
    healthcheck:
      test: ["CMD", "/usr/local/bin/telltale", "health", "--url", "http://127.0.0.1:8053/readyz"]
      interval: 30s
      timeout: 5s
      start_period: 30s
    network_mode: host
    user: 0:0
    cap_drop: [ALL]
    cap_add: [NET_BIND_SERVICE]
    security_opt: ["no-new-privileges:true"]
    read_only: true
    volumes:
      - /volume1/docker/telltaledns/telltale.toml:/etc/telltale/telltale.toml:ro
      - /volume1/docker/telltaledns/:/var/lib/telltale:rw
    environment:
      TELLTALE_LOG: info
    logging:
      driver: json-file
      options: { max-size: "10m", max-file: "3" }
    restart: on-failure:5
STEP 9
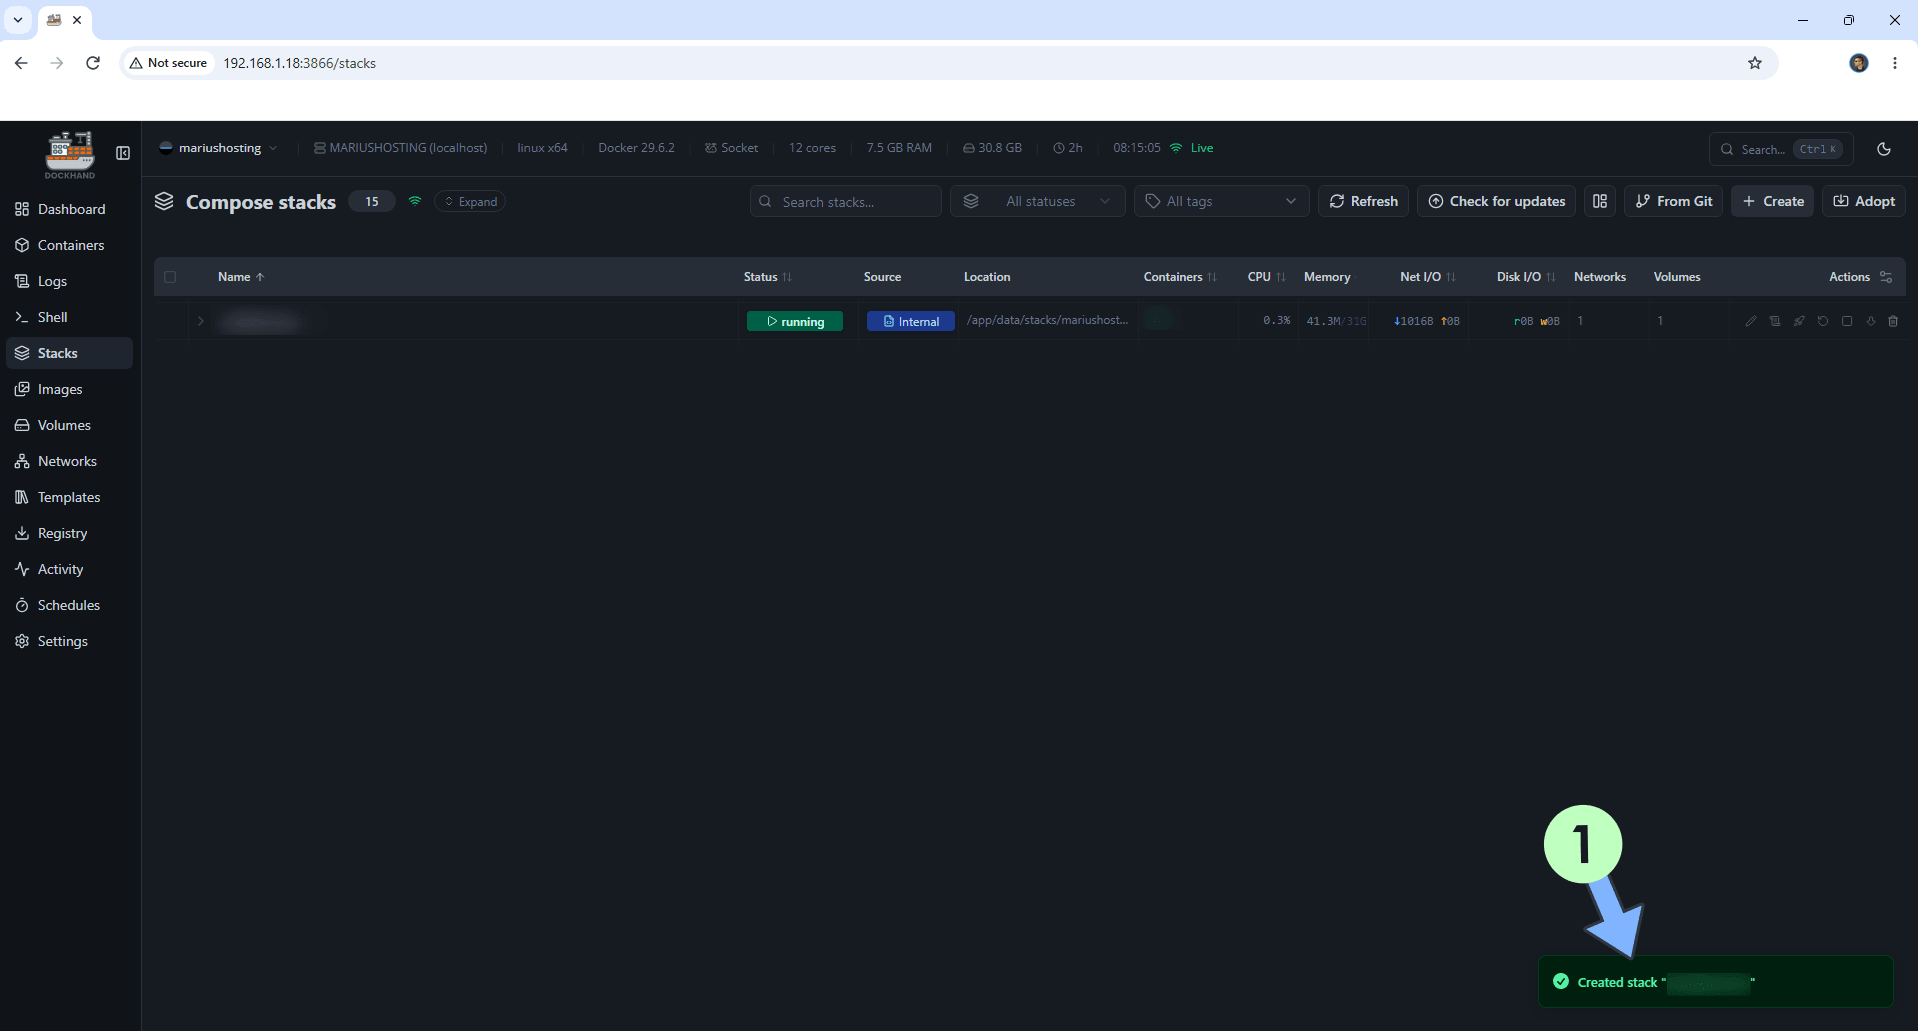
If everything goes right, you will see the following message at the bottom right of your screen: “Created stack “telltaledns”“.
STEP 10
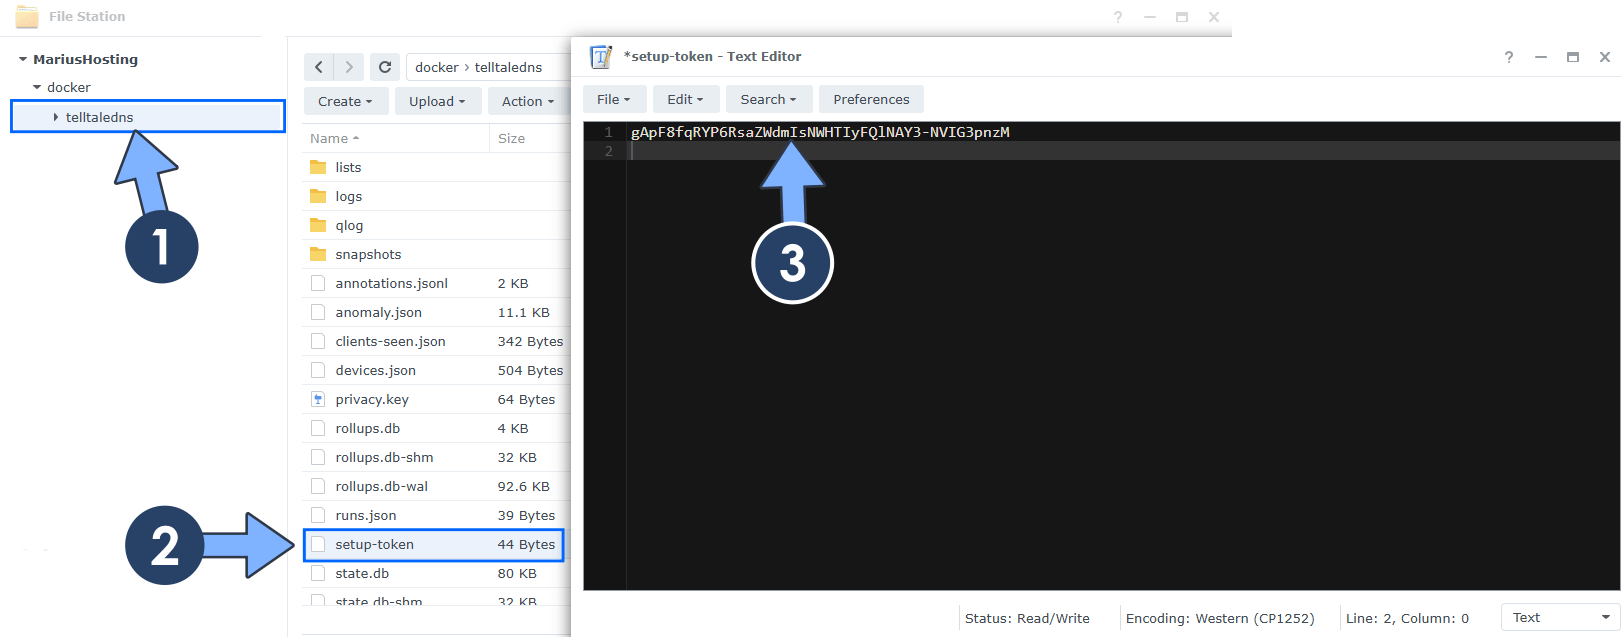
Open the telltaledns folder that you have previously created at STEP 5. Double click on the setup-token file to open it. Copy the setup token. You will need this token later at STEP 12. Follow the instructions in the image below.
STEP 11
🟢Please Support My work by Making a Donation. Almost 99,9% of the people that install something using my guides forget to support my work, or just ignore STEP 1. I’ve been very honest about this aspect of my work since the beginning: I don’t run any ADS, I don’t require subscriptions, paid or otherwise, I don’t collect IPs, emails, and I don’t have any referral links from Amazon or other merchants. I also don’t have any POP-UPs or COOKIES. I have repeatedly been told over the years how much I have contributed to the community. It’s something I love doing and have been honest about my passion since the beginning. But I also Need The Community to Support me Back to be able to continue doing this work.
STEP 12
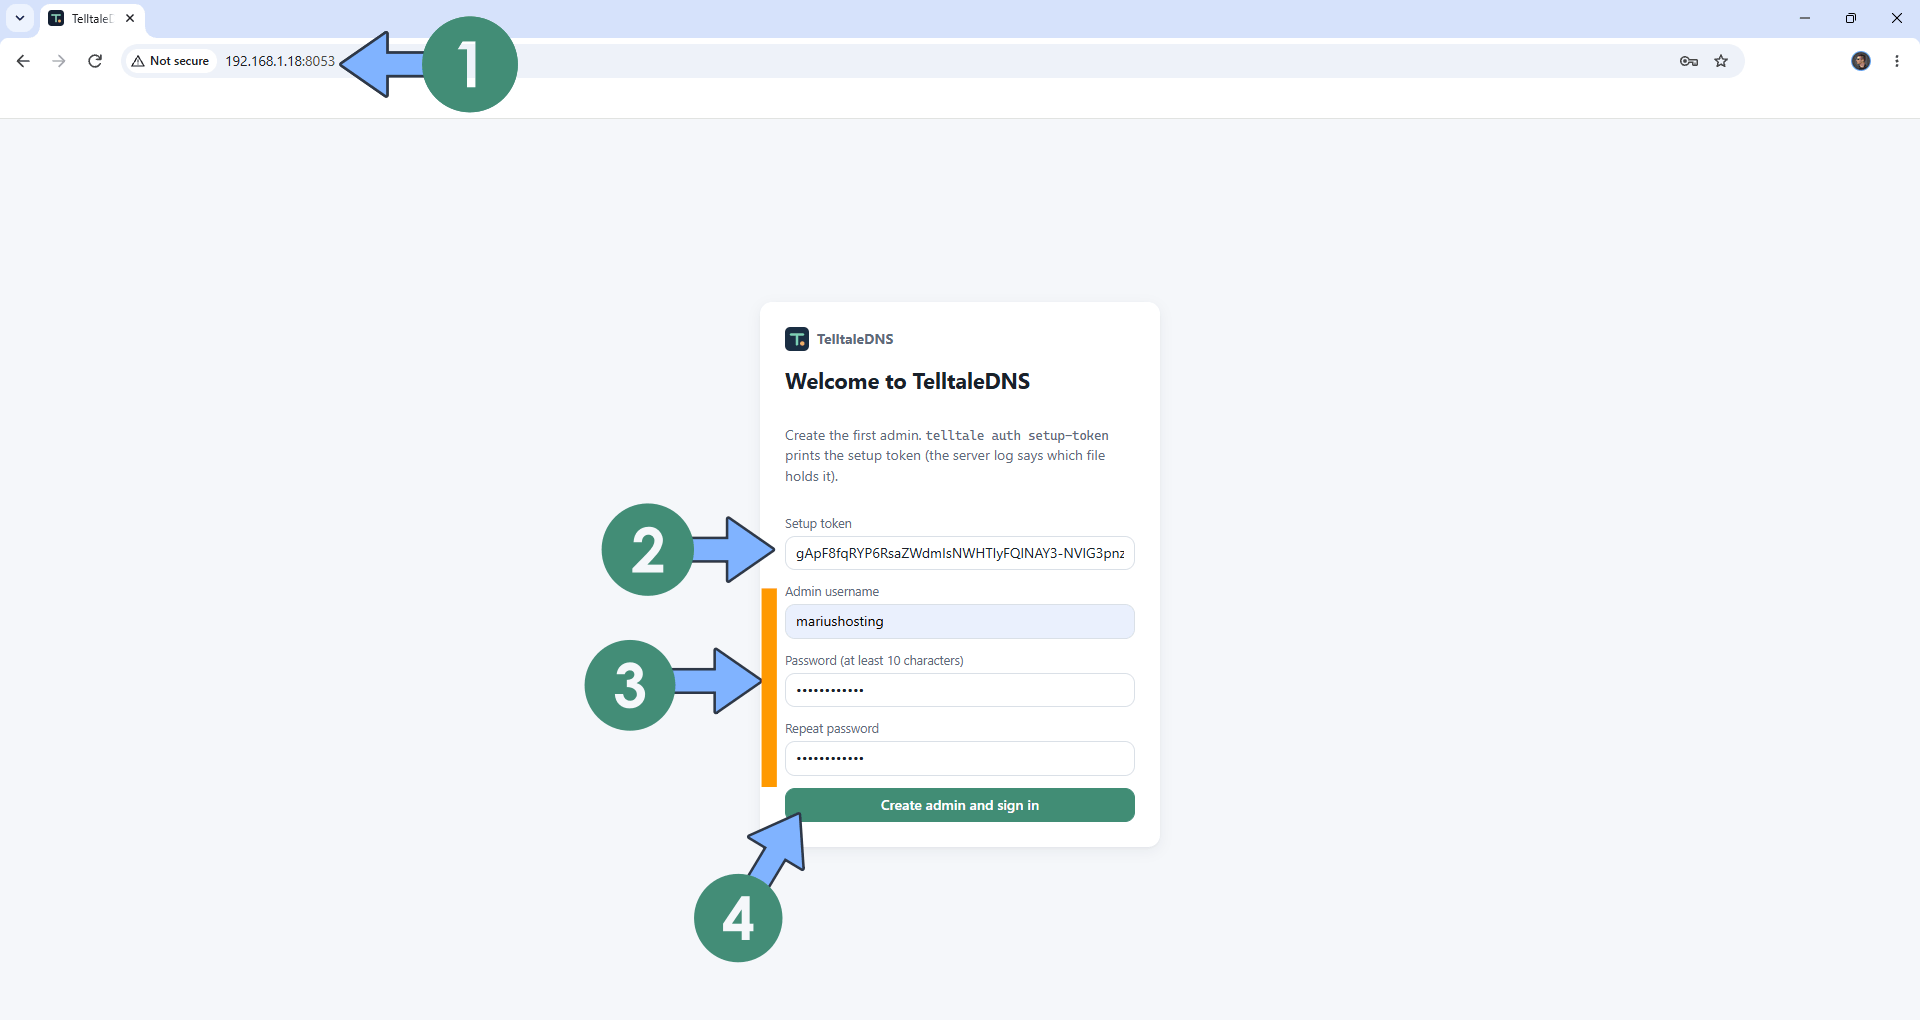
The installation process can take up to a few seconds/minutes. It will depend on your Internet speed connection. Now open your browser and type in http://synology-ip-address:8053 Type in your Setup token that you have previously copied at STEP 10. Type in your own Admin Username and Password. Click Create admin and sign in. Follow the instructions in the image below.
STEP 13
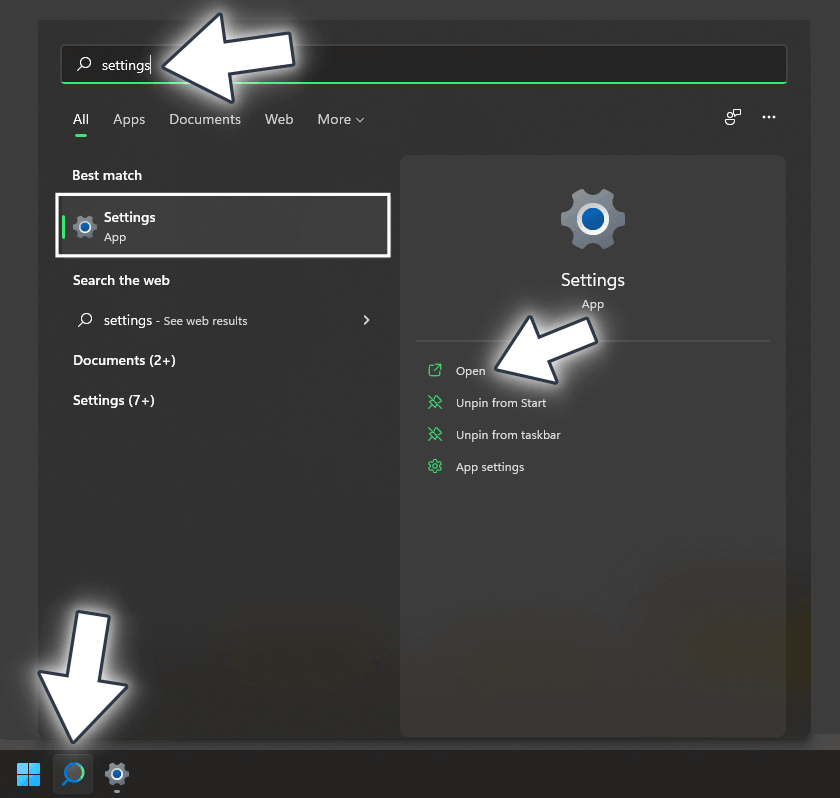
On your Windows 11 Desktop PC, search for Settings. Once you find it, click Open. Follow the instructions in the image below.
STEP 14
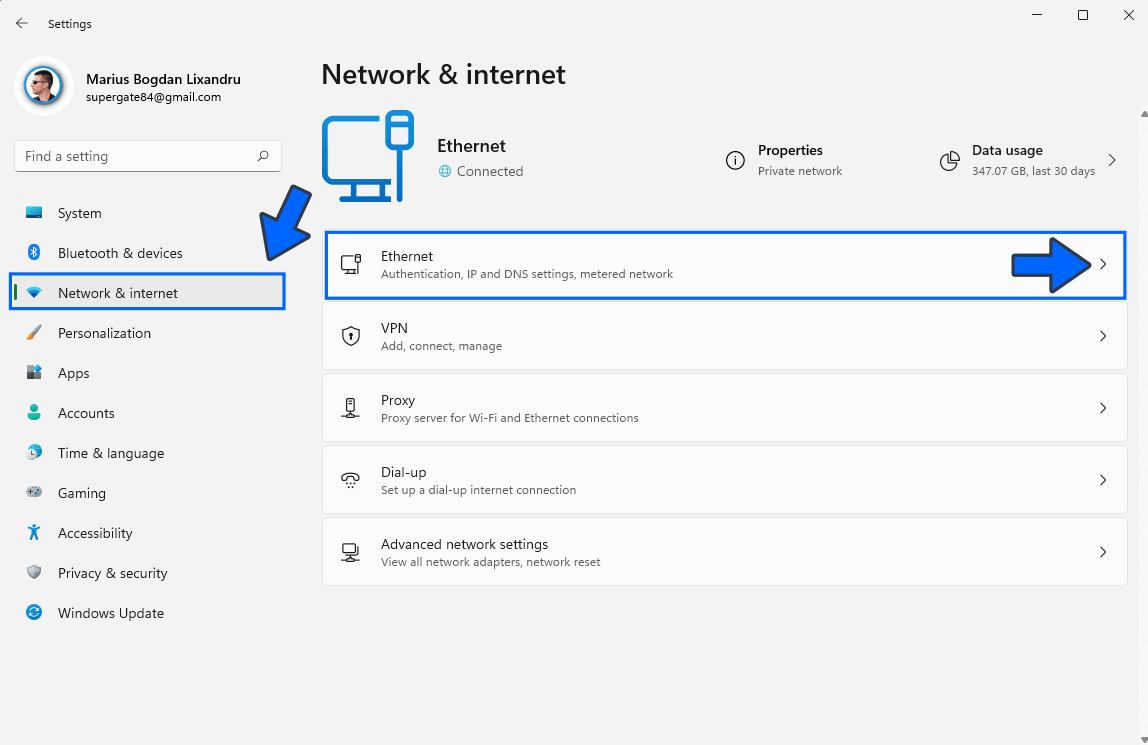
On the left sidebar, click Network & Internet. Select your Ethernet connection, then click the little arrow. Follow the instructions in the image below.
STEP 15
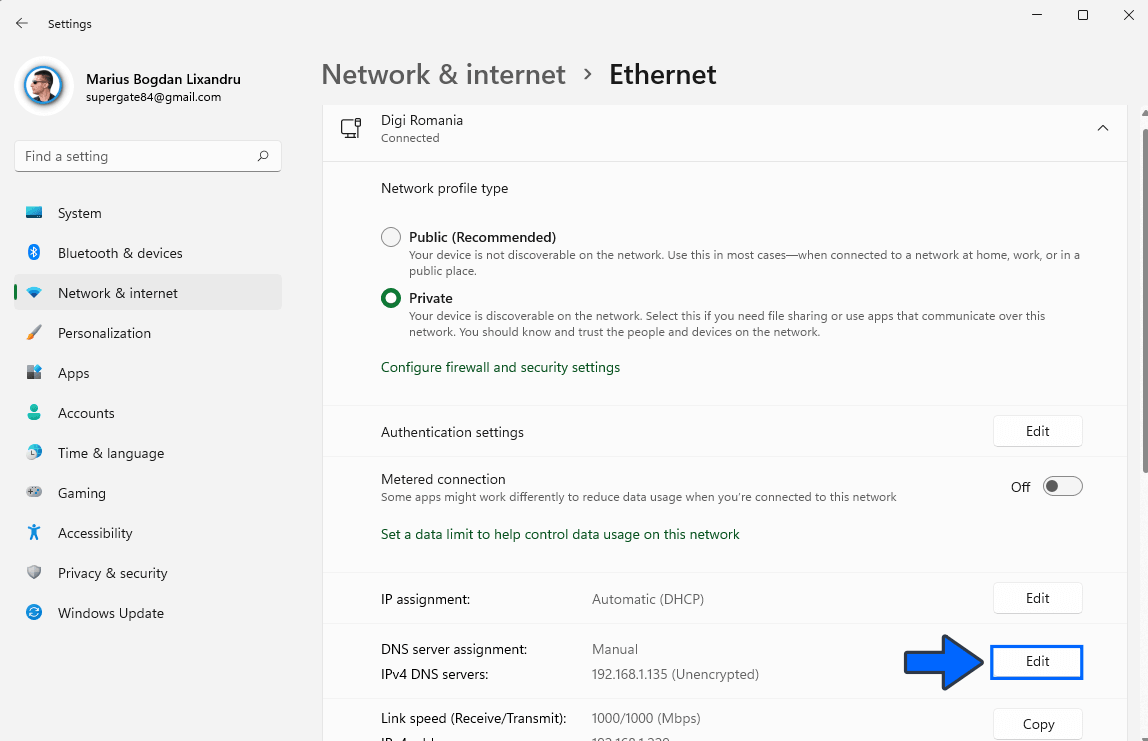
Scroll down until you find the option “DNS server assignment“. Click Edit. Follow the instructions in the image below.
STEP 16
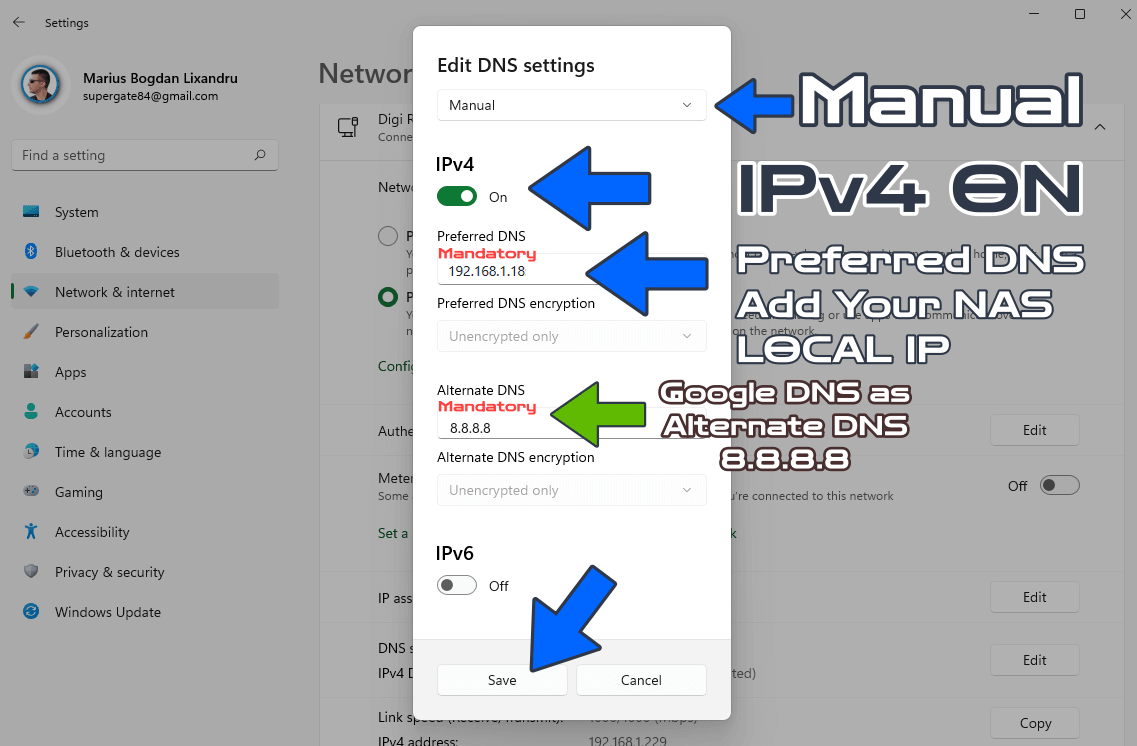
Edit DNS settings. Instead of Automatic DHCP, choose Manual. Turn ON IPv4. Add your Synology NAS local IP as the Preferred DNS and the Google DNS 8.8.8.8 as the Alternate DNS. Click Save. Follow the instructions in the image below.
STEP 17
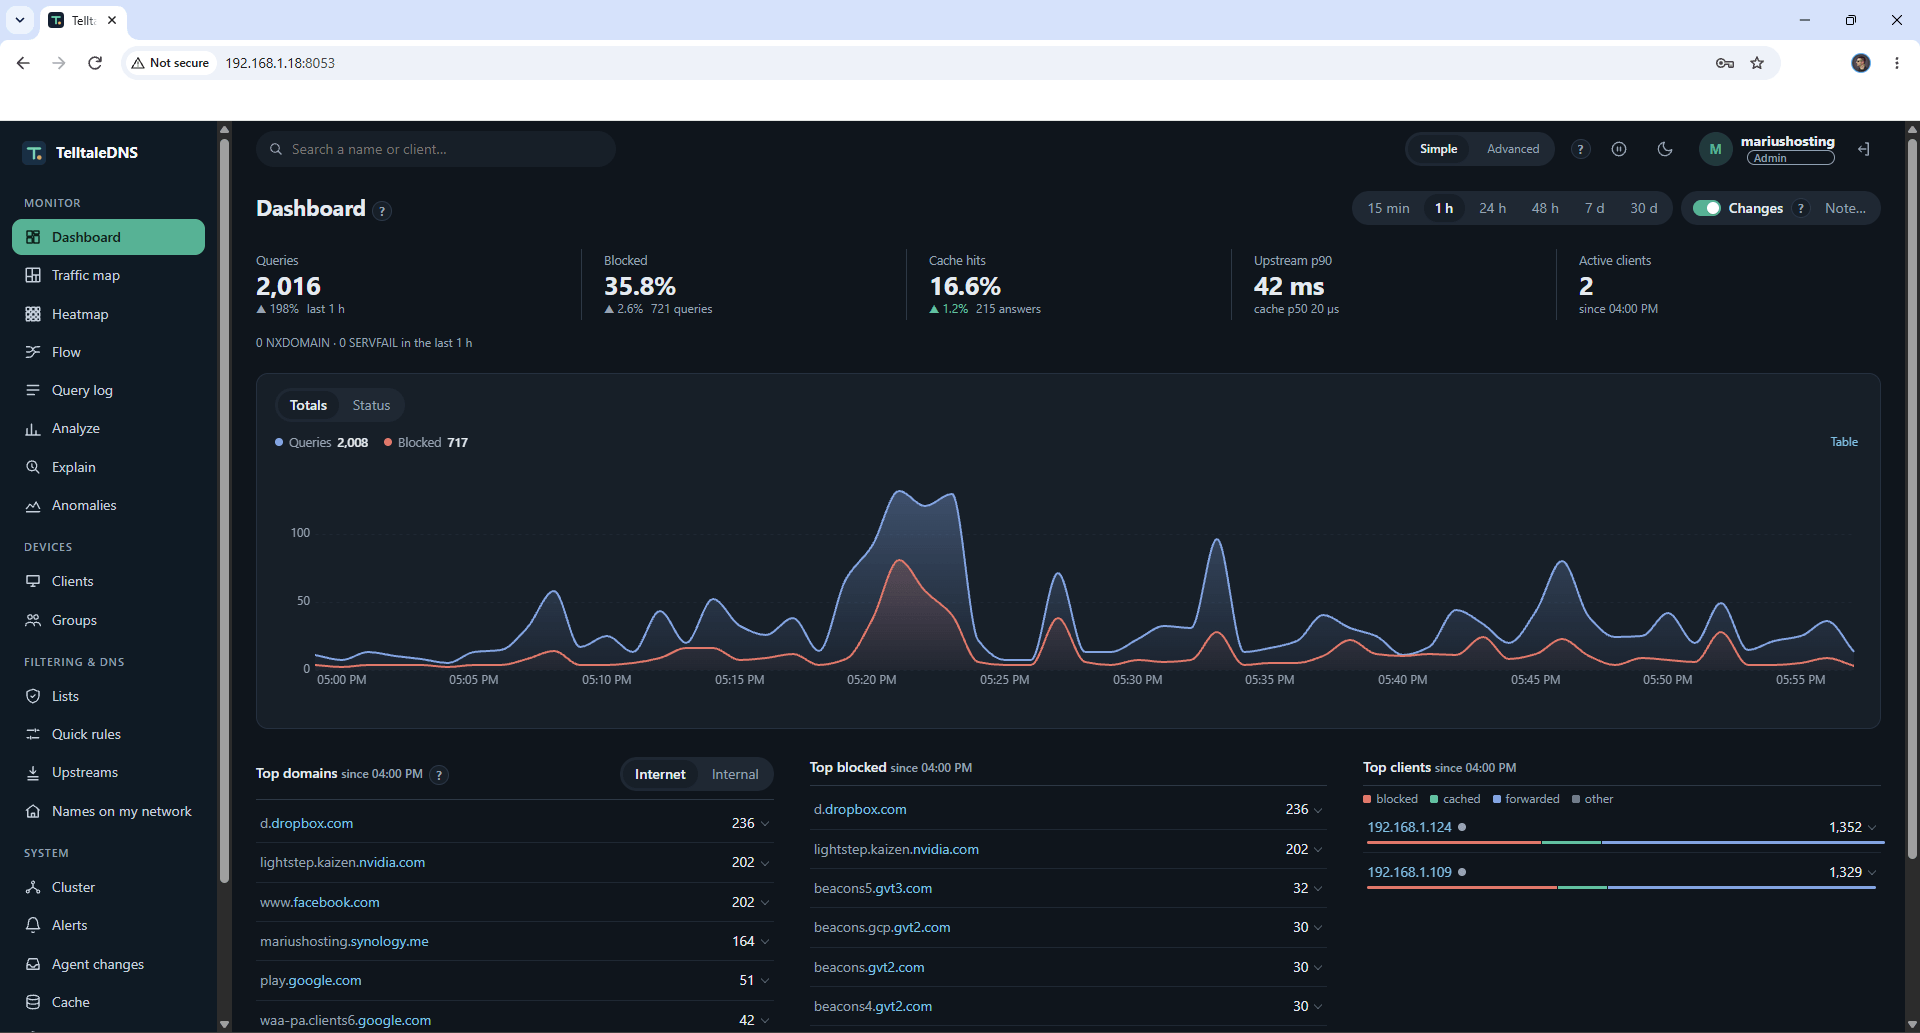
From now on your PC will be automatically protected from ads by TellTaleDNS. Start surfing the Internet via a web browser and you will see the number of blocked queries rapidly increasing in the graph.
STEP 18
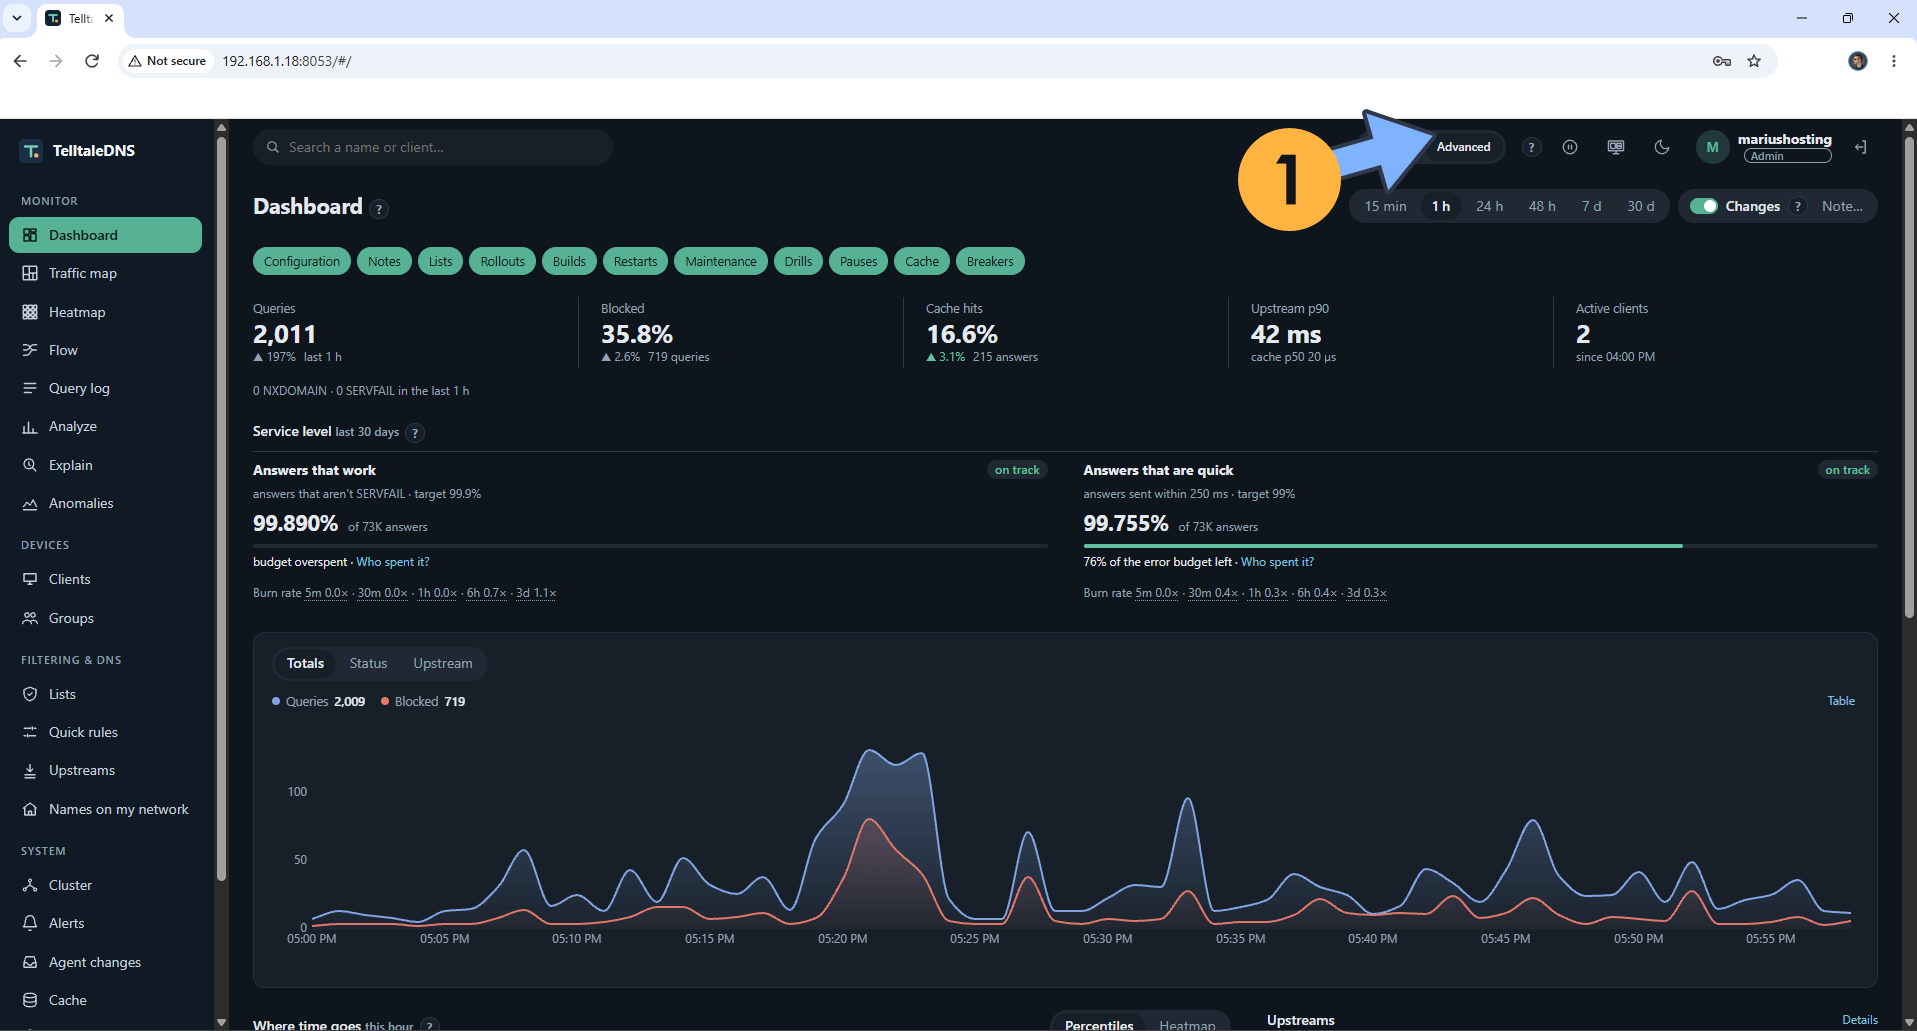
At the top right of the page, you can also switch to Advanced mode to see more details on the graph. Follow the instructions in the image below.
STEP 19
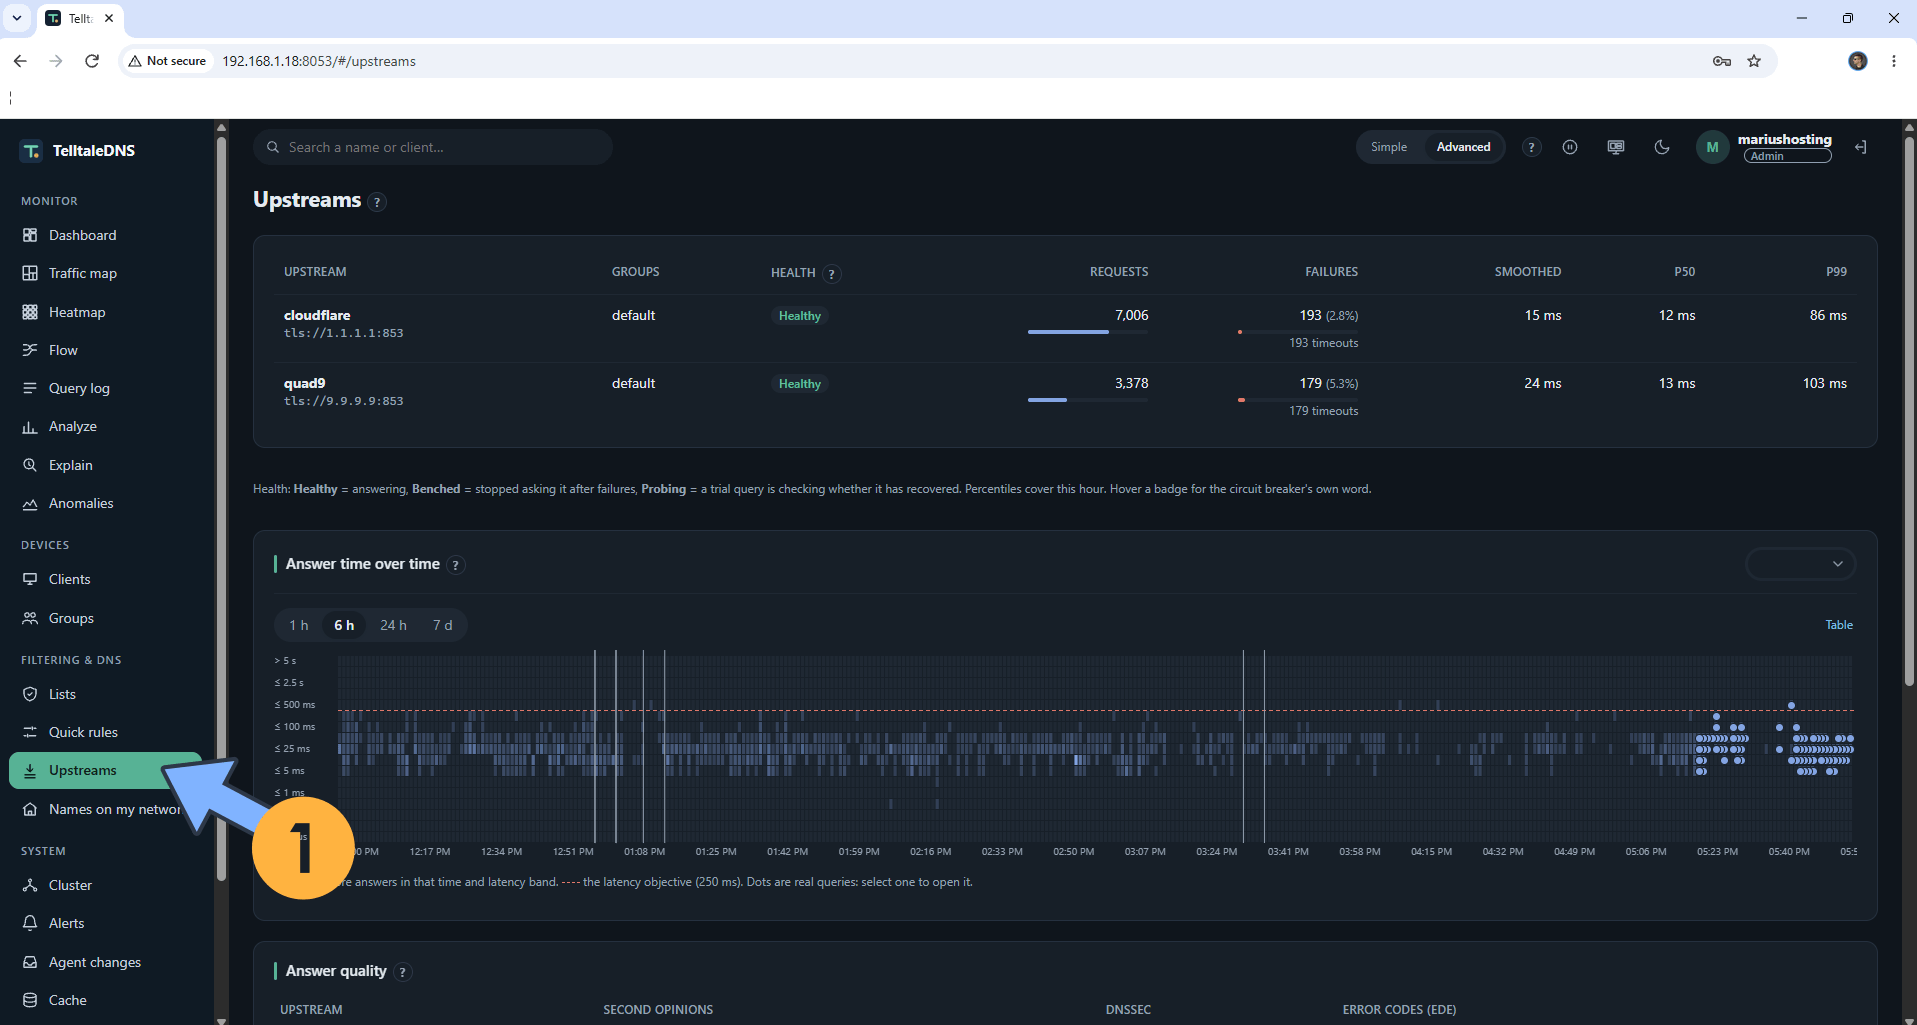
Your upstreams DNS at a glance!
Enjoy TellTaleDNS!
🆘TROUBLESHOOTING
If you encounter issues by using this container, make sure to check out the Common Docker issues article.
Note: If you want to run the TellTaleDNS container over HTTPS, check How to Run Docker Containers Over HTTPS. In order to make TellTaleDNS work via HTTPS, it’s mandatory to activate WebSocket.
Note: Can I run Docker on my Synology NAS? See the supported models.
Note: How to Back Up Docker Containers on your Synology NAS.
Note: Find out how to update the TellTaleDNS container with the latest image.
Note: How to Free Disk Space on Your NAS if You Run Docker & Dockhand.
Note: How to Schedule Start & Stop For Docker Containers.
Note: How to Activate Email Notifications.
Note: How to Add Access Control Profile on Your NAS.
Note: How to Change Docker Containers Restart Policy.
Note: How to Use Docker Containers With VPN.
Note: Convert Docker Run Into Docker Compose.
Note: How to Clean Docker.
Note: How to Clean Docker Automatically.
Note: Best Practices When Using Docker and DDNS.
Note: Some Docker Containers Need WebSocket.
Note: Find out the Best NAS Models For Docker.
Note: Activate Gmail SMTP For Docker Containers.
This post was updated on Saturday / November 21st, 2026 at 11:25 PM