

ImgCompress is a free, open-source, self-hosted image processing toolbox that runs entirely inside a single Docker container. It compresses images in bulk, converts more than 70 formats (including HEIC, PSD, RAW, SVG, AVIF and PDF), removes backgrounds with built-in local AI, upscales images up to 16K, and offers a simple web-based editor for cropping, resizing, adding text or logos. All processing happens locally on your own hardware so files never leave your server, it works offline after the initial setup, and it is designed to run easily on any Docker-capable machine including NAS devices. I set up ImgCompress on my Synology NAS with Docker Compose a few weeks ago and it has become my go-to tool for handling photo and design files. I regularly drop in batches of HEIC images from my phone or large PSD files, compress them or convert them to WebP, and the results are consistently good without any noticeable quality loss. The local AI background removal has been especially useful for product shots, and because everything stays on the NAS I never worry about uploading personal photos anywhere. It runs quietly in the background, uses a reasonable amount of resources, and the web interface is clean enough that I can use it from my phone or laptop without any hassle. In this step by step guide I will show you how to install ImgCompress on your Synology NAS using Docker & Dockhand.
💡Note:
This guide works perfectly with the latest ImgCompress v1.0.0 release.
STEP 1
Please Support My work by Making a Donation.
STEP 2
Install Dockhand using my step by step guide. If you already have Dockhand installed on your Synology NAS, skip this STEP. ⚠️Attention: Make sure you have installed the latest Dockhand version.
STEP 3
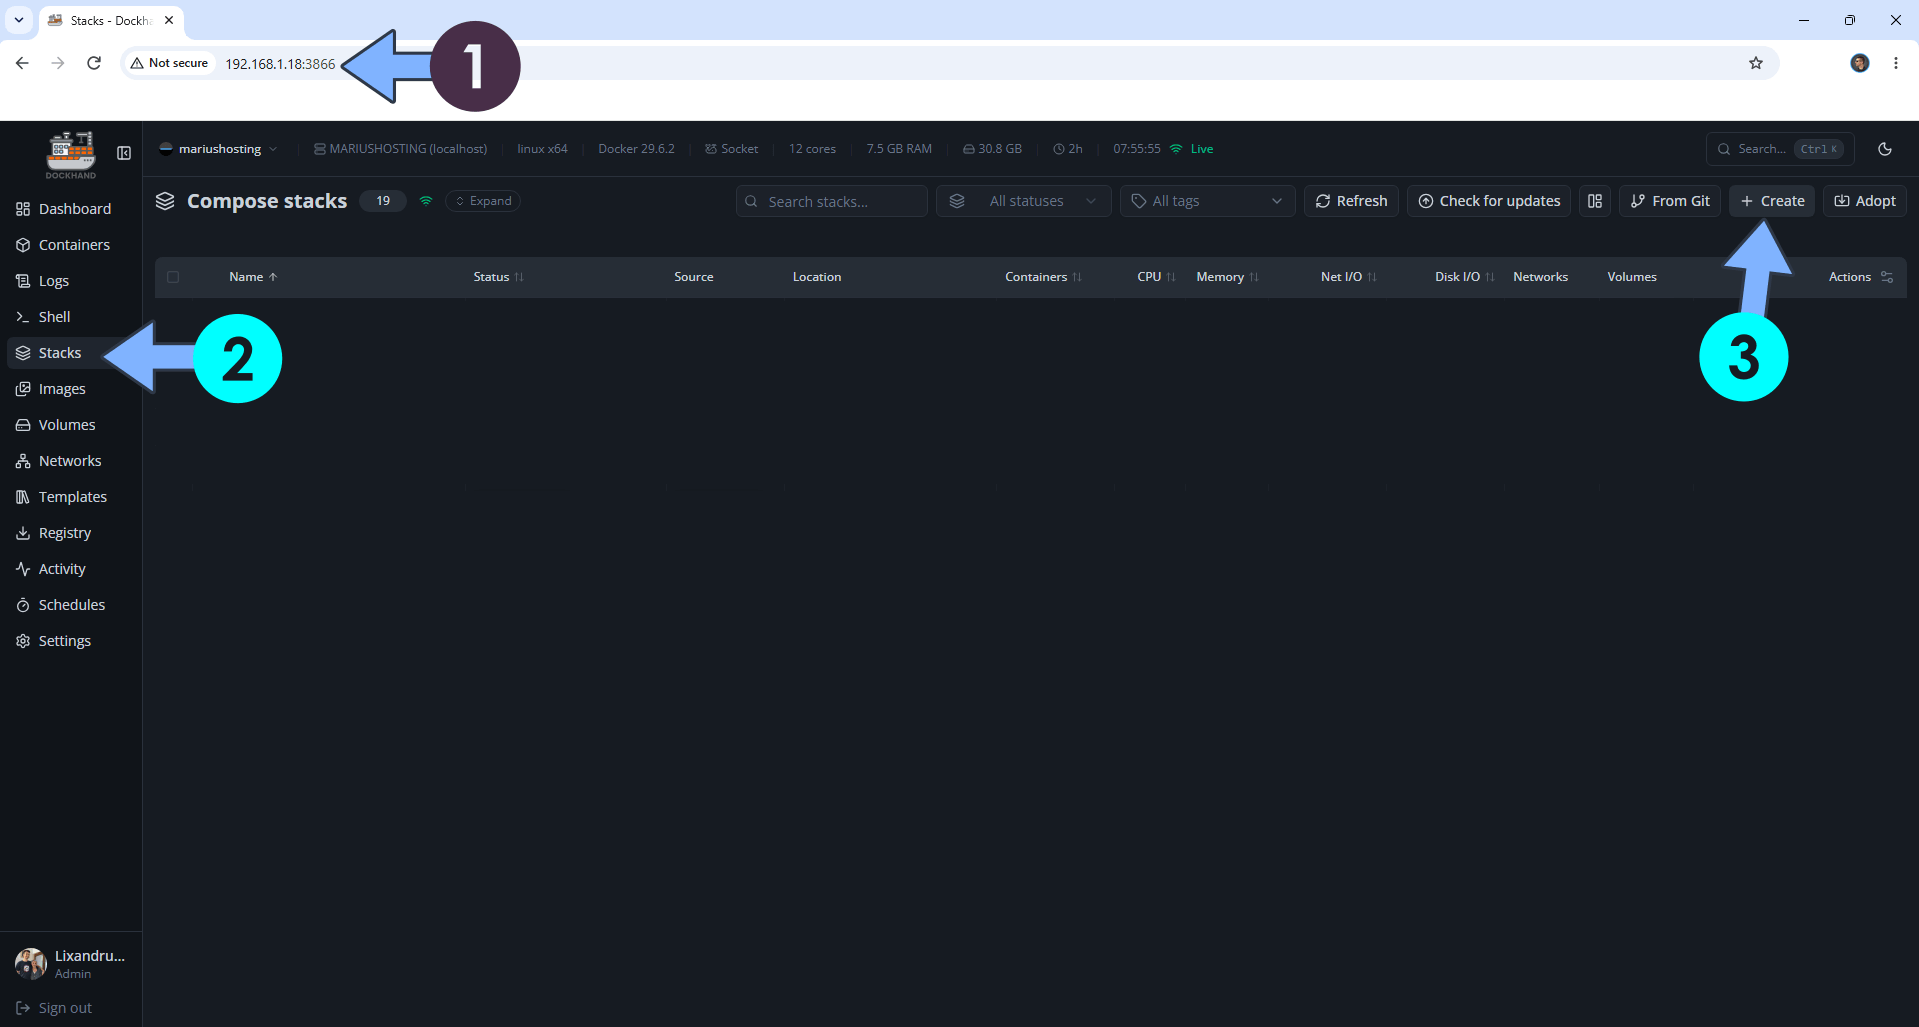
Open your browser and type in http://synology-ip-address:3866 to connect to your Dockhand container. On the left sidebar, click Stacks then + Create. Follow the instructions in the image below.
STEP 4
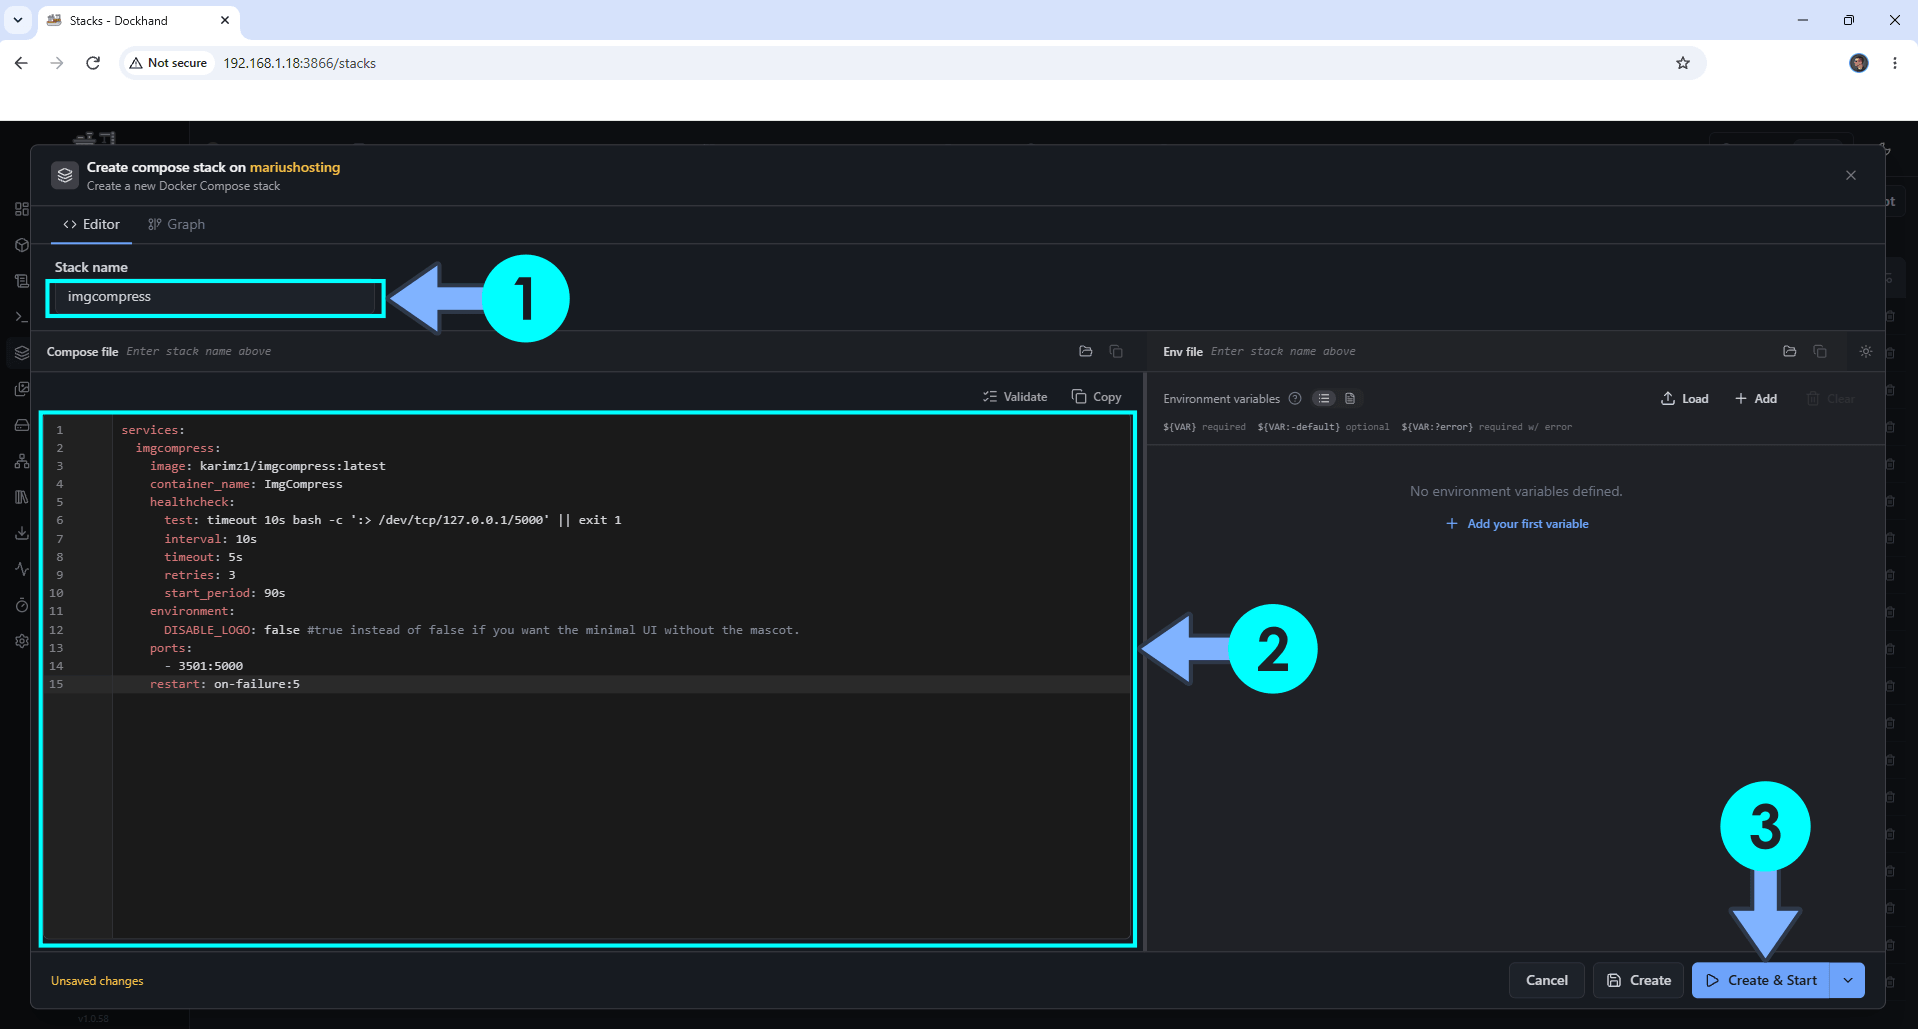
In the Stack name field, type in imgcompress. ⚠️Warning: Type in the name in lowercase letters. The installation process can take up to a few seconds/minutes. It will depend on your Internet speed connection. Follow the instructions in the image below.
Note: Copy Paste the code below in the Dockhand Compose Stack then click Create & Start.
services:
  imgcompress:
    image: karimz1/imgcompress:latest
    container_name: ImgCompress
    healthcheck:
      test: timeout 10s bash -c ':> /dev/tcp/127.0.0.1/5000' || exit 1
      interval: 10s
      timeout: 5s
      retries: 3
      start_period: 90s
    environment:
      DISABLE_LOGO: false #true instead of false if you want the minimal UI without the mascot.
    ports:
      - 3501:5000
    restart: on-failure:5
STEP 5
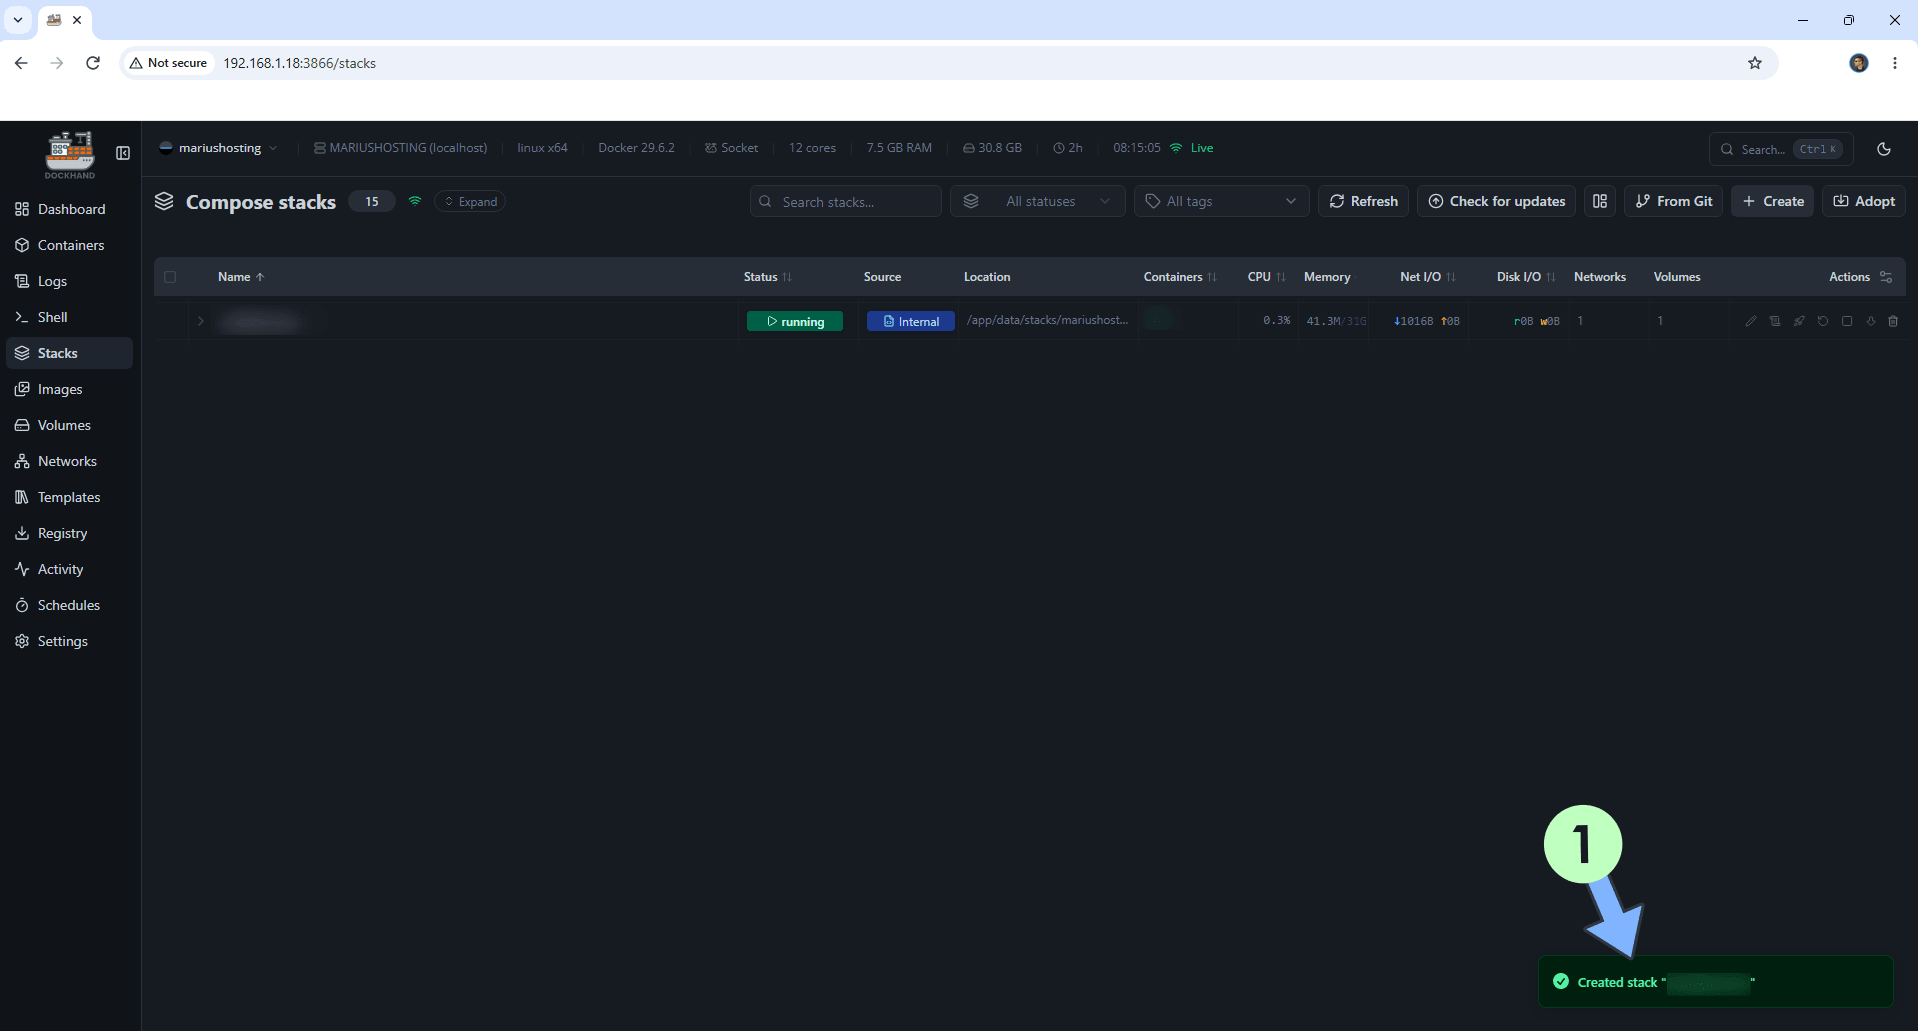
If everything goes right, you will see the following message at the bottom right of your screen: “Created stack “imgcompress”“.
STEP 6
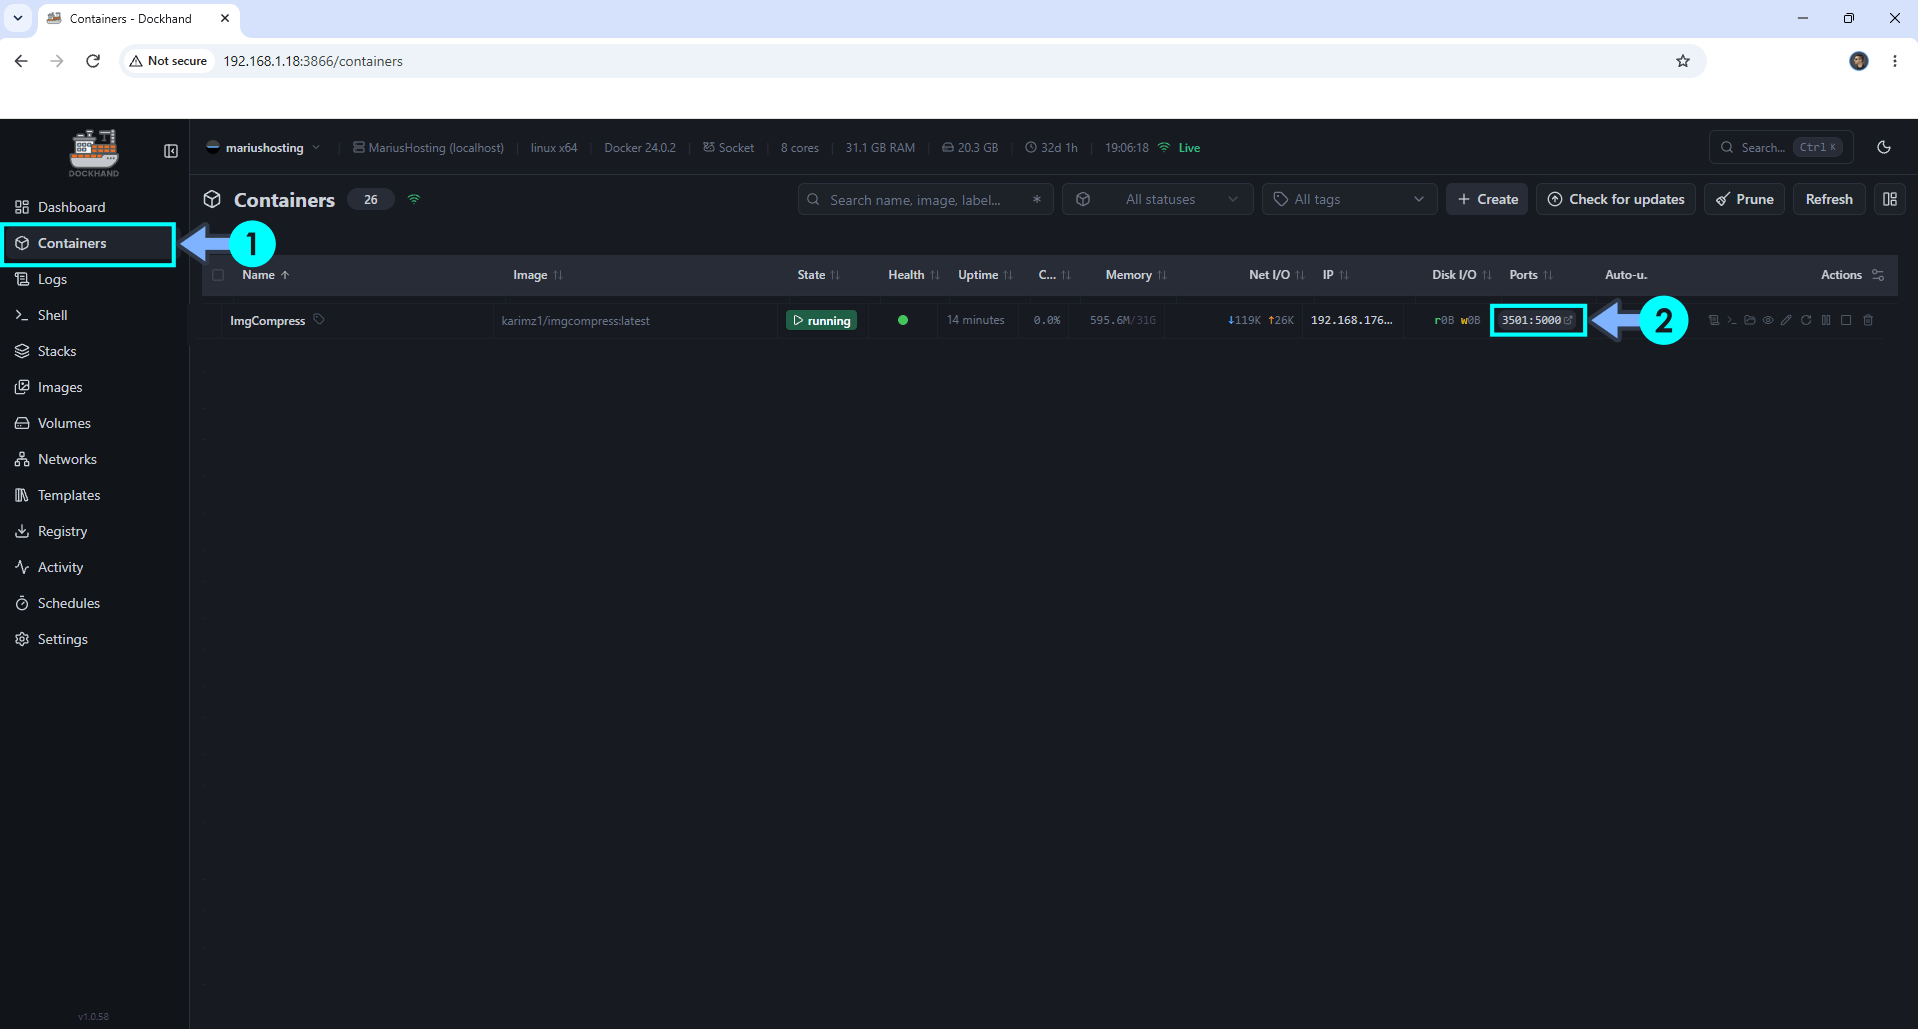
On the left sidebar, click Containers. Identify your ImgCompress container then click on ports 3501:5000. Follow the instructions in the image below.
STEP 7
🟢Please Support My work by Making a Donation. Almost 99,9% of the people that install something using my guides forget to support my work, or just ignore STEP 1. I’ve been very honest about this aspect of my work since the beginning: I don’t run any ADS, I don’t require subscriptions, paid or otherwise, I don’t collect IPs, emails, and I don’t have any referral links from Amazon or other merchants. I also don’t have any POP-UPs or COOKIES. I have repeatedly been told over the years how much I have contributed to the community. It’s something I love doing and have been honest about my passion since the beginning. But I also Need The Community to Support me Back to be able to continue doing this work.
STEP 8
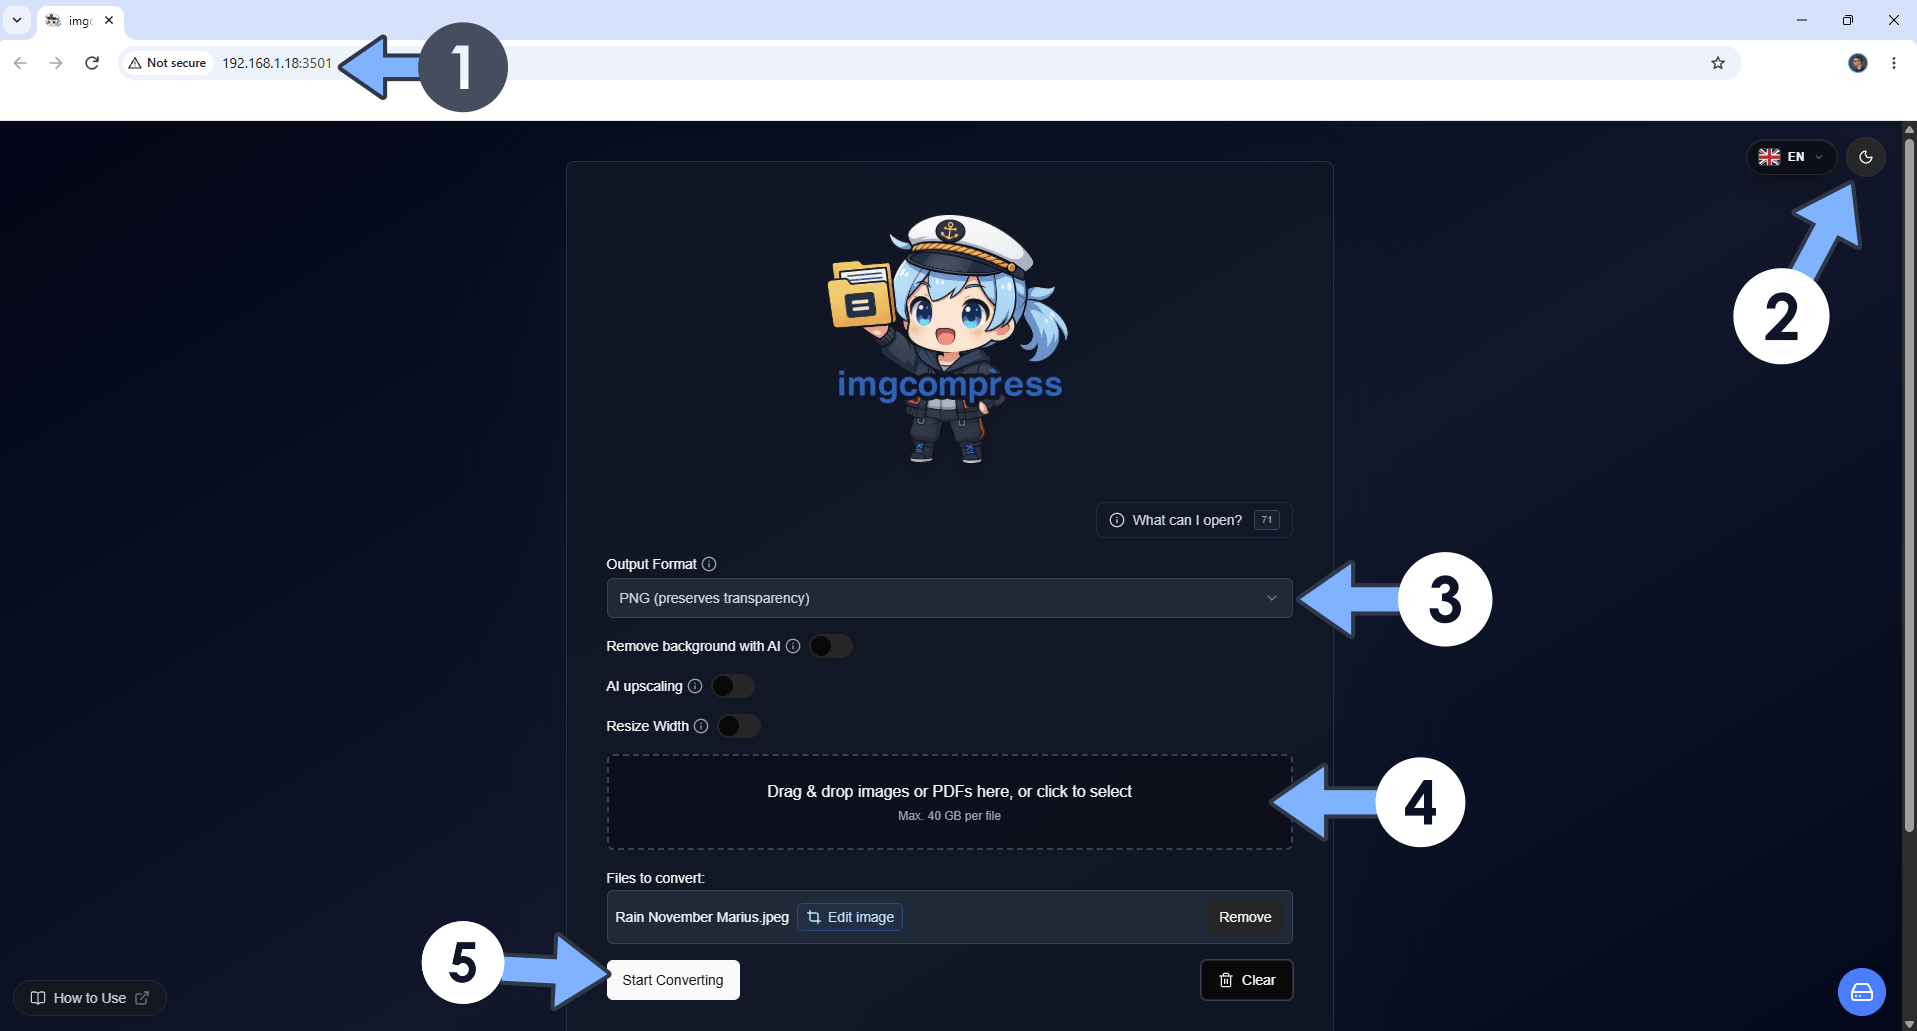
The installation process can take up to a few seconds/minutes. It will depend on your Internet speed connection. Now open your browser and type in http://synology-ip-address:3501 Switch the theme to Dark. Change the language. Select the image output format. Drag & Drop your files. Click Start Converting. Follow the instructions in the image below.
STEP 9
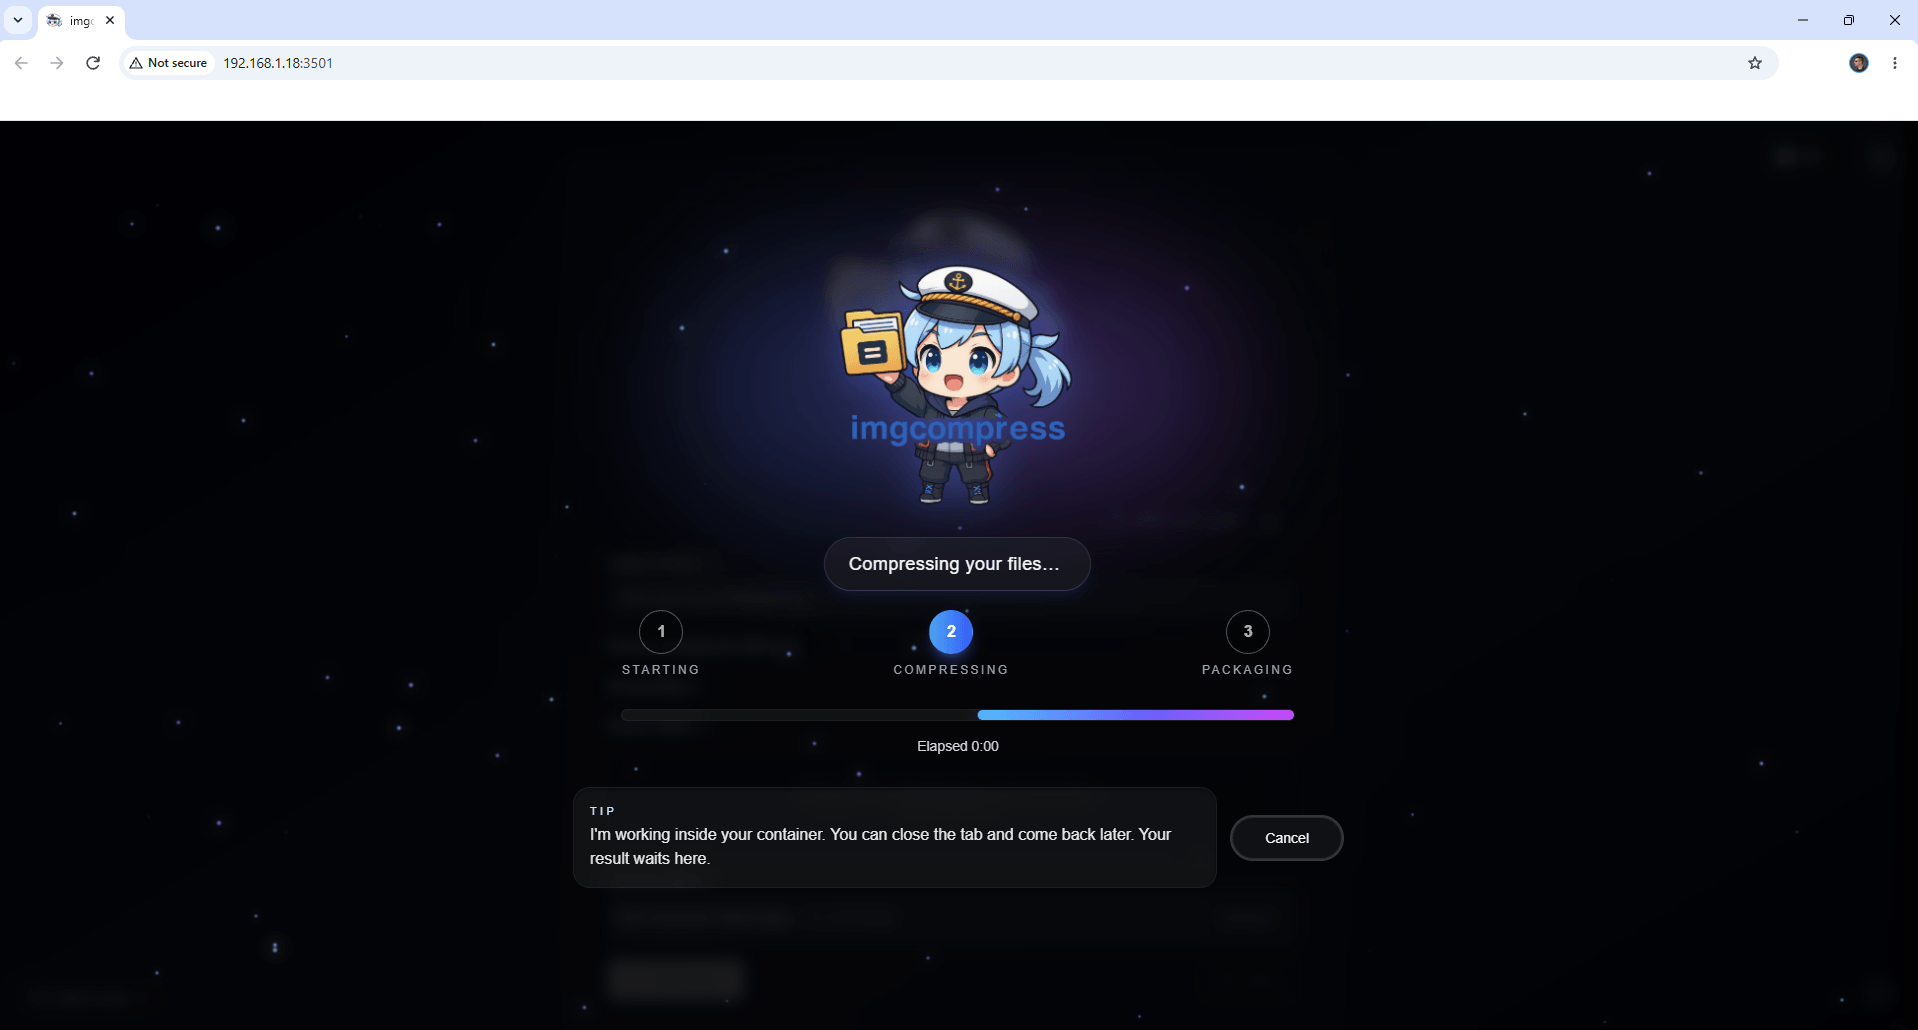
Wait a few seconds until the images are converted. Let’s go straight to the next step.
STEP 10
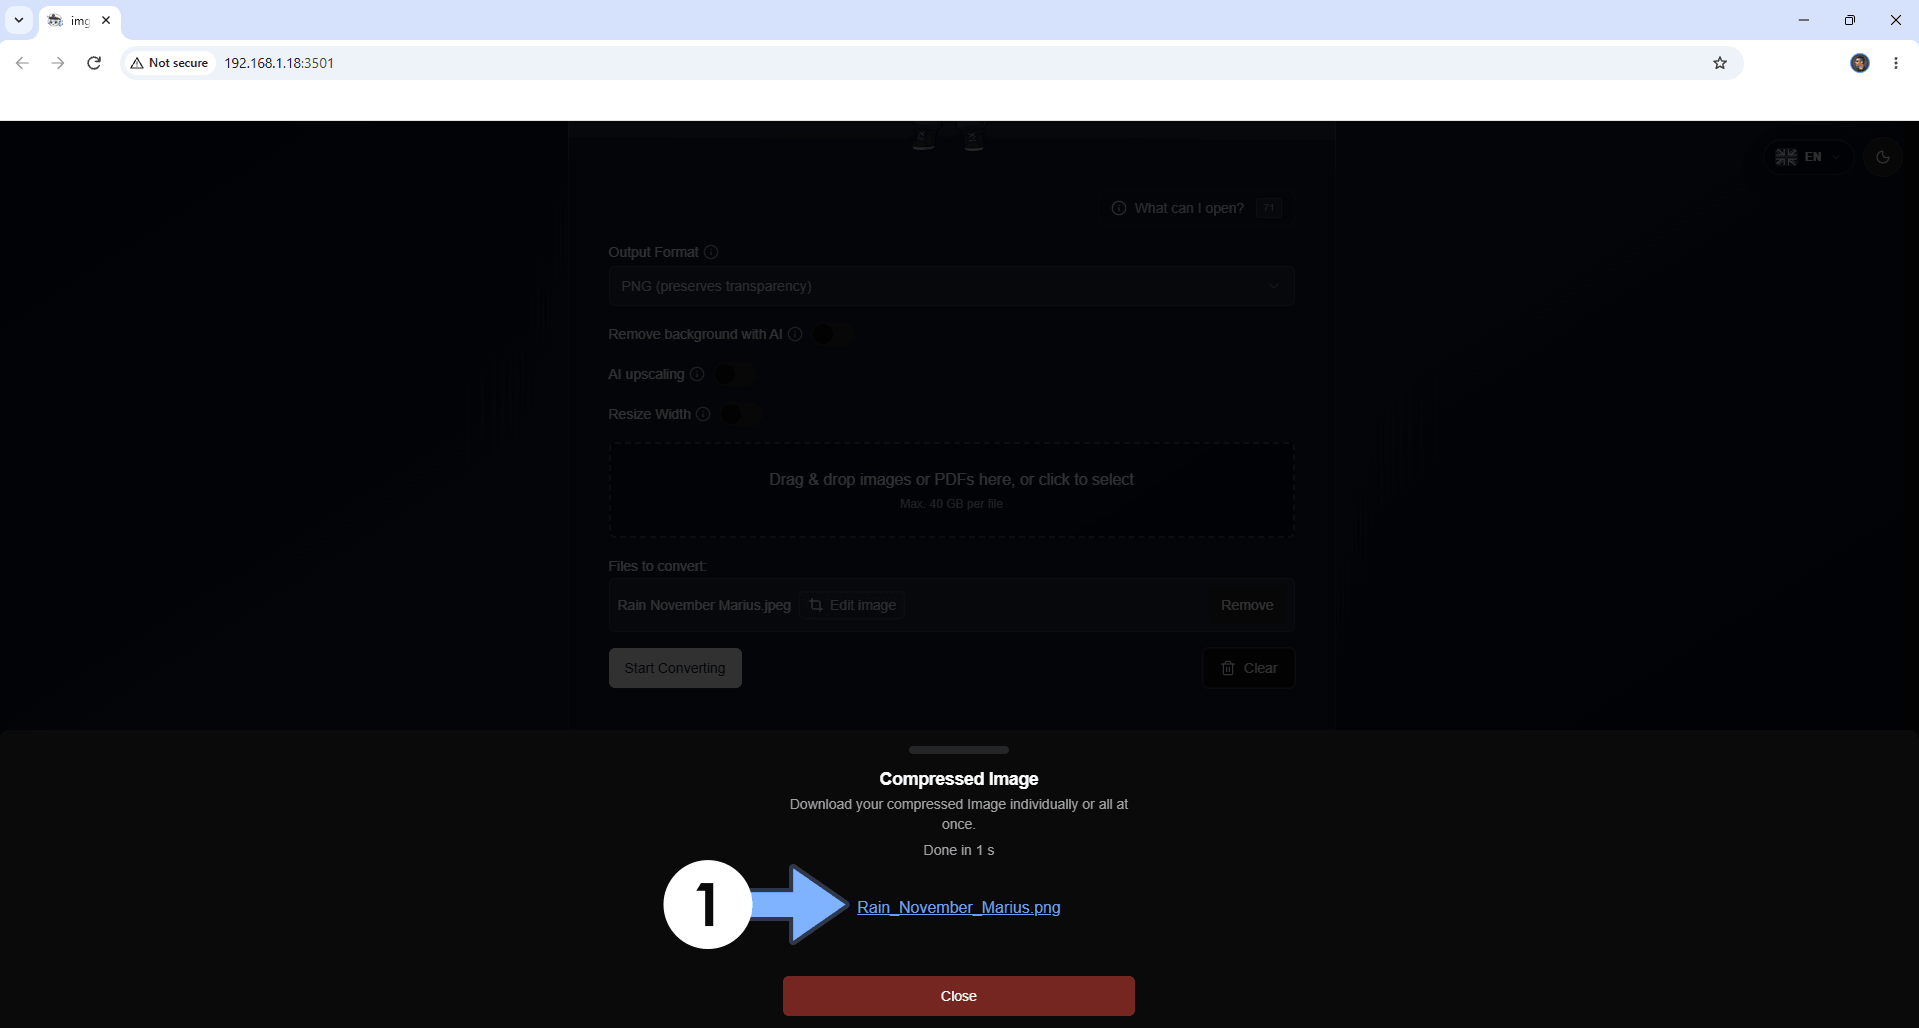
Click on the image name to download it. Follow the instructions in the image below.
STEP 11
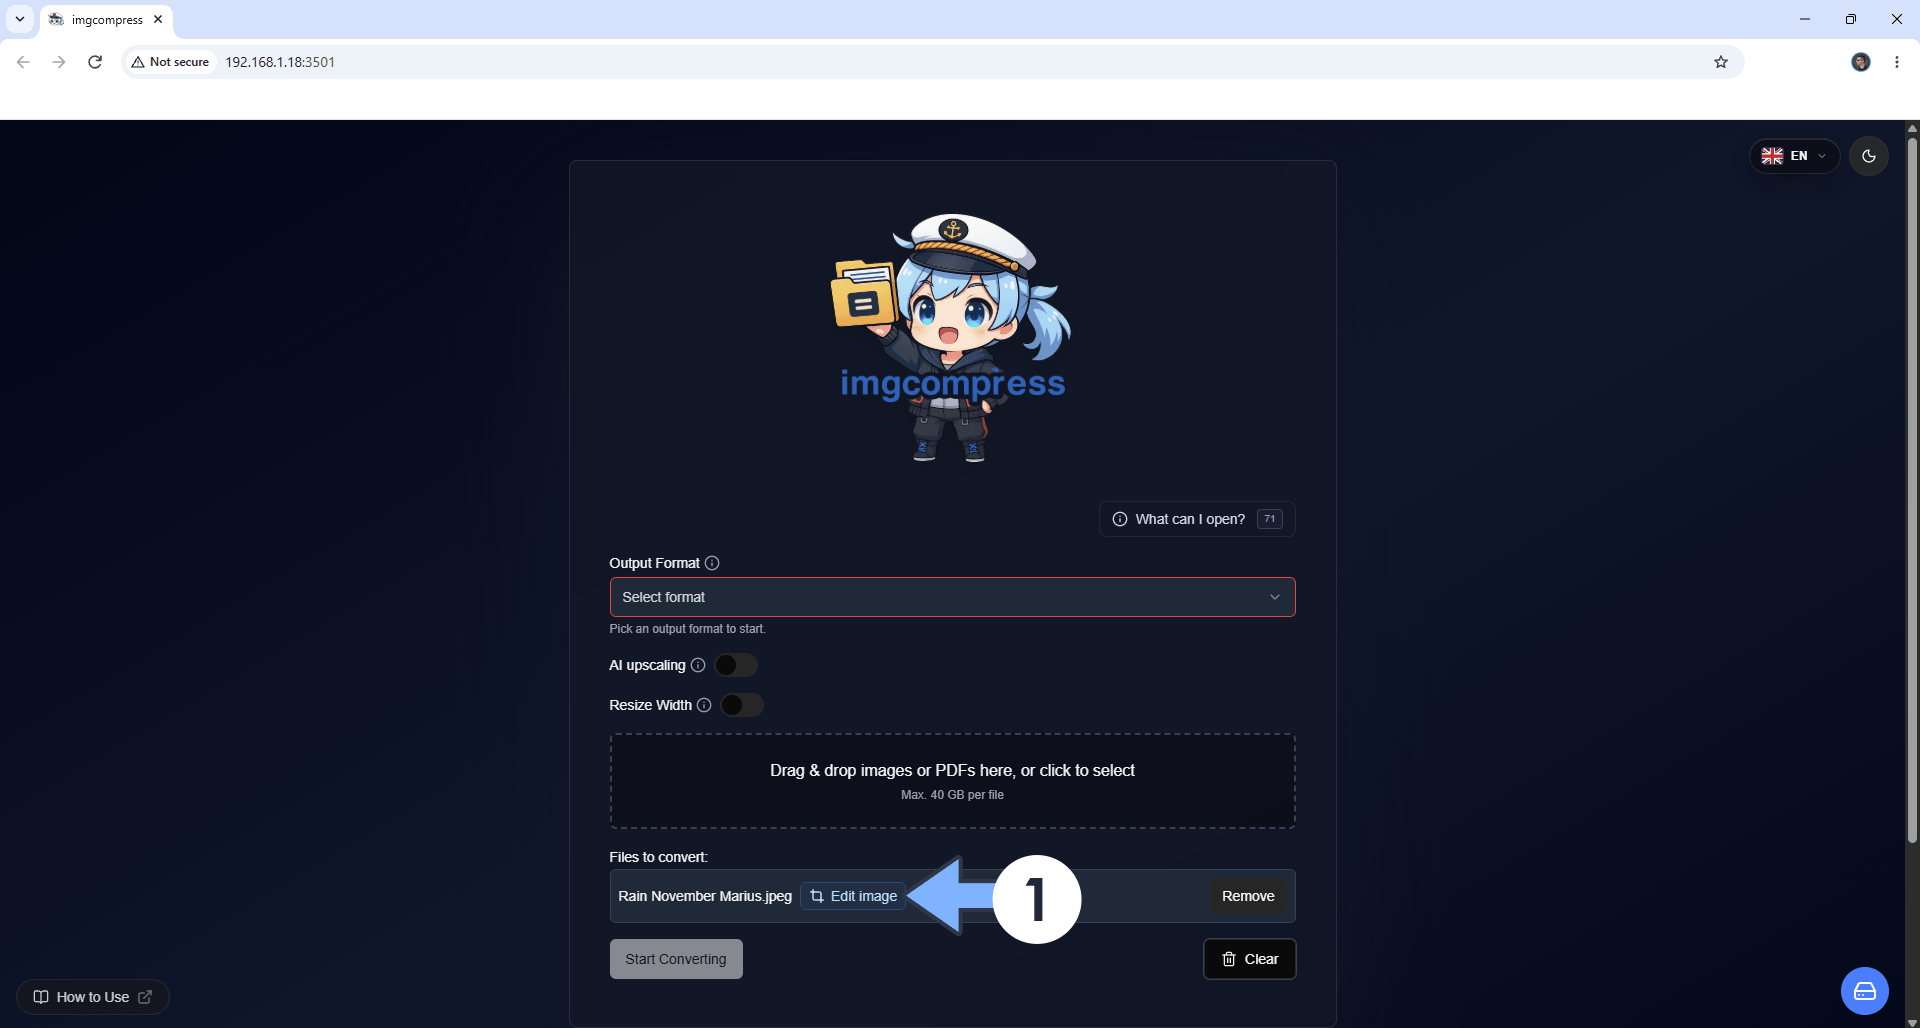
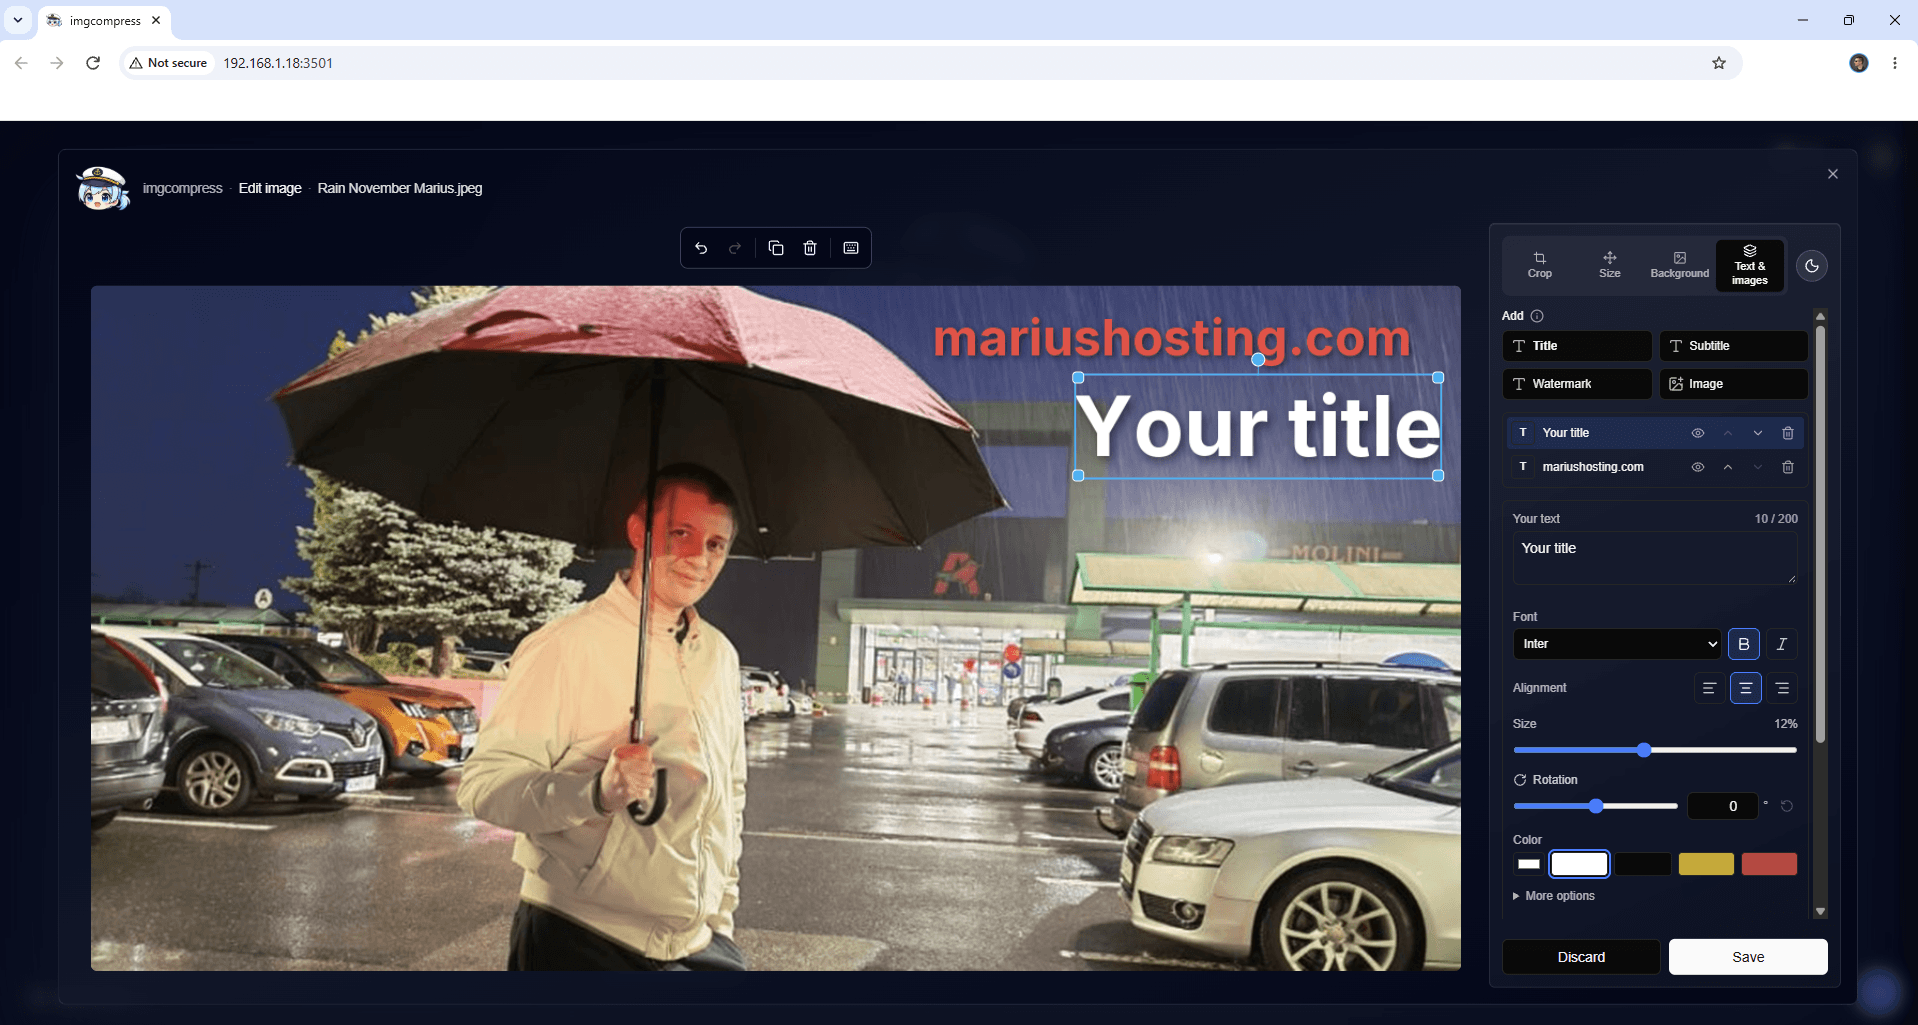
Once you drag & drop your images, you can also edit them. Click Edit image. Follow the instructions in the image below.
STEP 12
Edit your image before converting.
Enjoy ImgCompress!
🆘TROUBLESHOOTING
If you encounter issues by using this container, make sure to check out the Common Docker issues article.
Note: If you want to run the ImgCompress container over HTTPS, check How to Run Docker Containers Over HTTPS. In order to make ImgCompress work via HTTPS, it’s mandatory to activate WebSocket.
Note: Can I run Docker on my Synology NAS? See the supported models.
Note: How to Back Up Docker Containers on your Synology NAS.
Note: Find out how to update the ImgCompress container with the latest image.
Note: How to Free Disk Space on Your NAS if You Run Docker & Dockhand.
Note: How to Schedule Start & Stop For Docker Containers.
Note: How to Activate Email Notifications.
Note: How to Add Access Control Profile on Your NAS.
Note: How to Change Docker Containers Restart Policy.
Note: How to Use Docker Containers With VPN.
Note: Convert Docker Run Into Docker Compose.
Note: How to Clean Docker.
Note: How to Clean Docker Automatically.
Note: Best Practices When Using Docker and DDNS.
Note: Some Docker Containers Need WebSocket.
Note: Find out the Best NAS Models For Docker.
Note: Activate Gmail SMTP For Docker Containers.
This post was updated on Monday / November 16th, 2026 at 11:33 PM