
OpenTodo is an open-source, local-first task manager you host on your own server. It delivers the full feature set of commercial tools such as projects with sections and Kanban boards, subtasks, natural language quick add, reminders, time blocking, calendar views, labels, filters, and collaboration, while keeping every bit of data under your control with no subscriptions or vendor lock-in. The app is offline first (a complete copy lives on each device), syncs via a lightweight operation log, and runs efficiently from a single about 34 MB Go binary and one SQLite file. You can import from Todoist, TickTick, Google Tasks and others, optionally add your own AI assistant, and use it as a progressive web app, CLI, or through CalDAV and other integrations. After spinning it up with Docker on my NAS, I was surprised how polished and complete it felt. The keyboard-first workflow (especially the instant quick add) made capturing tasks faster than my previous cloud app, and the offline support meant I never hit a no connection wall while traveling. Switching over was painless thanks to the solid import tools, and knowing the data sits in a single file I can back up or export anytime removed the low level anxiety I had grown used to with SaaS tools. In this step by step guide I will show you how to install OpenTodo on your Synology NAS using Docker & Dockhand.
💡Note:
This guide works perfectly with the latest OpenTodo v0.22.0 release.
STEP 1
Please Support My work by Making a Donation.
STEP 2
Install Dockhand using my step by step guide. If you already have Dockhand installed on your Synology NAS, skip this STEP. ⚠️Attention: Make sure you have installed the latest Dockhand version.
STEP 3
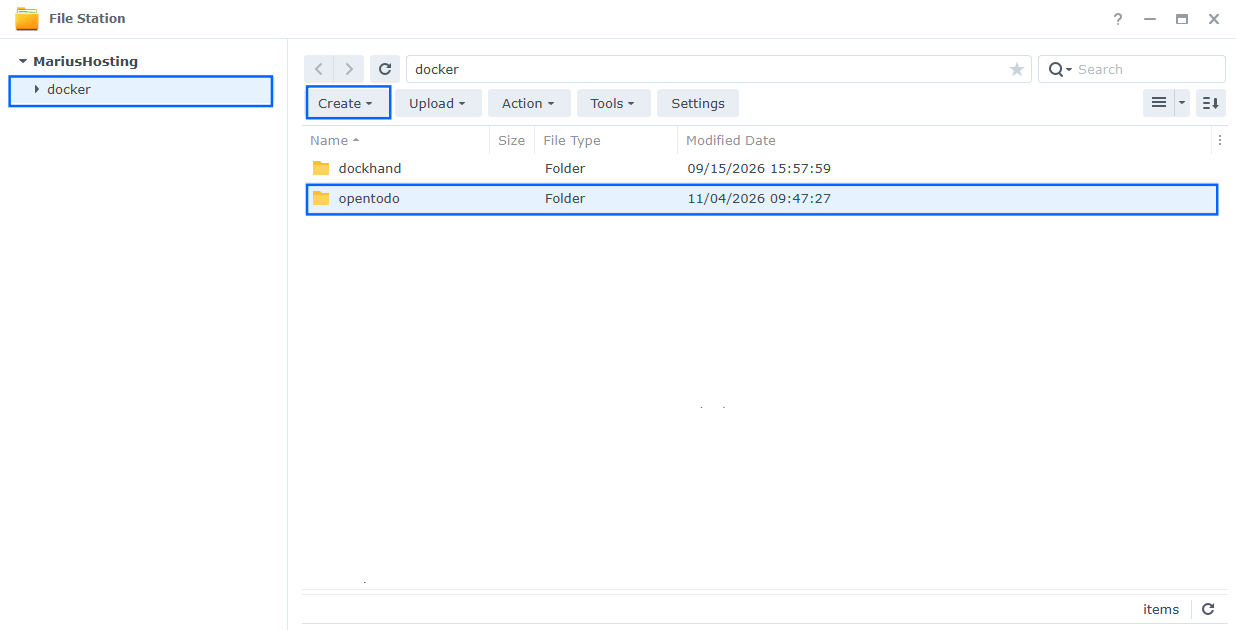
Go to File Station and open the docker folder. Inside the docker folder, create one new folder and name it opentodo. Follow the instructions in the image below.
Note: Be careful to enter only lowercase, not uppercase letters.
STEP 4
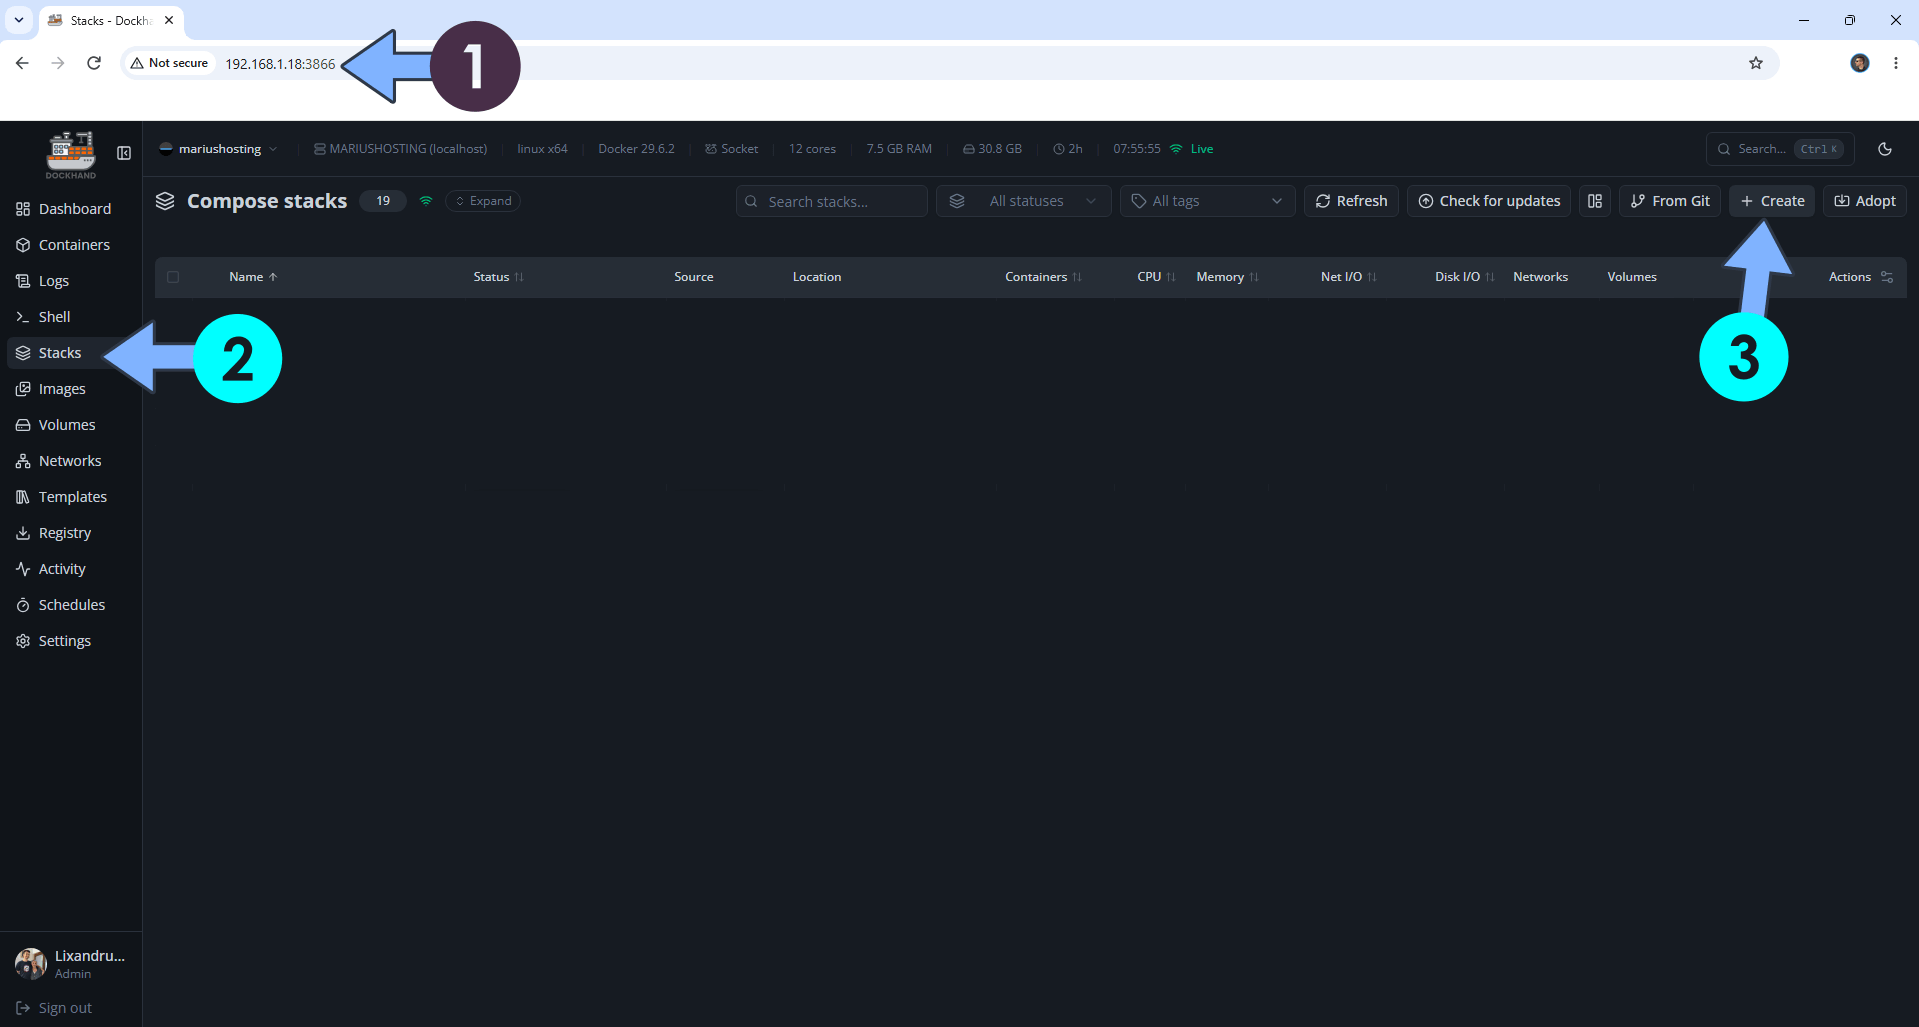
Open your browser and type in http://synology-ip-address:3866 to connect to your Dockhand container. On the left sidebar, click Stacks then + Create. Follow the instructions in the image below.
STEP 5
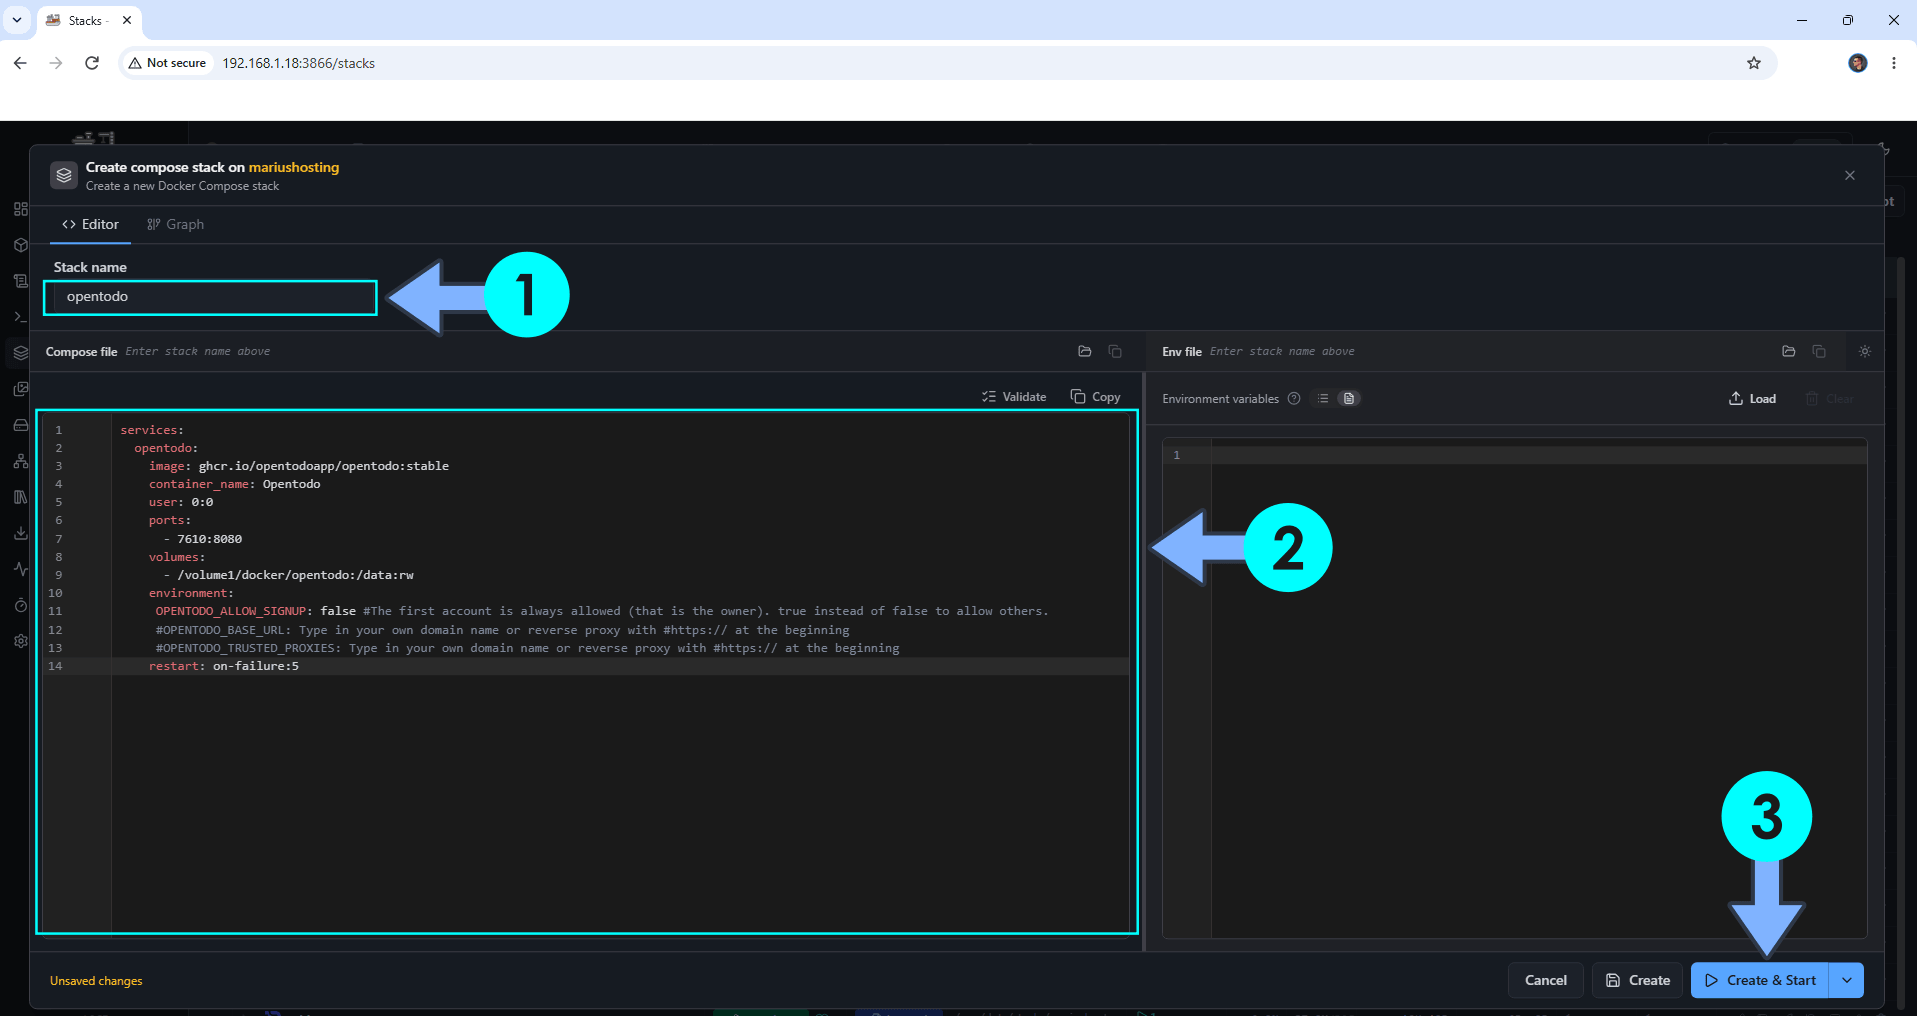
In the Stack name field, type in opentodo. ⚠️Warning: Type in the name in lowercase letters. The installation process can take up to a few seconds/minutes. It will depend on your Internet speed connection. Follow the instructions in the image below.
Note: Copy Paste the code below in the Dockhand Compose Stack then click Create & Start.
services:
  opentodo:
    image: ghcr.io/opentodoapp/opentodo:stable
    container_name: Opentodo
    user: 0:0
    ports:
      - 7610:8080
    volumes:
      - /volume1/docker/opentodo:/data:rw
    environment:
     OPENTODO_ALLOW_SIGNUP: false #The first account is always allowed (that is the owner). true instead of false to allow others.
     #OPENTODO_BASE_URL: Type in your own domain name or reverse proxy with #https:// at the beginning
     #OPENTODO_TRUSTED_PROXIES: Type in your own domain name or reverse proxy with #https:// at the beginning
    restart: on-failure:5
STEP 6
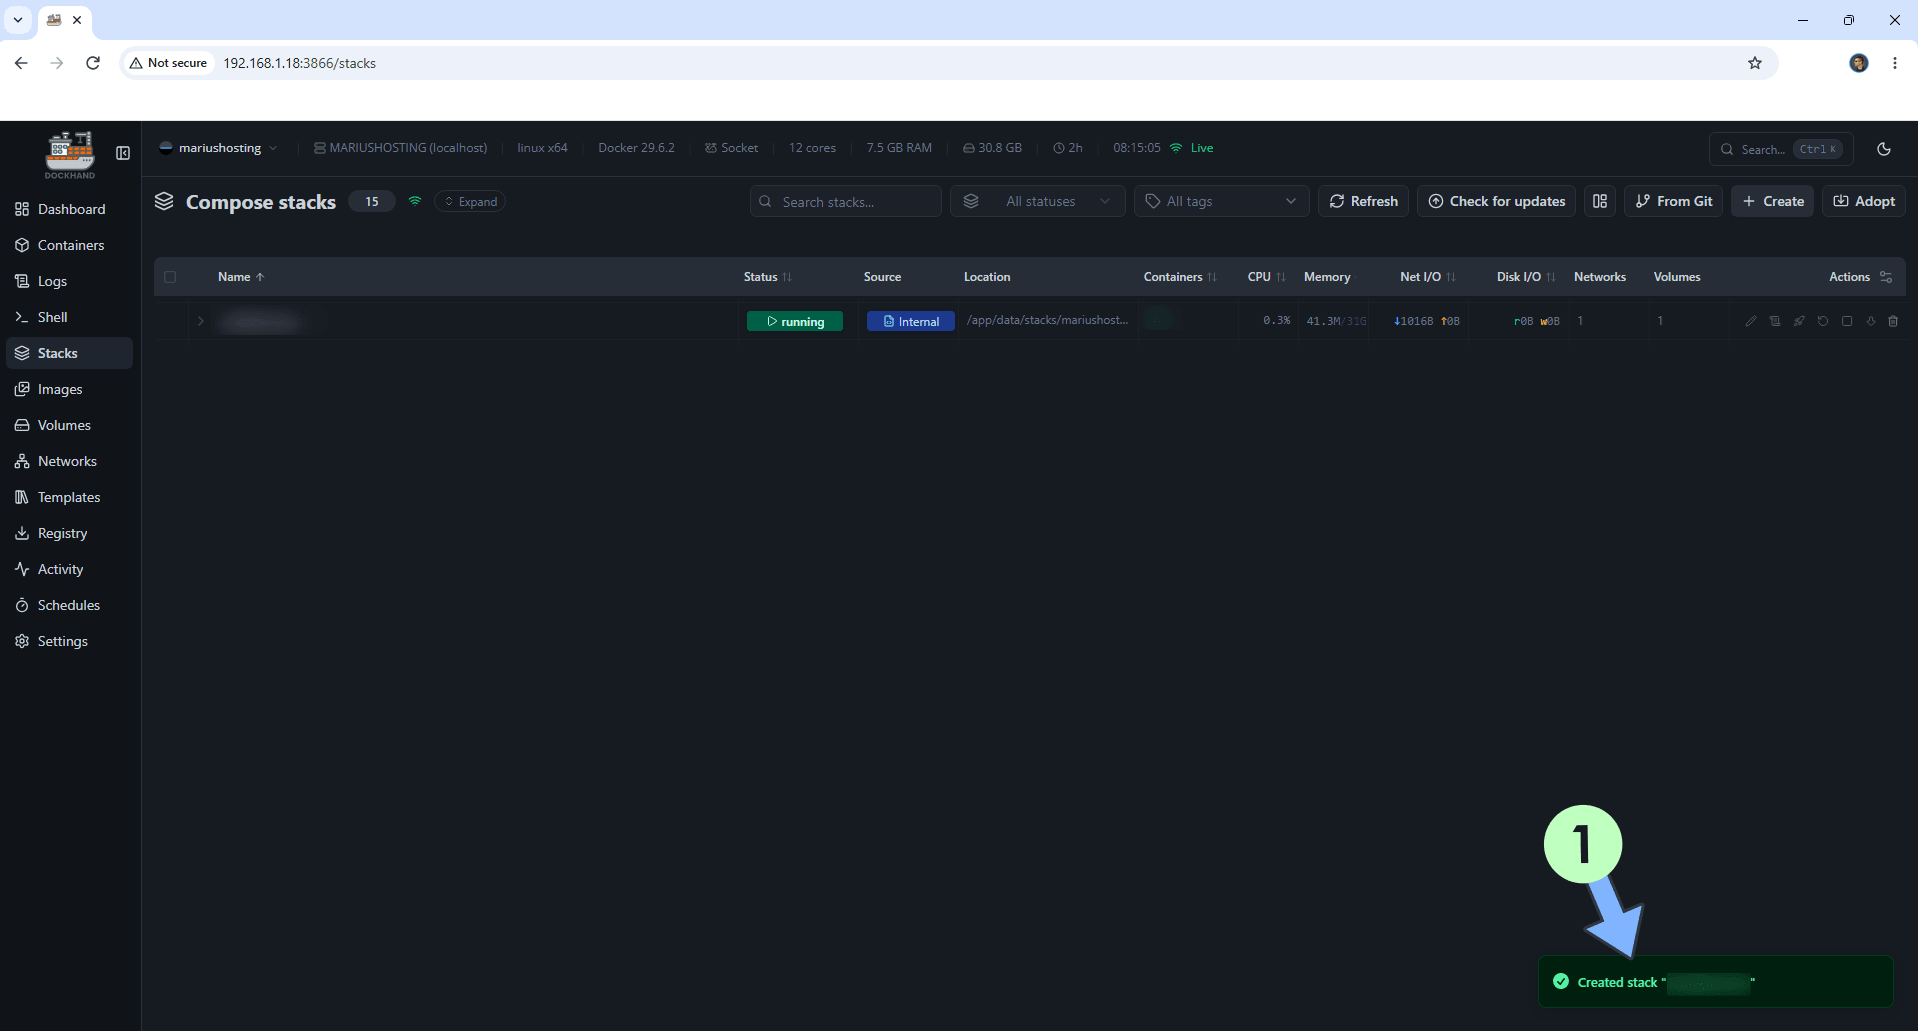
If everything goes right, you will see the following message at the bottom right of your screen: “Created stack “opentodo”“.
STEP 7
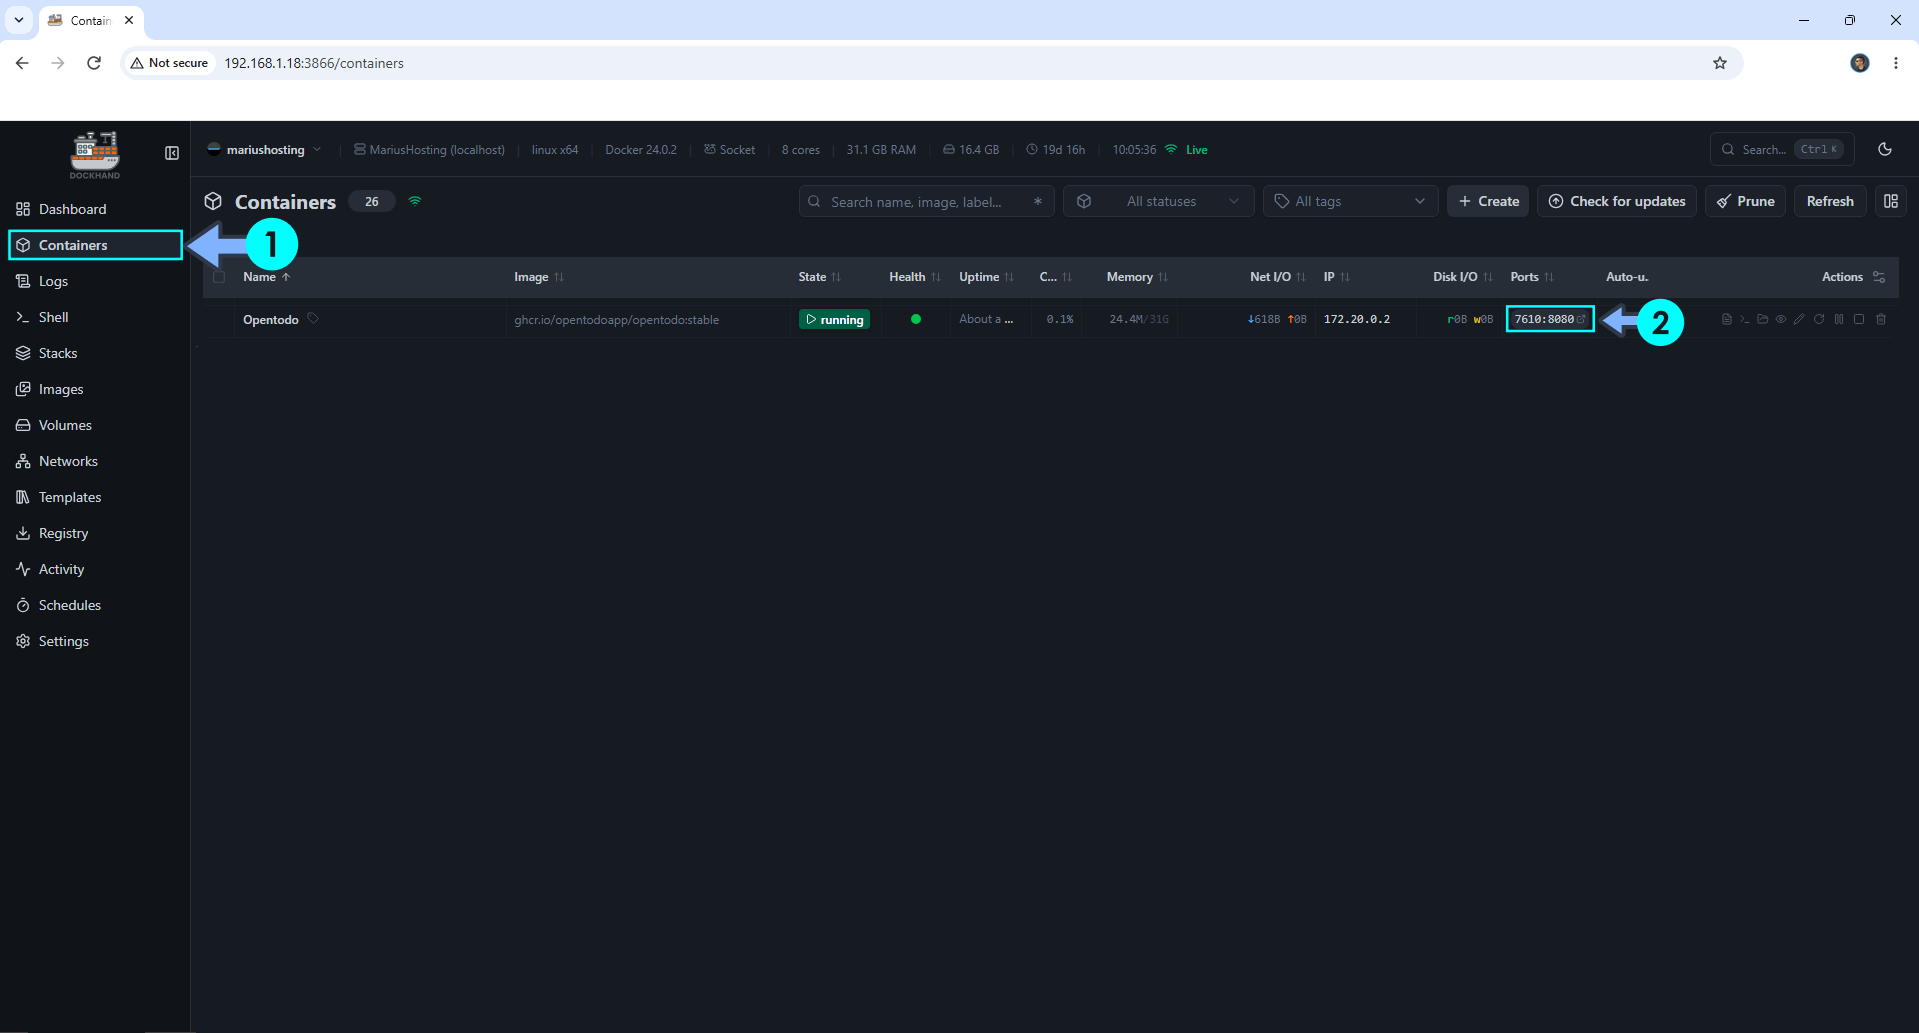
On the left sidebar, click Containers. Identify your Opentodo container then click on ports 7610:8000. Follow the instructions in the image below.
STEP 8
🟢Please Support My work by Making a Donation. Almost 99,9% of the people that install something using my guides forget to support my work, or just ignore STEP 1. I’ve been very honest about this aspect of my work since the beginning: I don’t run any ADS, I don’t require subscriptions, paid or otherwise, I don’t collect IPs, emails, and I don’t have any referral links from Amazon or other merchants. I also don’t have any POP-UPs or COOKIES. I have repeatedly been told over the years how much I have contributed to the community. It’s something I love doing and have been honest about my passion since the beginning. But I also Need The Community to Support me Back to be able to continue doing this work.
STEP 9
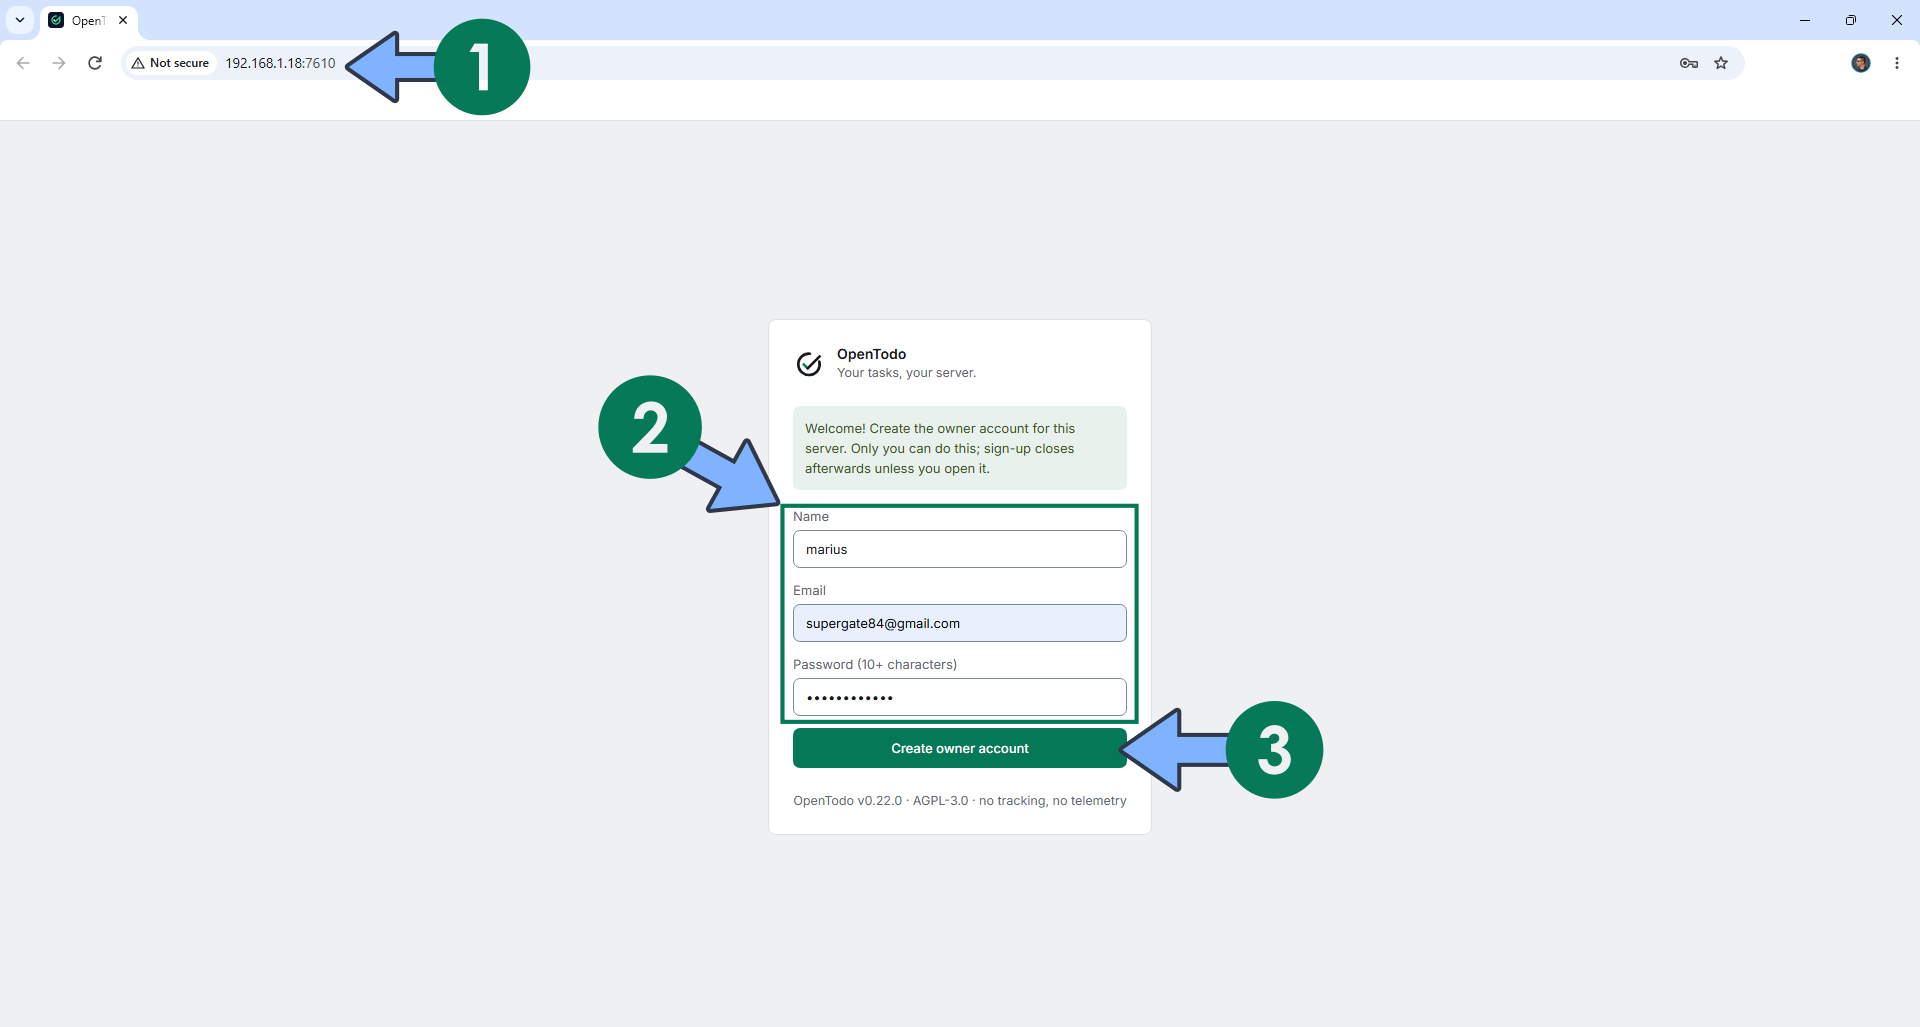
The installation process can take up to a few seconds/minutes. It will depend on your Internet speed connection. Now open your browser and type in http://synology-ip-address:7610 Create your administrator account. Click Create owner account. Follow the instructions in the image below.
STEP 10
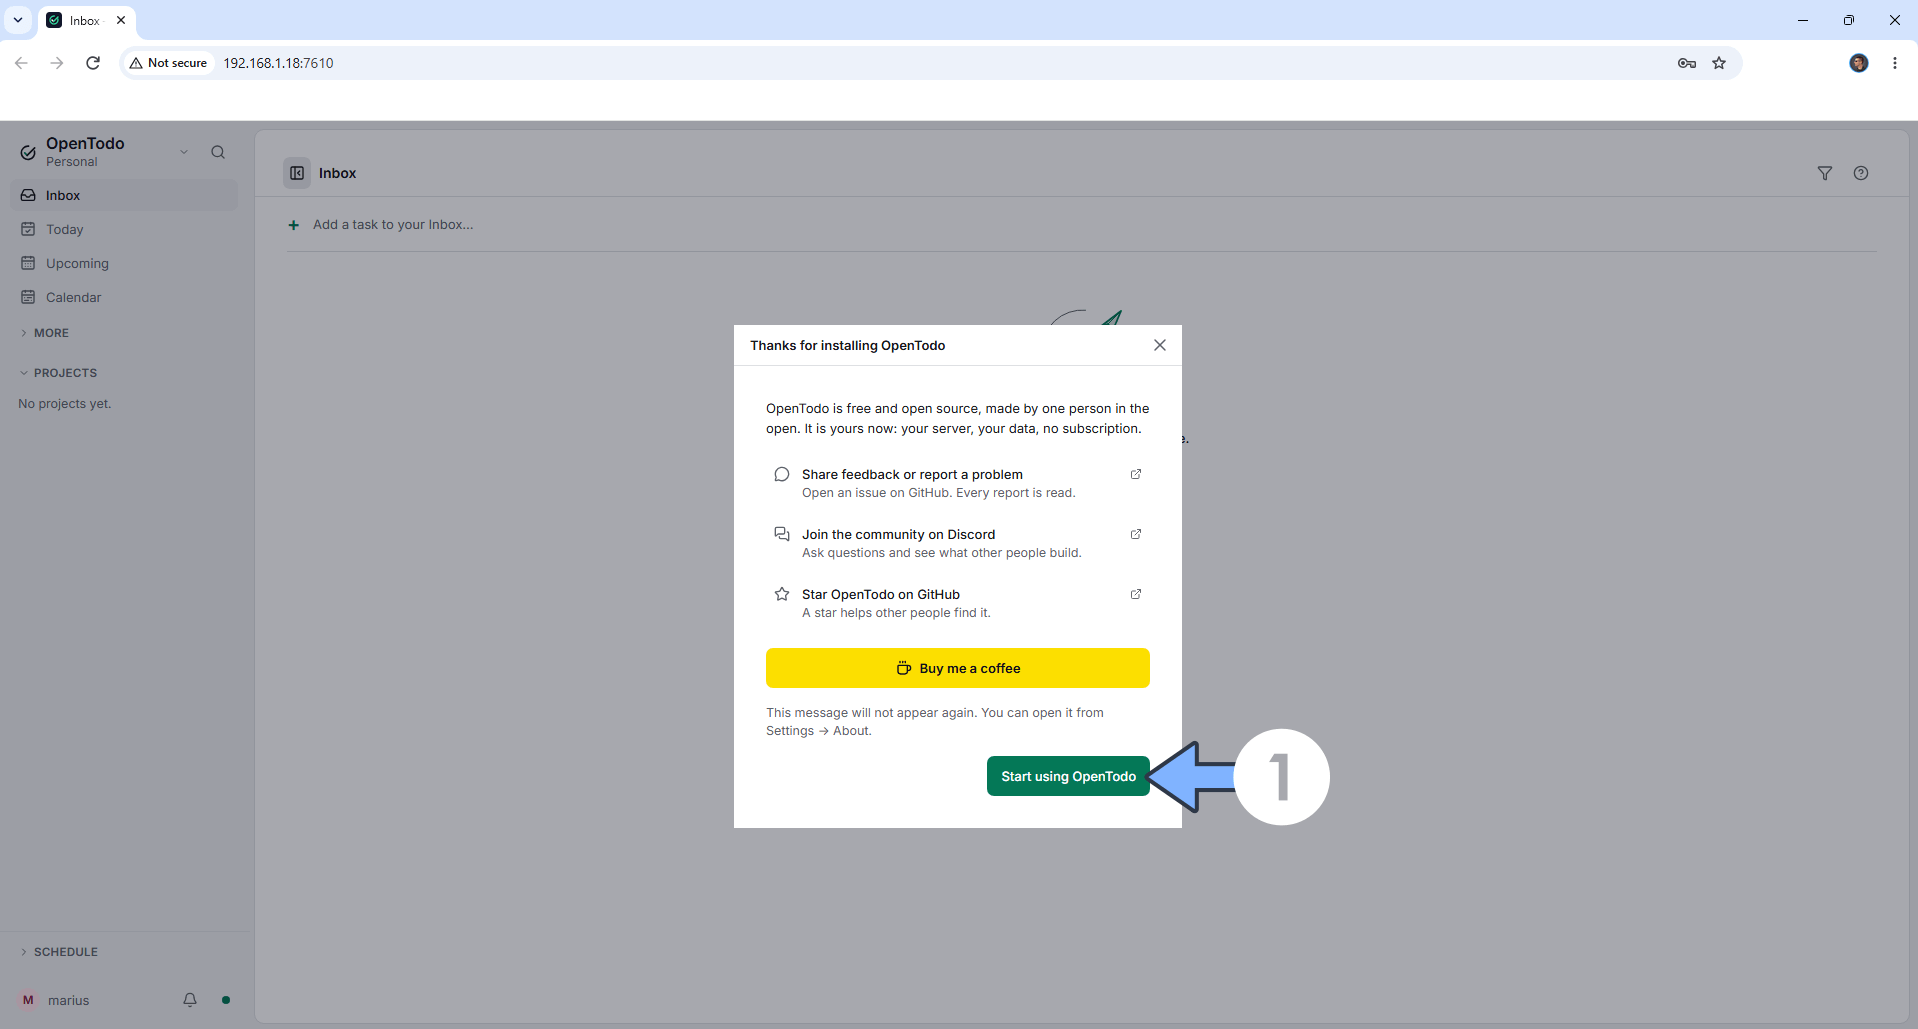
Click Start using OpenTodo. Follow the instructions in the image below.
STEP 11
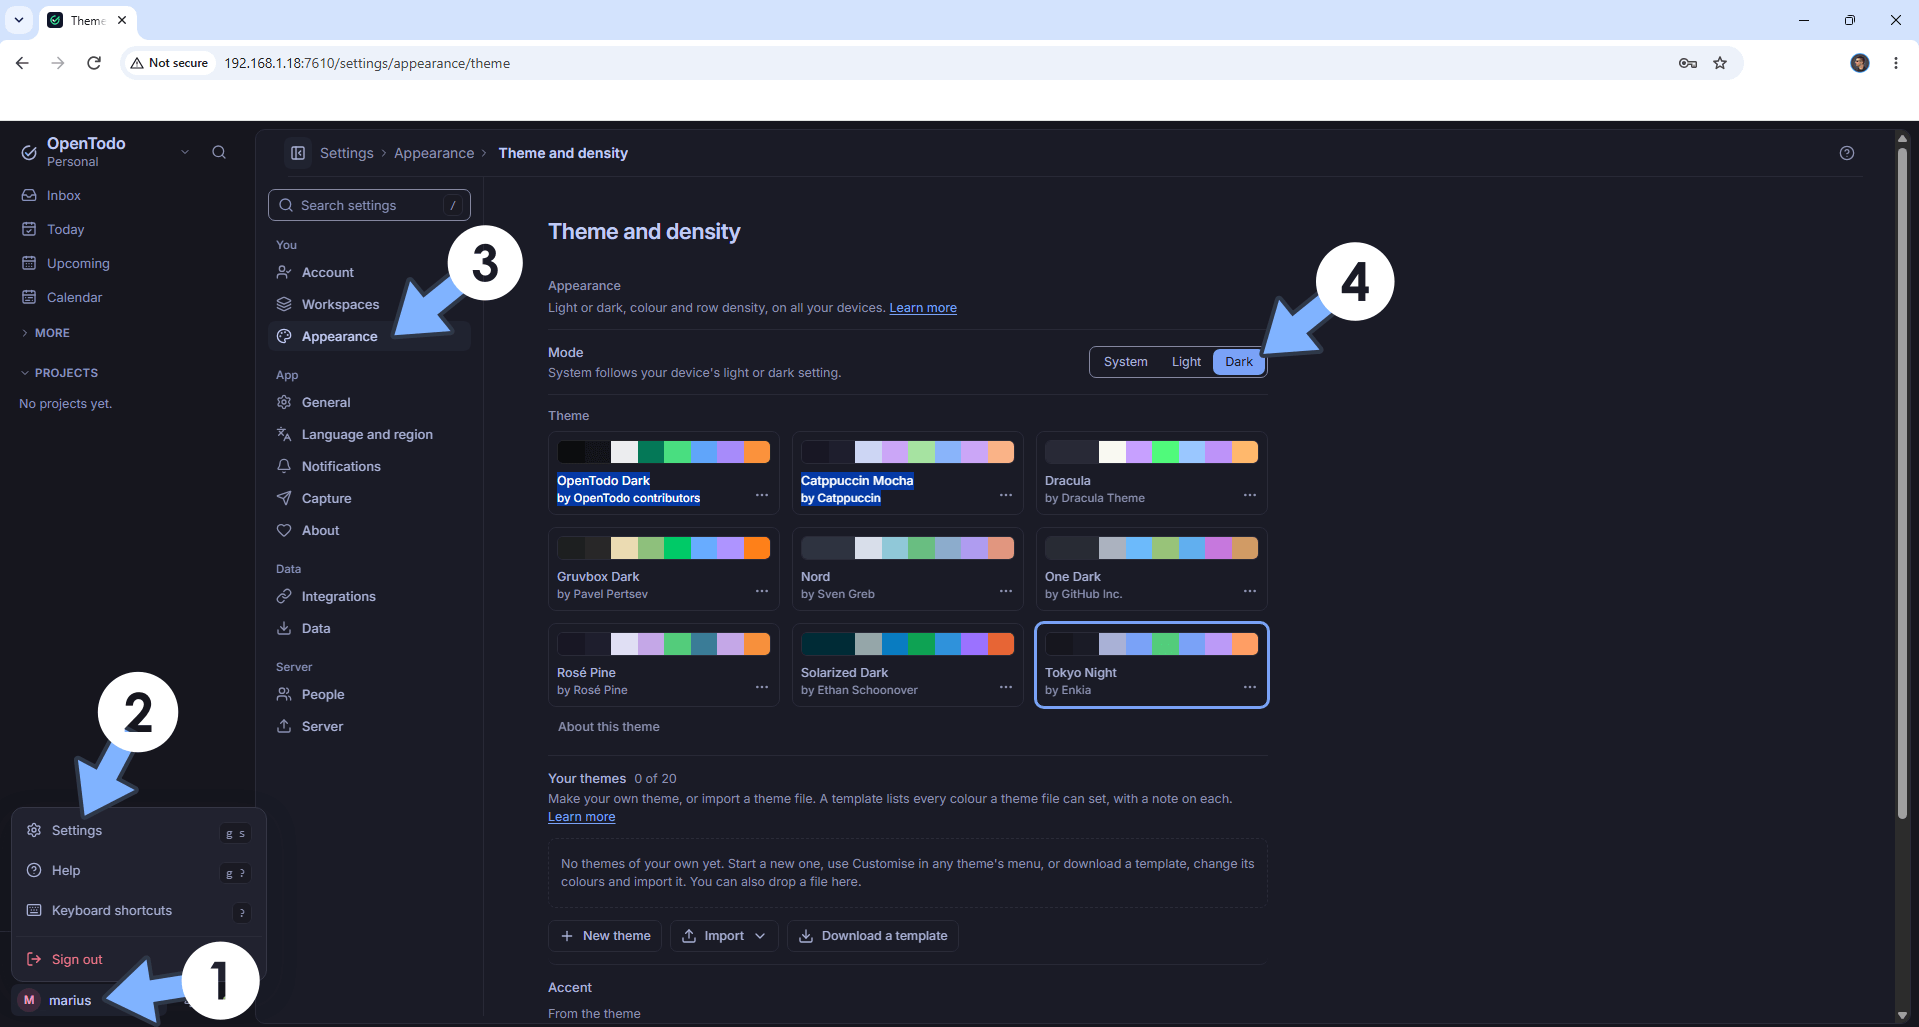
On the left sidebar, click on your user account then Settings. Click Appearance. Switch the theme to Dark. Follow the instructions in the image below.
STEP 12
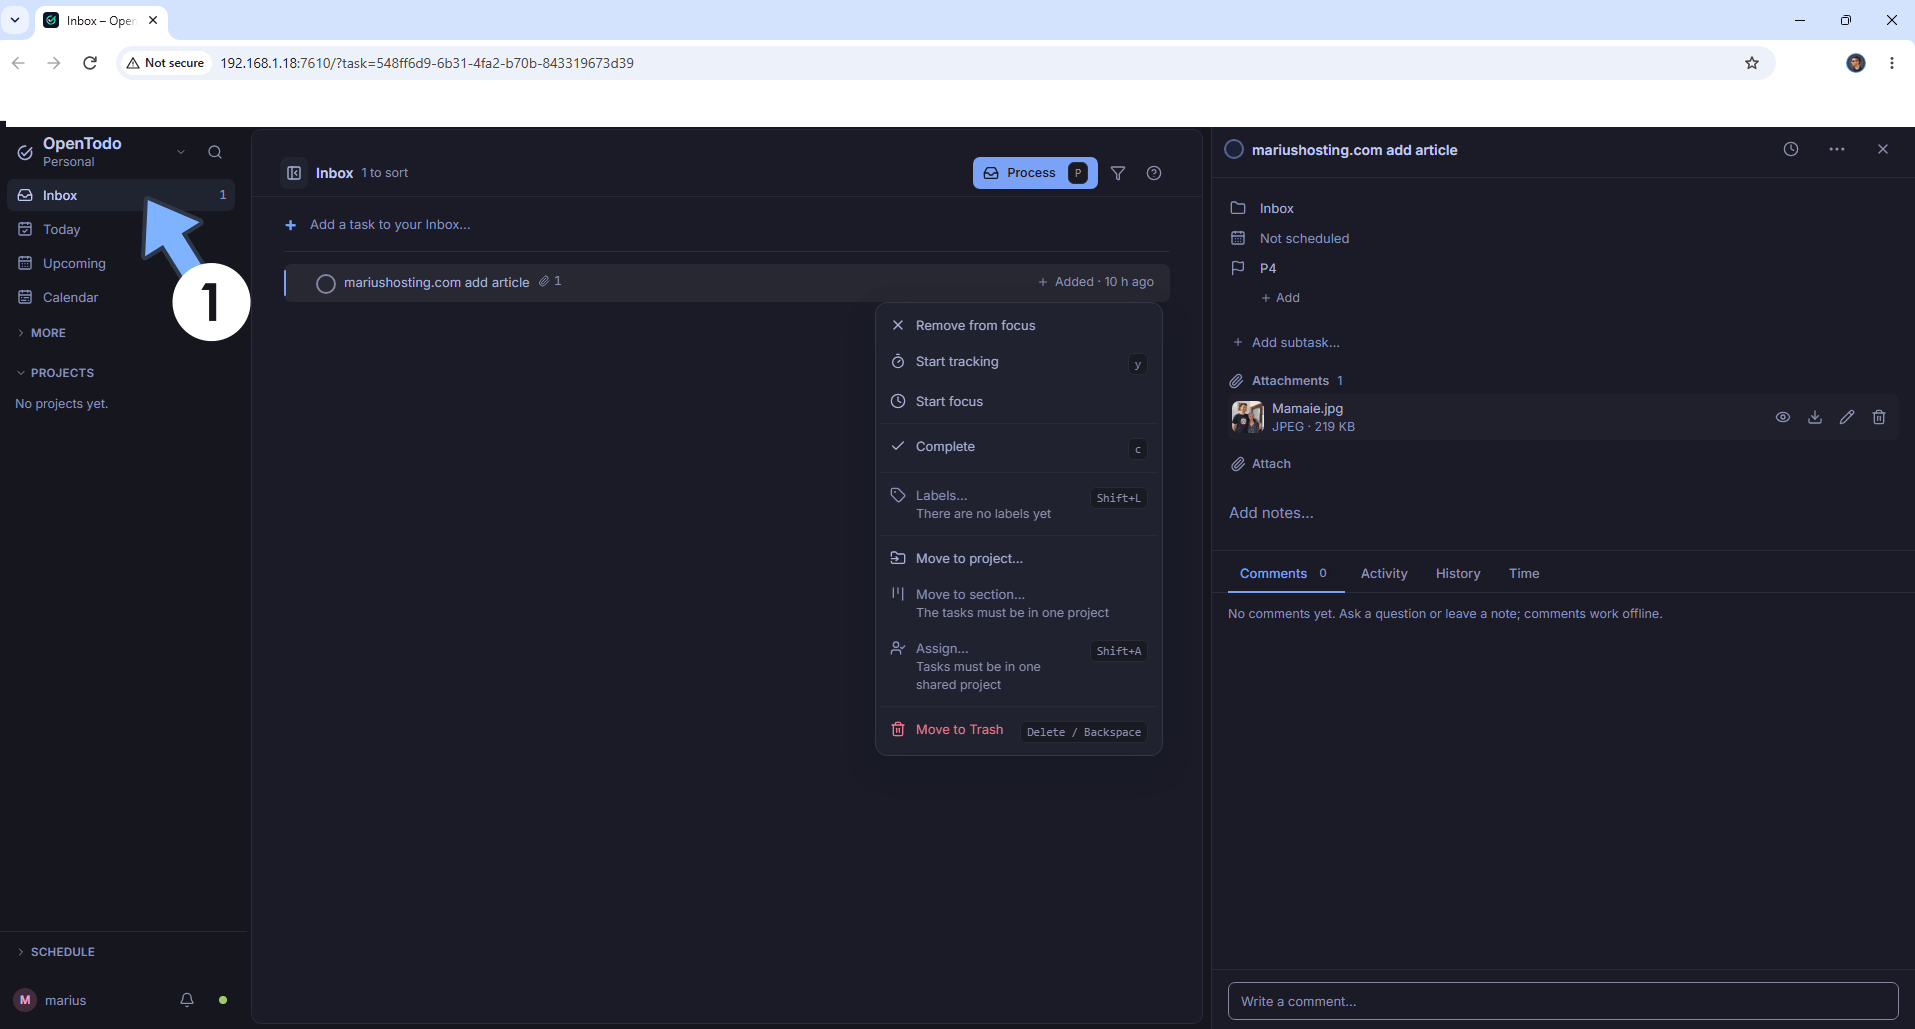
Add your first task. Follow the instructions in the image below.
Enjoy OpenTodo!
🆘TROUBLESHOOTING
If you encounter issues by using this container, make sure to check out the Common Docker issues article.
Note: If you want to run the OpenTodo container over HTTPS, check How to Run Docker Containers Over HTTPS. In order to make OpenTodo work via HTTPS, it’s mandatory to activate WebSocket.
Note: Can I run Docker on my Synology NAS? See the supported models.
Note: How to Back Up Docker Containers on your Synology NAS.
Note: Find out how to update the OpenTodo container with the latest image.
Note: How to Free Disk Space on Your NAS if You Run Docker & Dockhand.
Note: How to Schedule Start & Stop For Docker Containers.
Note: How to Activate Email Notifications.
Note: How to Add Access Control Profile on Your NAS.
Note: How to Change Docker Containers Restart Policy.
Note: How to Use Docker Containers With VPN.
Note: Convert Docker Run Into Docker Compose.
Note: How to Clean Docker.
Note: How to Clean Docker Automatically.
Note: Best Practices When Using Docker and DDNS.
Note: Some Docker Containers Need WebSocket.
Note: Find out the Best NAS Models For Docker.
Note: Activate Gmail SMTP For Docker Containers.
This post was updated on Wednesday / November 4th, 2026 at 10:07 PM