
Yuvomi is a self-hosted family planner that replaces a dozen paid apps with one home you actually own. Tasks, calendar, meals, recipes, shopping, pantry, budget, documents, health and more, packed into twenty switchable modules that talk to each other. It runs as a single Docker container on any home server or NAS. It stores everything in one SQLite database file. I’ve been running it on my Synology NAS for a few weeks. In this step by step guide I will show you how to install Yuvomi on your Synology NAS using Docker & Dockhand.
STEP 1
Please Support My work by Making a Donation.
STEP 2
Install Dockhand using my step by step guide. If you already have Dockhand installed on your Synology NAS, skip this STEP. ⚠️Attention: Make sure you have installed the latest Dockhand version.
STEP 3
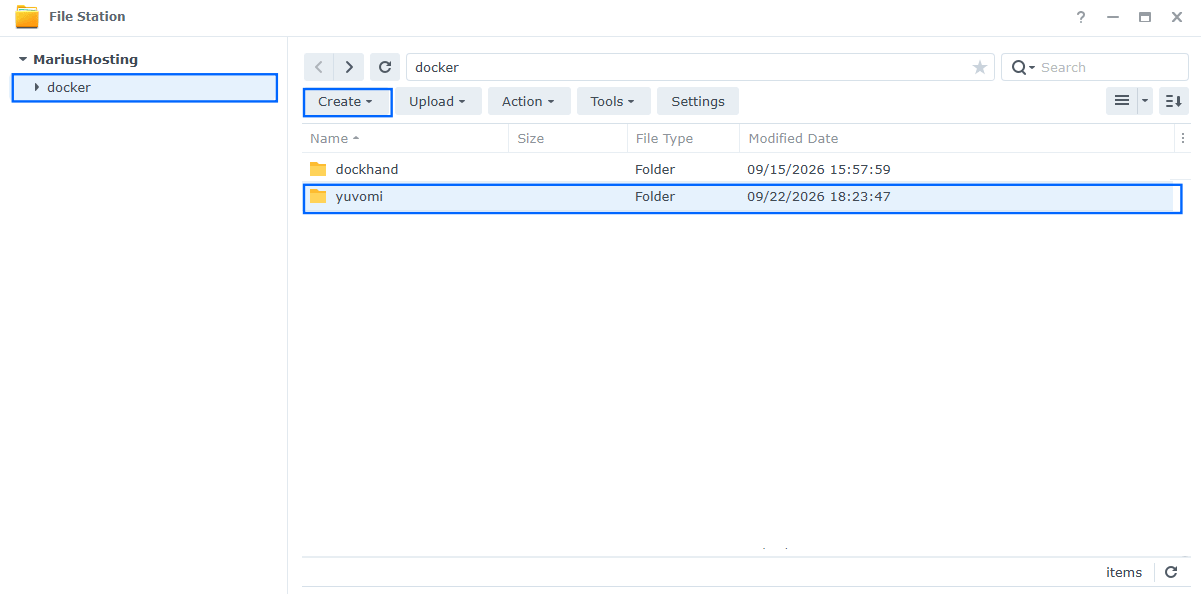
Go to File Station and open the docker folder. Inside the docker folder, create one new folder and name it yuvomi. Follow the instructions in the image below.
Note: Be careful to enter only lowercase, not uppercase letters.
STEP 4
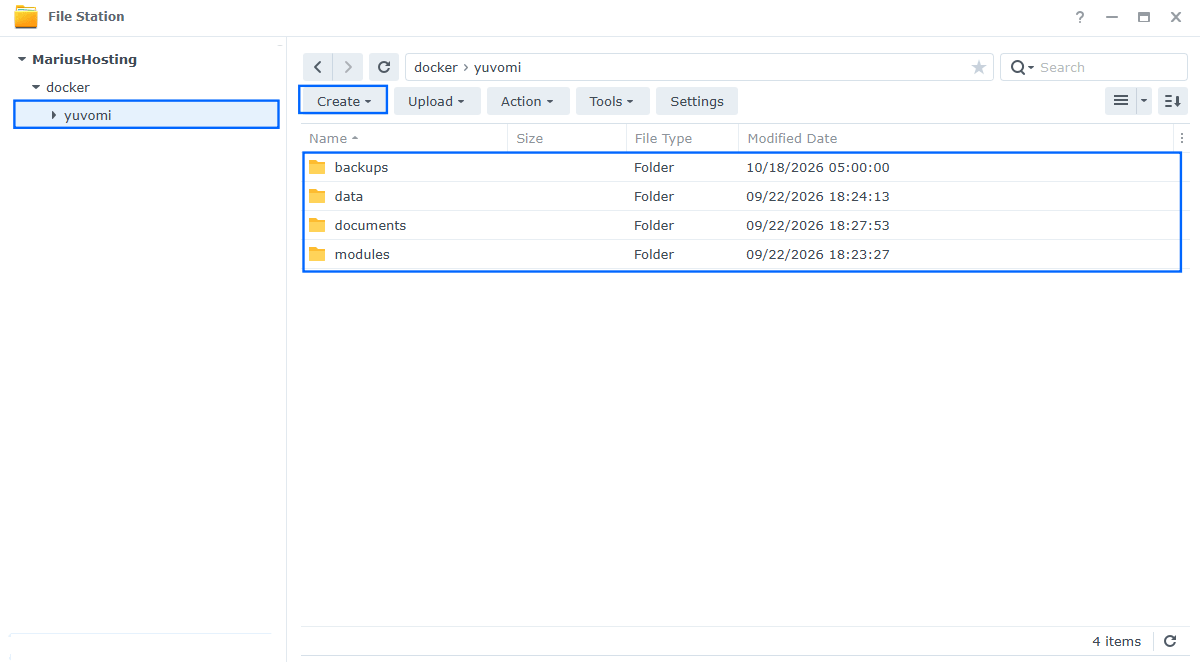
Now create four new folders inside the yuvomi folder that you have previously created at STEP 3 and name them backups, data, documents, modules. Follow the instructions in the image below.
Note: Be careful to enter only lowercase, not uppercase letters.
STEP 5
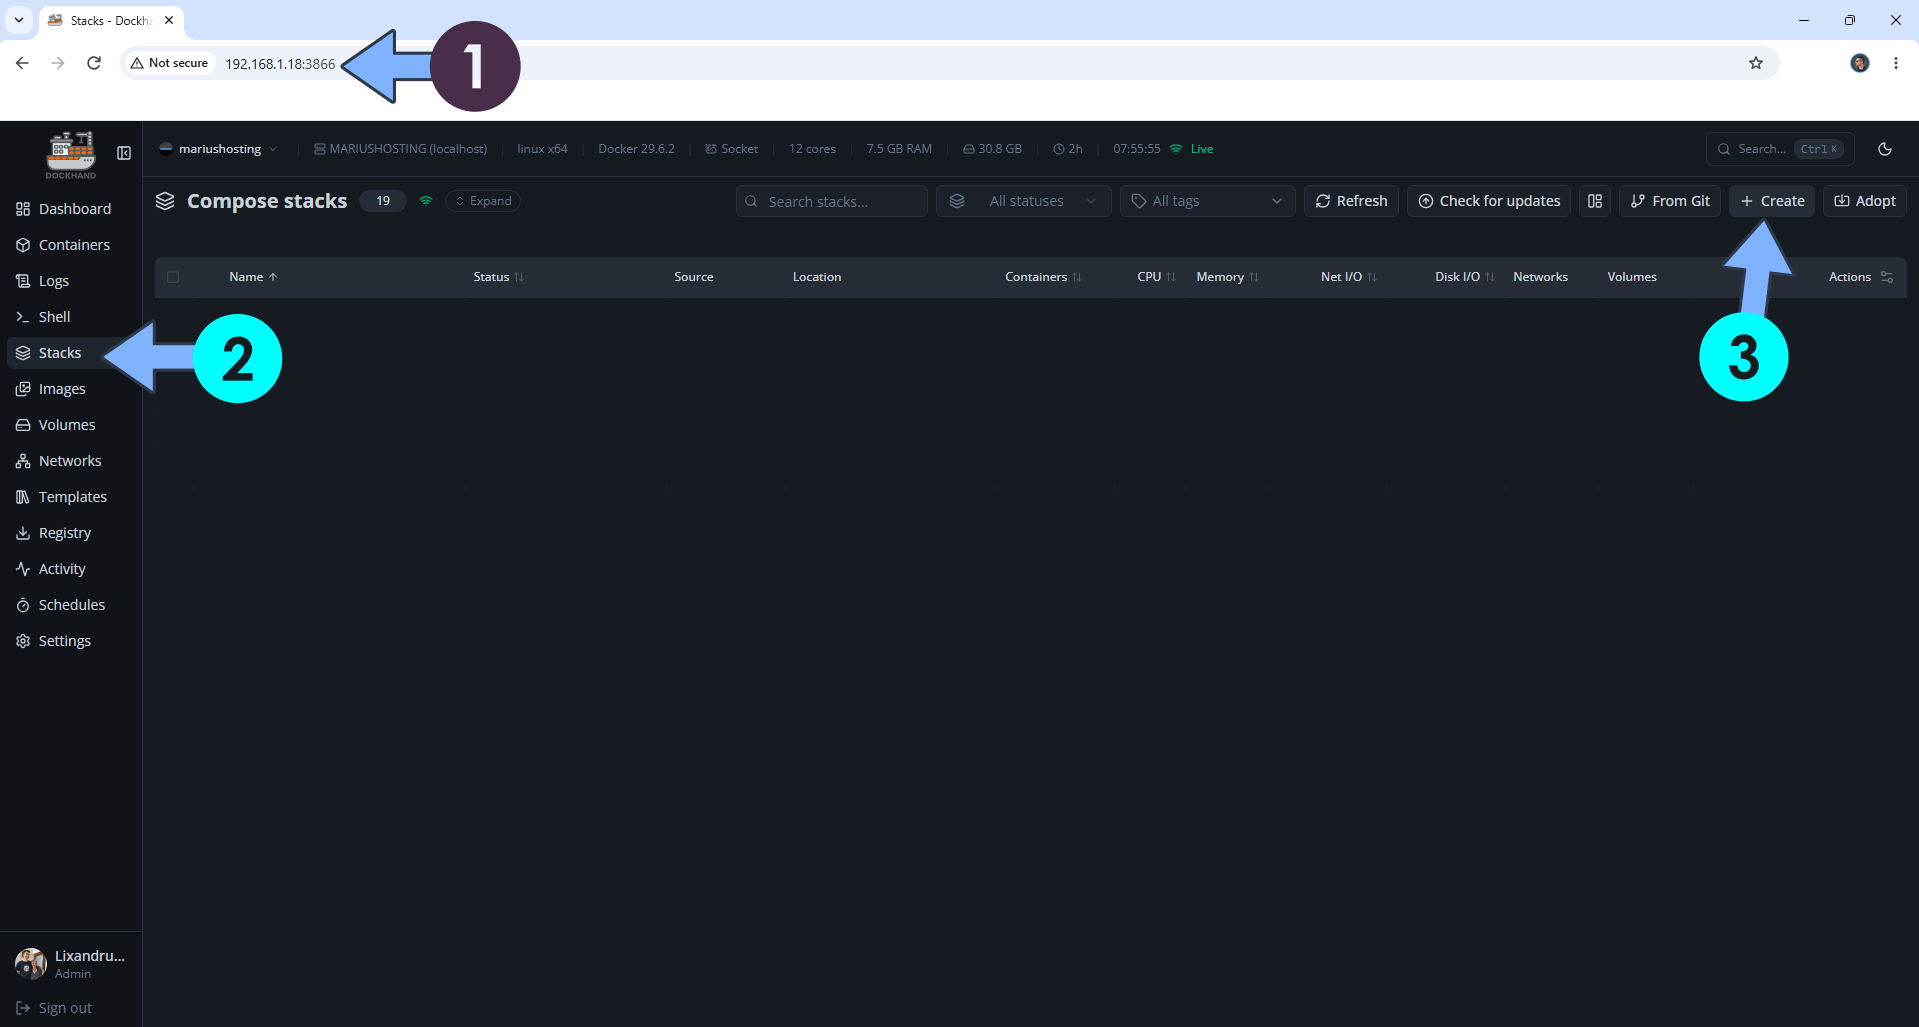
Open your browser and type in http://synology-ip-address:3866 to connect to your Dockhand container. On the left sidebar, click Stacks then + Create. Follow the instructions in the image below.
STEP 6
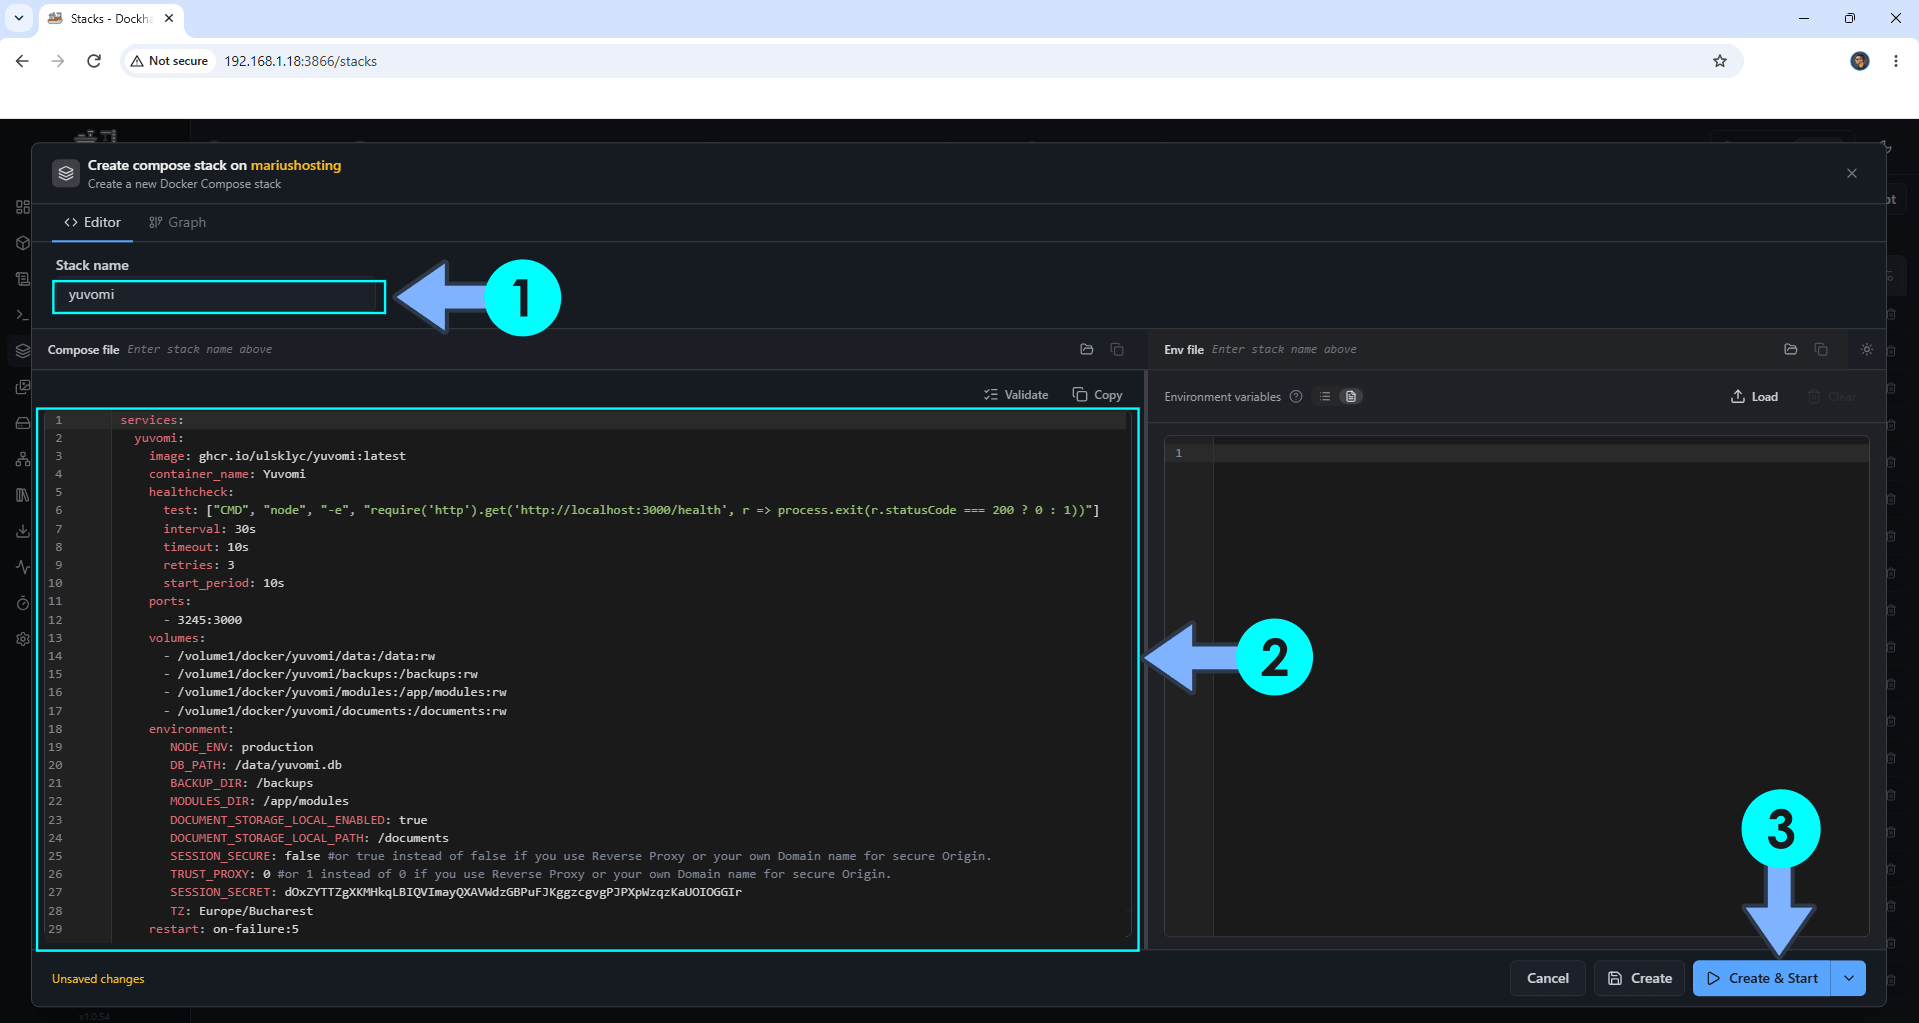
In the Stack name field, type in yuvomi. ⚠️Warning: Type in the name in lowercase letters. The installation process can take up to a few seconds/minutes. It will depend on your Internet speed connection. Follow the instructions in the image below.
Note: Copy Paste the code below in the Dockhand Compose Stack then click Create & Start.
services:
  yuvomi:
    image: ghcr.io/ulsklyc/yuvomi:latest
    container_name: Yuvomi
    healthcheck:
      test: ["CMD", "node", "-e", "require('http').get('http://localhost:3000/health', r => process.exit(r.statusCode === 200 ? 0 : 1))"]
      interval: 30s
      timeout: 10s
      retries: 3
      start_period: 10s
    ports:
      - 3245:3000
    volumes:
      - /volume1/docker/yuvomi/data:/data:rw
      - /volume1/docker/yuvomi/backups:/backups:rw
      - /volume1/docker/yuvomi/modules:/app/modules:rw
      - /volume1/docker/yuvomi/documents:/documents:rw
    environment:
       NODE_ENV: production
       DB_PATH: /data/yuvomi.db
       BACKUP_DIR: /backups
       MODULES_DIR: /app/modules
       DOCUMENT_STORAGE_LOCAL_ENABLED: true
       DOCUMENT_STORAGE_LOCAL_PATH: /documents
       SESSION_SECURE: false #or true instead of false if you use Reverse Proxy or your own Domain name for secure Origin.
       TRUST_PROXY: 0 #or 1 instead of 0 if you use Reverse Proxy or your own Domain name for secure Origin.
       SESSION_SECRET: dOxZYTTZgXKMHkqLBIQVImayQXAVWdzGBPuFJKggzcgvgPJPXpWzqzKaUOIOGGIr
       TZ: Europe/Bucharest
    restart: on-failure:5
Note: Before you paste the code above in the Web editor area below, change the value for SESSION_SECRET. (Generate your own Random 64 length SESSION_SECRET.)
Note: Before you paste the code above in the Web editor area below, change the value for TZ. (Select your current Time Zone from this list.)
STEP 7
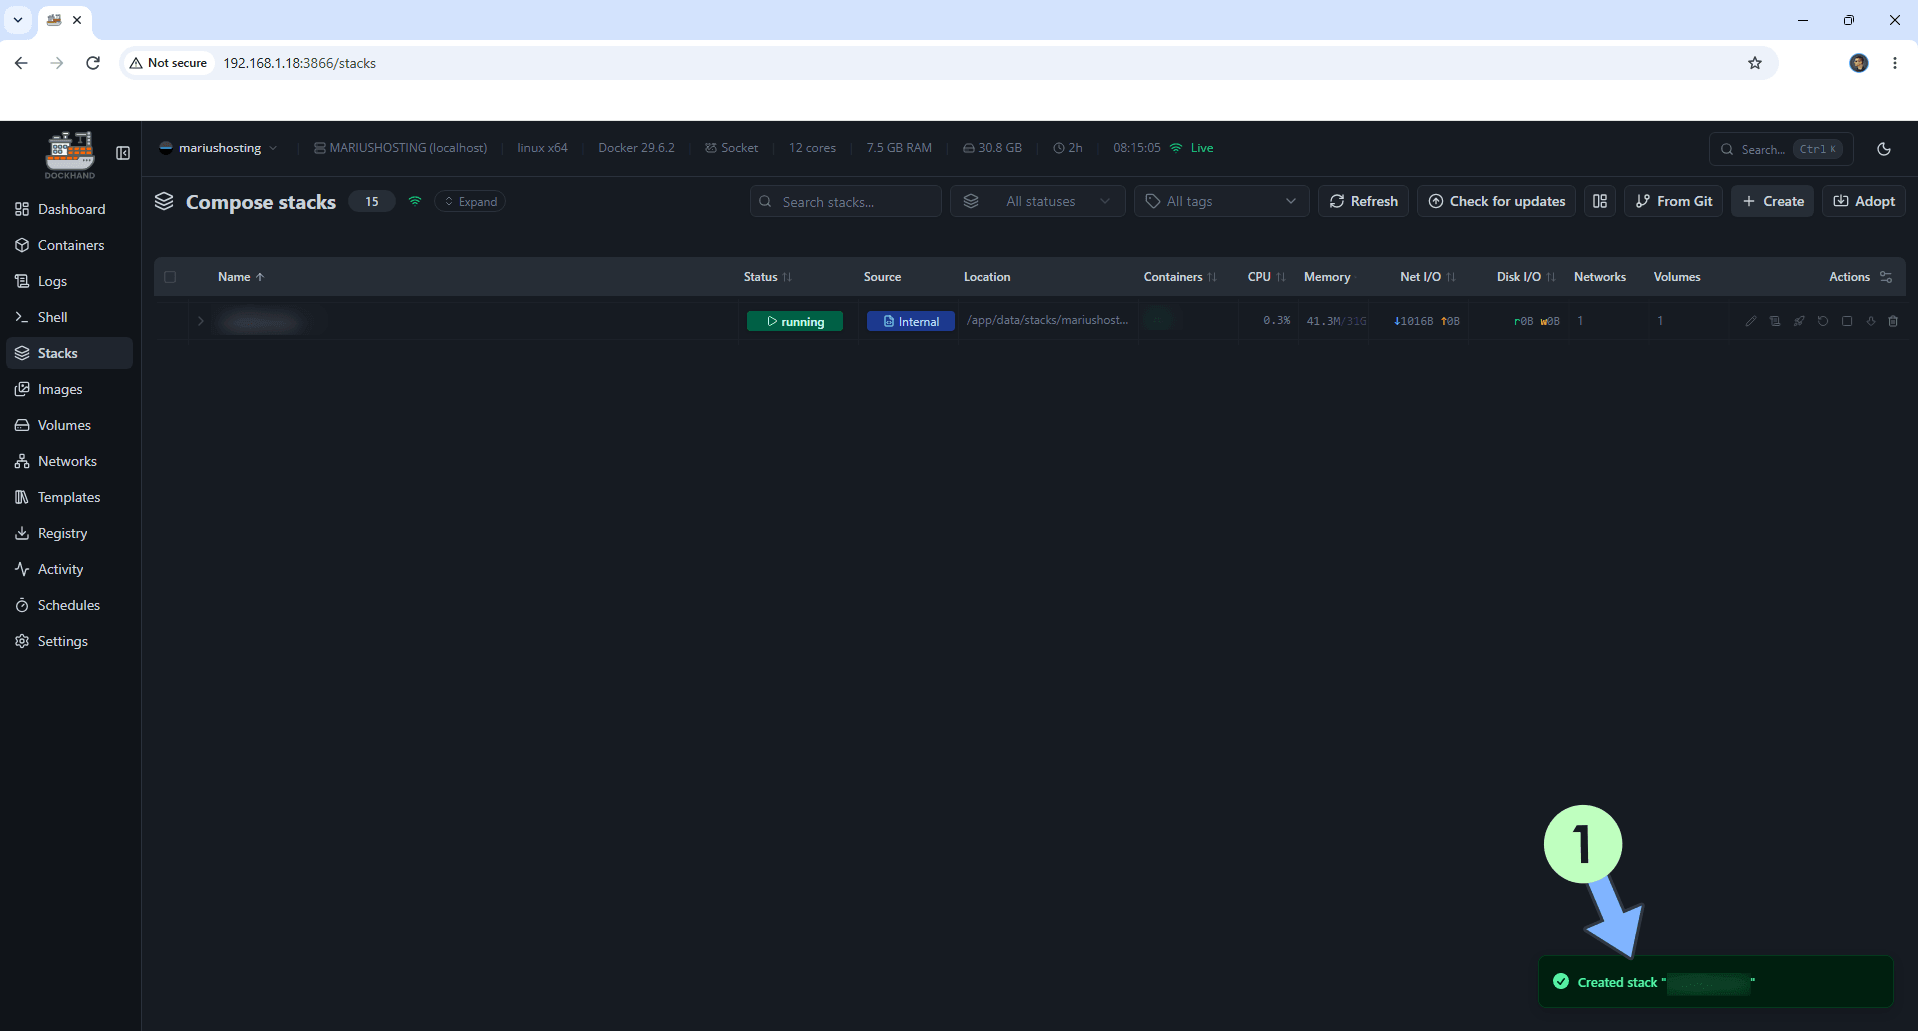
If everything goes right, you will see the following message at the bottom right of your screen: “Created stack “yuvomi”“.
STEP 8
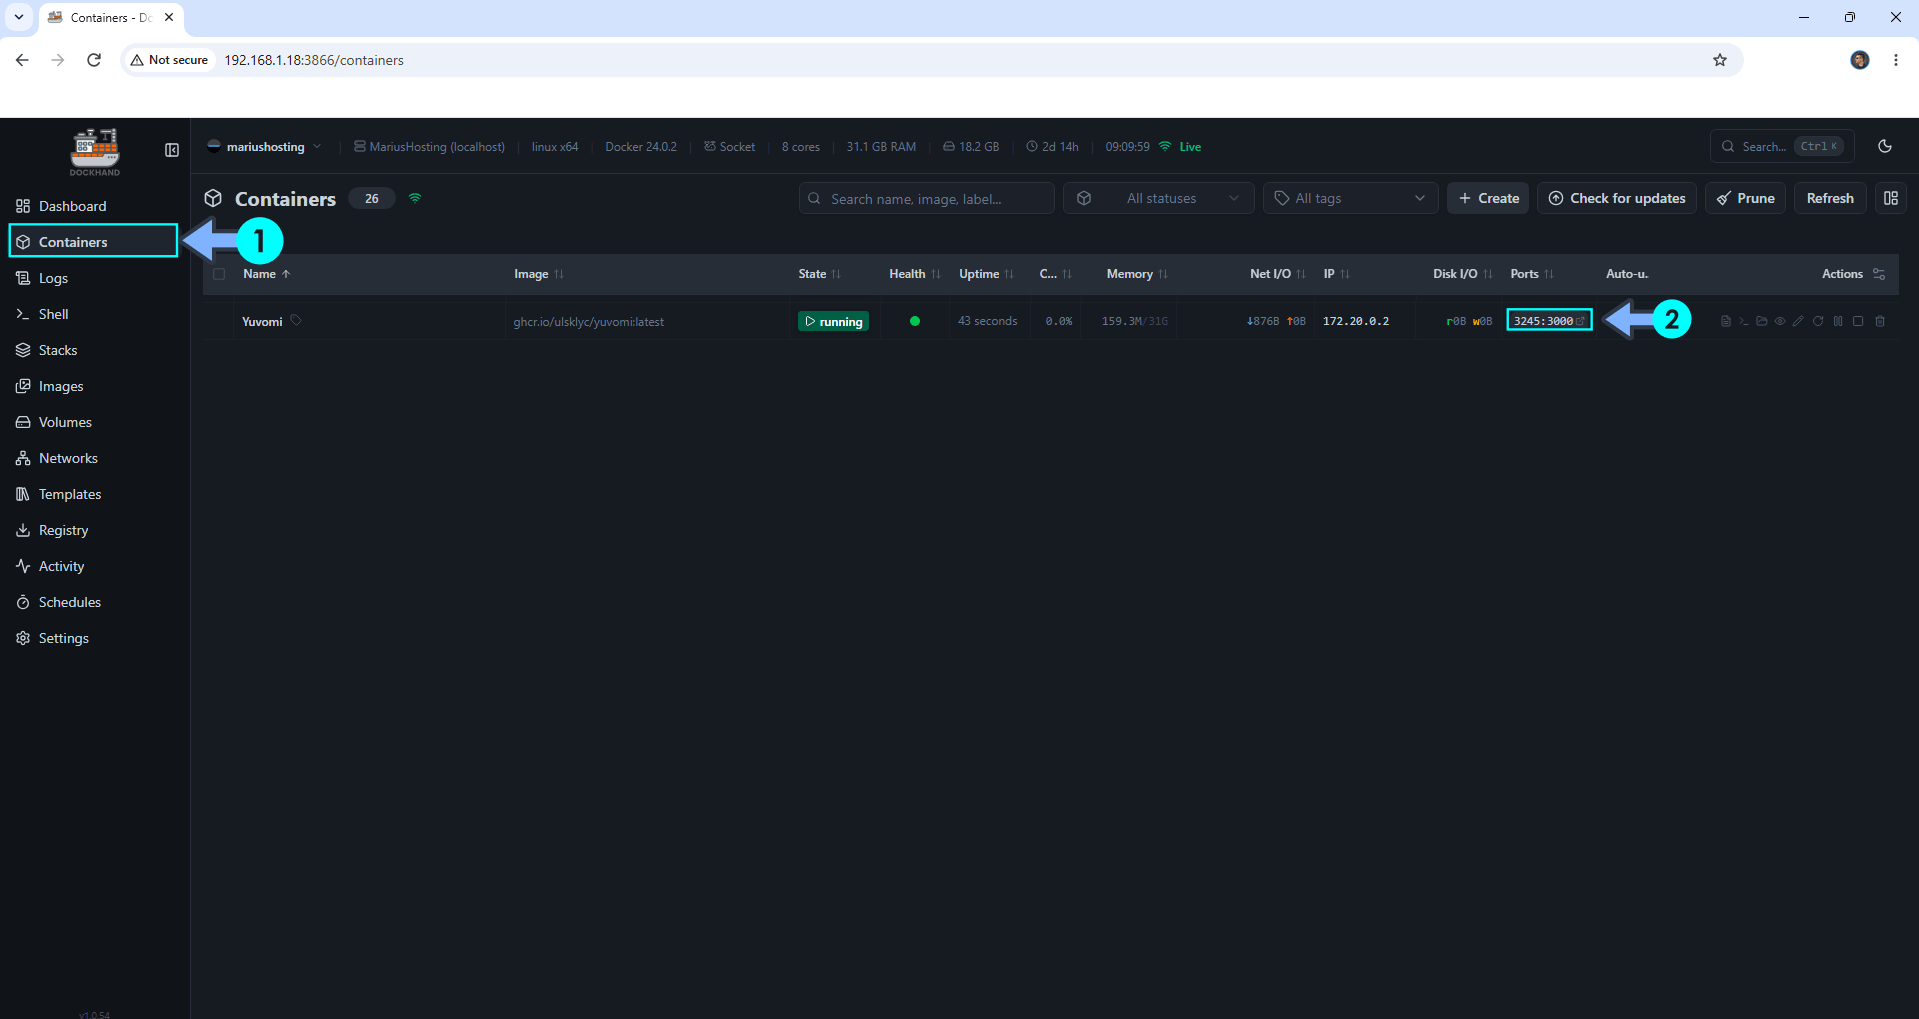
On the left sidebar, click Containers. Identify your Yuvomi container then click on ports 3245:3000. Follow the instructions in the image below.
STEP 9
🟢Please Support My work by Making a Donation. Almost 99,9% of the people that install something using my guides forget to support my work, or just ignore STEP 1. I’ve been very honest about this aspect of my work since the beginning: I don’t run any ADS, I don’t require subscriptions, paid or otherwise, I don’t collect IPs, emails, and I don’t have any referral links from Amazon or other merchants. I also don’t have any POP-UPs or COOKIES. I have repeatedly been told over the years how much I have contributed to the community. It’s something I love doing and have been honest about my passion since the beginning. But I also Need The Community to Support me Back to be able to continue doing this work.
STEP 10
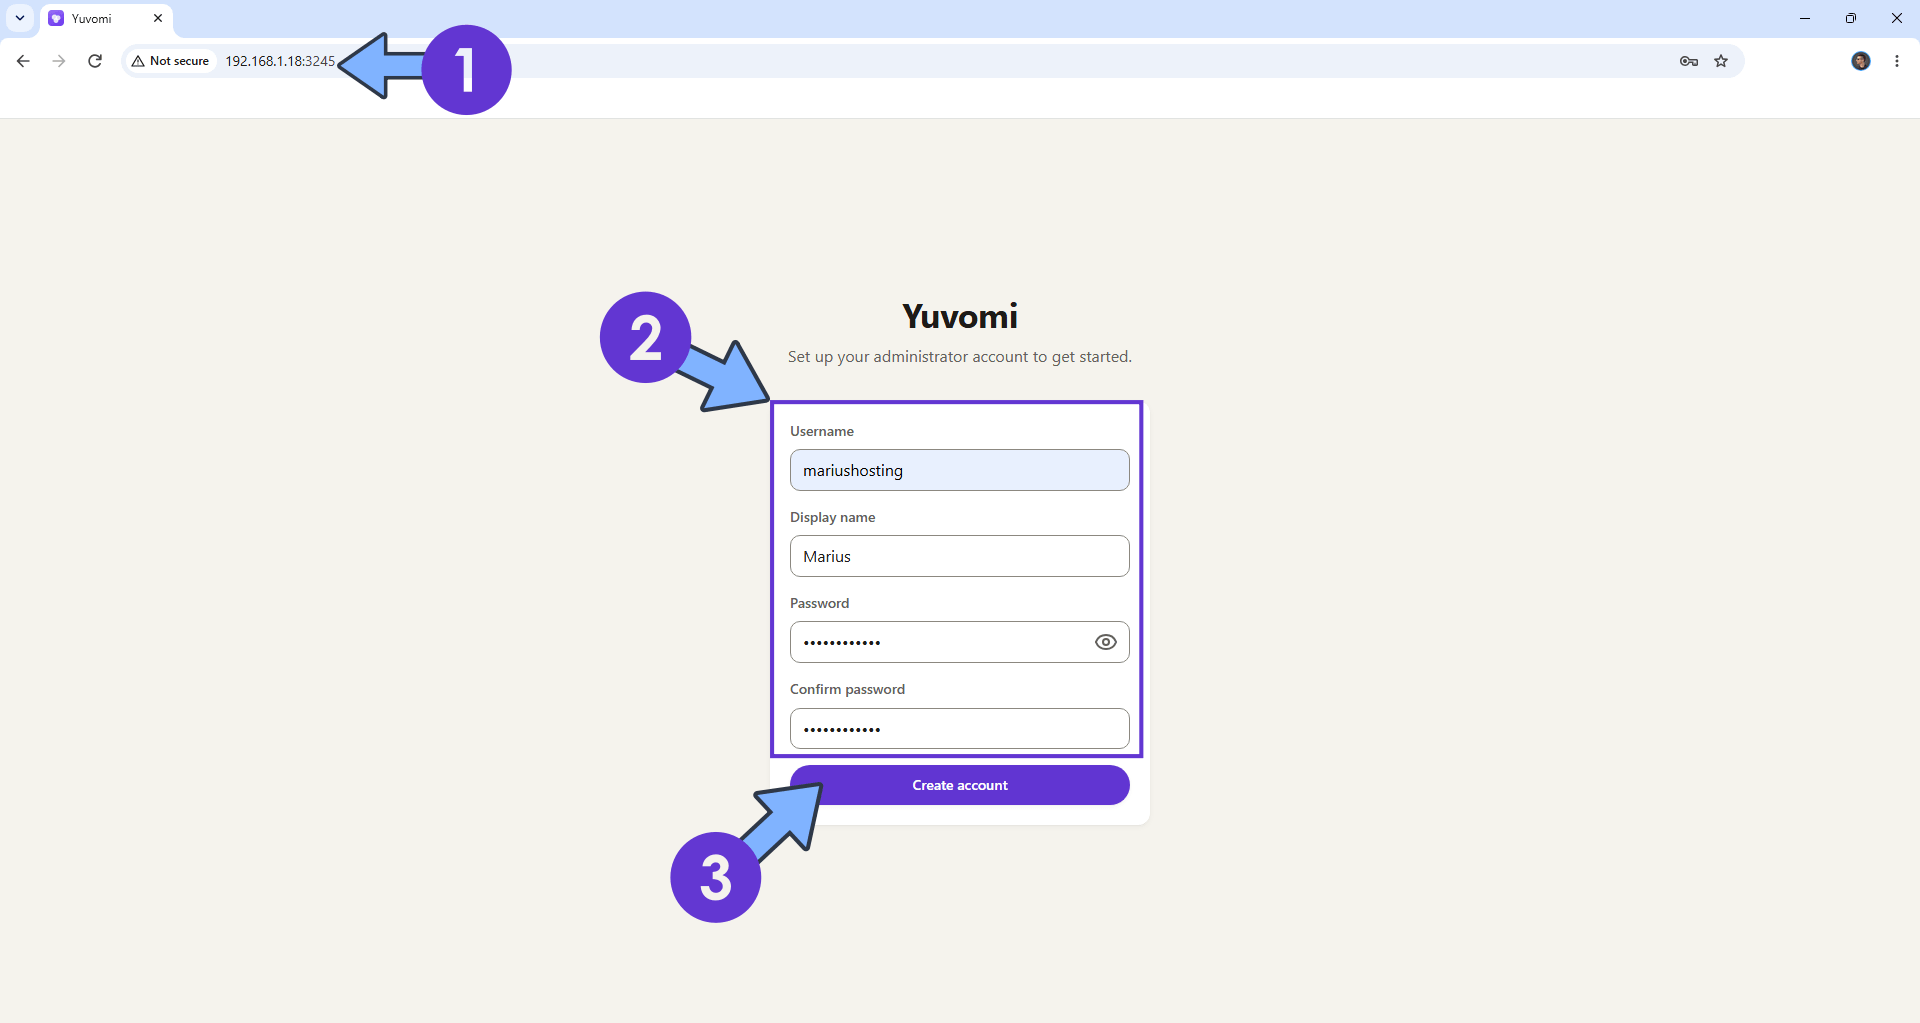
The installation process can take up to a few seconds/minutes. It will depend on your Internet speed connection. Now open your browser and type in http://synology-ip-address:3245 Type in your own details. Click Create Account. Follow the instructions in the image below.
STEP 11
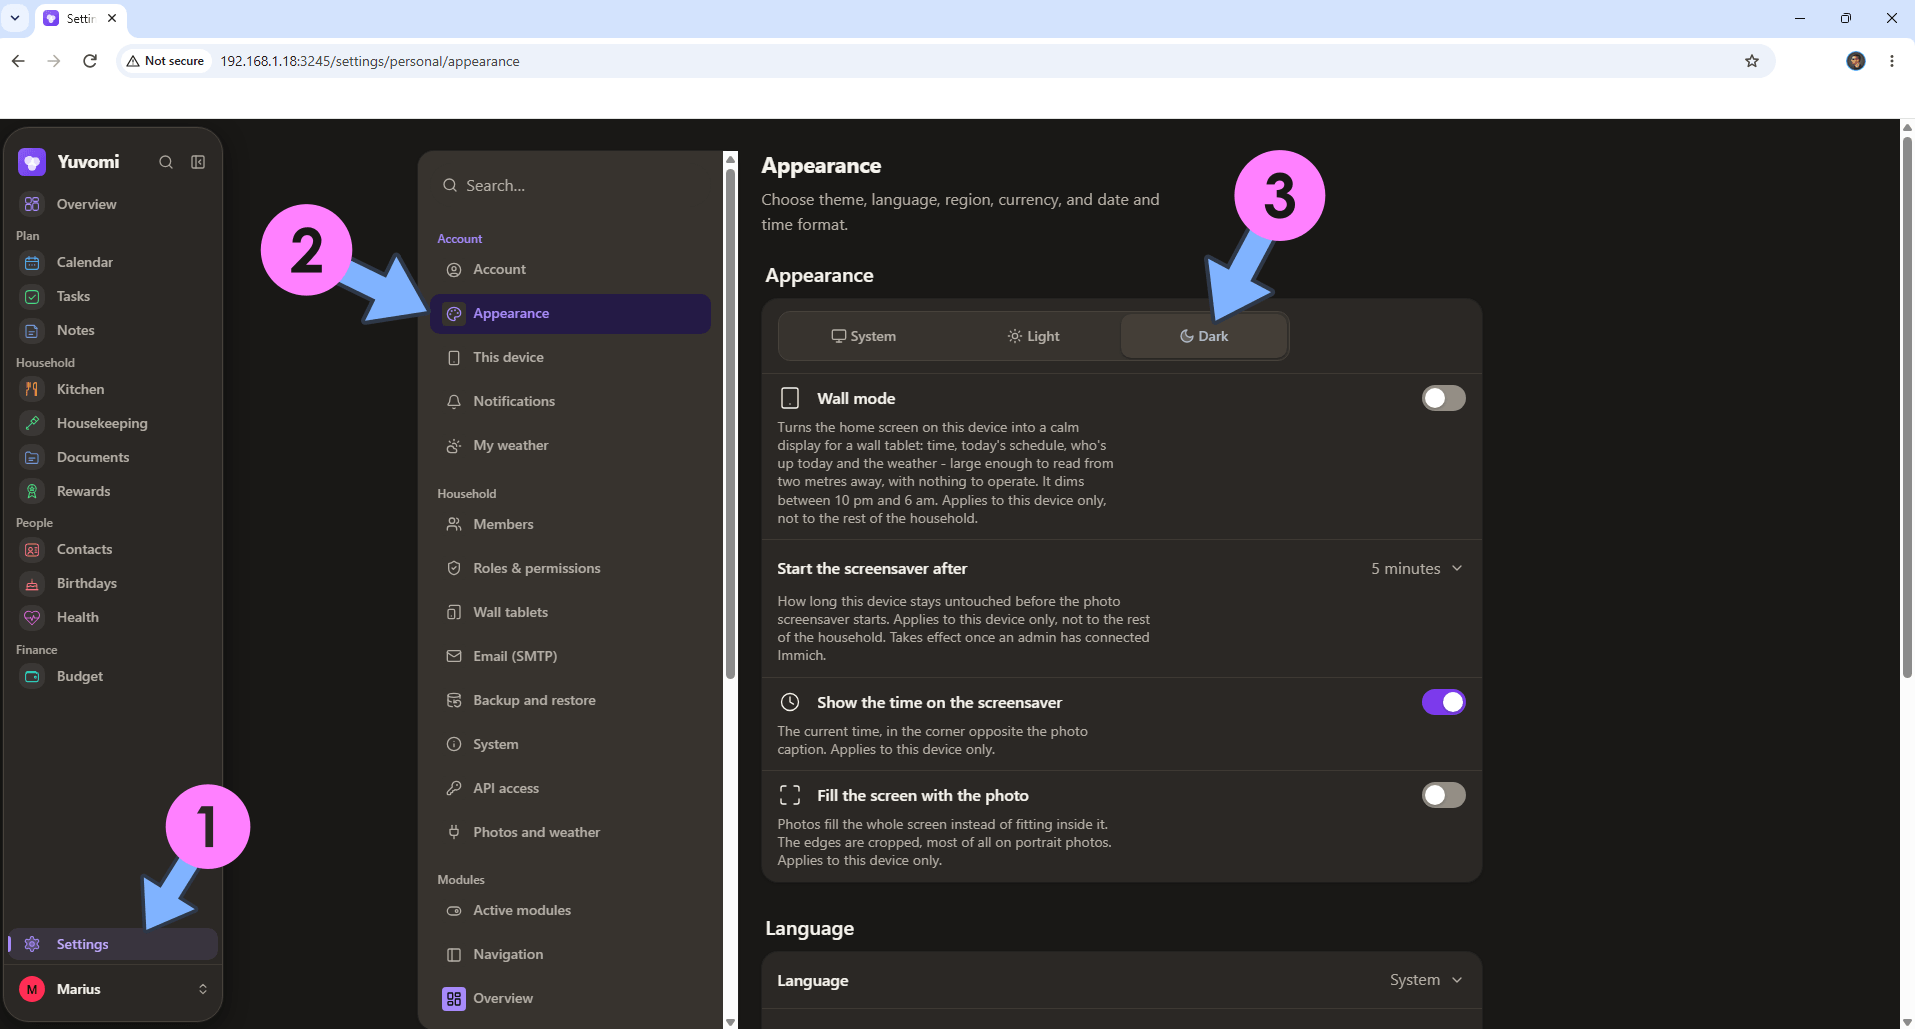
On the left sidebar, click Settings. Click Appearance. Switch the theme to Dark. Follow the instructions in the image below.
STEP 12
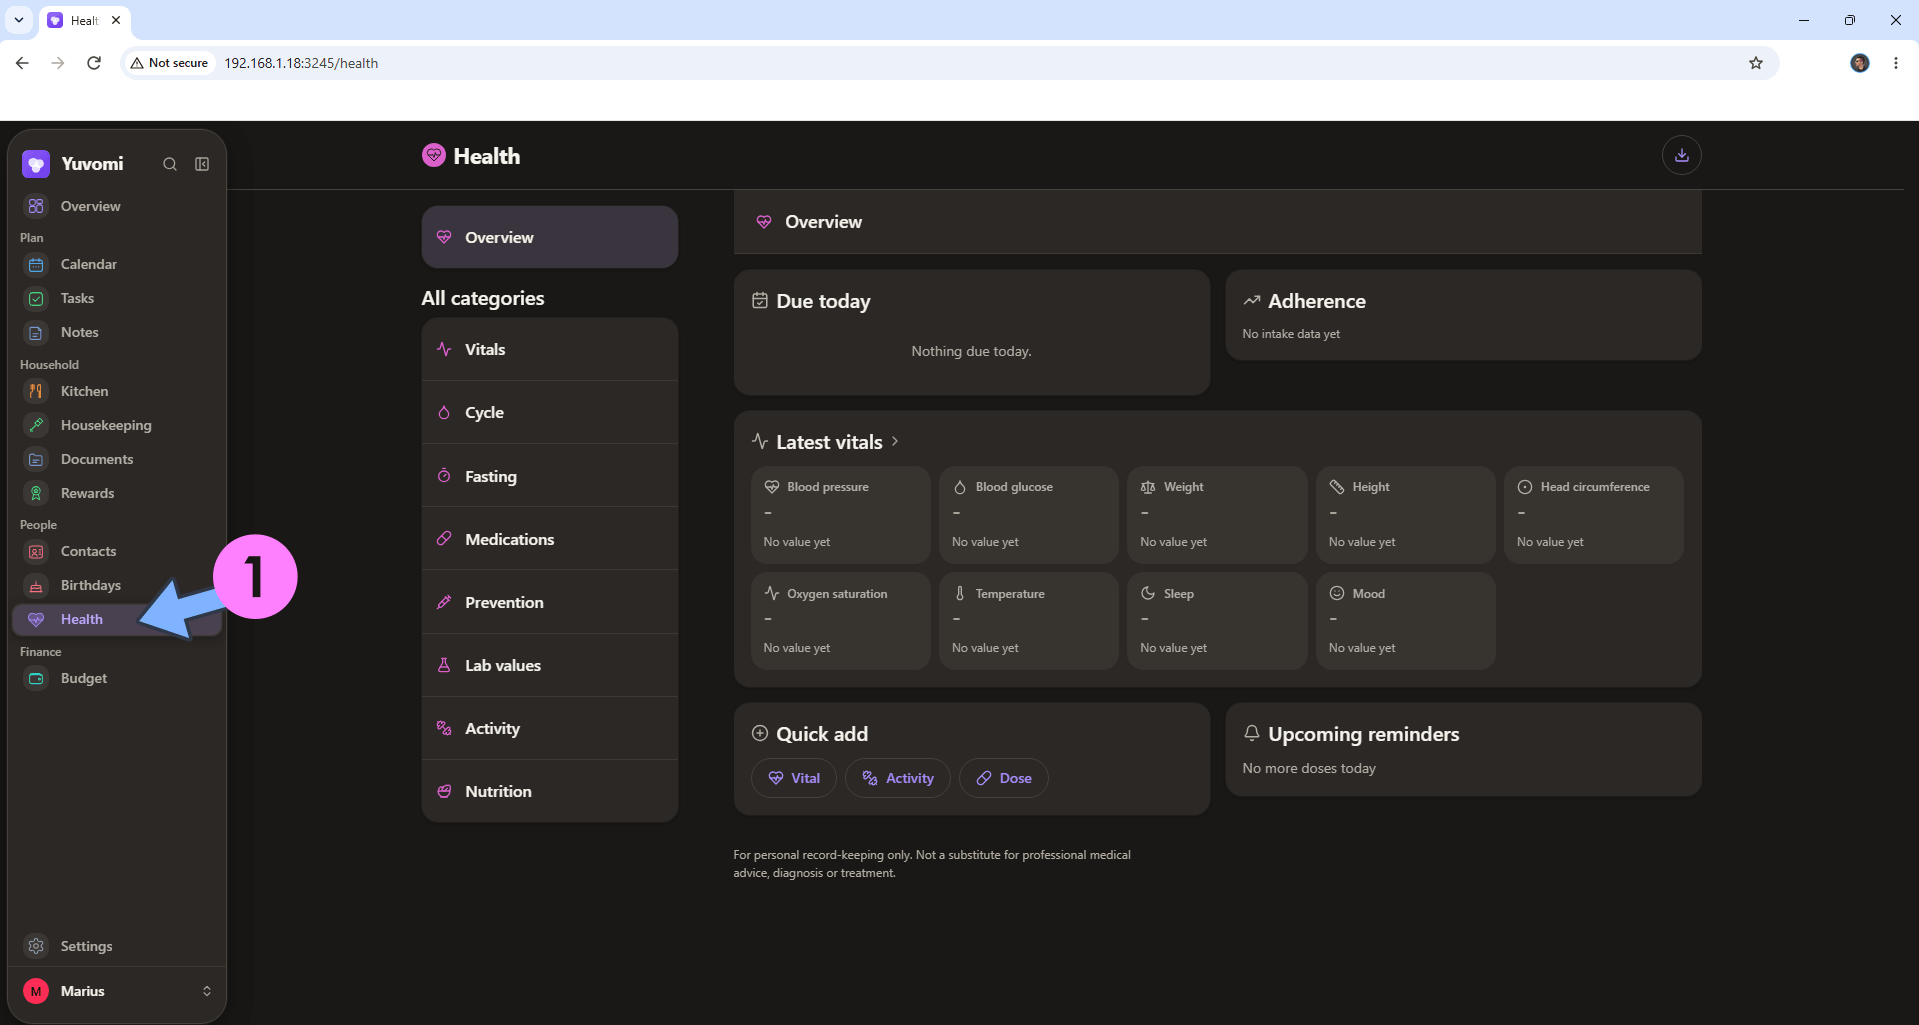
Your Health options at a glance!
STEP 13
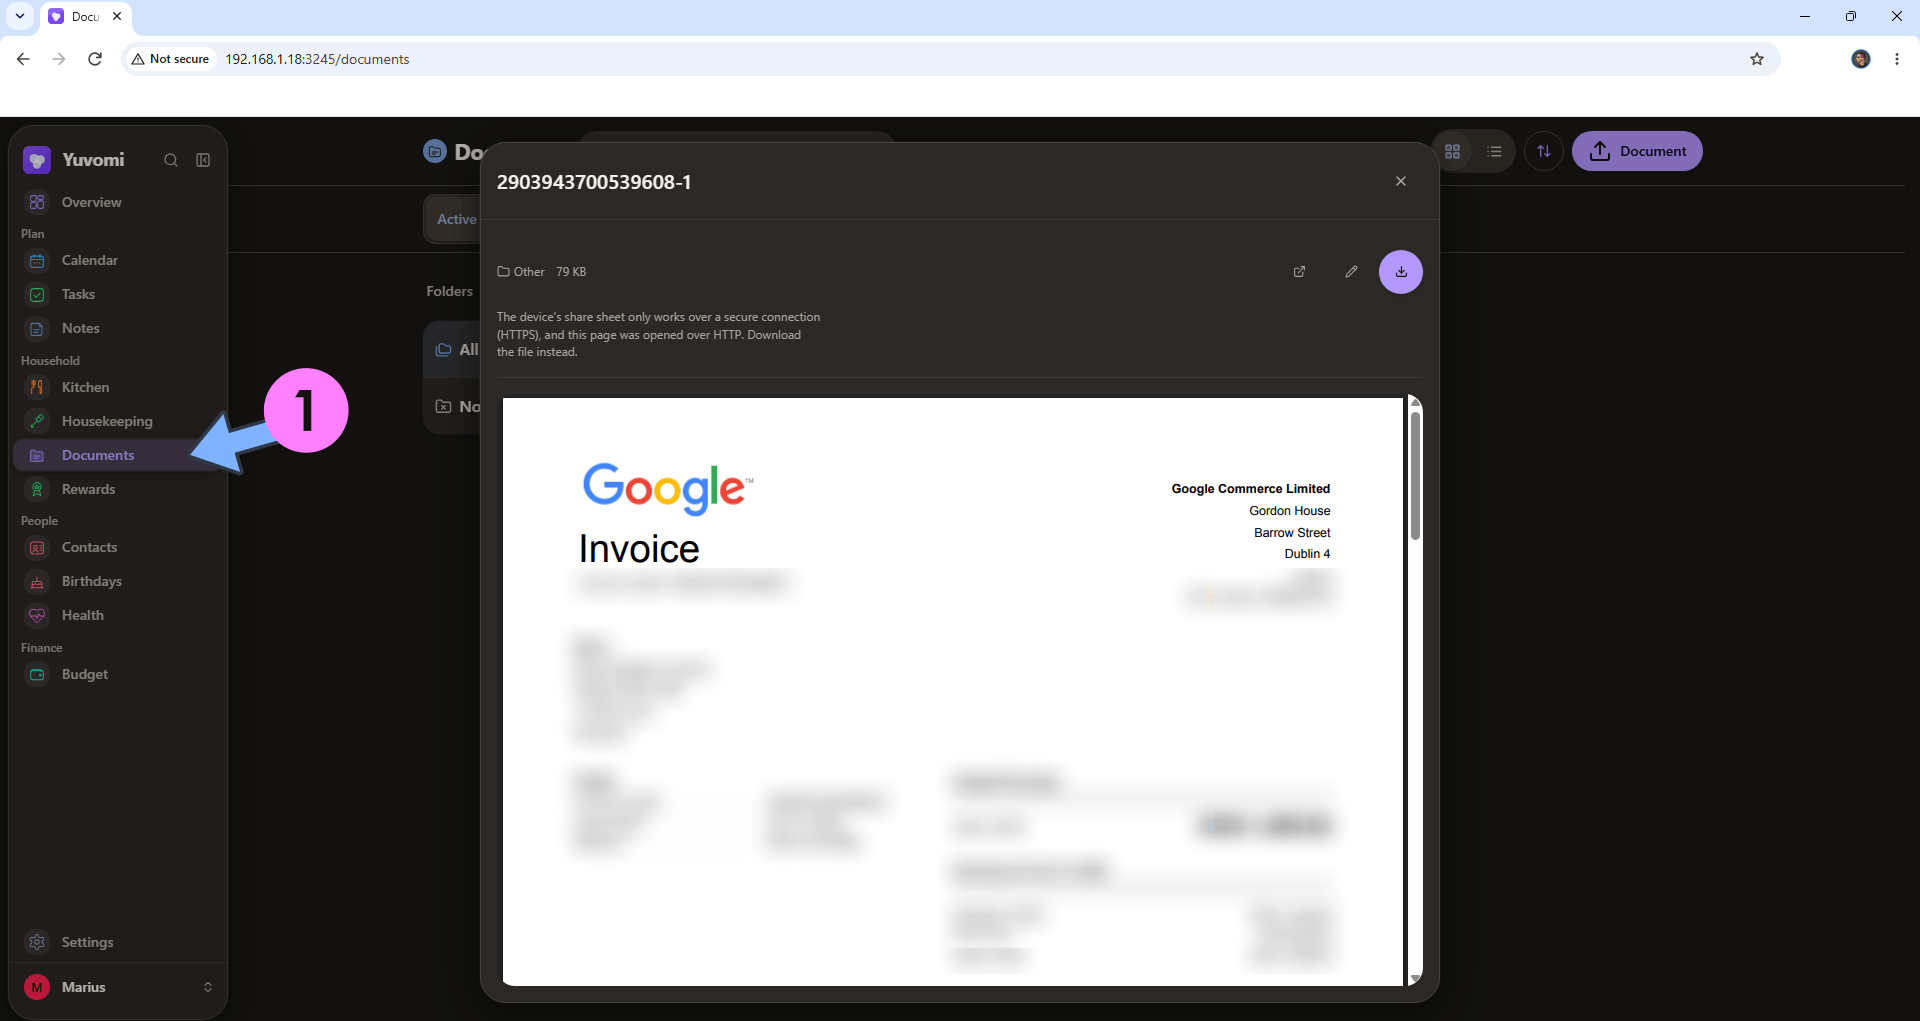
You can easily upload your documents. Follow the instructions in the image below.
STEP 14
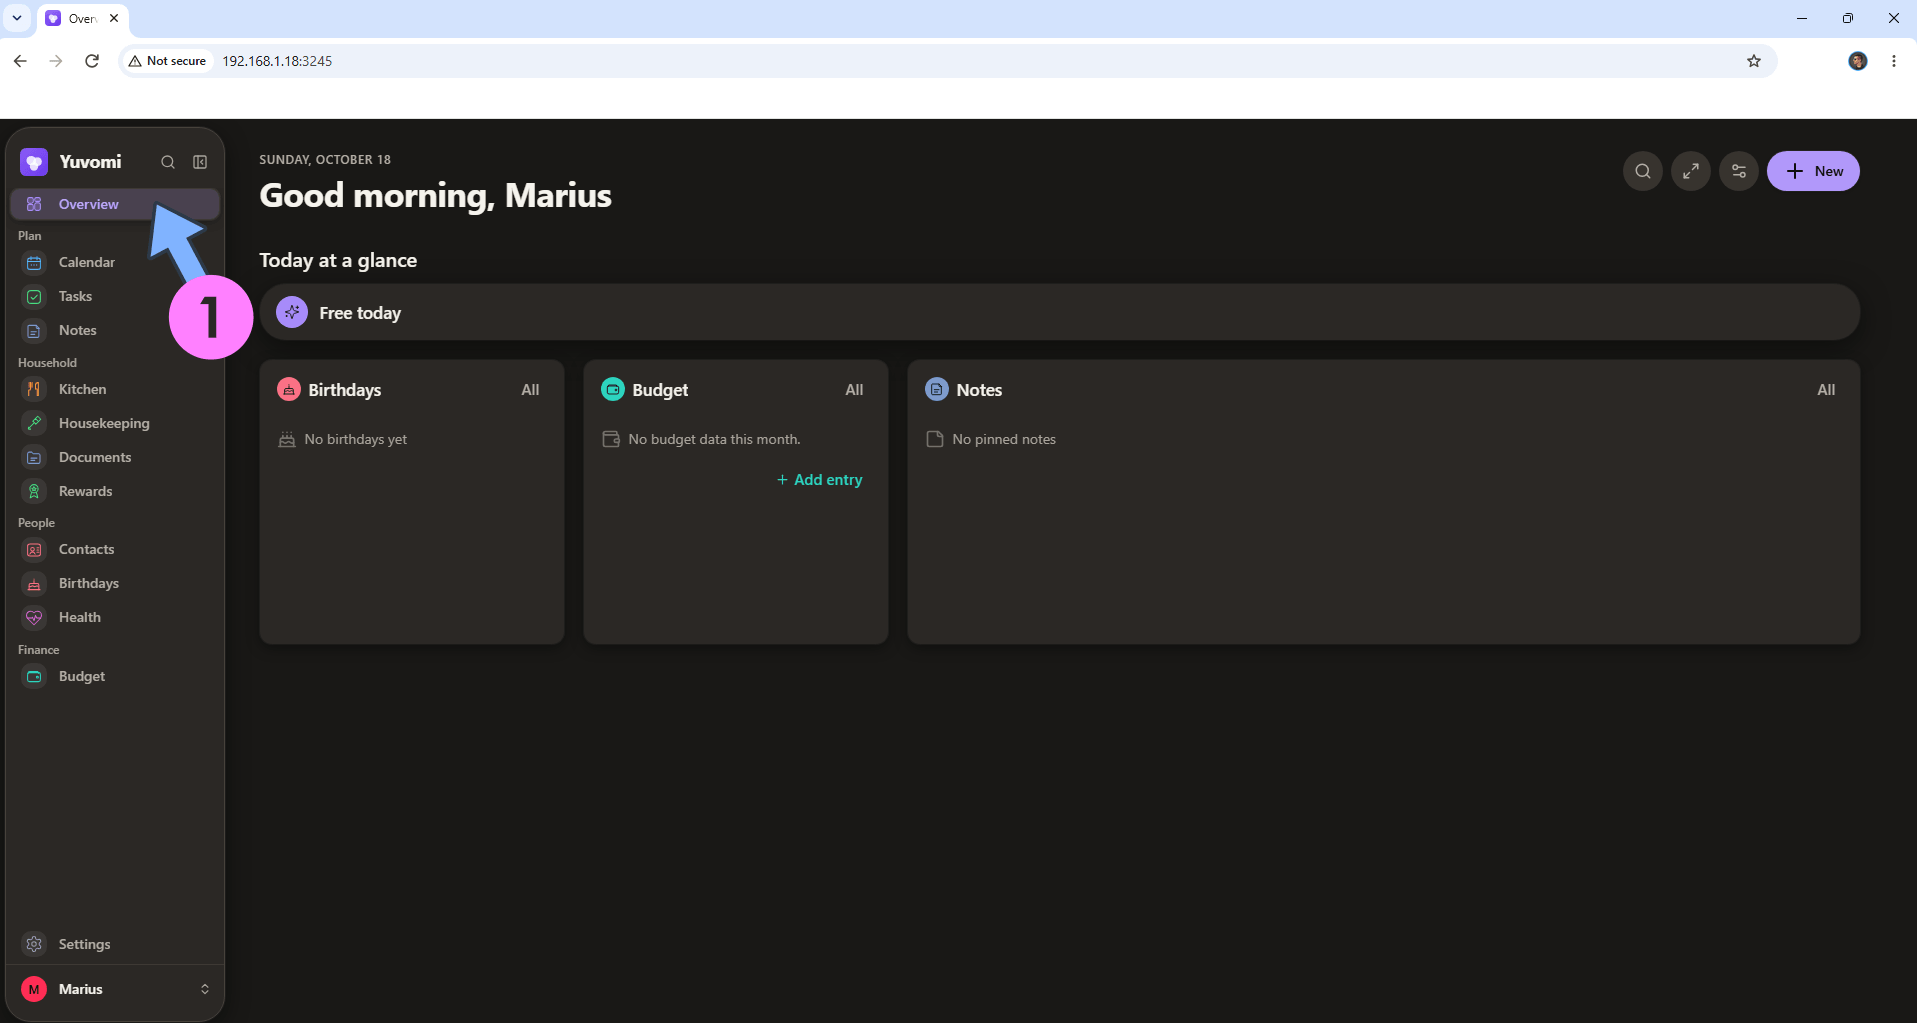
Your Yuvomi dashboard at a glance!
Enjoy Yuvomi!
🆘TROUBLESHOOTING
If you encounter issues by using this container, make sure to check out the Common Docker issues article.
Note: If you want to run the Yuvomi container over HTTPS, check How to Run Docker Containers Over HTTPS. In order to make Yuvomi work via HTTPS, it’s mandatory to activate WebSocket.
Note: Can I run Docker on my Synology NAS? See the supported models.
Note: How to Back Up Docker Containers on your Synology NAS.
Note: Find out how to update the Yuvomi container with the latest image.
Note: How to Free Disk Space on Your NAS if You Run Docker & Dockhand.
Note: How to Schedule Start & Stop For Docker Containers.
Note: How to Activate Email Notifications.
Note: How to Add Access Control Profile on Your NAS.
Note: How to Change Docker Containers Restart Policy.
Note: How to Use Docker Containers With VPN.
Note: Convert Docker Run Into Docker Compose.
Note: How to Clean Docker.
Note: How to Clean Docker Automatically.
Note: Best Practices When Using Docker and DDNS.
Note: Some Docker Containers Need WebSocket.
Note: Find out the Best NAS Models For Docker.
Note: Activate Gmail SMTP For Docker Containers.
This post was updated on Monday / October 19th, 2026 at 12:25 AM