Some Docker containers like Portainer, Home Assistant Supervisor, Stirling-PDF, Odoo, Mealie, TeslaMate, Photonix, Obsidian, Pi-Hole, OrangeHRM, Petio, Plex, Plex Hardware Transcoding, OnlyOffice, tinyMediaManager, Immich, Mattermost, PhotoPrism, Reduced, Rocket.Chat, Documize, Hemmelig, ThingsBoard, WatchYourLAN, SolidInvoice, CloudBeaver, Home Assistant, Home Assistant Supervisor, Uptime Kuma, Planka, Firefox, Shellngn, Audiobookshelf, NocoDB, Calibre, Monica, Wallabag, Scrypted, Sshwifty, Focalboard, Hoppscotch, Minecraft Bedrock, Minecraft Java (Not All) need WebSocket activation in order to work over an HTTPS connection (Reverse Proxy).
What is WebSocket? A WebSocket is a persistent connection between a client and server. WebSockets provide a bidirectional, full-duplex communications channel that operates over HTTP through a single TCP/IP socket connection. At its core, the WebSocket protocol facilitates message passing between a client and server.
Today, I will teach you how to activate WebSocket on some of your Docker Containers that need it.
STEP 1
Please Support My work by Making a Donation.
STEP 2
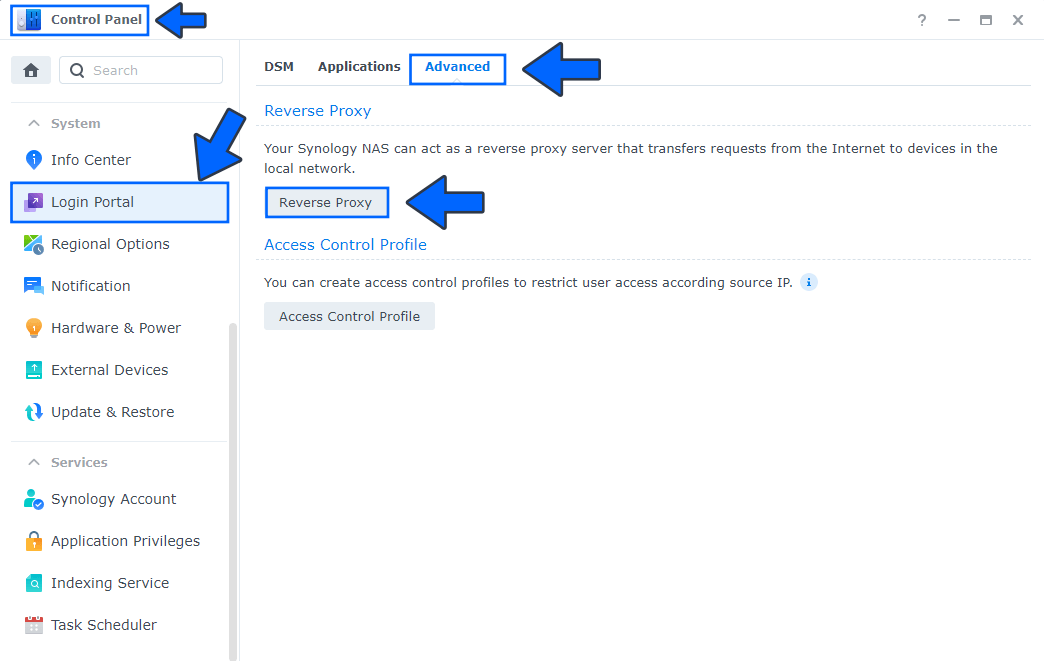
Go to Control Panel / Login Portal / Advanced / Reverse Proxy. Follow the instructions in the image below:

STEP 3
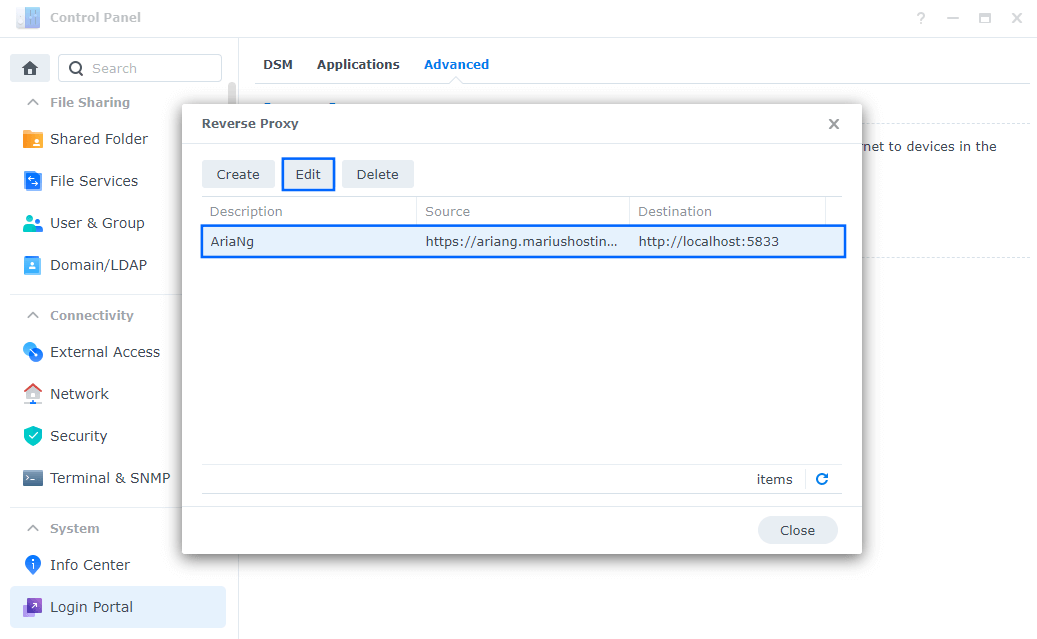
Select your Reverse Proxy, then click the Edit tab. Follow the instructions in the image below.

STEP 4
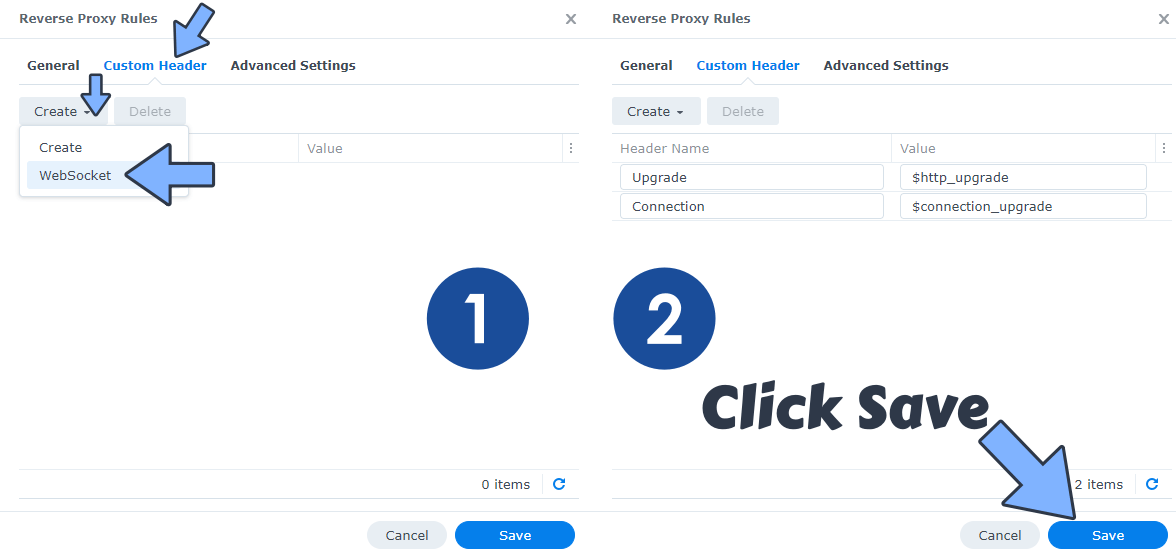
On the Reverse Proxy Rules, click the Custom Header tab. Click Create and then, from the drop-down menu, click WebSocket. After you click on WebSocket, two Header Names and two Values will be automatically added. Click Save. Follow the instructions in the image below.

Note: From now on, your Docker containers that need WebSocket in order to function over HTTPS will work.
This post was updated on Wednesday / August 27th, 2025 at 12:23 AM
