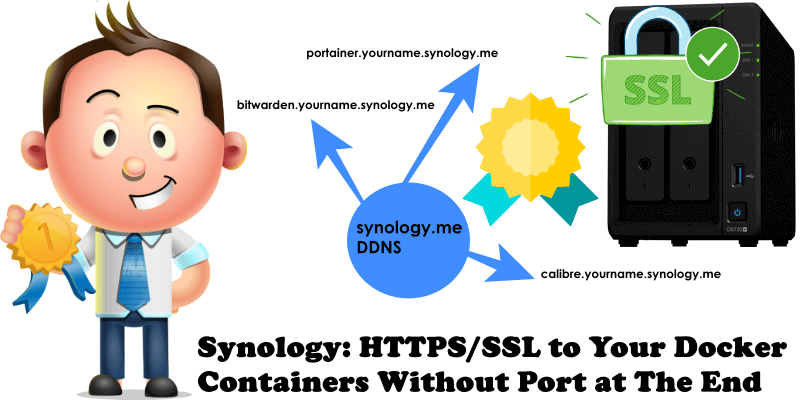
You all loved my series of articles on how to use an HTTPS/SSL certificate to secure your Docker containers and make them accessible from anywhere, like my article Synology: How to Allow BitWarden to Work Over an HTTPS Connection. And, to continue the series, today I have a new and exciting guide that many of you have been requesting for some time: how to remove the port number at the end of your DDNS synology.me address, for example, :5152. Today I will teach you how to add a custom Subdomain to your synology.me DDNS and use a different one for each of your containers, without worrying about remembering the final port number. Definitely a guide that you will find extremely useful and will surely help make your experience with Synology NAS devices even more exciting.
Remember this is a premium article and your support is appreciated.
STEP 1
Please Support My work by Making a Donation.
STEP 2
Follow my step by step guide on how to activate your synology.me DDNS on DSM 7
Follow my step by step guide on how to activate your synology.me DDNS on DSM 6.2.4
Note: If you already own a synology.me DDNS, skip this STEP.
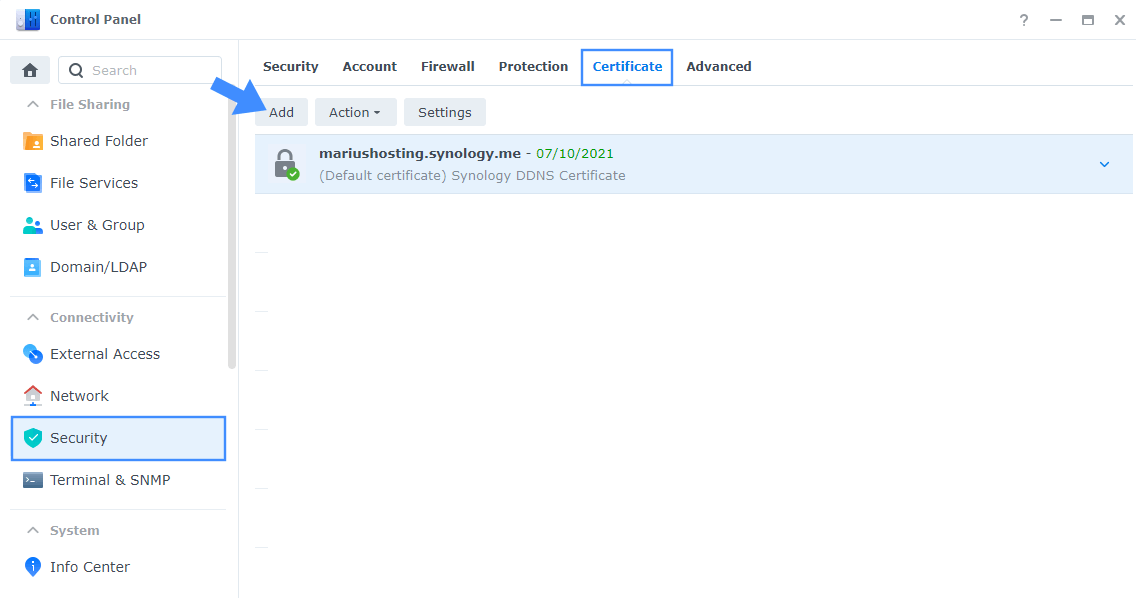
STEP 3
Go to Control Panel / Security / Certificate then click the Add tab. Follow the instructions in the image below.
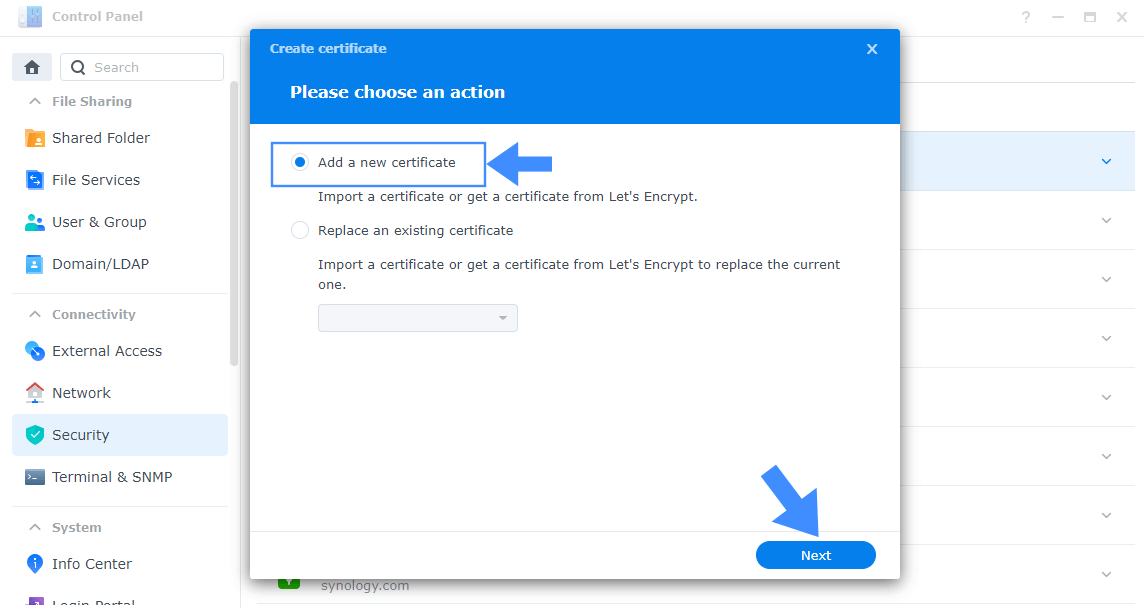
STEP 4
After you click Add on STEP 3 a new pop up window will open. Select Add a new certificate then click Next. Follow the instructions in the image below.
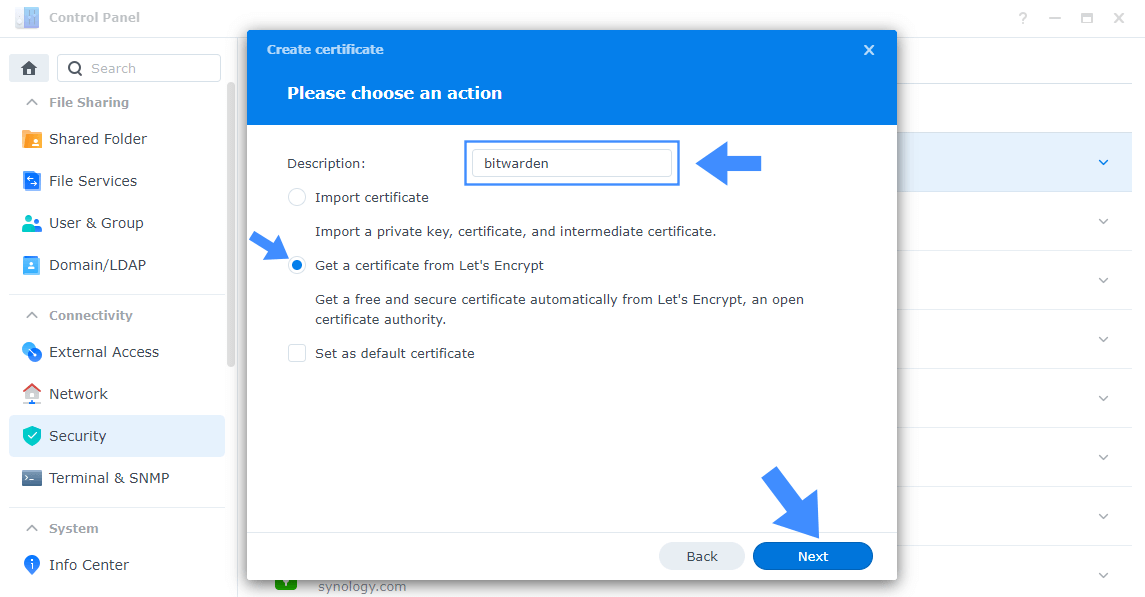
STEP 5
After you click Next, select a Description for your certificate. I choose “bitwarden” because I will be using this certificate for my Bitwarden container. Select Get a certificate from Let’s Encrypt then click Next. Follow the instructions in the image below.
STEP 6
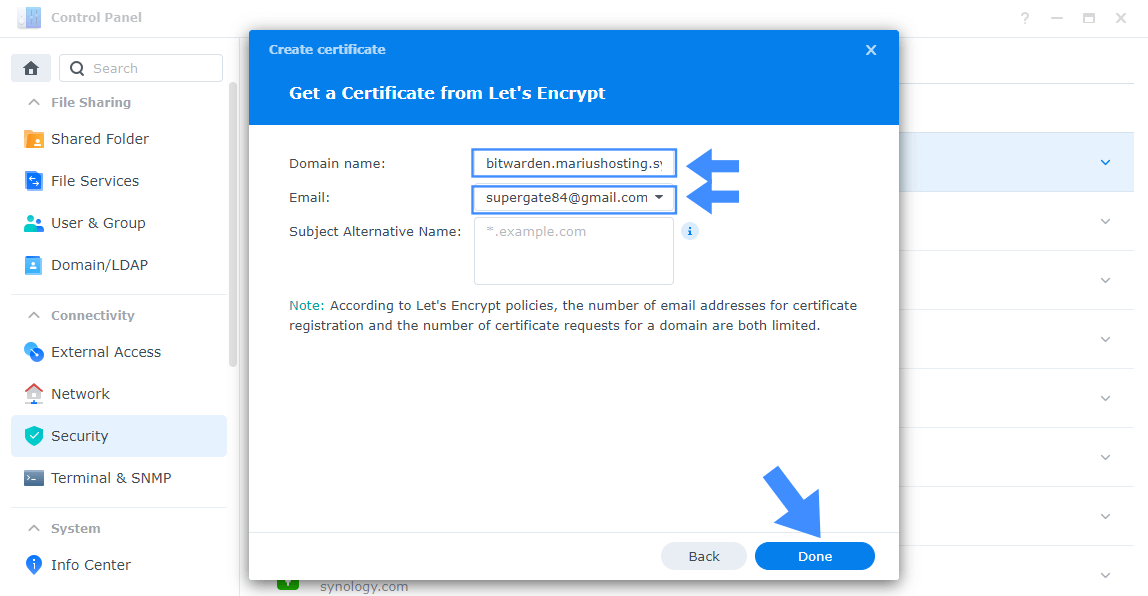
After you click Next, on the Domain name area, type in bitwarden.yourname.synology.me or the description name you have previously chosen at STEP 5. Type in your email in the Email area, then click Done. Follow the instructions in the image below.
STEP 7
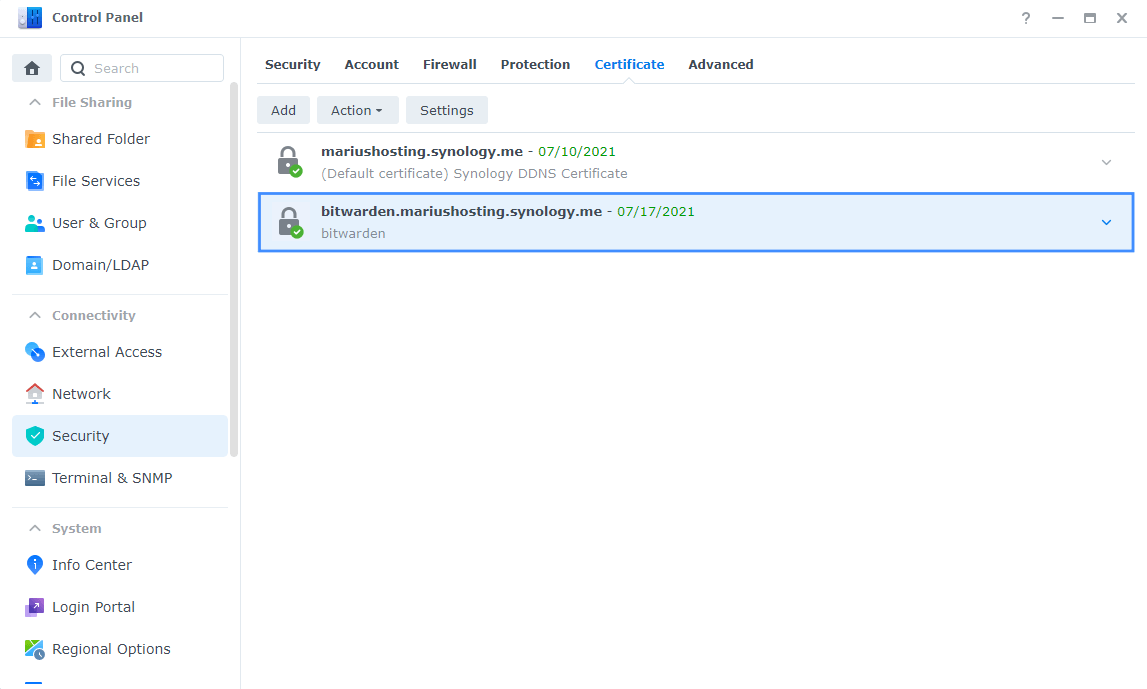
After you click Done, you will have to wait a few seconds for your new certificate to be created. If everything goes right, you will see your new certificate in the Certificate area.
Note: If you fail to create a new certificate try to create a new certificate using your http://yournasip:5000 instead using the https connection.
STEP 8
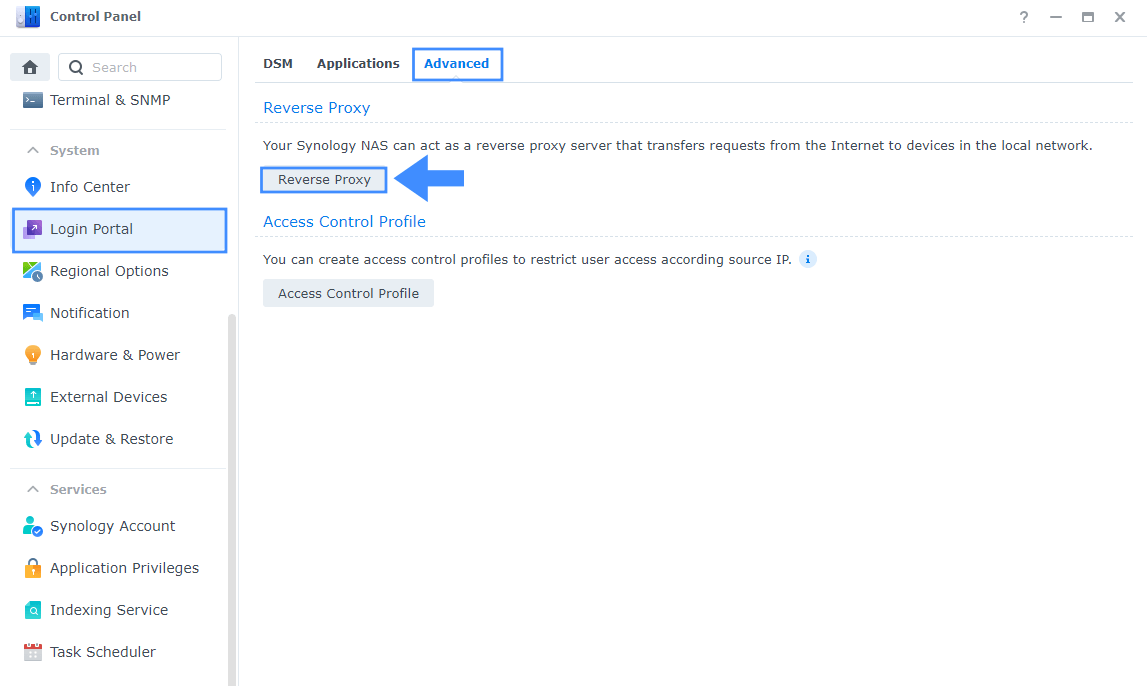
Go to Control Panel / Login Portal / Advanced Tab / click Reverse Proxy. Follow the instructions in the image below.
STEP 9
Now click the “Create” button. Follow the instructions in the image below.

STEP 10
After you click the Create button, the window below will open. Follow the instructions in the image below.
On General area, set the Reverse Proxy Name description: type in Bitwarden or the Description you have already chosen at STEP 5. After that, add the following instructions:
Source:
Protocol: HTTPS
Hostname: bitwarden.yourname.synology.me
Port: 443
Check Enable HSTS
Destination:
Protocol: HTTP
Hostname: localhost
Port: 5151 (Read the Note)
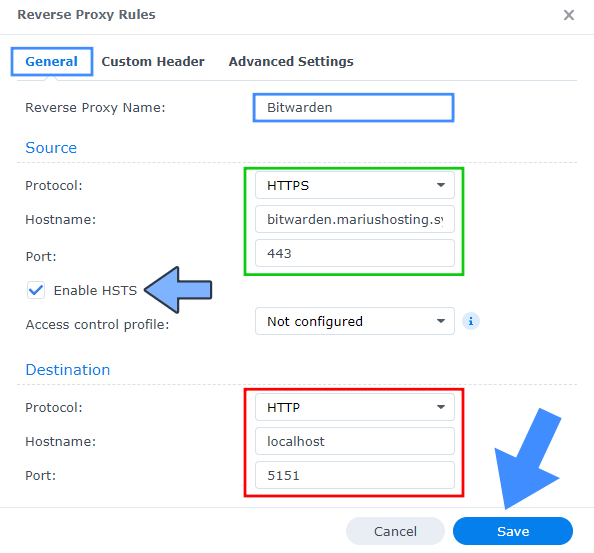
Note: Under Destination, the localhost port will vary depending on the port you used to create your container. This port can vary from container to container. For example, my Bitwarden container is running in localhost on port 5151.
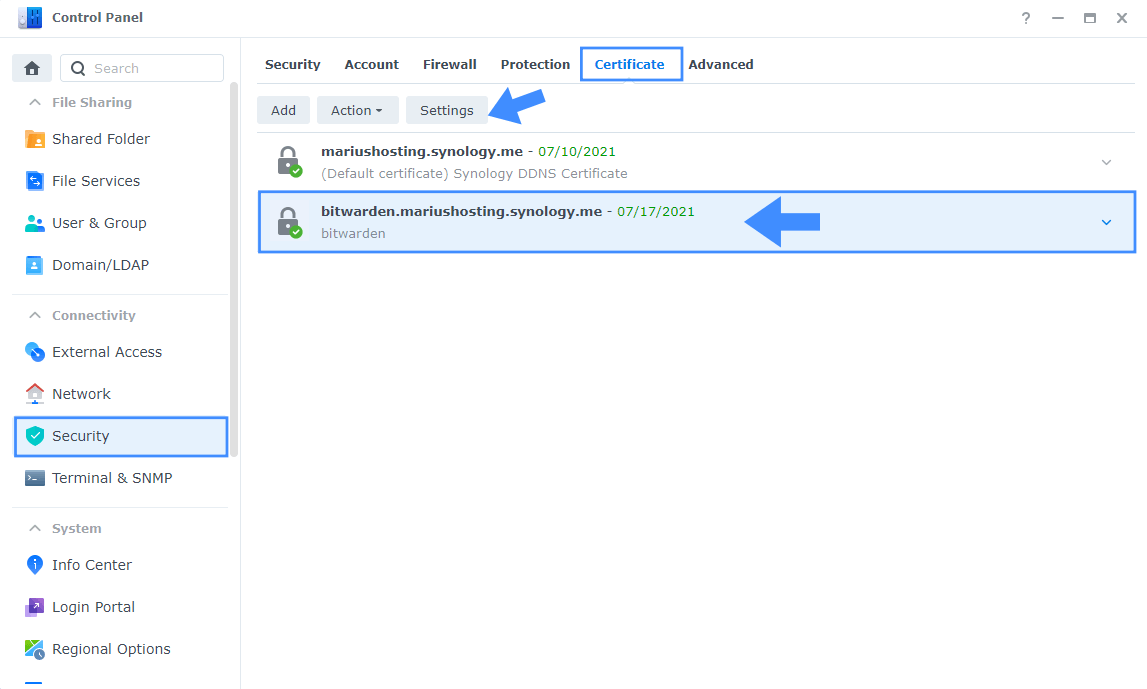
STEP 11
Go to Control Panel / Security / Certificate / Select the certificate you have previously created at STEP 7, then click Settings. Follow the instructions in the image below.
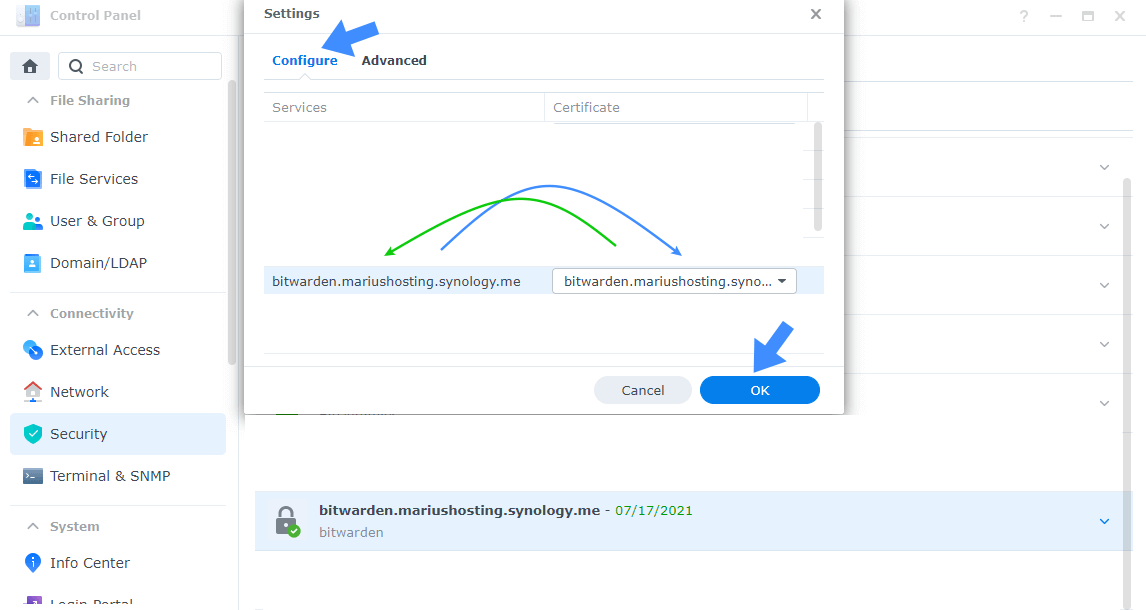
STEP 12
Your new certificate should be mirroring. Select your Certificate and, from the dropdown menu, select your Certificate again, then click OK. Follow the instructions in the image below.
STEP 13
🟢Please Support My work by Making a Donation. Almost 99,9% of the people that install something using my guides forget to support my work, or just ignore STEP 1. I’ve been very honest about this aspect of my work since the beginning: I don’t run any ADS, I don’t require subscriptions, paid or otherwise, I don’t collect IPs, emails, and I don’t have any referral links from Amazon or other merchants. I also don’t have any POP-UPs or COOKIES. I have repeatedly been told over the years how much I have contributed to the community. It’s something I love doing and have been honest about my passion since the beginning. But I also Need The Community to Support me Back to be able to continue doing this work.
STEP 14
Now open your browser and type in your HTTPS/SSL certificate, in my case https://bitwarden.mariushosting.synology.me
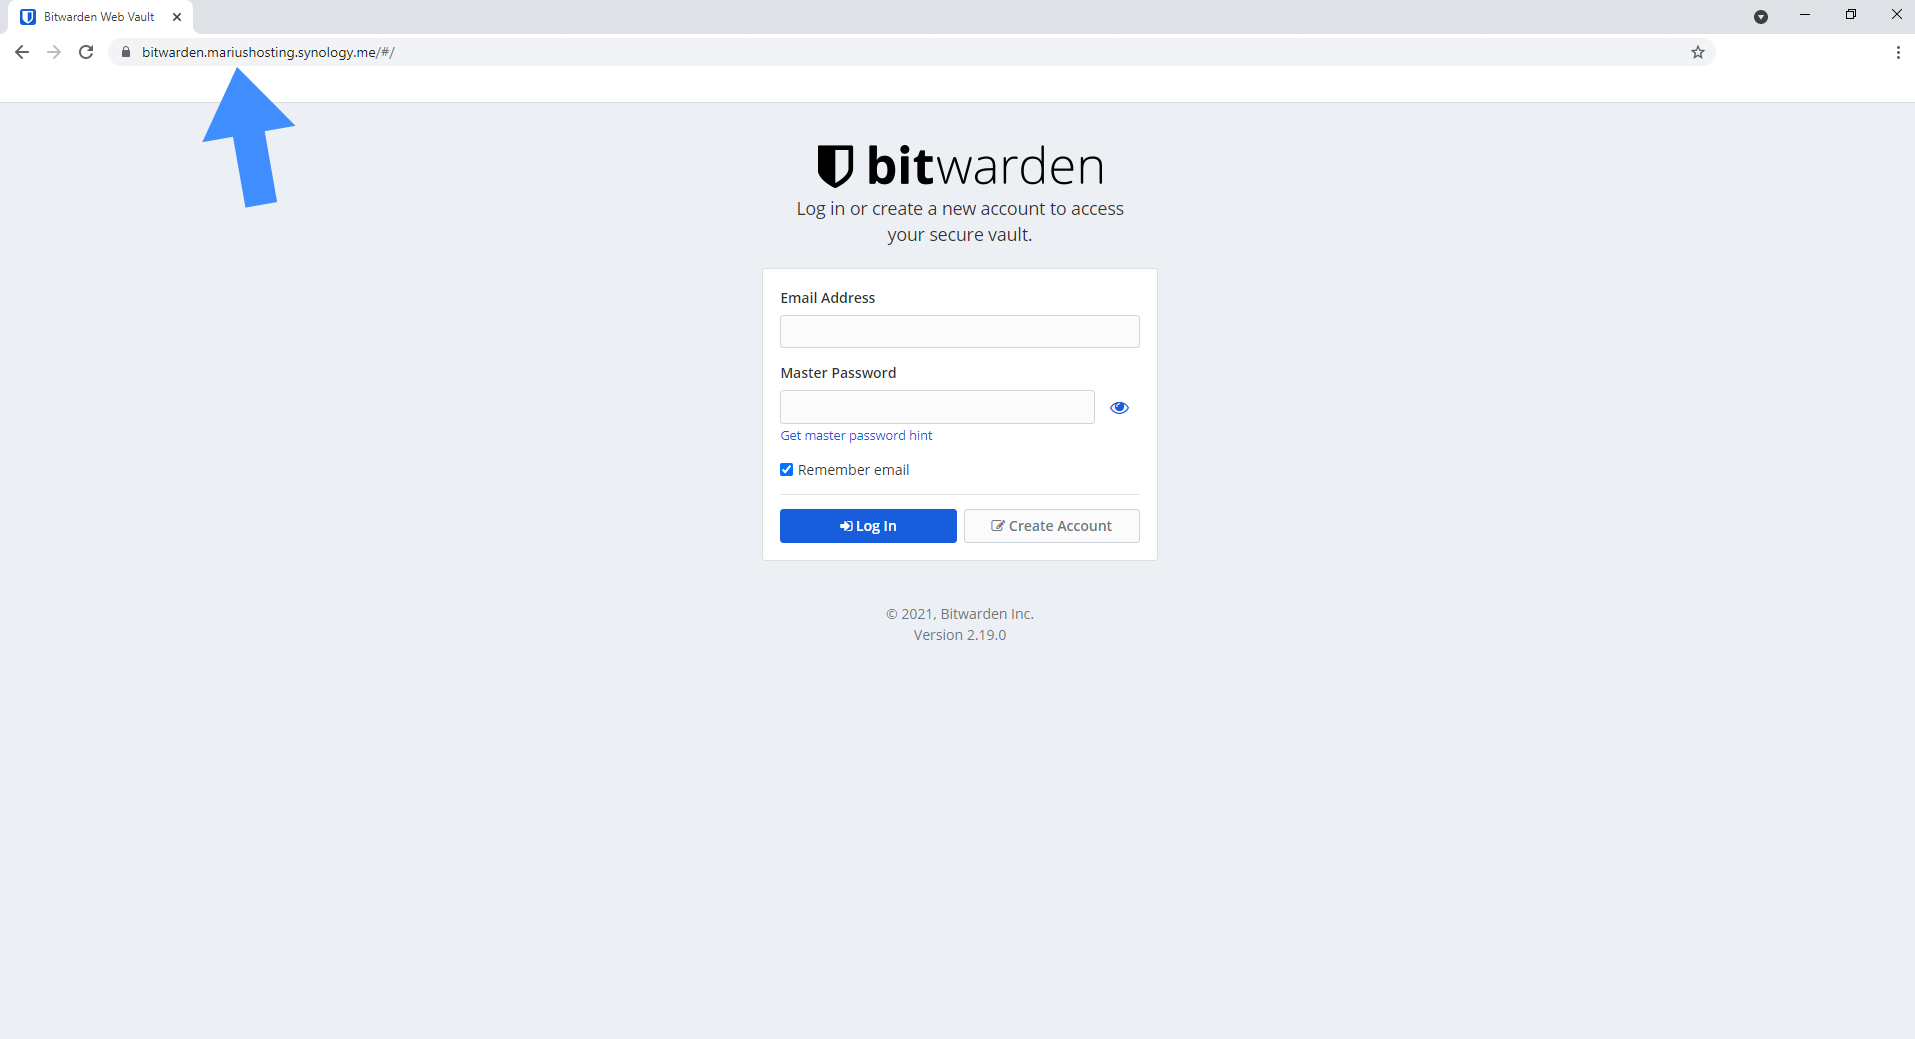
Note: In the browser address bar don’t forget to add https:// before the link.
STEP 15
STEP 16
Synology DSM 7: Access synology.me without Port :5001
Enjoy!
Note: This guide can be applied to all Synology NAS Docker Containers for which you want to use HTTPS/SSL.
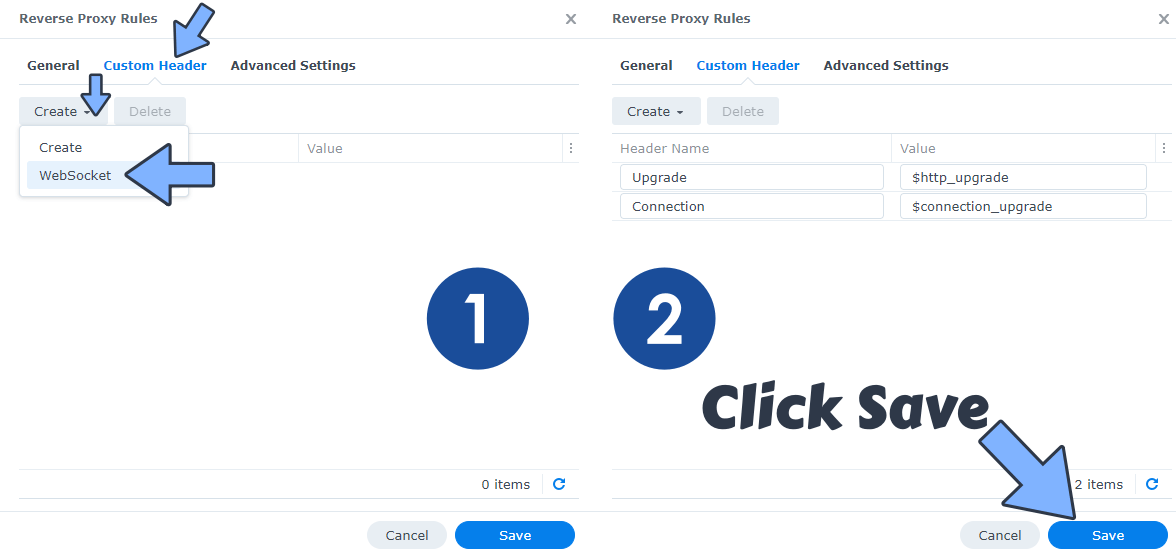
Note: Some Docker containers like Home Assistant (Not All) need WebSocket activation in order to work over an HTTPS connection. To do this, go to Control Panel / Login Portal / select your Reverse Proxy then click the Custom Header tab. Click Create and then, from the drop-down menu, click WebSocket. After you click on WebSocket, two Header Names and two Values will be automatically added. Click Save. Follow the instructions in the image below.
Note: If you don’t want to create new certificate for all your containers you should use my guide on How to Add Wildcard Certificate.
This post was updated on Sunday / August 24th, 2025 at 3:01 PM