I have come to realize that a lot of new Synology NAS users don’t know how to activate the HTTPS protocol. Are you tired of seeing your connection to your Synology NAS in the Chrome, Firefox, Safari etc. address bar is not secure? In this step by step guide I will try to easily explain to you how to enable HTTPS on your Synology NAS so that, instead of connecting through your Synology NAS LAN IP, you will connect to the HTTPS address you choose. The first advantage of this method is that you can connect to your NAS from your office or from a different location and not just from your local network. This guide is intended for users who have installed the new DSM 7.2 operating system.
STEP 1
Please Support My work by Making a Donation.
STEP 2
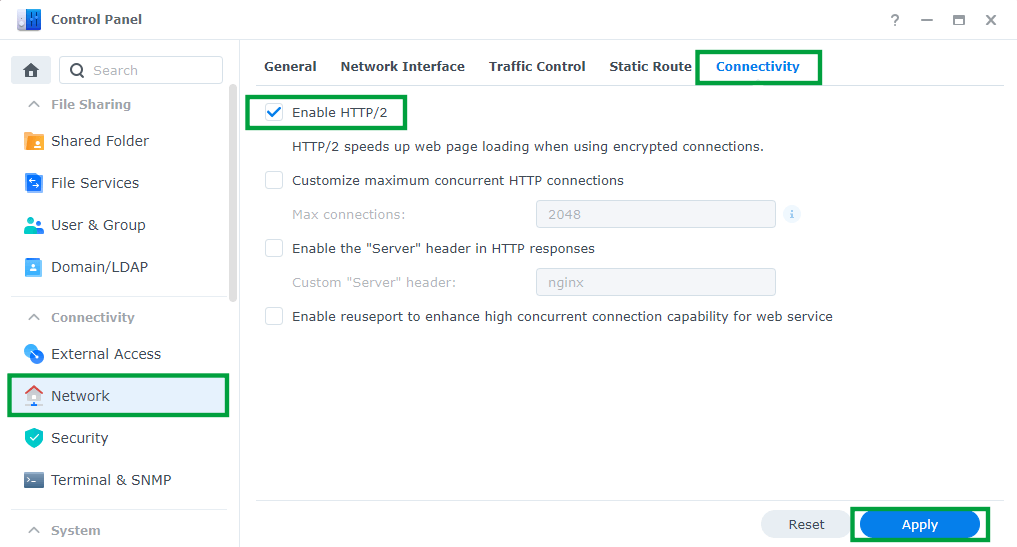
Go to Control Panel / Network / Connectivity / Check Enable HTTP/2 then click Apply. Follow the instructions in the image below.
STEP 3
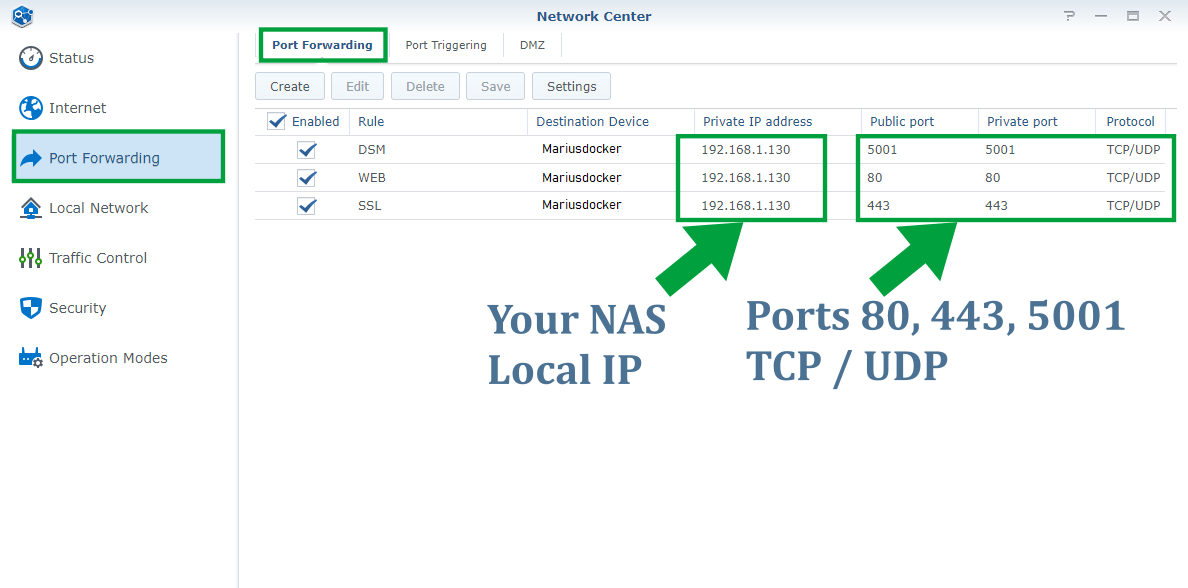
Be sure to open the necessary ports through your router settings, both TCP/UDP. Most people forget to port forward their ports in their router settings. If the ports that point to your Synology NAS device are not opened, all the services you have activated on those specific ports will not work. This is a step overlooked by many but essential for the perfect functioning of HTTPS. All you need to do is give your Synology device permissions on ports 80, 443, 5001, both TCP and UDP. Follow the instructions in the image below and remember that each router has a different design than the one presented in this image below. Currently I’m using a Synology RT6600ax router.
Note: Ports 80 and 443 are mandatory to validate the Let’s Encrypt SSL certificate, while port 5001 is used to connect to your NAS via the HTTPS protocol.
Note: If you want to change your standard DSM port 5001 on DSM 7.2, follow my step by step guide.
Note: UDP Port is not mandatory. Activate only if you can’t get the certificate.
STEP 4
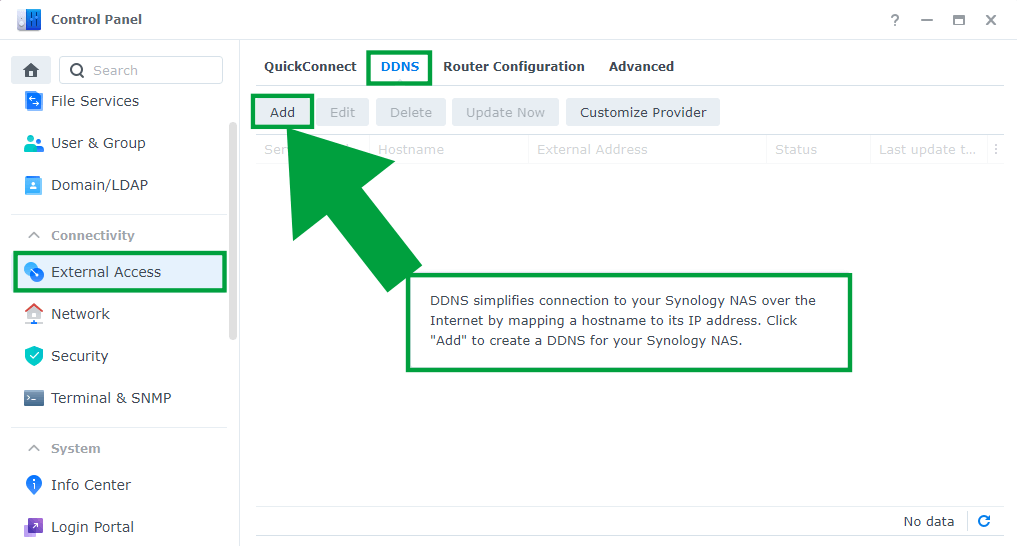
Go to Control Panel / External Access / DDNS / Add. Follow the instructions in the image below.
STEP 5
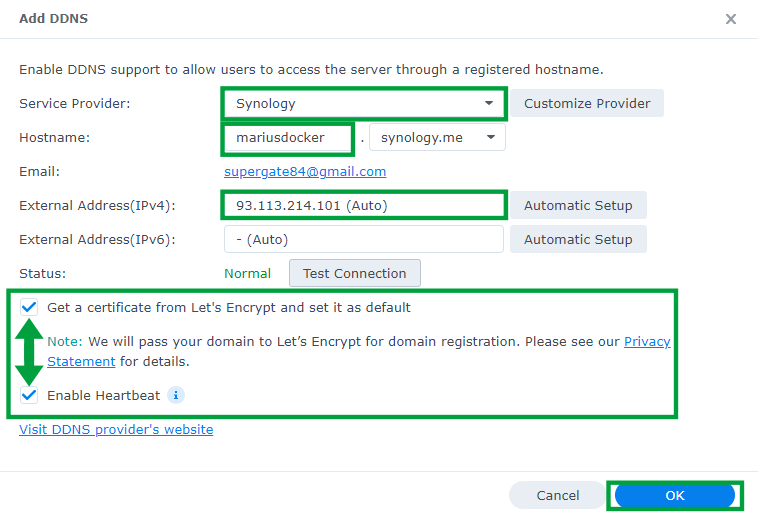
Once you click Add on STEP 4, the DDNS window will open. Select the following:
Service Provider: Synology
Hostname: YourPreferredName.synology.me (for the YourPreferredName you have to choose a name you like, a made-up name). In the image below I have chosen “mariusdocker”.
Email: Your Email (it would be helpful to use the same email you use for your Synology account).
External address(IPv4): Your current IP from your ISP (Internet Service Provider).
Check Get a certificate from Let’s Encrypt and set it as default.
Check Enable Heartbeat.
Click OK.
Note: By enabling Heartbeat, your Synology Account will send notifications to you when the connection is down. For example, if you lose your Internet connection or if you shut down your router.
Note: Dynamic DNS keeps DNS records automatically up to date when an IP address changes. So if you have a Dynamic IP released by your ISP (Internet Service Provider) and it changes, you don’t have to do anything because Synology will automatically take care of the issue and update your IPv4 IP automatically.
Note: You can choose between different Synology Hostnames.
STEP 6
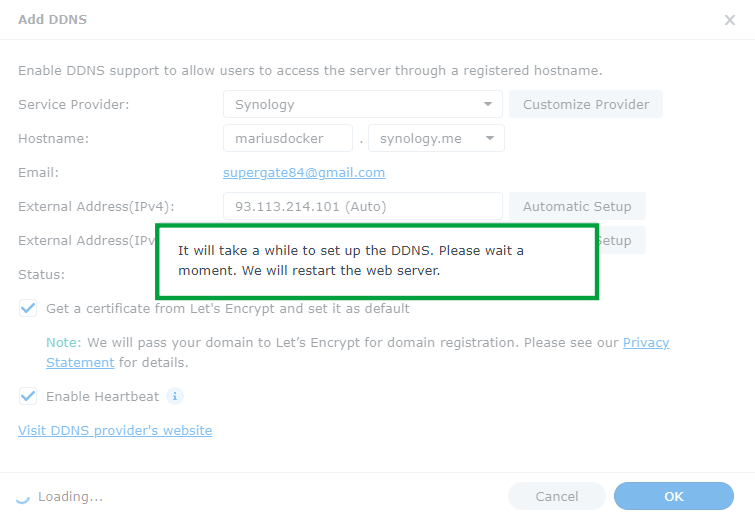
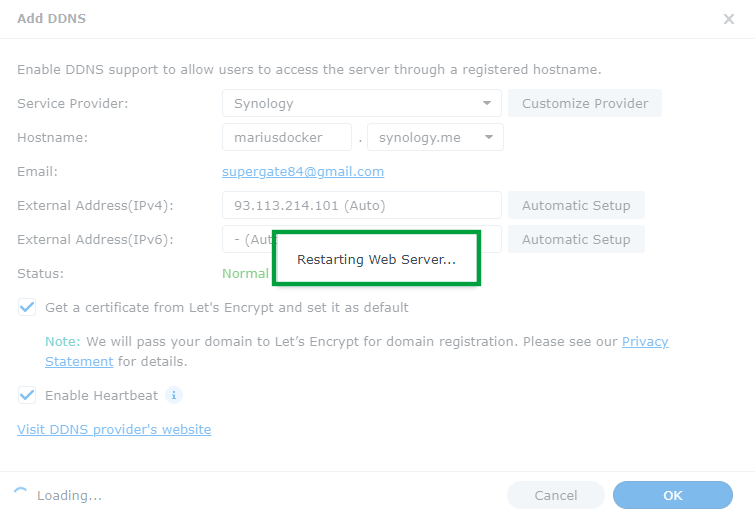
Once you click OK on STEP 5, you will see a message that informs you that: It will take a while to set up the DDNS. Please wait a moment. We will restart the web server. In my experience, you need to wait about 1 minute for the operation to be completed.
STEP 7
If everything went as it should, you should see “Normal” on the DDNS Status.

STEP 8
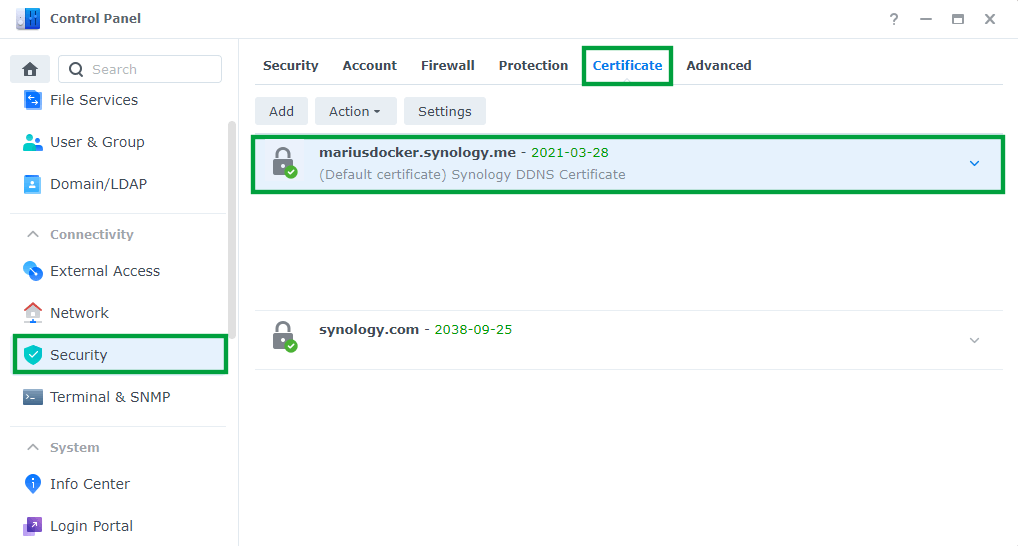
If everything went as it should, you should see your Let’s encrypt certificate for your new synology.me domain name under Control Panel / Security / Certificate.
STEP 9
With this free online tool, you can check if your ports 80, 443 and 5001 are 🟩opened and not 🟥closed. If they are closed, you should check your port forwarding settings at STEP 3 again until they are marked as opened.
STEP 10
🟢Please Support My work by Making a Donation. Almost 99,9% of the people that install something using my guides forget to support my work, or just ignore STEP 1. I’ve been very honest about this aspect of my work since the beginning: I don’t run any ADS, I don’t require subscriptions, paid or otherwise, I don’t collect IPs, emails, and I don’t have any referral links from Amazon or other merchants. I also don’t have any POP-UPs or COOKIES. I have repeatedly been told over the years how much I have contributed to the community. It’s something I love doing and have been honest about my passion since the beginning. But I also Need The Community to Support me Back to be able to continue doing this work.
STEP 11
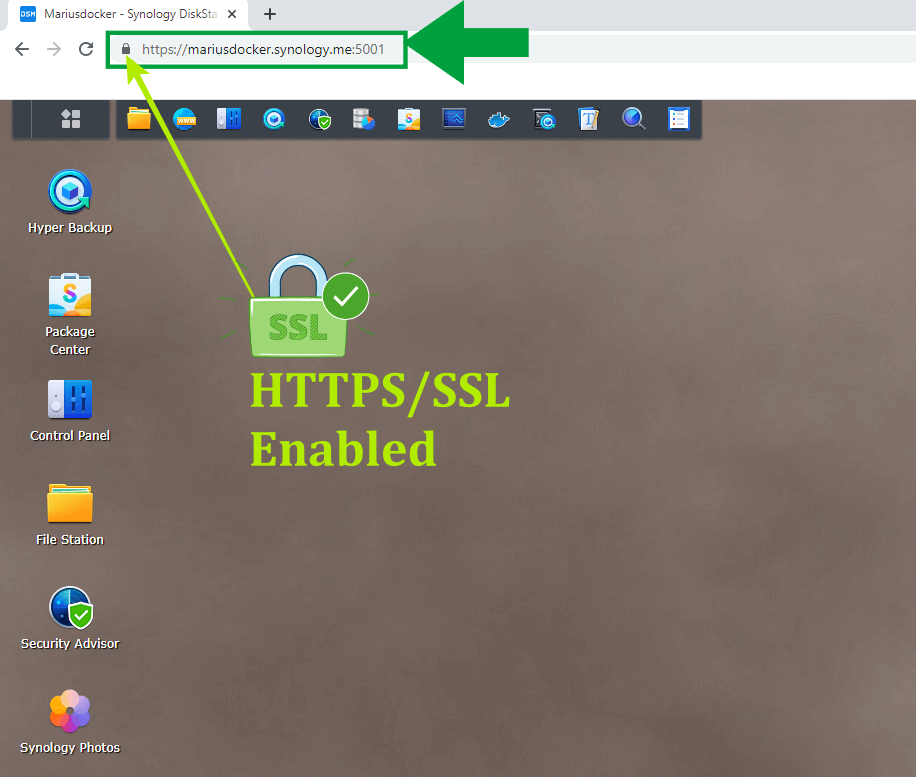
Now type https://YourPreferredName.synology.me:5001 in your Browser and press Enter. You should now see your Synology NAS connecting to DSM using HTTPS. If you experience any issues, just delete your browser cache or try to use a different browser. If you still have problems, don’t hesitate to contact Marius!
Note: How to Add Wildcard Certificate For Subdomains in DSM 7.
Note: Find out how to Access synology.me Without port :5001 at the end
Note: Change Port 5000 and 5001.
Note: Dynamic DNS keeps DNS records automatically up to date when an IP address changes. So if you have a Dynamic IP released by your ISP (Internet Service Provider) and it changes, you don’t have to do anything because Synology will automatically take care of the issue and update your IPv4 IP automatically.
Note: You can only set one hostname for each DDNS provider. For example, only one synology.me DDNS, only one FreeDNS DDNS etc.
Note: Find out how to enable HTTPS on DSM 6.2.4
Note: Read why you can you access your Synology NAS via DDNS address from outside your local network, but you can’t access it from within your own network.
This post was updated on Friday / May 2nd, 2025 at 12:34 AM