I have come to realize that a lot of new Synology NAS users don’t know how to activate the HTTPS protocol. Are you tired of seeing your connection to your Synology NAS in the Chrome address bar is not secure? In the step by step guide I will try to explain to you how to enable HTTPS on your Synology NAS so that, instead of connecting through your Synology NAS LAN IP, you will automatically connect to the HTTPS address you choose.
STEP 1
Please Support My work by Making a Donation.
STEP 2
Go to Control Panel / Network / DSM Settings / Check Automatically redirect HTTP connections to HTTPS (Web Station and Photo Station excluded) / Check Enable HTTP/2. Click Apply.

STEP 3
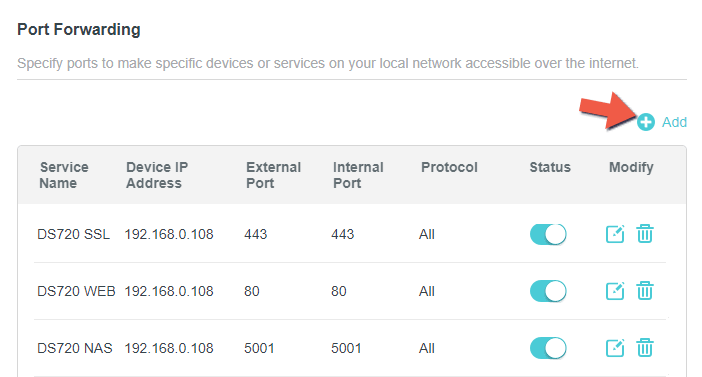
Be sure to open TCP/UDP ports through your router settings. Most people forget to activate port forwarding in their router settings. If the ports that point to your Synology device are not opened, all the services you have activated on those specific ports will not work. This is a step overlooked by many but essential for the perfect functioning of HTTPS. All you need to do is give your Synology device permissions on ports 80, 443, 5001 both TCP-UDP. Follow the instructions in the image below and remember that each router has a different design than the one presented in this image below. Port 80 and 443 are mandatory to validate Let’s Encrypt certificate.
STEP 4
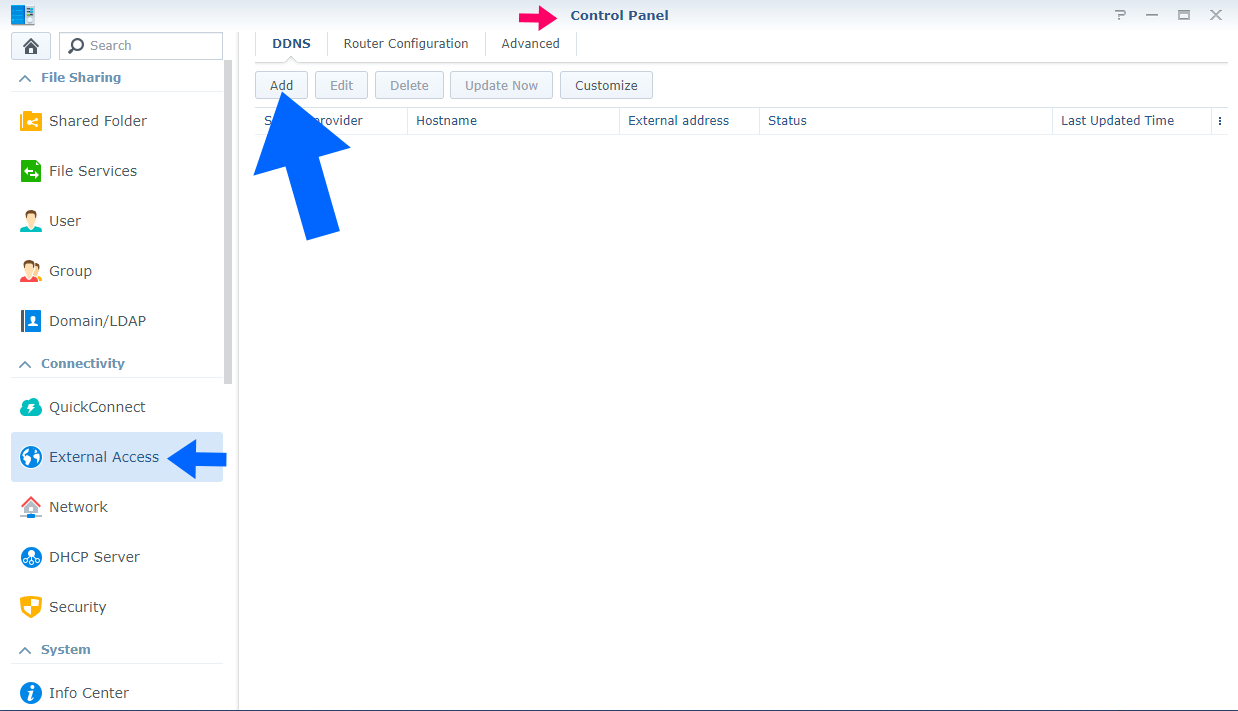
Go to Control Panel / External Access / DDNS / Add. Follow the instructions in the image below.
STEP 5
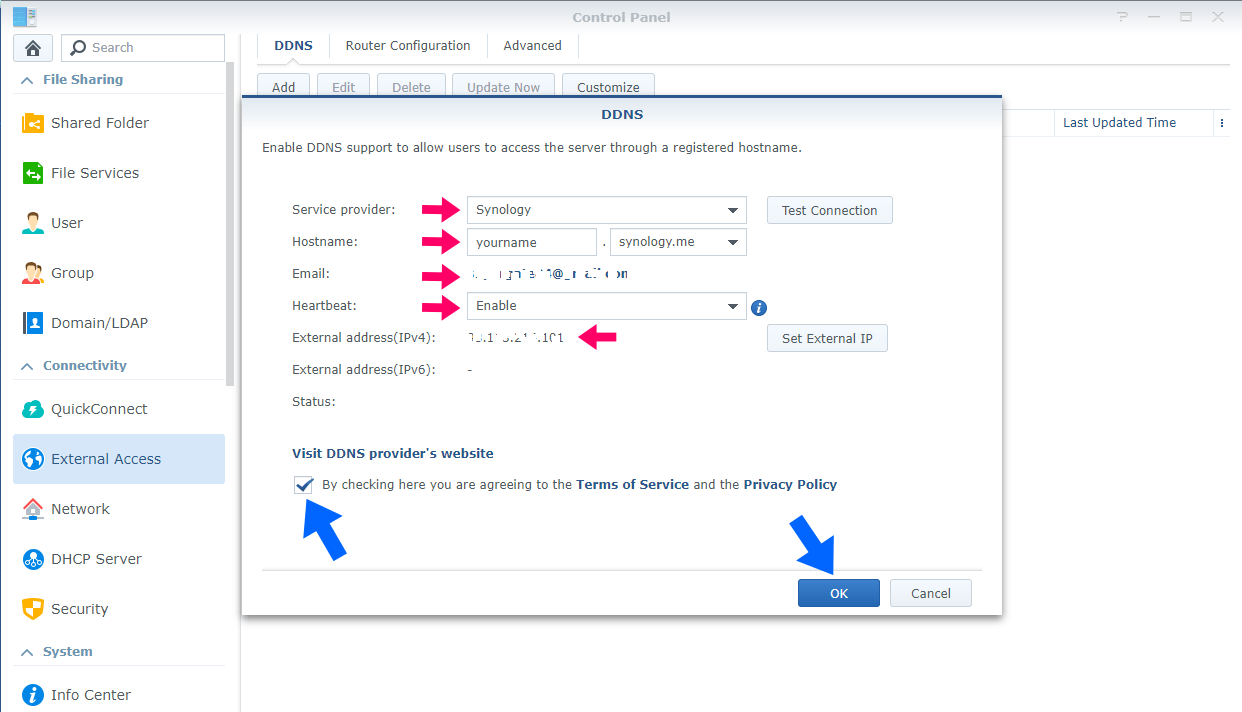
Once the DDNS window is open, select:
Service provider: Synology
Hostname: YourPreferredName.synology.me (for the YourPreferredName you have to choose a name you like, a made-up name).
Email: Your Email
Heartbeat: Enable
External address(IPV4): Your current IP
Check “By checking here you are agreeing to the Terms of Service and the Privacy Policy”, then click OK.
STEP 6
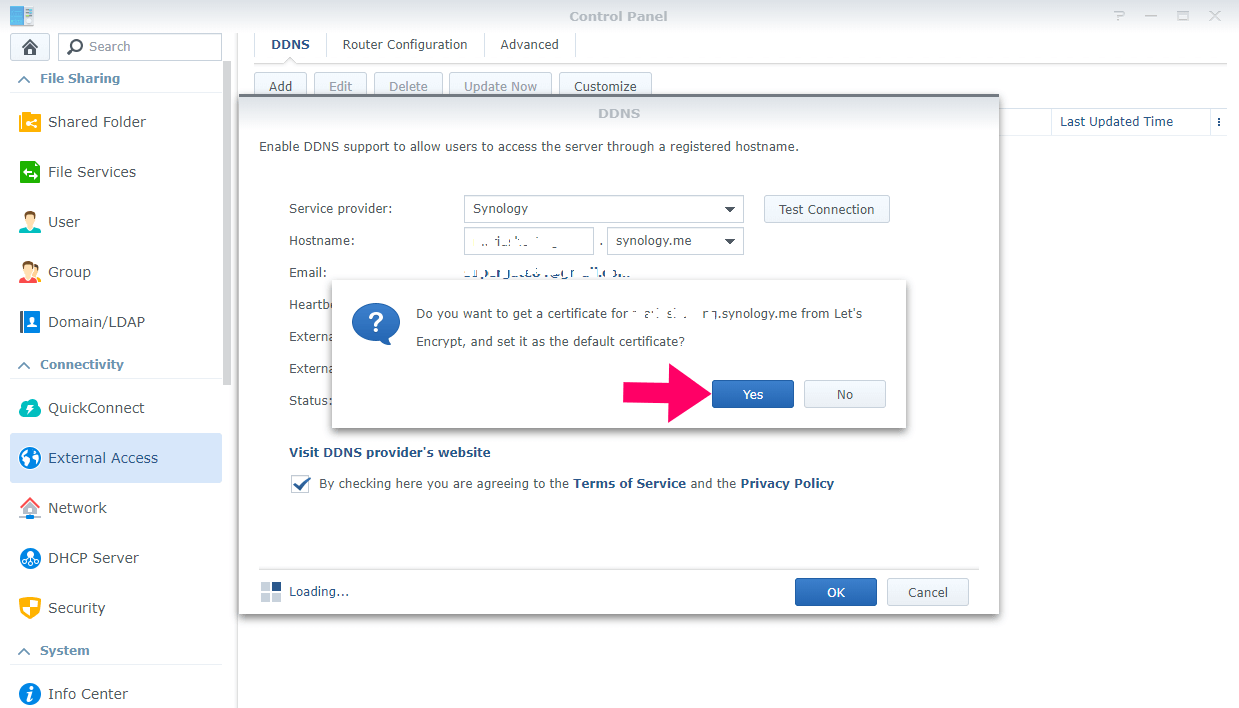
After clicking OK, the following pop-up message will appear: Do you want to get a certificate for YourPreferredName.synology.me from Let’s Encrypt, and set it as the default certificate? Click Yes.
STEP 7
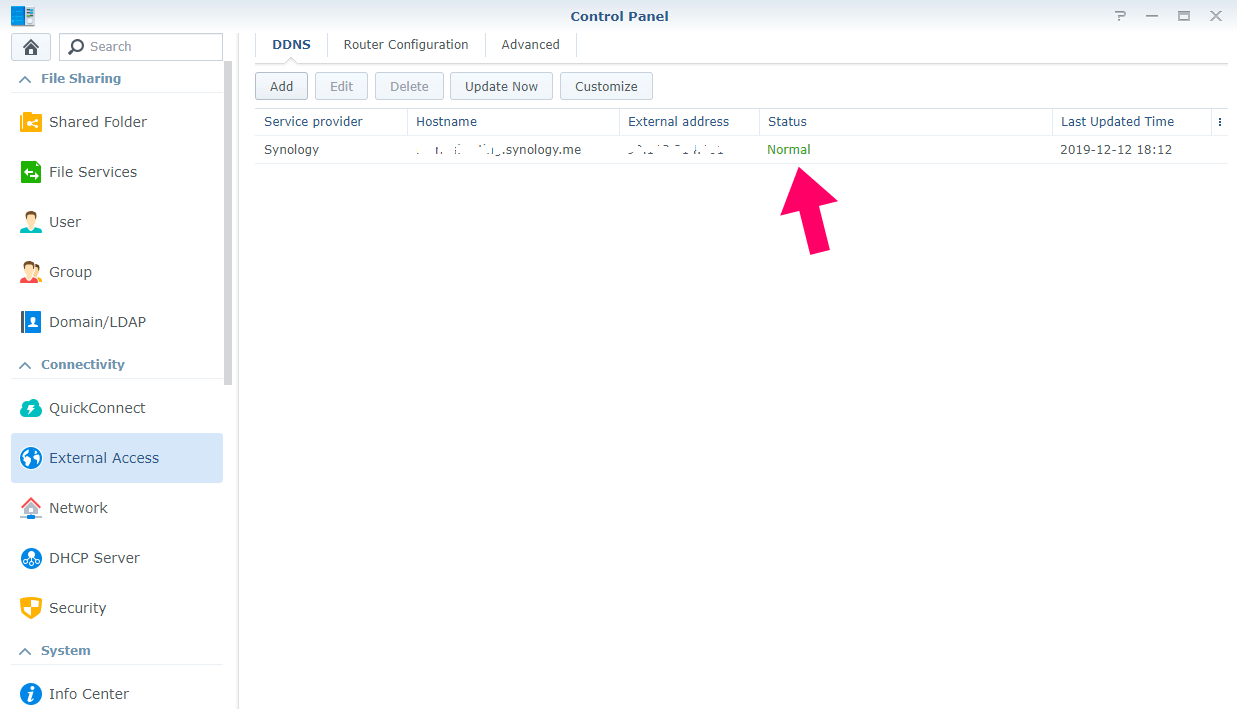
If everything went as it should, you should see “Normal” on the DDNS Status.
STEP 8
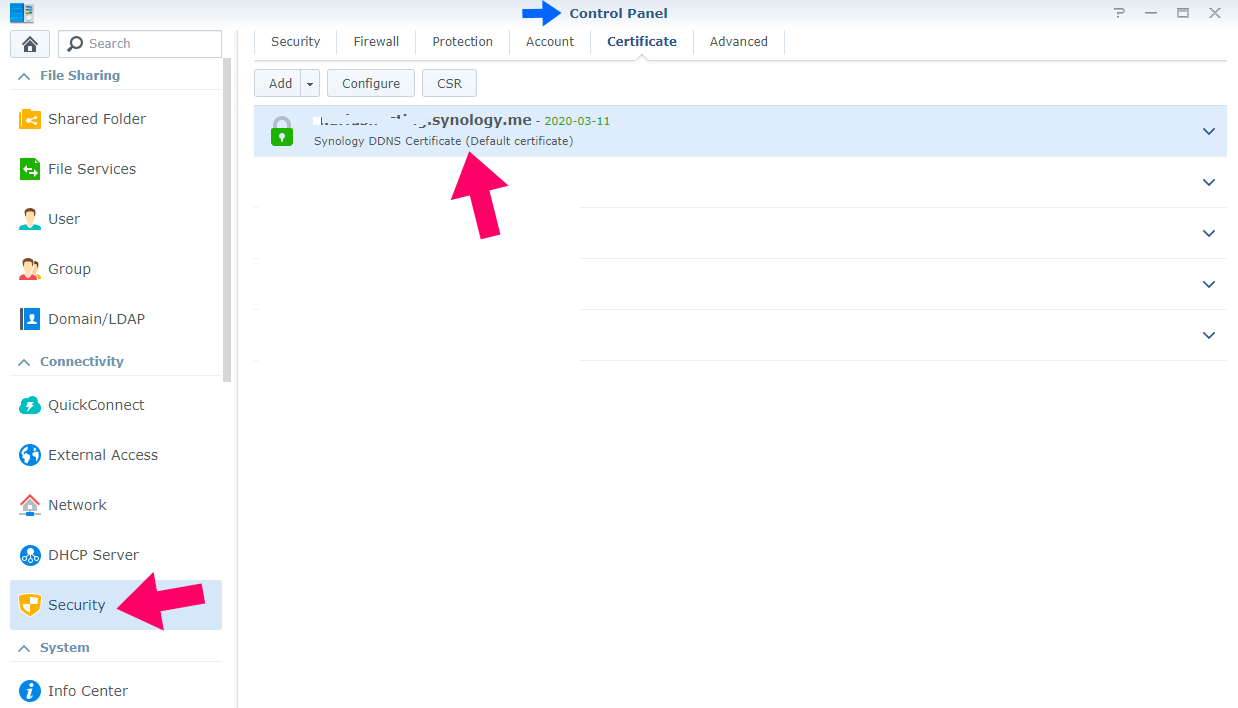
If everything worked, you should see YourPreferredName certificate as Default certificate (in Control Panel / Security / Certificate).
STEP 9
🟢Please Support My work by Making a Donation. Almost 99,9% of the people that install something using my guides forget to support my work, or just ignore STEP 1. I’ve been very honest about this aspect of my work since the beginning: I don’t run any ADS, I don’t require subscriptions, paid or otherwise, I don’t collect IPs, emails, and I don’t have any referral links from Amazon or other merchants. I also don’t have any POP-UPs or COOKIES. I have repeatedly been told over the years how much I have contributed to the community. It’s something I love doing and have been honest about my passion since the beginning. But I also Need The Community to Support me Back to be able to continue doing this work.
Now type https://YourPreferredName.synology.me:5001 into your Browser and press Enter. You should now see your Synology NAS connecting to DSM using HTTPS.
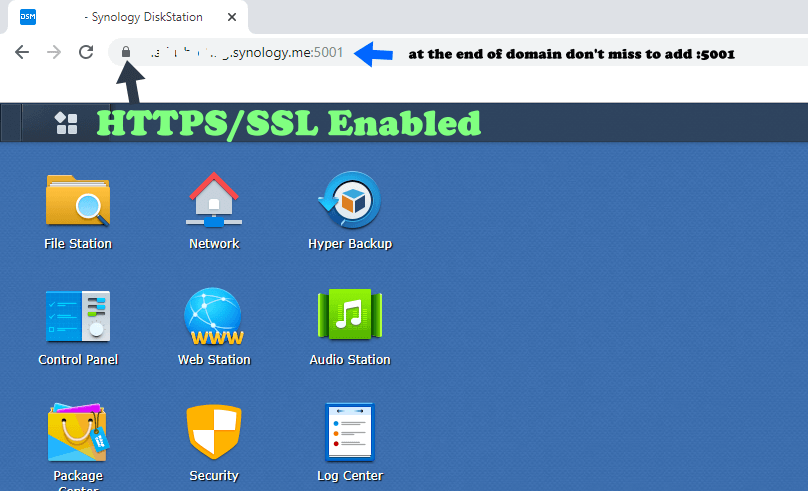
Note: Find out How to Access synology.me Without port :5001 at the End
This post was updated on Sunday / August 24th, 2025 at 2:55 PM