Have you already installed BitWarden using docker on your Synology NAS following my step by step guide? Do you want to log in via HTTPS using your custom domain name even when you are away from home? It’s simple and free. You don’t need to buy domains, you don’t need to look for information elsewhere because here you will find the easy way to do it.
STEP 1
Please Support My work by Making a Donation.
STEP 2
Follow my step by step guide on how to activate your synology.me DDNS on DSM 7
Follow my step by step guide on how to activate your synology.me DDNS on DSM 6.2.4
Note: If you already own a synology.me DDNS, skip this STEP.
STEP 3
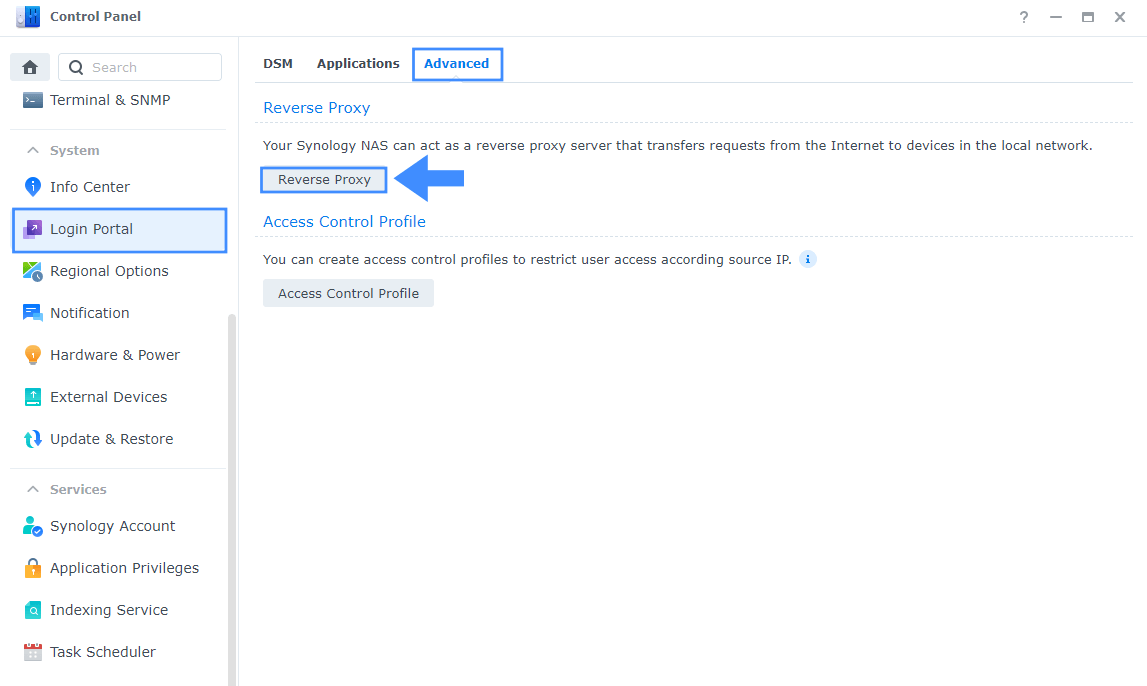
Go to Control Panel / Login Portal / Advanced Tab / click Reverse Proxy. Follow the instructions in the image below.
STEP 4
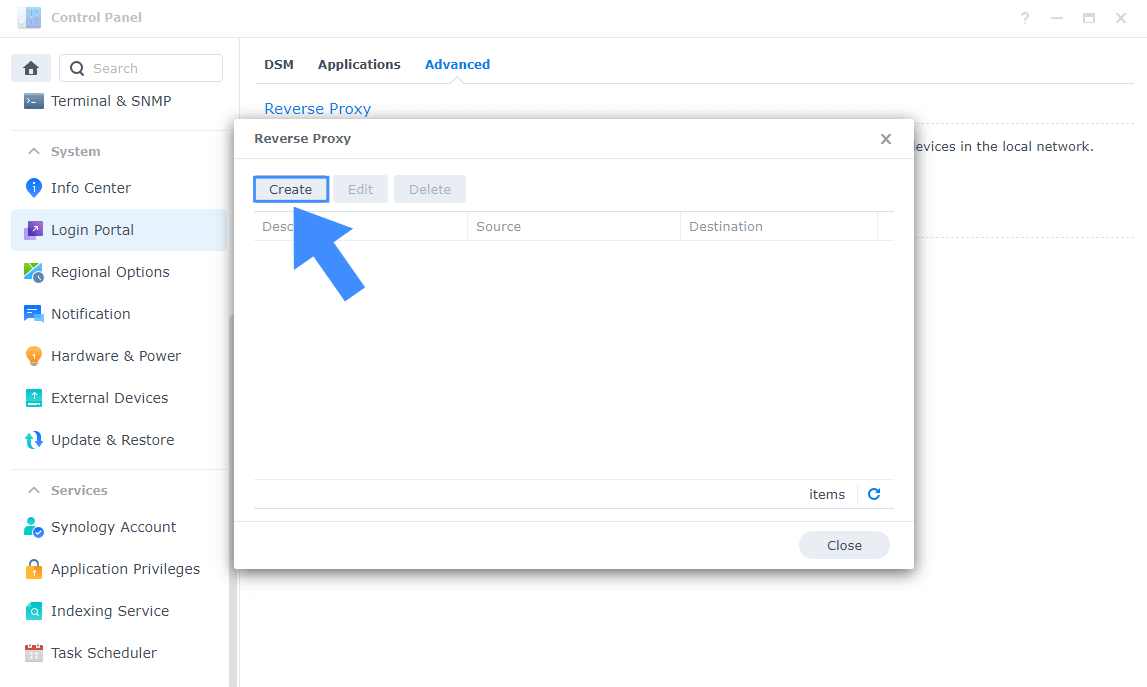
Now click the “Create” button. Follow the instructions in the image below.
STEP 5
After you click the Create button, the window below will open. Follow the instructions in the image below.
On General area, set the Reverse Proxy Name description: type in Bitwarden. After that, add the following instructions:
Source:
Protocol: HTTPS
Hostname: yourname.synology.me
Port: 5152
Destination:
Protocol: HTTP
Hostname: localhost
Port: 5151
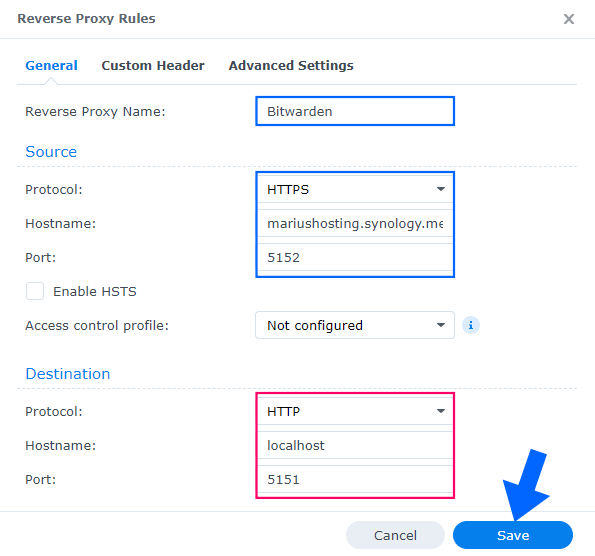
Note: Under Destination, the localhost port will vary depending on the port you used to create your container. This port can vary from container to container. For example, my Bitwarden container is running in localhost on port 5151.
STEP 6
Log into your router and go to the Port Forwarding area. Select your NAS Local IP Address and port forward port 5152 both TCP/UDP. Remember that every router has its own interface design. At the moment I am using a RT2600ac router. Follow the instructions in the image below:

STEP 7
🟢Please Support My work by Making a Donation. Almost 99,9% of the people that install something using my guides forget to support my work, or just ignore STEP 1. I’ve been very honest about this aspect of my work since the beginning: I don’t run any ADS, I don’t require subscriptions, paid or otherwise, I don’t collect IPs, emails, and I don’t have any referral links from Amazon or other merchants. I also don’t have any POP-UPs or COOKIES. I have repeatedly been told over the years how much I have contributed to the community. It’s something I love doing and have been honest about my passion since the beginning. But I also Need The Community to Support me Back to be able to continue doing this work.
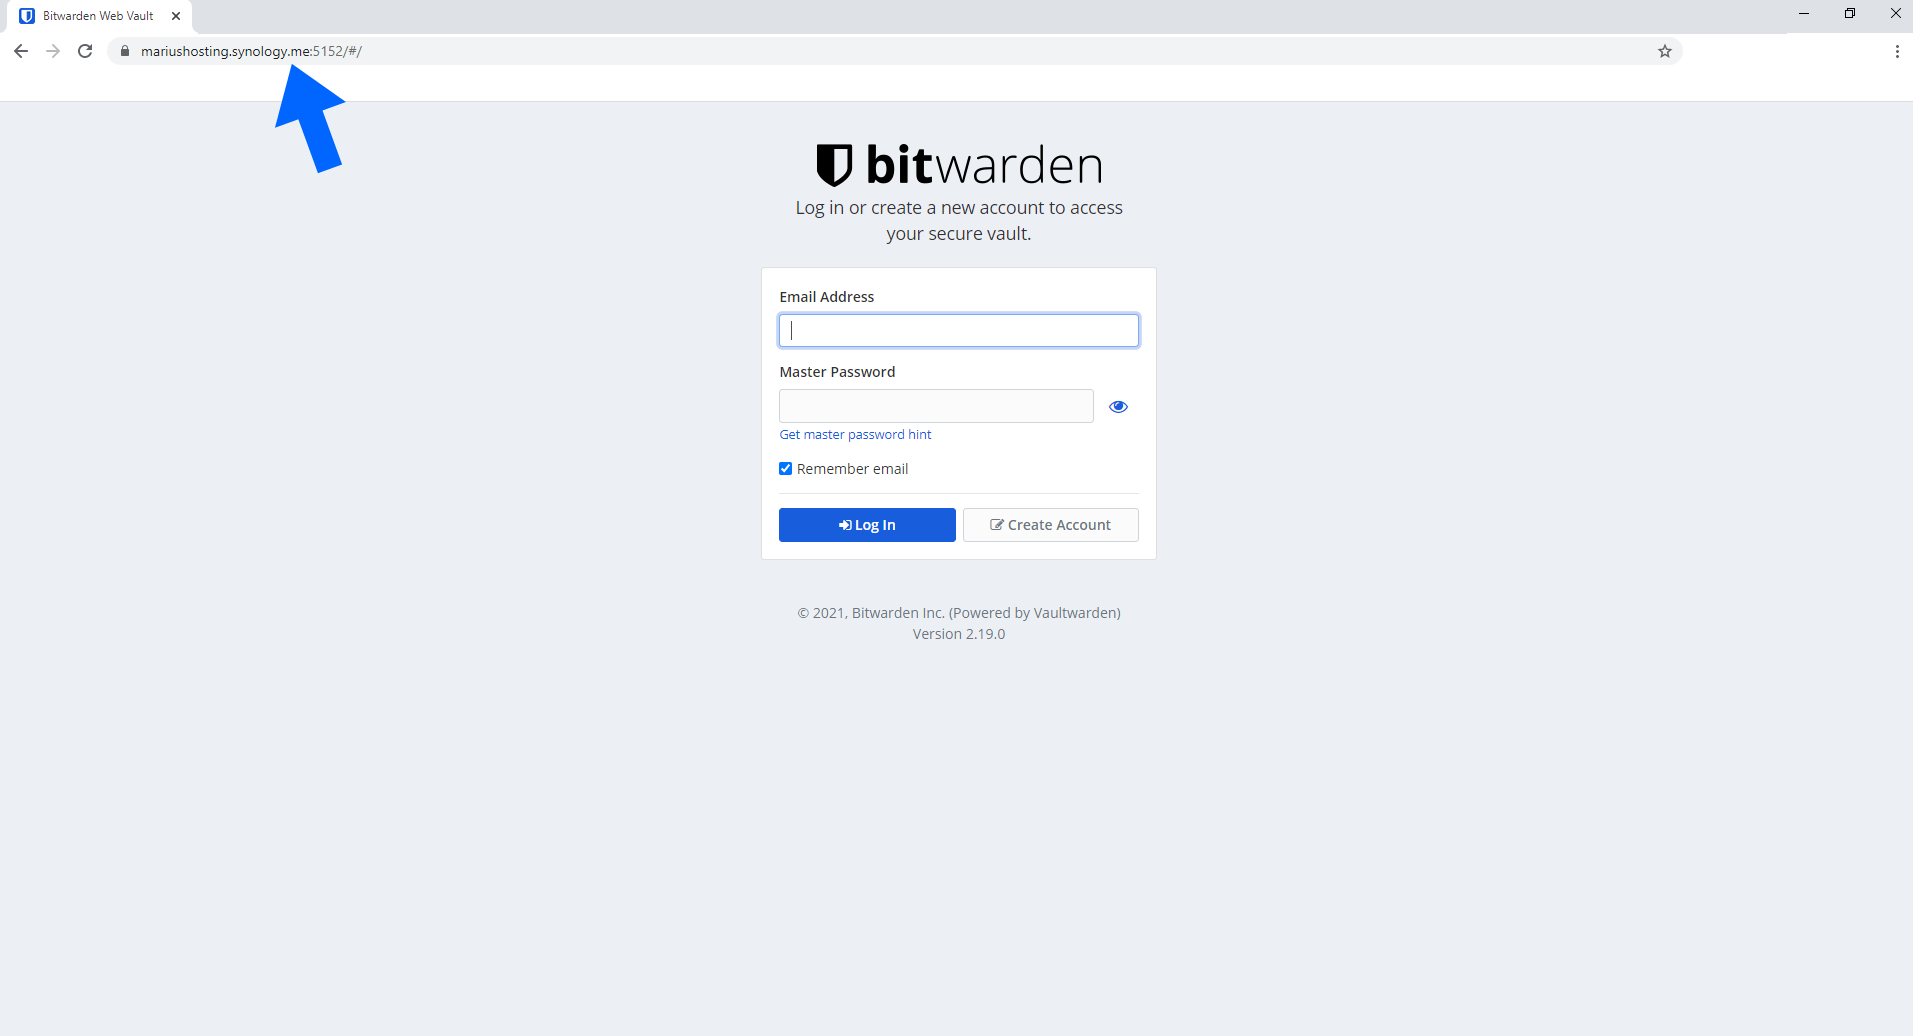
STEP 8
Open your browser and type in https://yourname.synology.me:5152 and you will see the HTTPS / SSL certificate working correctly. From now on you can access your BitWarden application over HTTPS from anywhere.
STEP 9
Note: You can use the same operation described above for all docker packages you have previously installed on your Synology NAS to access them via HTTPS/SSL.
Note: At STEP 4, instead of port 5152 you can use the port of your choice, but remember to port forward it (correctly) in your router following STEP 6.
This post was updated on Sunday / August 24th, 2025 at 2:47 PM