Did you connect your Reolink surveillance camera via the ethernet cable and power supply? Are you ready to set up your camera using the new Synology Surveillance Station 9? In this article I will explain how to add your Reolink camera(s) in Surveillance Station and enjoy your own video surveillance system operational from your very NAS or from a Synology branded NVR.
STEP 1
Please Support My work by Making a Donation.
STEP 2
Make sure you have the latest Surveillance Station 9 software installed on your NAS/NVR through Package Center in DSM 7.
STEP 3
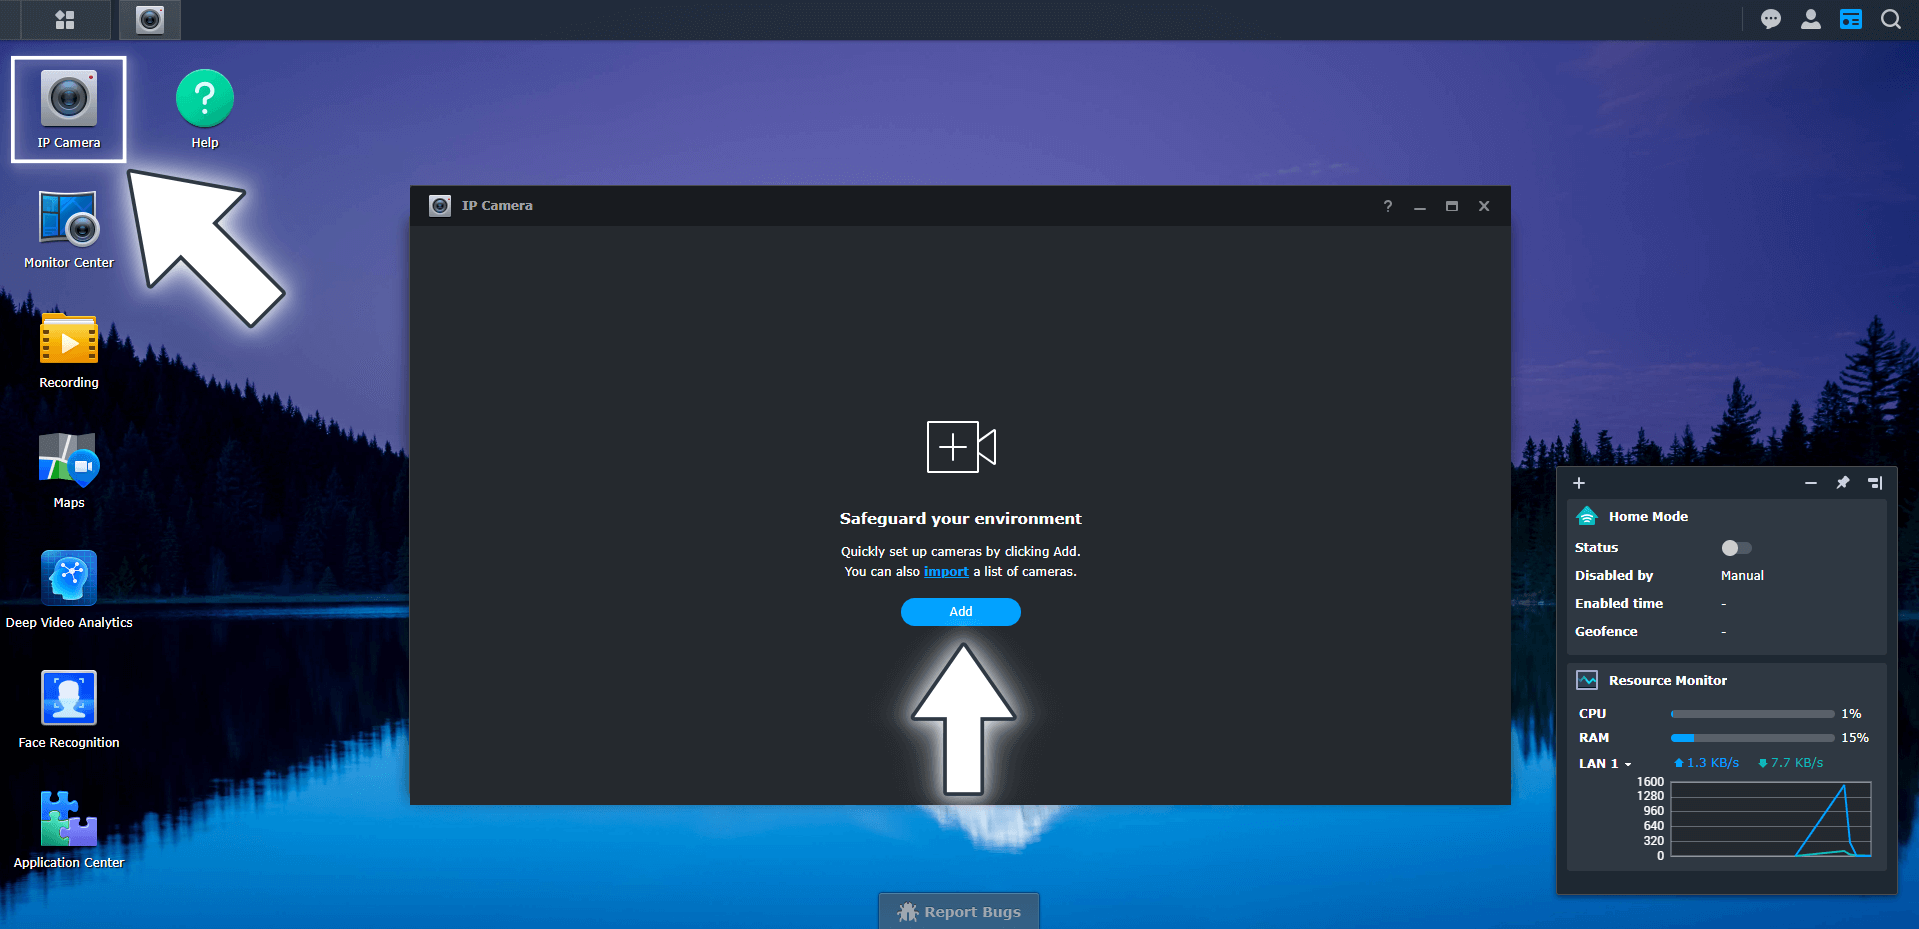
Open the Surveillance Station package then click the IP Camera icon. Click the blue Add button to start the automatic search for cameras. Follow the instructions in the image below.
STEP 4
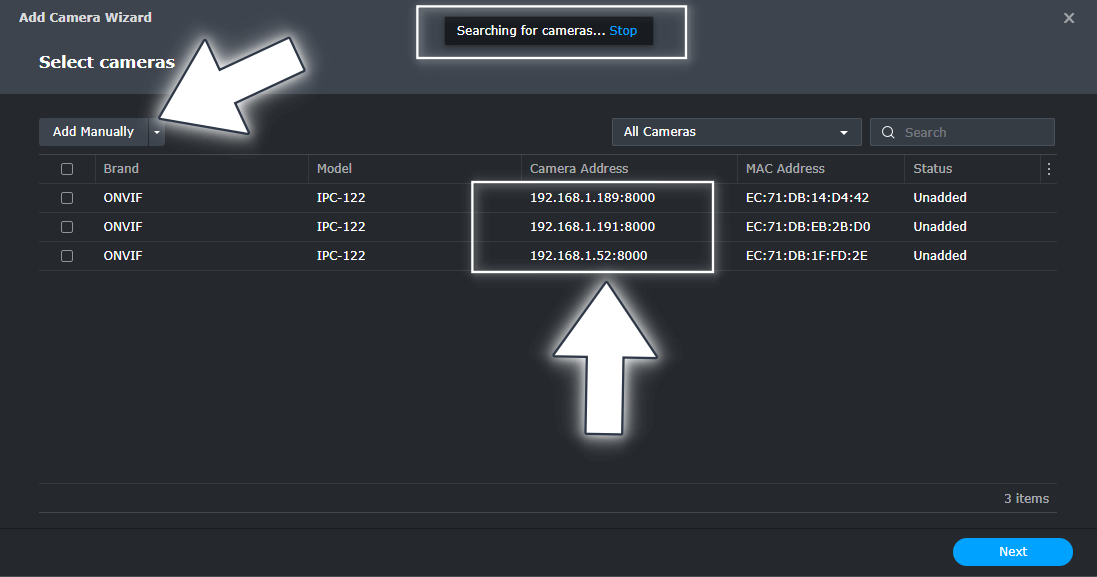
Within a few seconds all connected cameras will be found. Their Brand name will be marked with ONVIF. After this you need to copy all the IP camera addresses then click Add Manually. Follow the instructions in the image below.
STEP 5
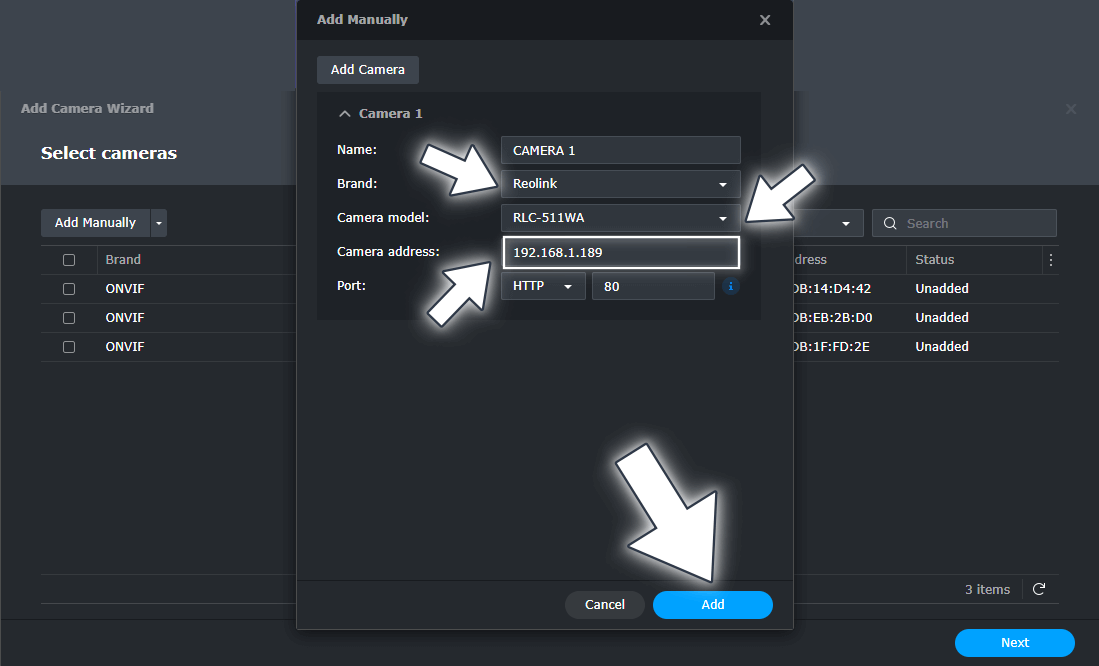
After you click Add Manually at STEP 4 you have to choose a Name for your camera, a Brand, in this case Reolink, the Camera model, in this case RLC-511WA, and the IP address for the camera you have previously copied at STEP 4. Click Add. If you have more cameras, perform the same “Add Manually” operation for all installed cameras one by one. Follow the instructions in the image below.
STEP 6
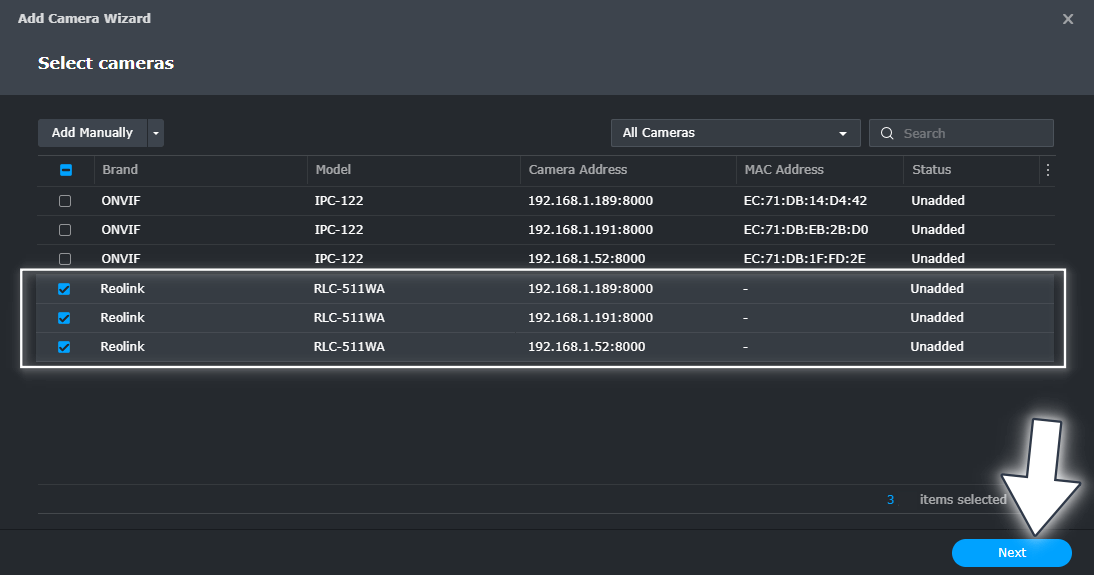
Select the Reolink Brand Cameras then click Next. Follow the instructions in the image below.
STEP 7
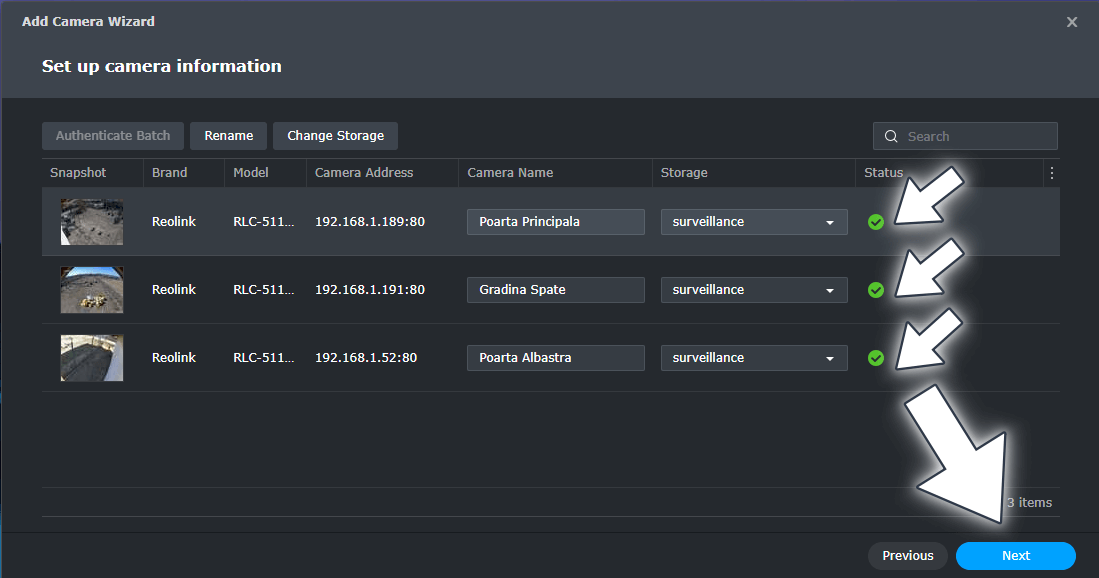
If the camera is correctly added you will see a green status. You can now change the camera name. In the Storage area select surveillance. Click Next. Follow the instructions in the image below.
STEP 8
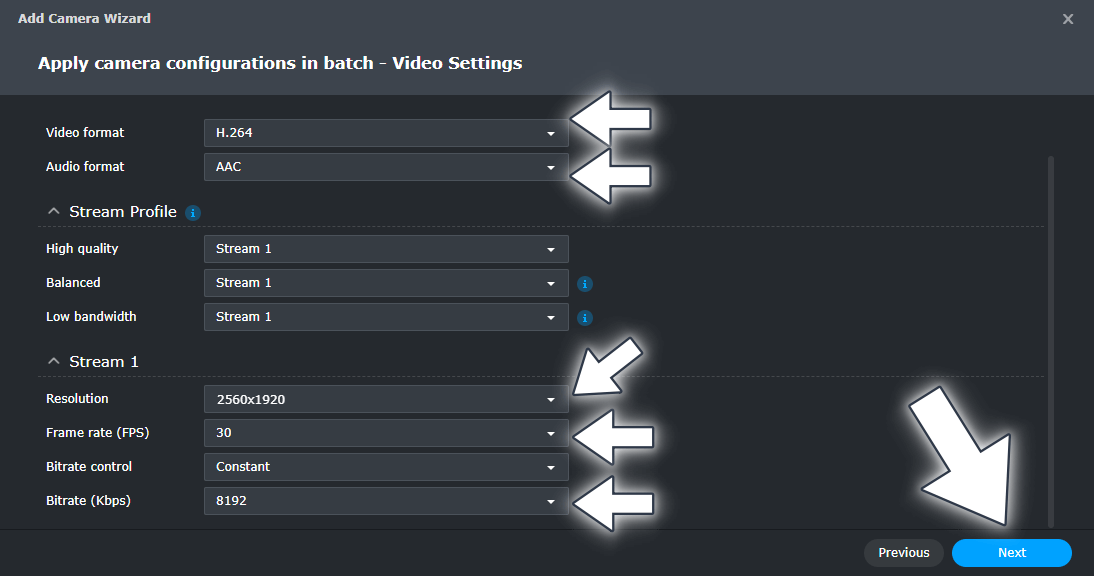
Select the H.264 Video Format. Select the AAC Audio Format. Select the maximum resolution of your camera – in my case, the RLC-511WA Reolink camera supports 2560×1920. Select the Frame rate – I suggest 30, and the Bitrate – 8192 Kpbs. Click Next. Follow the instructions in the image below.
STEP 9
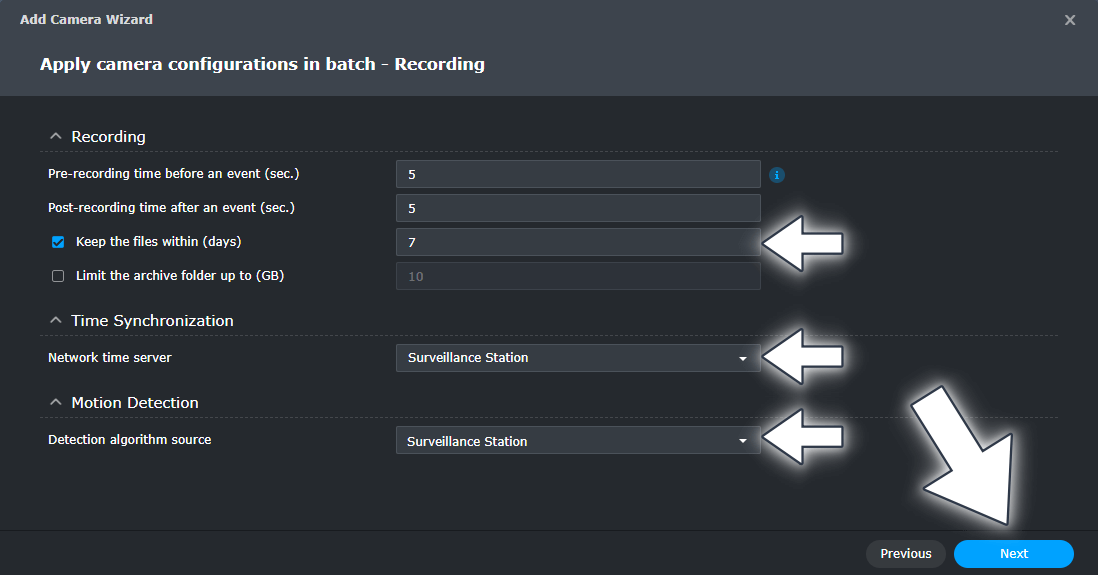
Depending on your Storage availability you can choose the number of days the files will be saved on your NAS/NVR. I chose 7 days (approximately 2.3 TB per week). If you have more storage availability, you can increase the days number. Choose Surveillance Station as Network time server and Surveillance Station as Detection algorithm source. Click Next. Follow the instructions in the image below.
STEP 10
Customize record settings. I chose Continuous recording to record 24 hours a day. Click Next. Follow the instructions in the image below.
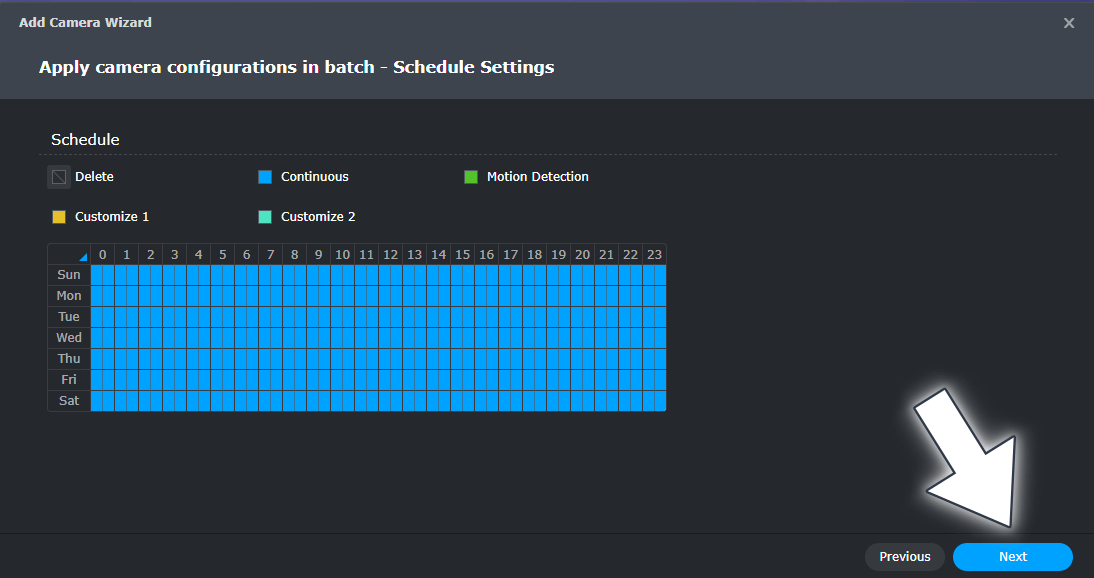
STEP 11
Read the summary then click Done. Follow the instructions in the image below.
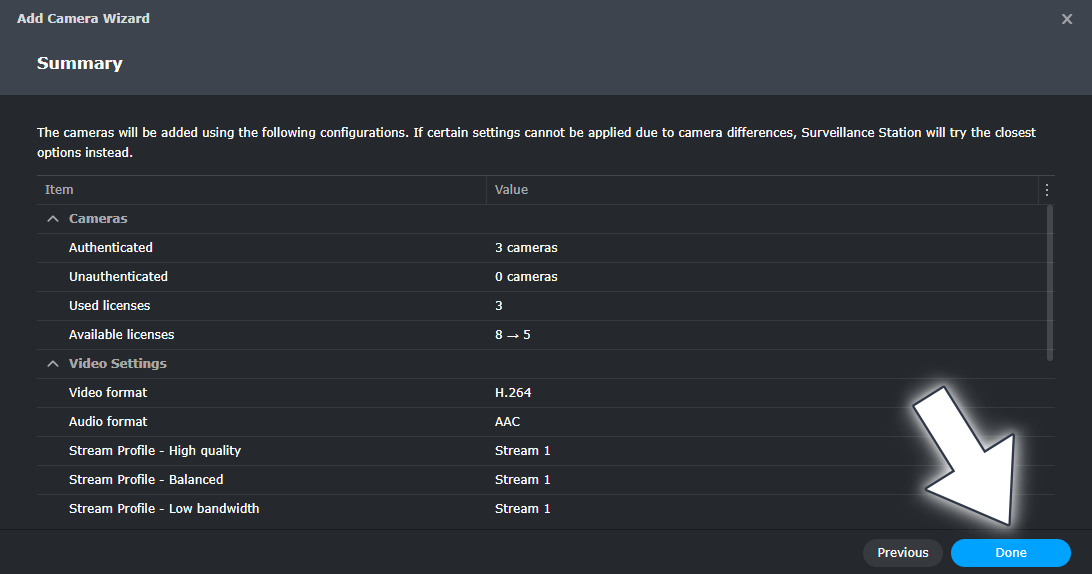
STEP 12
Wait a few minutes for the Surveillance Station Licenses to activate. Follow the instructions in the image below.
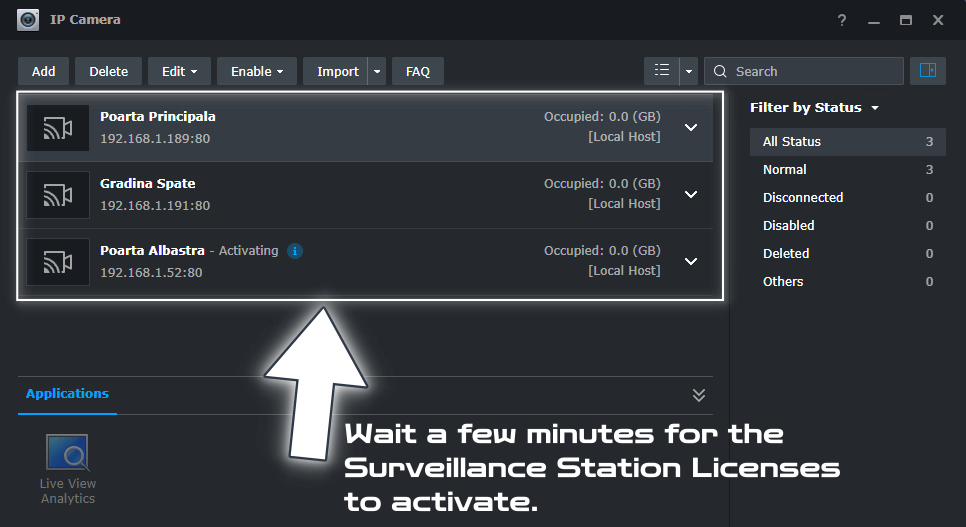
STEP 13
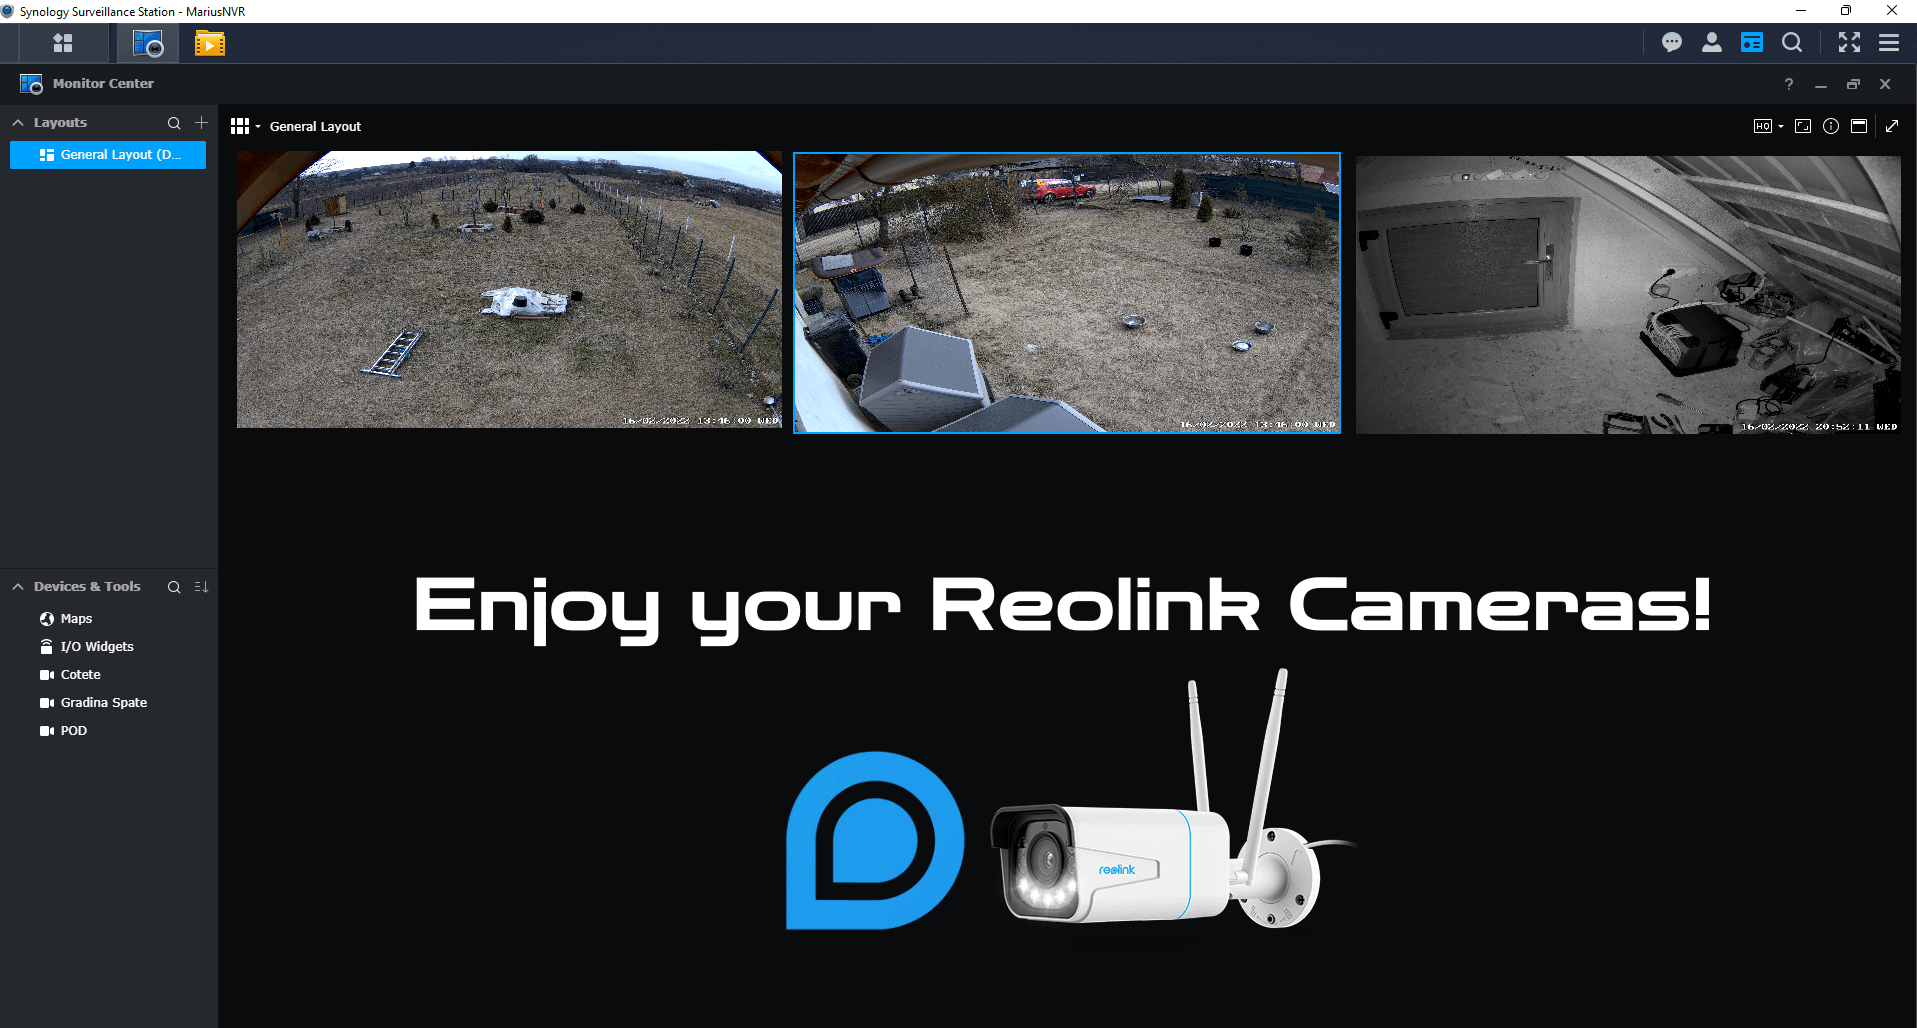
Open Surveillance Station the click on Monitor Center. Follow the instructions in the image below.
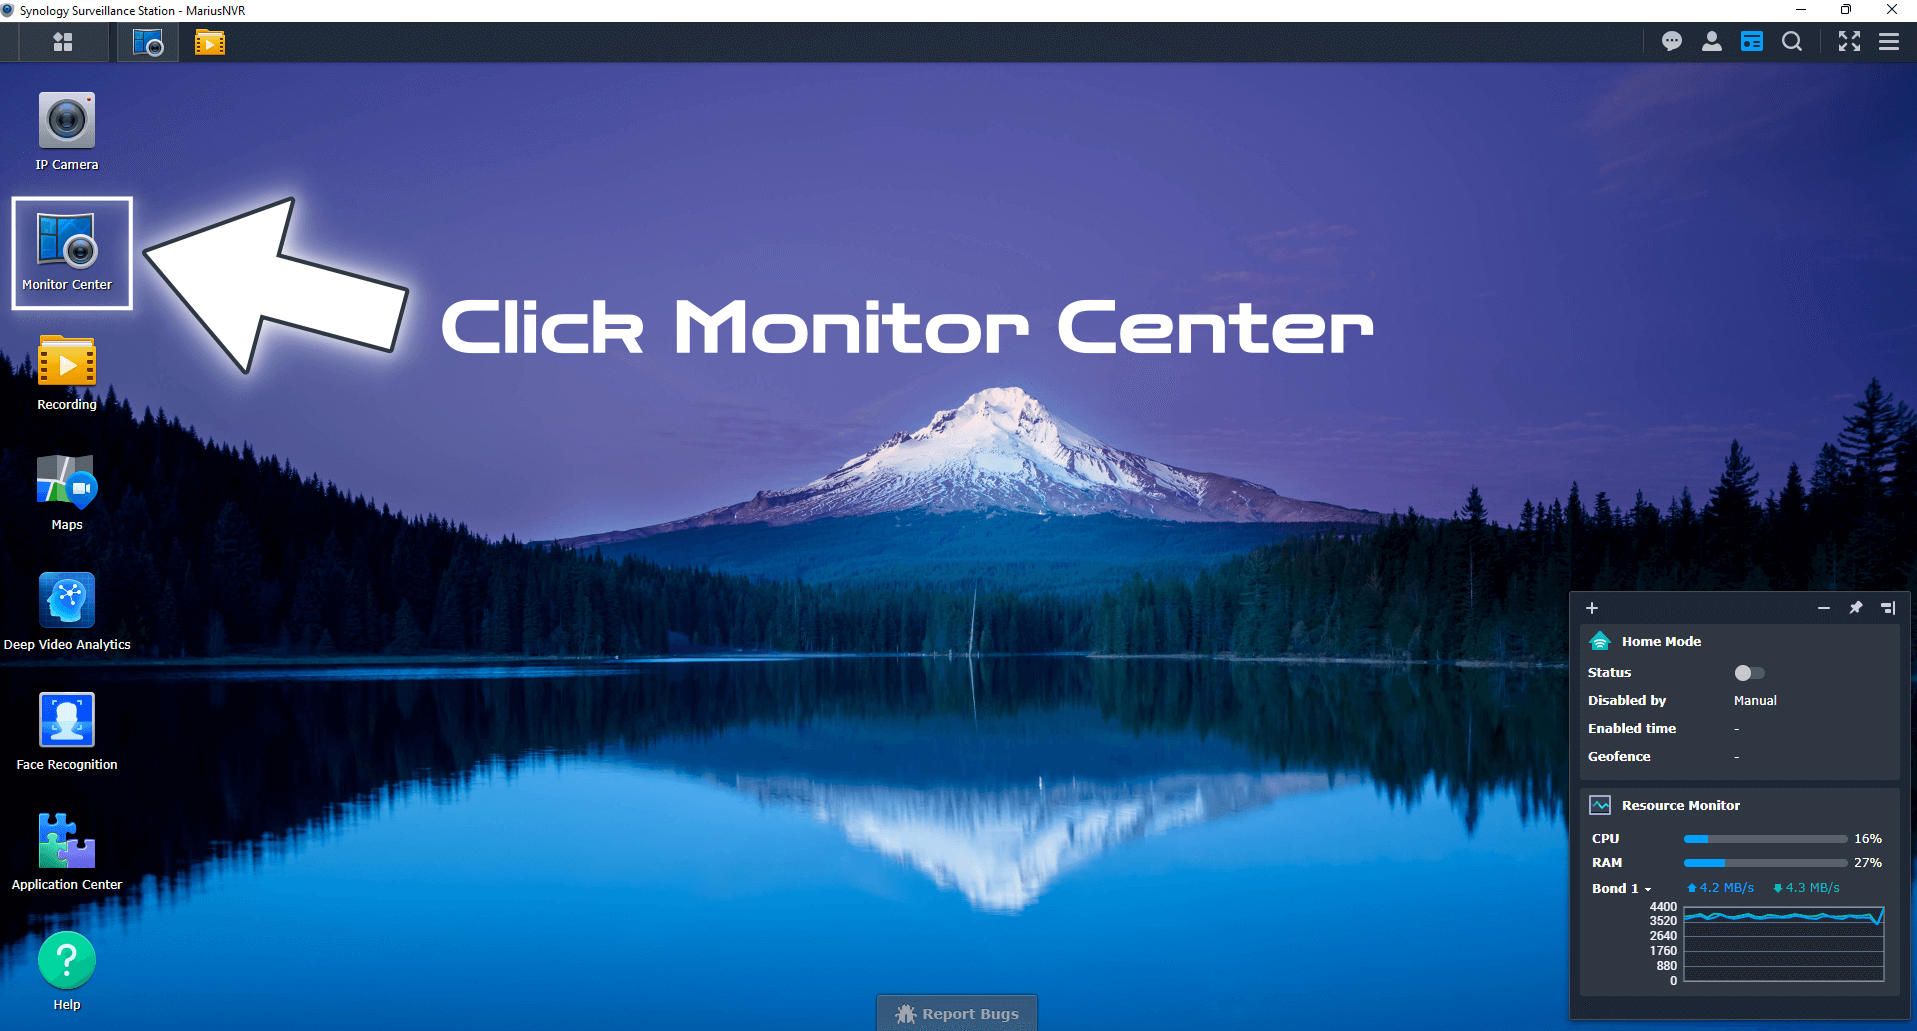
Enjoy your Reolink Cameras!
Note: Difference Between NAS and NVR.
Note: You can follow the same exact steps for a different camera brand.
Note: Reolink Cameras for the Synology DVA3221 NVR.
Note: Night Vision With Reolink Cameras.
Note: How to Update Reolink Camera Firmware.
Note: How to Set Up Reolink Camera Spotlight Schedule.
Note: How to Set Up Reolink Cameras Alarm.
Note: How to Remove Reolink Logo.
Note: How to Activate Reolink Camera Color at Night.
Note: Maintenance Of The Reolink Camera.
Note: How to Change Reolink Camera Password.
This post was updated on Wednesday / August 10th, 2022 at 10:28 PM
