Reolink frequently releases new firmware for their surveillance cameras. Today I will teach you how to update your outdated Reolink firmware with the latest version. If you are using Synology Surveillance Station, know that the video cameras from Reolink are supported which means you having the latest firmware is what is going to make your entire video surveillance system more prompt and more secure. The purpose of the firmware update is to bring about a change to the existing camera software in a way that will improve it.
STEP 1
Please Support My work by Making a Donation.
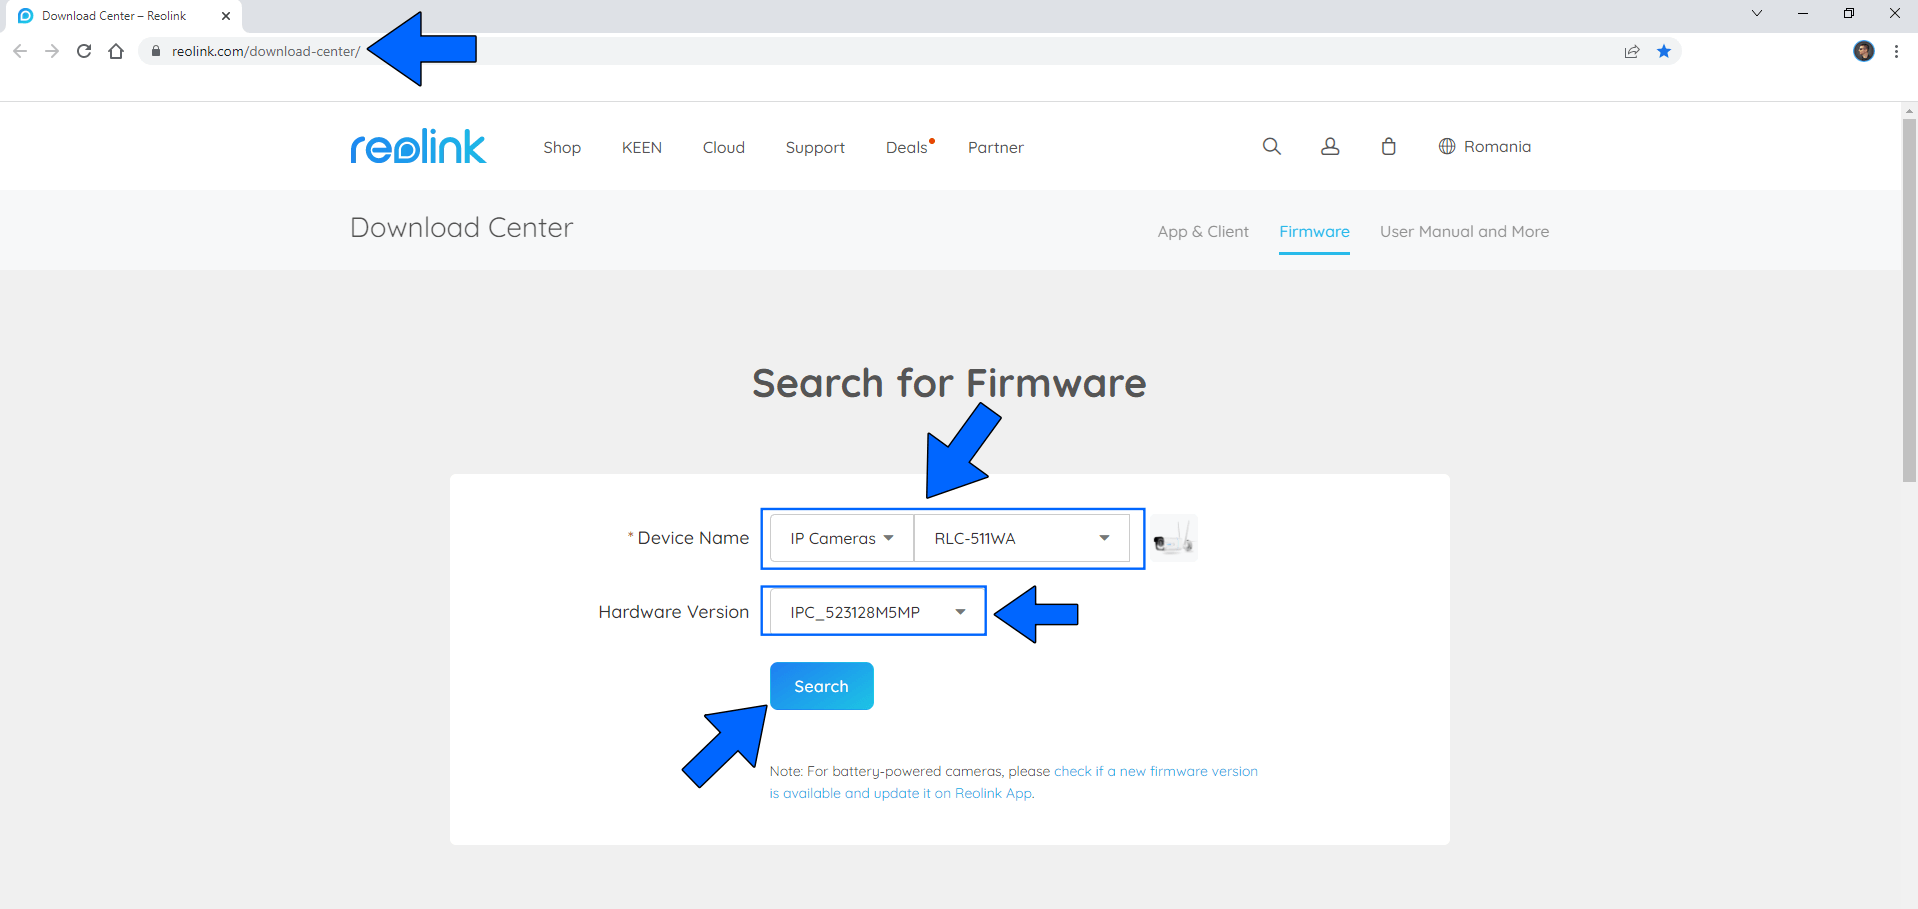
STEP 2
Go to the Reolink Download Center page then select your current camera model. Follow the instructions in the image below.
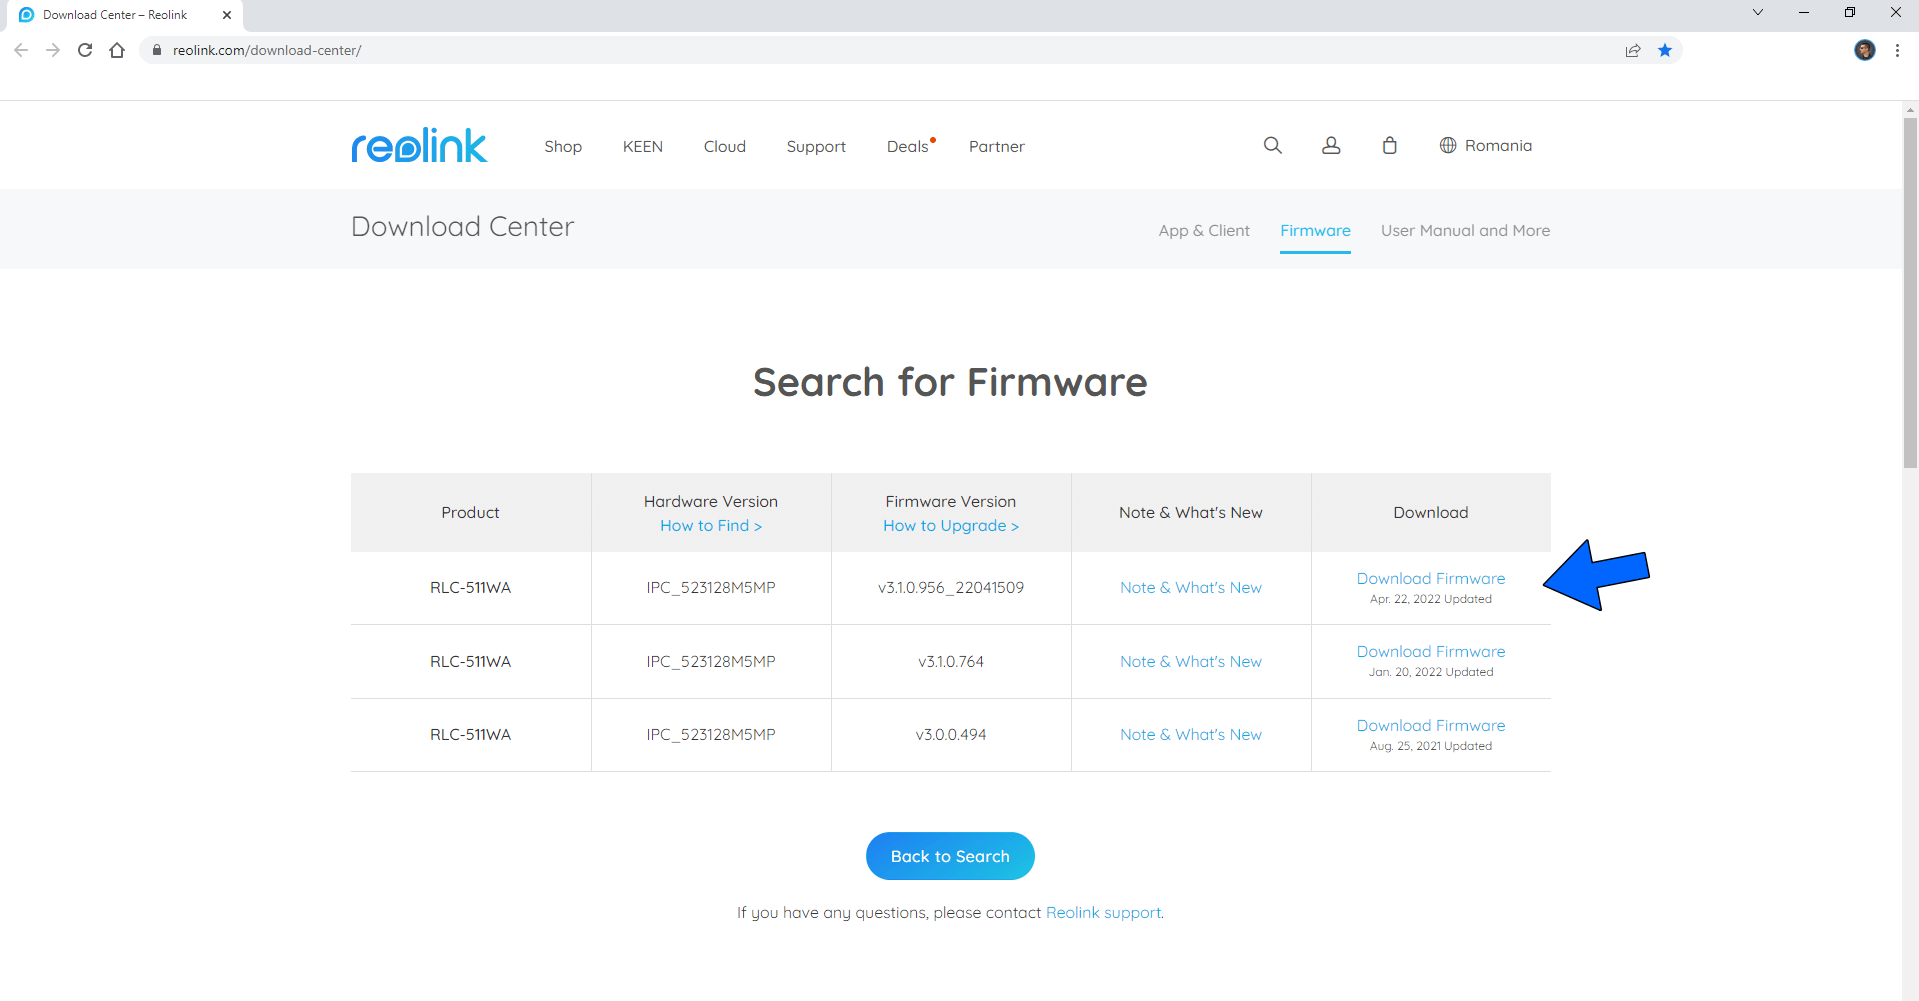
STEP 3
Download the latest “Firmware“. Follow the instructions in the image below.
STEP 4
Unzip the file you have just downloaded. Inside the zip file you will find a .pak file and a .pdf file with instructions. The .pak file is the file you will need later (at STEP 8).
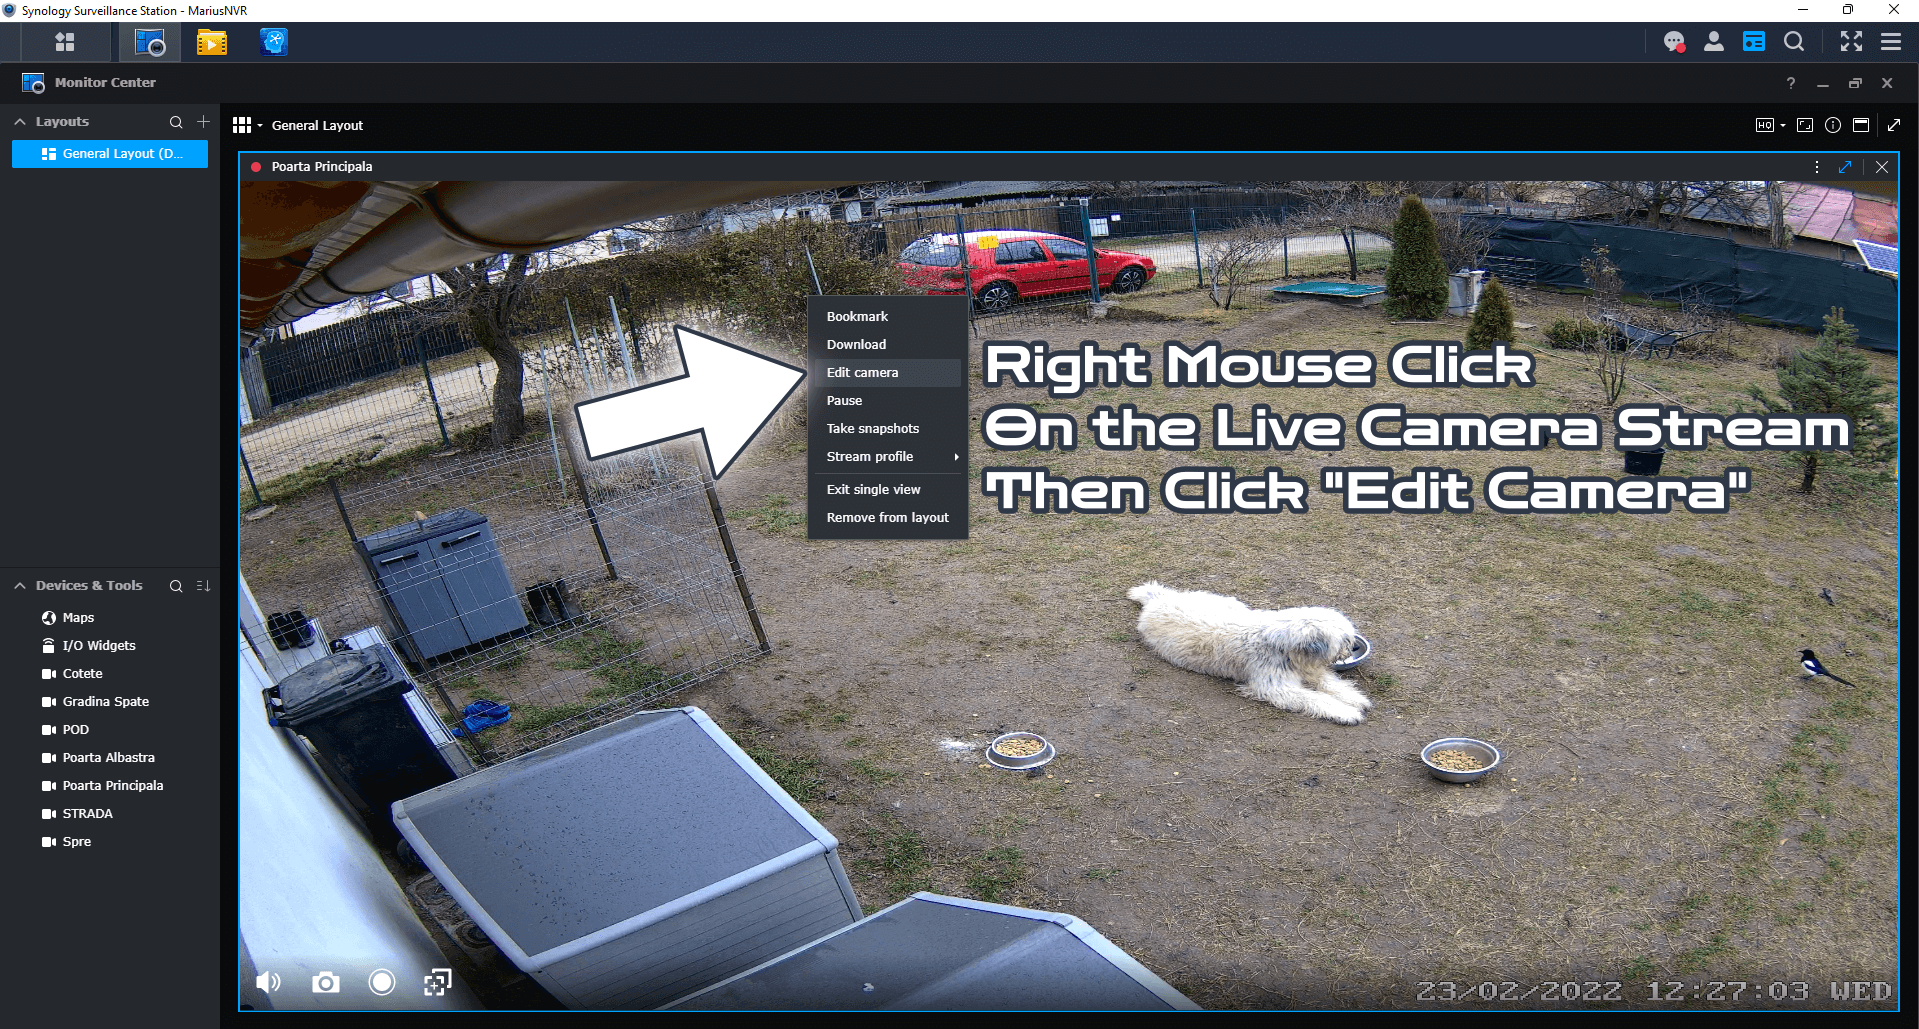
STEP 5
Open Synology Surveillance Station and select the Reolink camera whose firmware you want to update. Right mouse click on the live camera stream then click Edit Camera. Follow the instructions in the image below.
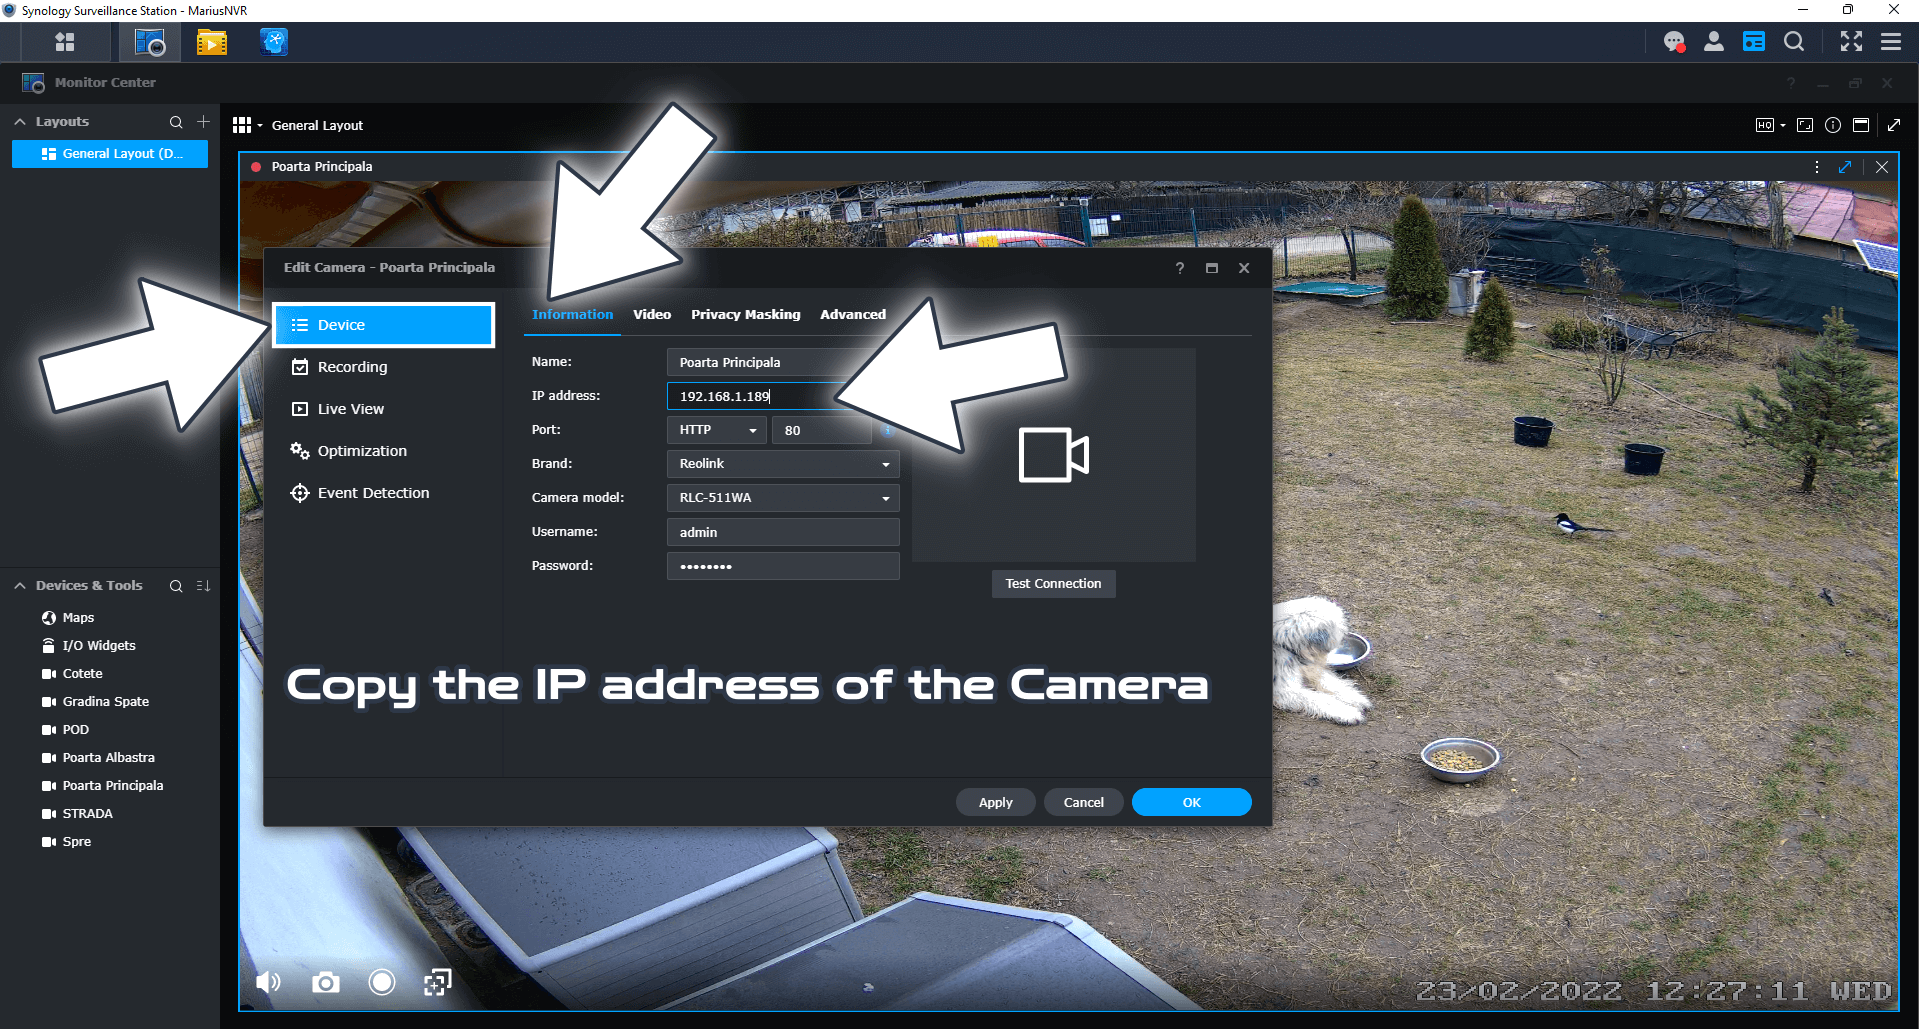
STEP 6
After you click Edit Camera on STEP 5, a new window will open. Click on Device / Information tab / copy the IP address of the camera. Follow the instructions in the image below.
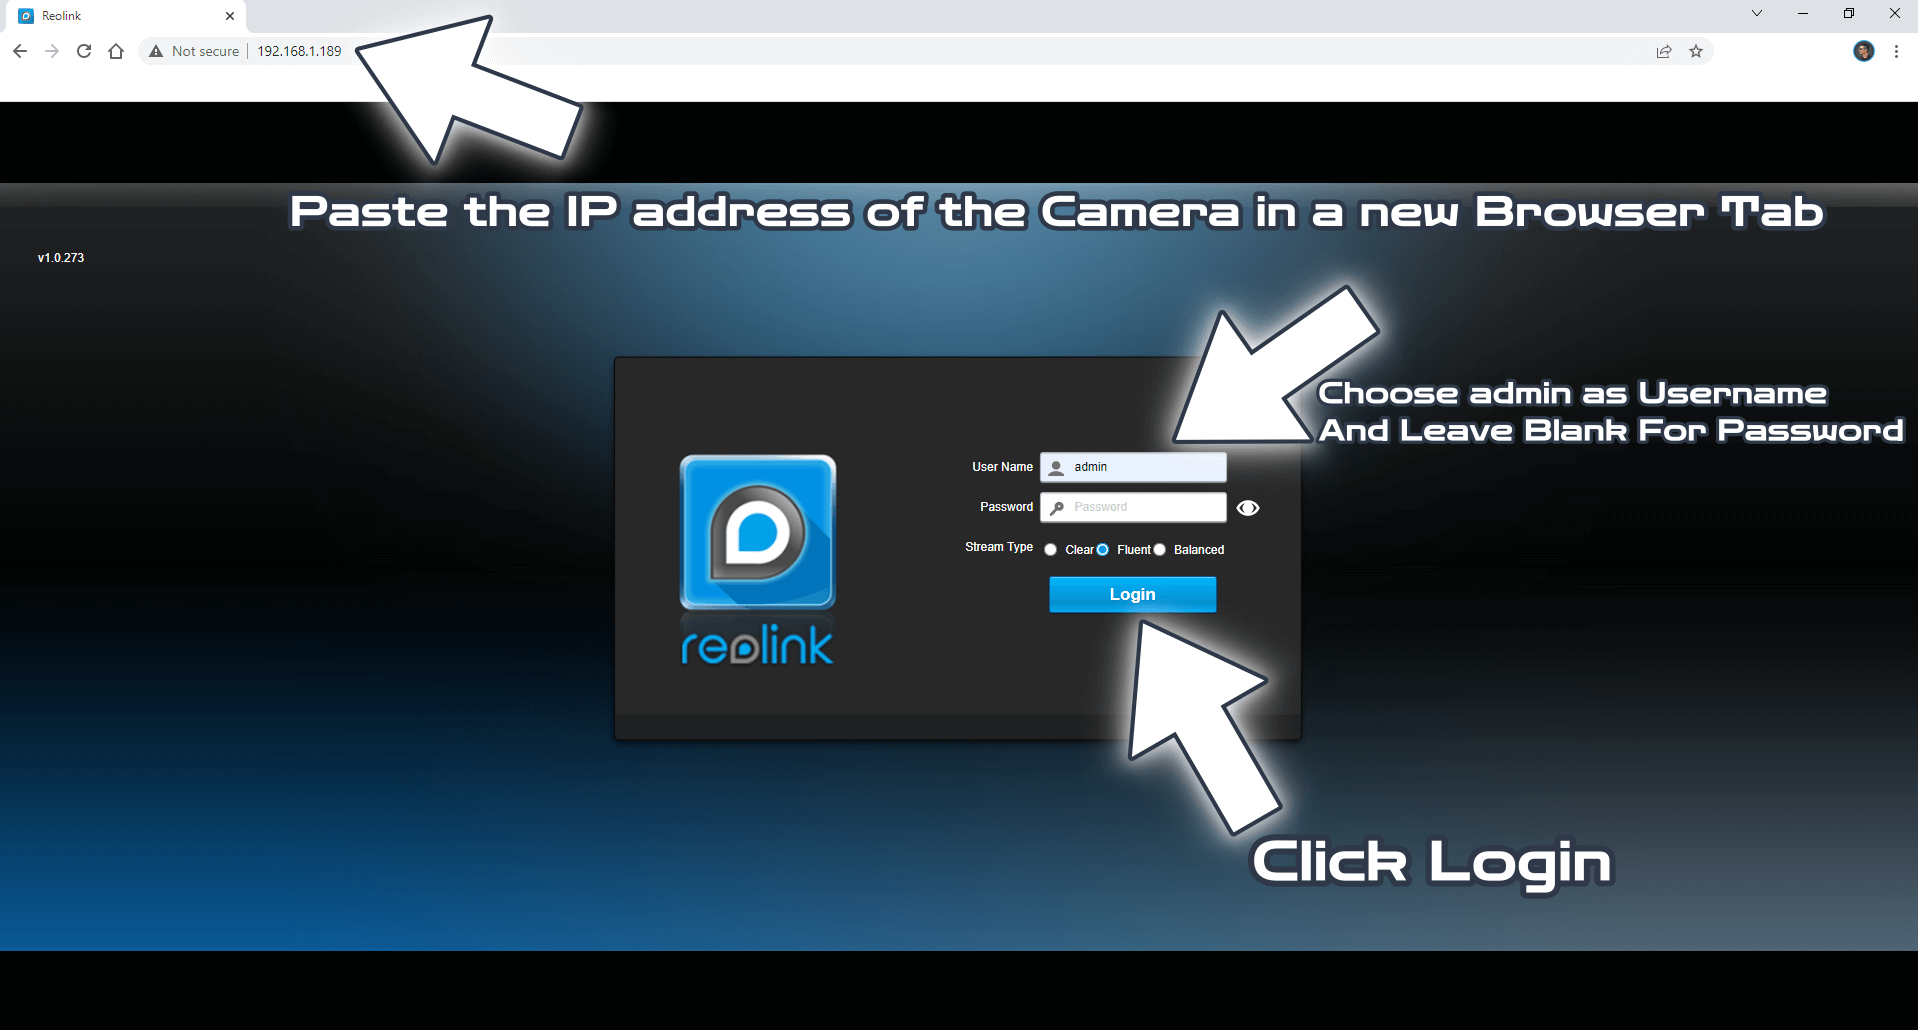
STEP 7
Paste the IP address of the camera in a new Browser tab. Choose admin as username and leave blank for password. Click Login. Follow the instructions in the image below.
Note: If you have changed your username or password sometime in the past, just type them in in the respective fields. The admin username and the blank password are the standard credentials for Reolink cameras.
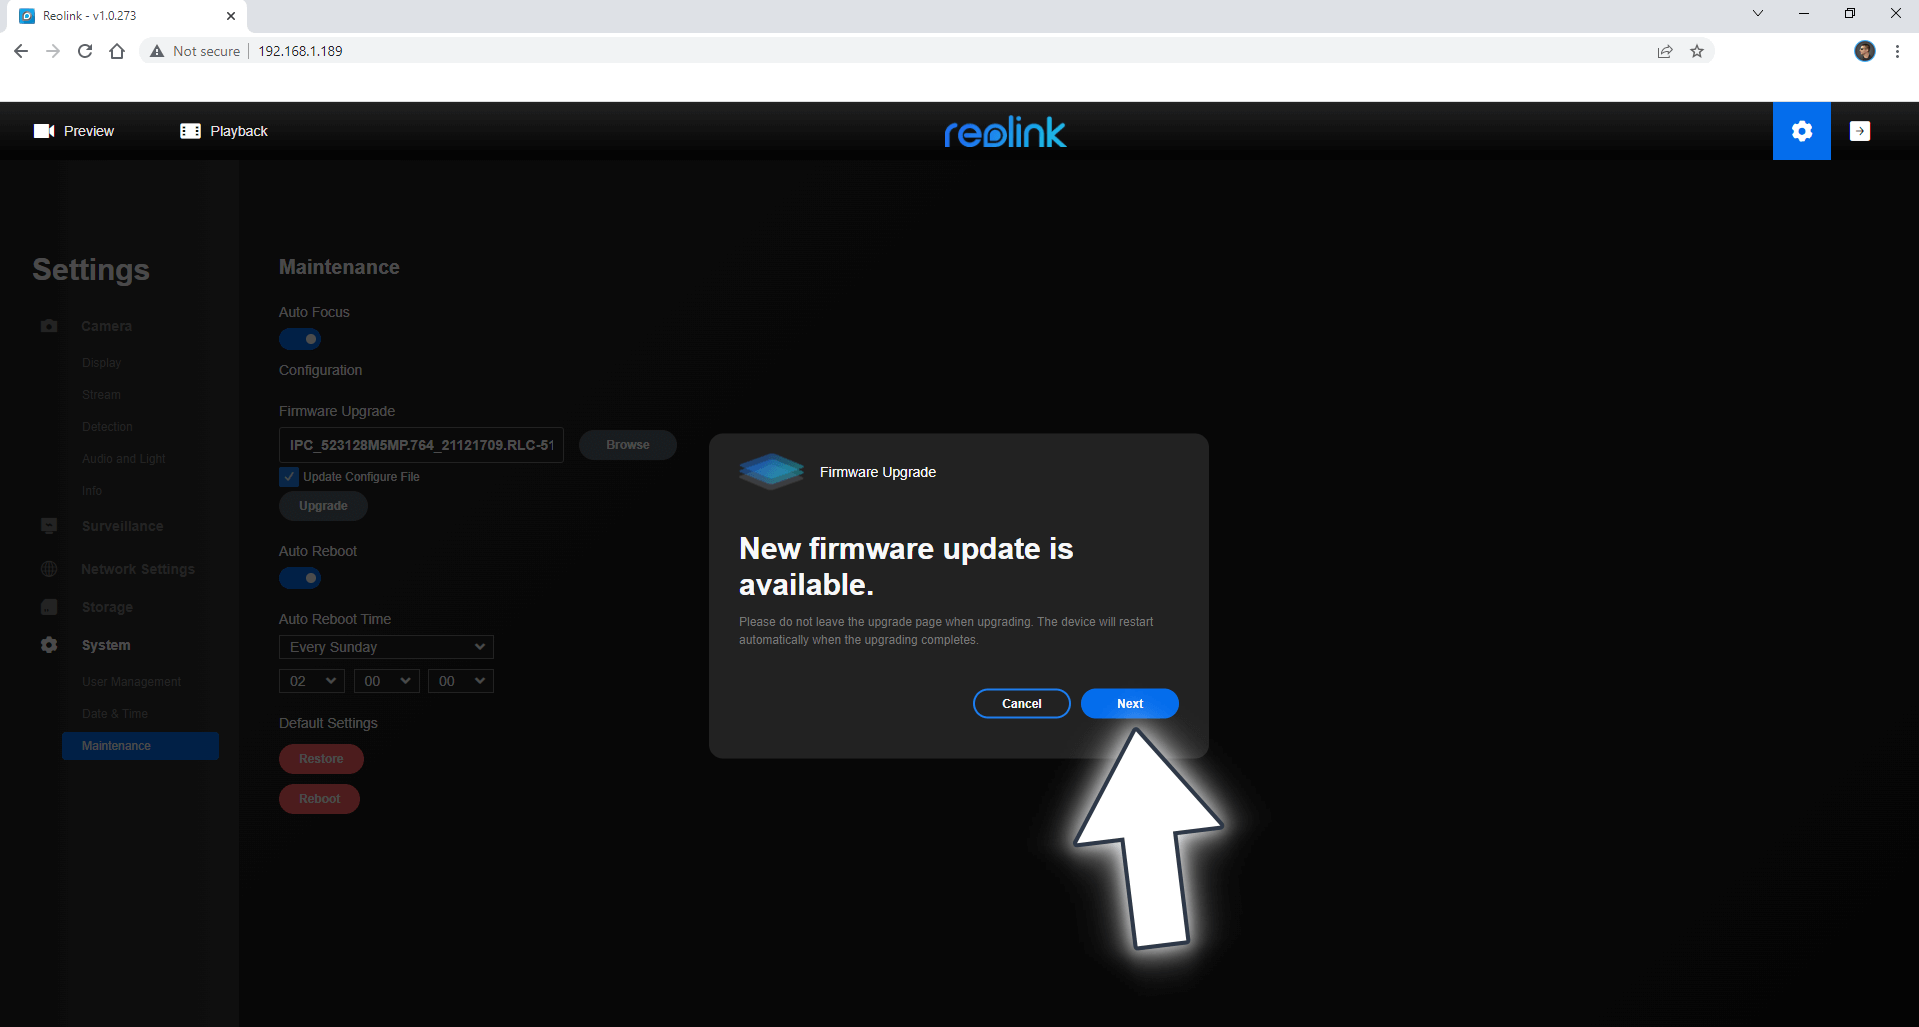
STEP 8
After you log into the Reolink camera, click the gear Settings icon at the top right of the page. On the left sidebar select System then Maintenance. Upload the .pak file you have previously downloaded and unzipped at STEP 4 then check Update Configure File. Click Upgrade. Follow the instructions in the image below.

STEP 9
After you click Upgrade at STEP 8 a new pop up window will open. Click Next. Follow the instructions in the image below.
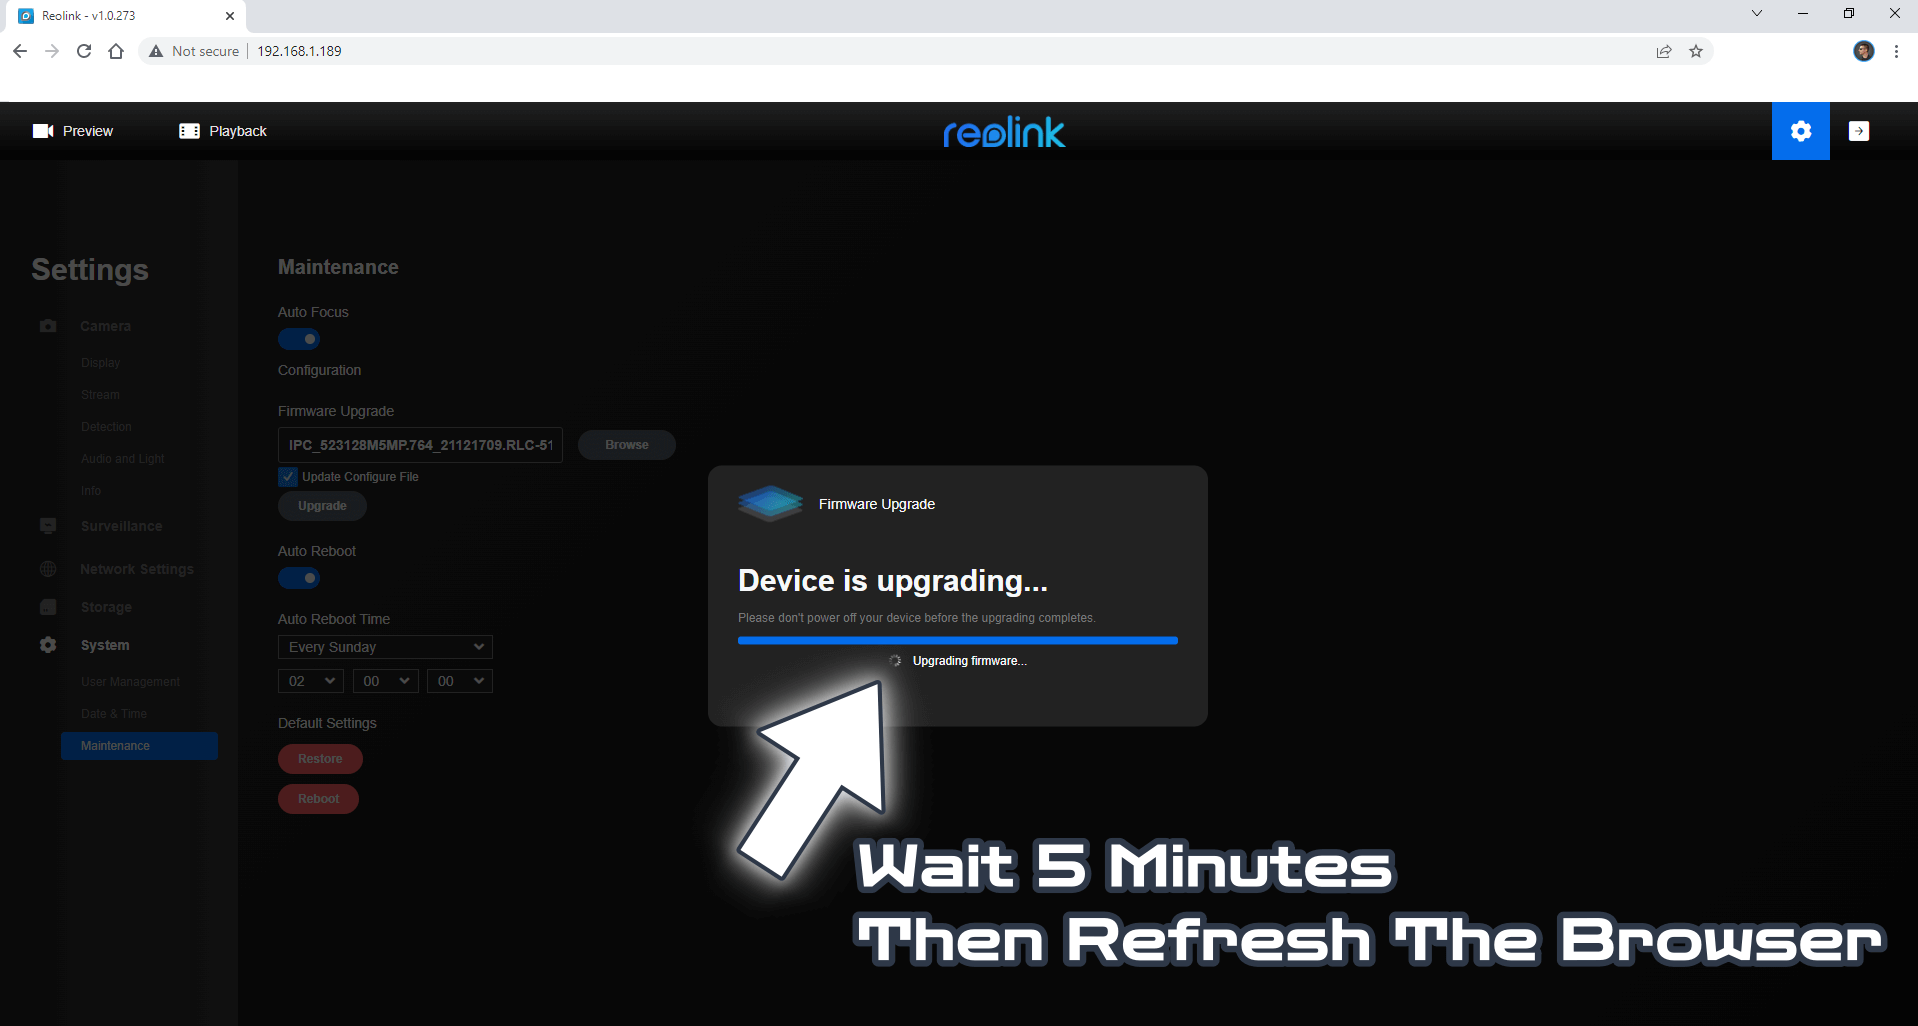
STEP 10
Wait approximately 5 minutes then refresh the browser page. Follow the instructions in the image below.
Note: Sometimes the page refresh is automatic and sometimes it’s not. So, after 5 minutes just refresh your browser page because this is roughly the needed timeline for the firmware to be updated.
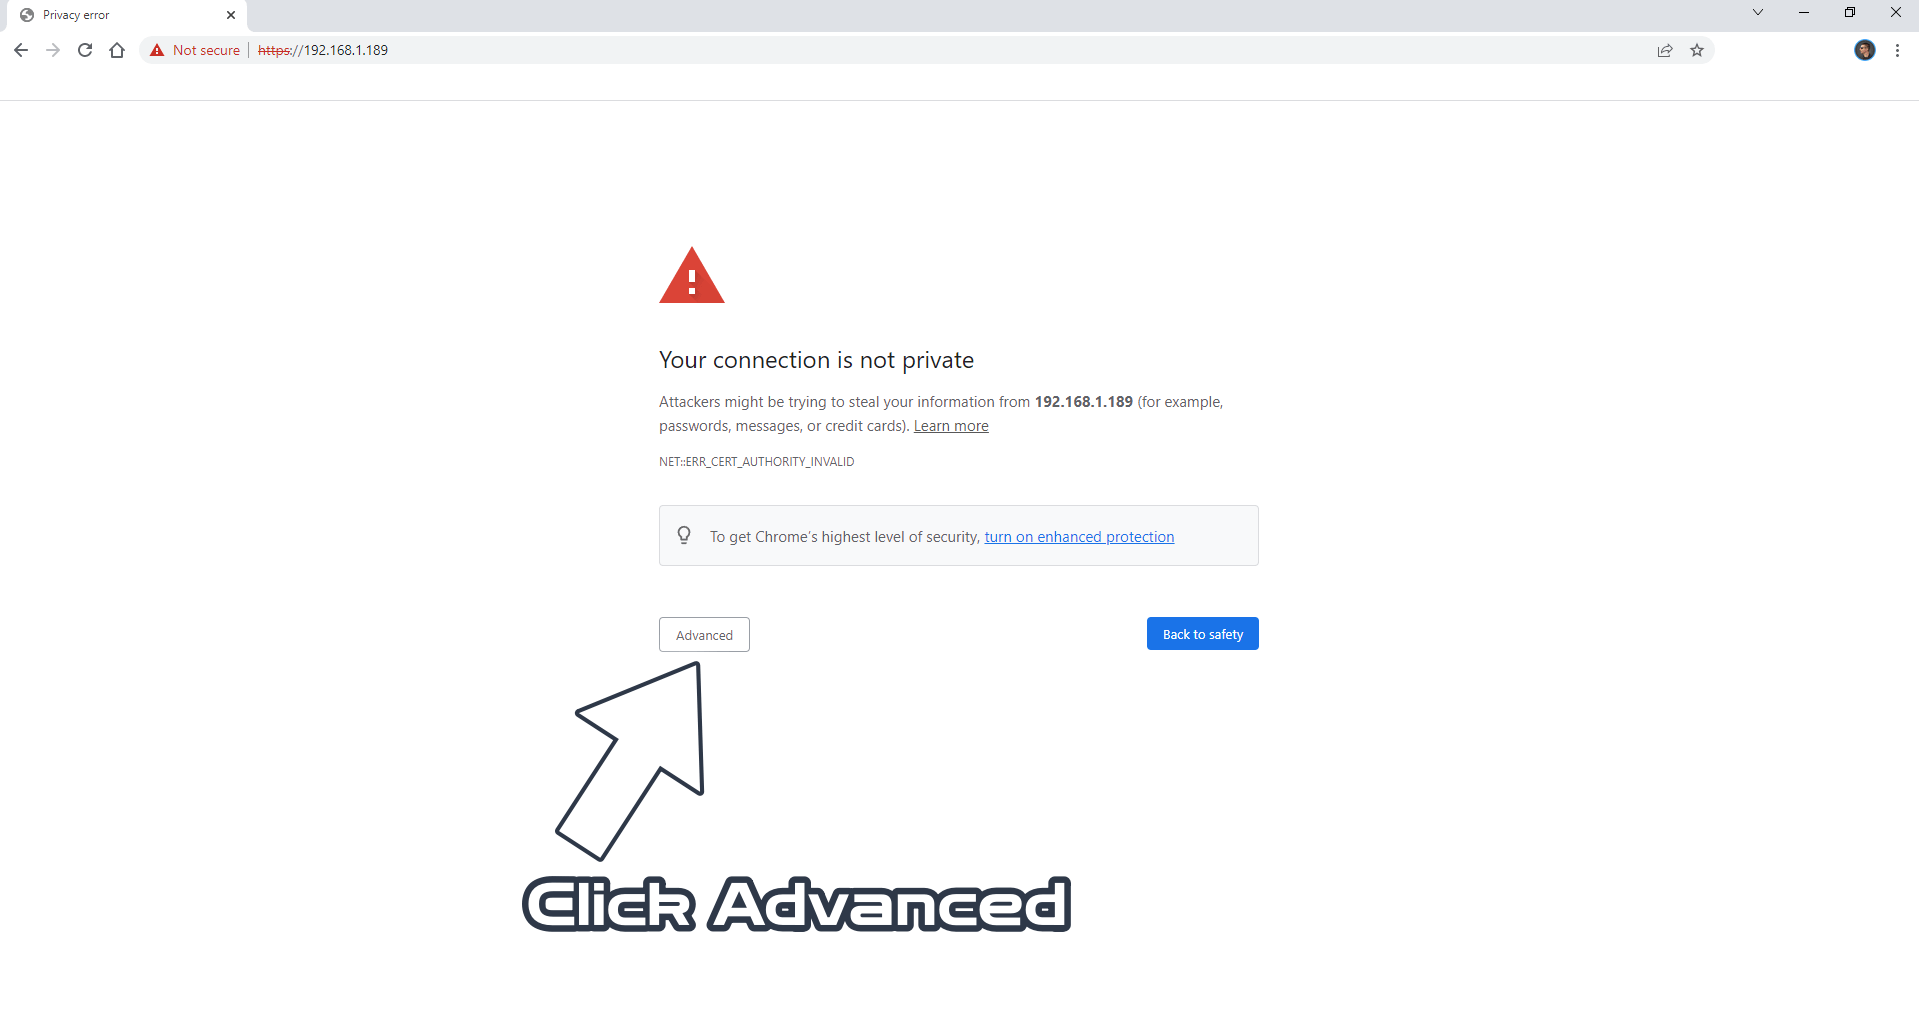
STEP 11
If you get a page that says “Your connection is not private”, just click Advanced. Follow the instructions in the image below.
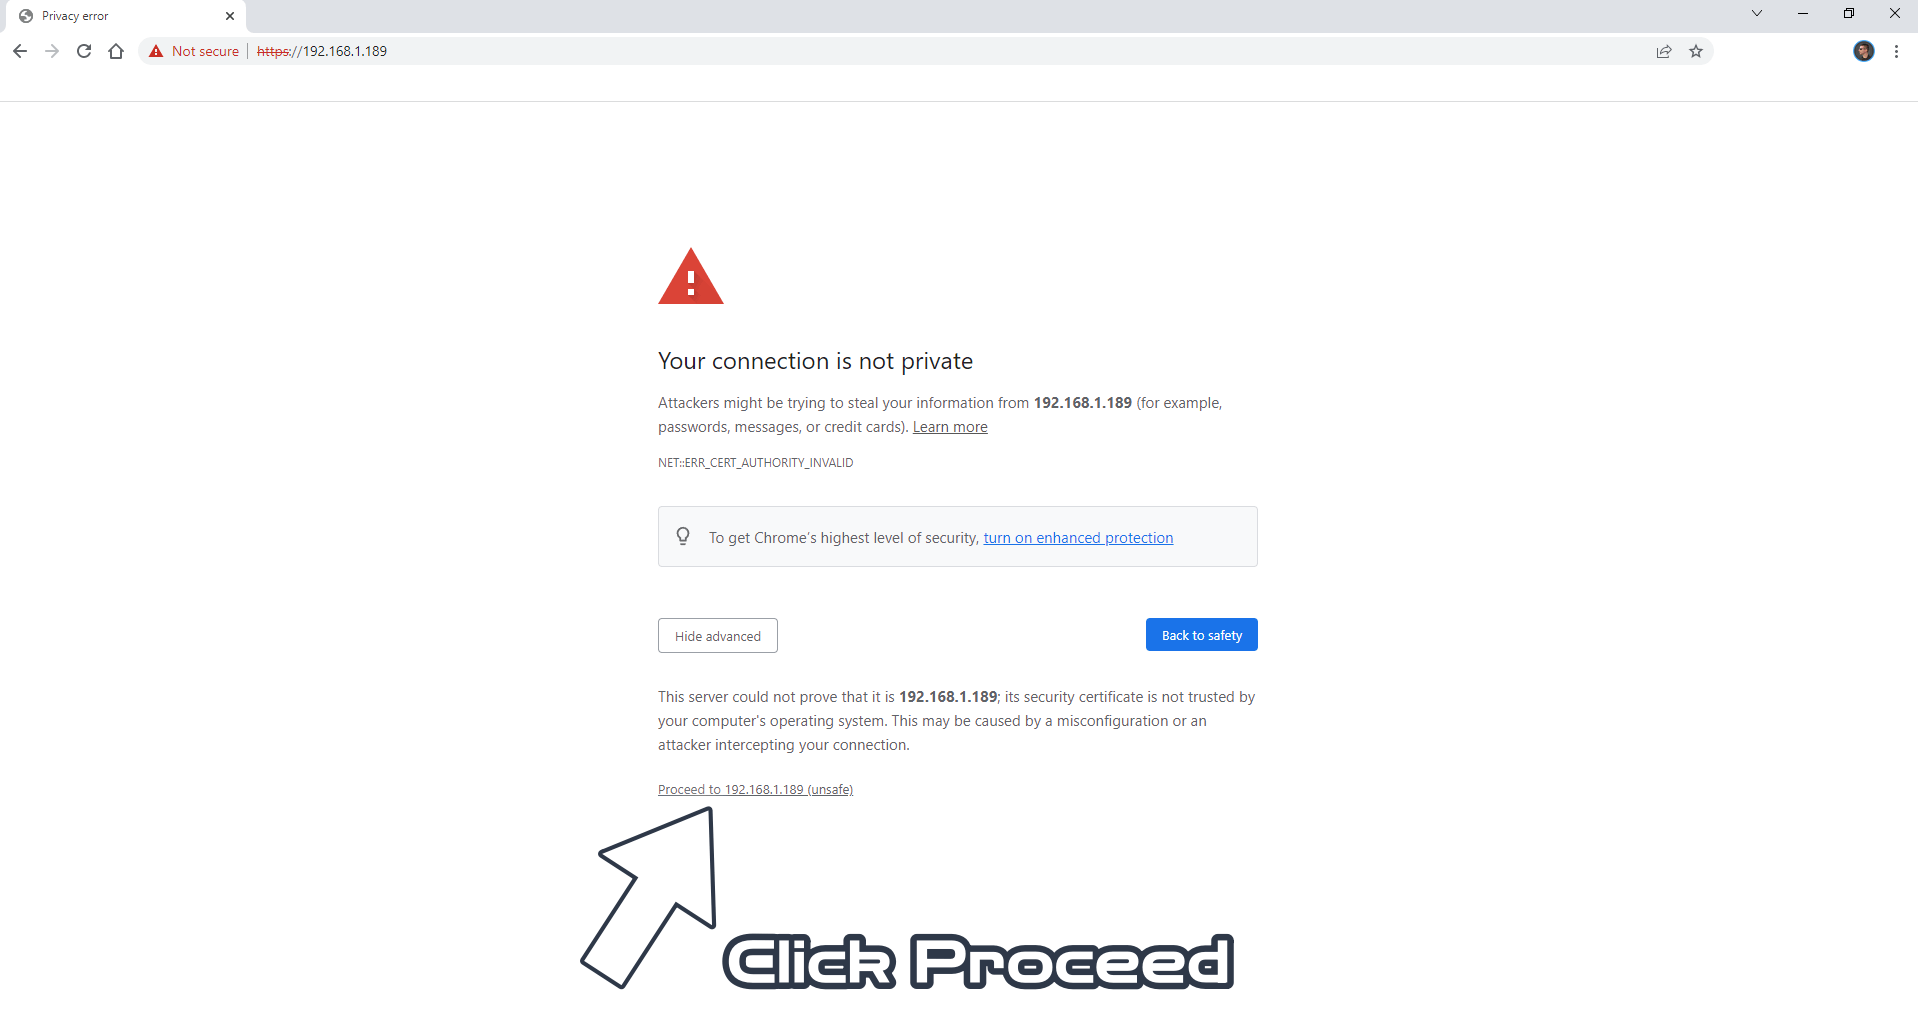
STEP 12
Click Proceed. Follow the instructions in the image below.
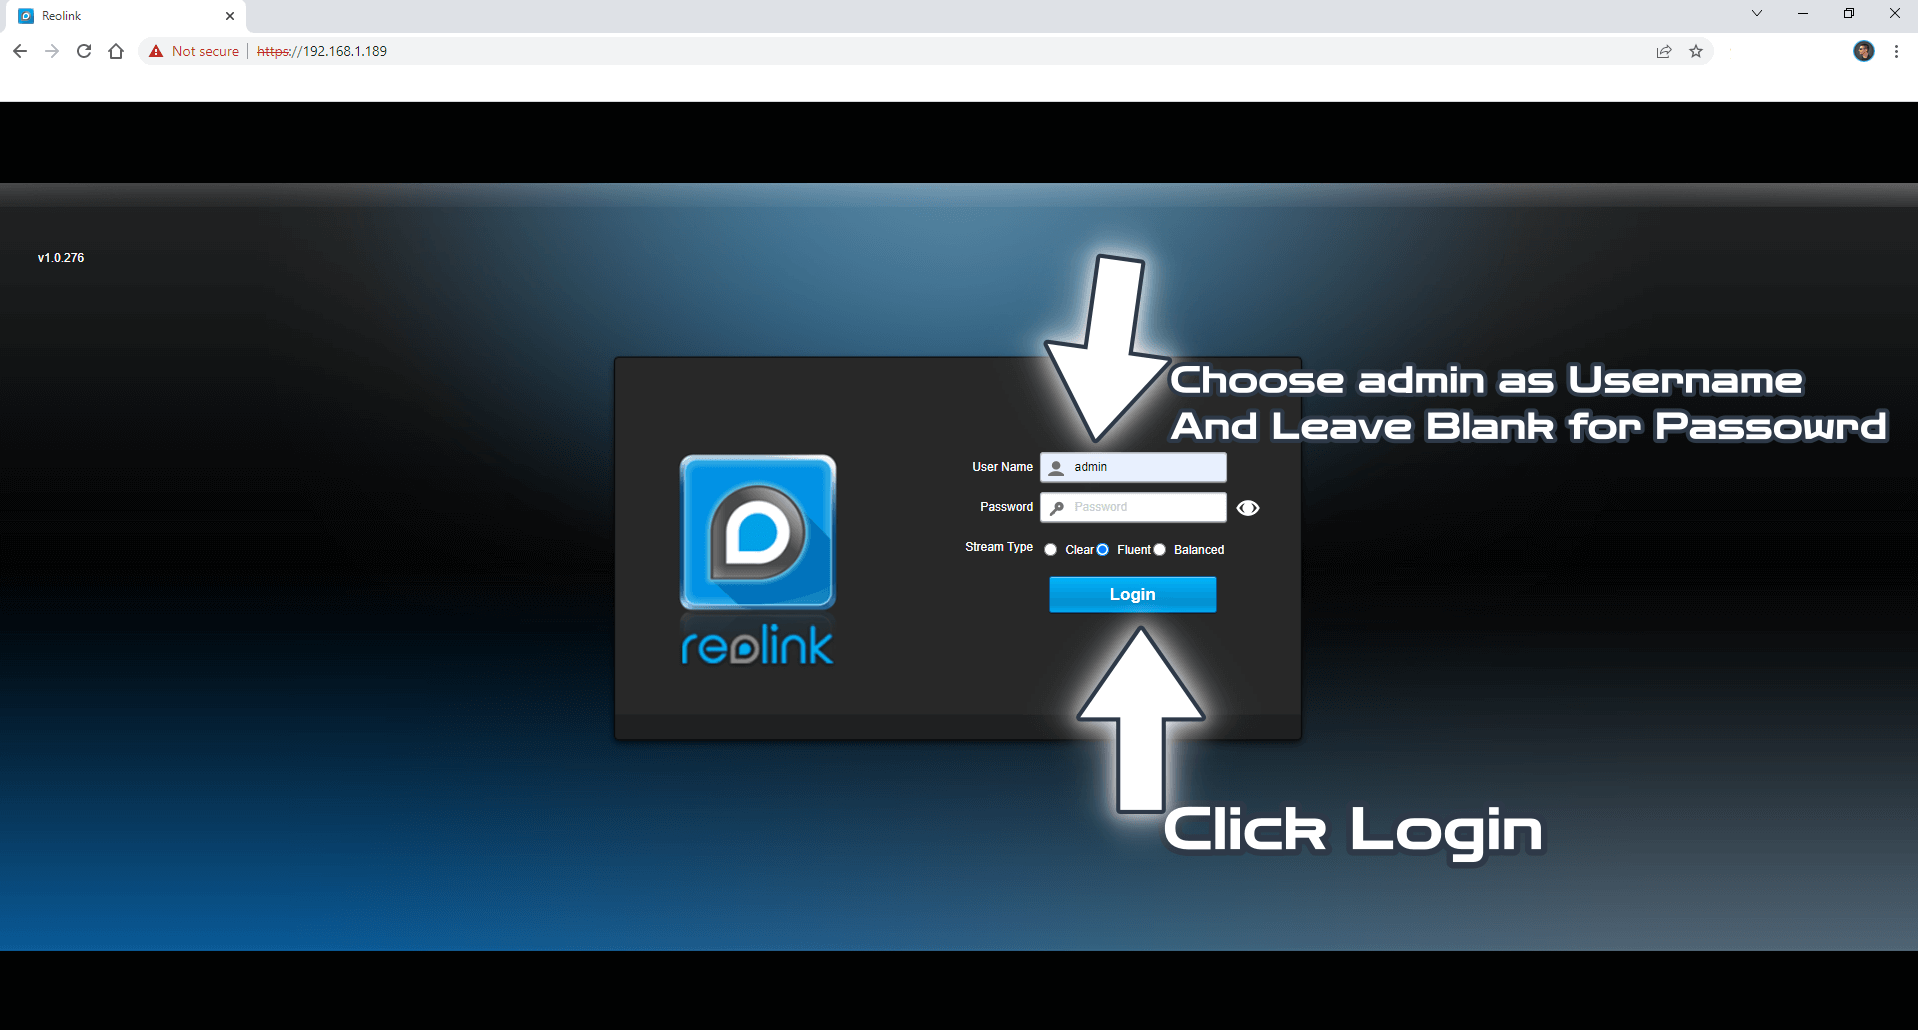
STEP 13
Choose admin as username and leave blank for password. Click Login. Follow the instructions in the image below.
Note: If you have changed your username or password sometime in the past, just type them in in the respective fields. The admin username and the blank password are the standard credentials for Reolink cameras.
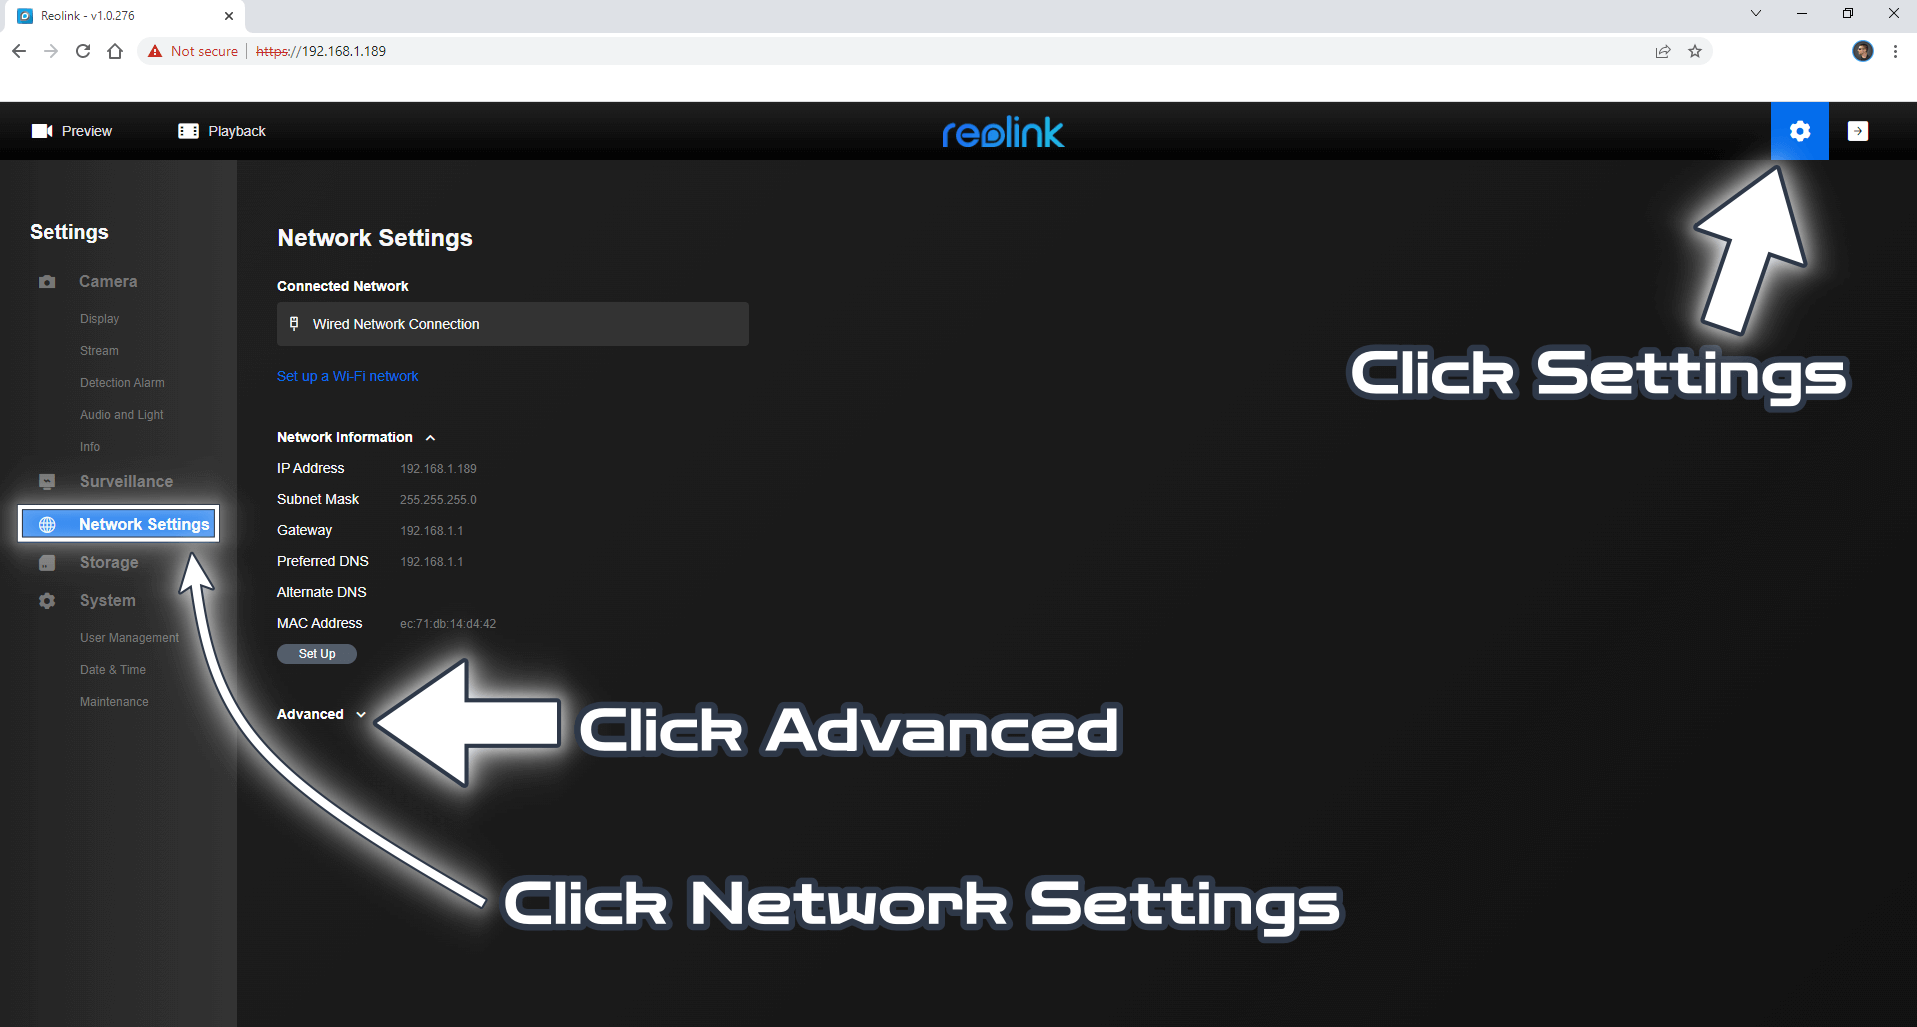
STEP 14
After you log into the Reolink camera, click the gear Settings icon at the top right of the page. On the left sidebar select Network Settings then click Advanced. Follow the instructions in the image below.
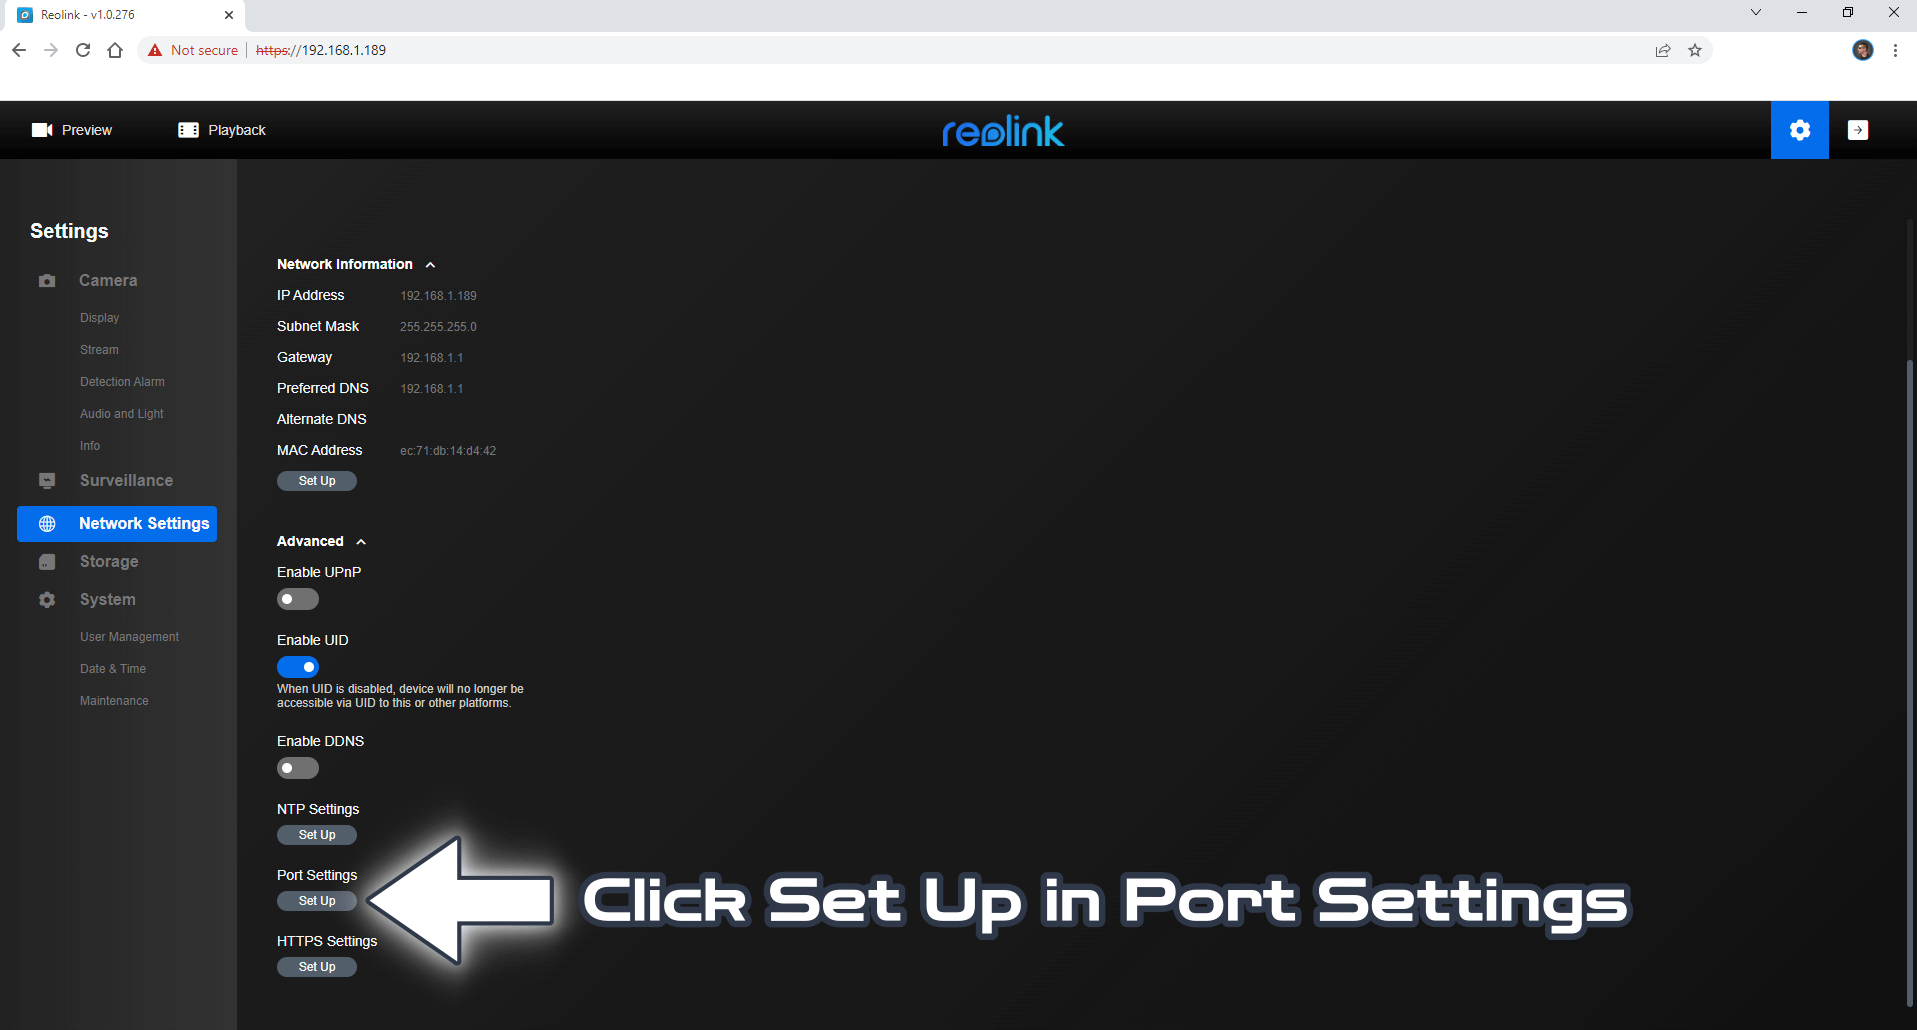
STEP 15
Click Set Up in Port Settings. Follow the instructions in the image below.
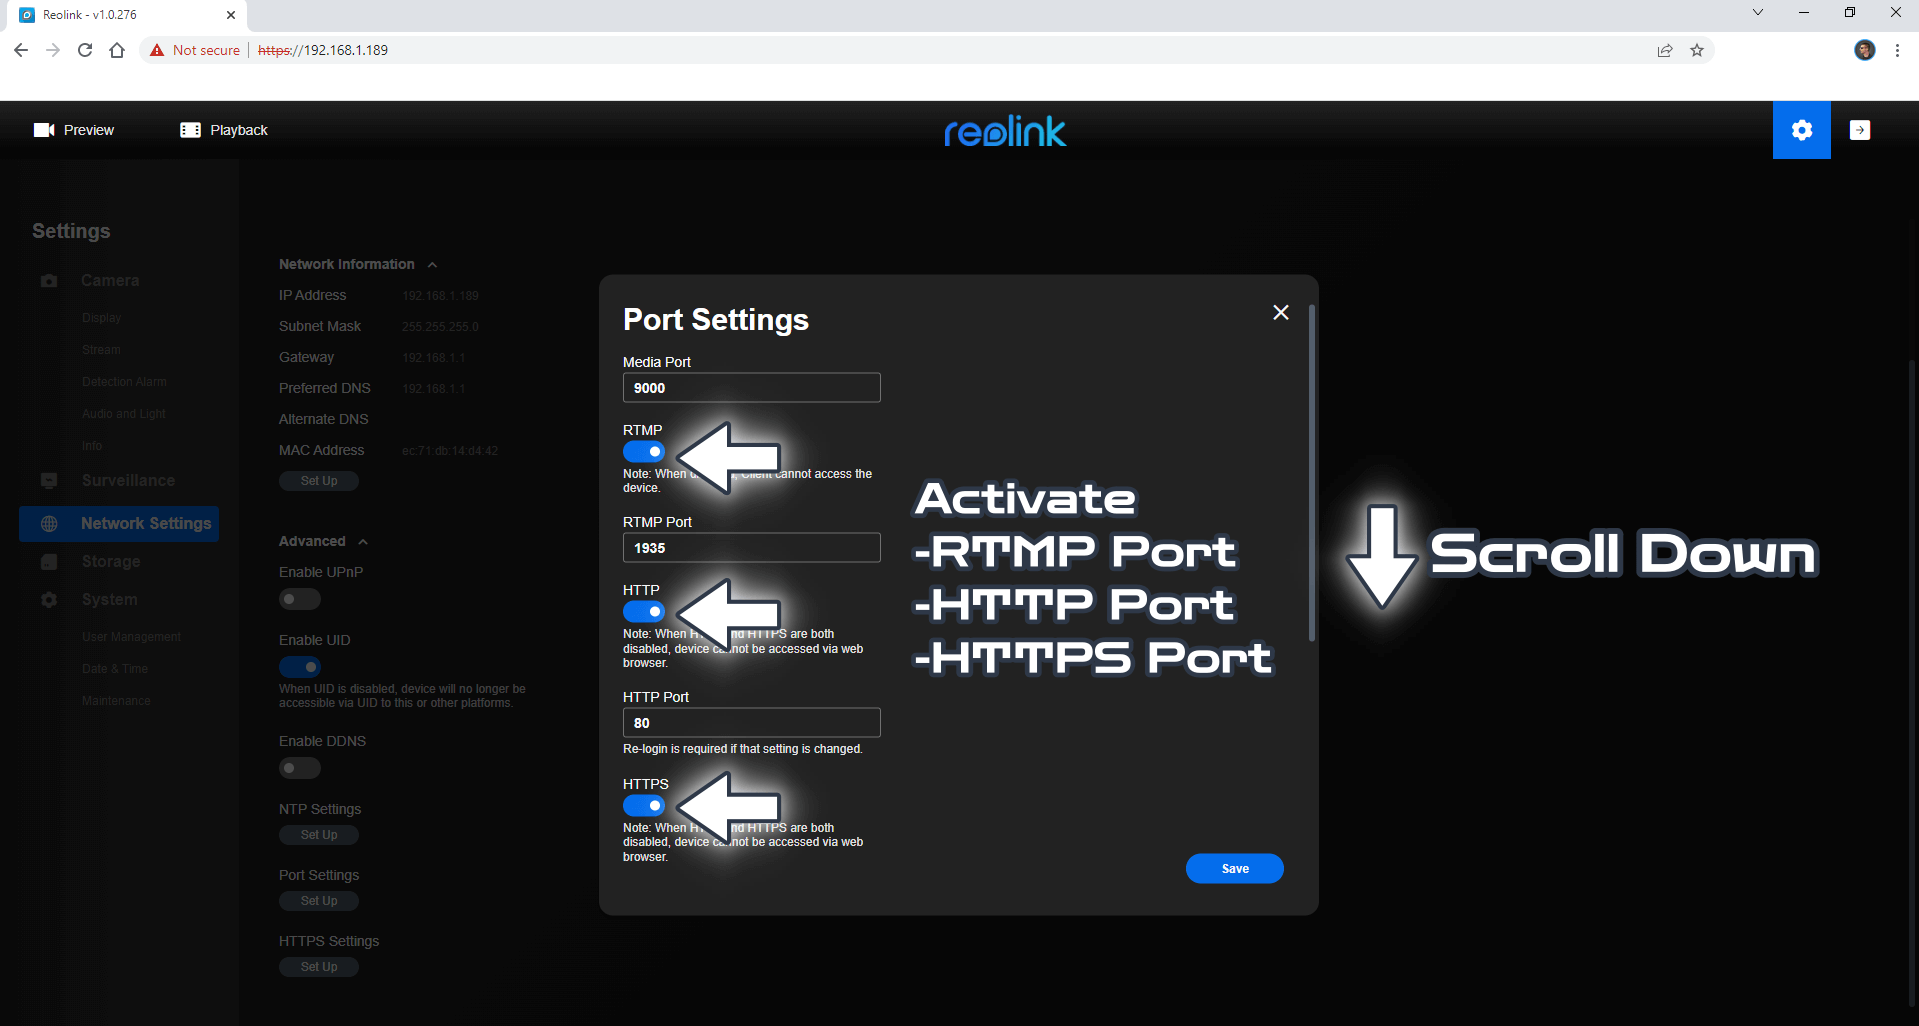
STEP 16
Activate the RTMP port, the HTTP port, and the HTTPS port then scroll down the page. Follow the instructions in the image below.
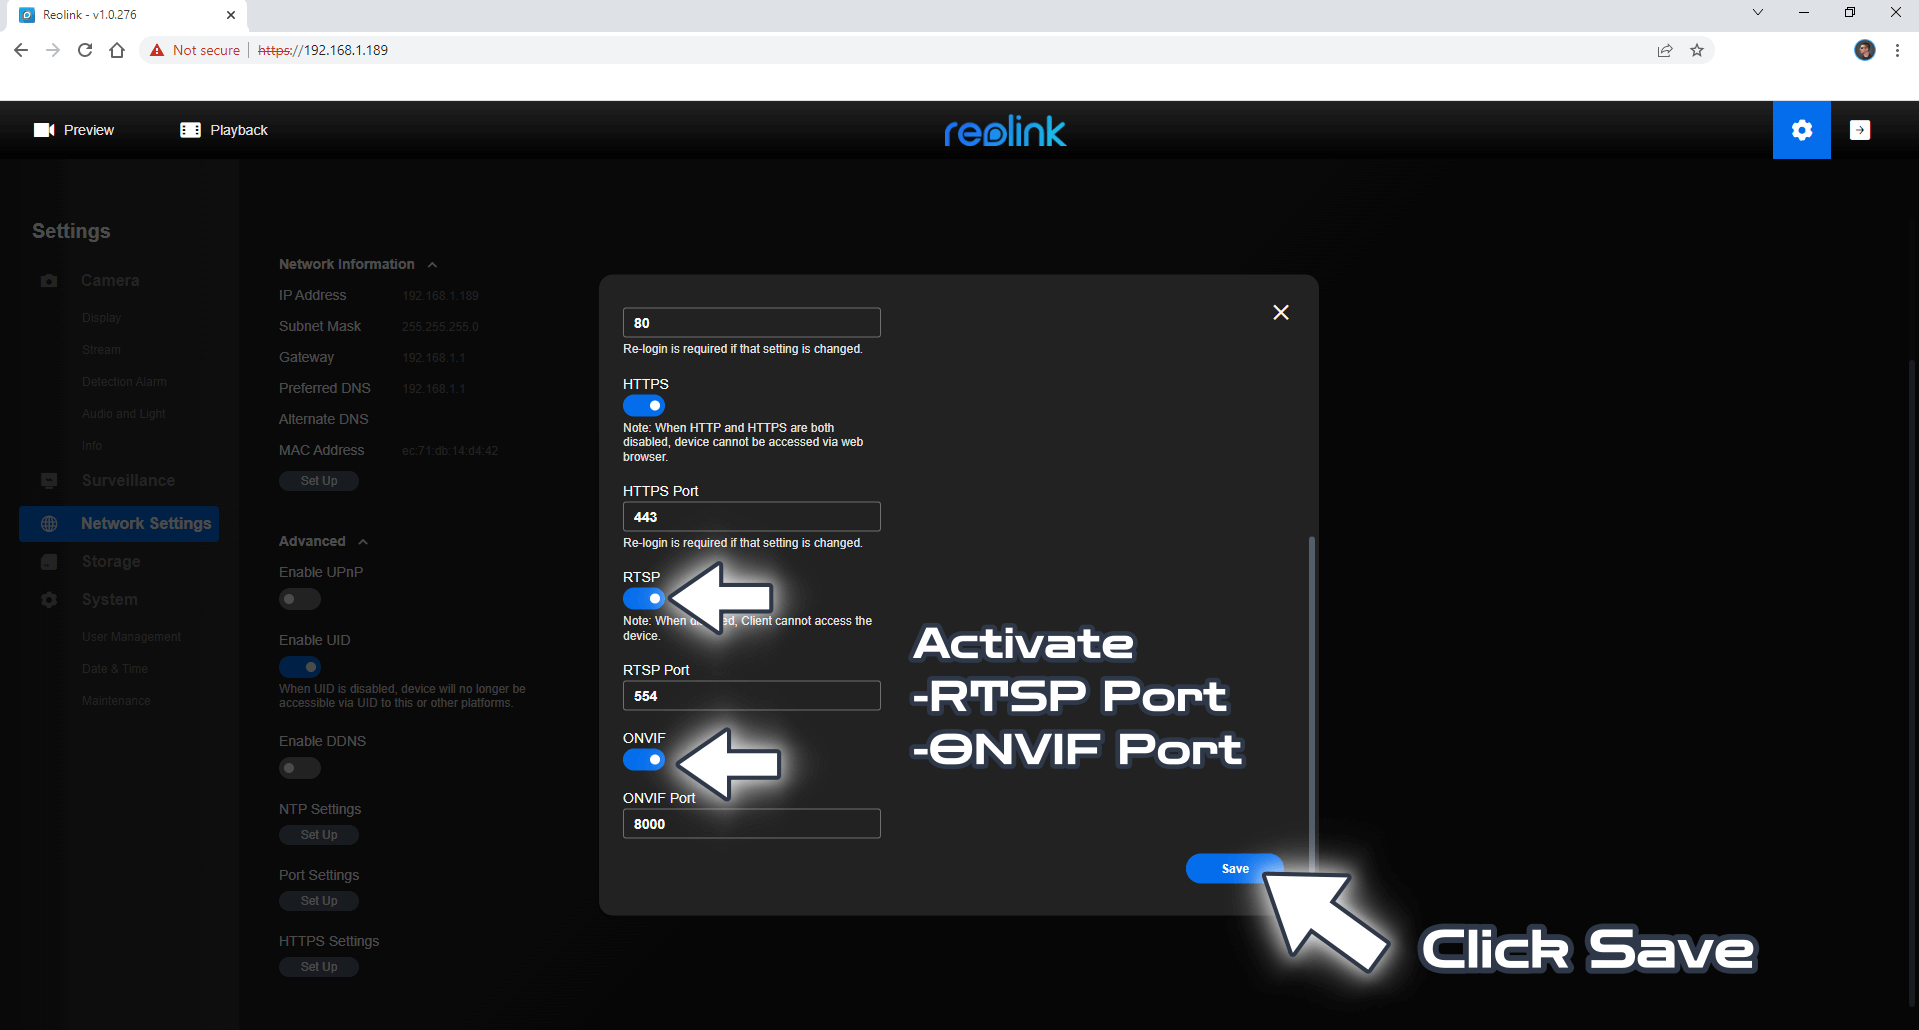
STEP 17
Activate the RTSP Port and the ONVIF Port then click Save. Follow the instructions in the image below.
Note: It’s a good idea to check if all the ports are active after a Firmware update because, if some ports remain inactive, then the camera will not work in Synology Surveillance Station.
STEP 18
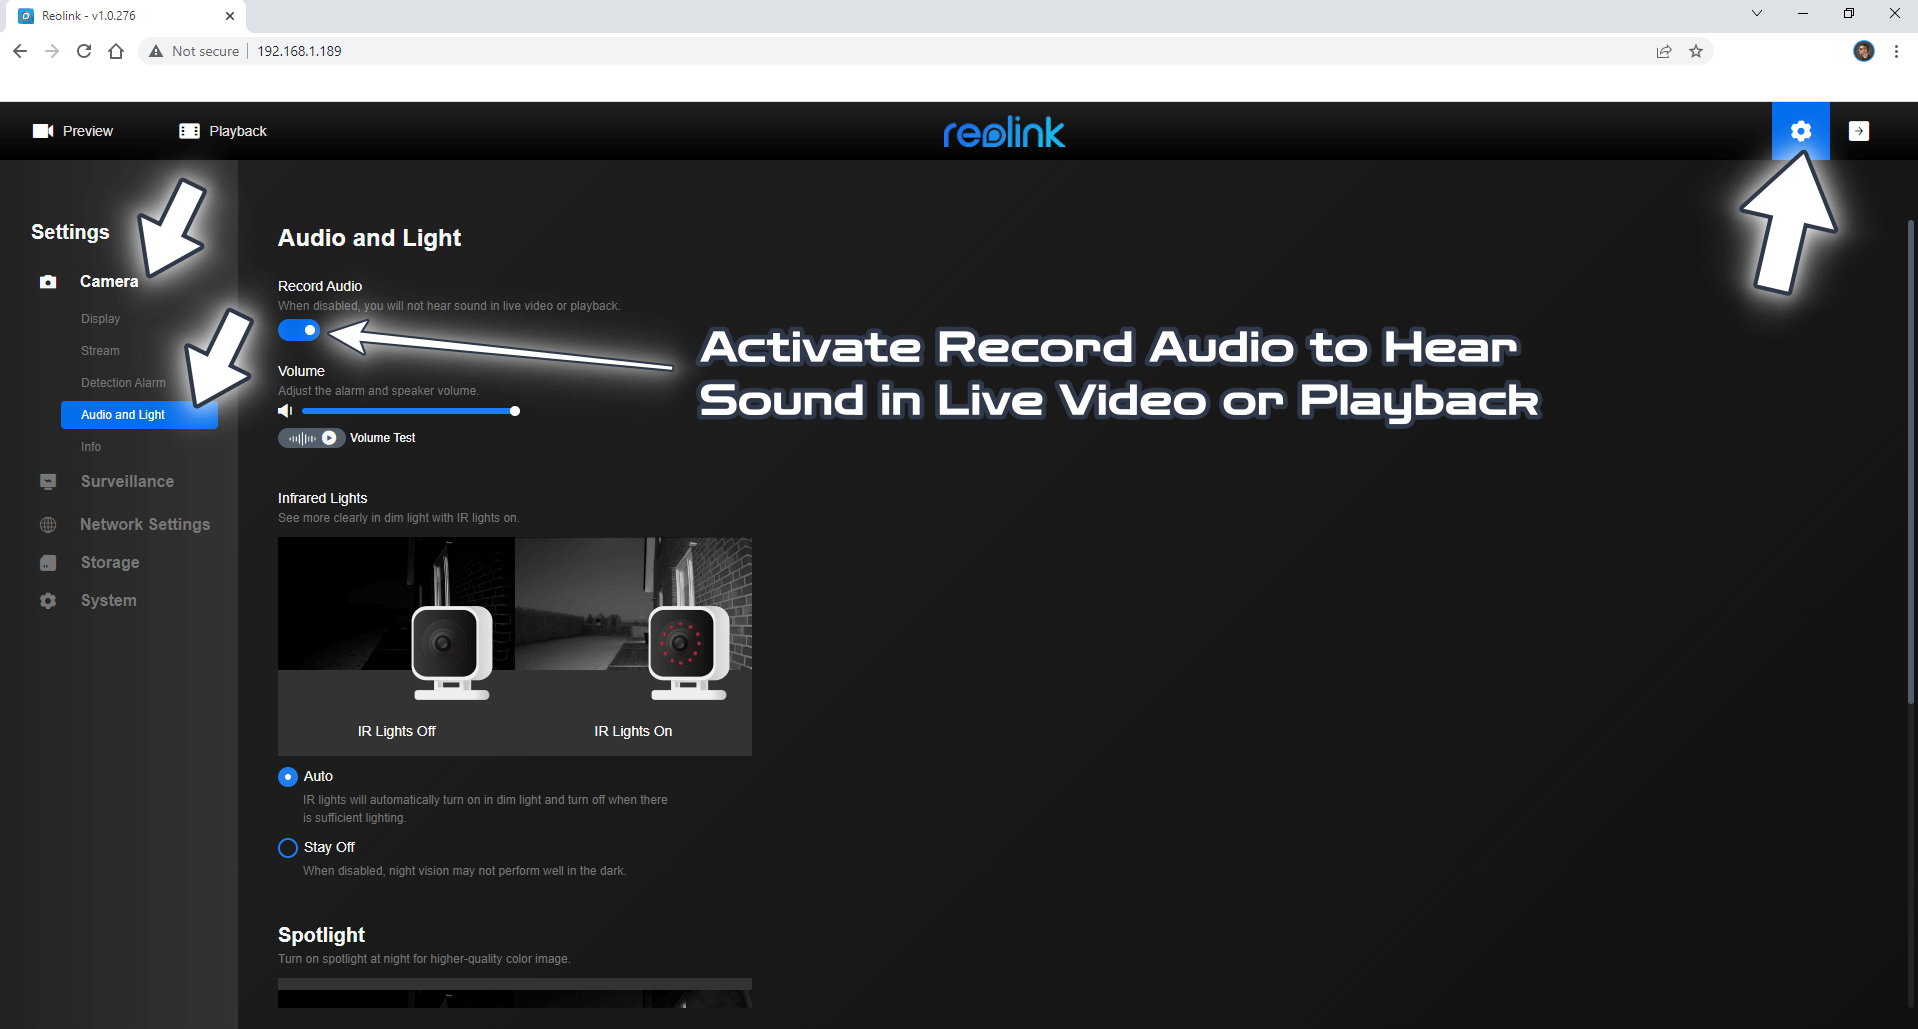
On the left sidebar select Camera then Audio and Light. Activate Record Audio to hear sound in live video or playback. Follow the instructions in the image below.
Note: It’s a good idea to check if the Record Audio option is active after a Firmware update because some firmware updates can deactivate that option by default. I want the audio in my videos!
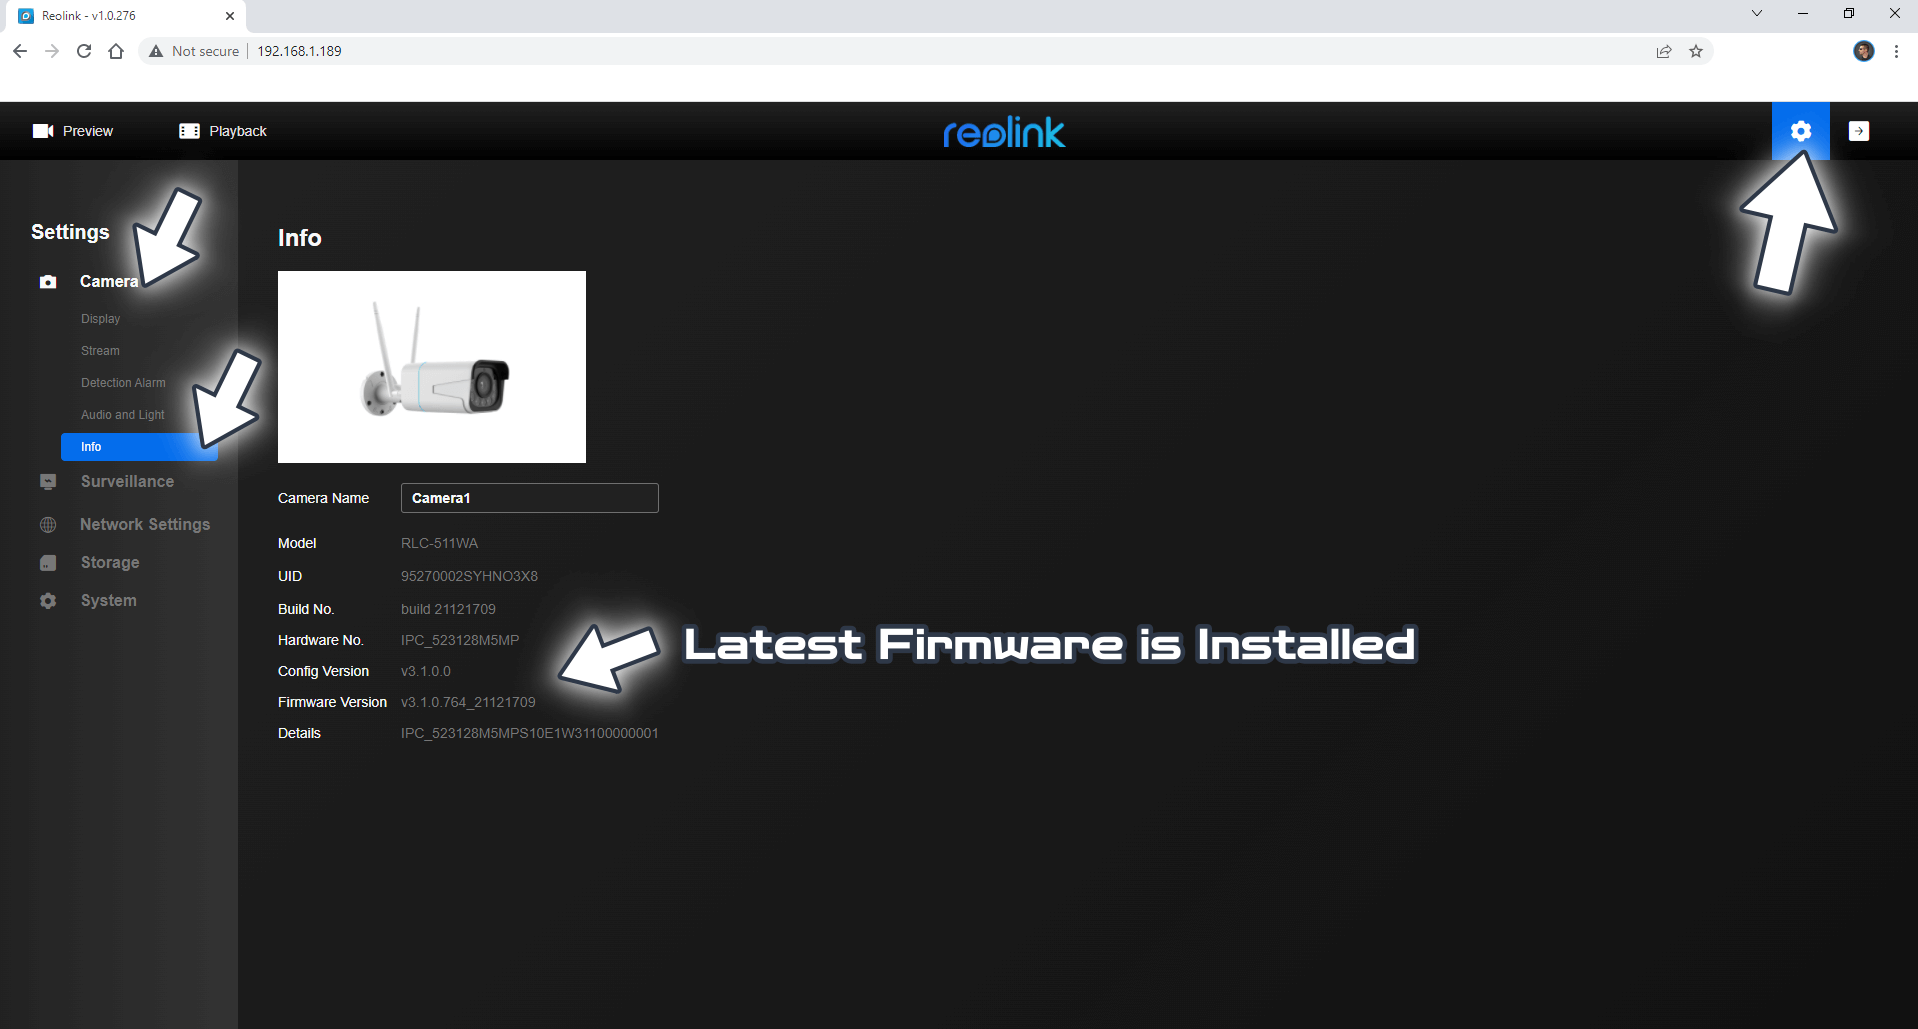
STEP 19
Check if the latest firmware is correctly installed. Follow the instructions in the image below.
Enjoy your Reolink Camera with the updated Firmware in Synology Surveillance Station!
Now you can go back to your Synology Surveillance Station Software and see if your Reolink camera works as expected after the firmware update.
Note: Difference Between NAS and NVR.
Note: Reolink Cameras for the Synology DVA3221 NVR.
Note: How to Add Reolink Cameras to Surveillance Station.
Note: Night Vision With Reolink Cameras.
Note: How to Set Up Reolink Camera Spotlight Schedule.
Note: How to Set Up Reolink Cameras Alarm.
Note: How to Remove Reolink Logo.
Note: How to Activate Reolink Camera Color at Night.
Note: Maintenance Of The Reolink Camera.
Note: How to Change Reolink Camera Password.
This post was updated on Wednesday / August 10th, 2022 at 10:30 PM