One of the most important things all users should do when they buy a Reolink camera for video surveillance is to change the default password and create a new user that is not admin. Once you do this, you just change the credentials in Synology Surveillance Station so that the camera continues to do its work in the background, but with an extra layer of security. In today’s article I will teach you how to change your Reolink camera password and how to add a new administrator user.
STEP 1
Please Support My work by Making a Donation.
STEP 2
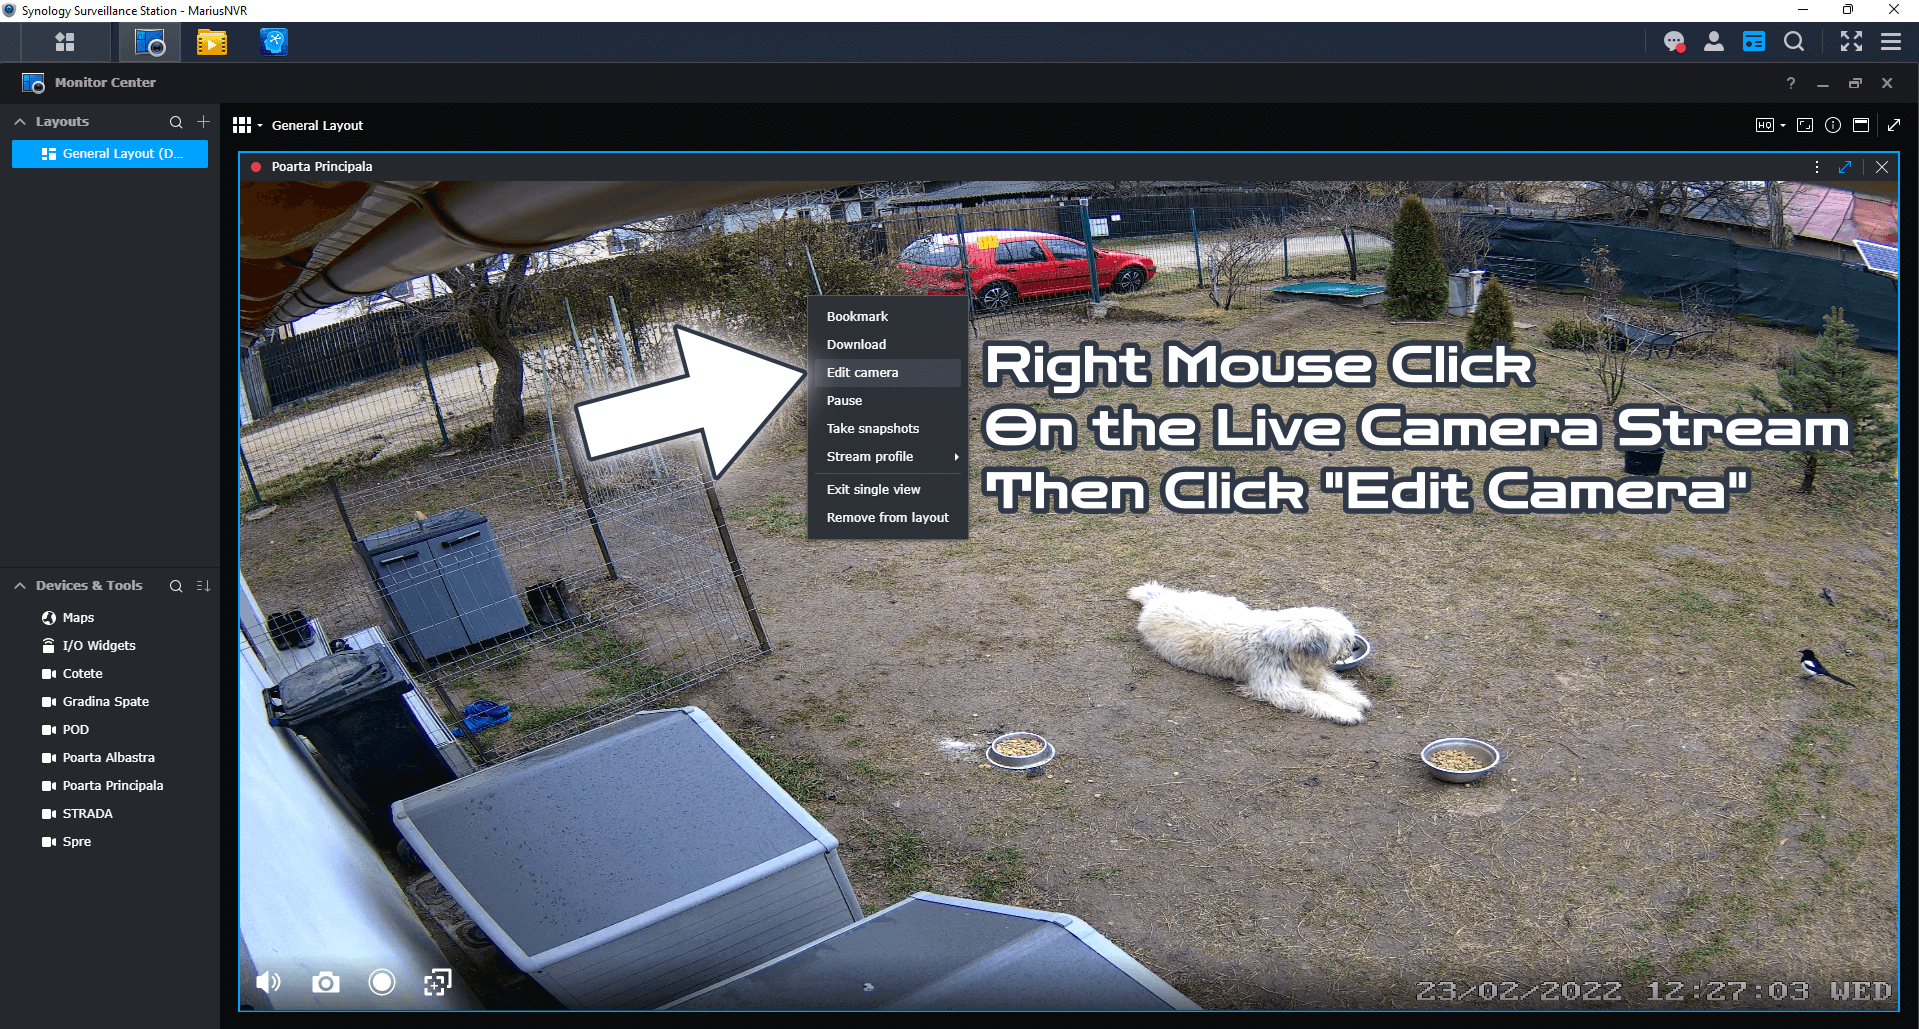
Open Synology Surveillance Station and select the Reolink camera for which you want to change the password. Right mouse click on the live camera stream then click Edit Camera. Follow the instructions in the image below.
STEP 3
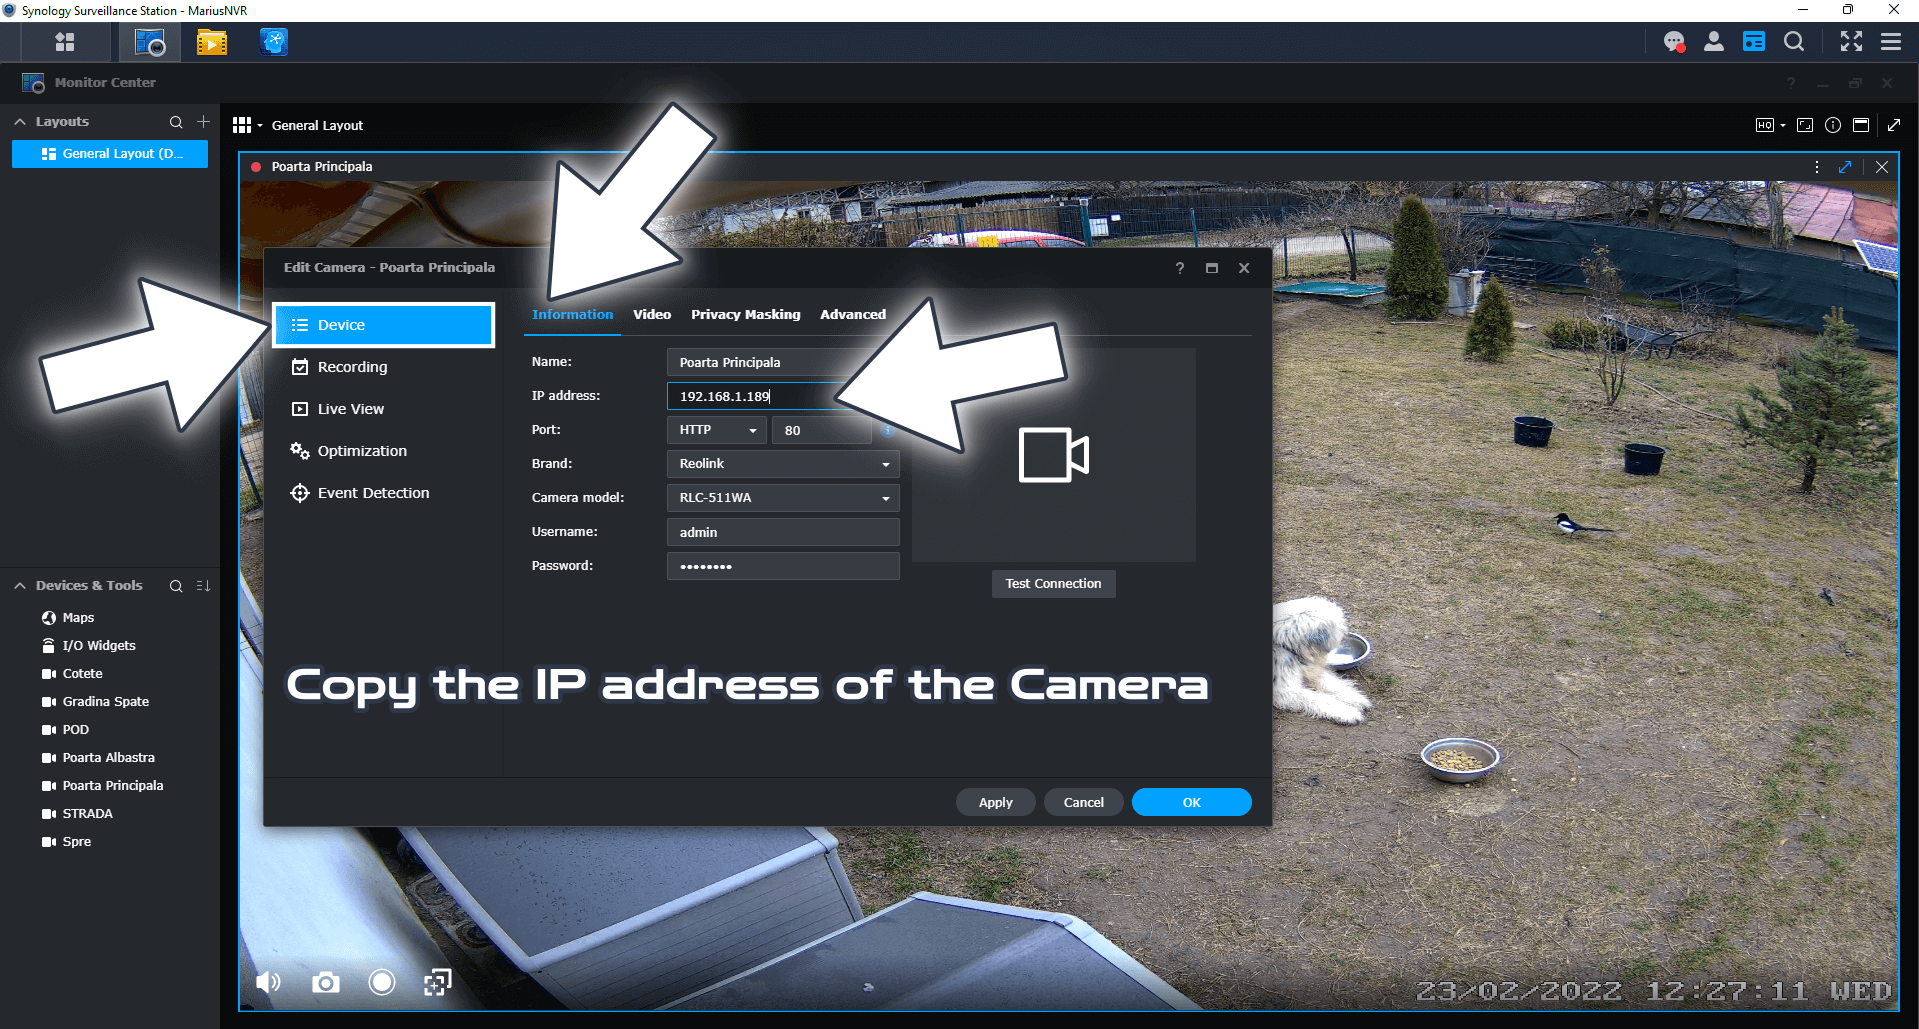
After you click Edit Camera on STEP 2, a new window will open. Click on Device / Information tab / copy the IP address of the camera. Follow the instructions in the image below.
STEP 4
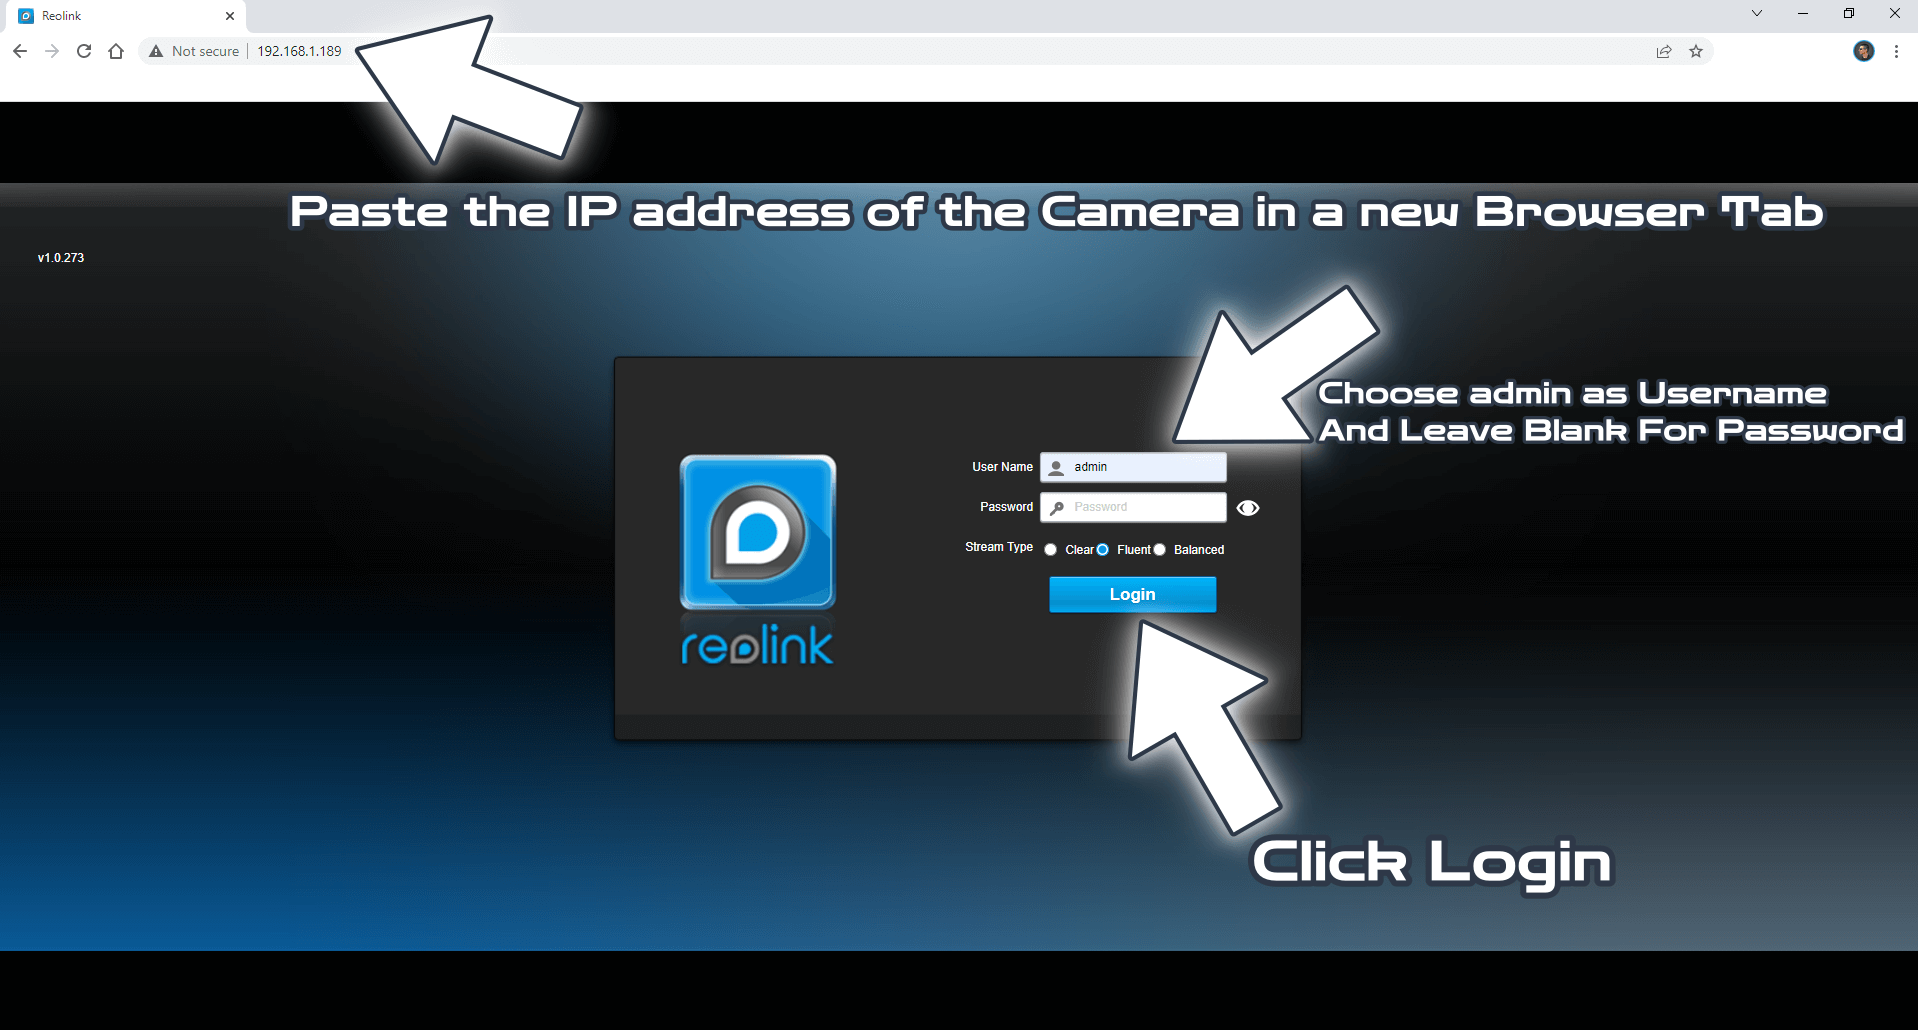
Paste the IP address of the camera in a new Browser tab. Choose admin as username and leave blank for password. Click Login. Follow the instructions in the image below.
STEP 5
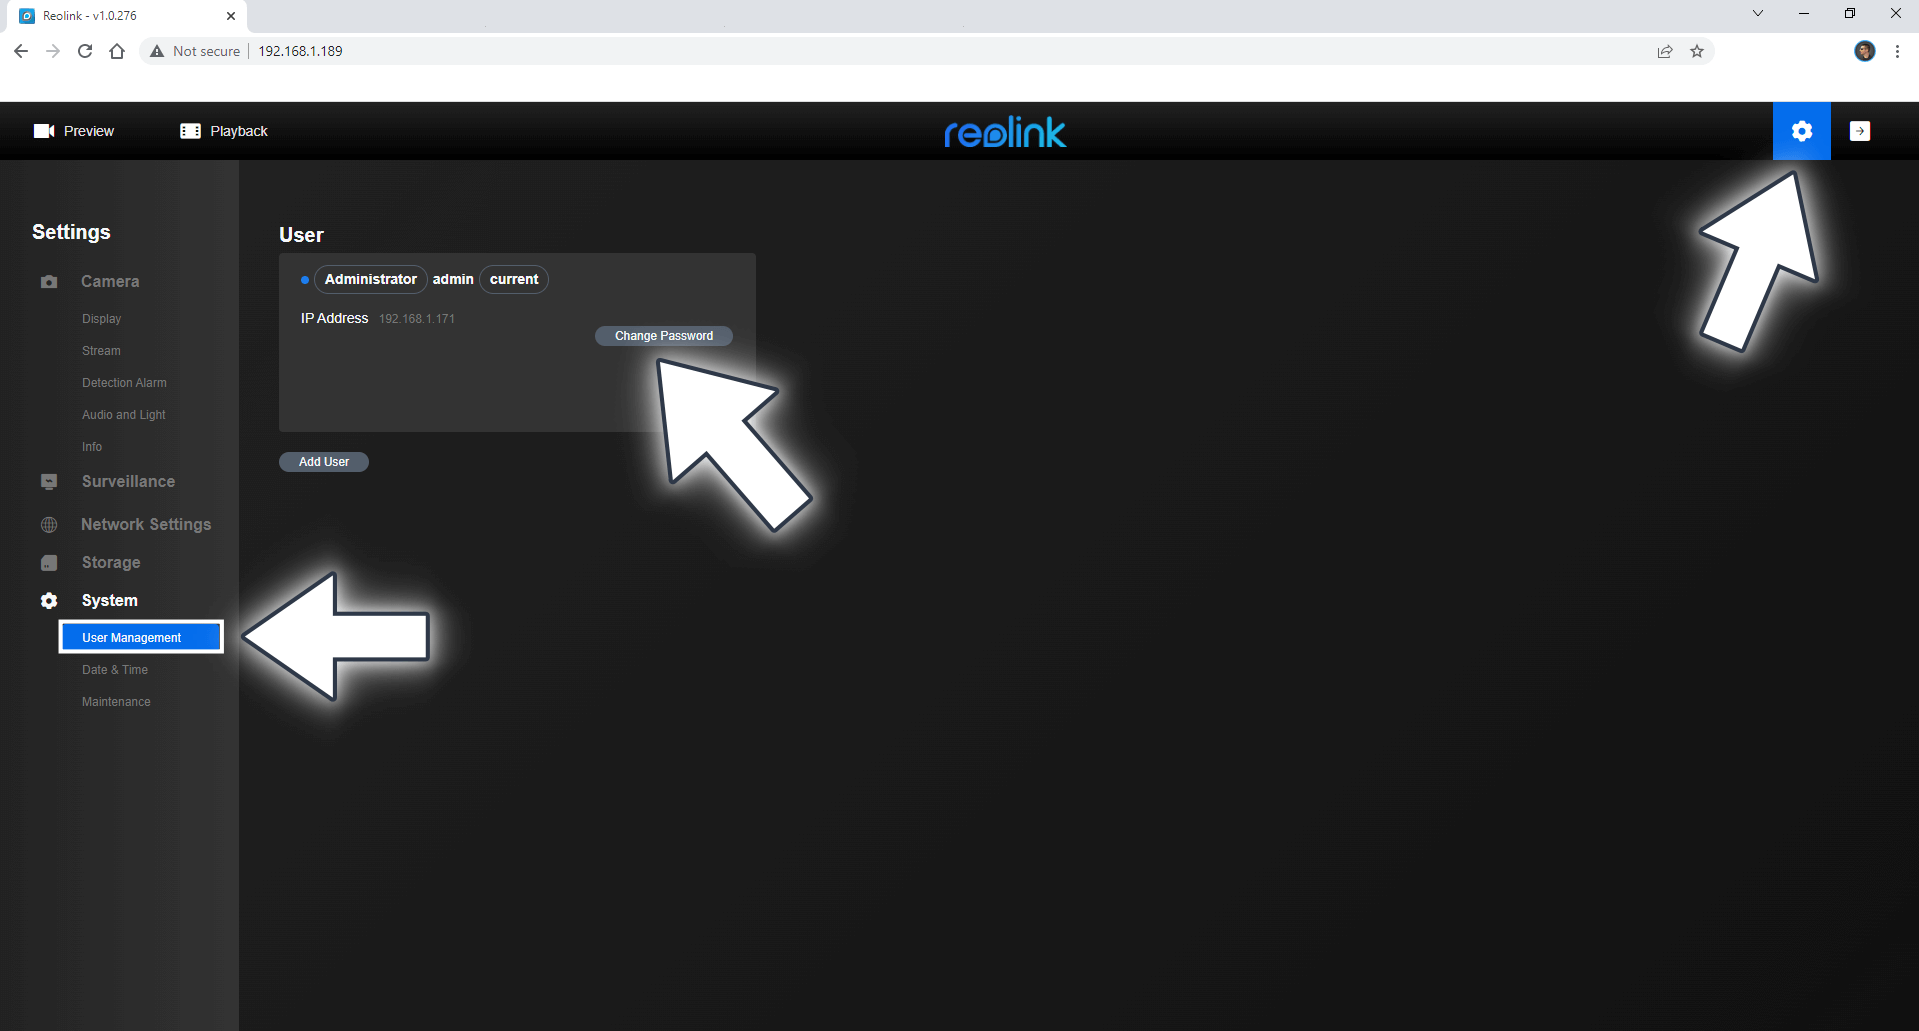
After you log into the Reolink camera, click the gear Settings icon at the top right of the page. On the left sidebar select System then User Management. Click Change Password to change the current “blank” password for the admin user. Follow the instructions in the image below.
STEP 6
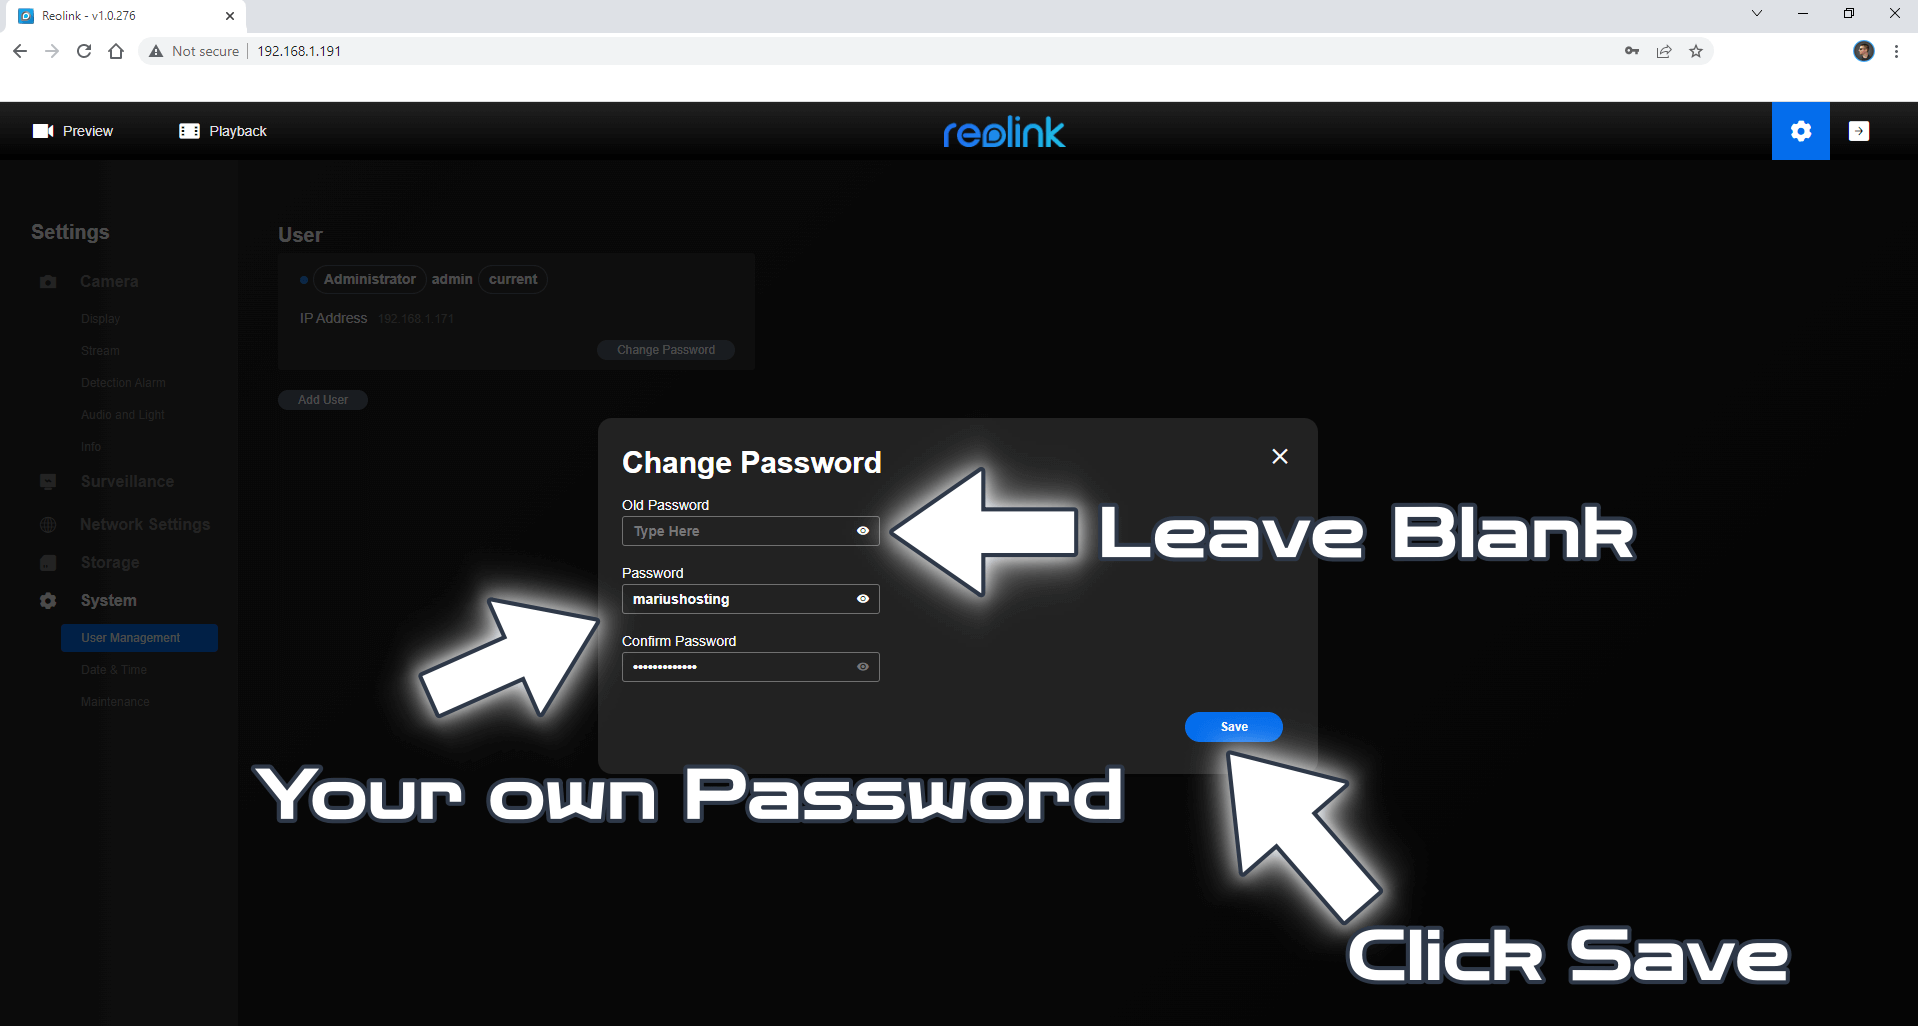
Leave the Old Password field blank, then type in your new password in the Password field. Click Save. Follow the instructions in the image below.
STEP 7
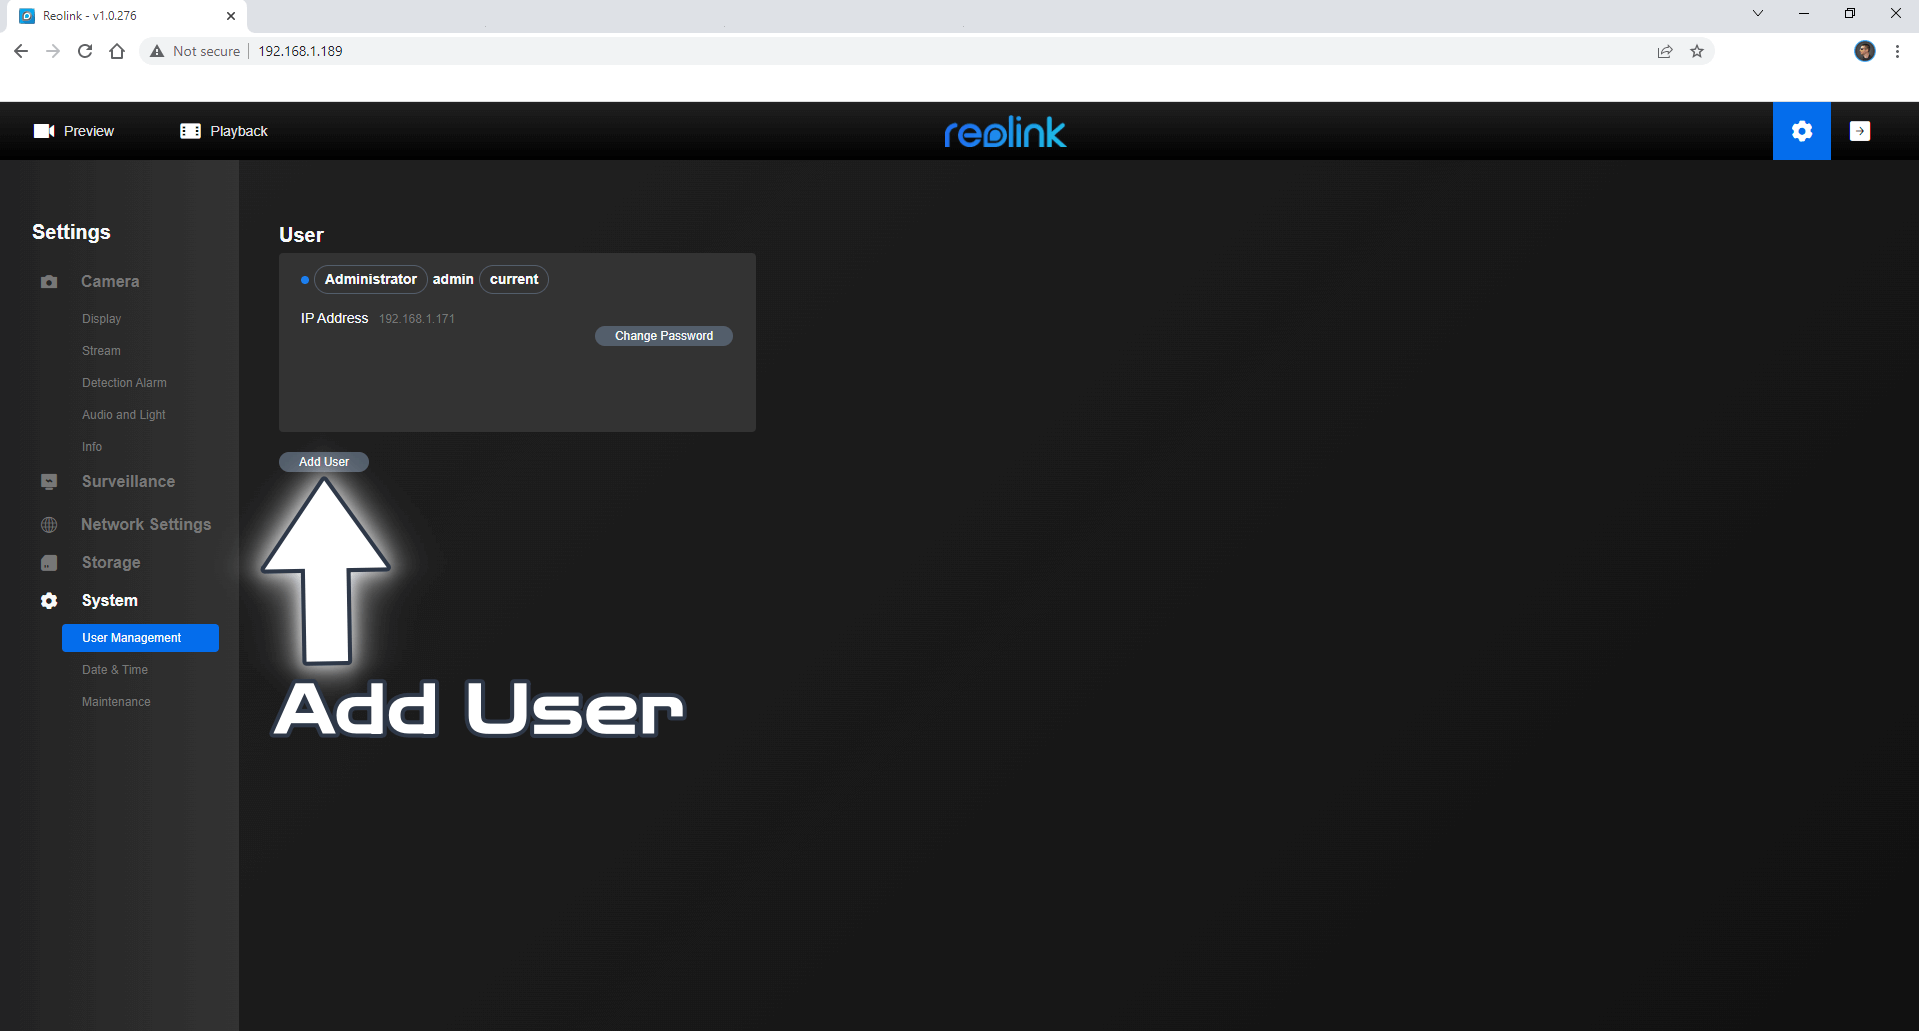
After you have changed the default admin password, click “Add User” to add a new user with administrator privileges. Follow the instructions in the image below.
STEP 8
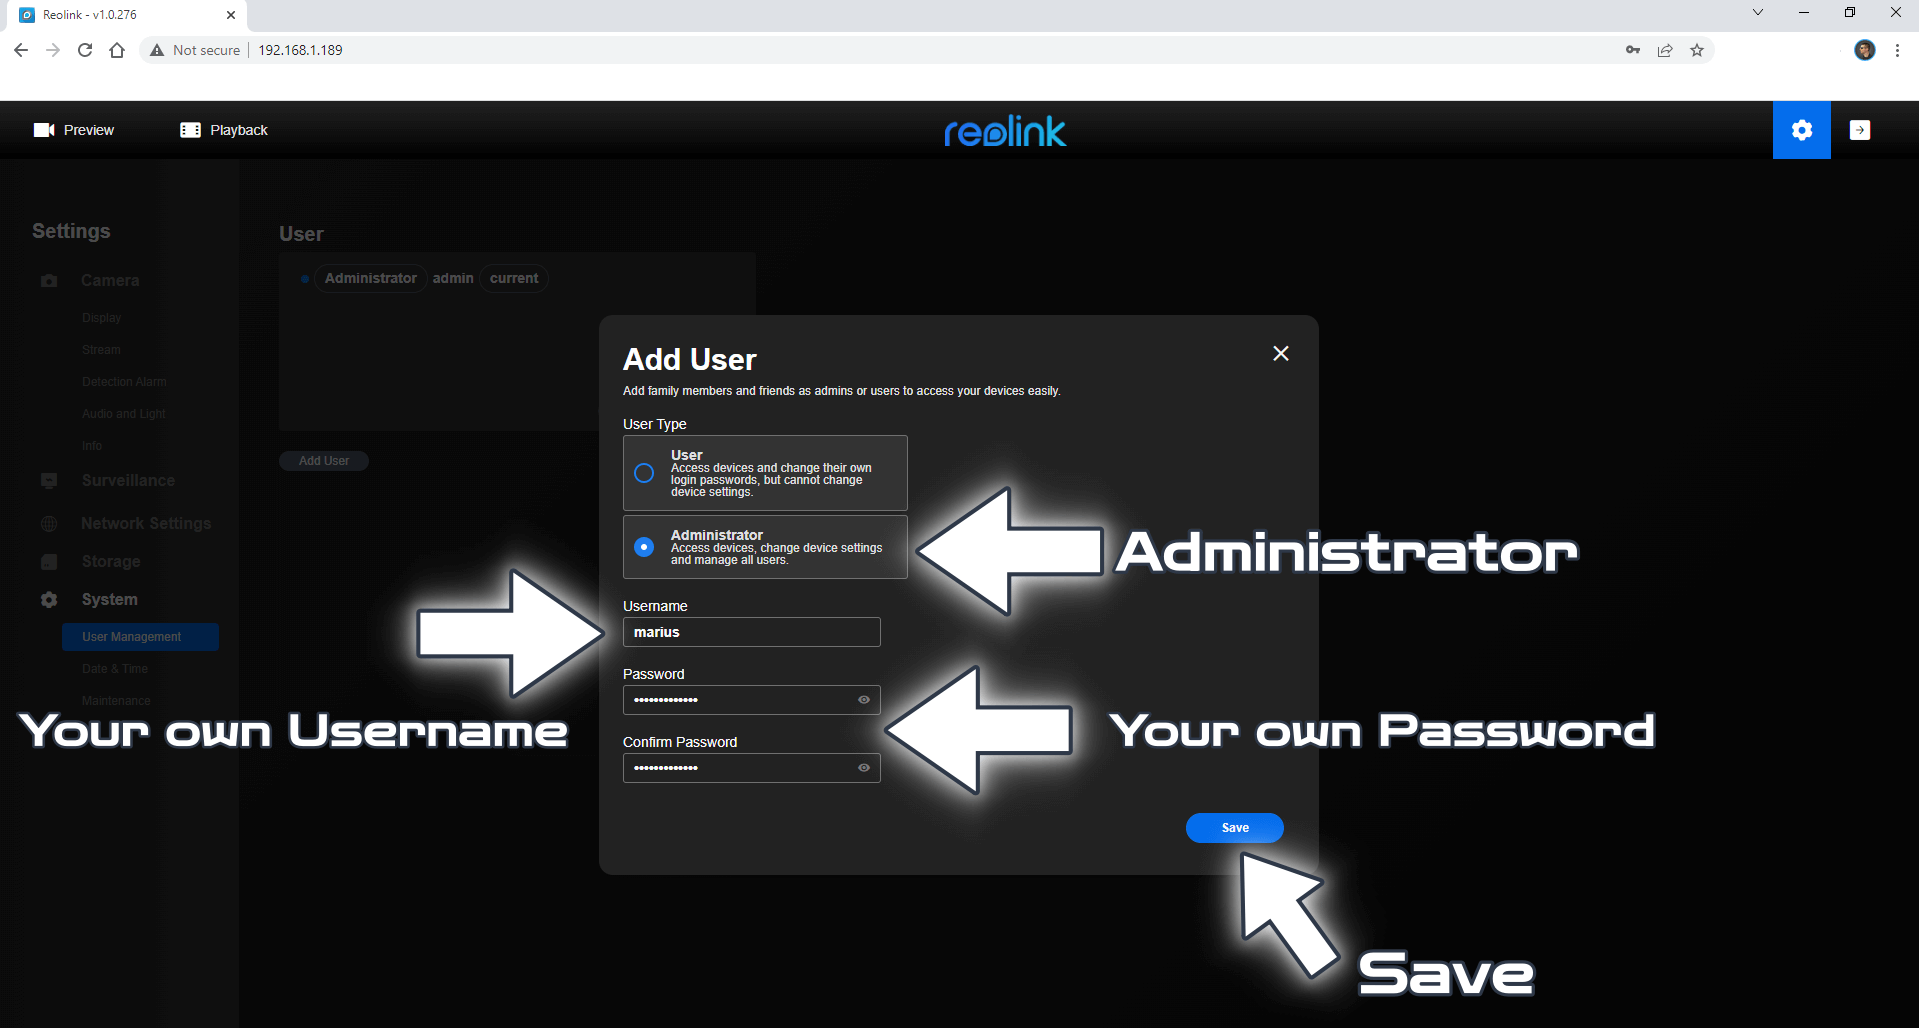
After you click Add User at STEP 7 choose the Administrator as User Type, then add your own Username and new Password for that user. Click Save. Follow the instructions in the image below.
STEP 9
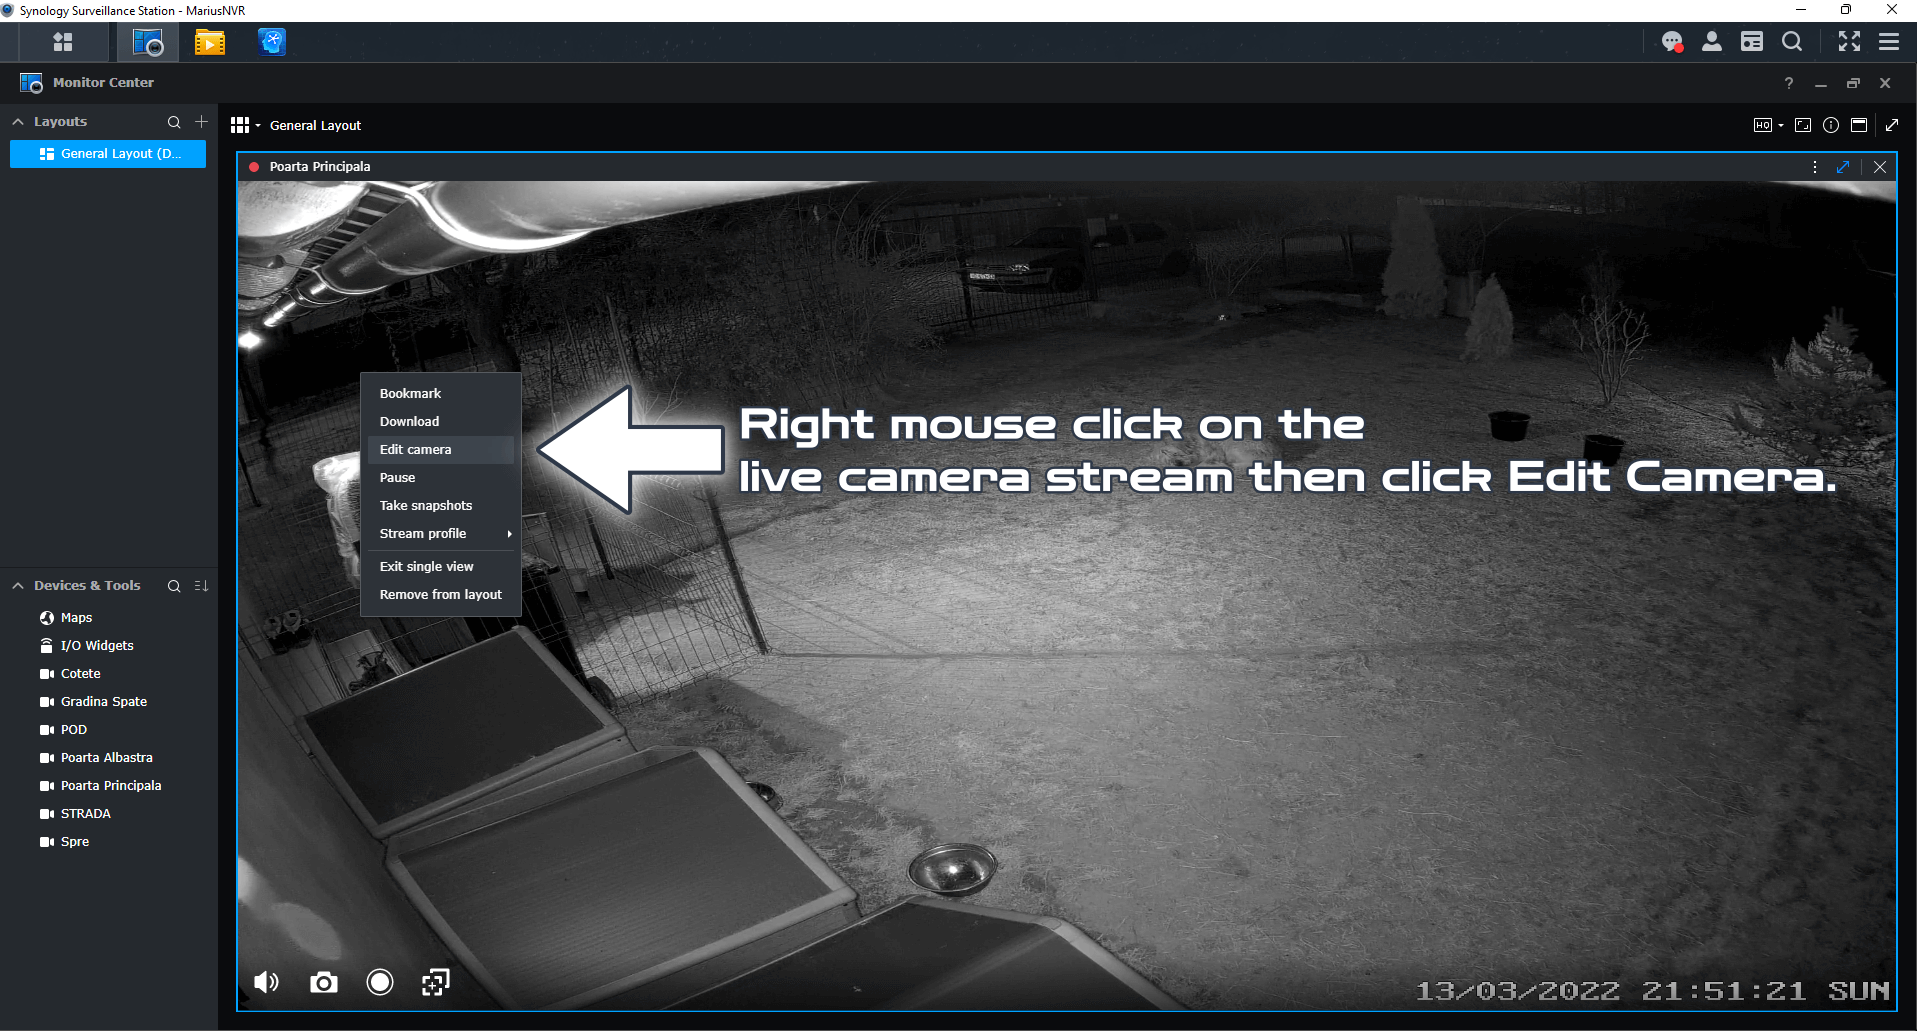
Go back to Surveillance Station. Right click on the live camera stream then click Edit Camera. Follow the instructions in the image below.
STEP 10
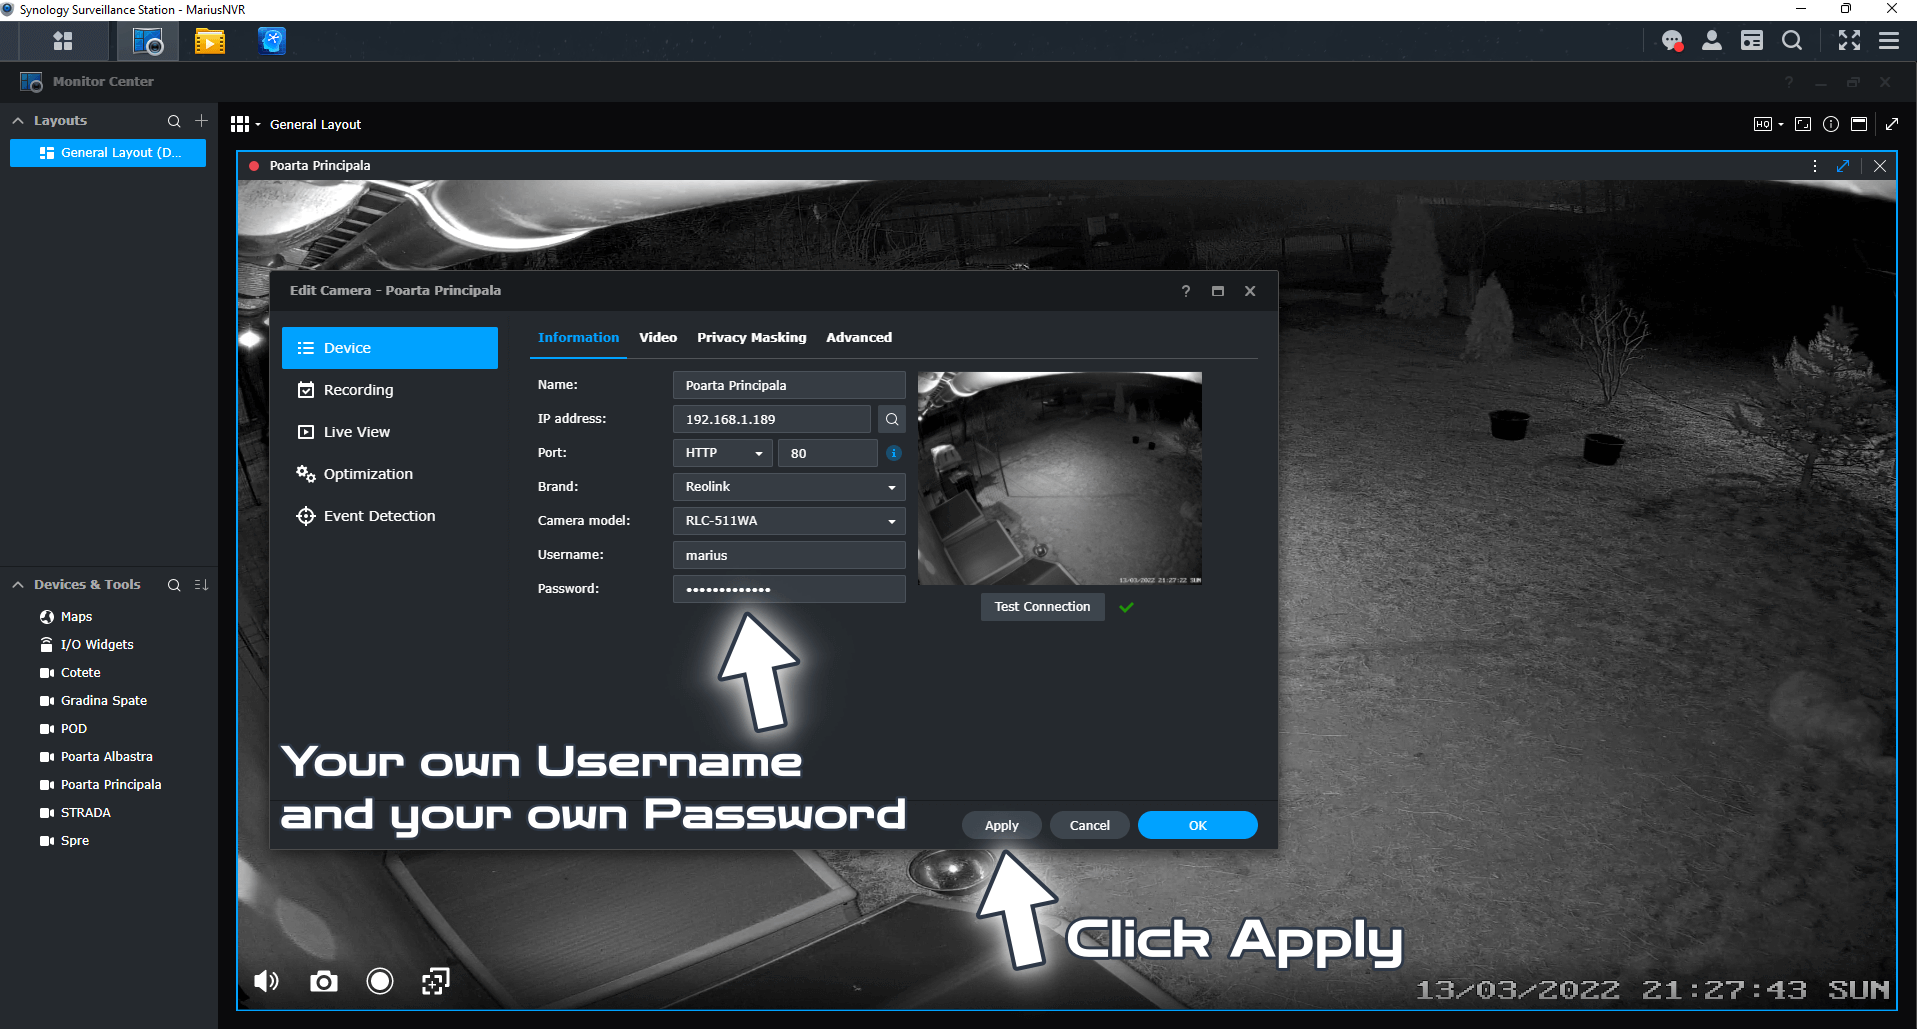
Click on Device / Information tab and add your own Username and Password you have created at STEP 8 then click Apply. Follow the instructions in the image below.
Note: Difference Between NAS and NVR.
Note: Reolink Cameras for the Synology DVA3221 NVR.
Note: How to Add Reolink Cameras to Surveillance Station.
Note: Night Vision With Reolink Cameras.
Note: How to Update Reolink Camera Firmware.
Note: How to Set Up Reolink Camera Spotlight Schedule.
Note: How to Remove Reolink Camera Logo.
Note: Maintenance Of The Reolink Camera.
This post was updated on Wednesday / August 10th, 2022 at 10:32 PM
