A few days ago I taught you how to Reverse Proxy an IP camera using your Synology NAS. Today I will teach you how to Reverse Proxy your router using the NAS. There may be instances when you may need to access the administration panel of your router, for instance, you might be on vacation and find yourself needing to access your home router remotely. In today’s example I will Reverse Proxy into the RT6600ax Synology router using my Synology NAS. Even if you have a different router, this operation can still be done by paying special attention to the notes at STEP 7.
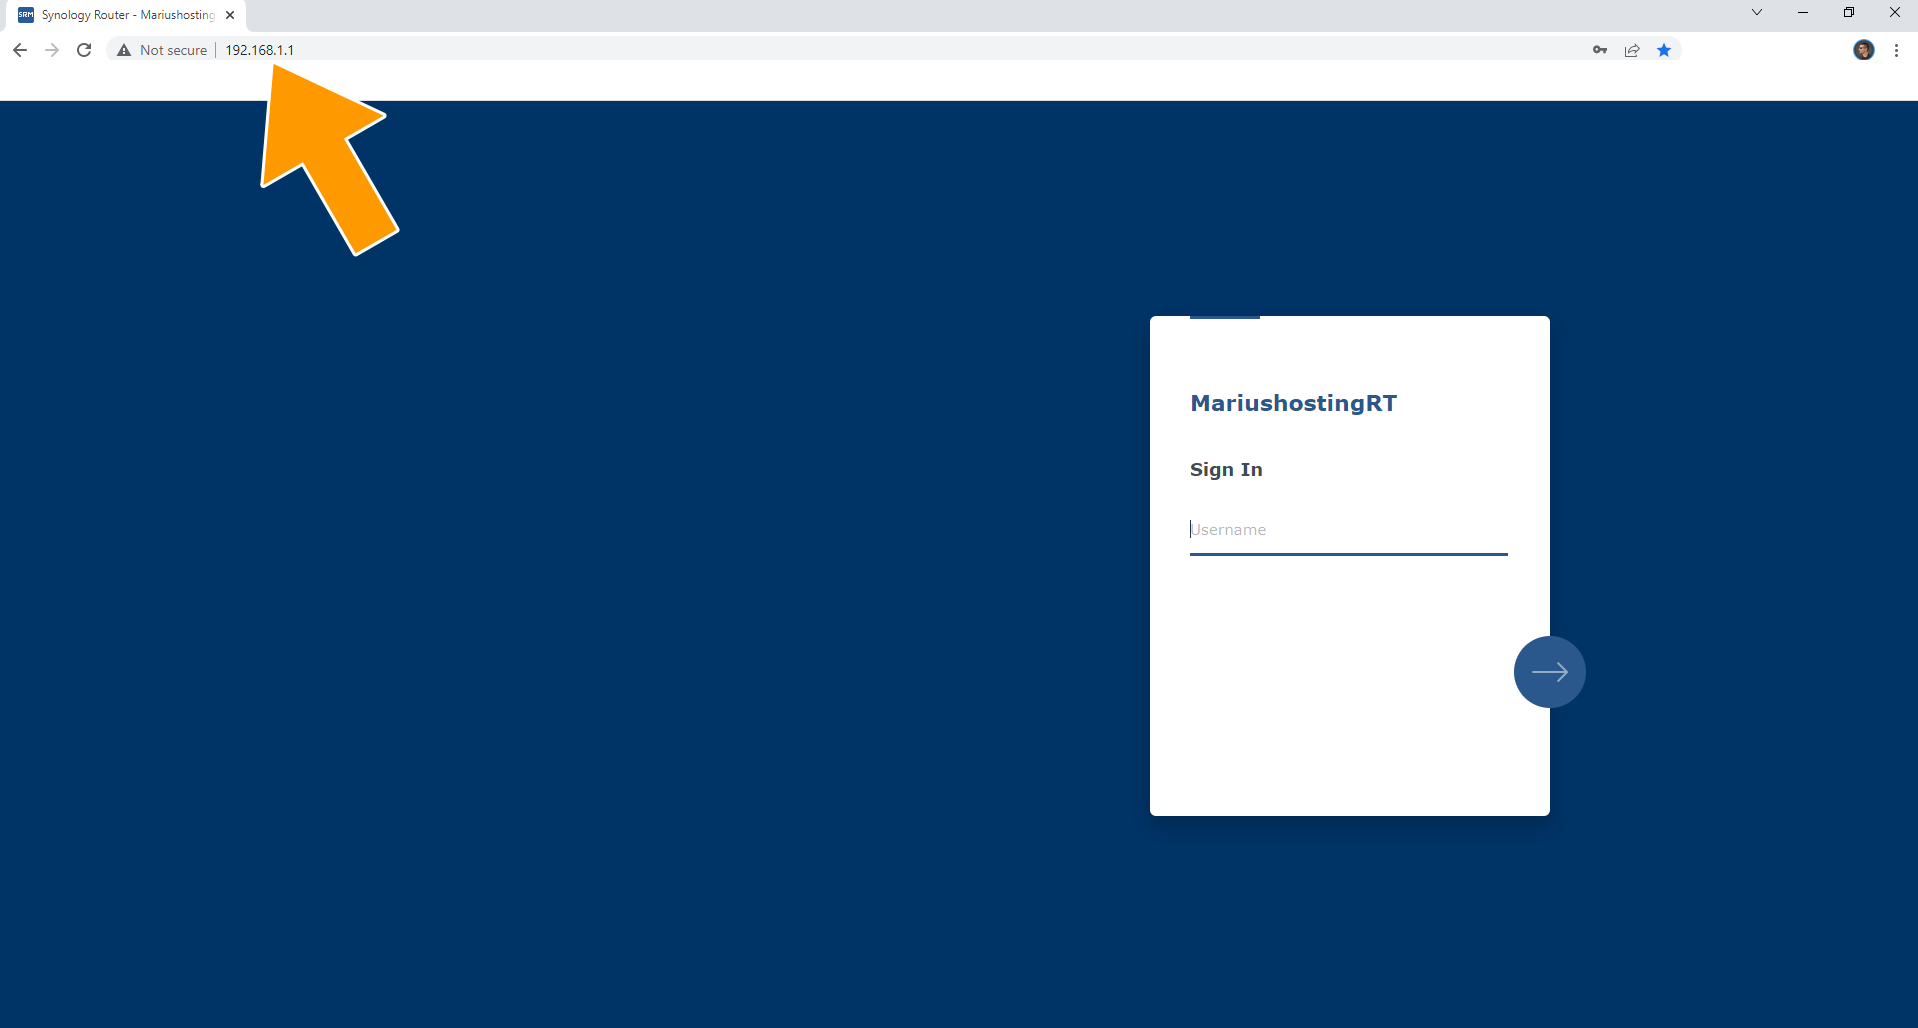
Look at the screenshot below. You generally connect to your router via browser using the standard local IP 192.168.1.0 In my case, considering that I have a Synology router, I am accessing it via the local IP 192.168.1.1 Your router may have a totally different local IP address so, for this reason, I encourage you to look behind your router and identify the local IP address needed for the connection.
STEP 1
Please Support My work by Making a Donation.
STEP 2
Make sure you have a synology.me Wildcard Certificate. Follow my guide to get a Wildcard Certificate. If you already have a synology.me Wildcard certificate, skip this STEP.
STEP 3
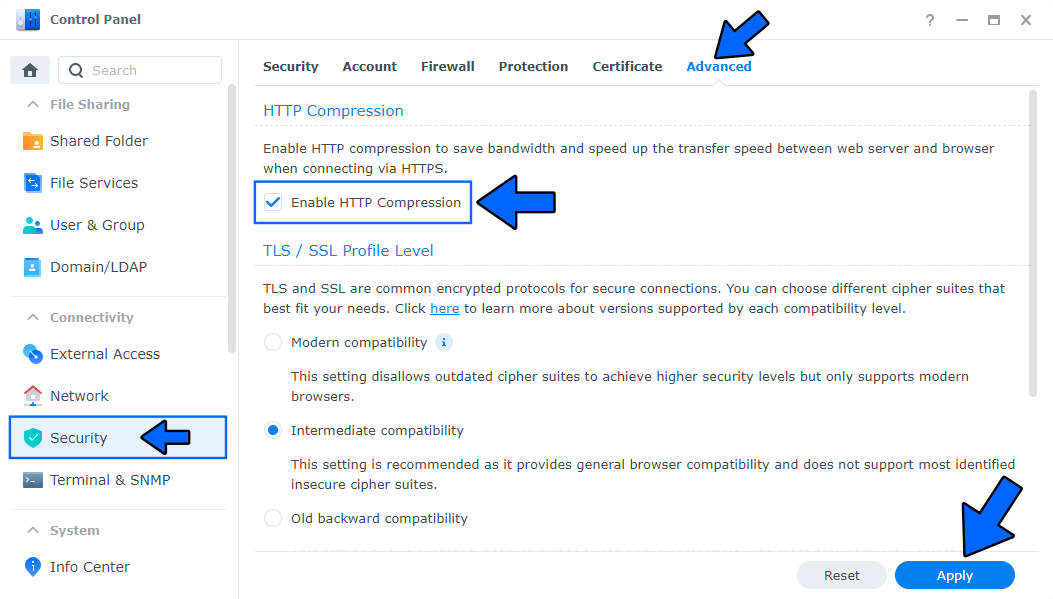
Go to Control Panel / Security / Advanced tab/ Check Enable HTTP Compression then click Apply. Follow the instructions in the image below.
STEP 4
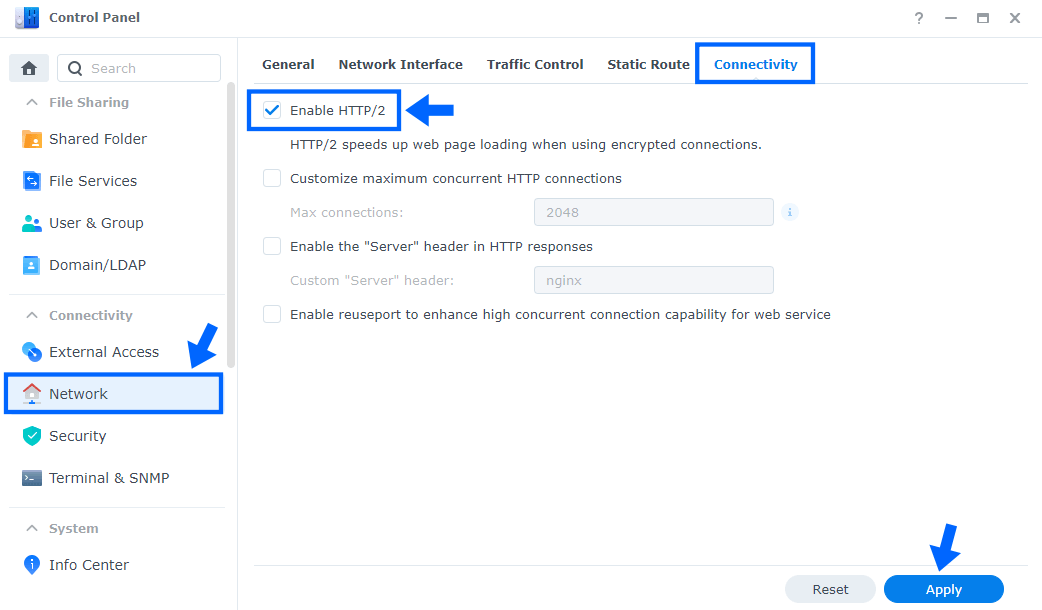
Go to Control Panel / Network / Connectivity tab/ Check Enable HTTP/2 then click Apply. Follow the instructions in the image below.
STEP 5
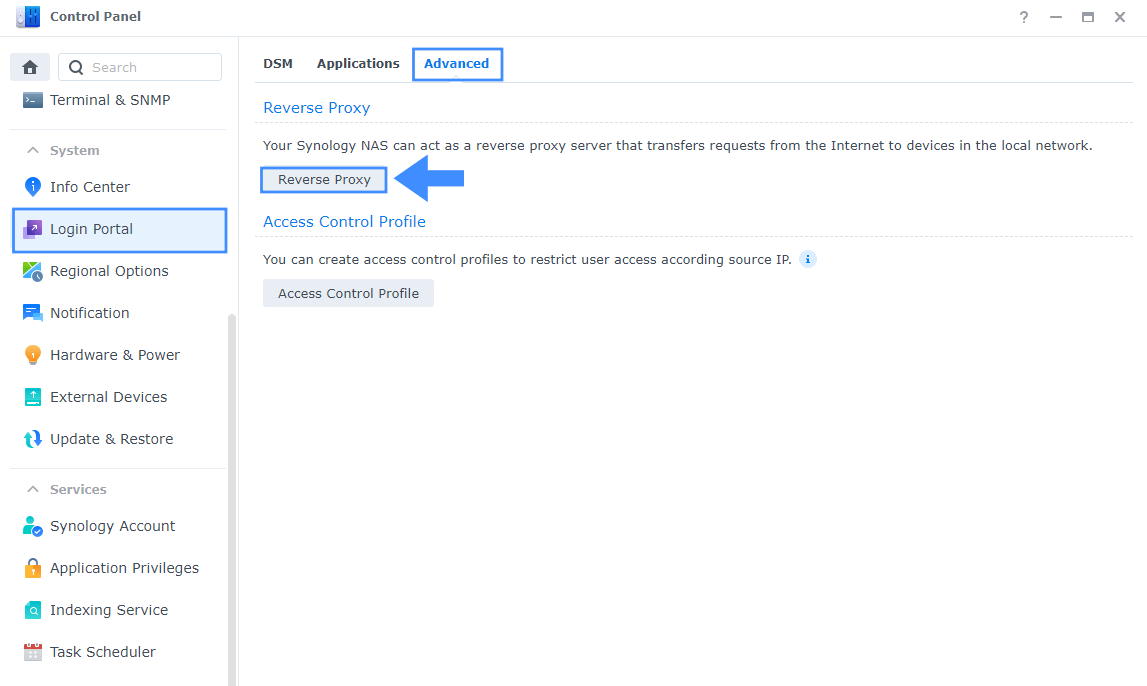
Go to Control Panel / Login Portal / Advanced Tab / click Reverse Proxy. Follow the instructions in the image below.
STEP 6
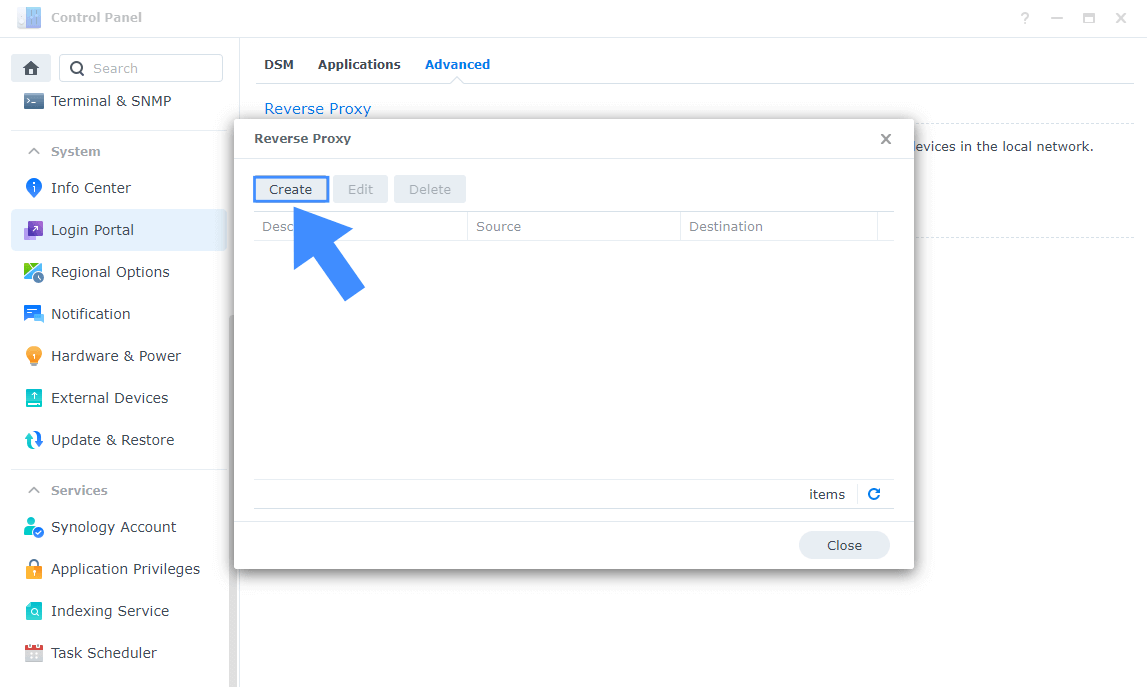
Now click the “Create” button. Follow the instructions in the image below.
STEP 7
After you click the Create button, the window below will open. Follow the instructions in the image below.
On the General area, set the Reverse Proxy Name description: type in Router. After that, add the following instructions:
Source:
Protocol: HTTPS
Hostname: router.yourname.synology.me
Port: 443
Destination:
Protocol: HTTP
Hostname: Your Local LAN Router IP
Port: 8000
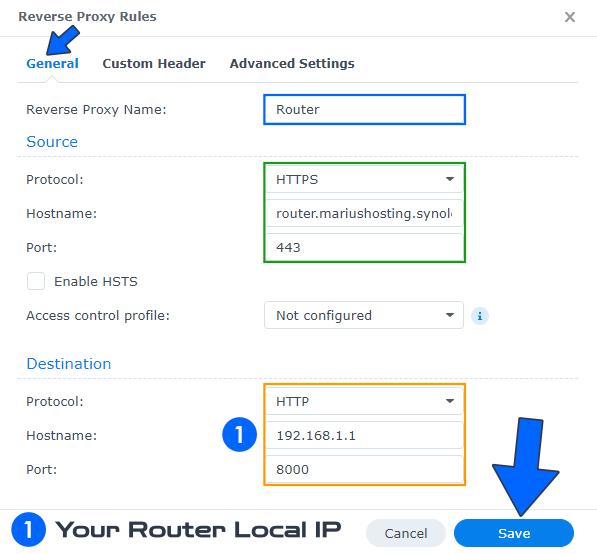
Note: Most routers have the local IP address (Hostname) 192.168.0.1 but Synology routers have the local IP address 192.168.1.1 so make sure to change the Hostname and type in the correct local IP address of your router.
Note: If you have a different router than the RT6600ax, RT2600ac or the MR2200ac, you should type in port 80 as Destination instead of 8000, if a different port is not mentioned anywhere else for your router model.
STEP 8
Go back to STEP 1 or you will deal with karma 🙂.
STEP 9
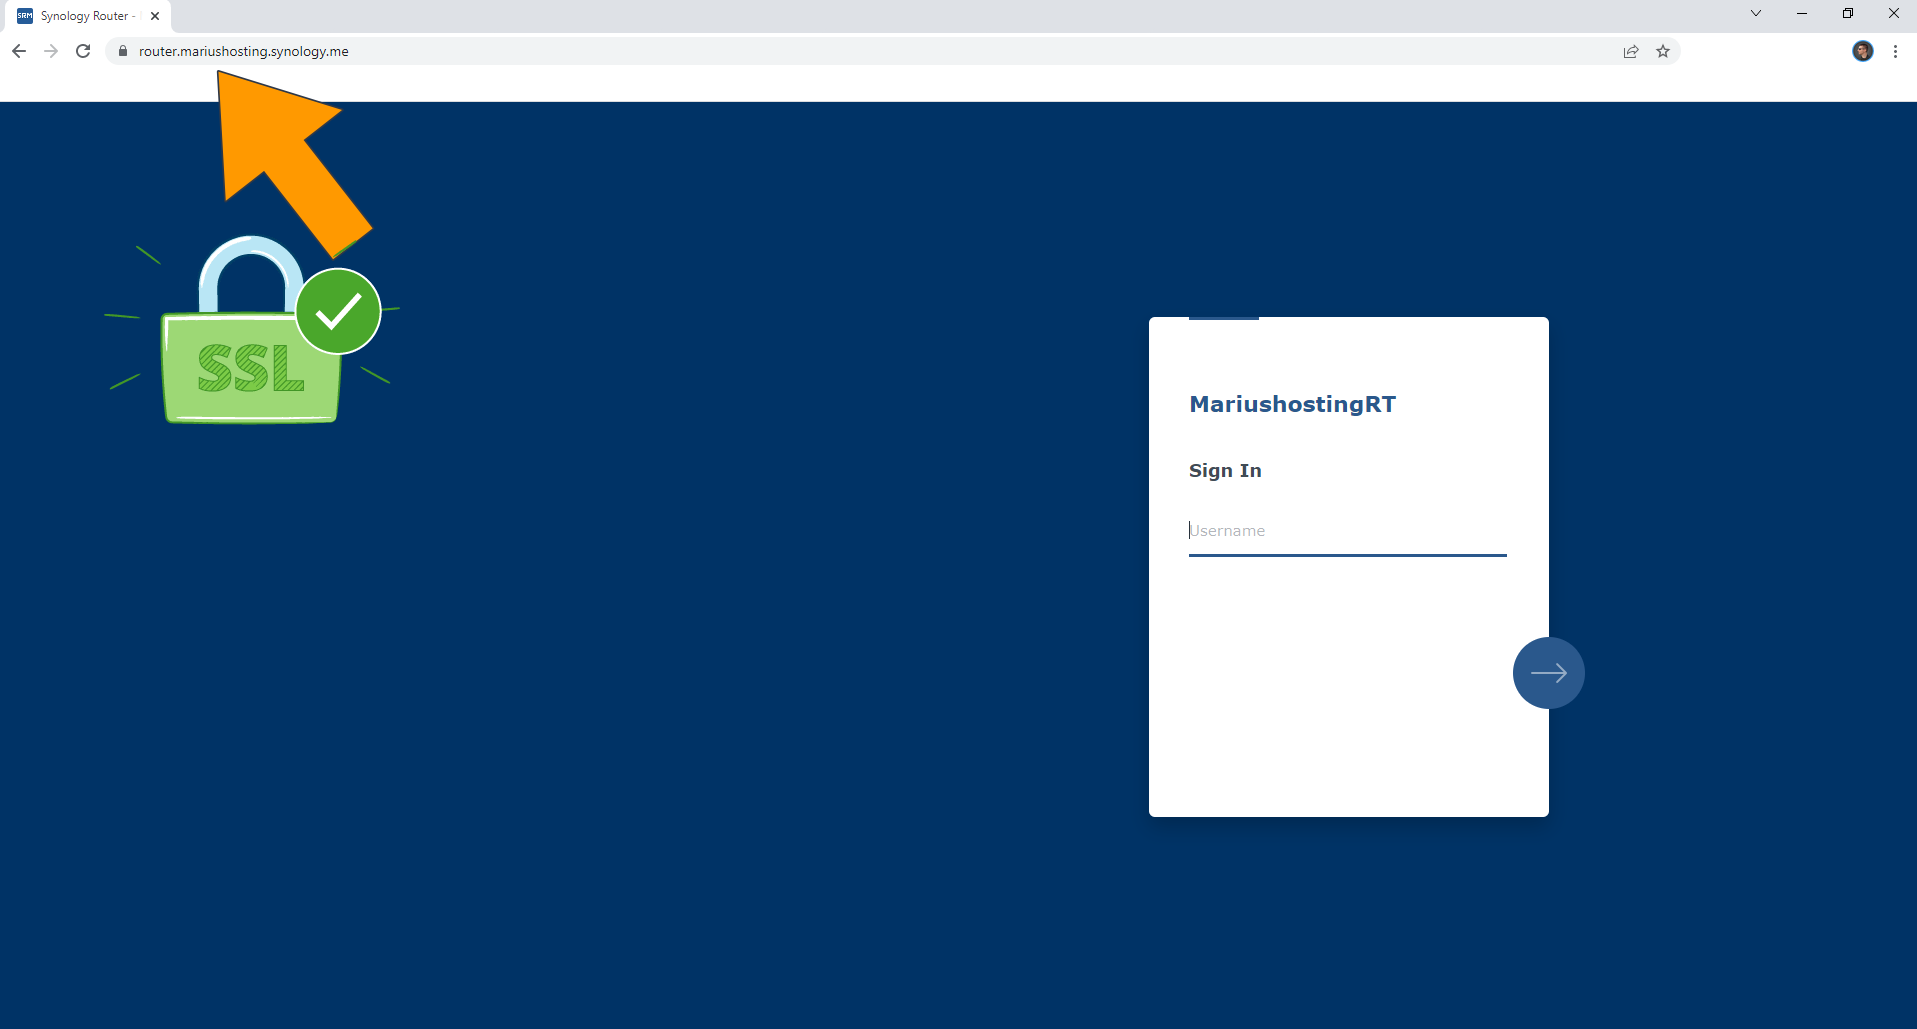
Now open your browser and type in your HTTPS/SSL certificate like this https://router.yourname.synology.me In my case it’s https://router.mariushosting.synology.me If everything goes right, you will see your router administrator page.
🔥Troubleshooting: If you experience connection issues, make sure RULE 5 is correctly applied to your Synology NAS Firewall configuration.
Note: Remember: when you expose your router to the Internet, change your administrator credentials and use a different username than admin and a strong password.
Note: Synology Reverse Proxy is a great solution to access your own router in exceptional cases.
Note: How to Prevent Search Engines From Indexing Your DDNS Address.
Note: How to Connect to Your RT6600ax via HTTPS.
This post was updated on Wednesday / February 19th, 2025 at 1:43 PM
