There may be instances when you may need to access the administration panel of your video surveillance IP cameras, with all the options there are, remotely, via https, in a browser. It does not matter whether or not you have Synology Surveillance Station installed because, simply put, you don’t need to have it. With this method you will be able to get any device in your local network online. Note: Before doing this, remember to change the administration passwords of your local devices. In today’s guide I will teach you how to make the best use of Synology’s reverse proxy for video surveillance.
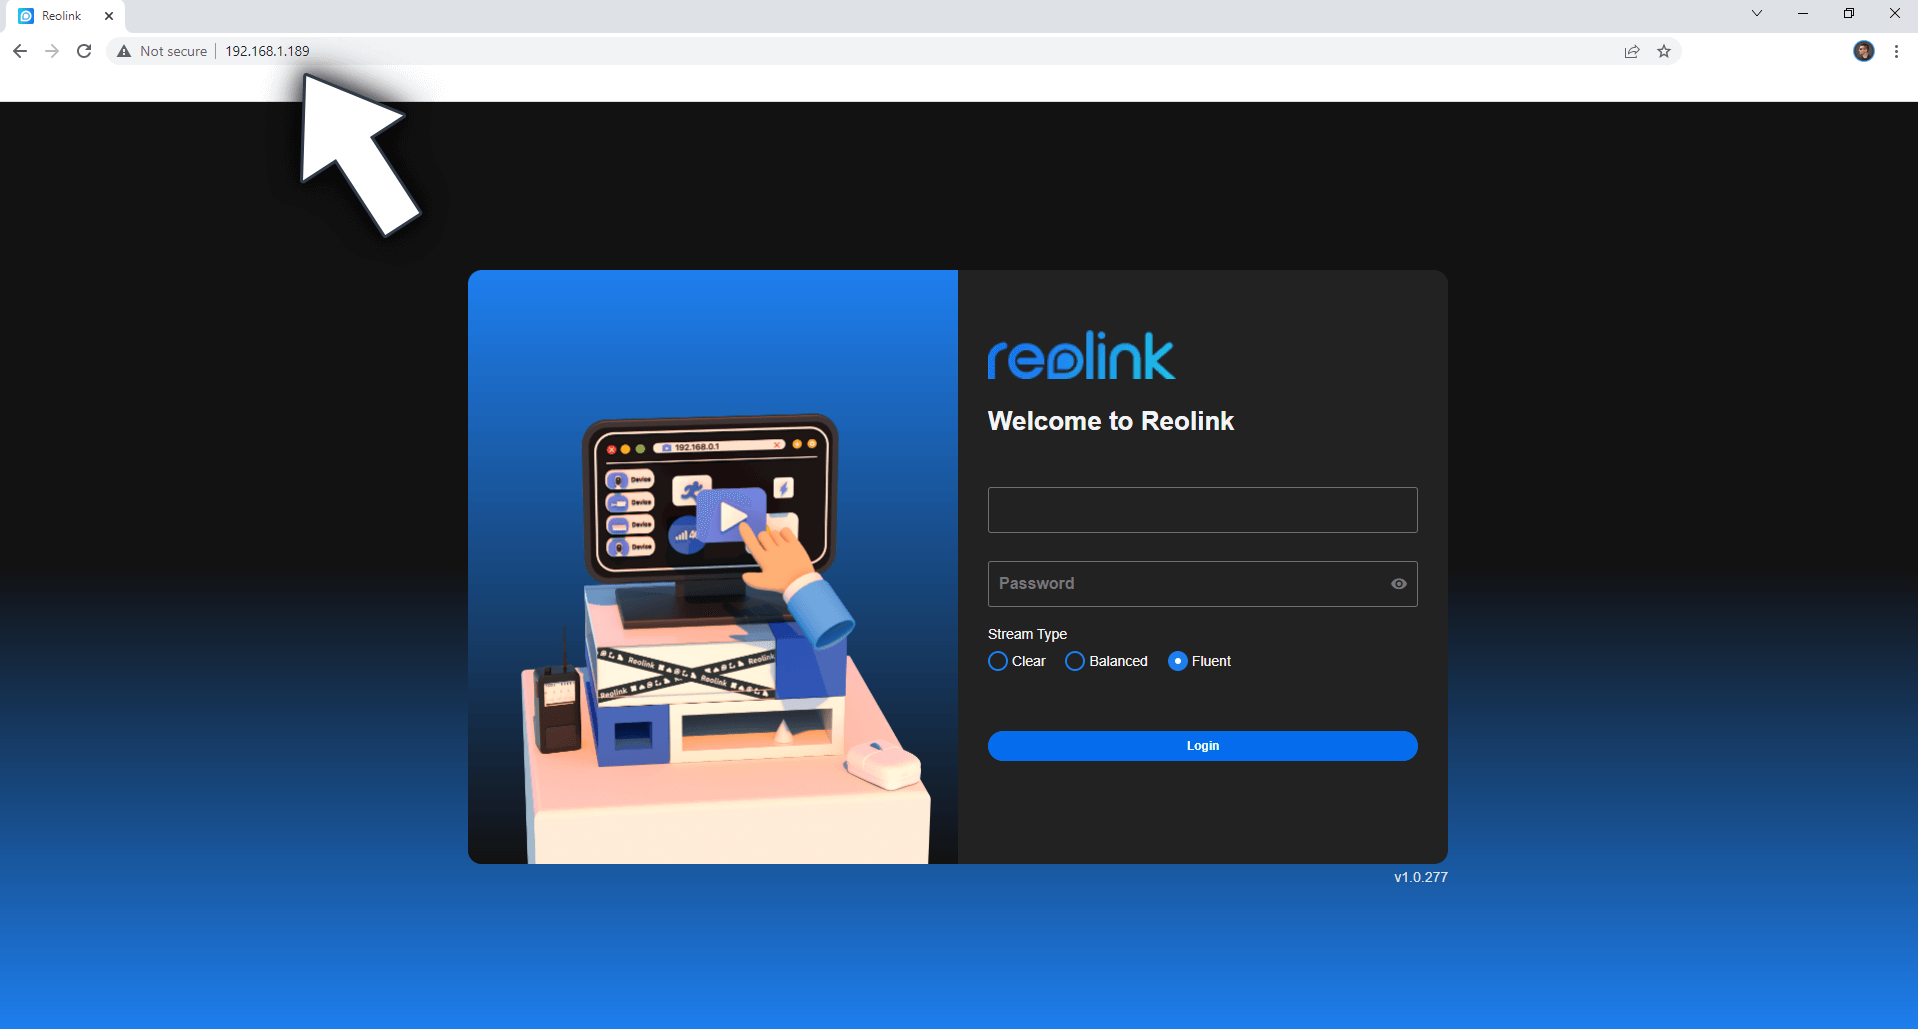
Look at the screenshot below. Have you ever thought about how many devices you have in your home network? By now you know that you can easily access all of them in your local LAN network, through their local IP address, thanks to DHCP. But these local IPs can only be reached while in your local network, not outside it (hence the name). Well, today you will learn how to take them to the Internet. Note: A DHCP is a network server that automatically provides and assigns IP addresses, default gateways and other network parameters to client devices. In my case as well as in yours it will be the router that will generate and assign the local addresses for your devices.
STEP 1
Please Support My work by Making a Donation.
STEP 2
Make sure you have a synology.me Wildcard Certificate. Follow my guide to get a Wildcard Certificate. If you already have a synology.me Wildcard certificate, skip this STEP.
STEP 3
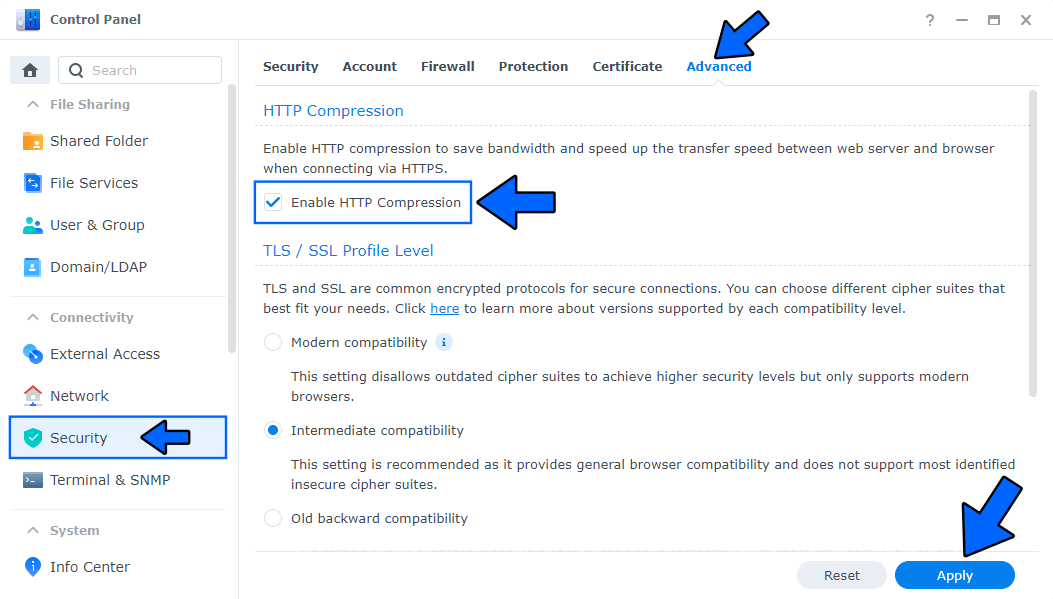
Go to Control Panel / Security / Advanced tab/ Check Enable HTTP Compression then click Apply. Follow the instructions in the image below.
STEP 4
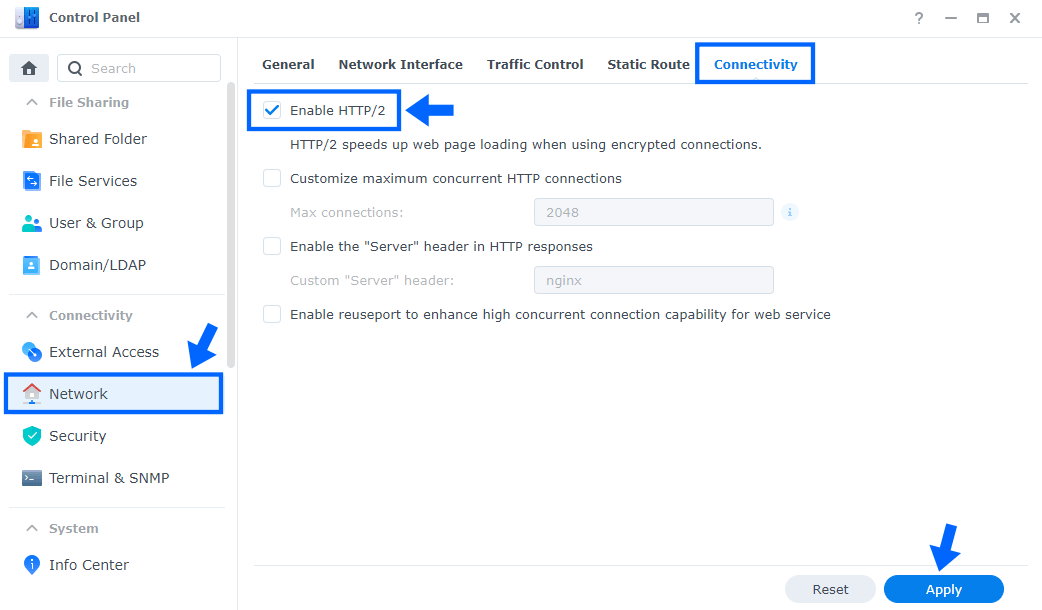
Go to Control Panel / Network / Connectivity tab/ Check Enable HTTP/2 then click Apply. Follow the instructions in the image below.
STEP 5
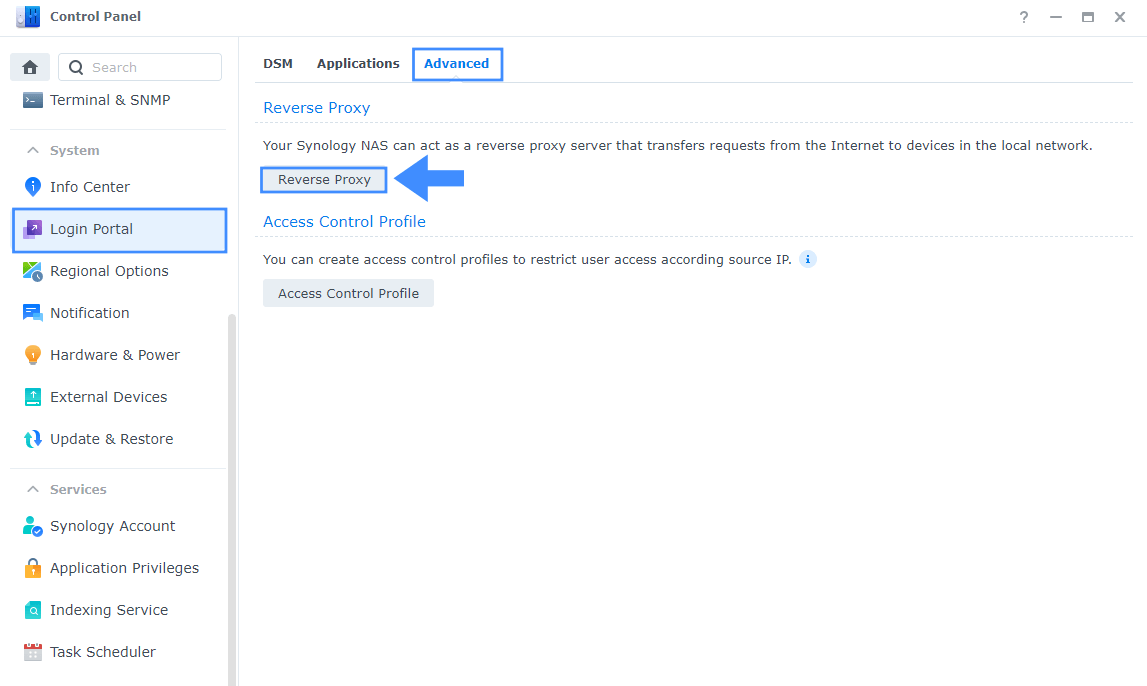
Go to Control Panel / Login Portal / Advanced Tab / click Reverse Proxy. Follow the instructions in the image below.
STEP 6
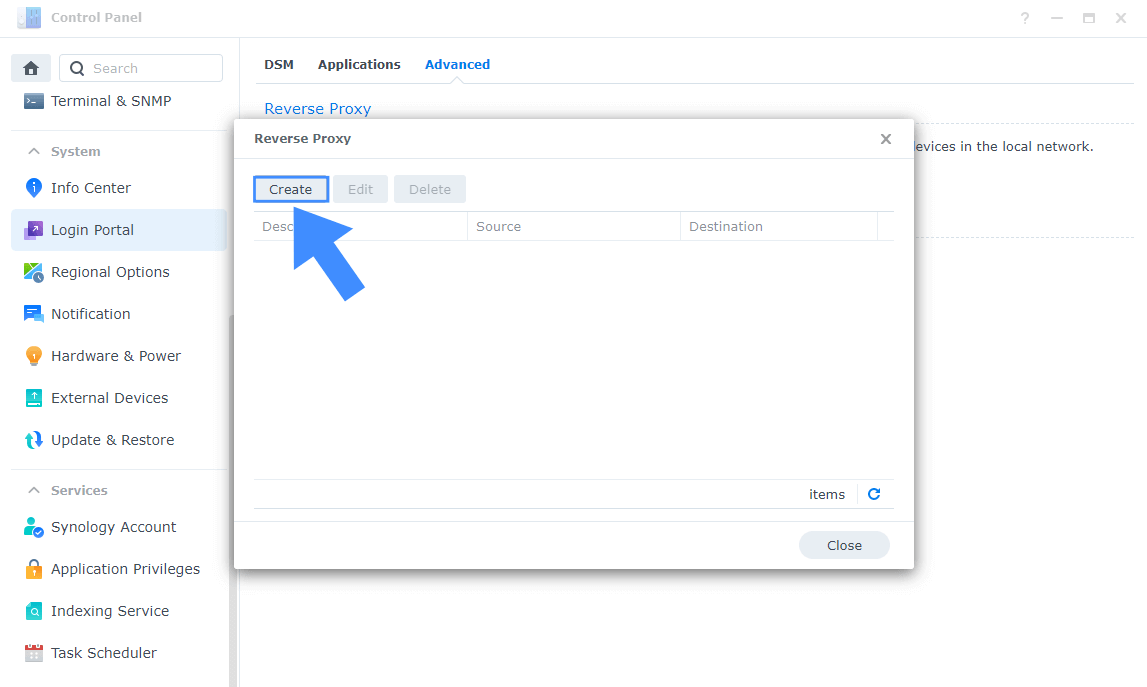
Now click the “Create” button. Follow the instructions in the image below.
STEP 7
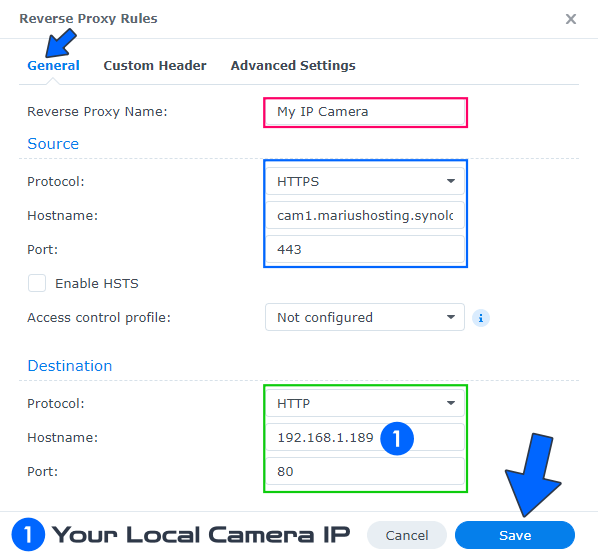
After you click the Create button, the window below will open. Follow the instructions in the image below.
On the General area, set the Reverse Proxy Name description: type in My IP Camera. After that, add the following instructions:
Source:
Protocol: HTTPS
Hostname: cam1.yourname.synology.me
Port: 443
Destination:
Protocol: HTTP
Hostname: Your Local LAN Camera IP
Port: 80
STEP 8
Go back to STEP 1 or you will deal with karma 🙂.
STEP 9
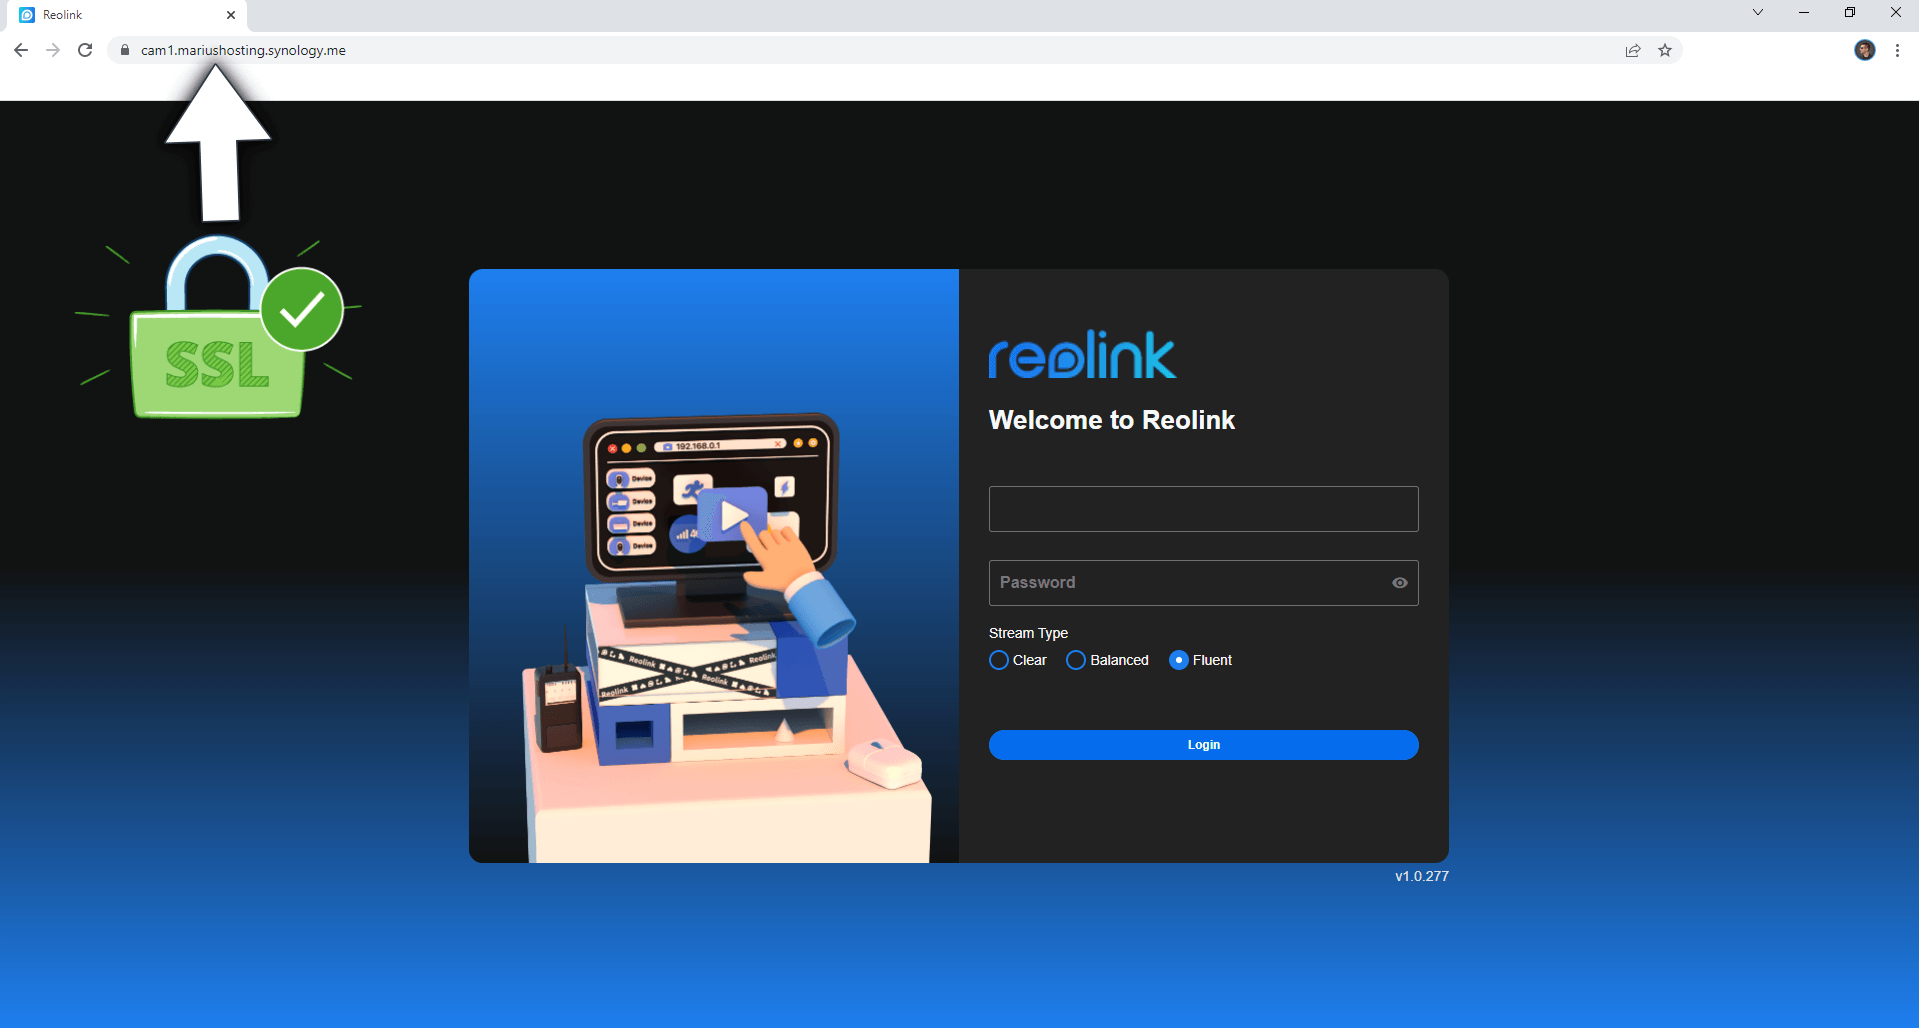
Now open your browser and type in your HTTPS/SSL certificate like this https://cam1.yourname.synology.me In my case it’s https://cam1.mariushosting.synology.me If everything goes right, you will see your camera IP administration page.
🔥Troubleshooting: If you experience connection issues, make sure RULE 5 is correctly applied on your Synology NAS Firewall configuration.
Note: I’m using a Reolink camera and I find the Synology reverse proxy a great solution to access my camera IP in exceptional cases.
Note: How to Prevent Search Engines From Indexing Your DDNS Address.
This post was updated on Saturday / May 20th, 2023 at 4:29 PM
