
A few days ago I showed you how to Reverse Proxy an IP camera using your Synology NAS and how to Reverse Proxy your router. Today I want to show you how to Reverse Proxy multiple NAS devices in the same local area network using your NAS. Only one NAS will have a DDNS address with access to the Internet, while the rest of the NAS devices will not. In this case, the NAS with DDNS will act as proxy.
So, let’s say you have more than one Synology NAS in your local network, but only one device has Internet access via DDNS like a synology.me address or something else. For example, in my case I have a DS1621xs+ with a DDNS synology.me address. The other NAS, an RS422+, has no DDNS registered and I only access it in my local network. Today I will teach you how to access your local NAS via Proxy. In my case the Proxy will be the DS1621xs+ NAS. In the instructions below the NAS with DDNS access will be marked in green, while the NAS without DDNS access will be marked in red.
STEP 1
Please Support My work by Making a Donation.
STEP 2
Make sure you have a synology.me Wildcard Certificate for the NAS with DDNS access. Follow my guide to get a Wildcard Certificate. If you already have a synology.me Wildcard certificate, skip this STEP.
STEP 3
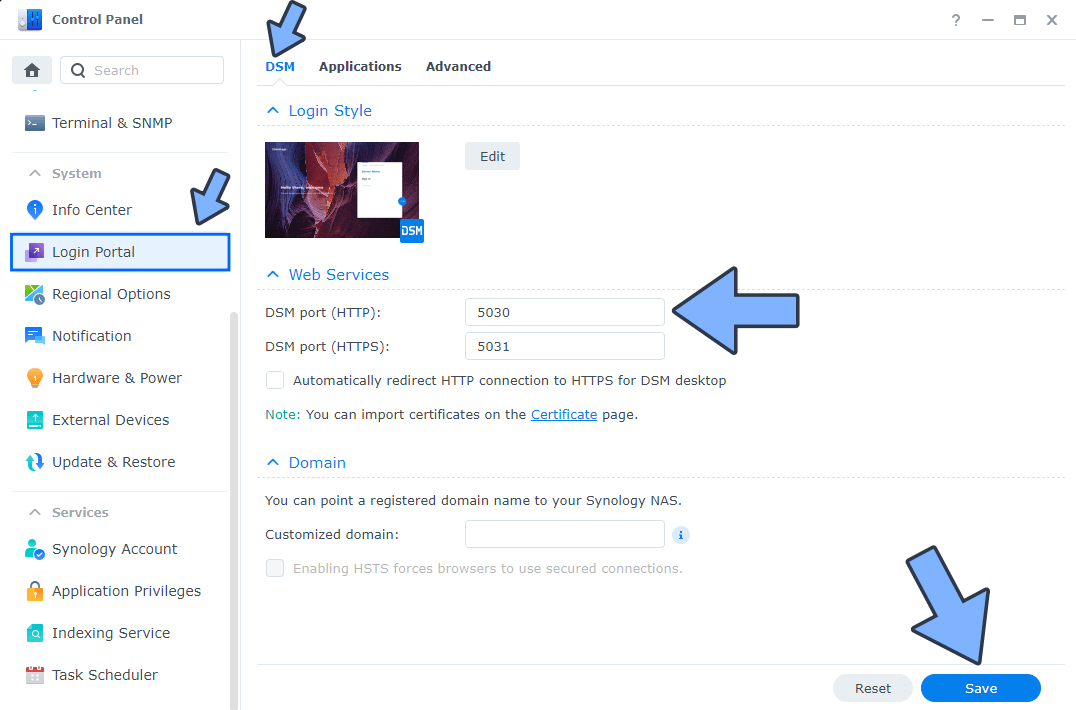
Go to Control Panel / Login Portal / DSM tab / Change the HTTP port on the NAS with no DDNS access. In the example below I have changed the standard HTTP port on my RS422+ to 5030. You can change the standard port with any other port of your choosing so long as they’re between 1024 and 65535. Click Save. Follow the instructions in the image below.
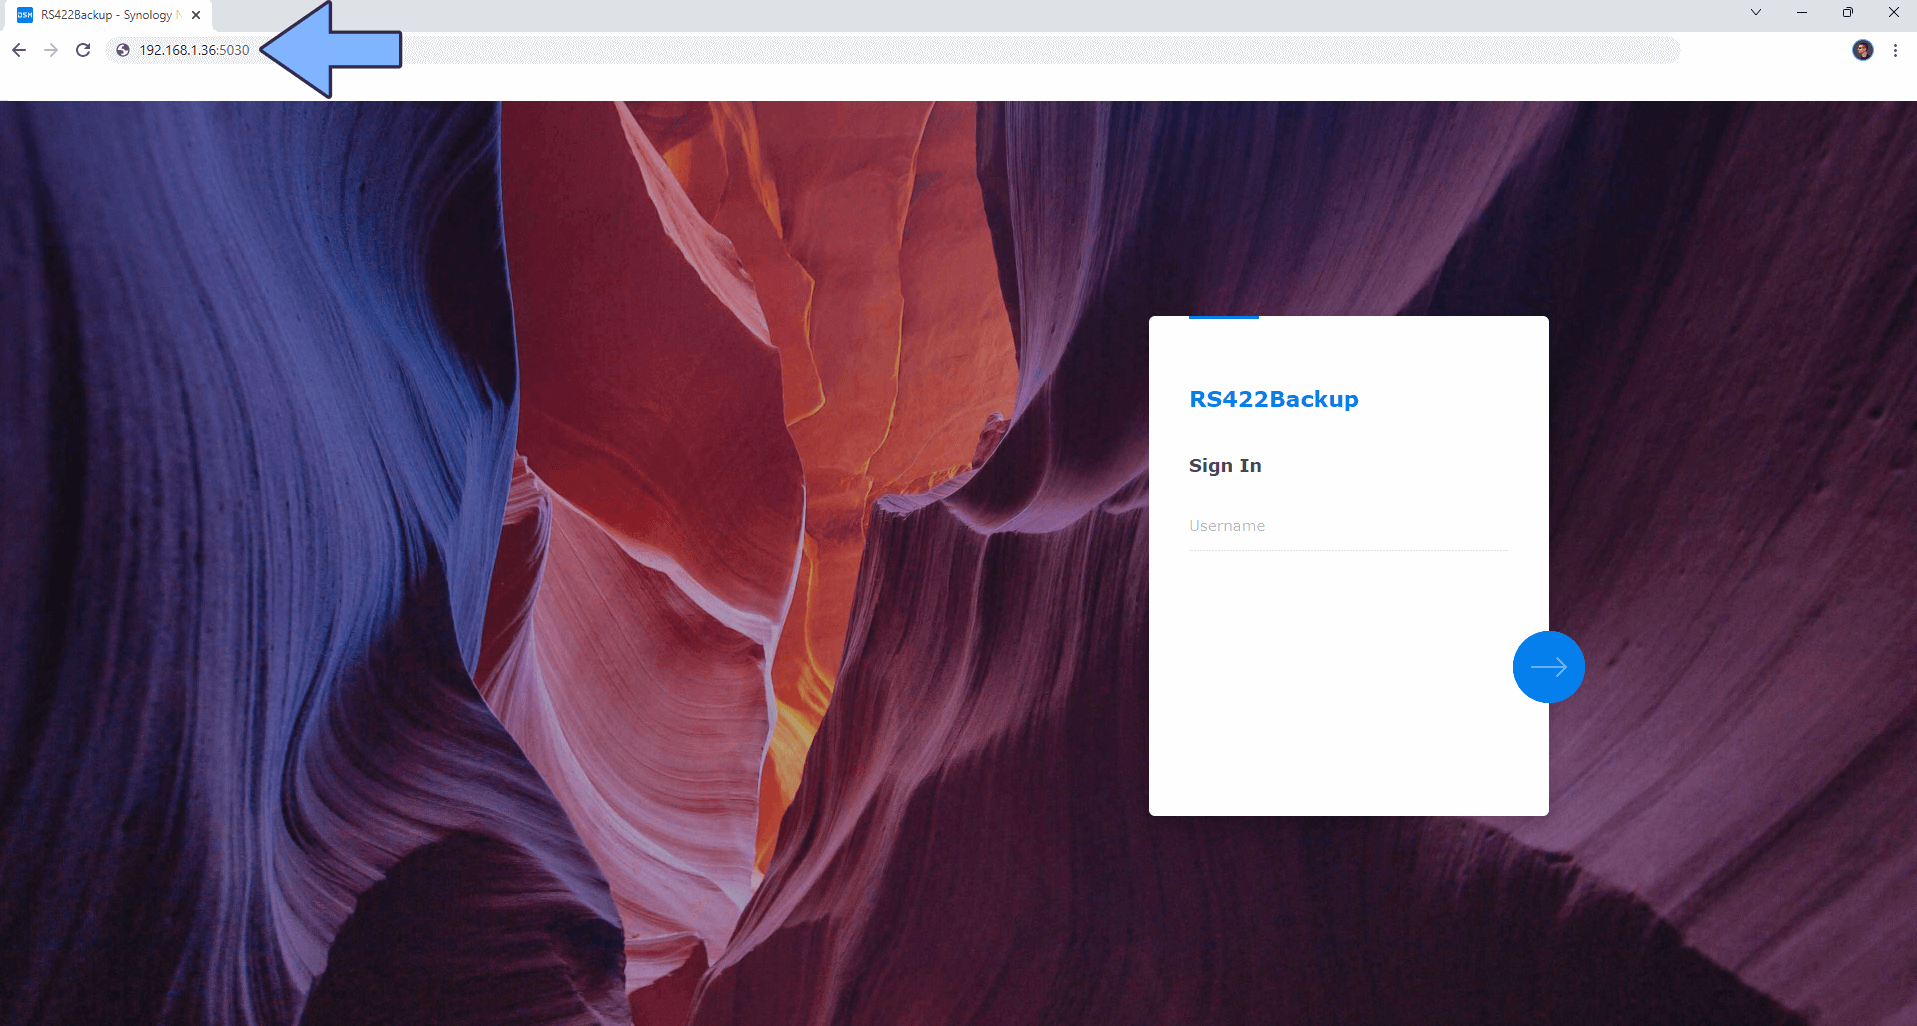
Look at the screenshot below. You generally connect to the NAS without DDNS via its local IP followed by :portnumber
STEP 4
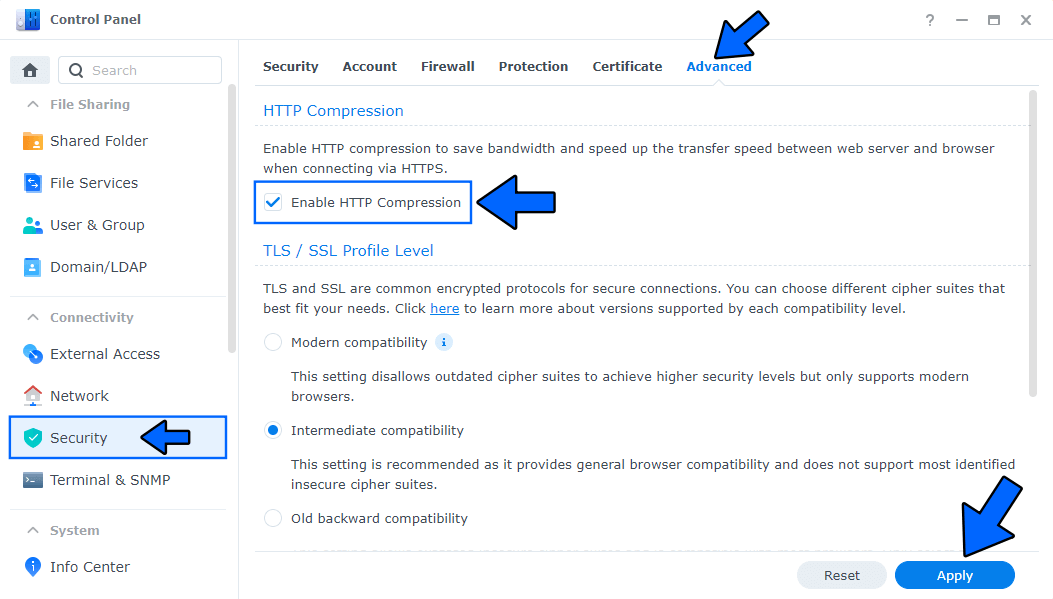
On both the NAS with DDNS and without DDNS, go to Control Panel / Security / Advanced tab/ Check Enable HTTP Compression then click Apply. Follow the instructions in the image below.
STEP 5
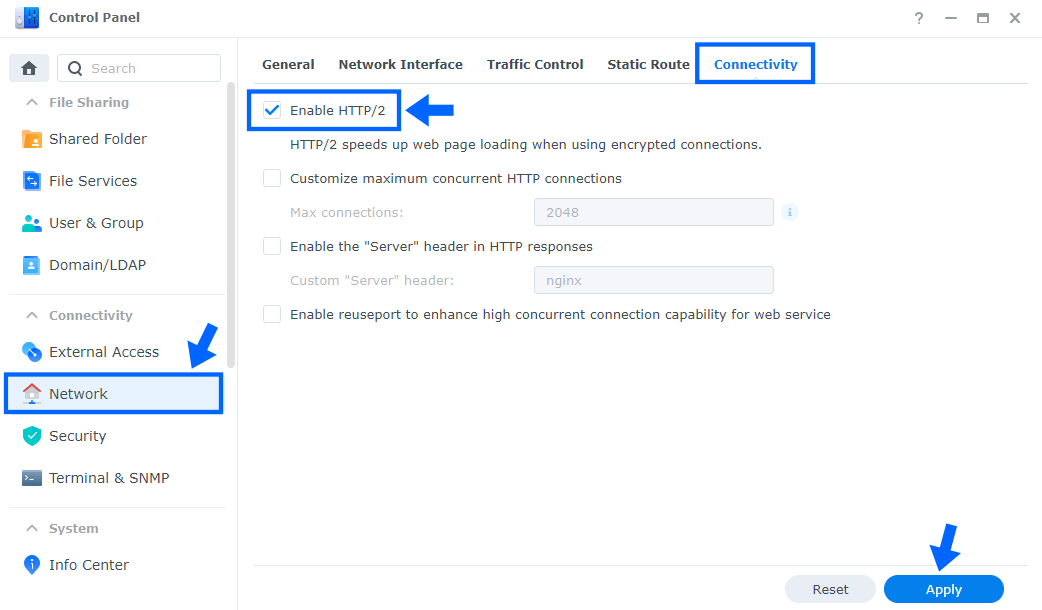
On both the NAS with DDNS and without DDNS, go to Control Panel / Network / Connectivity tab/ Check Enable HTTP/2 then click Apply. Follow the instructions in the image below.
STEP 6
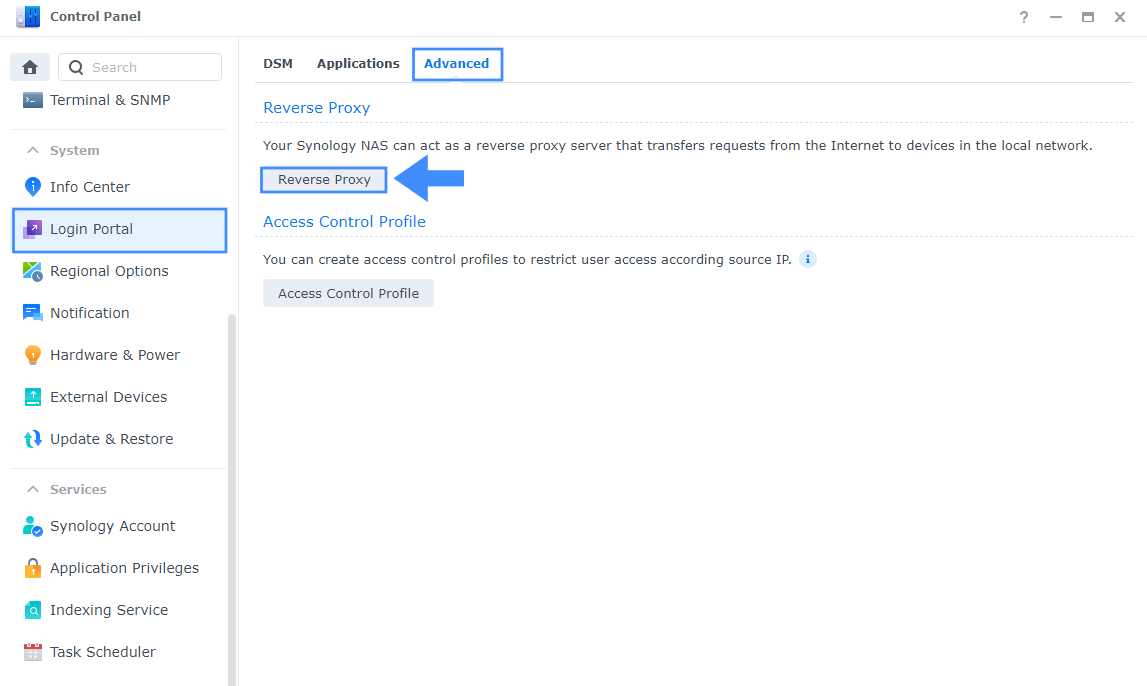
On the NAS with DDNS, go to Control Panel / Login Portal / Advanced Tab / click Reverse Proxy. Follow the instructions in the image below.
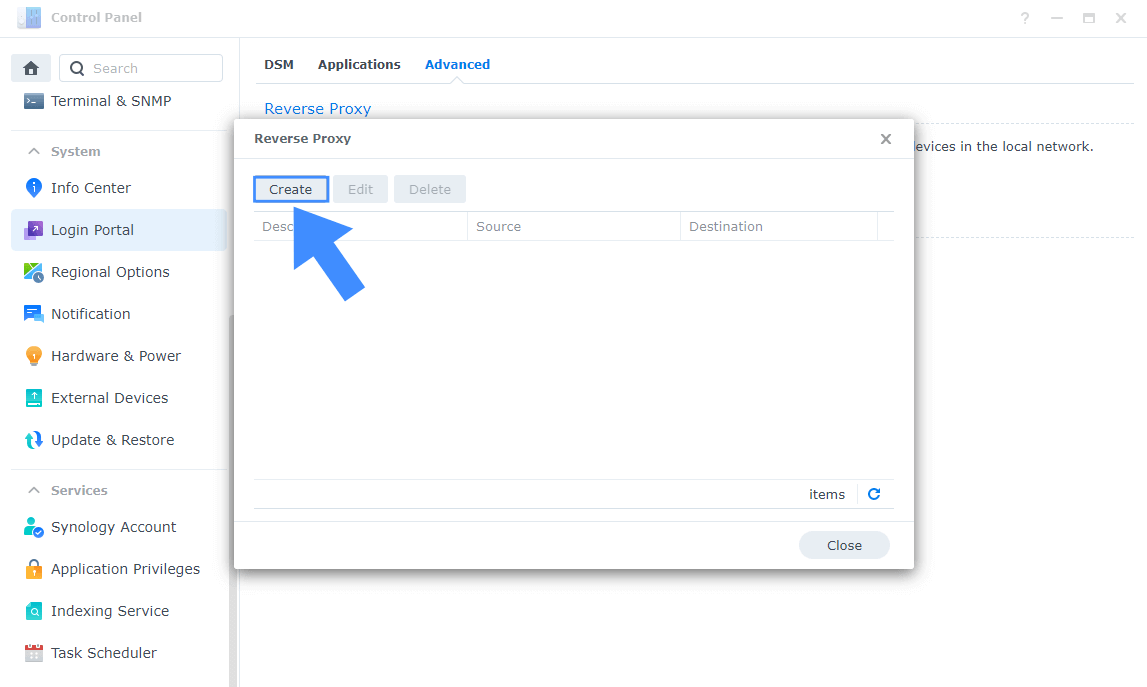
Now click the “Create” button. Follow the instructions in the image below.
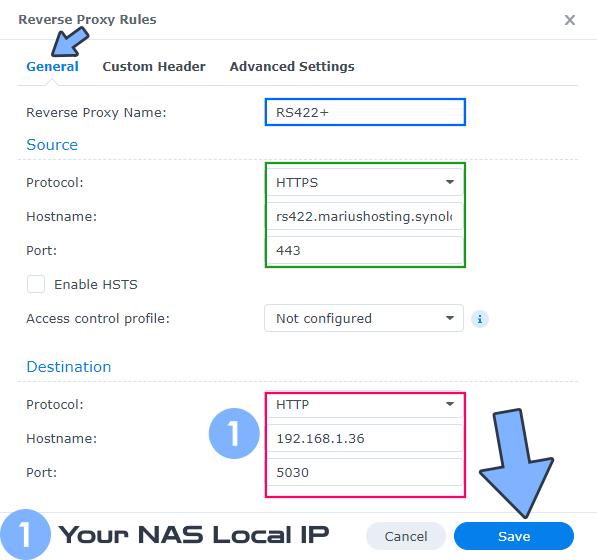
After you click the Create button, the window below will open. Follow the instructions in the image below.
On the General area, set the Reverse Proxy Name description: type in Your Local non DDNS NAS Name. After that, add the following instructions:
Source:
Protocol: HTTPS
Hostname: yourlocalnasname.yourname.synology.me
Port: 443
Destination:
Protocol: HTTP
Hostname: Your non DDNS NAS Local IP
Port: The Port You have previously set up at STEP 3 on your NAS without DDNS access.
STEP 7
🟢Please Support My work by Making a Donation. Almost 99,9% of the people that install something using my guides forget to support my work, or just ignore STEP 1. I’ve been very honest about this aspect of my work since the beginning: I don’t run any ADS, I don’t require subscriptions, paid or otherwise, I don’t collect IPs, emails, and I don’t have any referral links from Amazon or other merchants. I also don’t have any POP-UPs or COOKIES. I have repeatedly been told over the years how much I have contributed to the community. It’s something I love doing and have been honest about my passion since the beginning. But I also Need The Community to Support me Back to be able to continue doing this work.
STEP 8
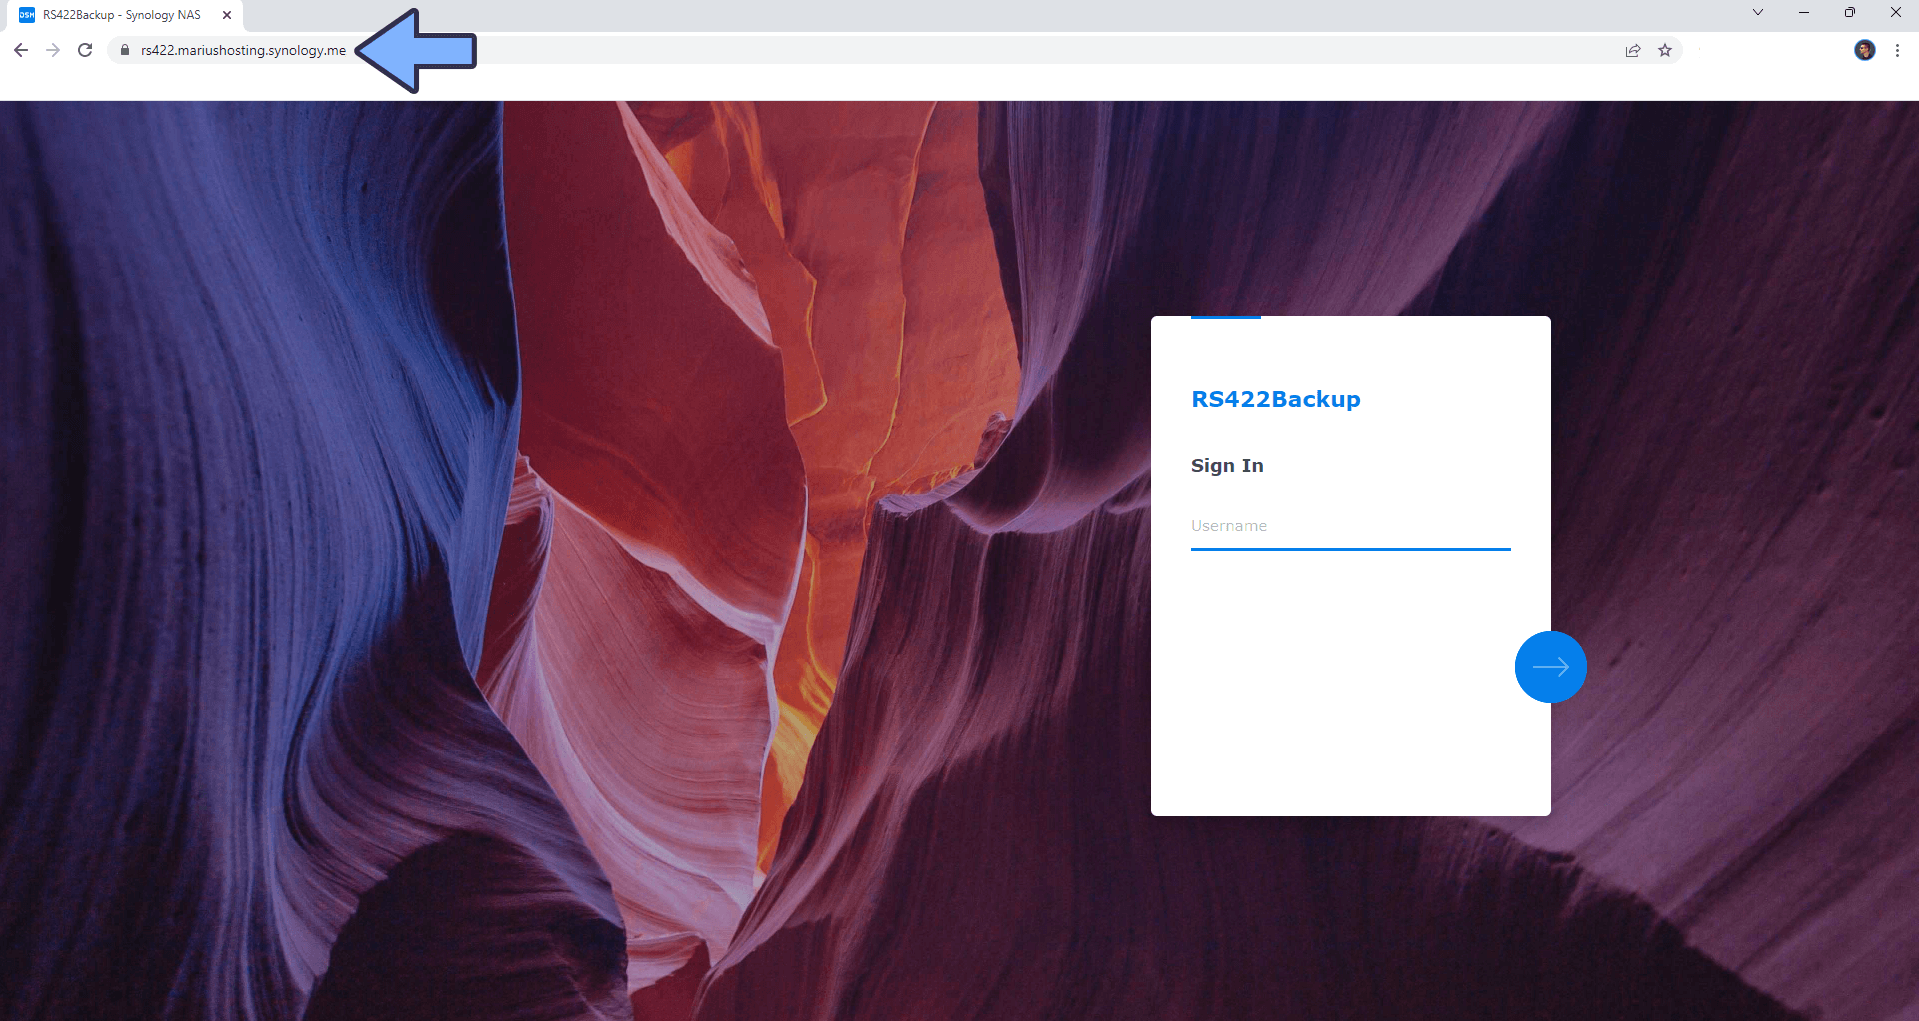
Now open your browser and type in your HTTPS/SSL certificate like this https://yourlocalnasname.yourname.synology.me In my case it’s https://rs422.mariushosting.synology.me If everything goes right, you will see your Local NAS Login page.
🔥Troubleshooting: If you experience connection issues, make sure RULE 5 is correctly applied to your Synology NAS Firewall configuration.
Note: Synology Reverse Proxy is a great solution to access all the NAS devices in your local area network via Internet in exceptional cases.
Note: How to Prevent Search Engines From Indexing Your DDNS Address.
This post was updated on Sunday / August 24th, 2025 at 2:42 PM