A few weeks ago I showed you how to install Emby media server on your Synology NAS using Docker. Since many people are unfamiliar with Docker and do not want to use it, today I propose a new guide on how to install Emby without Docker. Emby is a media server designed to organize, play, and stream audio and video to a variety of devices. Although Plex and Jellyfin might be two of the most well-known media servers, there is a third one that has started to gain popularity. Emby is the new kid on the block. In this step by step guide I will show you how to install Emby on your Synology NAS without Docker.
STEP 1
Please Support My work by Making a Donation.
STEP 2
Download the Latest Emby Server .spk Package for your NAS device from the official Emby website.
STEP 3
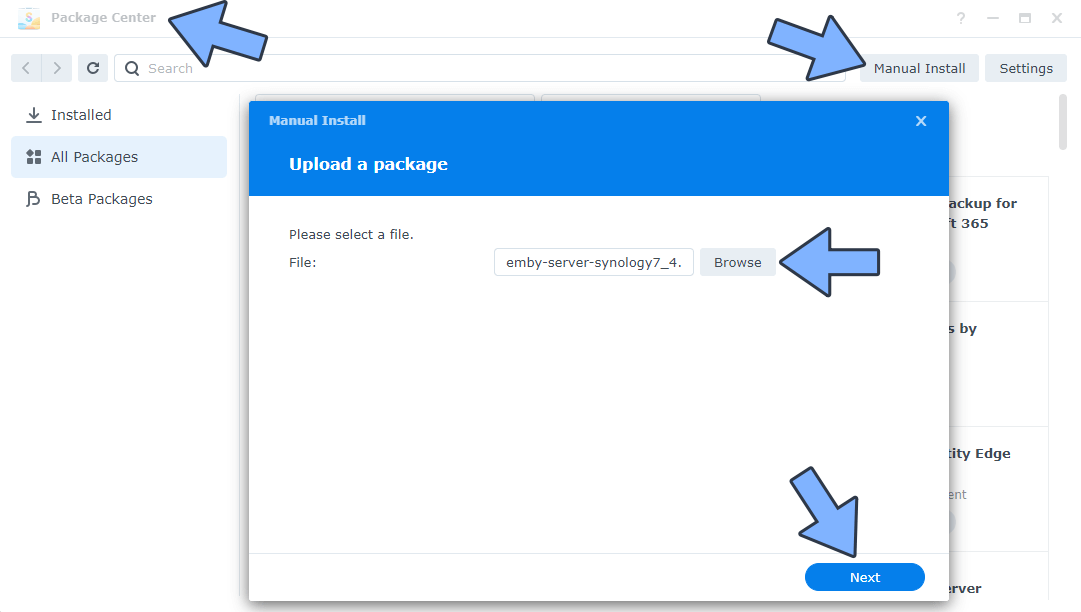
Go to Package Center and click Manual Install. Browse the emby-server-synology file you have previously downloaded at STEP 2, then click Next. Follow the instructions in the image below.
STEP 4
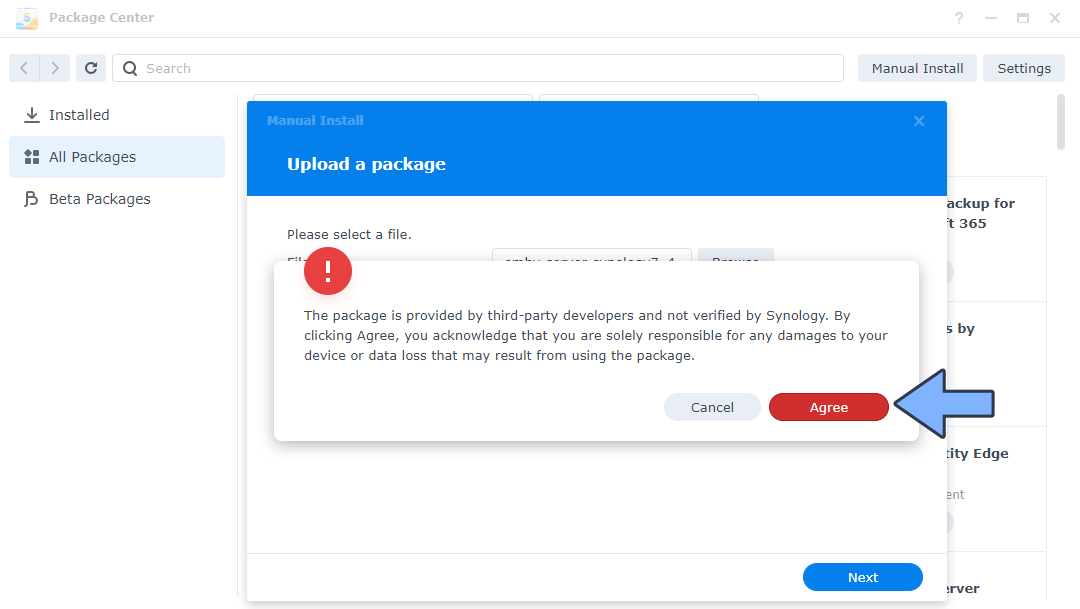
After you click Next on STEP 3, a new pop up warning window will open. Click Agree. Follow the instructions in the image below.
STEP 5
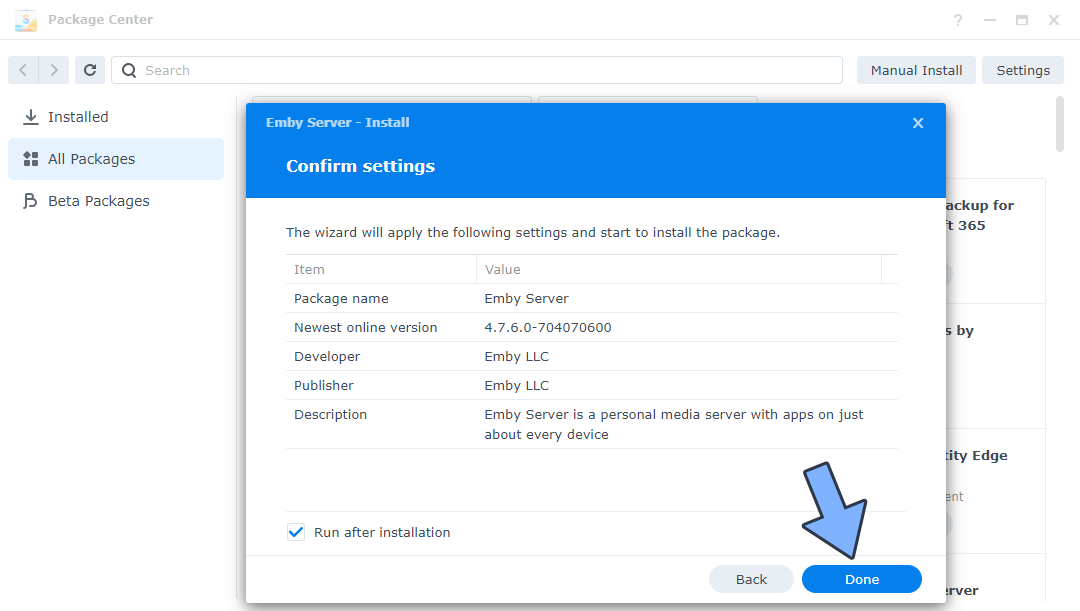
After you click Agree, click Done. Follow the instructions in the image below.
STEP 6
Enjoy your Emby Server without Docker! Click Open.
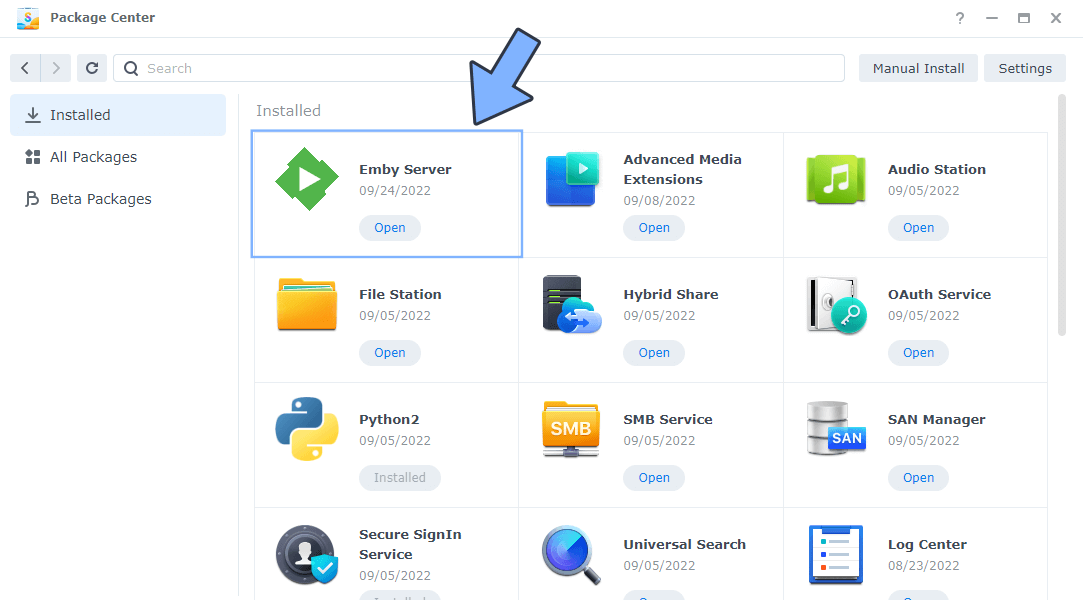
If you want to use your Emby Server when you are outside your local network, just follow the steps below.
STEP A
Please Support My work by Making a Donation.
STEP B
Make sure you have a synology.me Wildcard Certificate. Follow my guide to get a Wildcard Certificate. If you already have a synology.me Wildcard certificate, skip this STEP.
STEP C
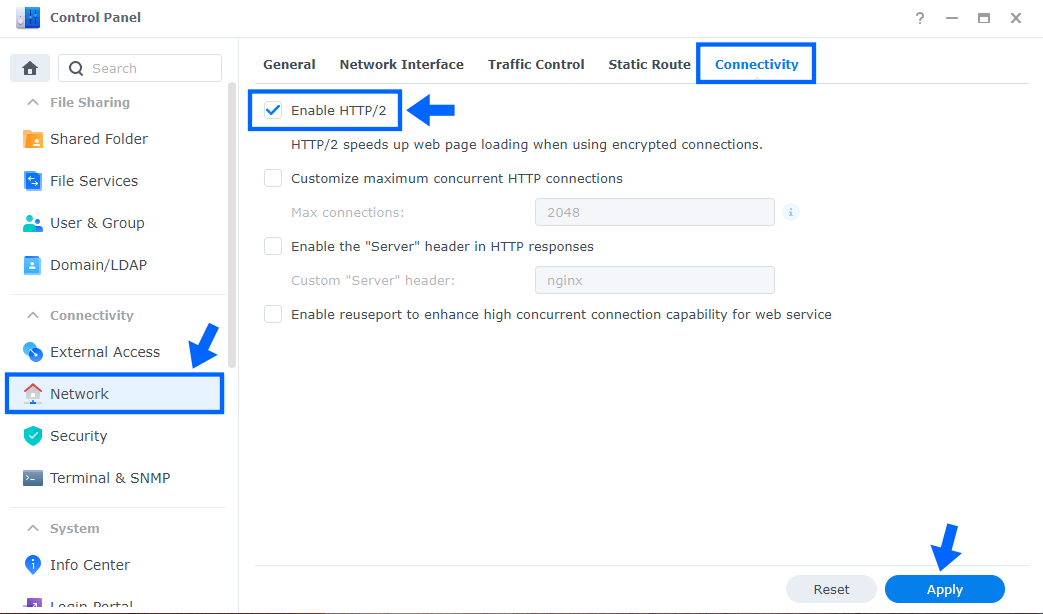
Go to Control Panel / Network / Connectivity tab/ Check Enable HTTP/2 then click Apply. Follow the instructions in the image below.
STEP D
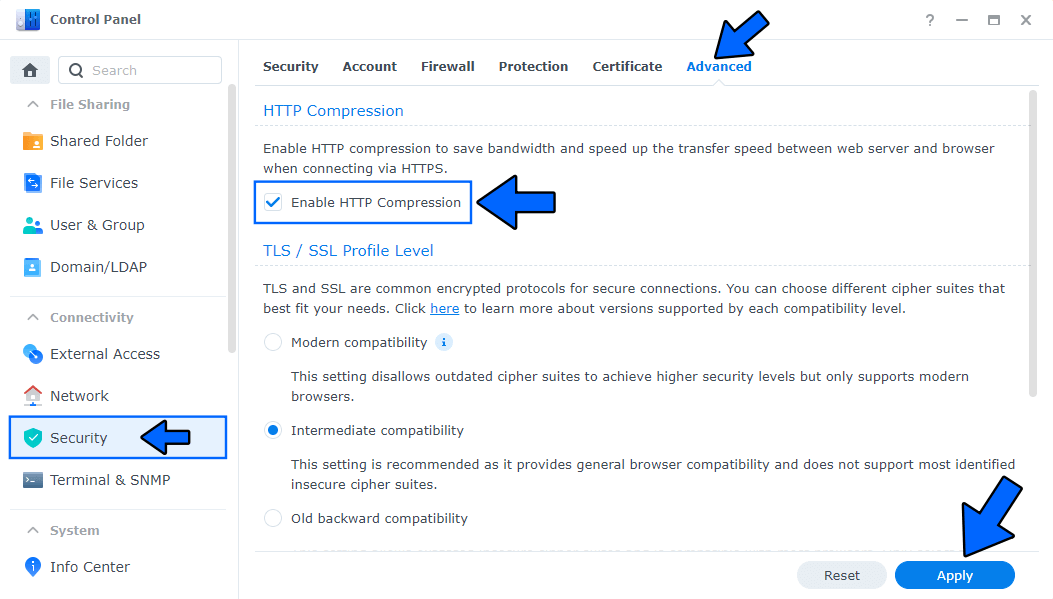
Go to Control Panel / Security / Advanced tab/ Check Enable HTTP Compression then click Apply. Follow the instructions in the image below.
STEP E
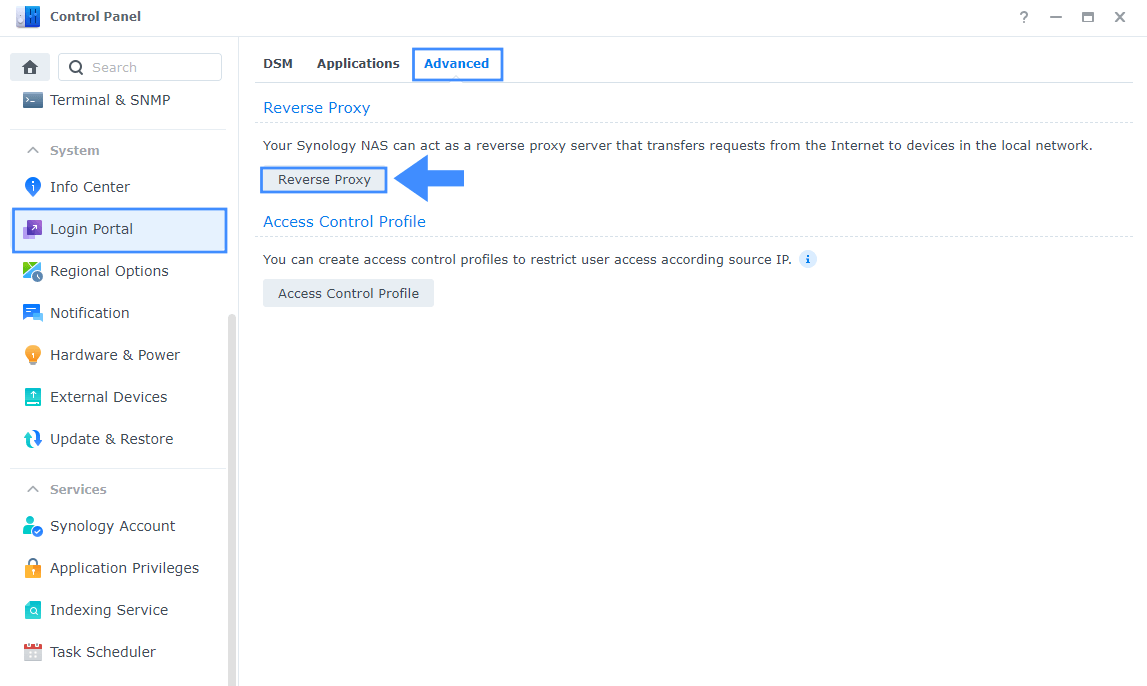
Go to Control Panel / Login Portal / Advanced Tab / click Reverse Proxy. Follow the instructions in the image below.
STEP F
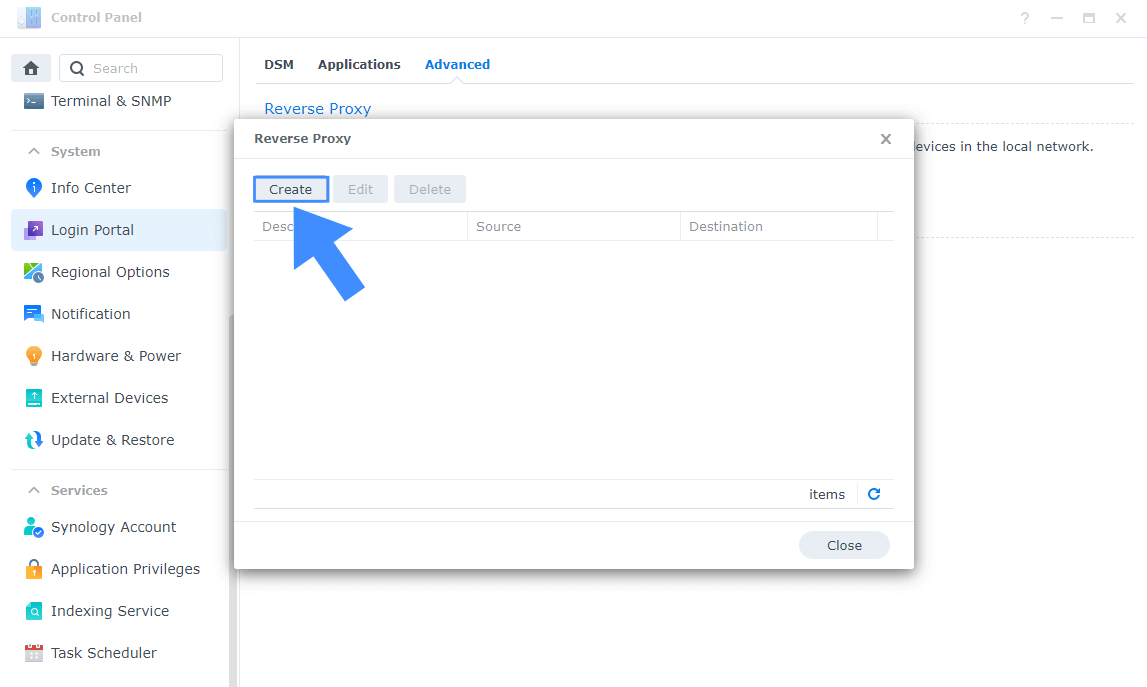
Now click the “Create” button. Follow the instructions in the image below.
STEP G
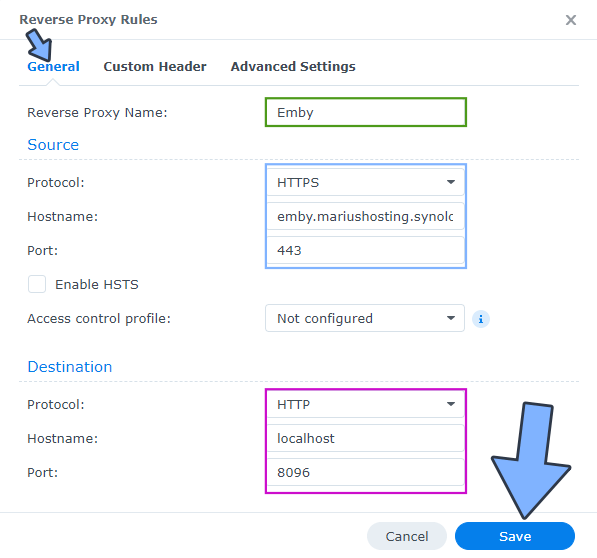
After you click the Create button, the window below will open. Follow the instructions in the image below.
On the General area, set the Reverse Proxy Name description: type in Emby. After that, add the following instructions:
Source:
Protocol: HTTPS
Hostname: emby.yourname.synology.me
Port: 443
Destination:
Protocol: HTTP
Hostname: localhost
Port: 8096
STEP H
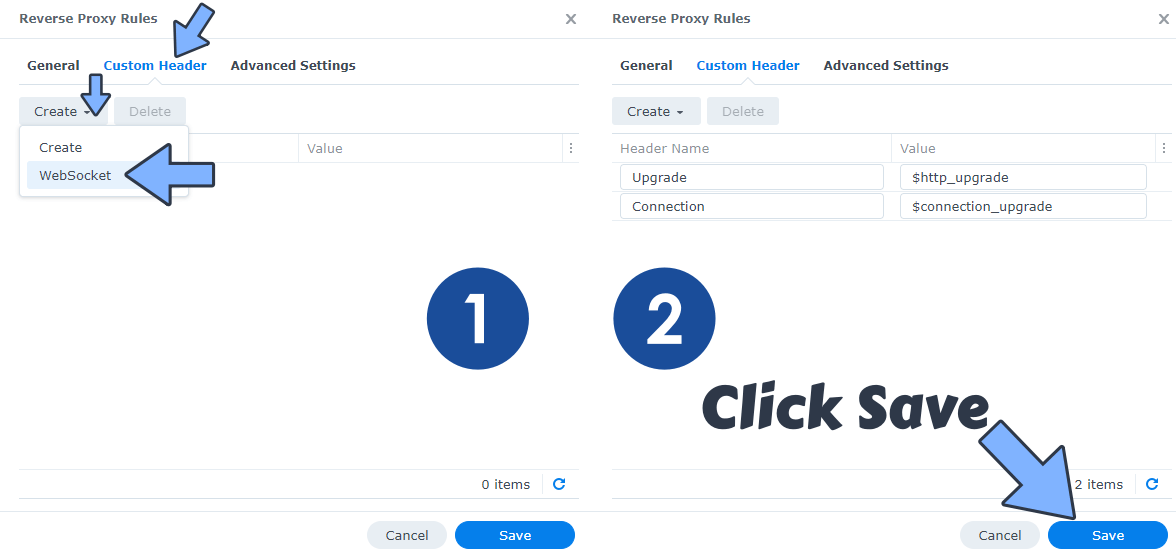
On the Reverse Proxy Rules click the Custom Header tab. Click Create and then, from the drop-down menu, click WebSocket. After you click on WebSocket, two Header Names and two Values will be automatically added. Click Save. Follow the instructions in the image below.
STEP I
🟢Please Support My work by Making a Donation. Almost 99,9% of the people that install something using my guides forget to support my work, or just ignore STEP 1. I’ve been very honest about this aspect of my work since the beginning: I don’t run any ADS, I don’t require subscriptions, paid or otherwise, I don’t collect IPs, emails, and I don’t have any referral links from Amazon or other merchants. I also don’t have any POP-UPs or COOKIES. I have repeatedly been told over the years how much I have contributed to the community. It’s something I love doing and have been honest about my passion since the beginning. But I also Need The Community to Support me Back to be able to continue doing this work.
STEP L
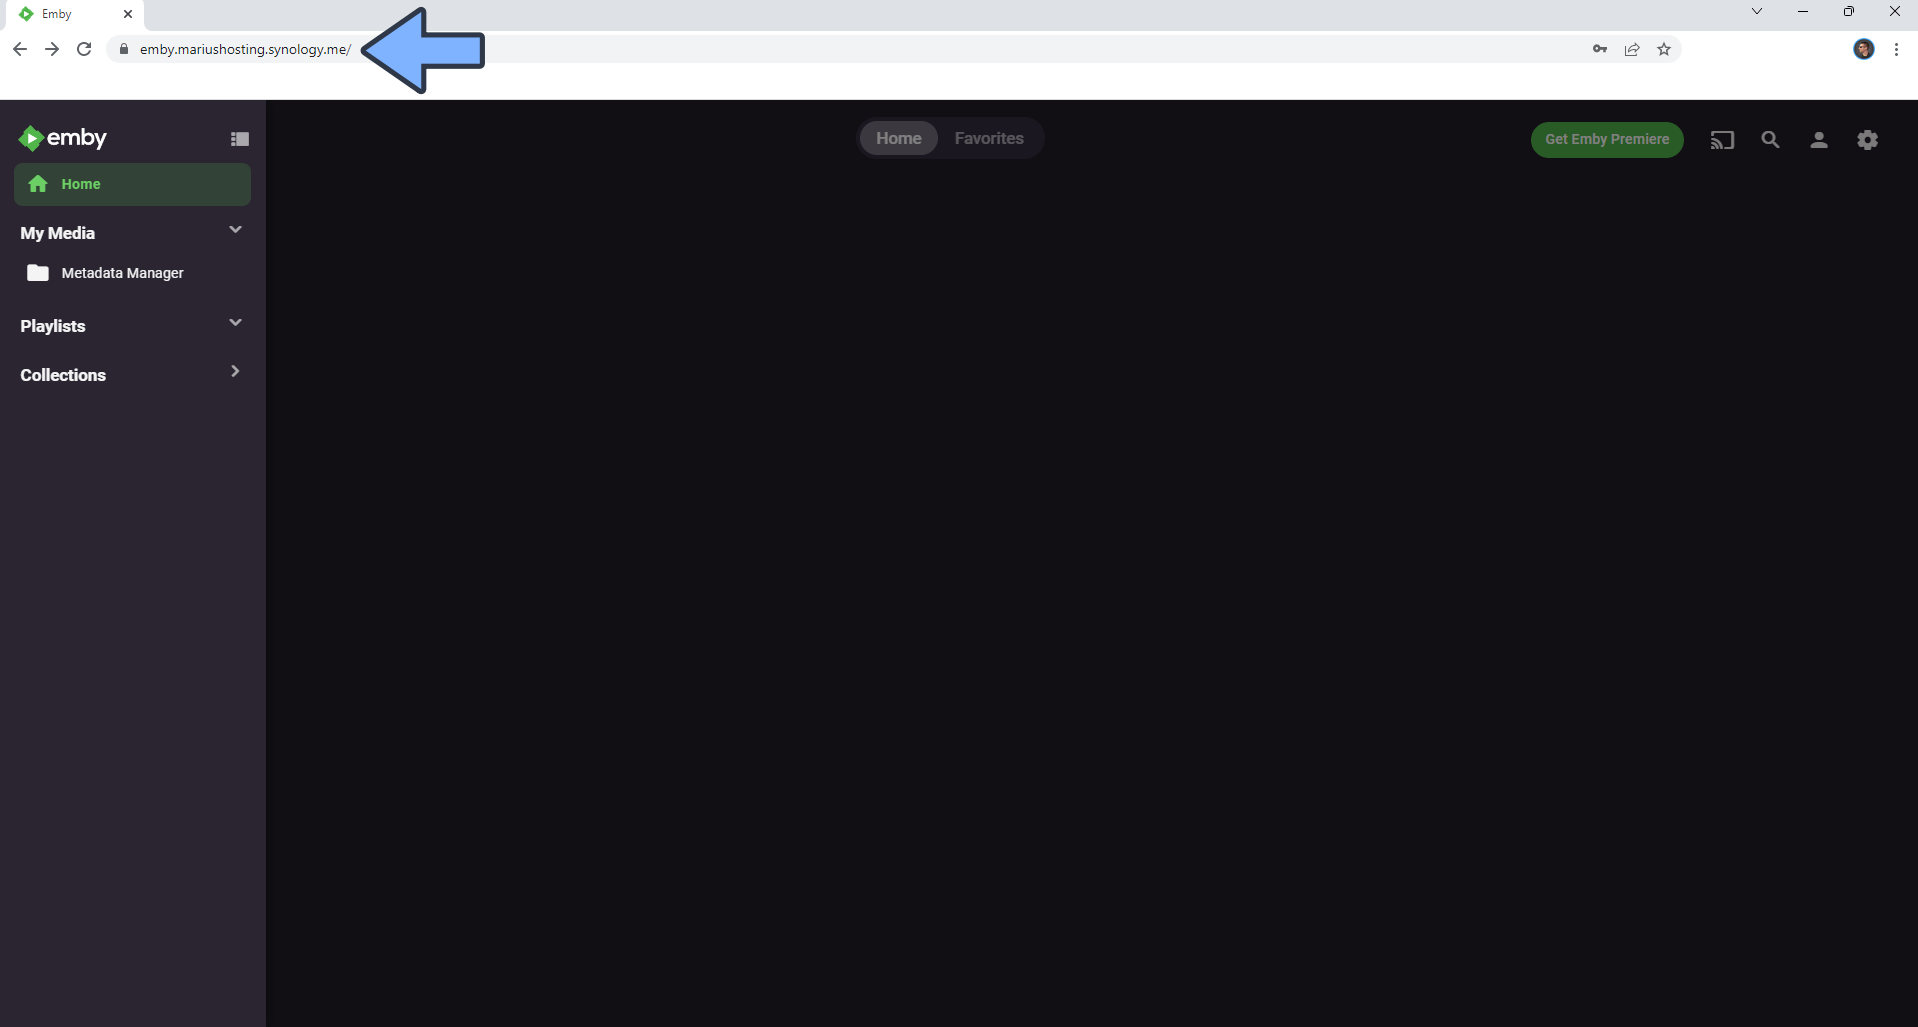
Now open your browser and type in your HTTPS/SSL certificate like this https://emby.yourname.synology.me In my case it’s https://emby.mariushosting.synology.me If everything goes right, you will see the emby page. Follow the instructions in the image below.
Note: You can install the Emby server without Docker with the latest DSM 7.2.2 version.
This post was updated on Sunday / August 24th, 2025 at 2:58 PM
