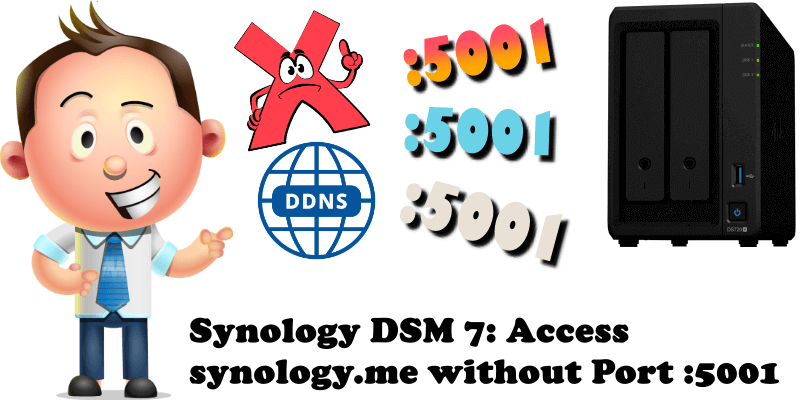
Are you tired of typing yourname.synology.me:5001 in your browser address bar every time you log into your DSM 7xx? Would you like to know how to remove the :5001 part and still be able to access your Synology on DSM 7xx in a professional way? Right now, if you remove the port number :5001 from your synology.me address and press Enter, instead of your usual login page, a standard screen with an error message will appear.
Did you know your Synology NAS can act as a Reverse Proxy Server that transfers requests from the Internet to devices in the local network? Starting today, you will be able to connect to your synology.me DDNS address without typing :5001 at the end of the link every single time. To learn how to do this, just follow the instructions below.
STEP 1
Please Support My work by Making a Donation.
STEP 2
Create a synology.me DDNS by following my step by step guide. If you already own a synology.me DDNS, skip this STEP.
STEP 3
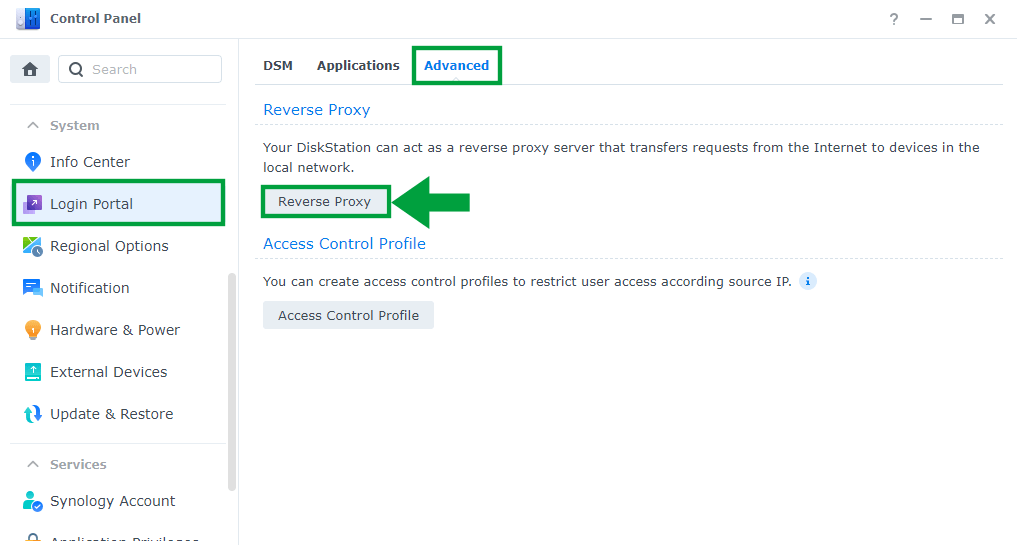
Go to Control Panel / Login Portal / Advanced / Reverse Proxy. Follow the instructions in the image below.
STEP 4
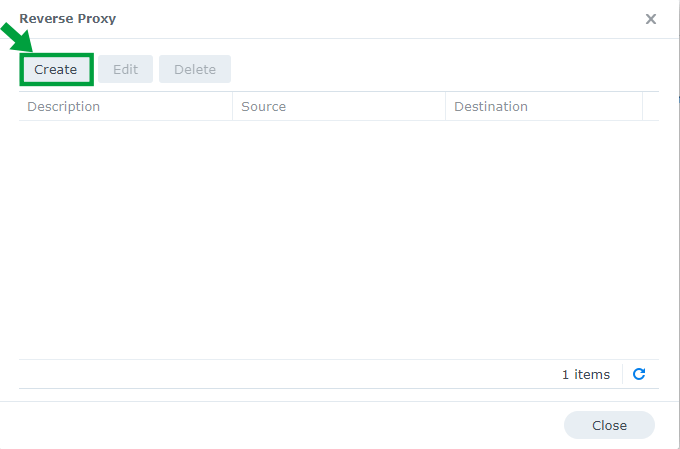
After you click on Reverse Proxy, the screen below will open. Click Create.
STEP 5
After you click Create, a new window titled Reverse Proxy Rules will appear. Click the General option and then follow the instructions below.
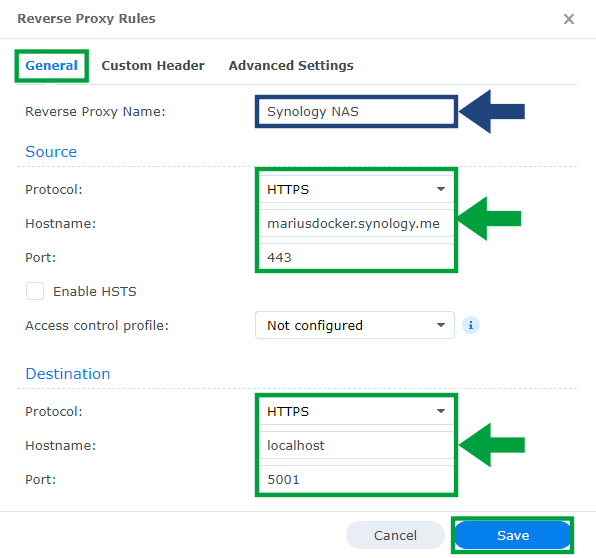
- Reverse Proxy Name: Type in name or description (you can just type in Synology NAS, like I did).
- Source
- Protocol: select HTTPS (which is the transfer protocol used to access the web over the Internet using Reverse Proxy)
- Hostname: type in the individual unique domain name for your Synology NAS that you want to access over the Internet using the Reverse Proxy protocol (for example: yourname.synology.me) In my case I used my own DDNS name that I have previously created on STEP 2 of this article.
- Port: 443 (the default HTTPS port).
- Destination
- Protocol: select HTTPS
- Hostname: type in localhost
- Port: type in port 5001 or the port you have chosen to access your DSM via the HTTPS protocol. The standard port is 5001.
- Click Save.
STEP 6
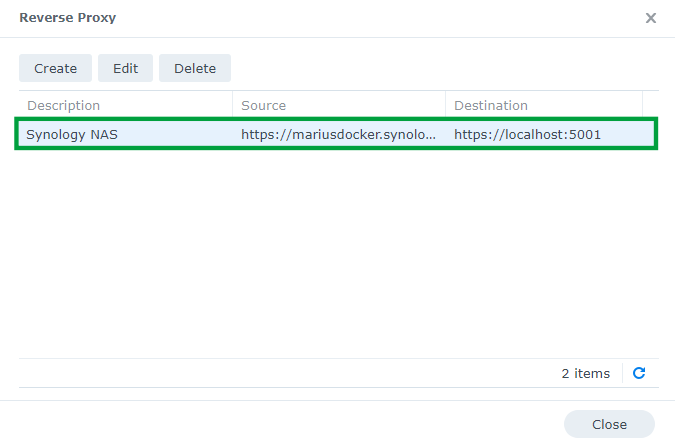
After clicking Save, if everything went as it should have, you should see your new Reverse Proxy rule.
STEP 7
🟢Please Support My work by Making a Donation. Almost 99,9% of the people that install something using my guides forget to support my work, or just ignore STEP 1. I’ve been very honest about this aspect of my work since the beginning: I don’t run any ADS, I don’t require subscriptions, paid or otherwise, I don’t collect IPs, emails, and I don’t have any referral links from Amazon or other merchants. I also don’t have any POP-UPs or COOKIES. I have repeatedly been told over the years how much I have contributed to the community. It’s something I love doing and have been honest about my passion since the beginning. But I also Need The Community to Support me Back to be able to continue doing this work.
STEP 8
Now try to connect to your Synology DSM 7.1 through your browser using your name followed by synology.me without adding the :5001 port at the end. Enjoy!
Look here https://mariusdocker.synology.me/ It’s my synology.me login screen without :5001 at the end. PS: Don’t try to connect, your IP will be blocked automatically.
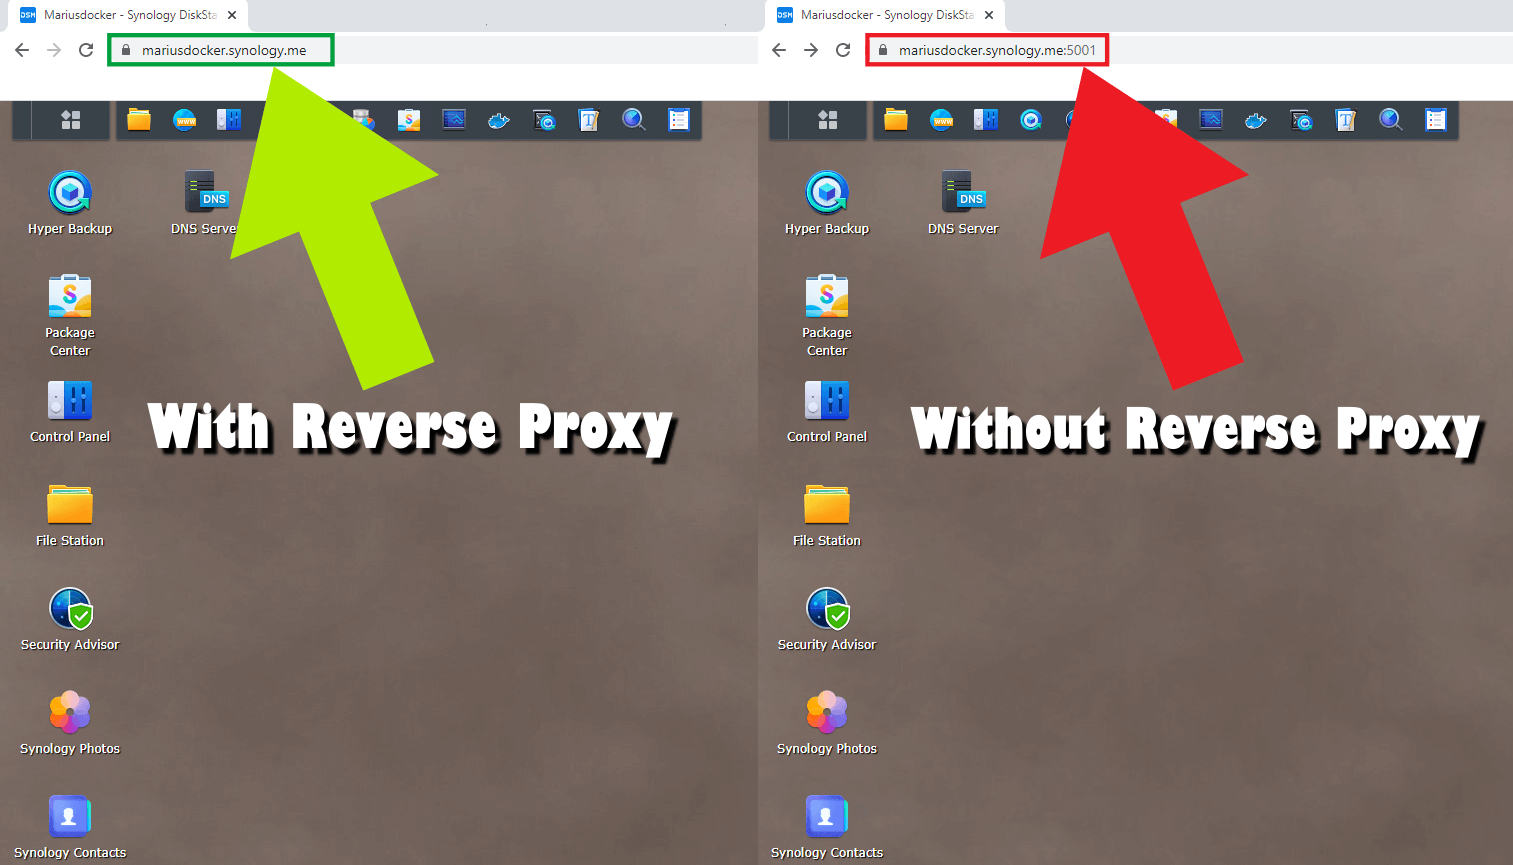
Note: With Reverse Proxy, from now on you can connect to your NAS without adding the :5001 port at the end. Remember you can connect to your DDNS with or without :5001 at the end and everything will work fine either way.
Note: Access synology.me without Port 5001 at the end on DSM 6.2.4
This post was updated on Friday / February 7th, 2025 at 12:56 PM