
Anyone who has ever configured Nginx or the Apache web server knows that having multiple threads for each service provides better performance than having a single process handling all the requests. Today I will teach you how to activate reuseport which is an option that allows you to enhance high concurrent connection capability for web services. With this option enabled, each worker has its own listening socket and on each new connection, the kernel chooses one of them which will receive it – so there is no port contention.
STEP 1
Please Support My work by Making a Donation.
STEP 2
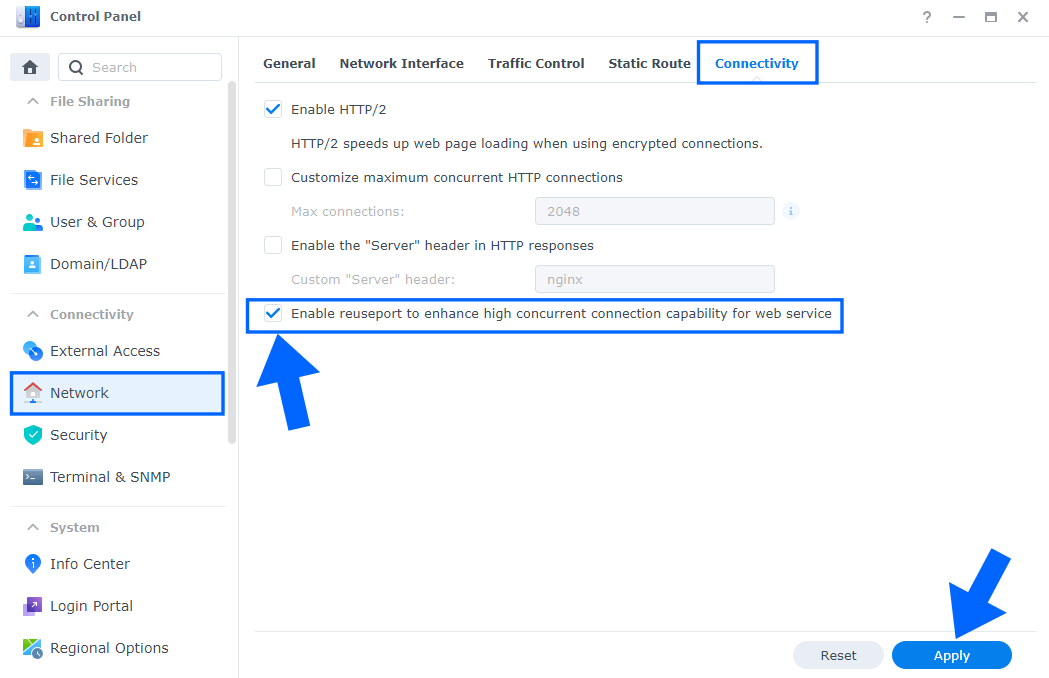
Go to Control Panel / Network / Connectivity / Check Enable reuseport to enhance high concurrent connection capability for web service, then click Apply.
STEP 3
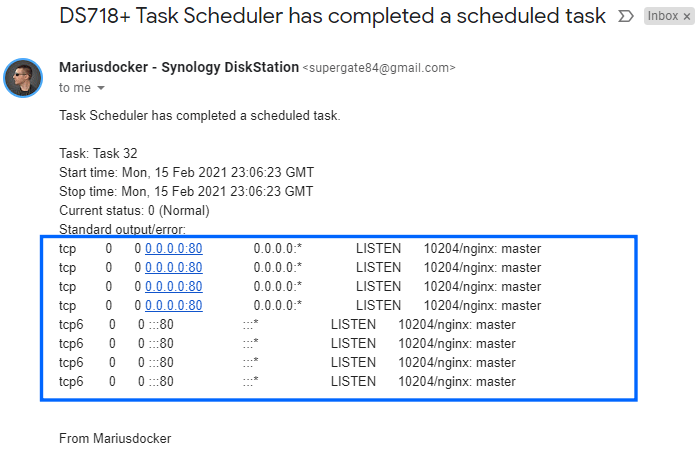
If you want to check if the reuseport option is working, just SSH into your NAS and add this command line below.
Note: You can also test port 443 instead 80.
netstat -plnt | grep ":80 "
Without reuseport enabled. A single listening socket notifies workers about incoming connections, and each worker tries to take a connection.
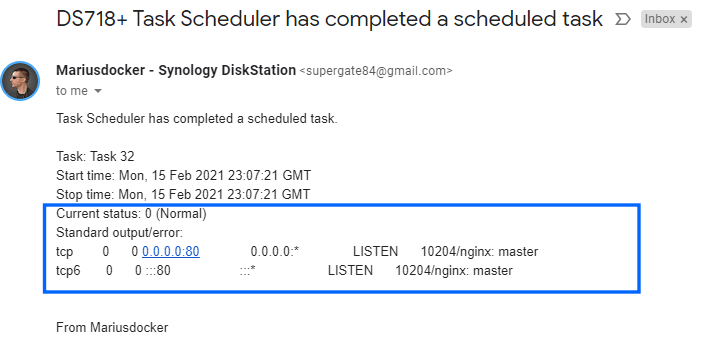
With reuseport enabled. There are multiple socket listeners for each IP address and port combination, one for each worker process. The kernel determines which available socket listener (and by implication, which worker) gets the connection. This can reduce lock contention between workers accepting new connections, and improve performance if you host a website on your Synology NAS.
Below you can see an image that gives you a good idea of how it works.
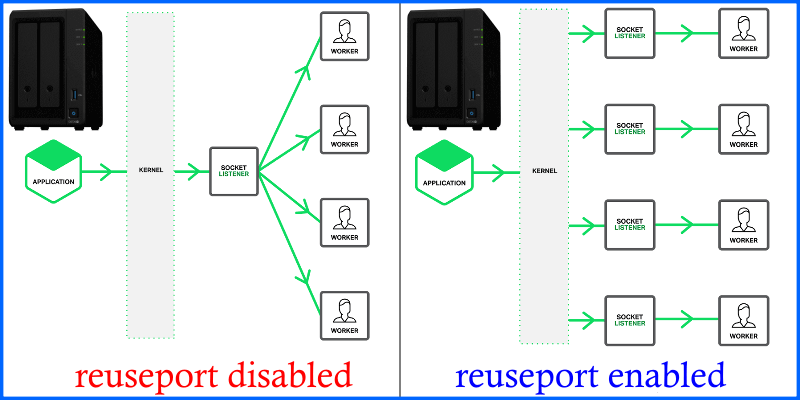
Note: With reuseport enabled, you will enjoy reduced latency.
This post was updated on Tuesday / May 30th, 2023 at 10:20 AM