Are you hosting your website on your Synology NAS like I am doing using WordPress? If the answer is yes, then you really should read on. WordPress uses the MySQL/MariaDB database to cache internal application objects like breadcrumbs, menu items etc. which are very heavy to generate. A database handles queries for page requests, and causes increased load-times when your website is loaded intensively. Redis provides a caching mechanism that acts as an alternative to your MySQL/MariaDB database. If someone is visiting your WordPress website, the MySQL/MariaDB queries required to generate the entire page are served via Redis which caches the results. This results in blazing fast load times, comparable to static pages without Redis. In this step by step guide I will show you how to add Redis Object Cache to WordPress using Docker on your Synology NAS. Note: If you are looking to add Redis Object Cache to your WordPress installed via Docker, check out my guide on How to Install WordPress on your Synology NAS.
STEP 1
Please Support My work by Making a Donation.
STEP 2
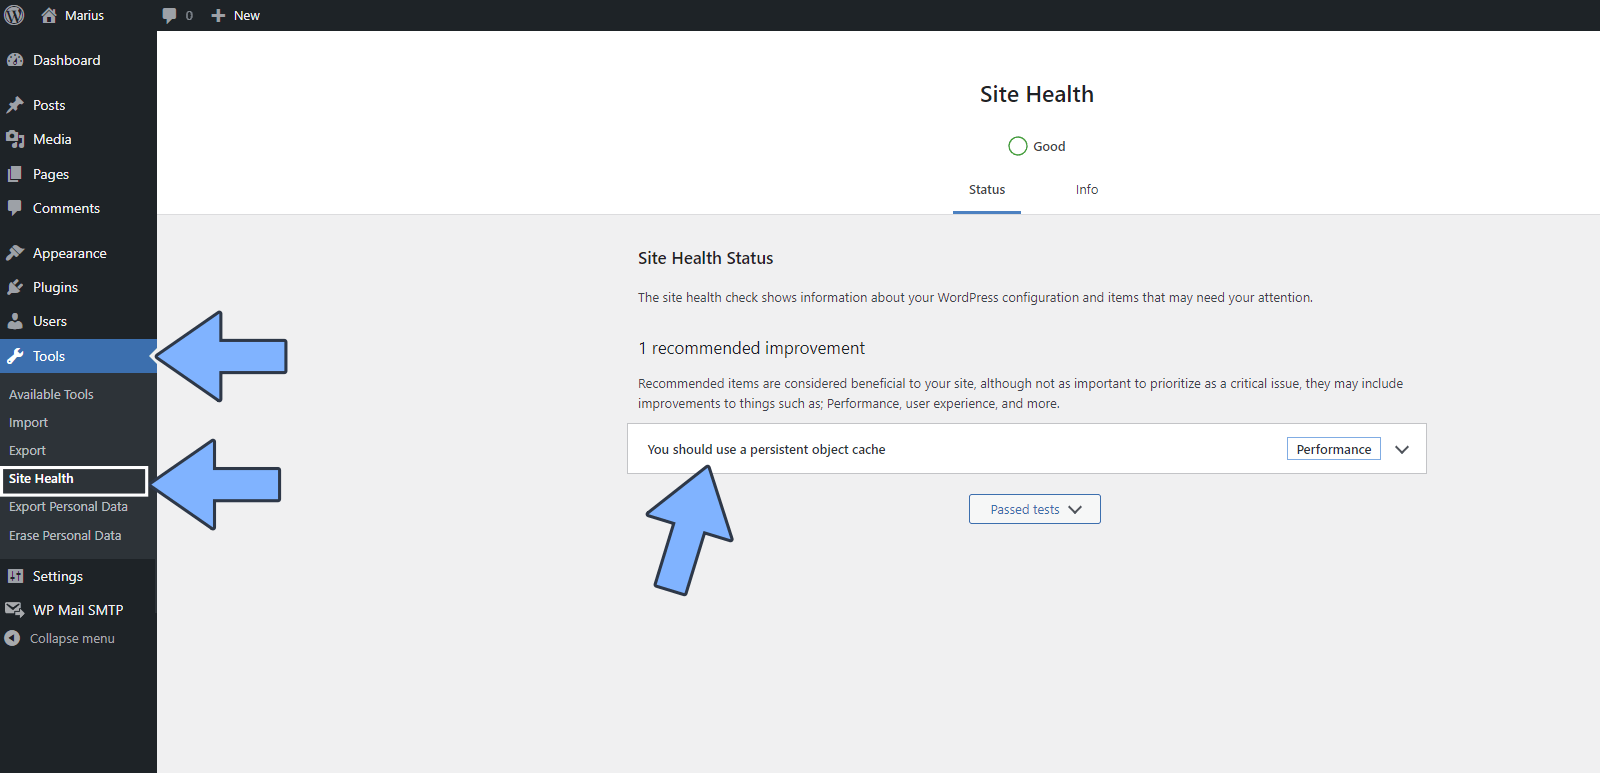
When you perform a Site Health test on your WordPress website, you will see a message recommending you to use a persistent object cache. Follow the instructions in the image below.
STEP 3
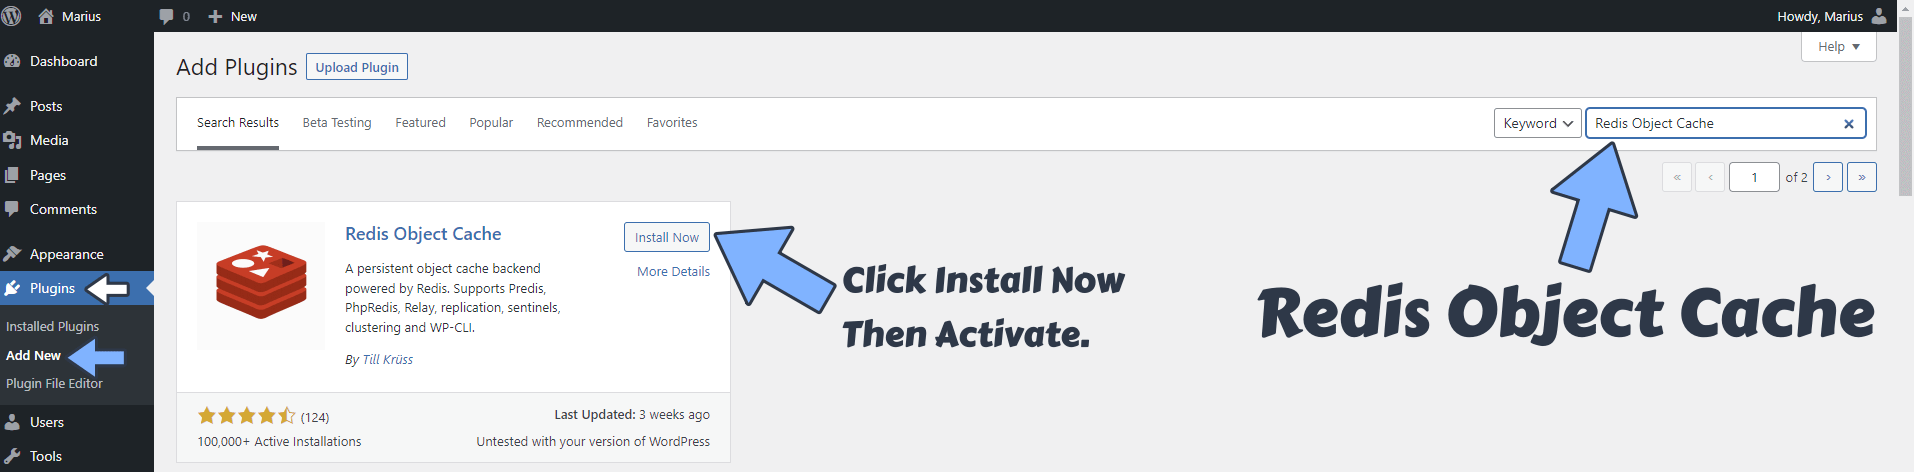
On the WordPress left sidebar click on Plugins, then Add New. Search for Redis Object Cache, a plugin by Till Krüss. When you find the plugin named Redis Object Cache, click Install Now then Activate it. Follow the instructions in the image below.
STEP 4
After the Redis Object Cache is installed, you will find it under the Settings menu. Click on Redis. On the Overview area, the Status will say Not connected. Follow the instructions in the image below.

STEP 5
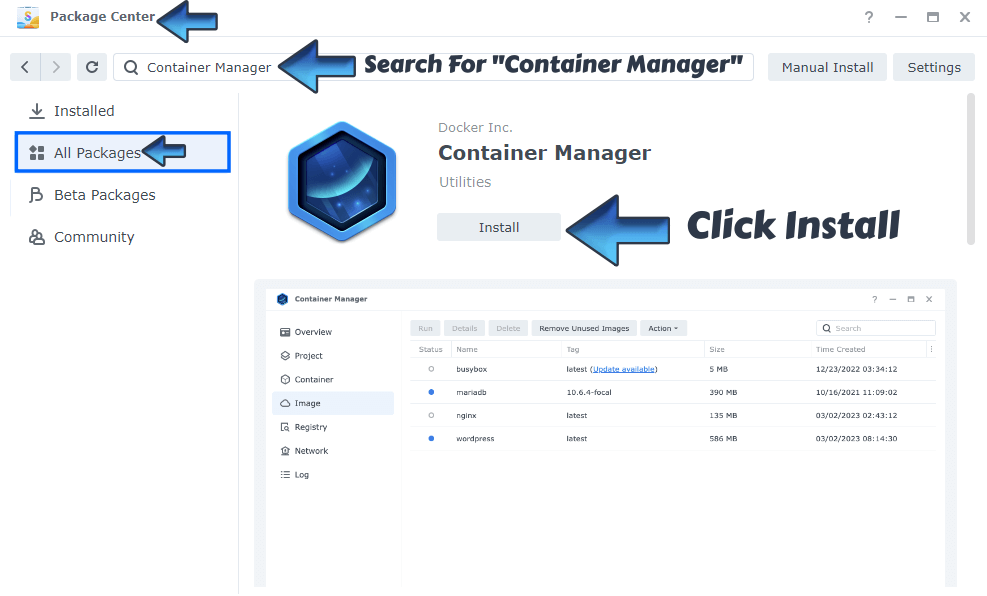
Install Container Manager via Synology “Package Center”.
STEP 6
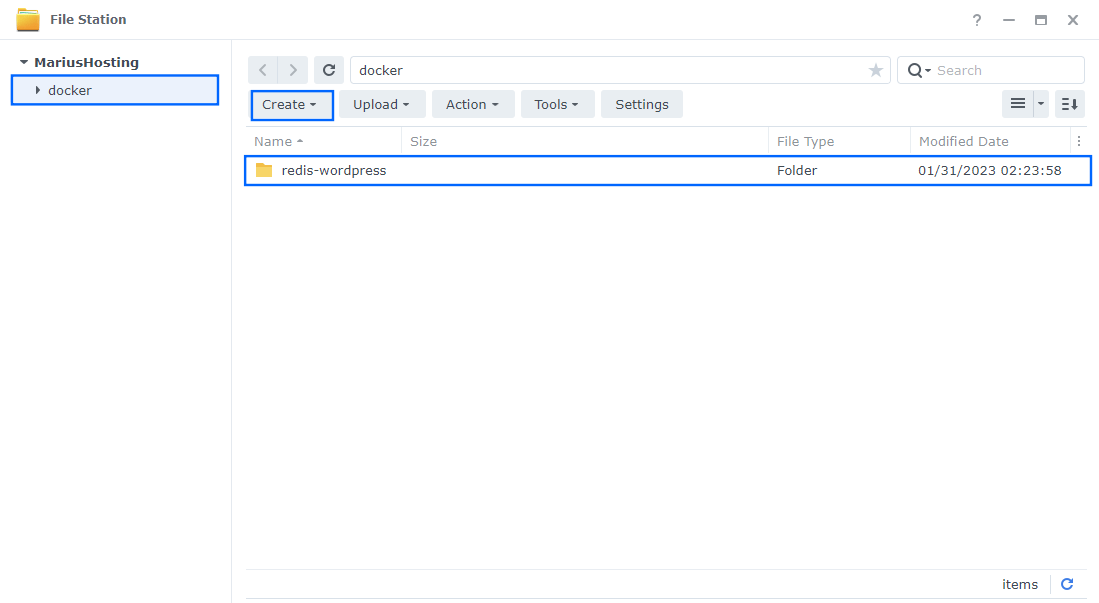
Go to File Station and open the docker folder. Inside the docker folder, create one new folder and name it redis-wordpress. Follow the instructions in the image below.
Note: Be careful to enter only lowercase, not uppercase letters.
STEP 7
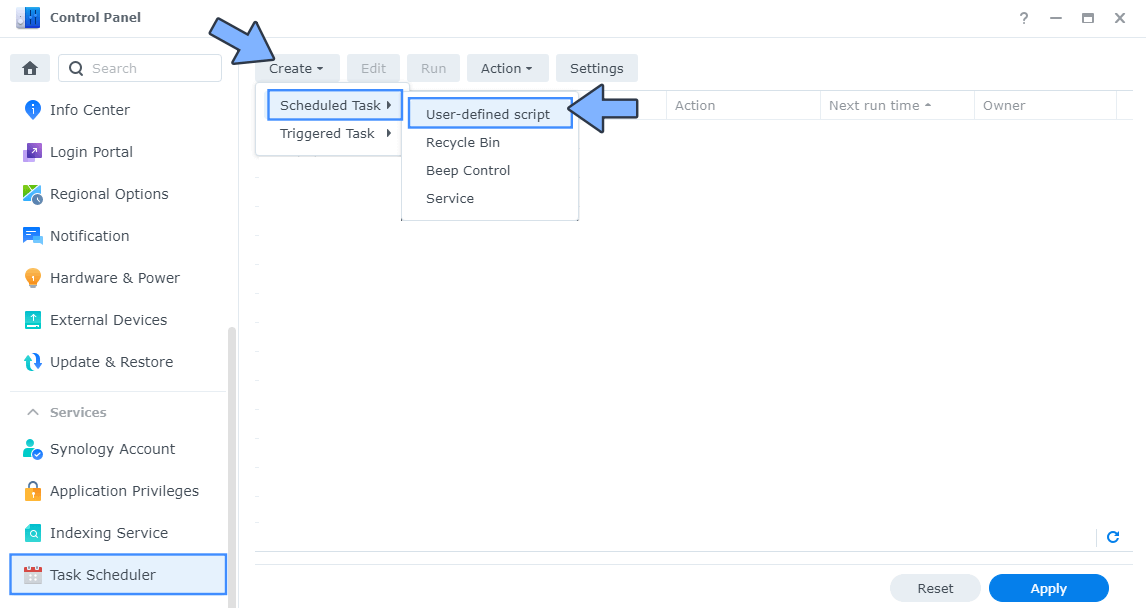
Go to Control Panel / Task Scheduler / Create / Scheduled Task / User-defined script. Follow the instructions in the image below.
STEP 8
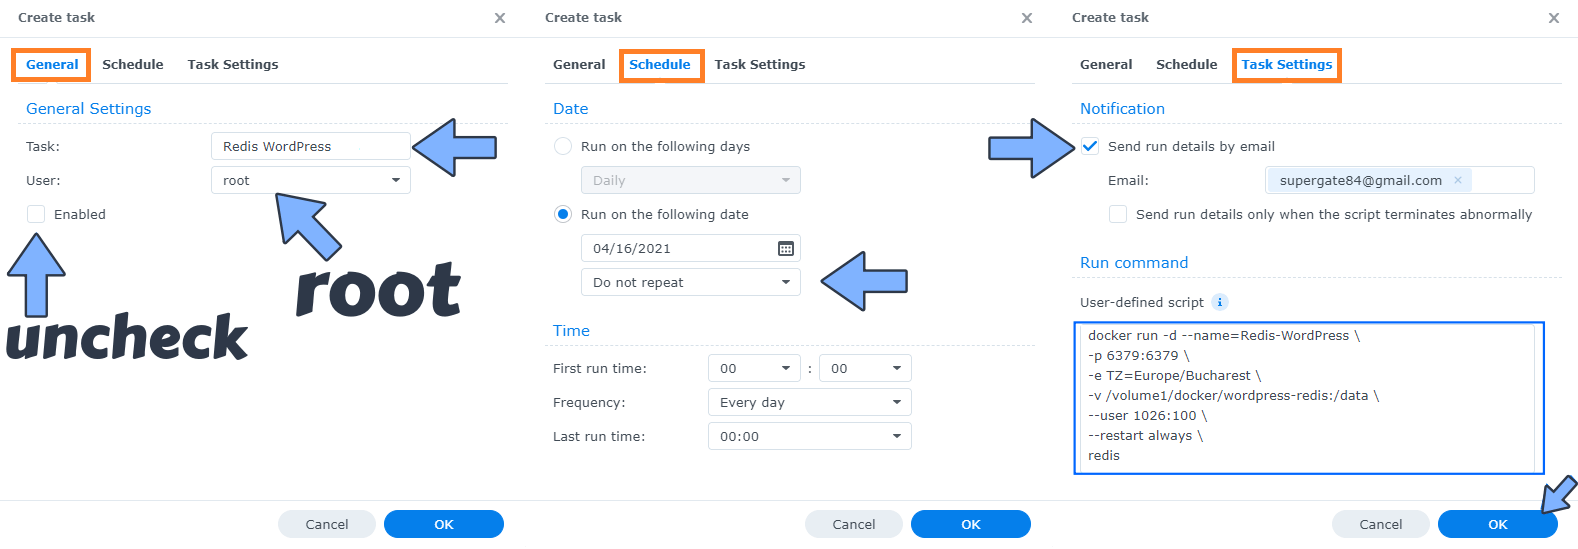
Once you click on User-defined script, a new window will open. Follow the instructions below:
- General: In the Task field type in Redis WordPress. Uncheck the “Enabled” option. Select root User.
- Schedule: Select Run on the following date then select “Do not repeat“.
- Task Settings: Check “Send run details by email“, add your email then copy paste the code below in the Run command area. After that, click OK.
docker run -d --name=Redis-WordPress \
-p 6379:6379 \
-e TZ=Europe/Bucharest \
-v /volume1/docker/redis-wordpress:/data \
--user 1026:100 \
--restart always \
redis
Note: Before you paste the code above in the Run command area below, change the value for TZ. (Select your current Time Zone from this list.)
Note: Before you paste the code above in the Run command area below, change the value numbers for – – user with your own UID and GID values. (Follow my step by step guide on how to do this.) 1026 is my personal UID value and 100 is my personal GID value. You have to type in your own values.
STEP 9
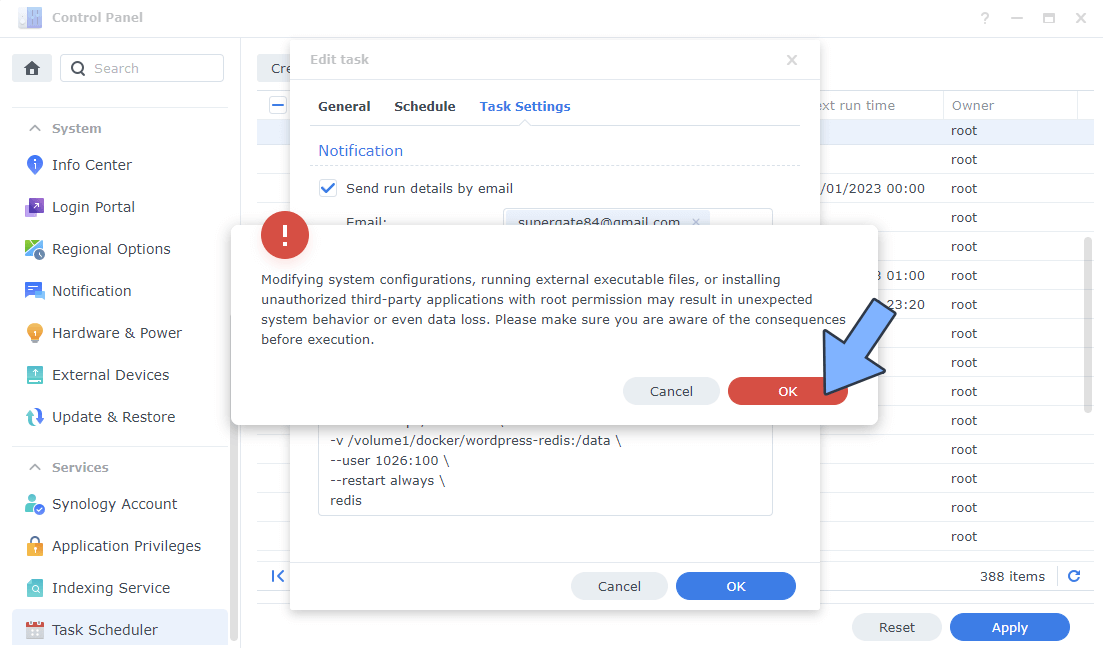
After you click OK on STEP 8 a new warning pop up window will open. Click OK.
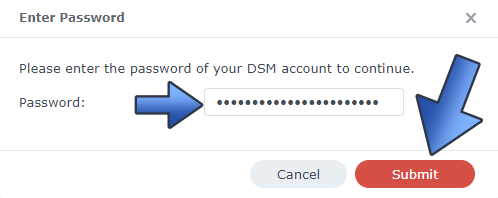
After you click OK, type in your DSM Password then click Submit. Follow the instructions in the image below.
STEP 10
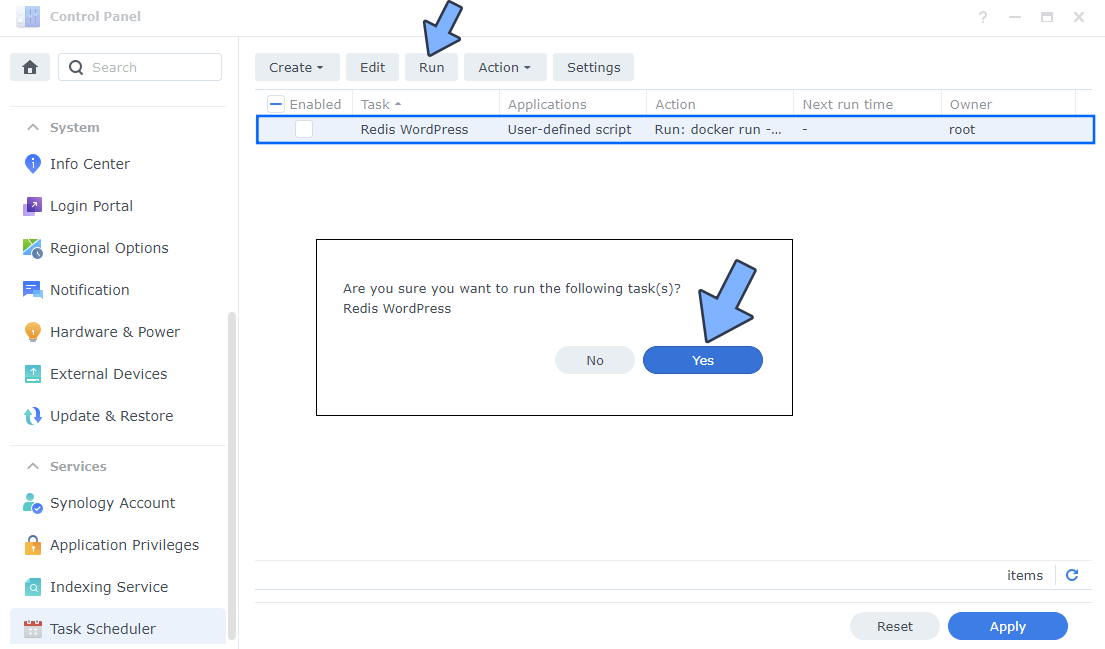
After you click Submit on STEP 9, select your “Redis WordPress” Task then click the “Run” tab. You will be asked to run Redis WordPress – click OK. Follow the instructions in the image below.
STEP 11
🟢Please Support My work by Making a Donation. Almost 99,9% of the people that install something using my guides forget to support my work, or just ignore STEP 1. I’ve been very honest about this aspect of my work since the beginning: I don’t run any ADS, I don’t require subscriptions, paid or otherwise, I don’t collect IPs, emails, and I don’t have any referral links from Amazon or other merchants. I also don’t have any POP-UPs or COOKIES. I have repeatedly been told over the years how much I have contributed to the community. It’s something I love doing and have been honest about my passion since the beginning. But I also Need The Community to Support me Back to be able to continue doing this work.
STEP 12
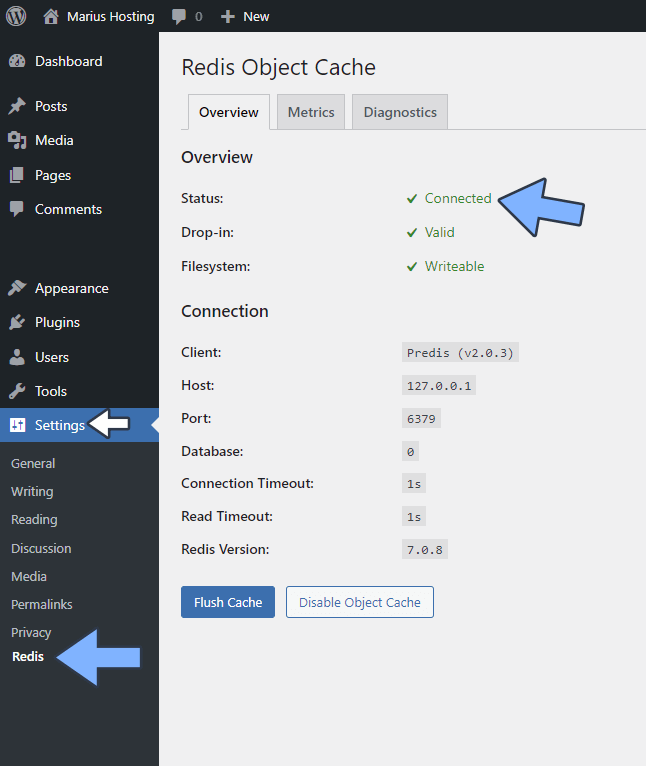
Go back to your WordPress website. Click on Redis. On the Overview area, the Status will say Connected. Follow the instructions in the image below.
Done! When a user requests a WordPress page for the first time, a MySQL/MariaDB database query is performed on your Synology NAS server. Redis will cache this query, so when another user requests the same identical WordPress page, the results are provided from Redis, without the need to query the MySQL/MariaDB database again. So, in a few words, if the query is not cached in Redis, the results are provided by your MySQL/MariaDB database, which are then added to the Redis cache. Redis stores data in memory rather than on an HDD or SSD cache; its response time is faster than others when performing read and write operations. I have been using Redis on mariushosting since the beginning of 2023 to boost user experience by improving page loading speed.
If you Monitor Your Synology with the Grafana and Prometheus Dashboard, you can also see how Redis WordPress performs on Network Traffic. Grafana with the Prometheus Dashboard allows you to monitor the Network Traffic of any Docker container you have installed on your Synology NAS.

Note: Can I run Docker on my Synology NAS? See the supported models.
Note: Find out how to update the Redis container with the latest image.
Note: Make sure RULE 6 is correctly applied on your Synology NAS Firewall.
This post was updated on Sunday / August 24th, 2025 at 2:43 PM