
Many people want to know how to activate Pi-hole on their Desktop PC with the latest Microsoft Windows 11 operating system. Today I will explain to you how to add Pi-hole as DNS on your Windows 11 Desktop PC using your Synology NAS. You can use Pi-hole as DNS to stop all Internet advertisements when you surf the web. Pi-hole functions similarly to a network firewall meaning that advertisements and tracking domains are blocked for all devices behind it, whereas traditional advertisement blockers only run in a user’s browser, and remove advertisements only on the same machine. Pi-hole blocks ads and trackers before they load. Ads are not only visually impacting you. They suck up network bandwidth, will use your machine CPU power, and have an unwanted effect on your device’s energy consumption.
STEP 1
Please Support My work by Making a Donation.
STEP 2
Install Pi-Hole on your Synology NAS using my step by step guide.
STEP 3
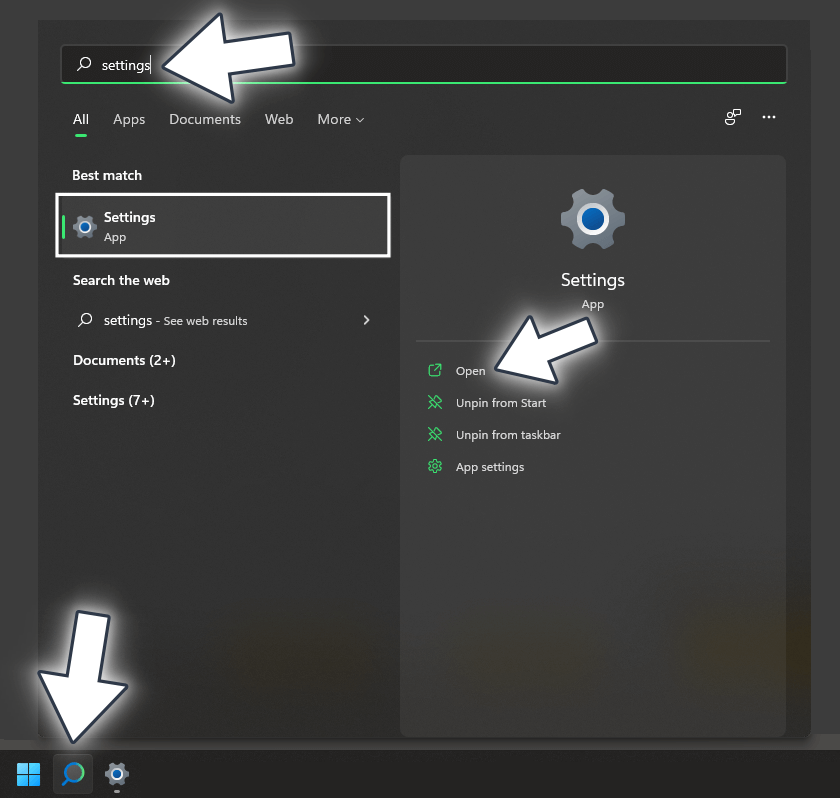
On your Windows 11 Desktop PC search for “Settings“. Once you find it, click Open. Follow the instructions in the image below.
STEP 4
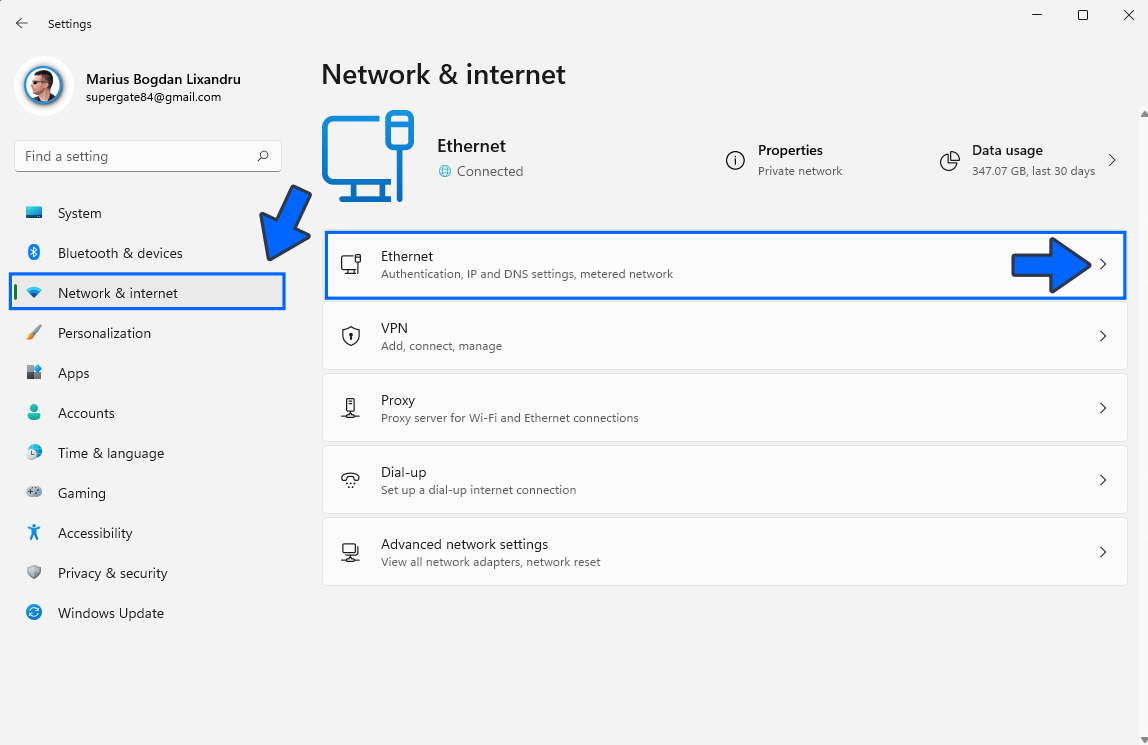
On the left sidebar click Network & Internet. Select your Ethernet connection, then click the little arrow. Follow the instructions in the image below.
STEP 5
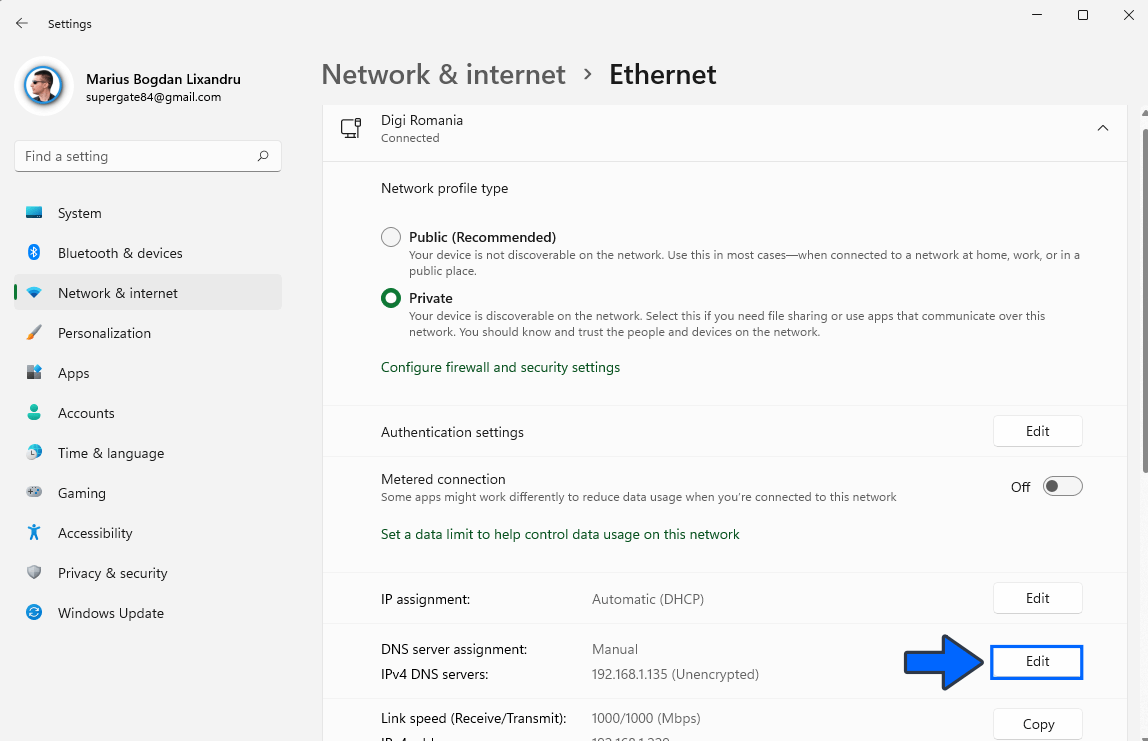
Scroll down until you find the option “DNS server assignment“. Click Edit. Follow the instructions in the image below.
STEP 6
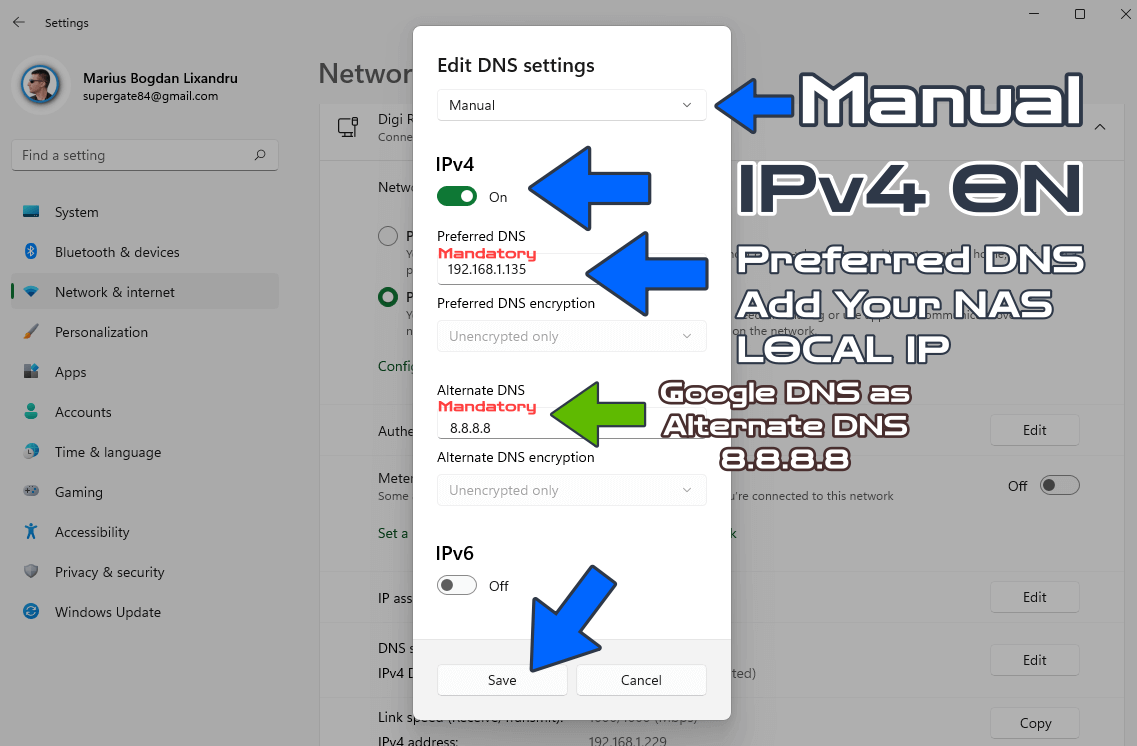
Edit DNS settings. Instead of Automatic DHCP, choose Manual. Turn ON IPv4. Add your Synology NAS local IP as the Preferred DNS and the Google DNS 8.8.8.8 as the Alternate DNS. Click Save. Follow the instructions in the image below.
STEP 7
🟢Please Support My work by Making a Donation. Almost 99,9% of the people that install something using my guides forget to support my work, or just ignore STEP 1. I’ve been very honest about this aspect of my work since the beginning: I don’t run any ADS, I don’t require subscriptions, paid or otherwise, I don’t collect IPs, emails, and I don’t have any referral links from Amazon or other merchants. I also don’t have any POP-UPs or COOKIES. I have repeatedly been told over the years how much I have contributed to the community. It’s something I love doing and have been honest about my passion since the beginning. But I also Need The Community to Support me Back to be able to continue doing this work.
STEP 8
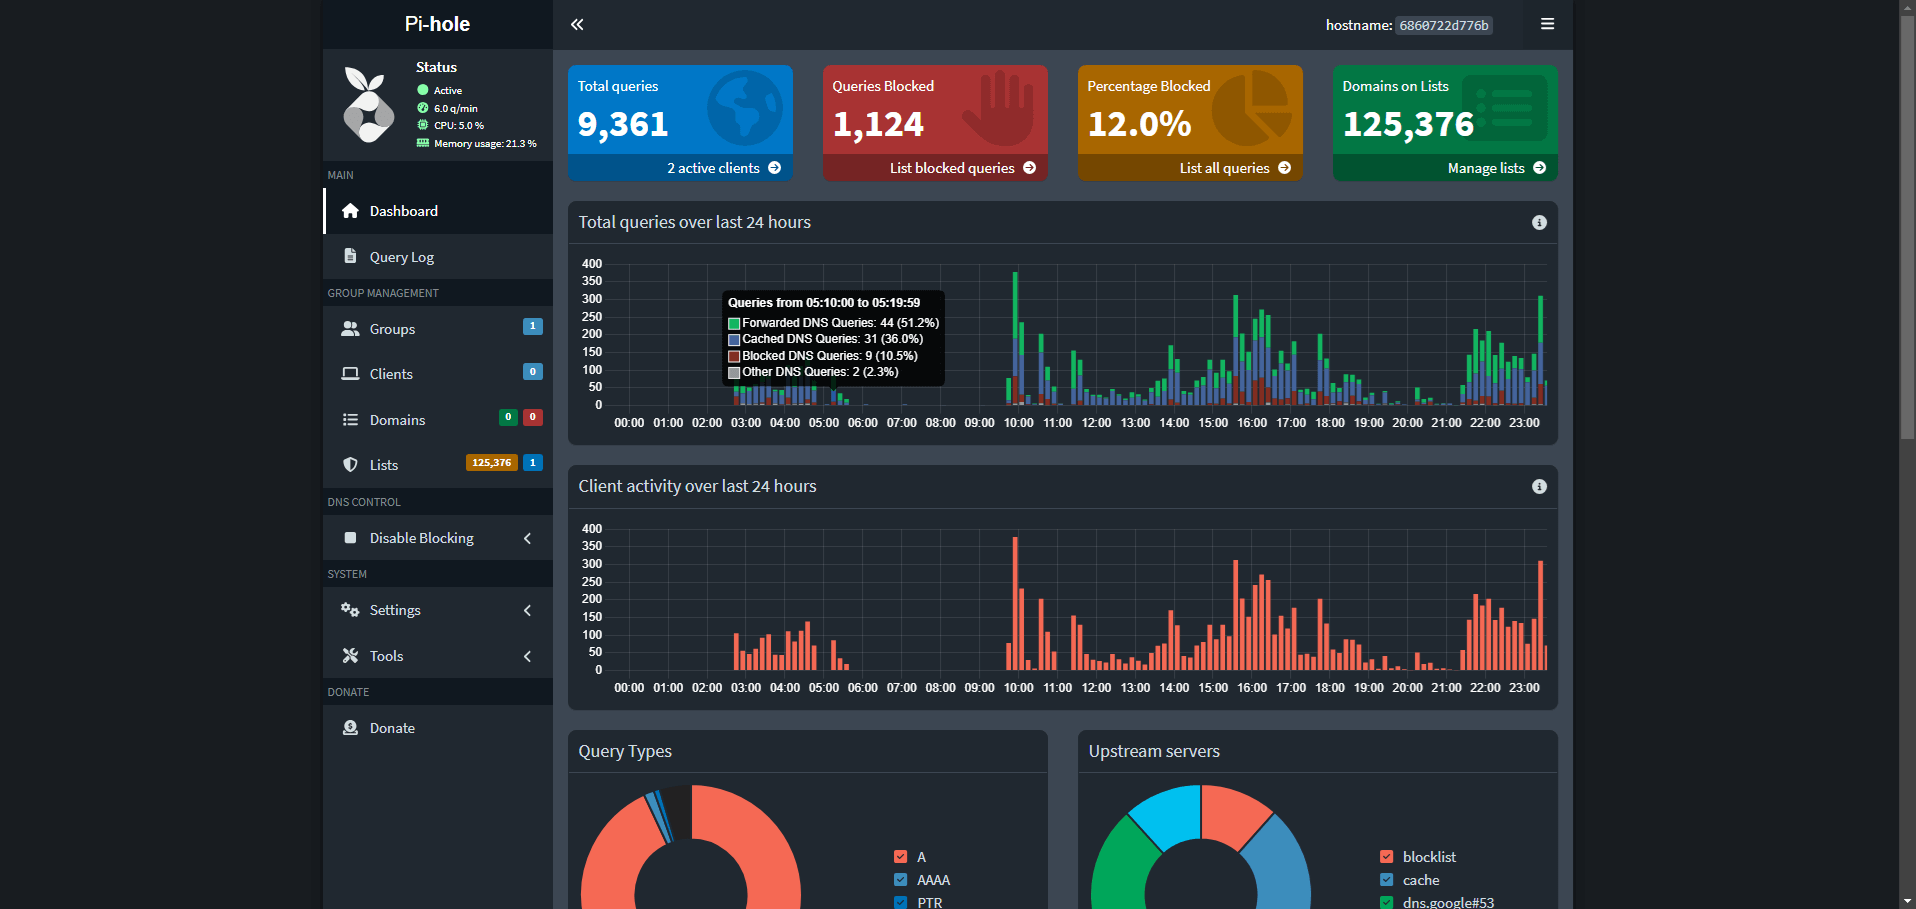
From now on, your PC will be automatically protected from ads by Pi-Hole. Start surfing the Internet via a web browser and you will see the number of blocked queries rapidly increasing in the graph.
Note: The guide above will show you how to add Pi-hole as DNS on a Windows 11 Desktop PC. You can change the DNS of all the devices in your home, from your MAC computer, tablet, mobile phones, both Android and iOS, to your Smart TV. You just have to change their DNS by adding your NAS Local IP.
Note: If you haven’t yet upgraded your PC to Windows 11 and are still running Windows 10, then know the procedure to add Pi-hole as your DNS server is different. To change your DNS server on a Windows 10 computer, go to Settings / Network & Internet / Change adapter options. Right-click on your Ethernet connection and select Properties / IPv4 / Properties. Finally, on the General tab, select Use the following DNS server addresses and add your Synology NAS local IP on the first DNS line (Preferred DNS server), then click Save.
Note: If you like the dark theme in the screenshot above read my guide on How to Activate Dark Mode in Pi-hole.
Note: How to Update Pi-Hole on your Synology NAS.
This post was updated on Wednesday / July 2nd, 2025 at 7:19 AM