
Quad9 DNS blocks lookups of malicious host names from an up-to-the-minute list of threats. This blocking action protects your computer, mobile device or IoT systems against a wide range of threats such as malware, phishing, spyware, and botnets, and it can improve performance in addition to guaranteeing privacy. The Quad9 DNS service is operated by the Swiss-based Quad9 Foundation whose mission is to provide a safer and more robust Internet for everyone.
If you don’t set up specific DNS servers on your computer (or your router), default DNS servers from your ISP (Internet Service Provider) will be used. To avoid unwanted DNS errors on your Synology NAS device, switch to public DNS servers like the Quad9 DNS. There are plenty of public DNS services you can use, such as CloudFlare, OpenDNS or Google DNS.
The Quad9 Public DNS IP addresses (IPv4) are the following:
9.9.9.9
149.112.112.112
To Manually add Quad9 DNS on your Synology NAS device, just go to Control Panel / Network / General. Check “Manually configure DNS server” and type in your Preferred DNS Server: 9.9.9.9 On Alternative DNS Server type in: 149.112.112.112 – Follow the instructions in the image below.
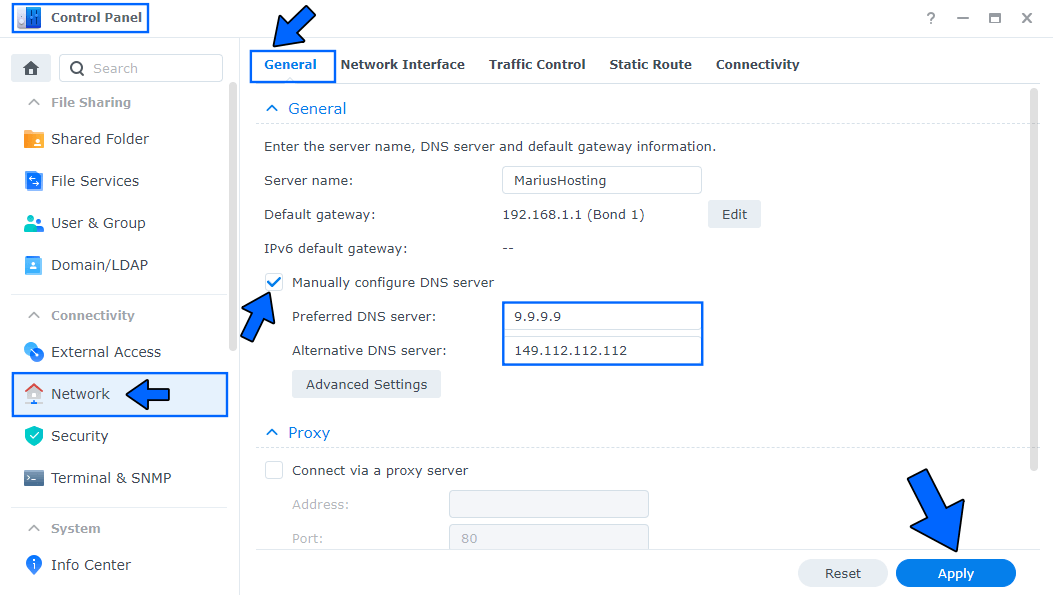
After you have manually inserted your DNS Server, click “Apply“. Now your Synology NAS device will use Quad9 DNS for different services like Download Station, Audio Station, Video Station, and many other apps.
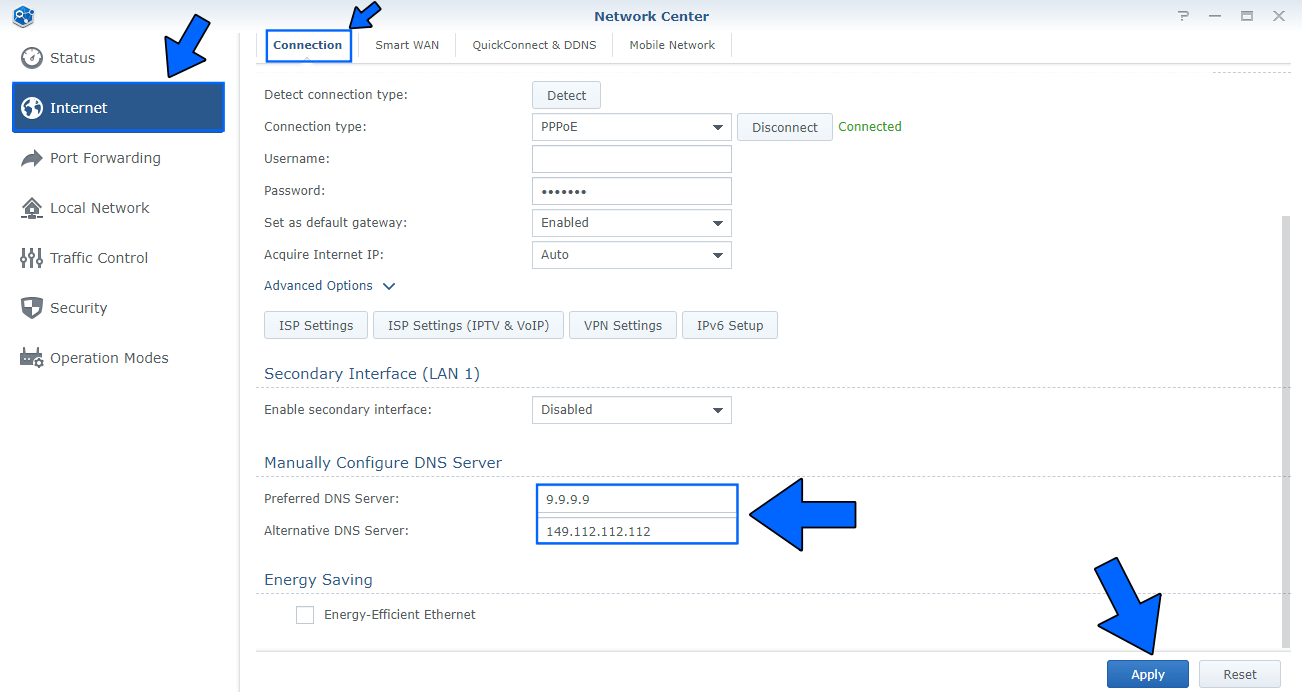
You can also change your router DNS and add your favorite DNS instead. At the moment I am using an RT6600ax Synology router. Remember that every router has its own interface design. If you, like me, own a Synology router, go to Network Center / Internet / Connection tab / under Manually configure DNS server type in your Preferred DNS Server: 9.9.9.9 and on Alternative DNS Server type in: 149.112.112.112 – Follow the instructions in the image below.
This post was updated on Thursday / January 8th, 2026 at 1:43 PM