Did you know that, if you have a Synology NAS, you can request files from other people who do not have a Synology box? File requests are file-uploading invitations. With file request links, users can directly upload multiple files to File Station on your Synology NAS. This tool should be used with the utmost care; you should only give such a link to people you know well and trust, and use a password.
STEP 1
Please Support My work by Making a Donation.
STEP 2
Create your own shared folder.
STEP 3
Follow my step by step guide on how to activate your synology.me DDNS on DSM 7
Follow my step by step guide on how to activate your synology.me DDNS on DSM 6.2.4
Note: If you already own a synology.me DDNS, skip this STEP.
STEP 4
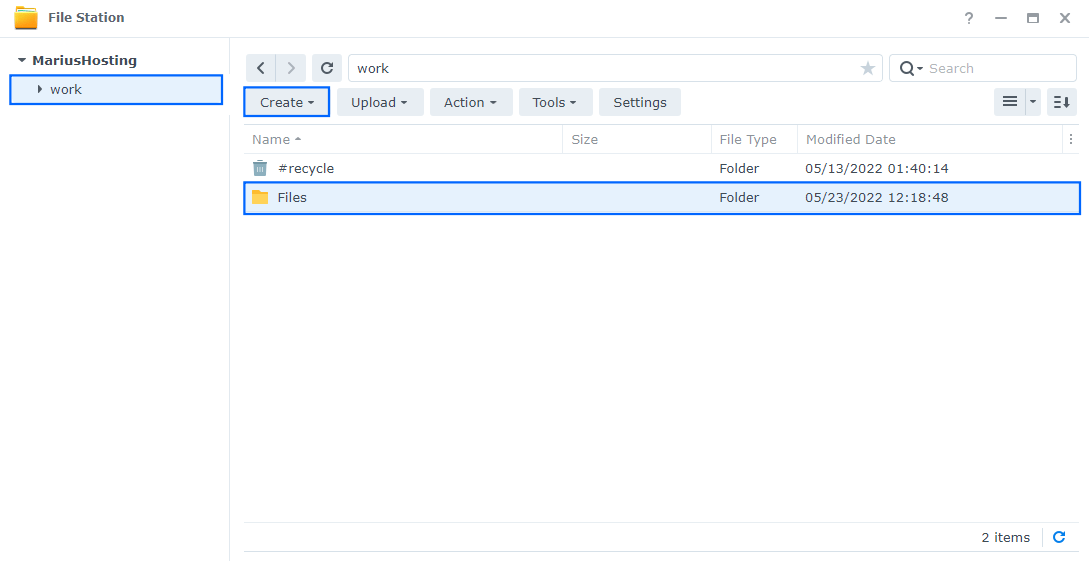
Inside the shared folder you have created at STEP 2 create a new folder. In my example below I created a new folder and named it “Files”. Follow the instructions in the image below.
STEP 5
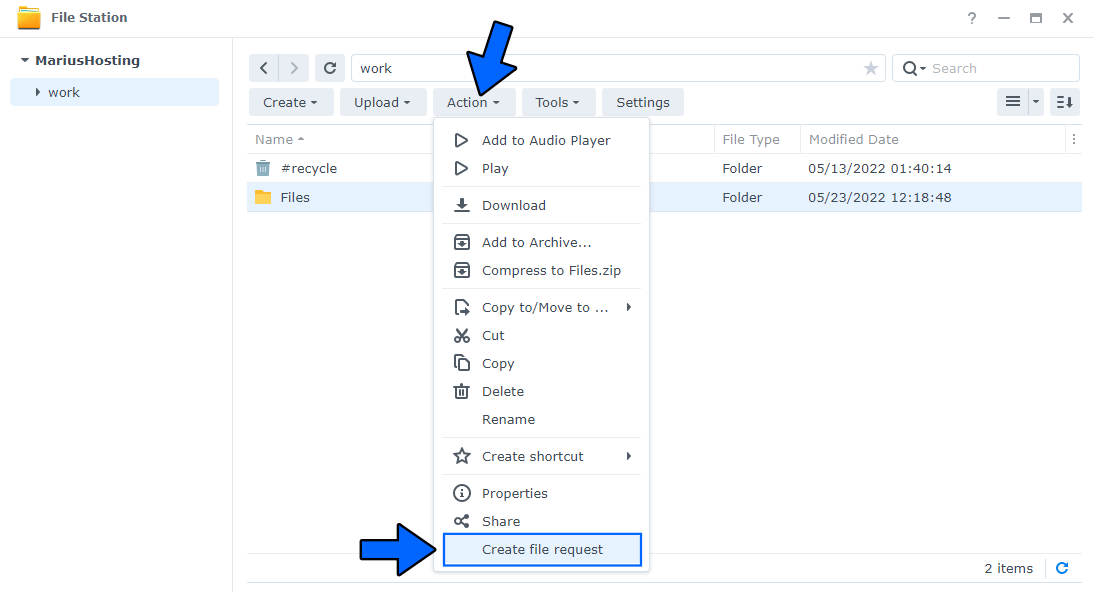
Select the folder you have created at STEP 4, then click the Action tab. After that, click on “Create file request“. Follow the instructions in the image below.
STEP 6
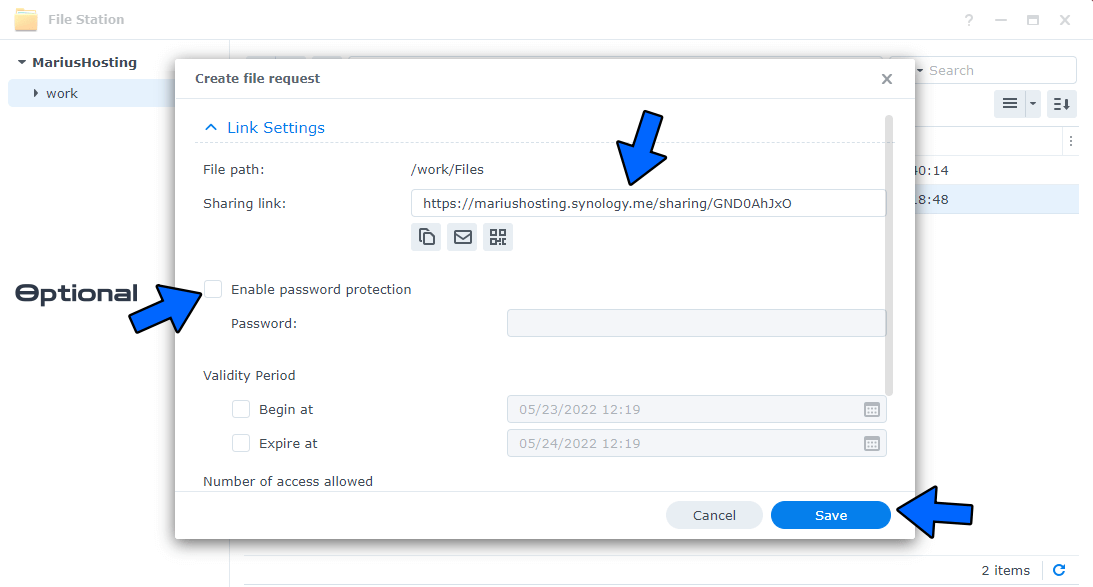
Copy the link that was automatically created. You can also enable password protection which allows you to add a password. Click Save. Follow the instructions in the image below.
STEP 7
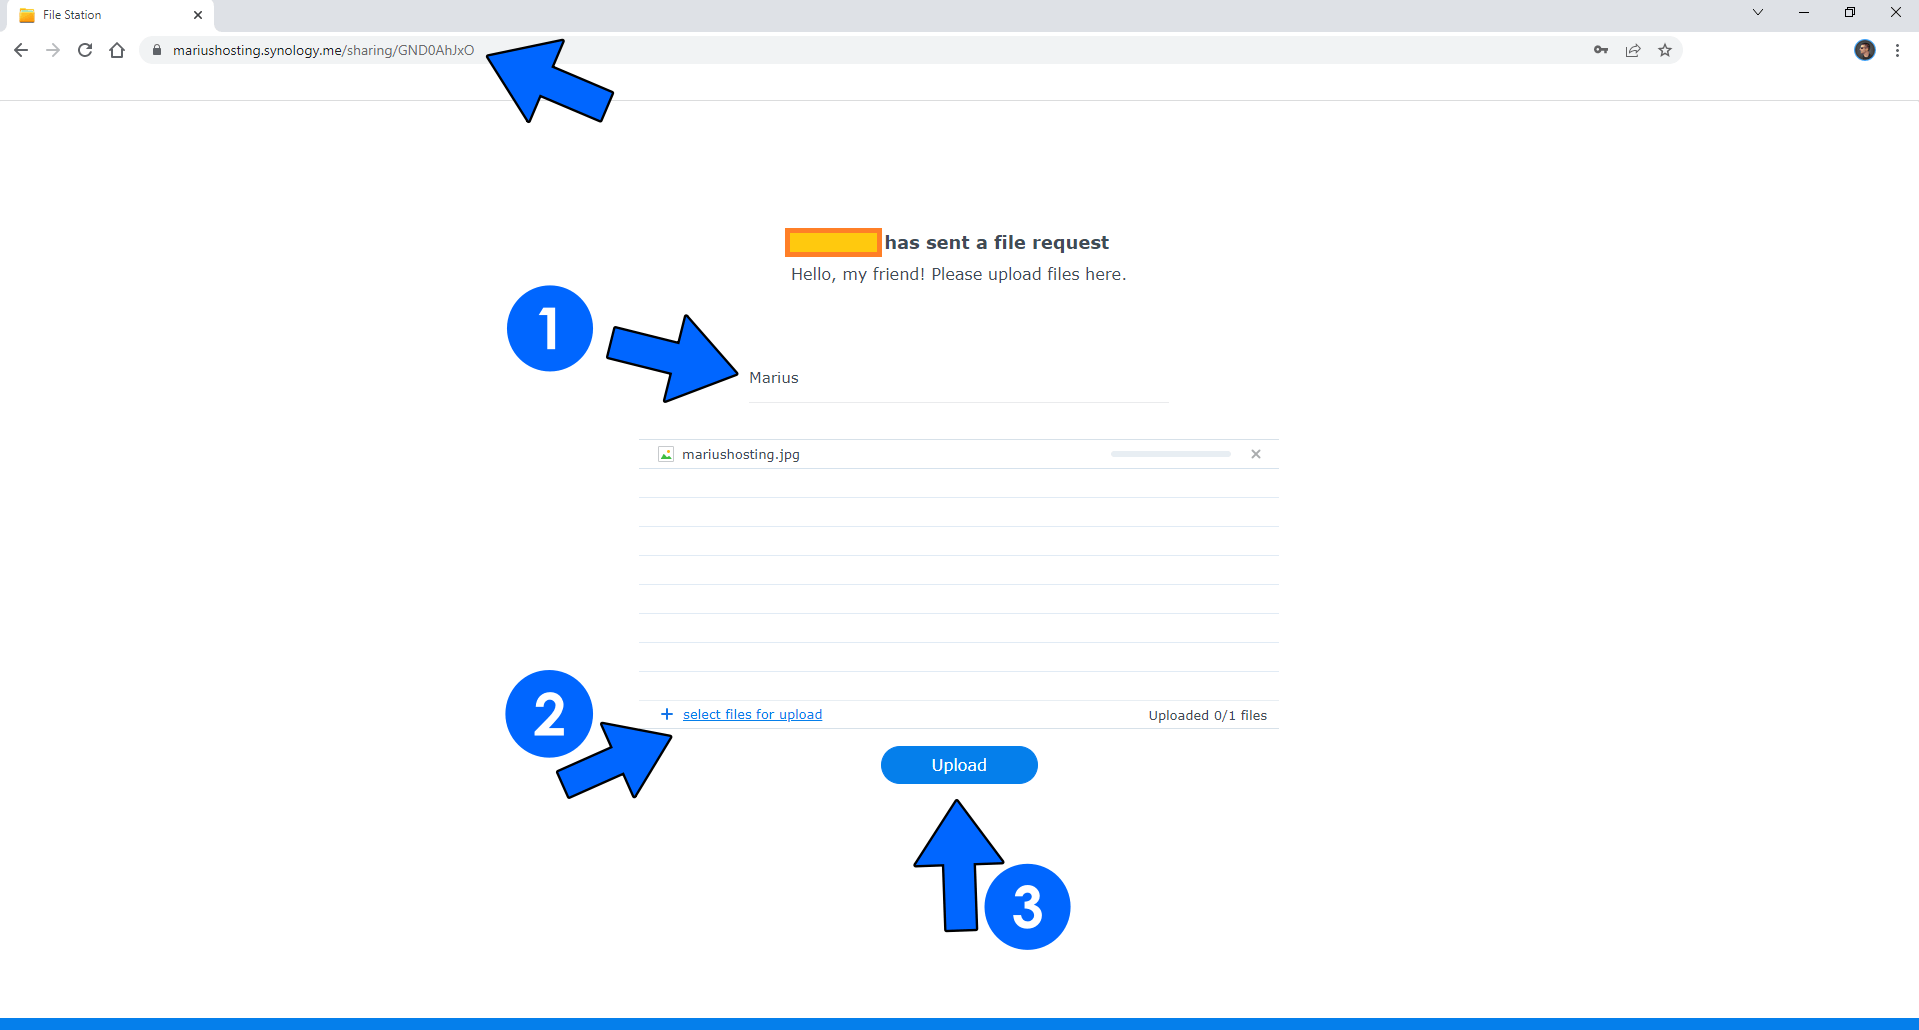
Paste the link you have previously copied at STEP 6 in your browser search bar. Add your name (mandatory), click +select files for upload then click the Upload button. Follow the instructions in the image below.
STEP 8
Once the files are uploaded correctly, they will be marked with a green checkmark. Follow the instructions in the image below.

STEP 9
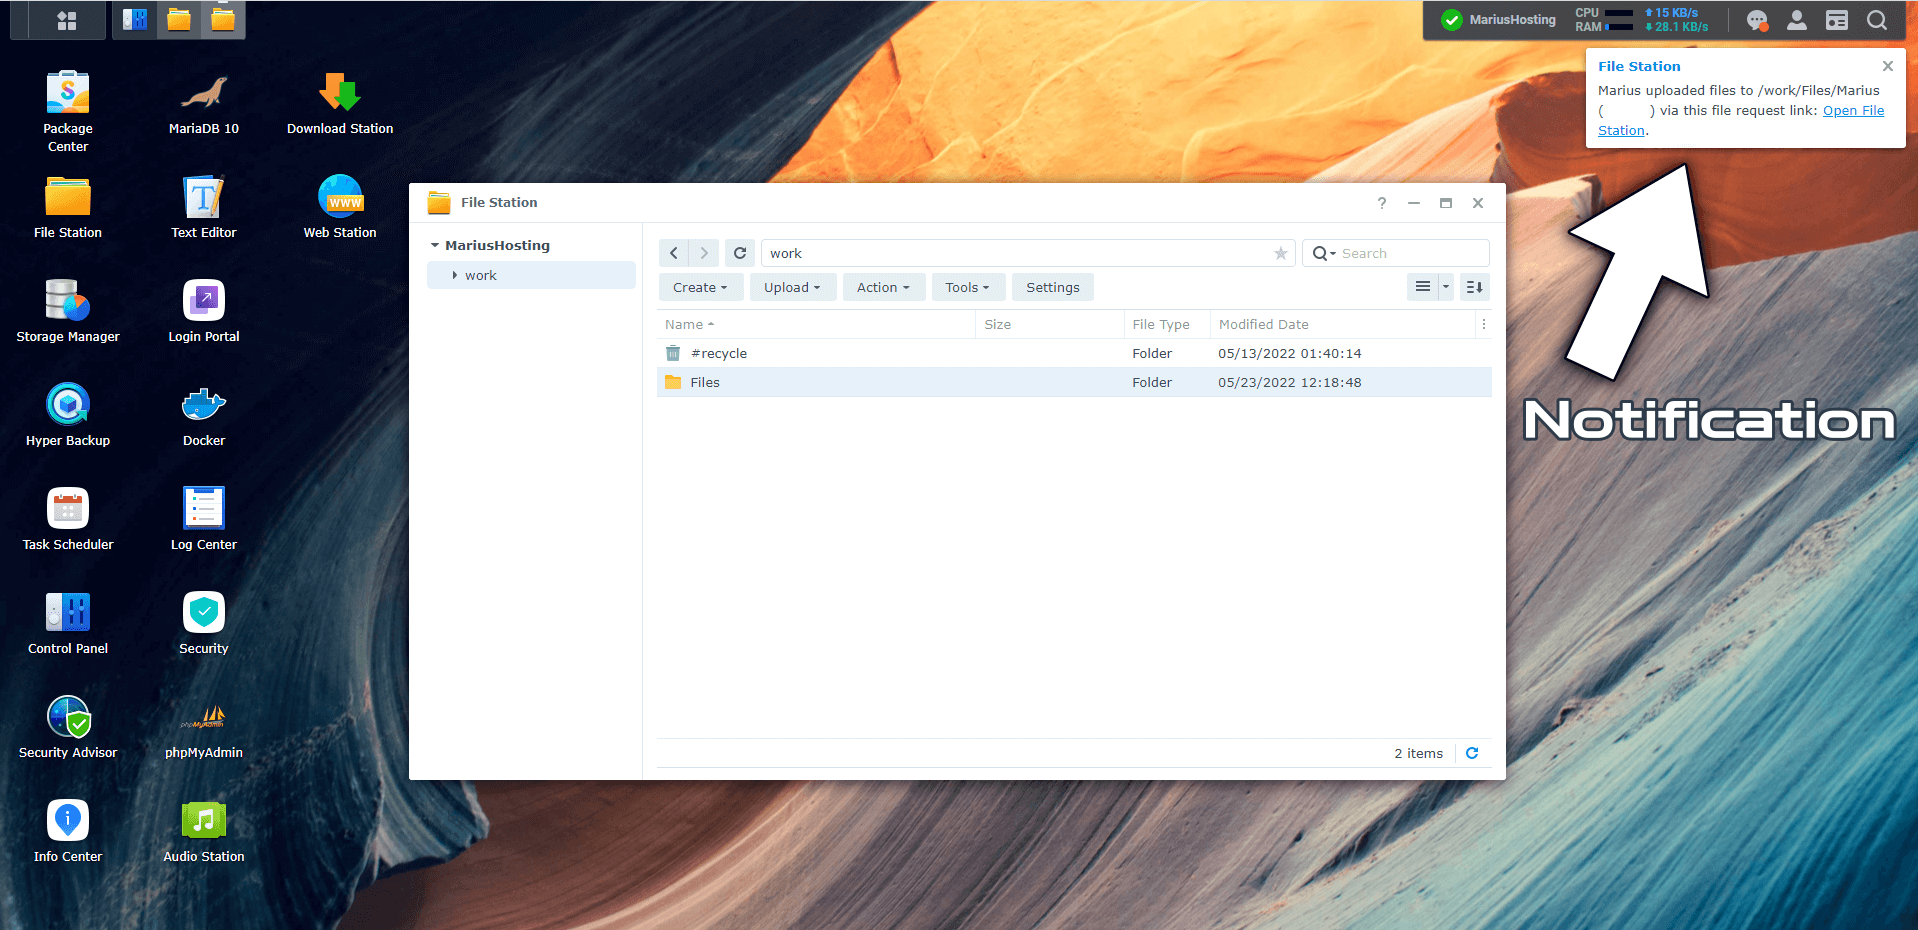
When someone sends you some files, you will get a real time notification in your DSM. Follow the instructions in the image below.
STEP 10
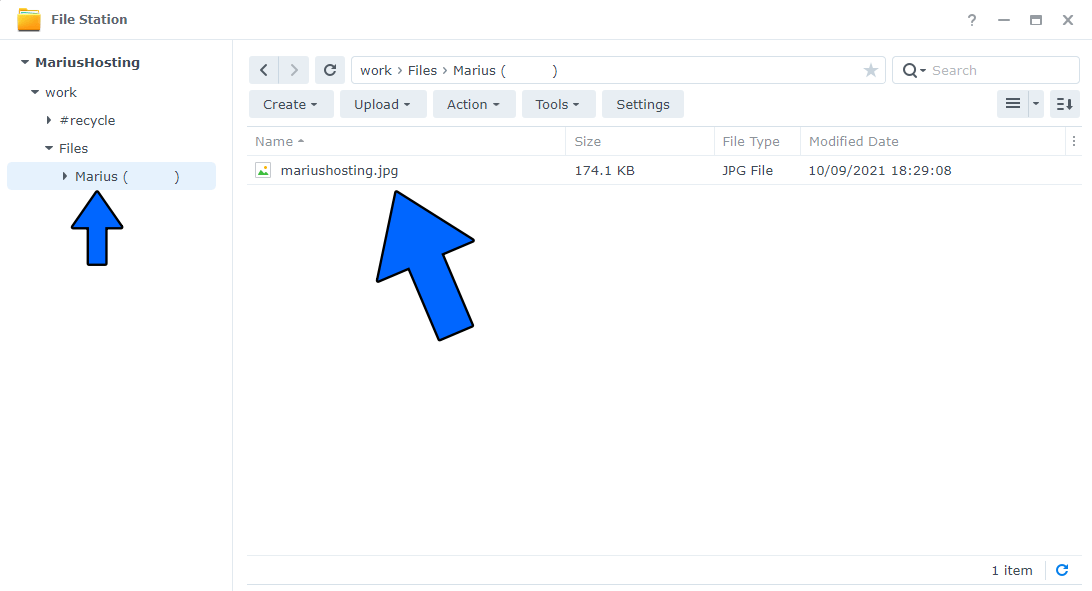
You will find the uploaded files in a new folder. The folder will have the name of the user previously chosen at STEP 7. Follow the instructions in the image below.
STEP 11
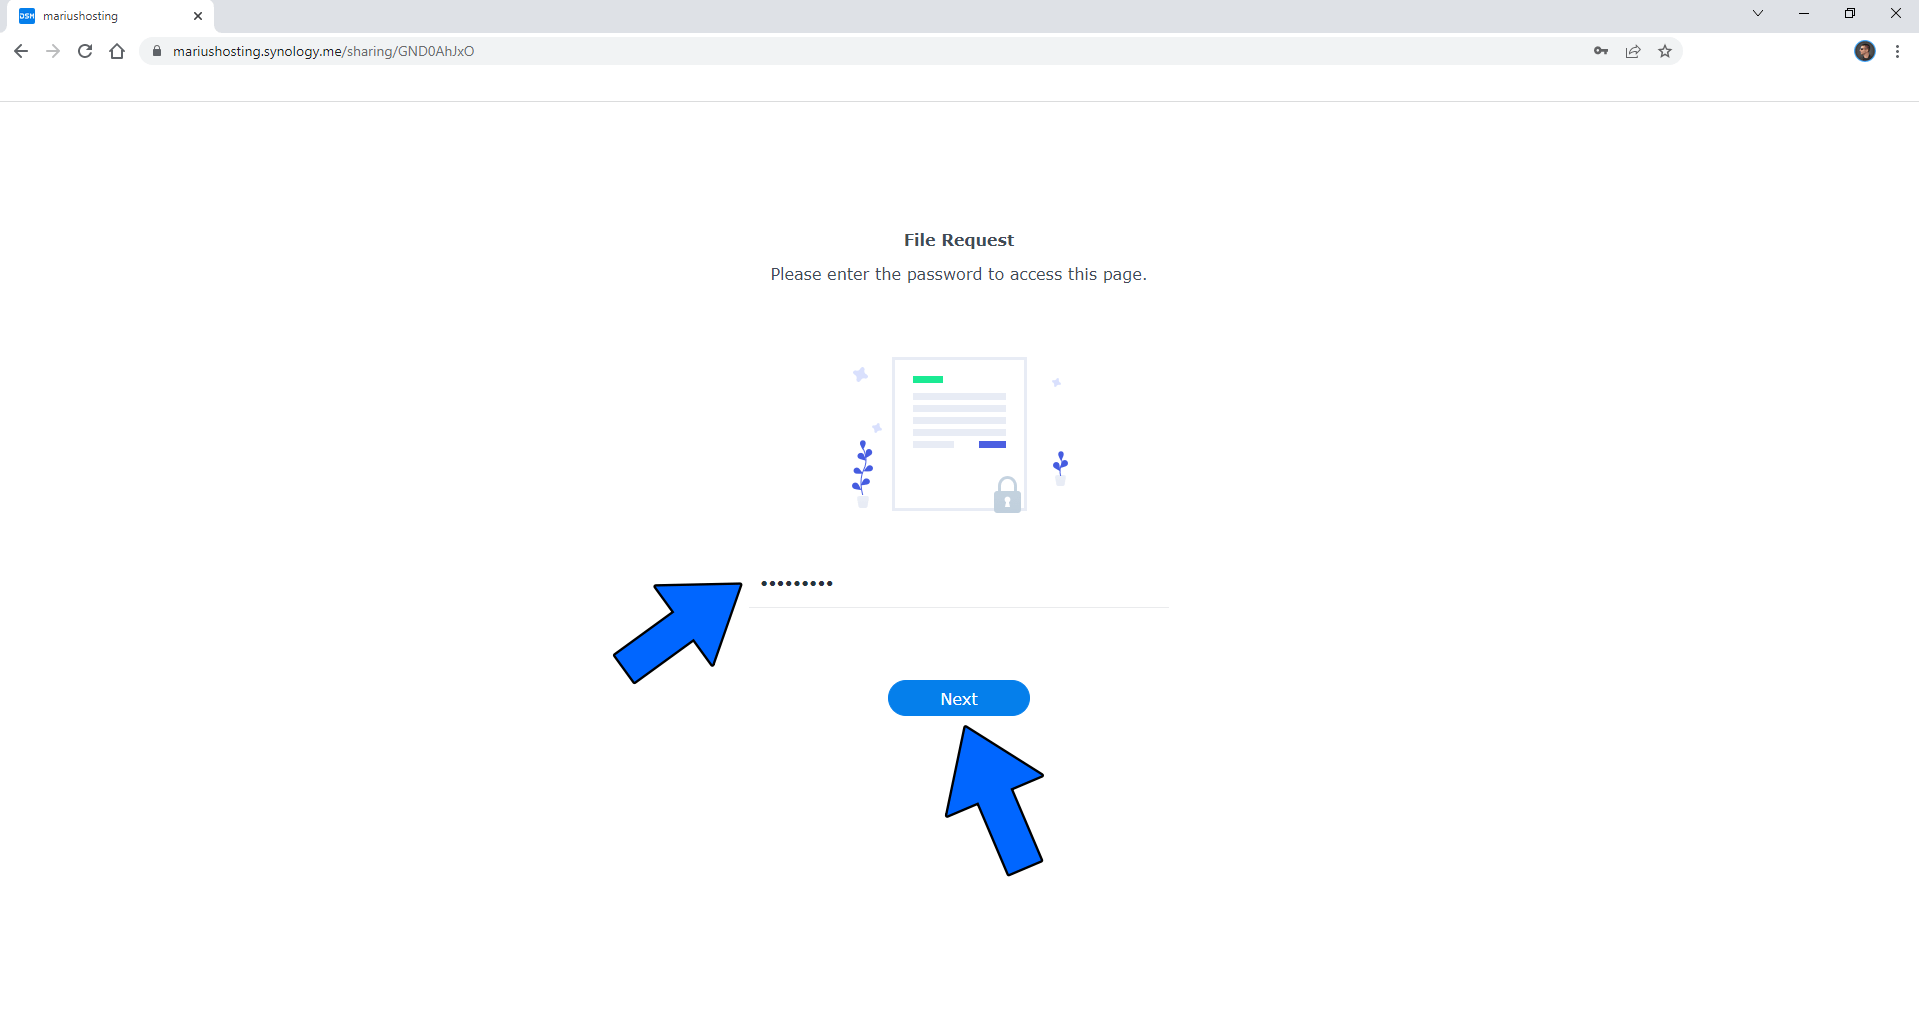
If, at STEP 6, you have chosen to “Enable Password Protection” you will be prompted to enter the password before you are able to upload files. Follow the instructions in the image below.
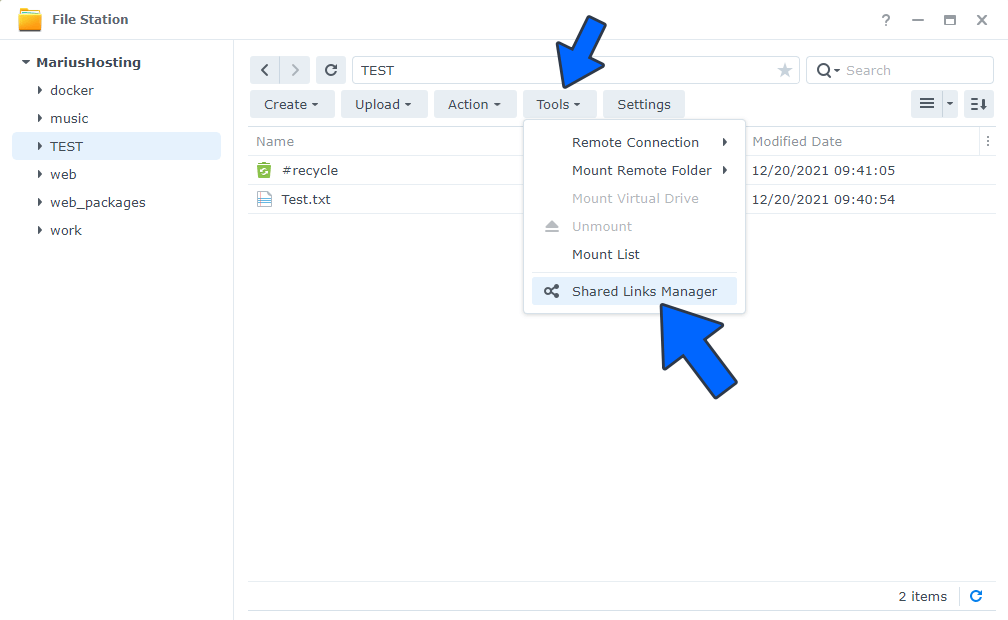
STEP 12
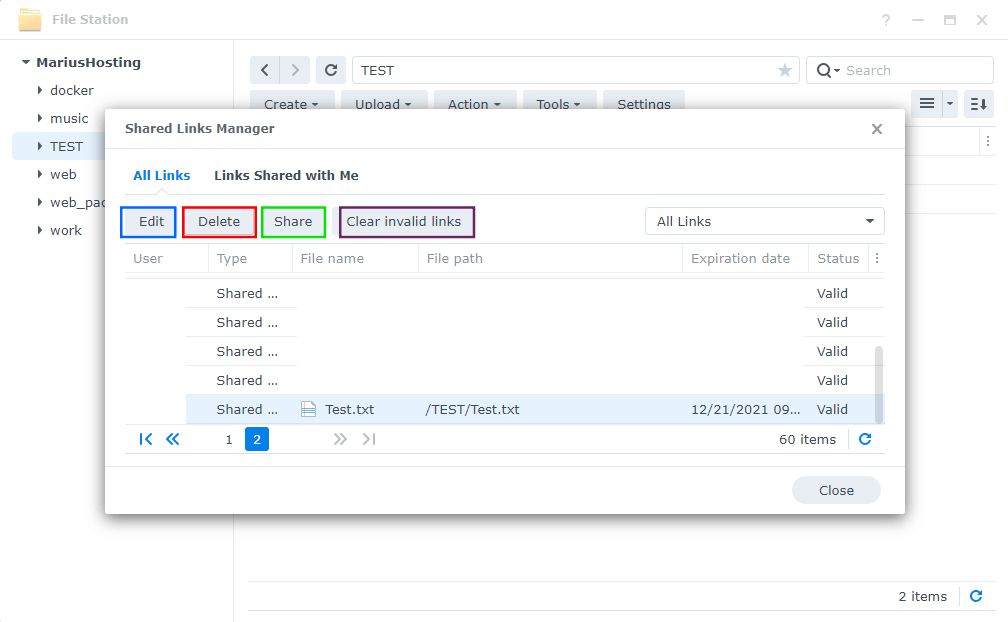
If you want to delete the file request link, you have to go to File Station / Tools / Shared Links Manager. Follow the instructions in the image below.
You will also have the option to:
- Edit: for example, change the expiration date.
- Delete: disallow for sharing.
- Share: share again.
- Clear invalid links: remove broken and expired links.
Note: Access synology.me without Port :5001
Note: How to Create a Shared Link on DSM 7.
Note: You can also use QuickConnect to create shared links instead of DDNS.
This post was updated on Sunday / May 14th, 2023 at 7:02 PM