Did you know File Station has a feature called “Shared Link”? File Station can automatically issue URLs to access specific files and folders, and send files to people outside your local network (LAN). When the recipient accesses the URL, the download screen appears for a single file, while the File Station screen appears for a folder. The shared file system can be very useful, for example, if you want to sell an eBook without using third-party services, or simply to exchange screenshots with the outside world without using third-party services. If you would use a third-party service for file sharing, then the files you share via said third-party service can be stored by them or even wind up somewhere else, depending on their terms and conditions. But with a Synology NAS device, you have absolute control over the files and folders you share. In short, everyone is free to use this system as they need.
STEP 1
Please Support My work by Making a Donation.
STEP 2
Follow my step by step guide on how to activate your synology.me DDNS on DSM 7
STEP 3
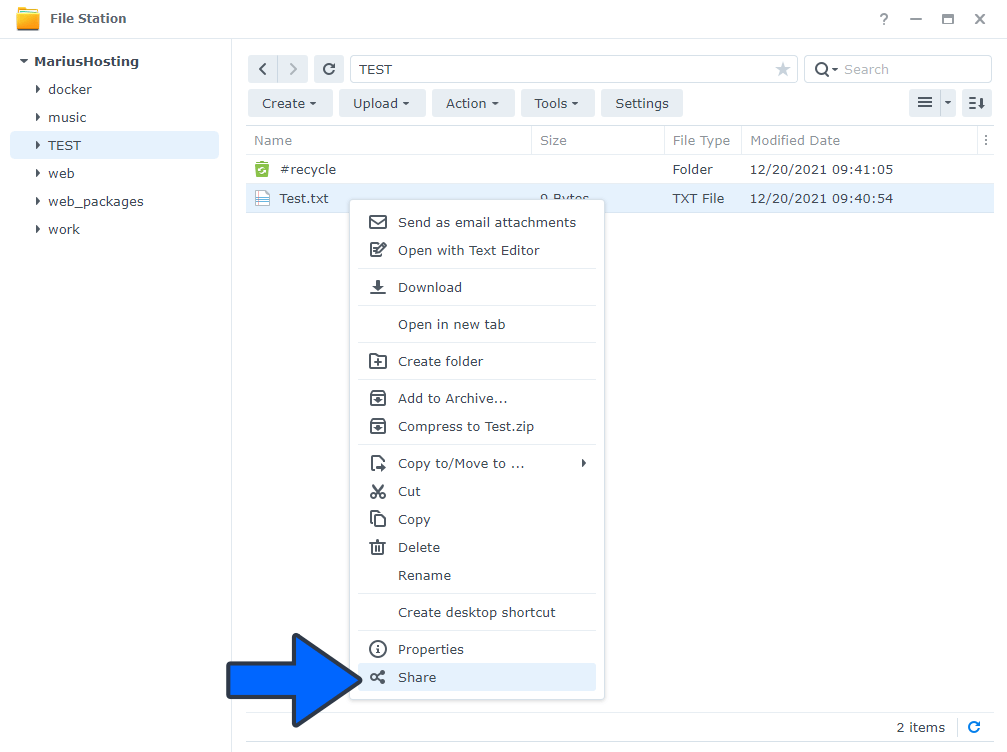
Simply right-click on a file or folder in File Station and select Share. Follow the instructions in the image below.
STEP 4
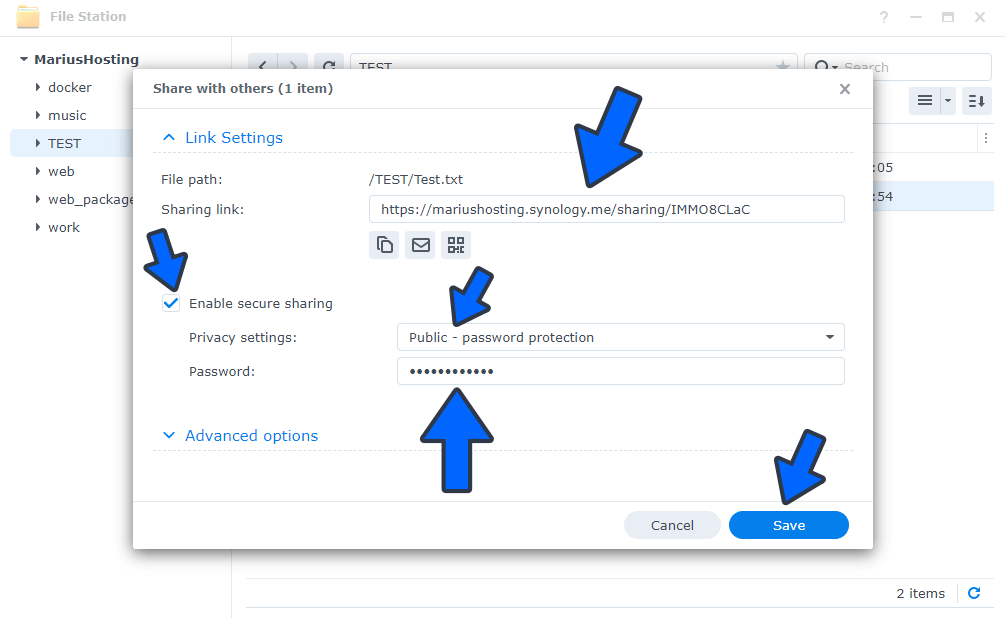
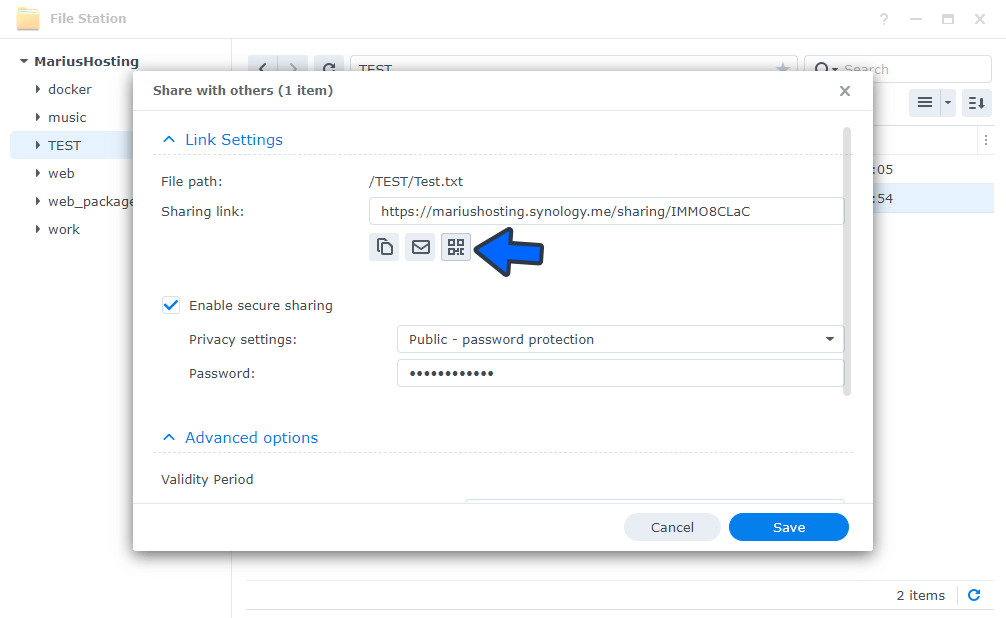
An URL (Shared Link) is issued instantly when the screen below opens. Just copy the Shared link and inform the other party. You can also set a password. Follow the instructions in the image below.
STEP 5
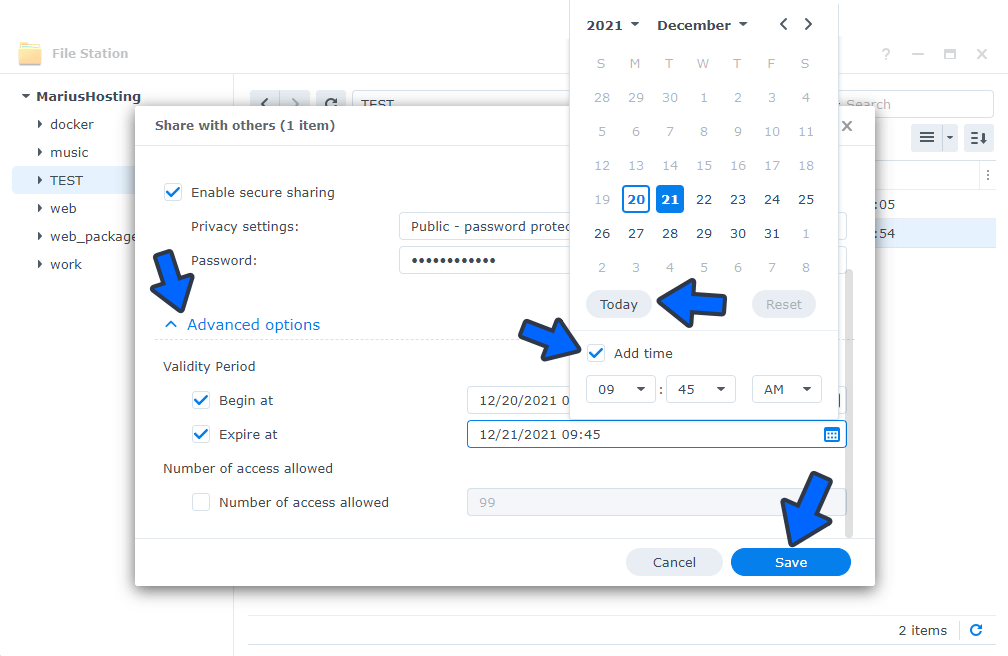
You can set a Validity period as well. For example, you can choose a specific time during which the Shared Link file is available. Follow the instructions in the image below.
STEP 6
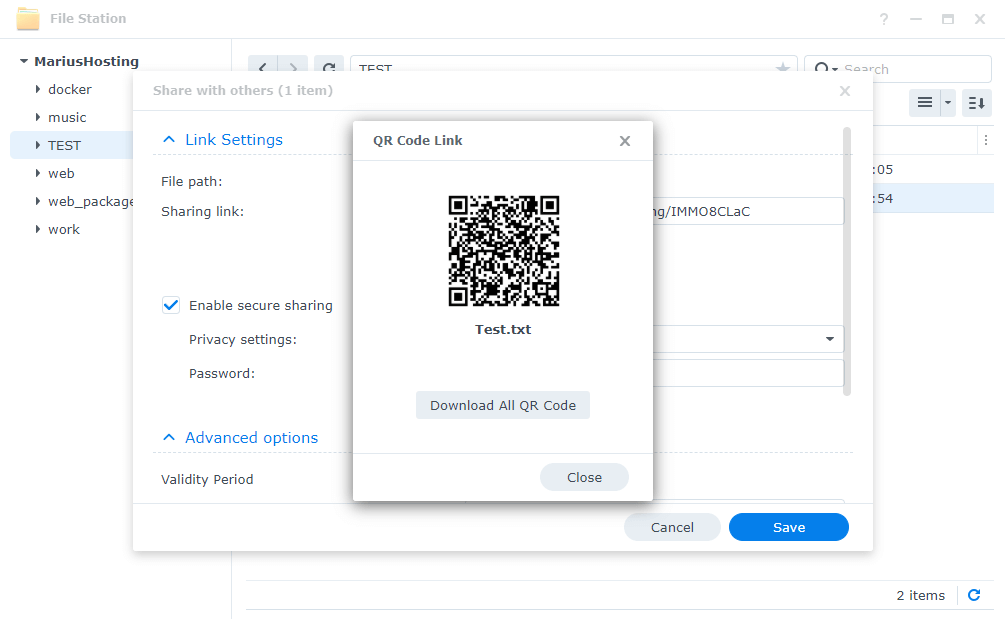
You can choose to use a QR code instead of Shared Link plain text. Follow the instructions in the images below.
STEP 7
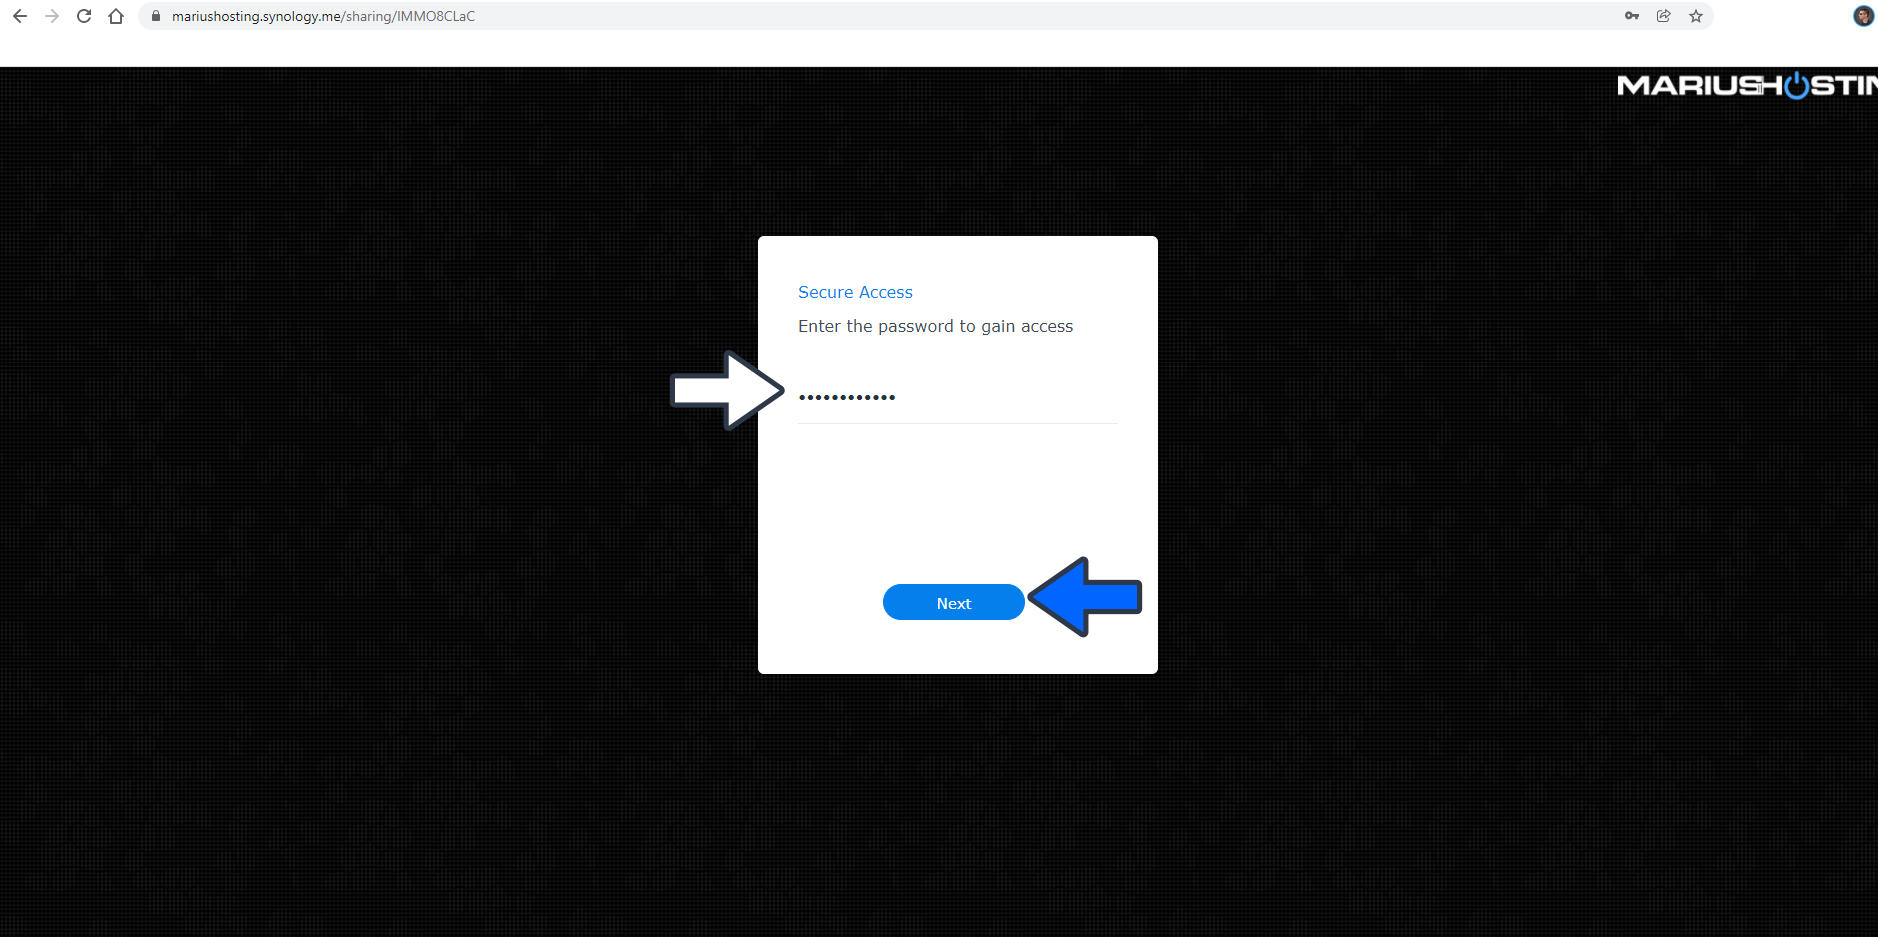
When you access the Shared Link in the browser, if you have previously set a password for that specific file, you will see something like in the screenshot below.
STEP 8
After the password has been entered, the user/s can download the file by simply clicking on the Download button.

STEP 9
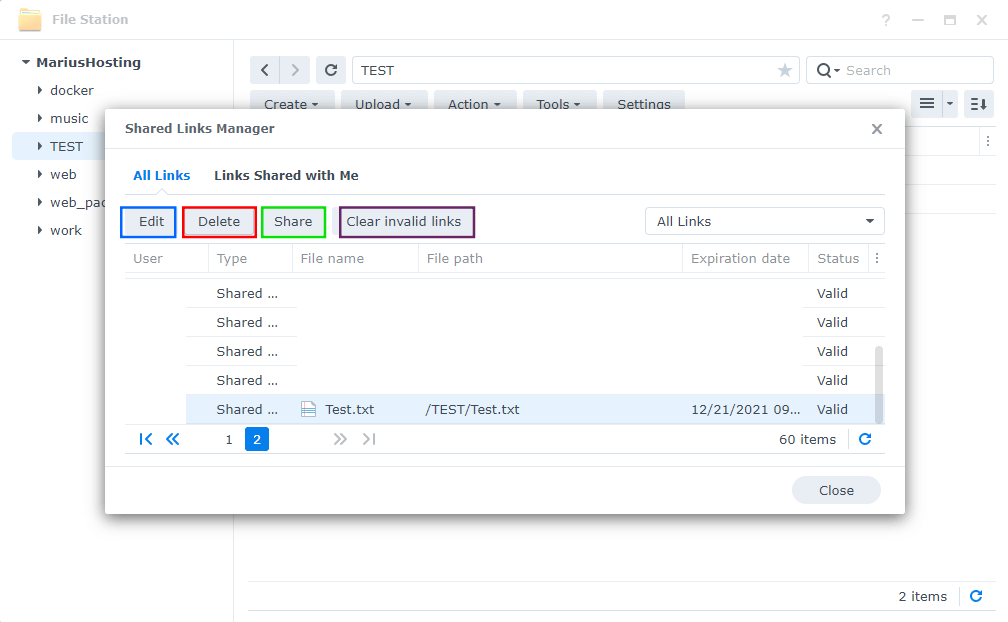
If you want to modify your shared file or simply delete it, you have to go to File Station / Tools / Shared Links Manager. Follow the instructions in the images below.
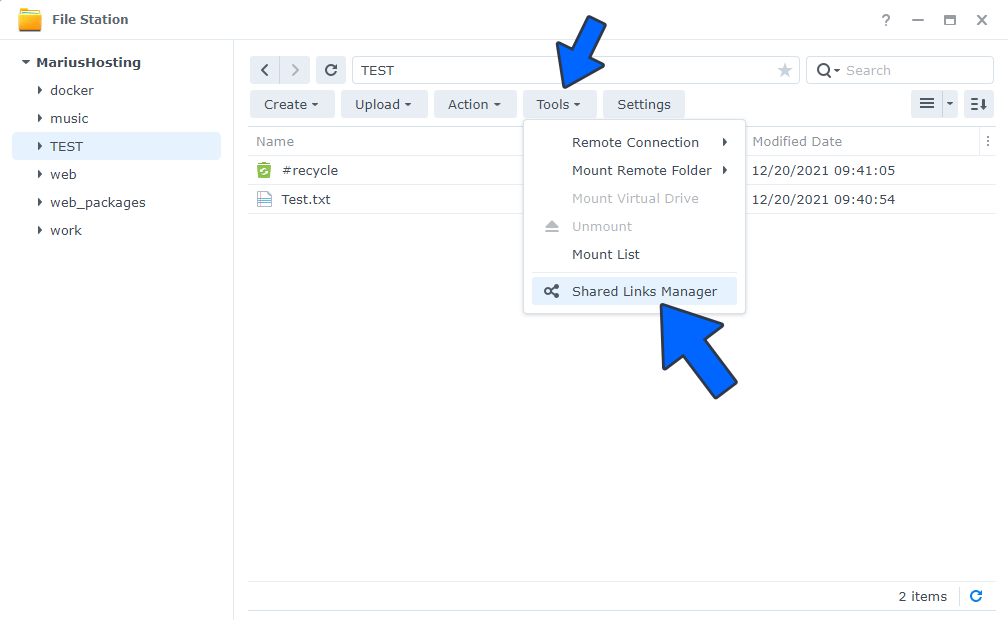
You will also have the option to:
- Edit: for example, change the expiration date.
- Delete: disallow for sharing.
- Share: share again.
- Clear invalid links: remove broken and expired links.
STEP 10
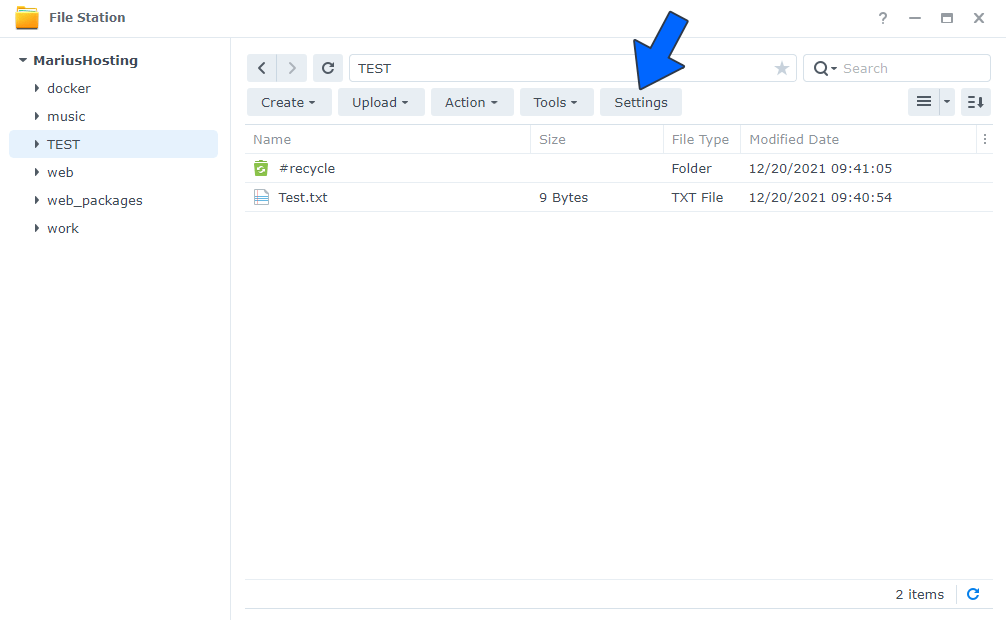
If you want, you can customize your “Shared Link” Download Page. On File Station click the Settings tab. Follow the instructions in the images below.
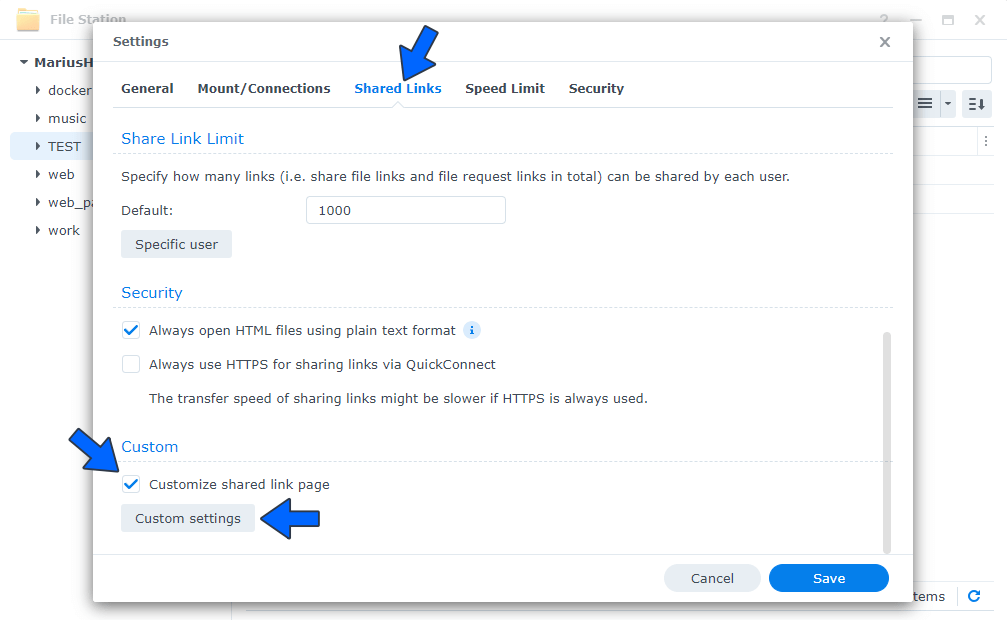
After you click the Settings tab, a new window will open. Click the Shared Links tab, then select “Customize shared link page” and click on Custom settings. Follow the instructions in the images below.
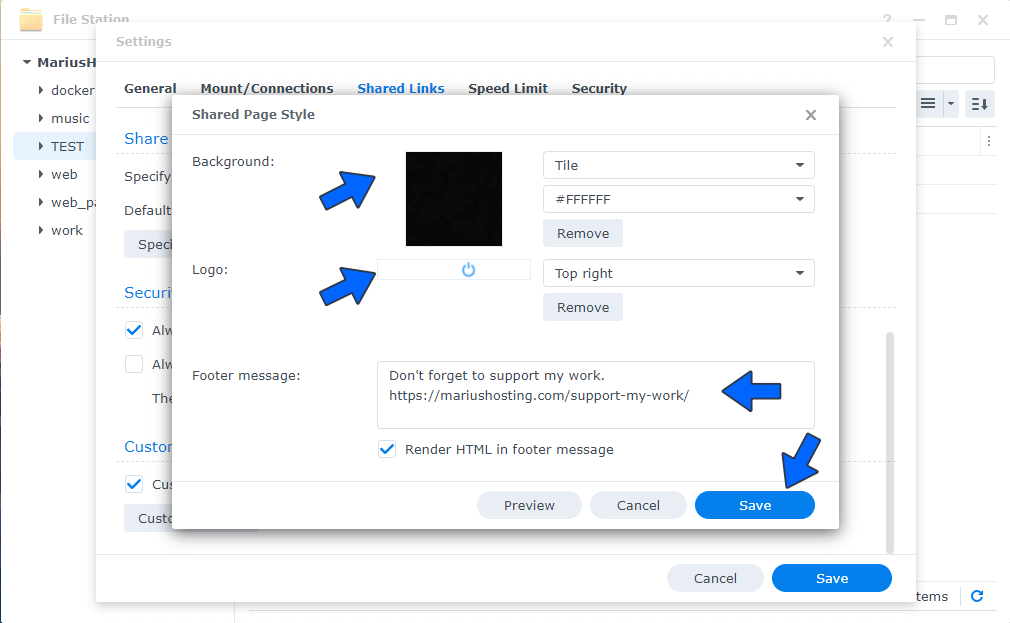
You can customize the page in the following ways:
- Background: Click the thumbnail or + to choose a default background/wallpaper image on your Synology NAS, or a previously applied image.
- Logo: Click the thumbnail or + to choose an uploaded image (smaller than 1 MB), an image on your Synology NAS, or a previously applied image. The logo can be positioned in any of the four corners.
- Footer message: You can add your personalized text.
- Click Preview to see if any adjustments are needed.
- Click Save to apply the settings.
Note: If you delete the shared file from File Station and try to access the Shared Link for that specific file again, when accessing the URL with a web browser, you will see an error message that says “Sorry, the page you are looking for is not found.”.
Note: If you have set a “Validity period” option, the link will be available only for the specific time you have chosen. If you try to access the page and the link hasn’t started yet, when accessing the URL with a web browser, you will see an error message that says “This shared link is not available.”.
This post was updated on Sunday / July 13th, 2025 at 7:06 PM