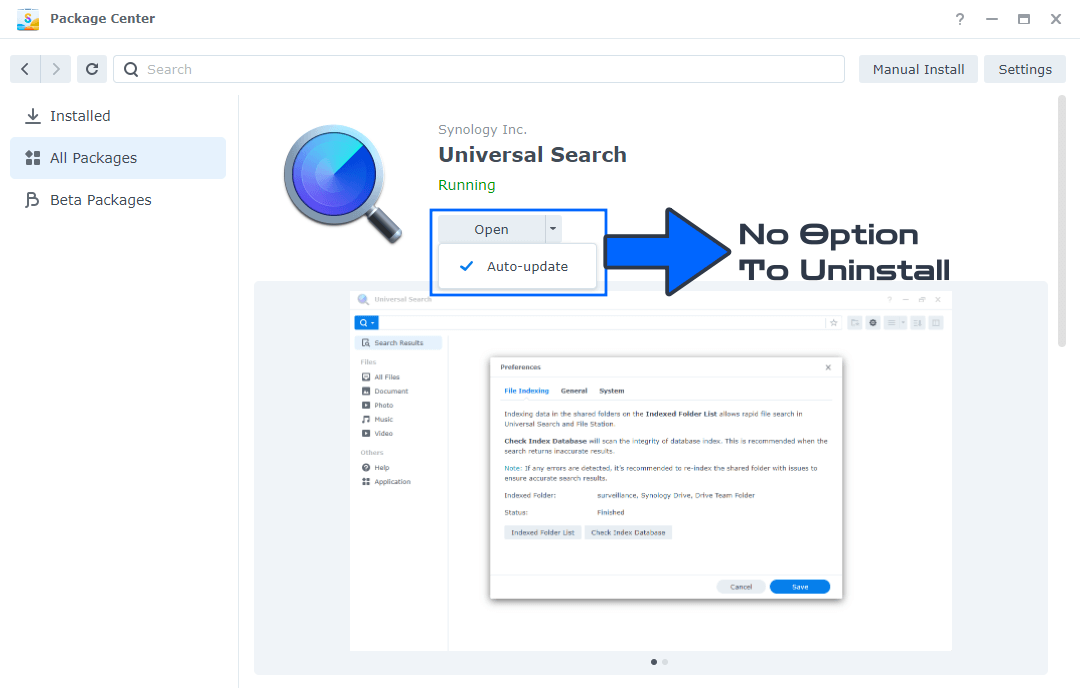
Have you happened to notice that you can’t delete the Universal Search (SynoFinder) package from Synology Package Center? If, for one reason or another, you are not interested in the package and you want to have nothing to do with Universal Search, today I will teach you how to permanently delete it from your NAS. Remember, even if you delete the Universal Search package, if you change your mind, you can always easily reinstall it with just one click directly from Synology’s Package Center. What is Universal Search? Synology Universal Search is a powerful search tool for your Synology NAS. In one search, you can find matched items from photos to notes. You can also index folders to provide precise and prompt search results by filename or file content. With Synology Universal Search, everything on your Synology NAS is just a few clicks away.
Note: Some packages have a dependency on Universal Search so, before uninstall it, make sure you don’t have other packages that depend on Universal Search like “Synology Drive, Synology Photos”. In any case, you can reinstall it with just one click.
STEP 1
Please Support My work by Making a Donation.
STEP 2
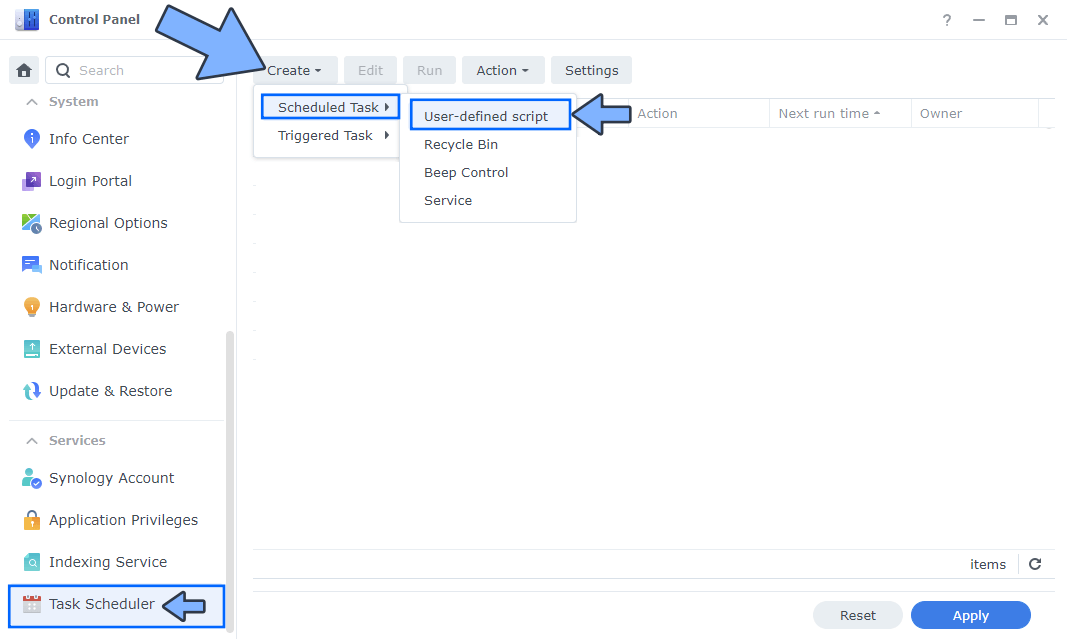
Go to Control Panel / Task Scheduler / Create / Scheduled Task / User-defined script. Follow the instructions in the image below.
STEP 3
Once you click on User-defined script, a new window will open. Follow the instructions below:
- General: In the Task field type in Uninstall Universal Search. Uncheck the “Enabled” option. Select root User.
- Schedule: Select Run on the following date then select “Do not repeat“.
- Task Settings: Check “Send run details by email“, add your email then copy paste the code below in the Run command area. After that, click OK.
/usr/syno/bin/synopkg uninstall SynoFinder

STEP 4
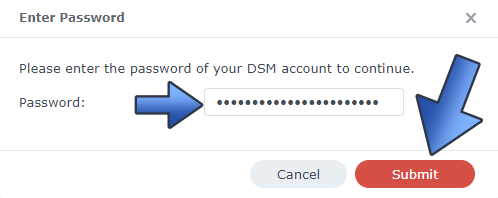
After you click OK on STEP 3 a new warning pop up window will open. Click OK.

After you click OK, type in your DSM Password then click Submit. Follow the instructions in the image below.
STEP 5
After you click Submit on STEP 4, select your “Uninstall Universal Search” Task then click the “Run” tab. You will be asked to run Uninstall Universal Search – click OK. Follow the instructions in the image below.
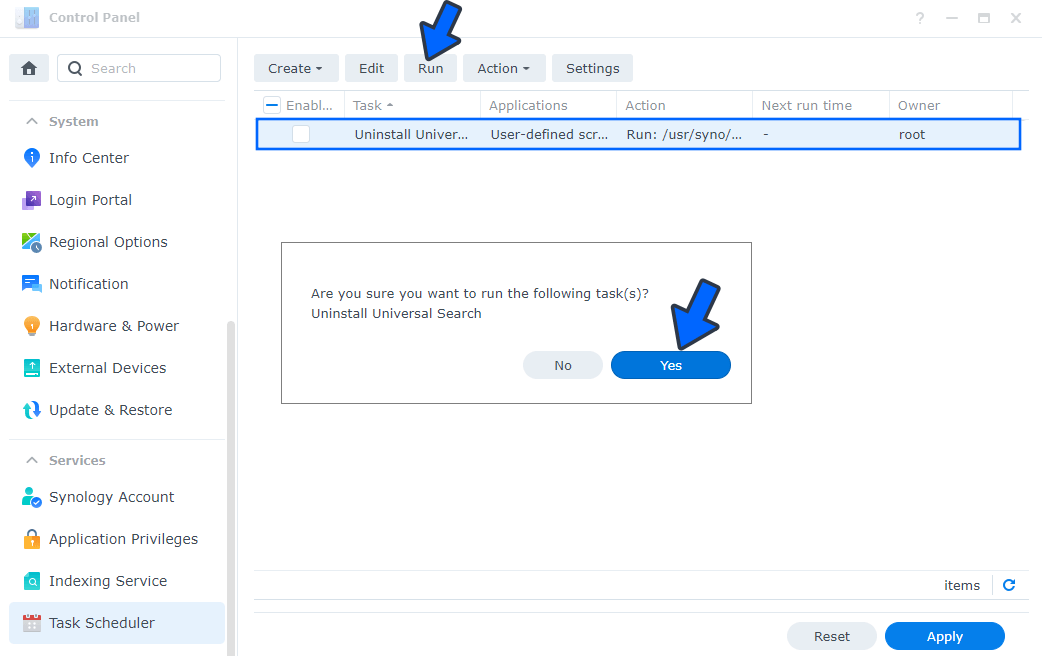
Note: The process to uninstall Universal Search (SynoFinder) will initialize automatically immediately after you click OK.
Note: If you change your mind, you can always easily reinstall Universal Search with just one click directly from Synology’s Package Center.
Note: Also see How to Delete Active Insight.
Note: Also see How to Delete Hybrid Share.
Note: Also see How to Delete SAN Manager.
Note: Also see How to Delete Python2.
Note: Also see How to Delete the Secure SignIn Service.
This post was updated on Thursday / July 6th, 2023 at 11:24 PM