In DSM 7, Synology’s Web Station application has undergone some changes. Surely you’re wondering how to change the upload_max_filsize value from 2 MB to 512 MB on your WordPress website hosted on a Synology NAS device. In this article I will teach you not only how to change the upload_max_filesize value, but also how to change all the following PHP values to the maximum values:
upload_max_filesize 512M
post_max_size 128M
memory_limit 256M
max_execution_time 300
max_input_time 300
Note: The images and instructions below work for PHP 8.0 – 7.3 – 7.2 – 7.1 – 7.0 too, even though they are about PHP 7.4.
STEP 1
Please Support My work by Making a Donation.
STEP 2
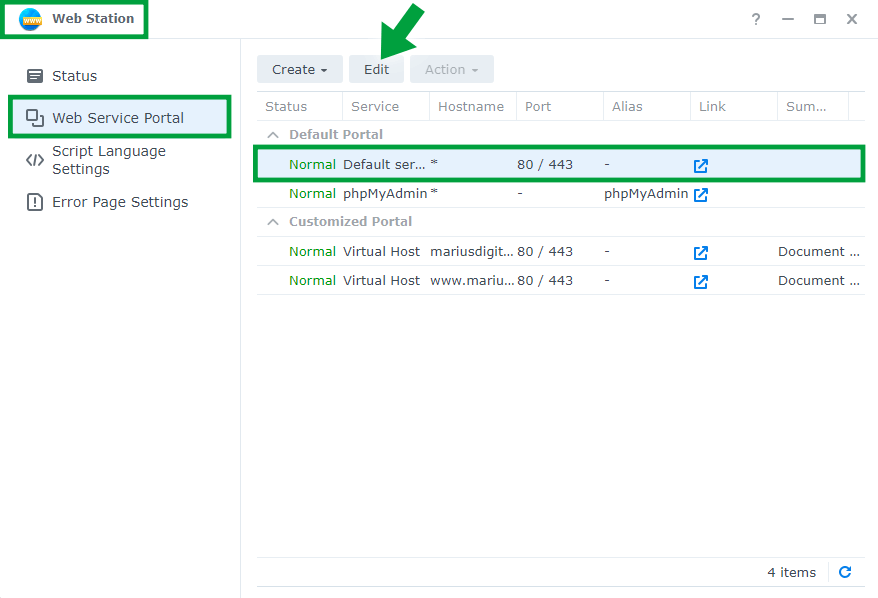
First of all, open the application named Web Station. Once opened, in the left menu click on Web Service Portal / select the current Default Portal, then click Edit. Follow the instructions in the image below.
STEP 3
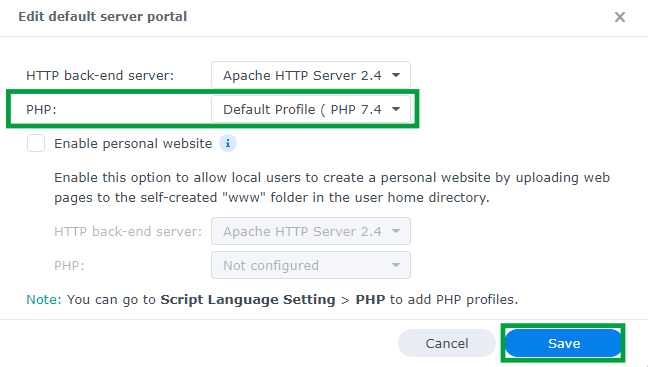
Once you click on Edit, the following screen will open. In the dropdown menu select the PHP 7.4 Default Profile then click Save. Follow the instructions in the image below.
Note: If you can’t find PHP 7.4 in the dropdown menu, that means that you don’t have PHP 7.4 installed. In this case, go to Package Center and Install PHP 7.4
STEP 4
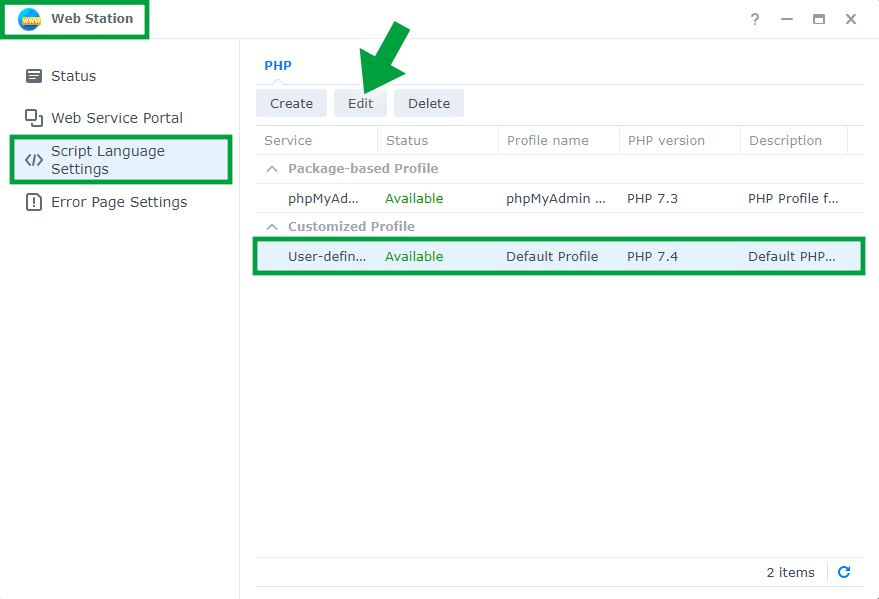
Go back to Web Station. In the left menu click on Script Language Settings / select the current Default Profile, then click Edit. Follow the instructions in the image below.
STEP 5
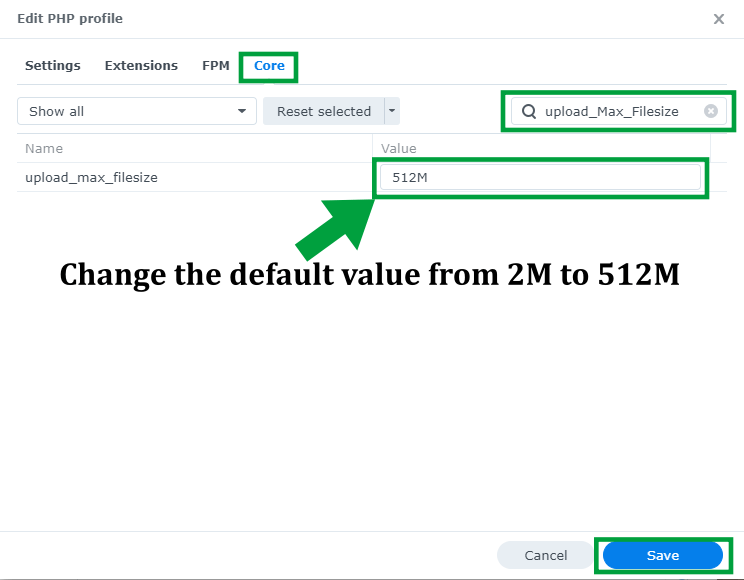
Once you click on Edit, the following screen will open. Go to the Core tab, then type in the following in the search box: upload_max_filesize. Change the default value from 2M to 512M then click Save. Follow the instructions in the image below.
STEP 6
Now repeat the same instructions provided at STEP 5 for all the others values.
post_max_size 128M
memory_limit 256M
max_execution_time 300
max_input_time 300
STEP 7
🟢Please Support My work by Making a Donation. Almost 99,9% of the people that install something using my guides forget to support my work, or just ignore STEP 1. I’ve been very honest about this aspect of my work since the beginning: I don’t run any ADS, I don’t require subscriptions, paid or otherwise, I don’t collect IPs, emails, and I don’t have any referral links from Amazon or other merchants. I also don’t have any POP-UPs or COOKIES. I have repeatedly been told over the years how much I have contributed to the community. It’s something I love doing and have been honest about my passion since the beginning. But I also Need The Community to Support me Back to be able to continue doing this work.
STEP 8
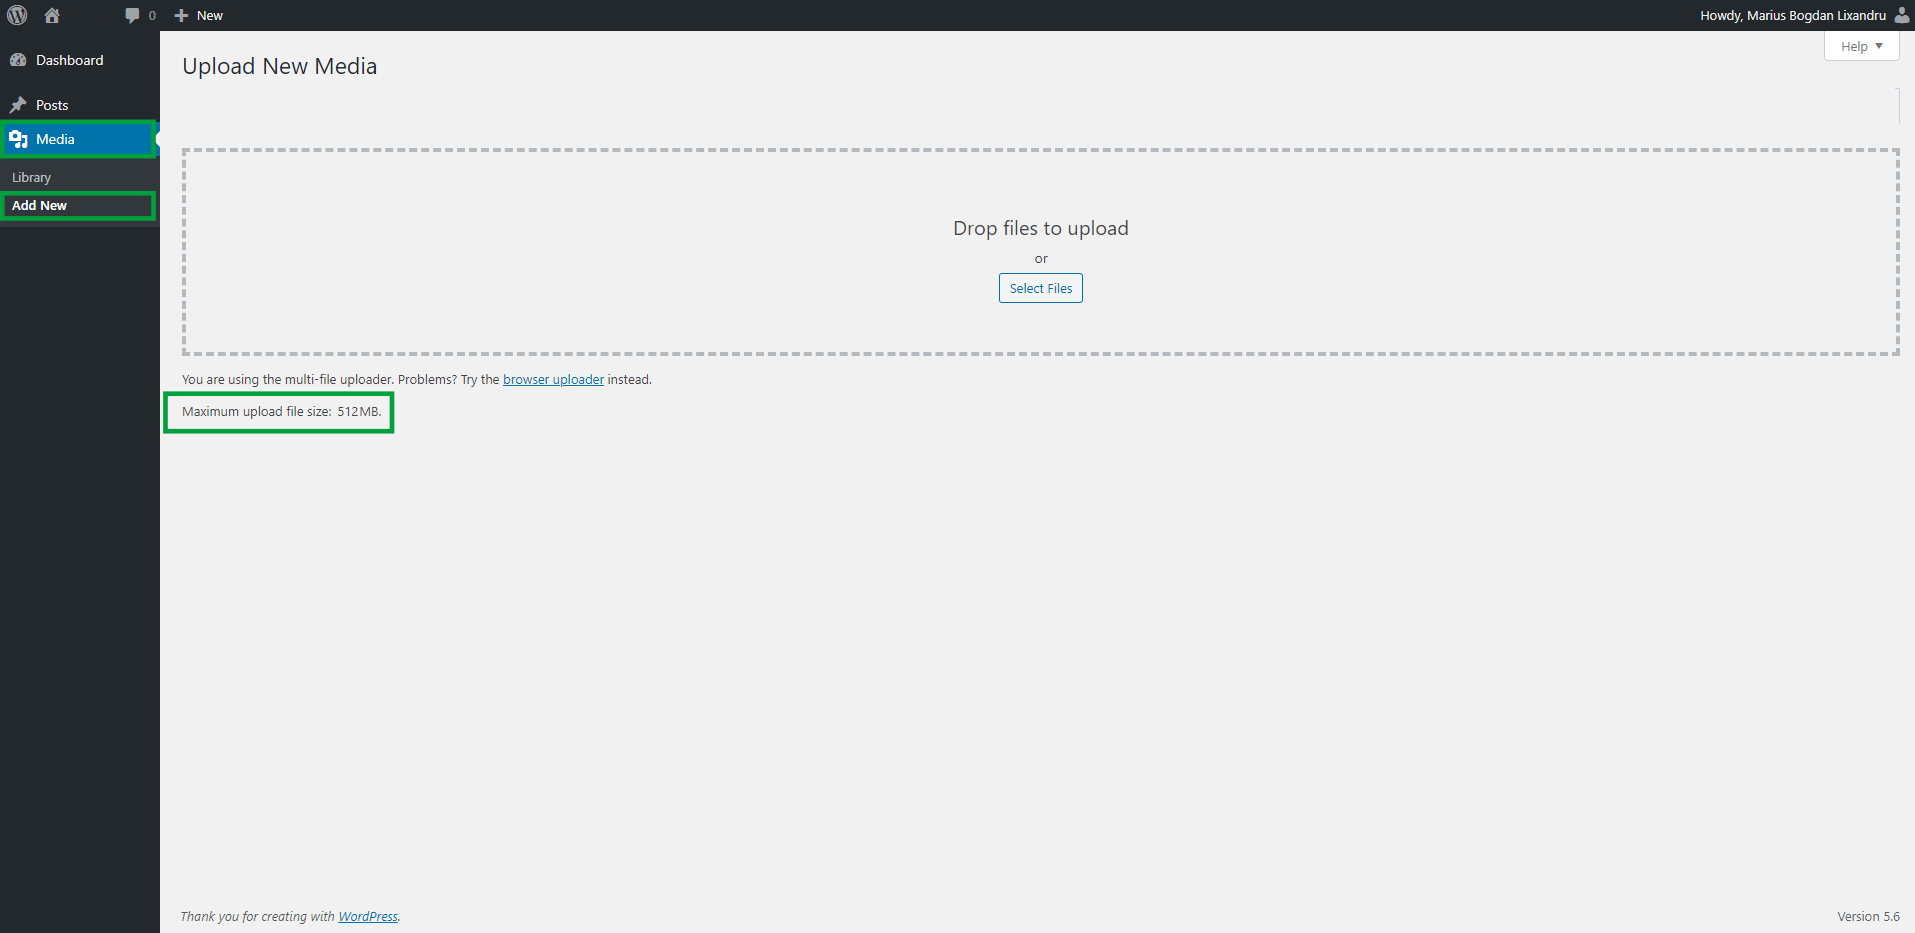
Log into your WordPress and go to Media / Add New. If everything went well, you will see the Maximum upload file size: 512 MB.
Note: Many people believe that it is enough to add a file called php.ini in the main WordPress folder to change the upload_max_filsize value, but this is not the case when hosting a website from home on a Synology NAS server. Not even adding the variables to the wp-config.php WordPress file will solve the problem. The only 100% working solution is to change the settings directly in Web Station. The instructions above work perfectly with PHP 7.0.X – PHP 7.2.X – PHP 7.3.X even though they are about PHP 7.4.X
Note: Read my article Pay For Web Hosting vs Hosting on My Synology NAS.
Note: If you encounter any problems, just contact me.
Note: Find out how to change Upload_Max_Filesize on WordPress if you are using DSM 6.2.4
This post was updated on Sunday / August 24th, 2025 at 2:46 PM