
Sometimes it can happen to even the most prepared of users to lose their Portainer password. If this happens, if you do not have a Backup of Portainer, the only solution left is to reset your current Portainer password. In this step by step guide I will show you how to reset the password in Portainer and get access again if you use a UGREEN NAS device.
STEP 1
Please Support My Work by Making a Donation.
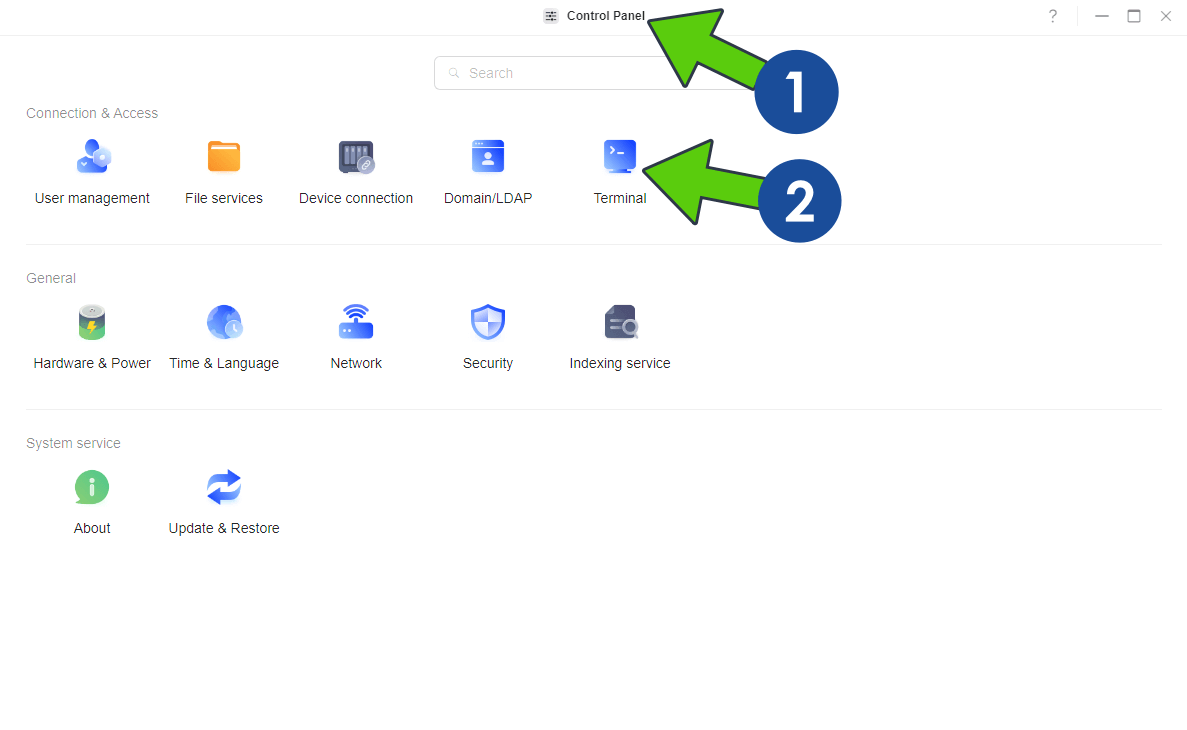
STEP 2
Go to Control Panel, then click on the Terminal icon. Follow the instructions in the image below.
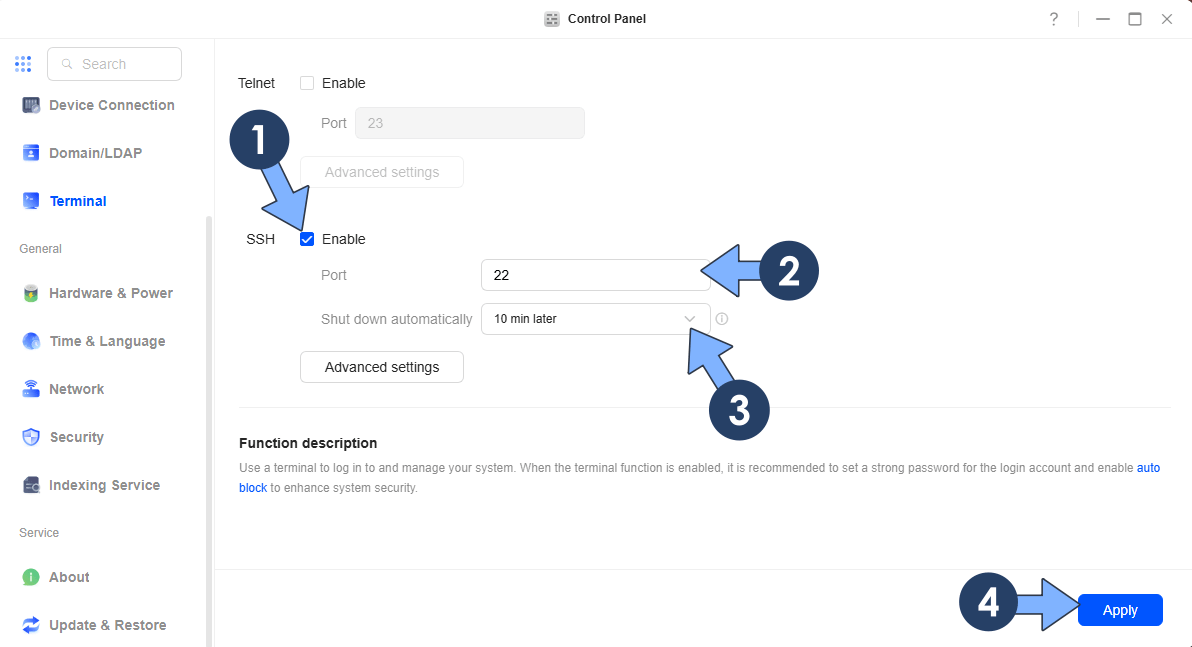
STEP 3
Check the Enable box to Enable the SSH service on port 22 . Select to Shut down the service automatically after 10 minutes. Click Apply. Follow the instructions in the image below.
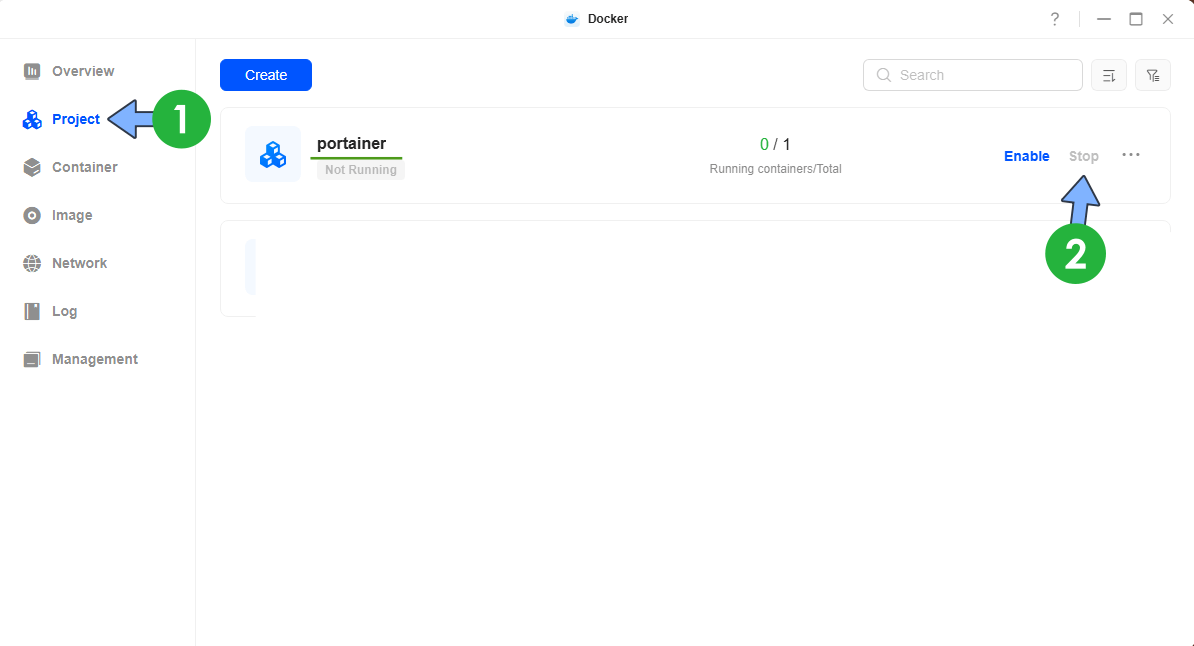
STEP 4
Open the Docker app. On the left sidebar, click Project. Stop the portainer project. ⚠️Note: If you have used the SSH guide to install Portainer on your UGREEN NAS, you should stop the portainer container. Otherwise, if you have used the guide to install Portainer without SSH on your UGREEN NAS, you should follow the screenshot below and stop the portainer project.
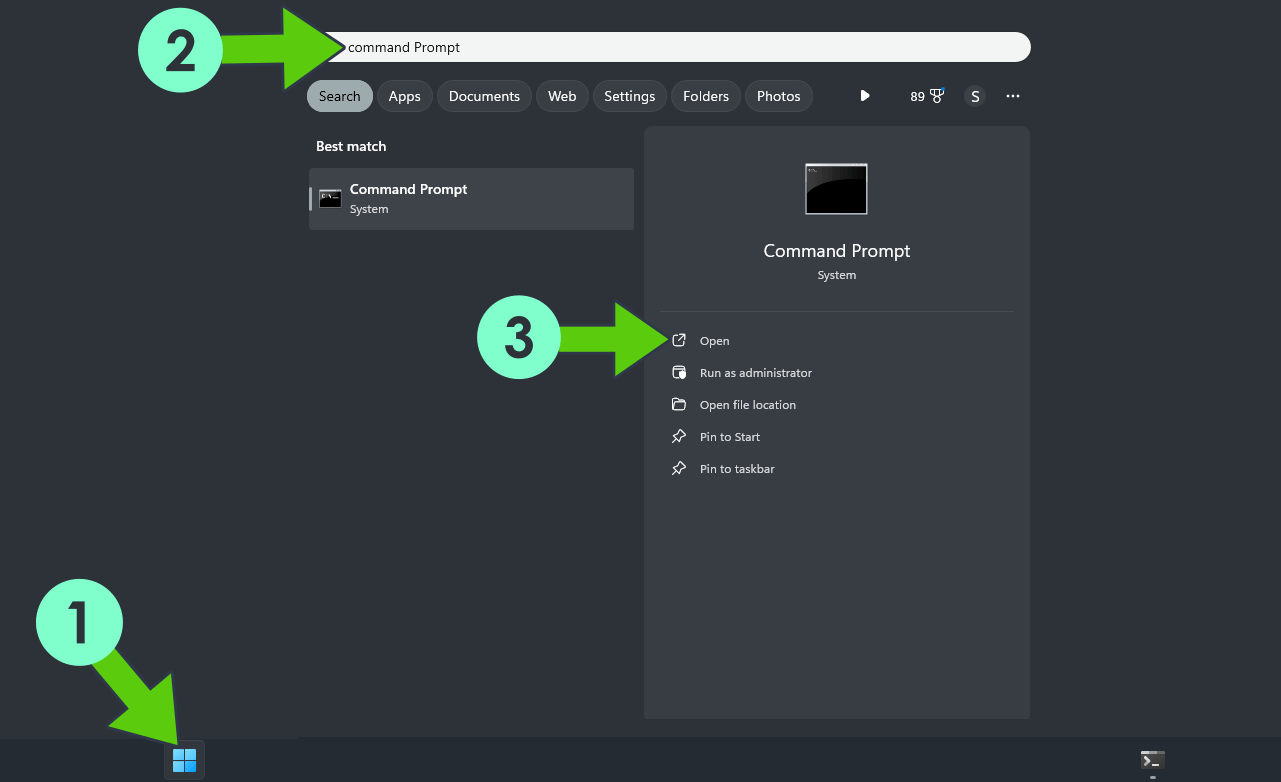
STEP 5
Now open the Windows Command Prompt Client. Search for command prompt on your Windows PC. Follow the instructions in the image below. You can also use the PuTTY Client or Mac Z Shell (Client) if you are a Mac user.
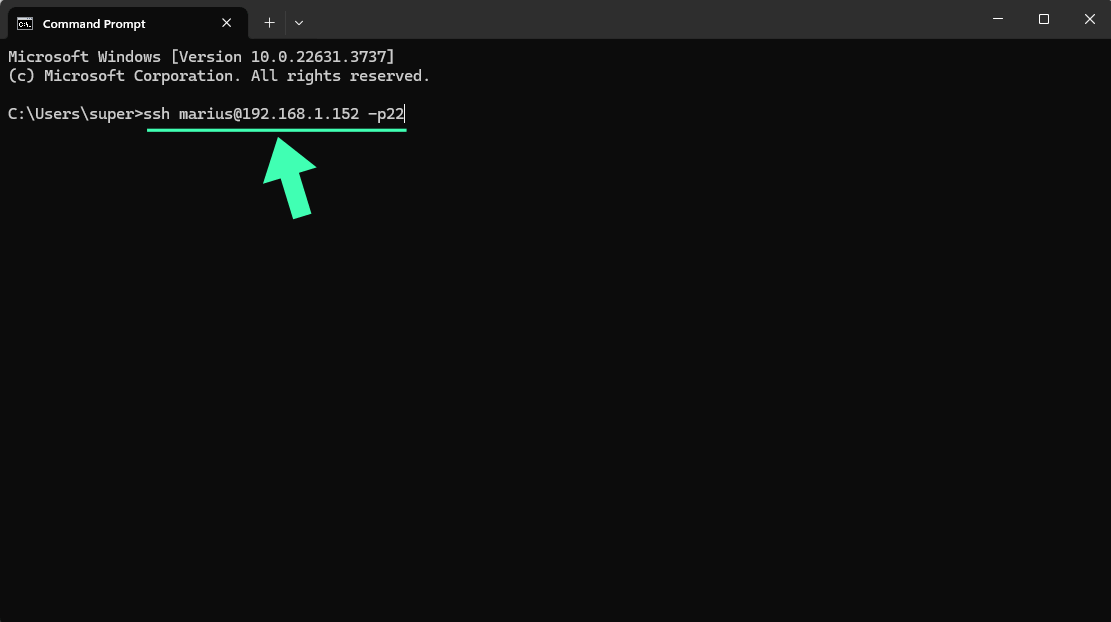
STEP 6
On Windows 10, open Command Prompt or use PuTTY or Mac Z Shell and type in ssh yourUGREENASusername@yourUGREENASip -p22 then press Enter on your keyboard. Follow the instructions in the image below.
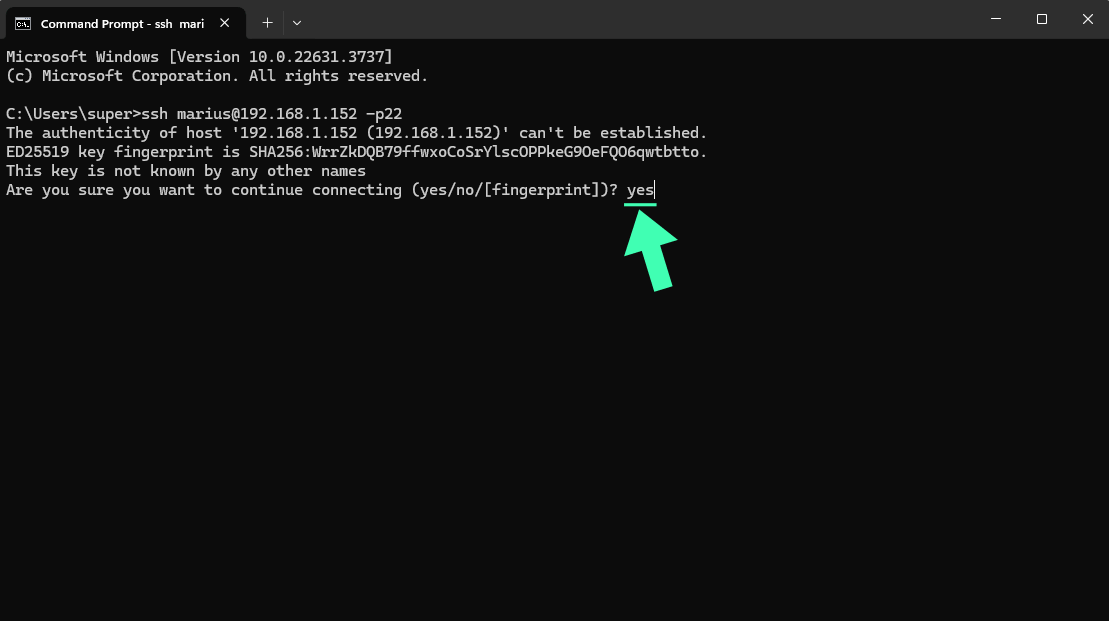
STEP 7
In Command Prompt, the message “Are you sure you want to continue connecting (yes/no)?” can sometimes appear. Type yes and then press Enter on your keyboard. Follow the instructions in the image below.
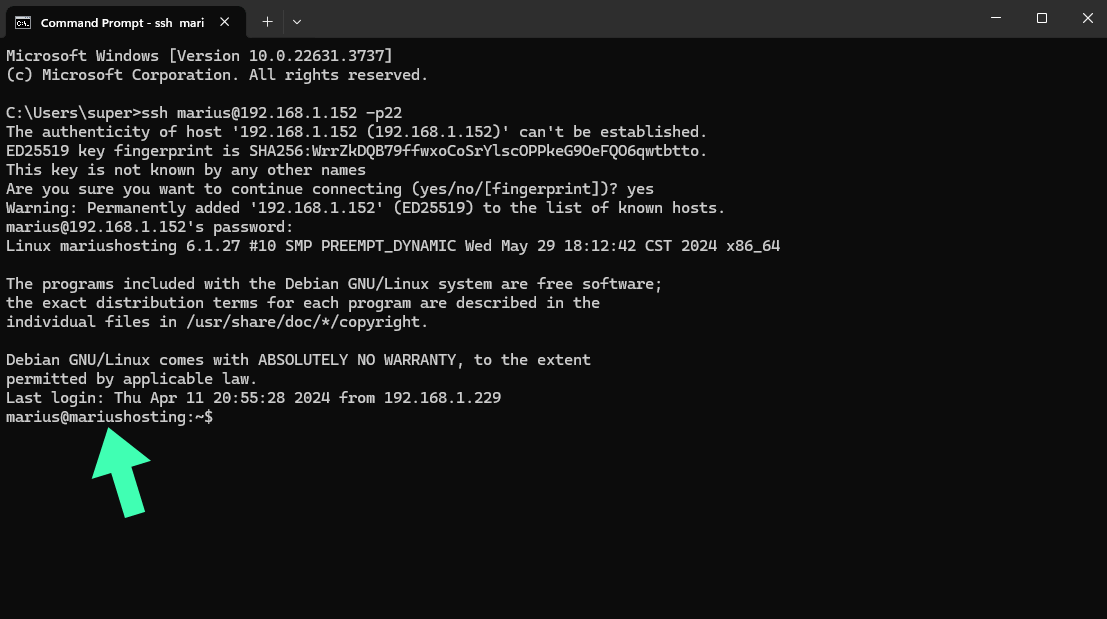
STEP 8
After you press Enter, you will be prompted to type in your UGREEN NAS password. Type it in, then press Enter on your keyboard. ⚠️Warning: When you enter the password, the command prompt will not show the written password. Just type in your password and hit enter. Follow the instructions in the image below.

After you type in your password, your Command Prompt will look like this:
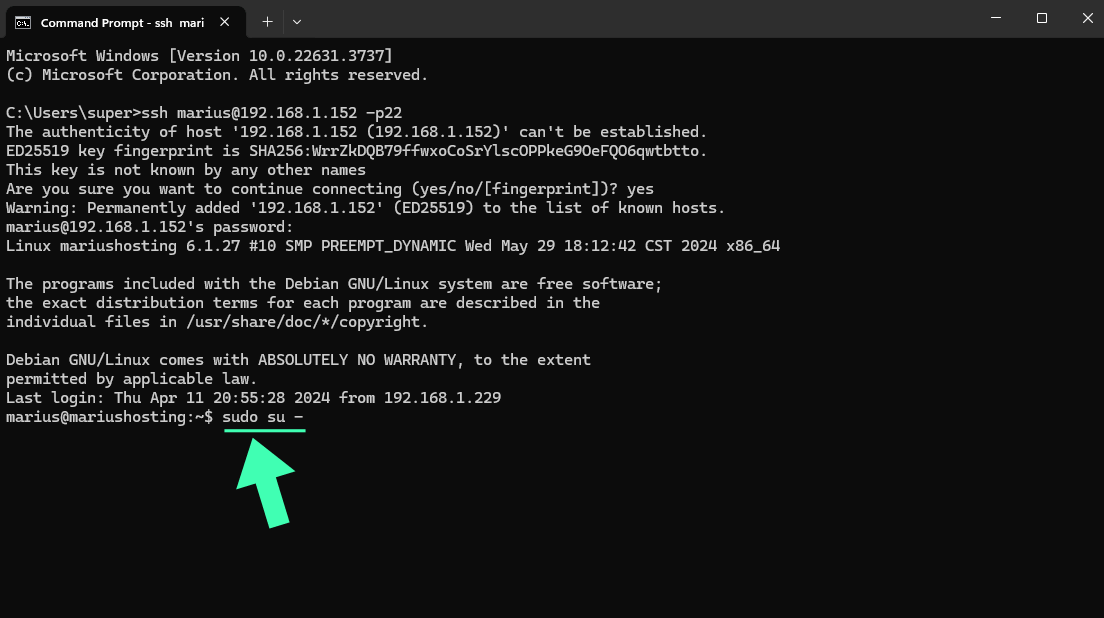
STEP 9
Now type in:
sudo su -
Then press Enter on your keyboard. Follow the instructions in the image below.
The su command switches to root user with high privileges.
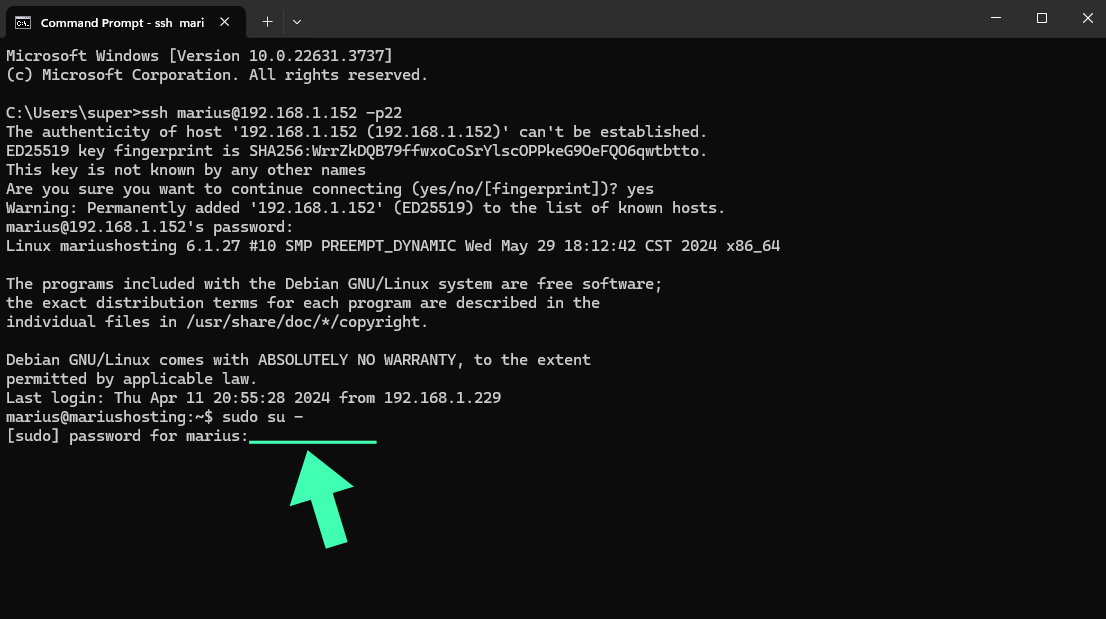
STEP 10
After you press Enter, you will be prompted to type in your UGREEN NAS password. Type in it, then press Enter on your keyboard. ⚠️Warning: When you enter the password, the command prompt will not show the written password. Just type in your password and hit enter. Now you have full root access to your NAS. Follow the instructions in the image below.
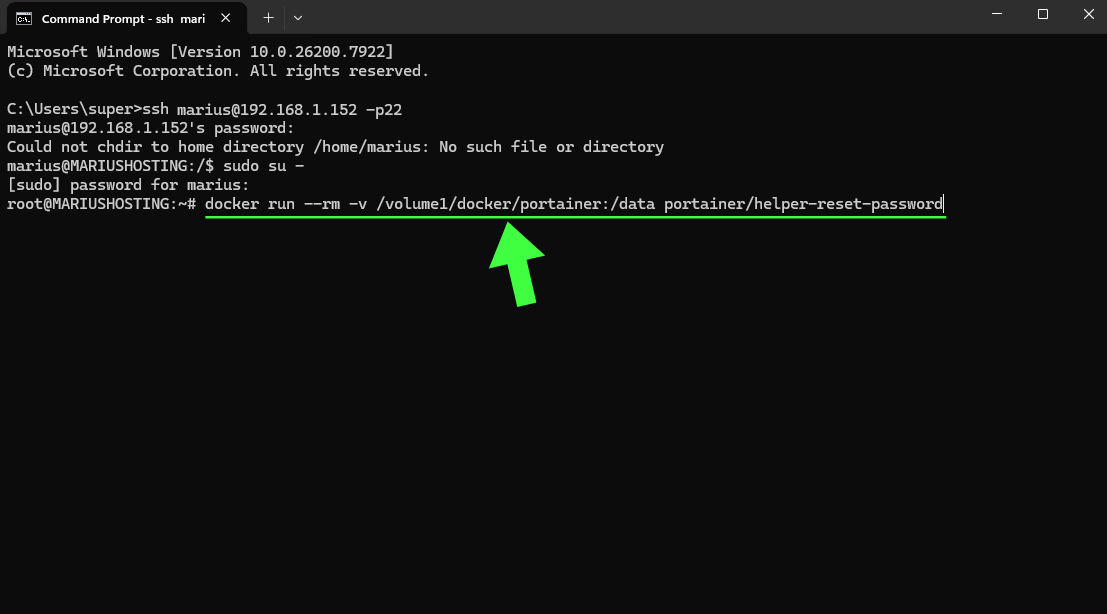
STEP 11
Copy/Paste the code below in your Command Prompt client, then press Enter.
docker run --rm -v /volume1/docker/portainer:/data portainer/helper-reset-password
Follow the instructions in the image below.
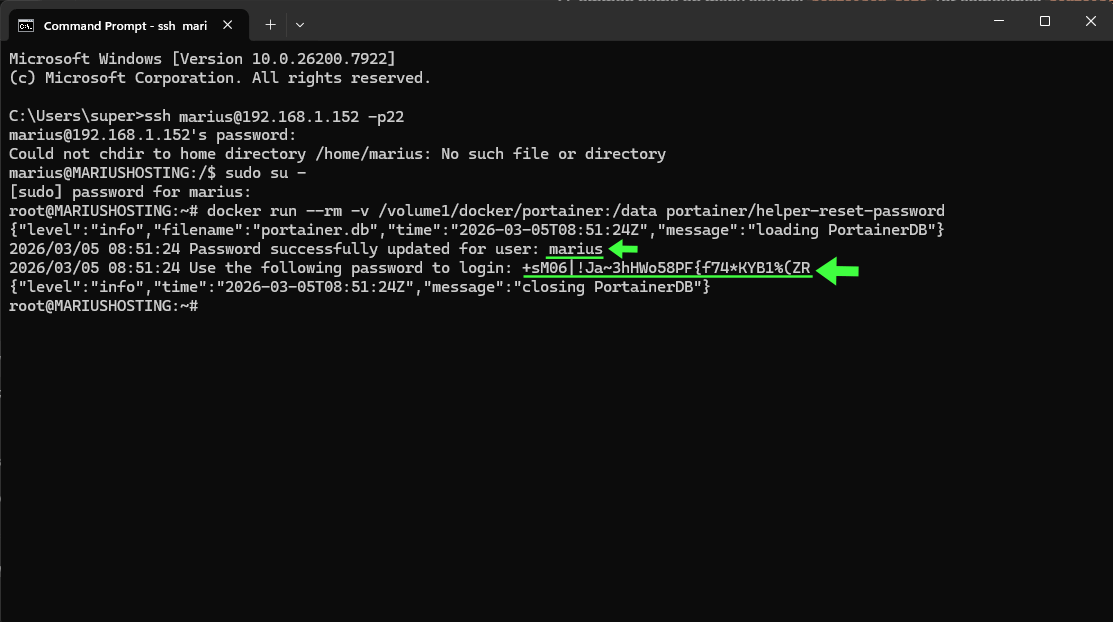
STEP 12
Copy your new auto-generated Portainer password and your username. Follow the instructions in the image below.
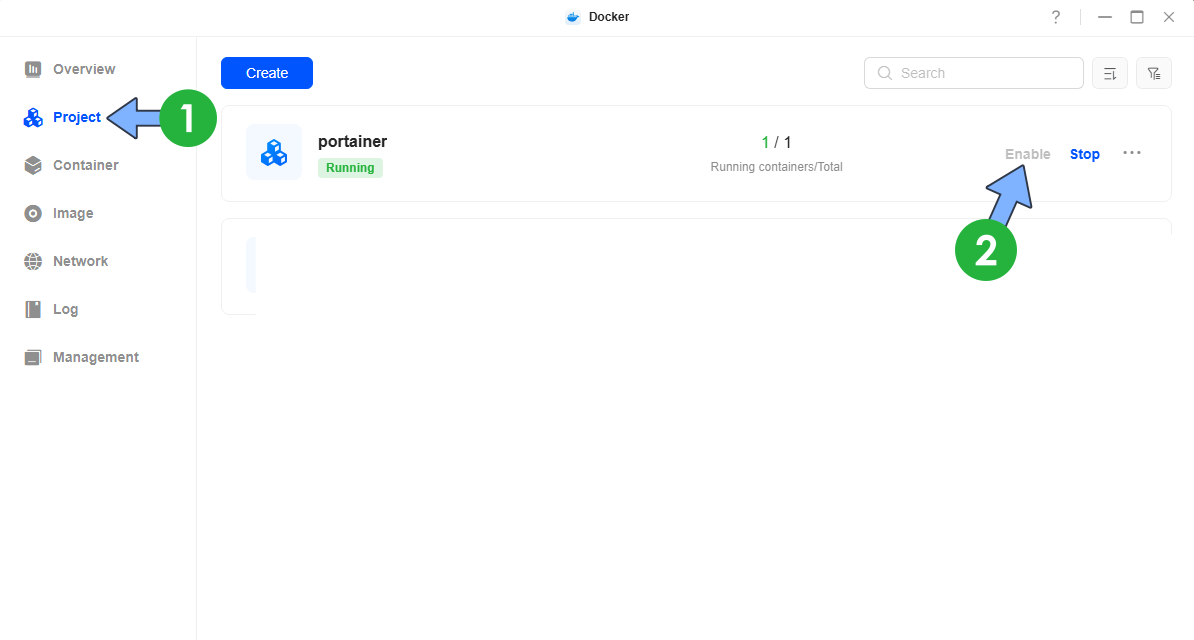
STEP 13
Open the Docker app. On the left sidebar, click Project. Enable the portainer project. ⚠️Note: If you have used the SSH guide to install Portainer on your UGREEN NAS, you should start the portainer container. Otherwise, if you have used the guide to install Portainer without SSH on your UGREEN NAS, you should follow the screenshot below and Enable the portainer project.
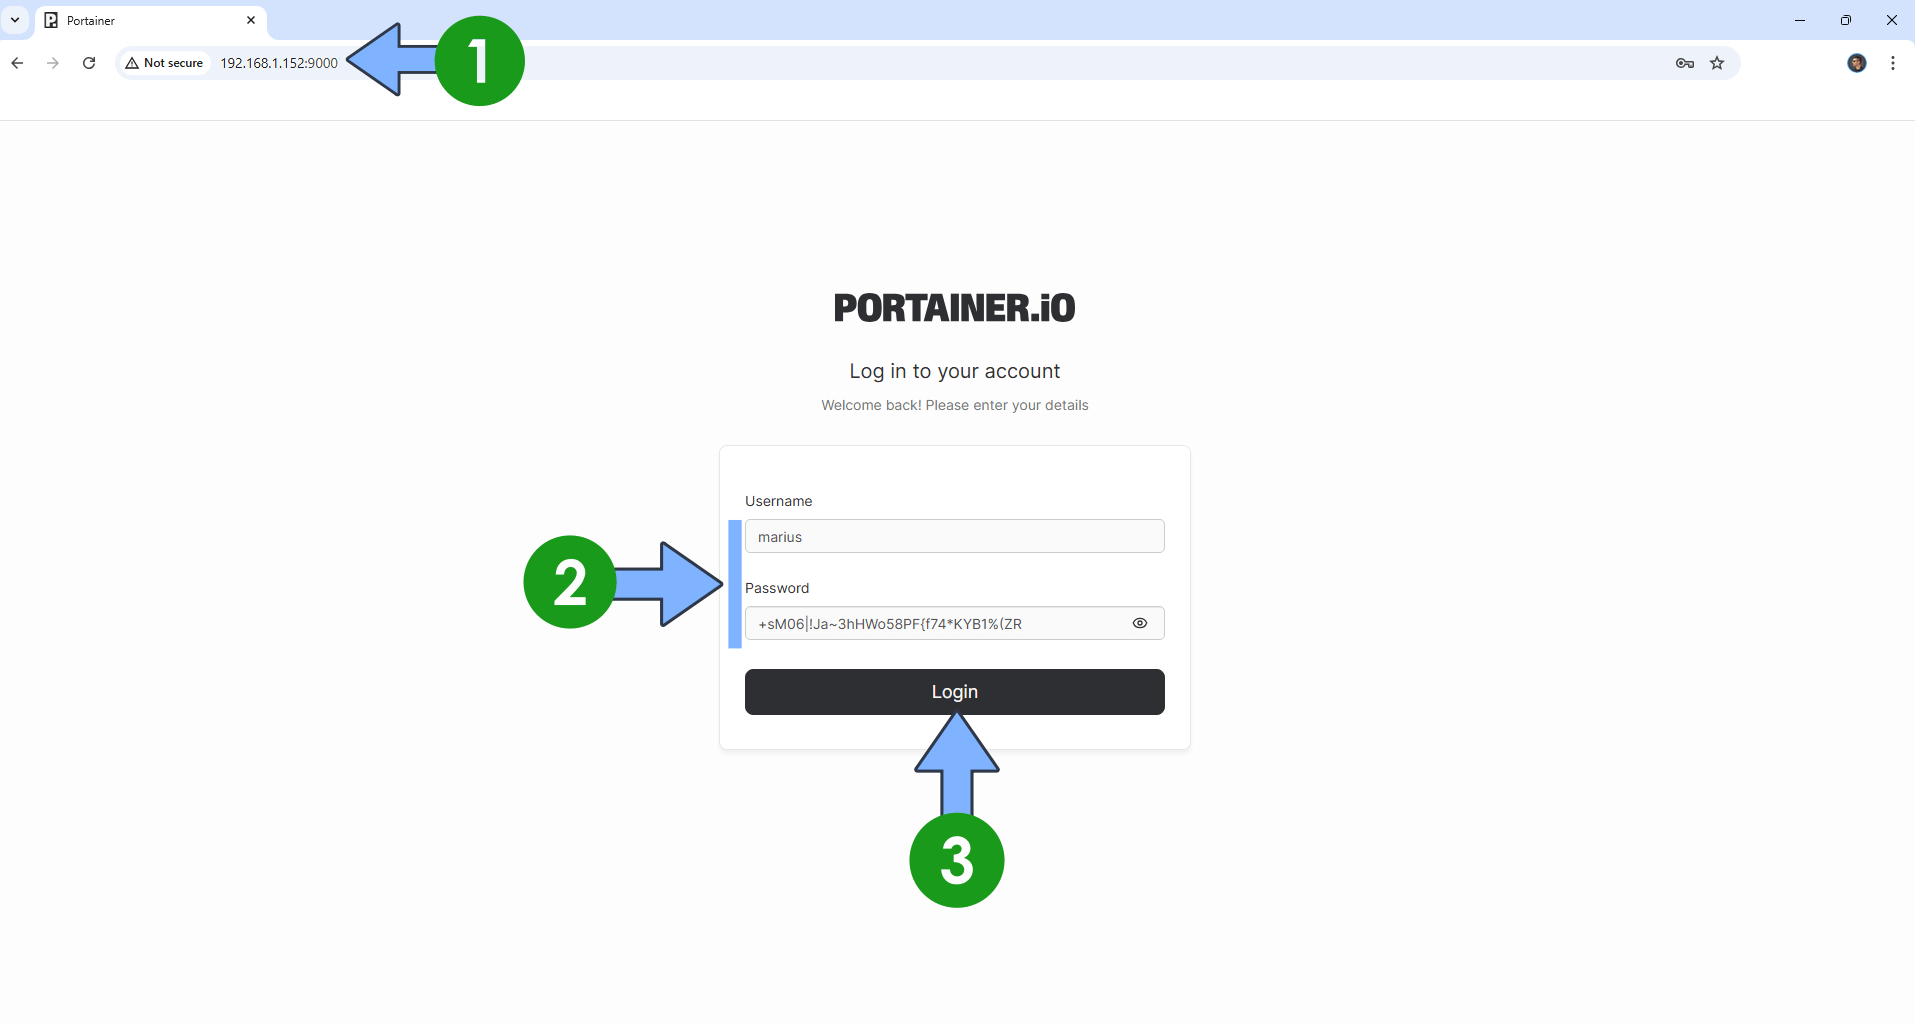
STEP 14
Access your Portainer instance at YourNASIP:9000 Type in your own Username and your Auto-Generated Password that you have previously copied at STEP 12. Click Login. Follow the instructions in the image below.
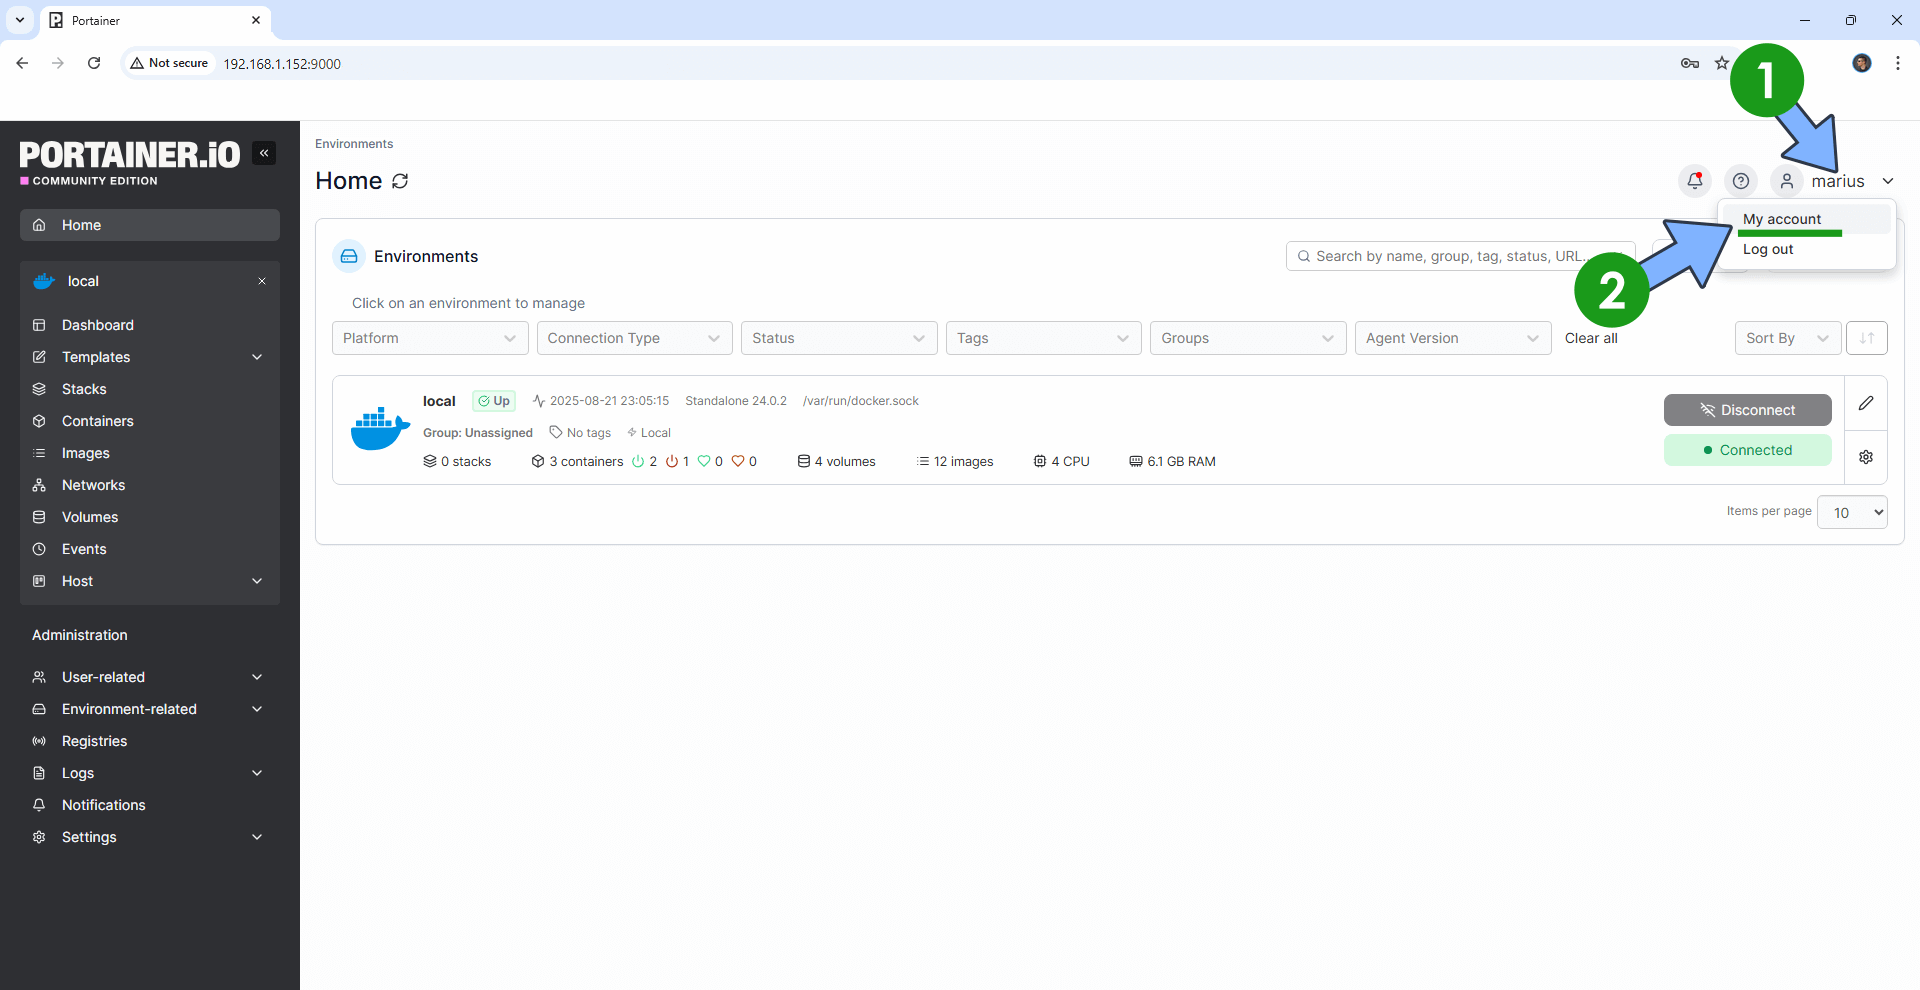
STEP 15
At the top right of the page, click on your username then My account. Follow the instructions in the image below.
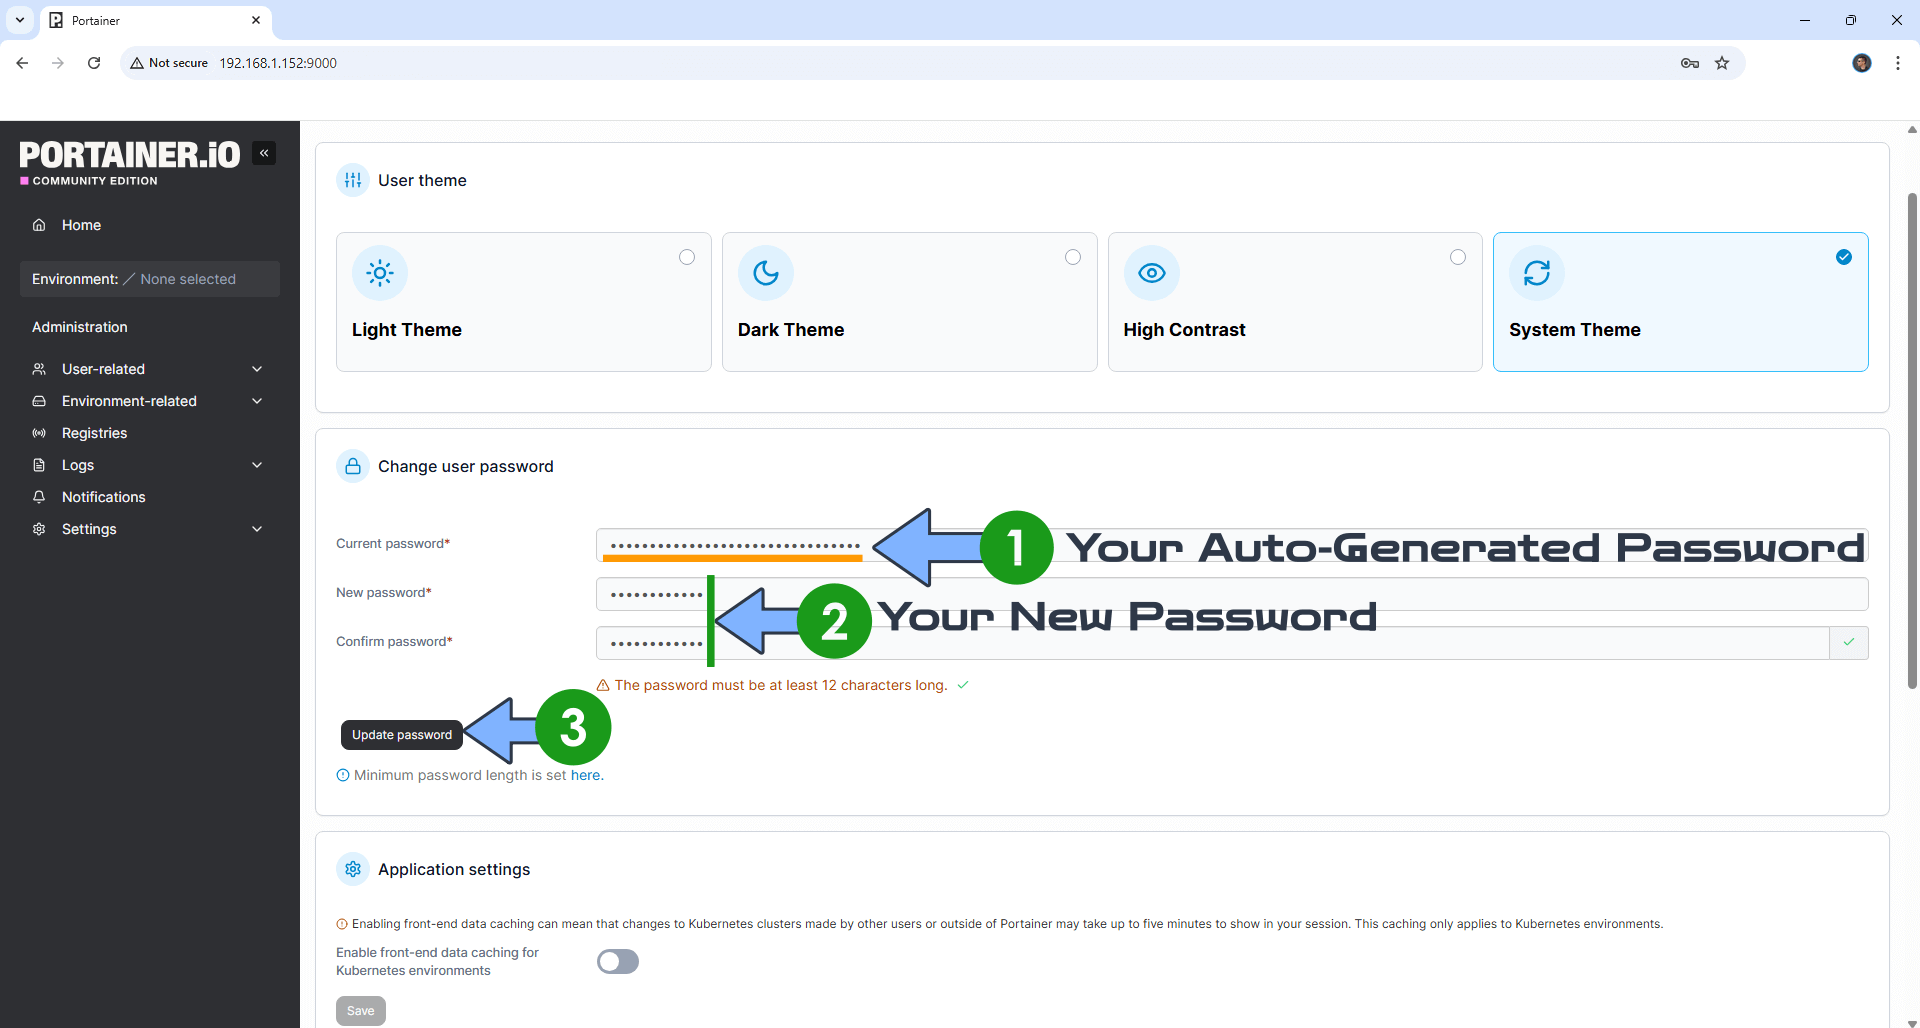
STEP 16
Change your current Auto-Generated password with your own password, then click Update password. Follow the instructions in the image below.
STEP 17
A new pop up window will open. Click Change. Follow the instructions in the image below.

STEP 18
Enjoy your Portainer on your UGREEN NAS!
This post was updated on Thursday / March 5th, 2026 at 11:10 PM