Did you know you can back up your Portainer? If you’ve been regularly using my Docker guides, you know that some of them require Portainer for the installation. If you also use Portainer, and you have a lot of data saved such as stacks (stacks allow you to use docker-compose.yml files), environments like your NAS public IP, and other special settings such as the Dark Mode theme, your Portainer Username and Password etc., it’s advisable and a good practice to make a backup of your Portainer every now and then so that you never lose your favorite settings you’ve worked so hard to set. Having a backup of your Portainer allows you to restore all of your settings and data in case something were to happen.
STEP 1
Please Support My work by Making a Donation.
STEP 2
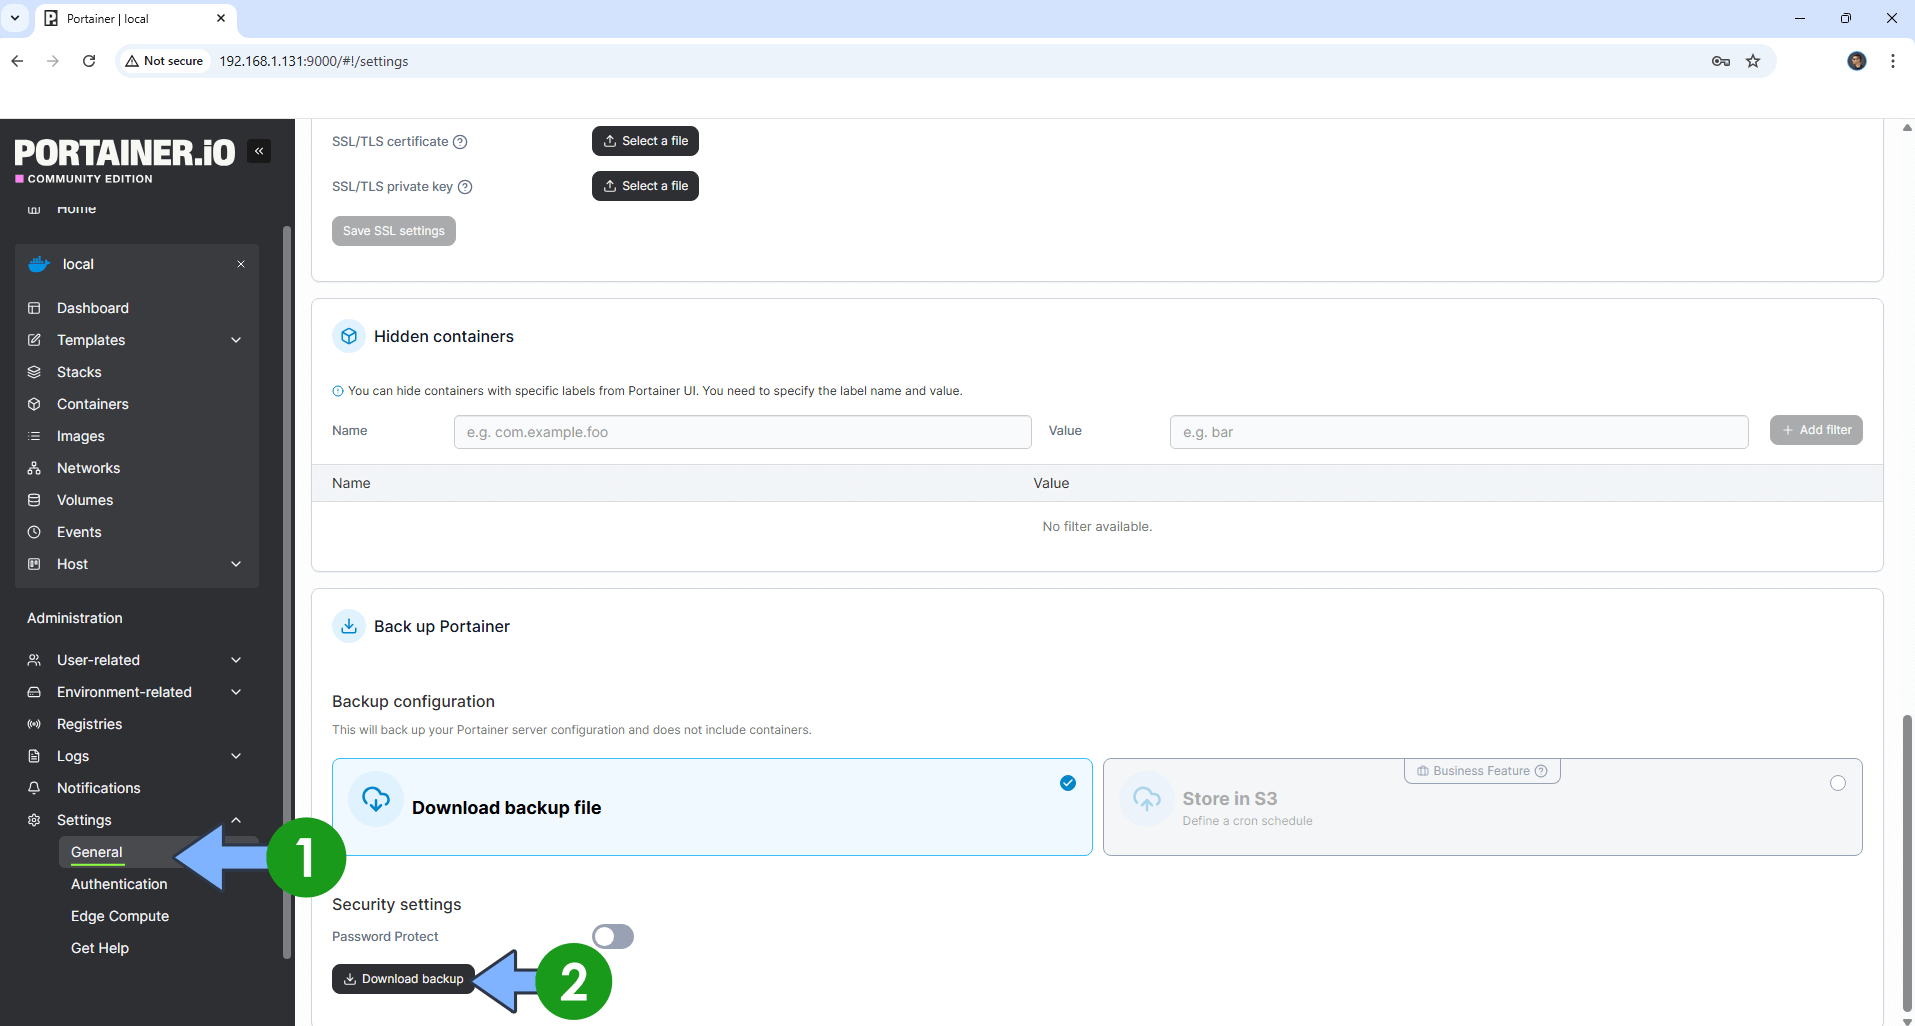
Log into your Portainer instance. On the left sidebar, click on Settings then scroll down the page until you find the Backup Portainer area. Click on the Download backup button. A file with a tar.gz extension will be automatically downloaded. Follow the instructions in the image below. Note: I recommend saving this backup to your Synology NAS, Synology C2 storage or a USB key.
STEP 3
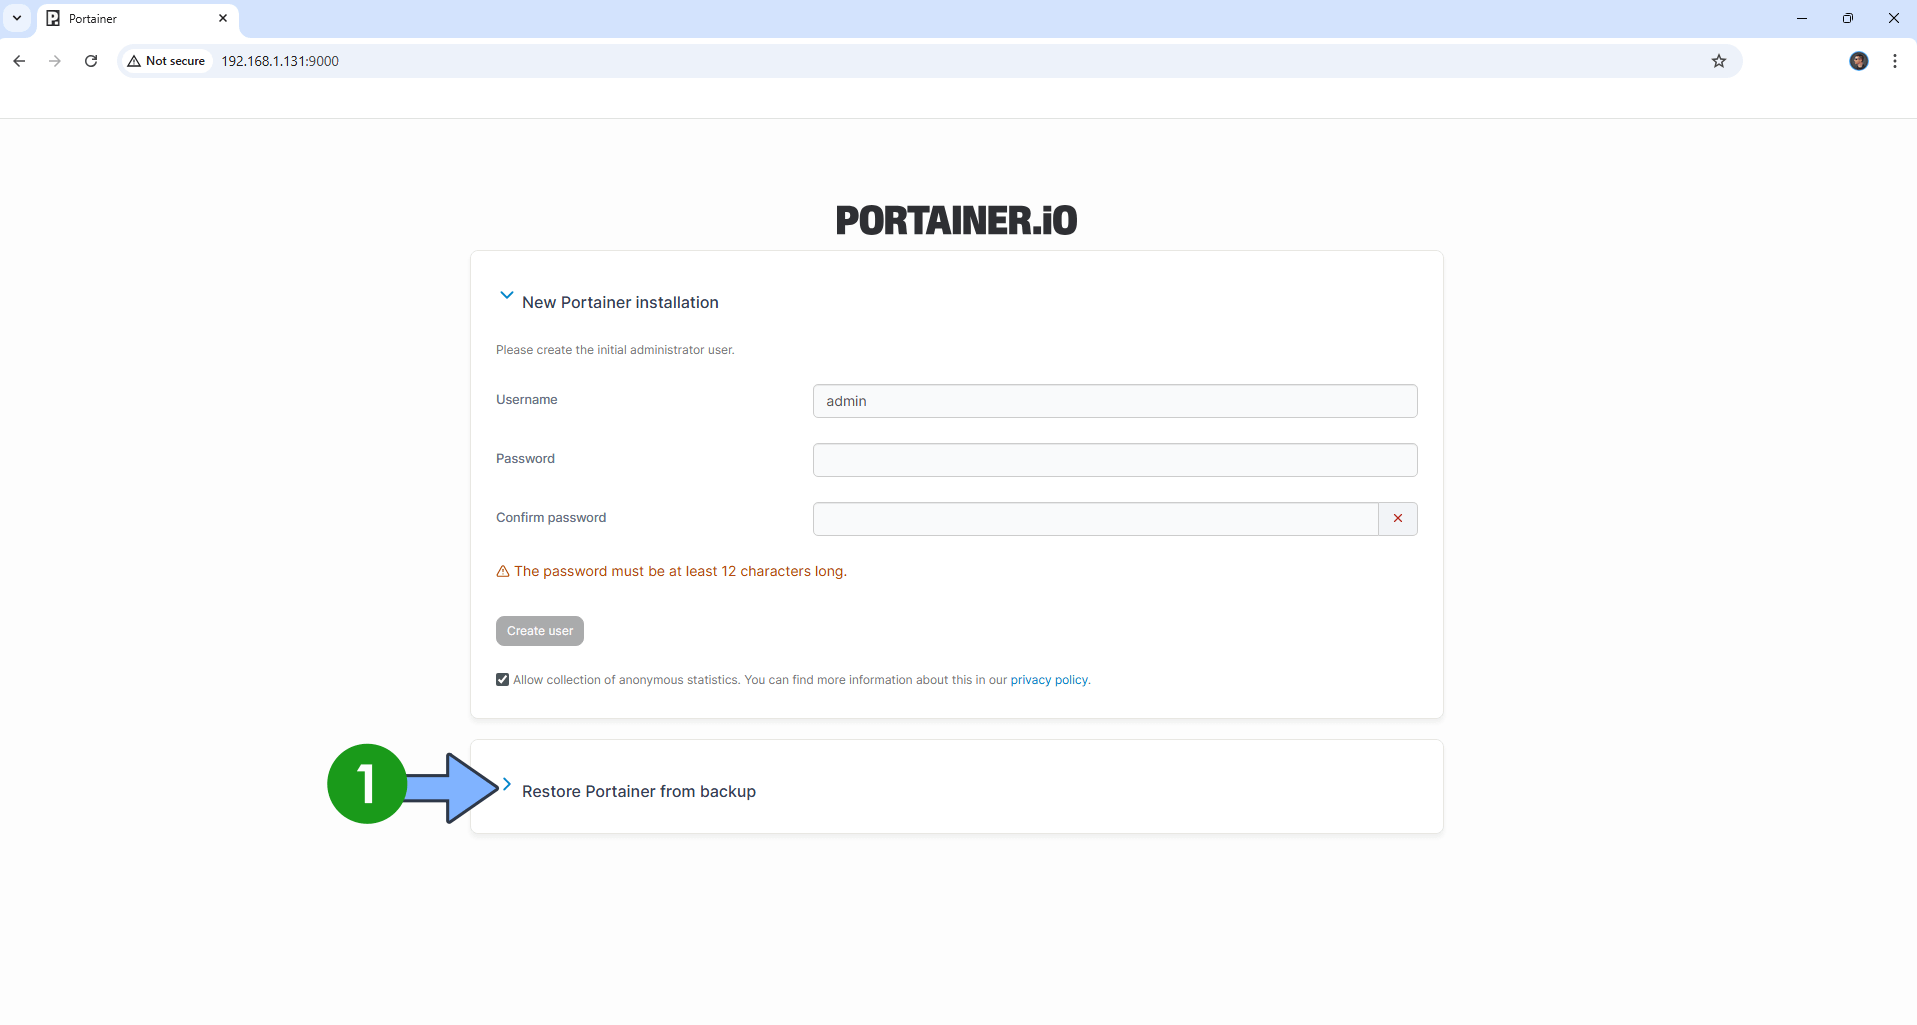
If you want to restore your entire Portainer backup to a new NAS, just install Portainer from scratch using my easy guide for Synology or UGREEN NAS. Click Restore Portainer from backup. Follow the instructions in the image below.
STEP 4
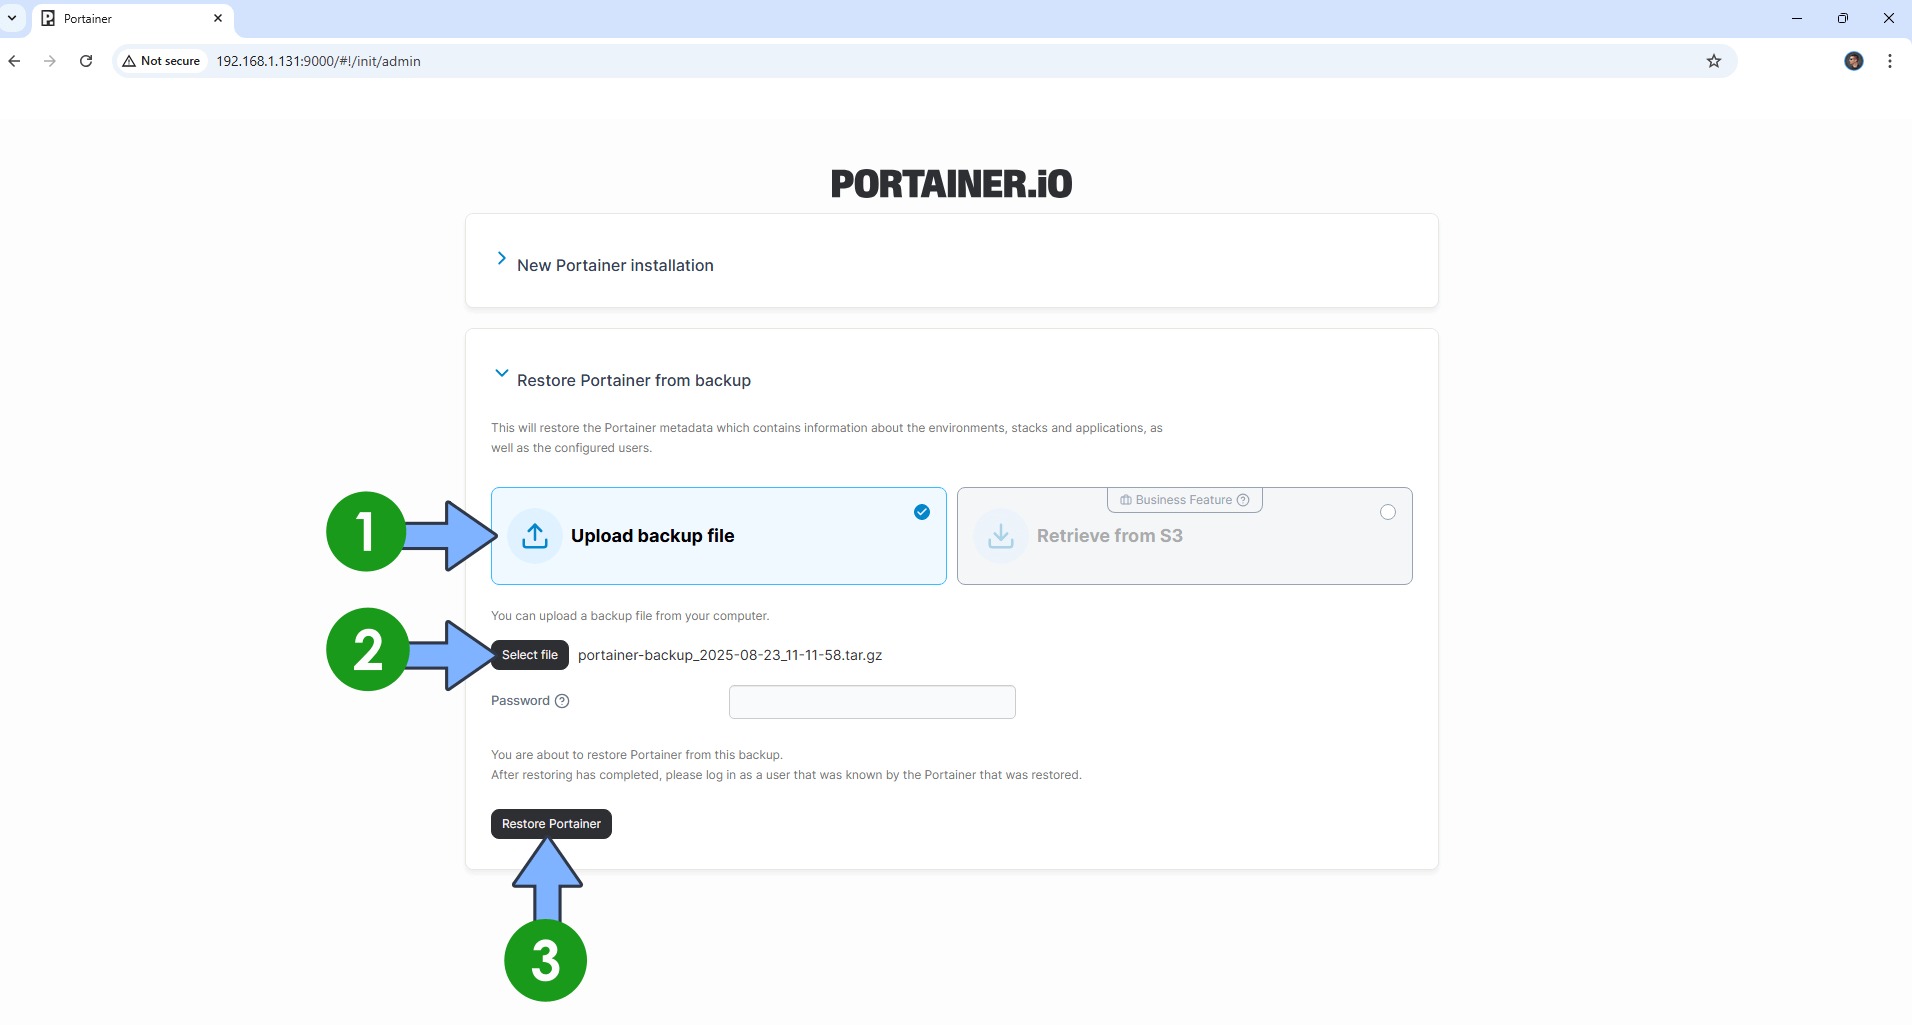
Click the Upload backup file button. Select the backup file with the tar.gz extension that you have previously downloaded at STEP 2, then click Restore Portainer. Follow the instructions in the image below.
STEP 5
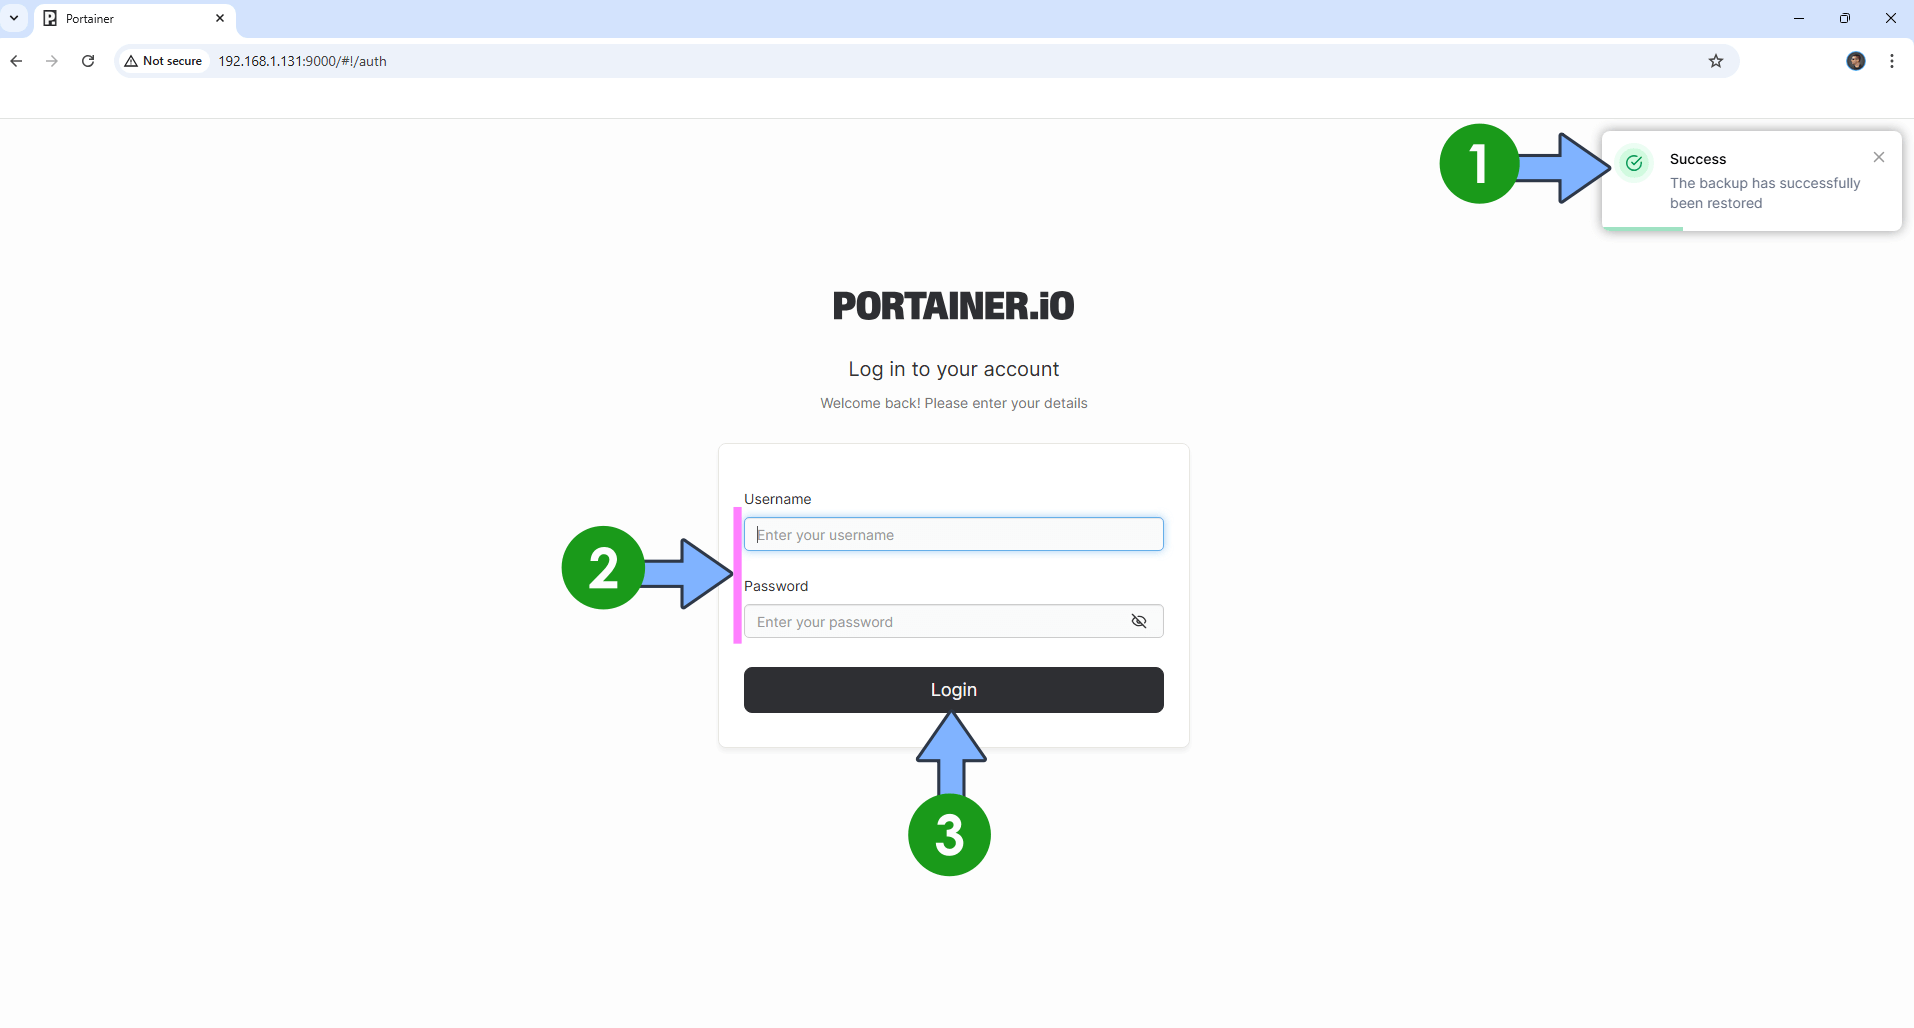
If everything goes right, you will see the following message at the top right of your screen: Success The backup has successfully been restored. Log into your Portainer with your Username and Password that you used when you first backed up.
Enjoy your restored Portainer!
This post was updated on Thursday / March 5th, 2026 at 9:52 PM