
Sometimes it can happen to even the most prepared of users to lose their Portainer password. If this happens, if you do not have a Backup of Portainer, the only solution left is to reset your current Portainer password. In this step by step guide I will show you how to reset the password in Portainer and get access again.
STEP 1
Please Support My work by Making a Donation.
STEP 2
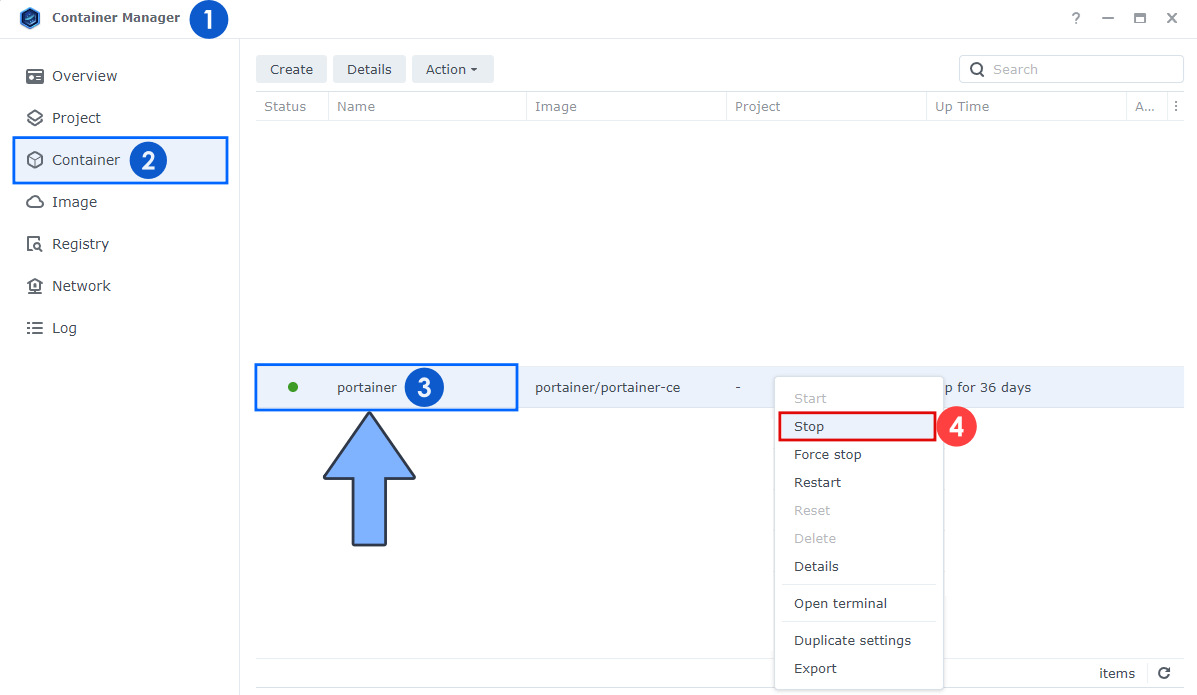
Open Docker or Container Manager. On the left sidebar click Container. Right click on your Portainer instance, then click Stop. Follow the instructions in the image below.
STEP 3
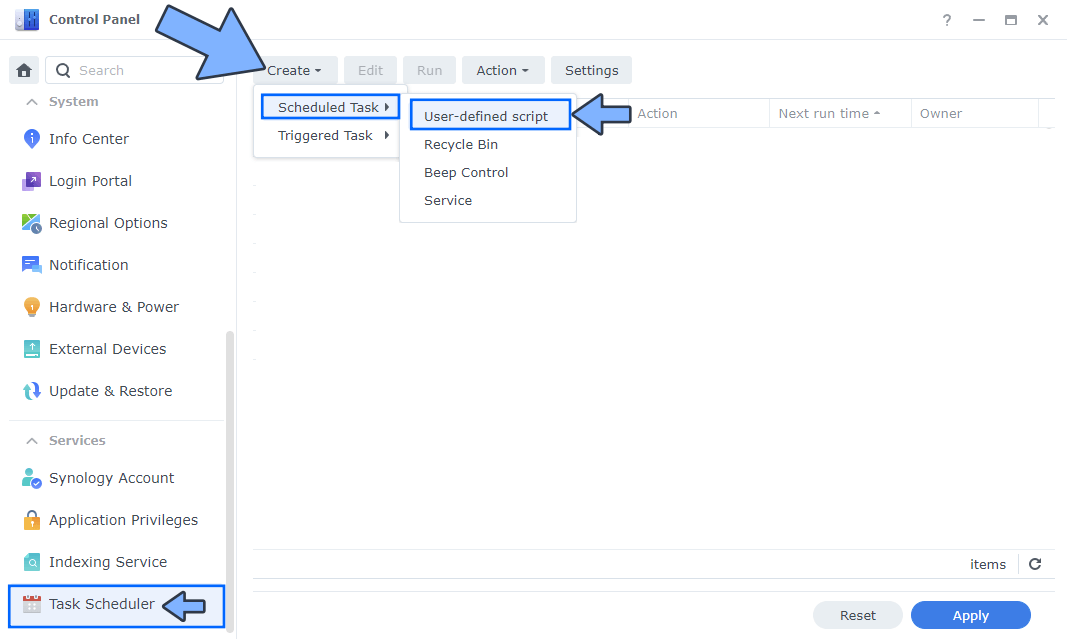
Go to Control Panel / Task Scheduler / Create / Scheduled Task / User-defined script. Follow the instructions in the image below.
STEP 4
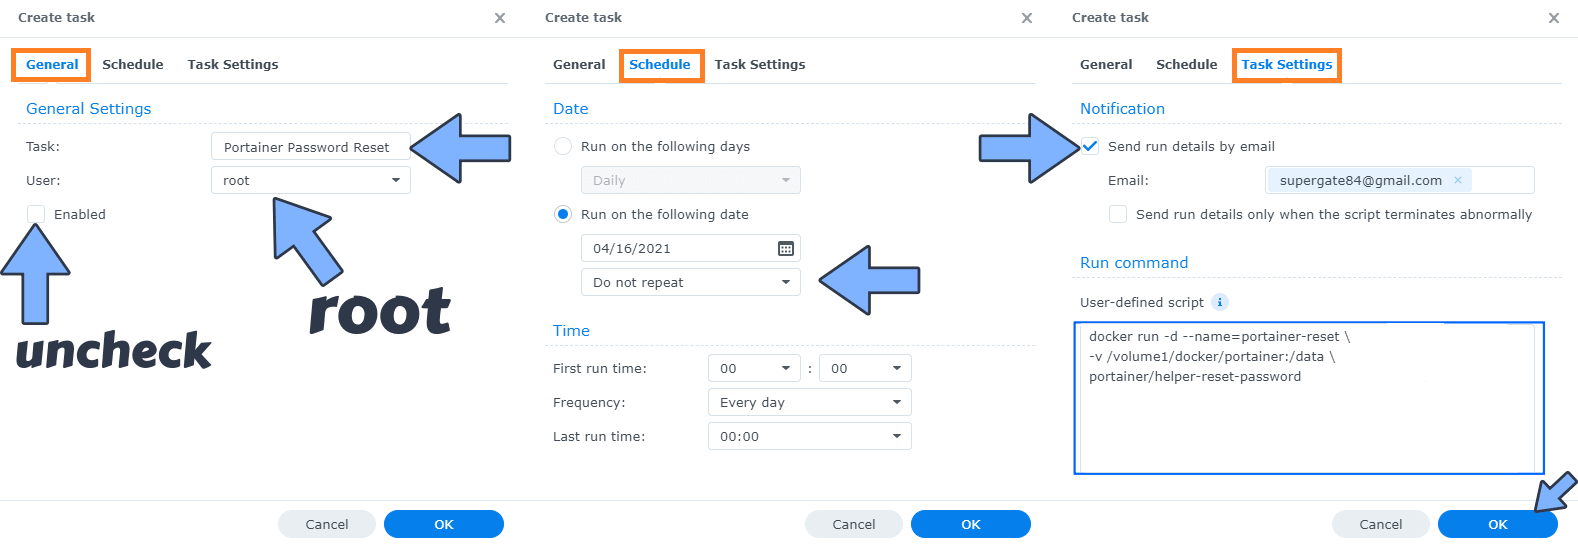
Once you click on User-defined script a new window will open. Follow the instructions below:
- General: In the Task field type in “Portainer Password Reset“. Uncheck the “Enabled” option. Select root User.
- Schedule: Select Run on the following date then select “Do not repeat“.
- Task Settings: Check “Send run details by email“, add your email then copy paste the code below in the Run command area. After that click OK.
docker run -d --name=portainer-reset \
-v /volume1/docker/portainer:/data \
portainer/helper-reset-password
STEP 5
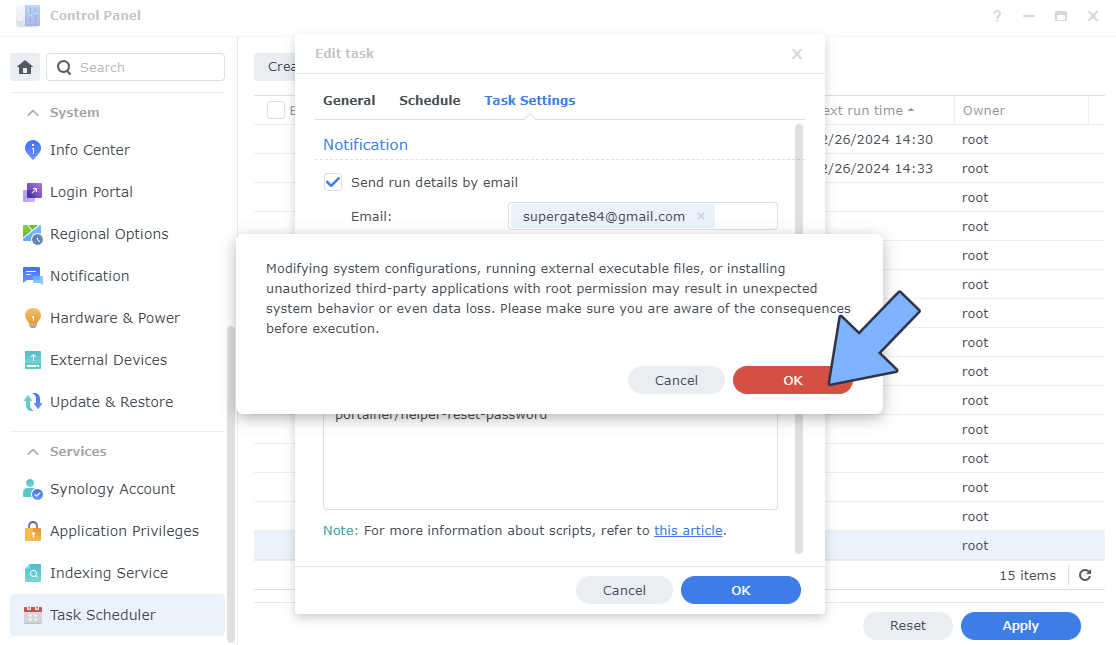
After you click OK on STEP 4 a new warning pop up window will open. Click OK.
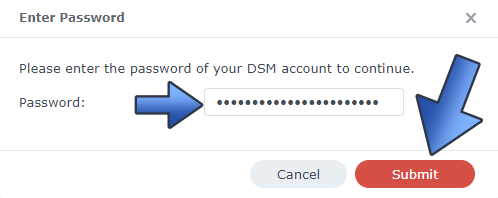
After you click OK, type in your DSM Password then click Submit. Follow the instructions in the image below.
STEP 6
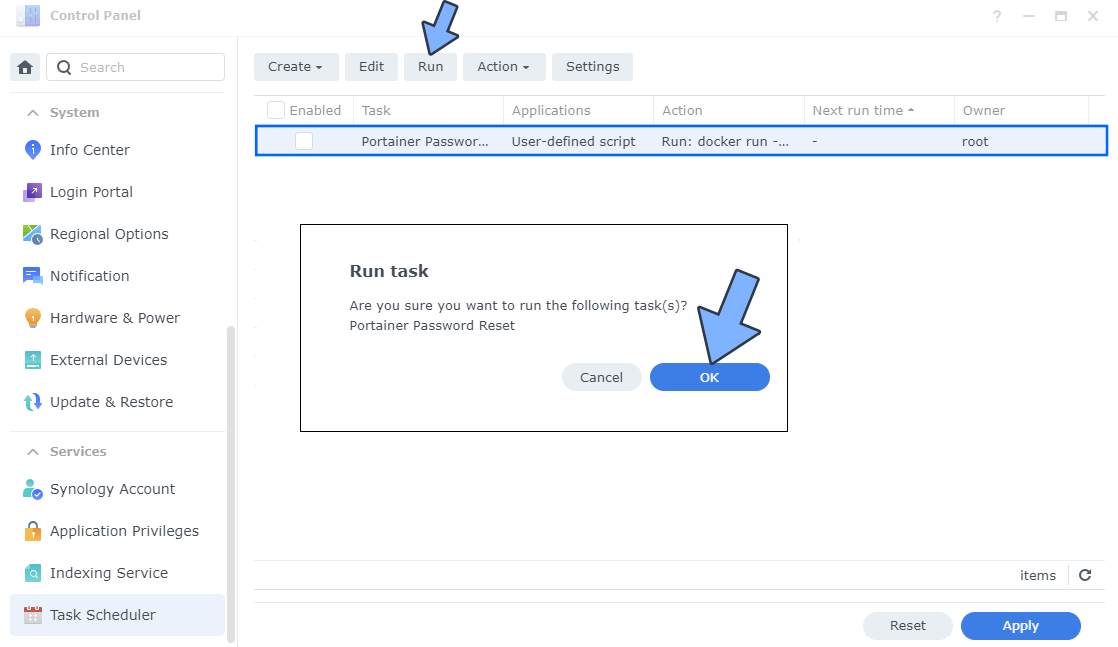
After you click Submit at STEP 5, select your “Portainer Password Reset” Task then click the “Run” tab. You will be asked to run Portainer Password Reset – click OK. Follow the instructions in the image below.
STEP 7
🟢Please Support My work by Making a Donation. Almost 99,9% of the people that install something using my guides forget to support my work, or just ignore STEP 1. I’ve been very honest about this aspect of my work since the beginning: I don’t run any ADS, I don’t require subscriptions, paid or otherwise, I don’t collect IPs, emails, and I don’t have any referral links from Amazon or other merchants. I also don’t have any POP-UPs or COOKIES. I have repeatedly been told over the years how much I have contributed to the community. It’s something I love doing and have been honest about my passion since the beginning. But I also Need The Community to Support me Back to be able to continue doing this work.
STEP 8
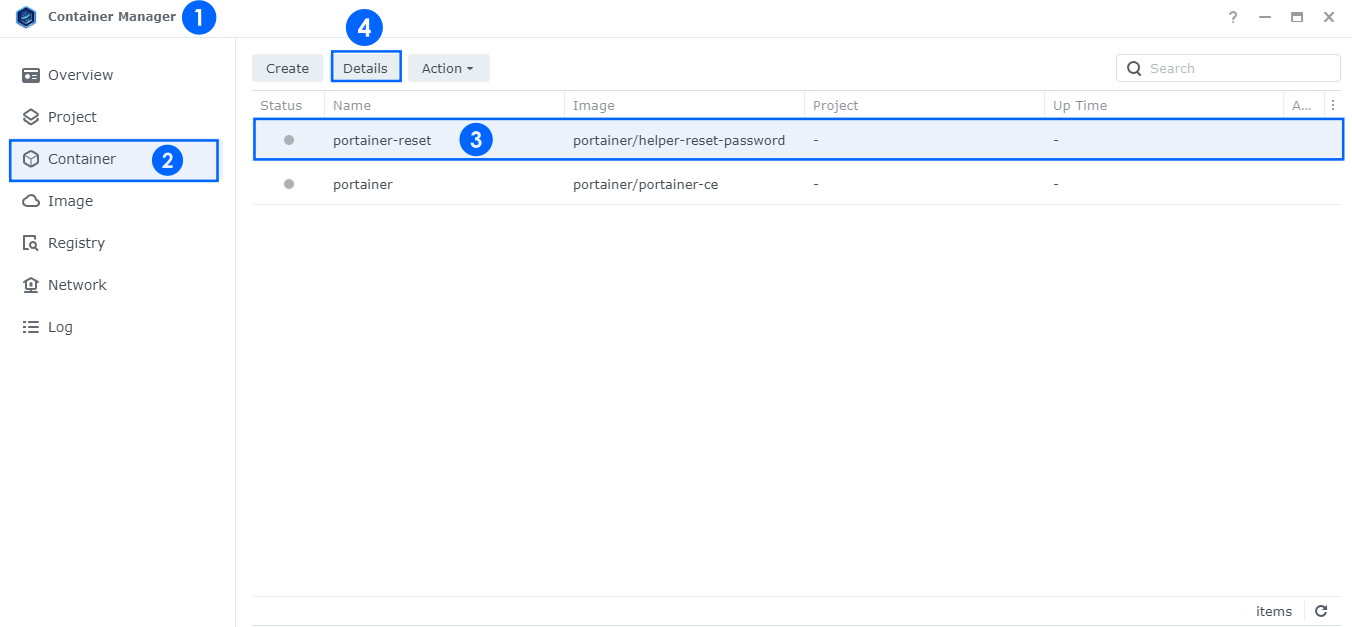
Open Container Manager or Docker. On the left sidebar click Container. Select your portainer-reset instance, then click the Details tab. Follow the instructions in the image below.
STEP 9
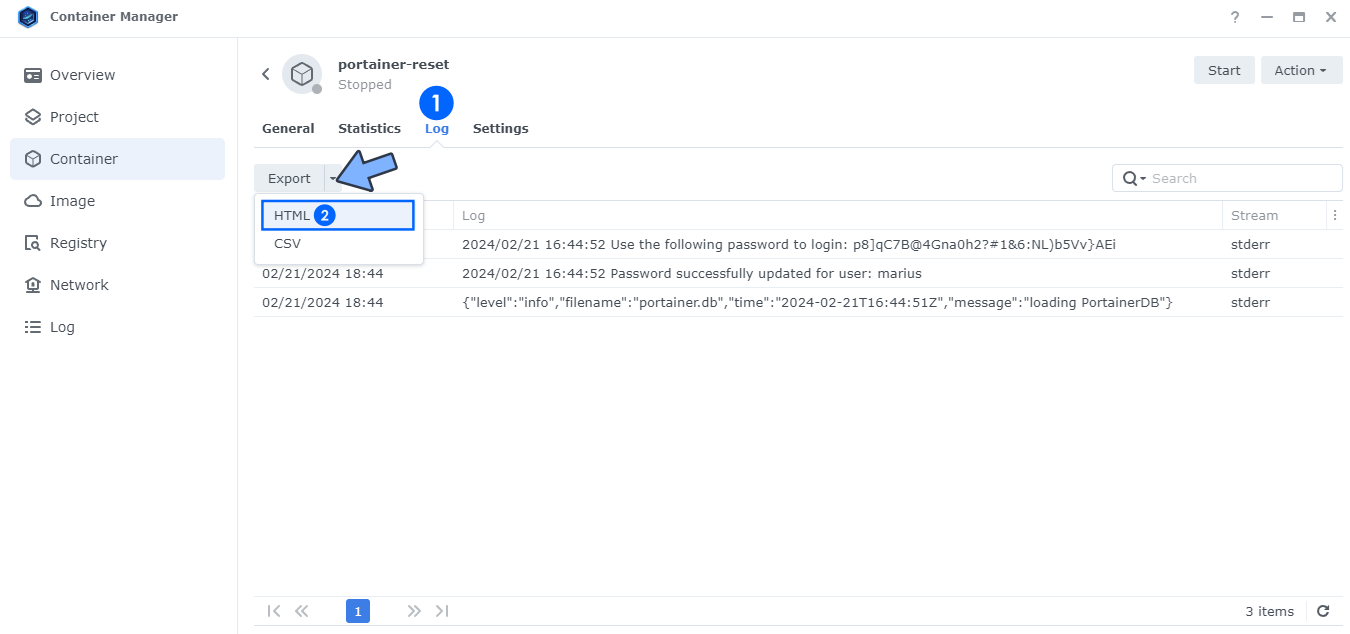
Click the Log tab, then Export. Click HTML. Follow the instructions in the image below.
STEP 10
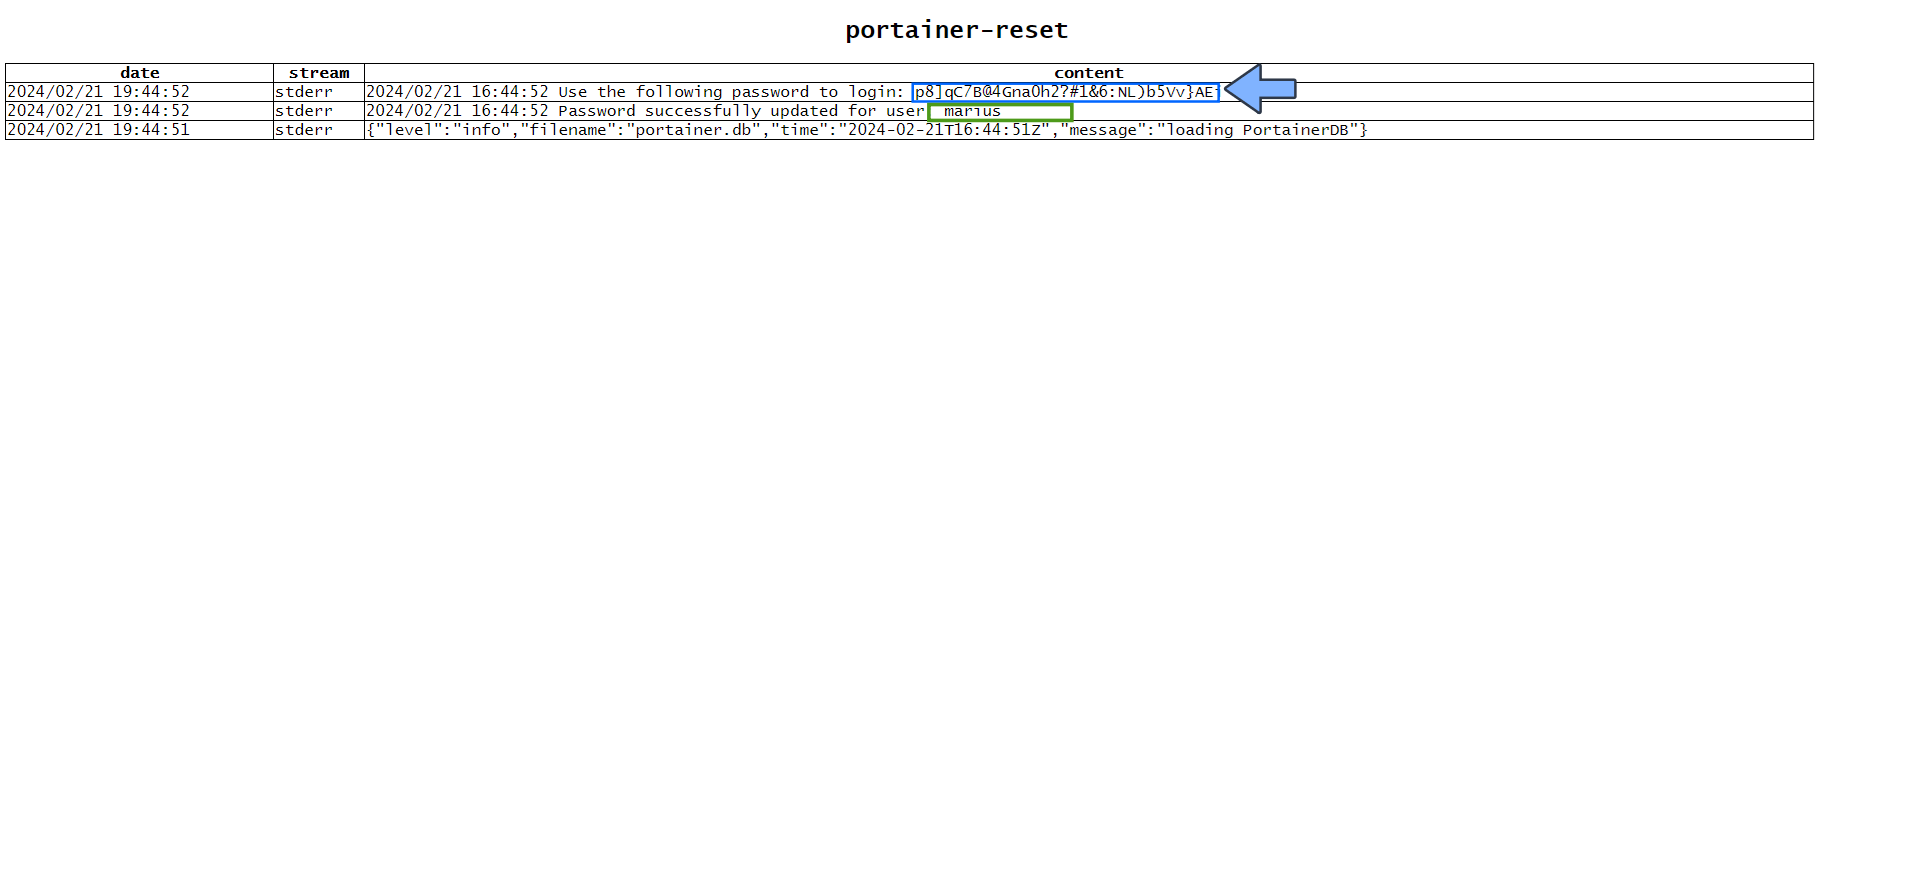
From the HTML file that you have previously downloaded at STEP 9, copy your new auto-generated Portainer password and your username. Follow the instructions in the image below.
STEP 11
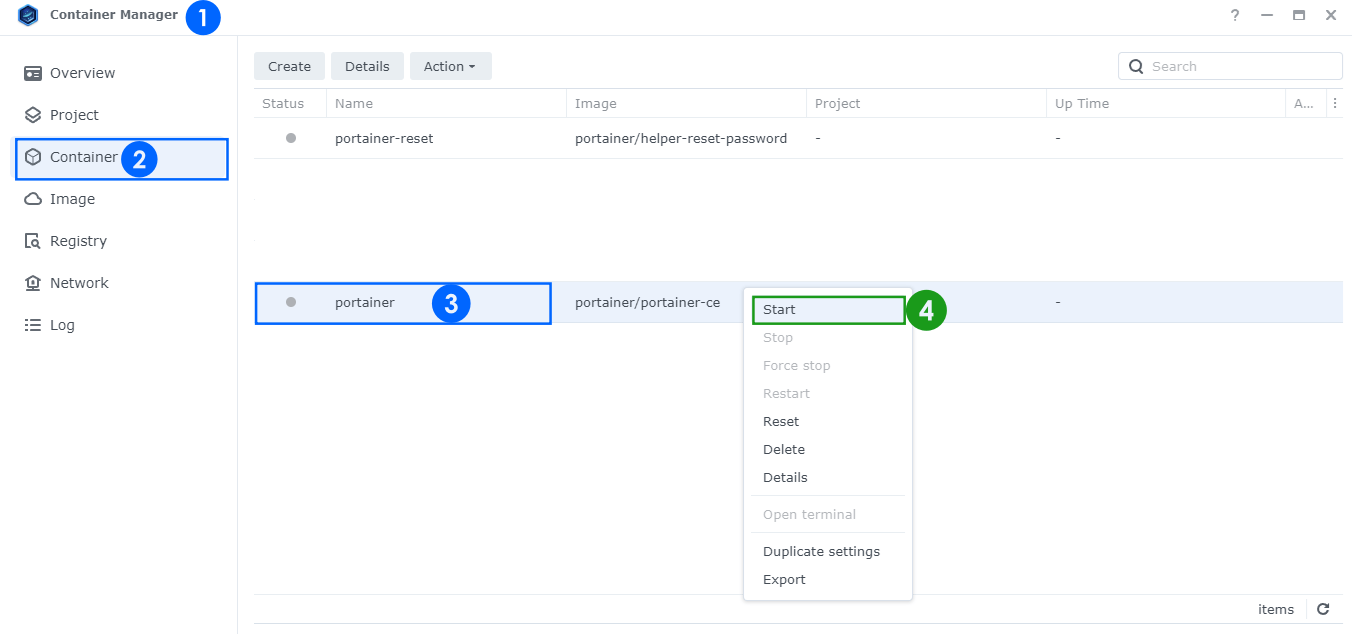
Open Docker or Container Manager. On the left sidebar click Container. Right click on your Portainer instance, then click Start. Follow the instructions in the image below.
STEP 12
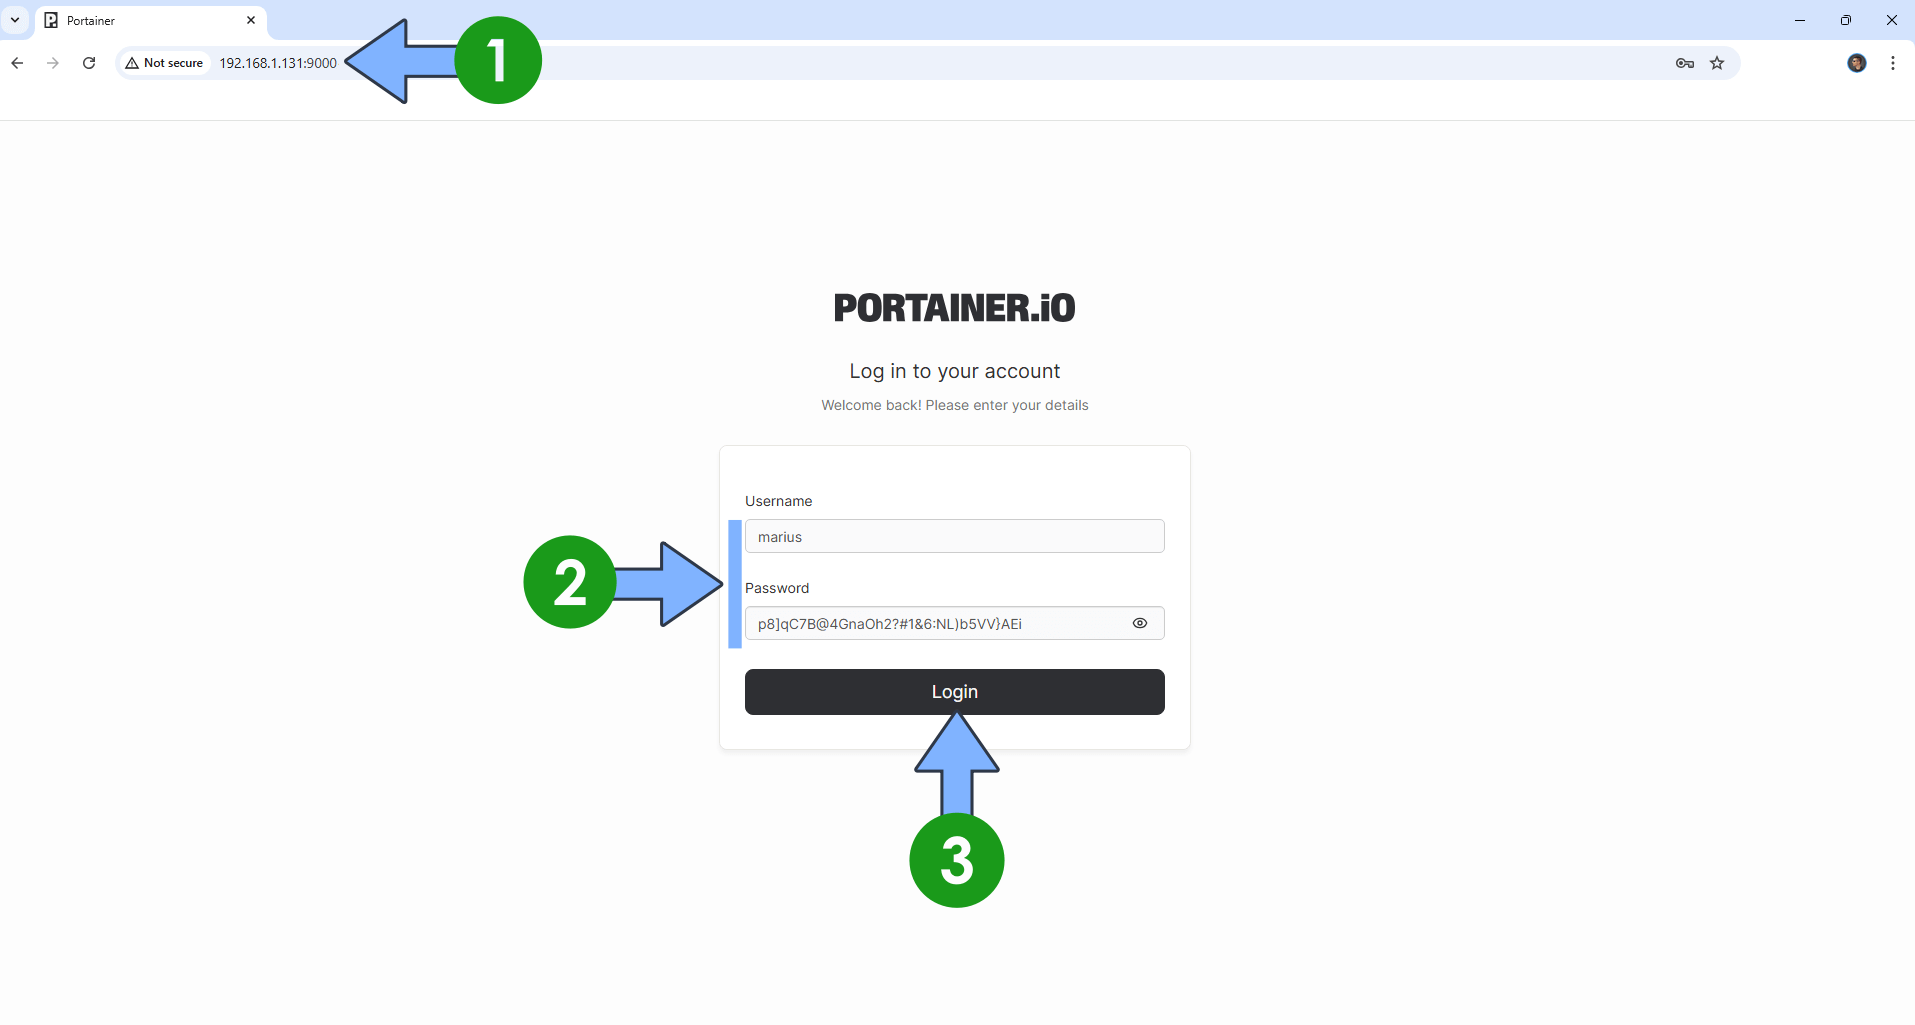
Access your Portainer instance at YourNASIP:9000 Type in your own Username and your Auto-Generated Password that you have previously downloaded at STEP 10. Click Login. Follow the instructions in the image below.
STEP 13
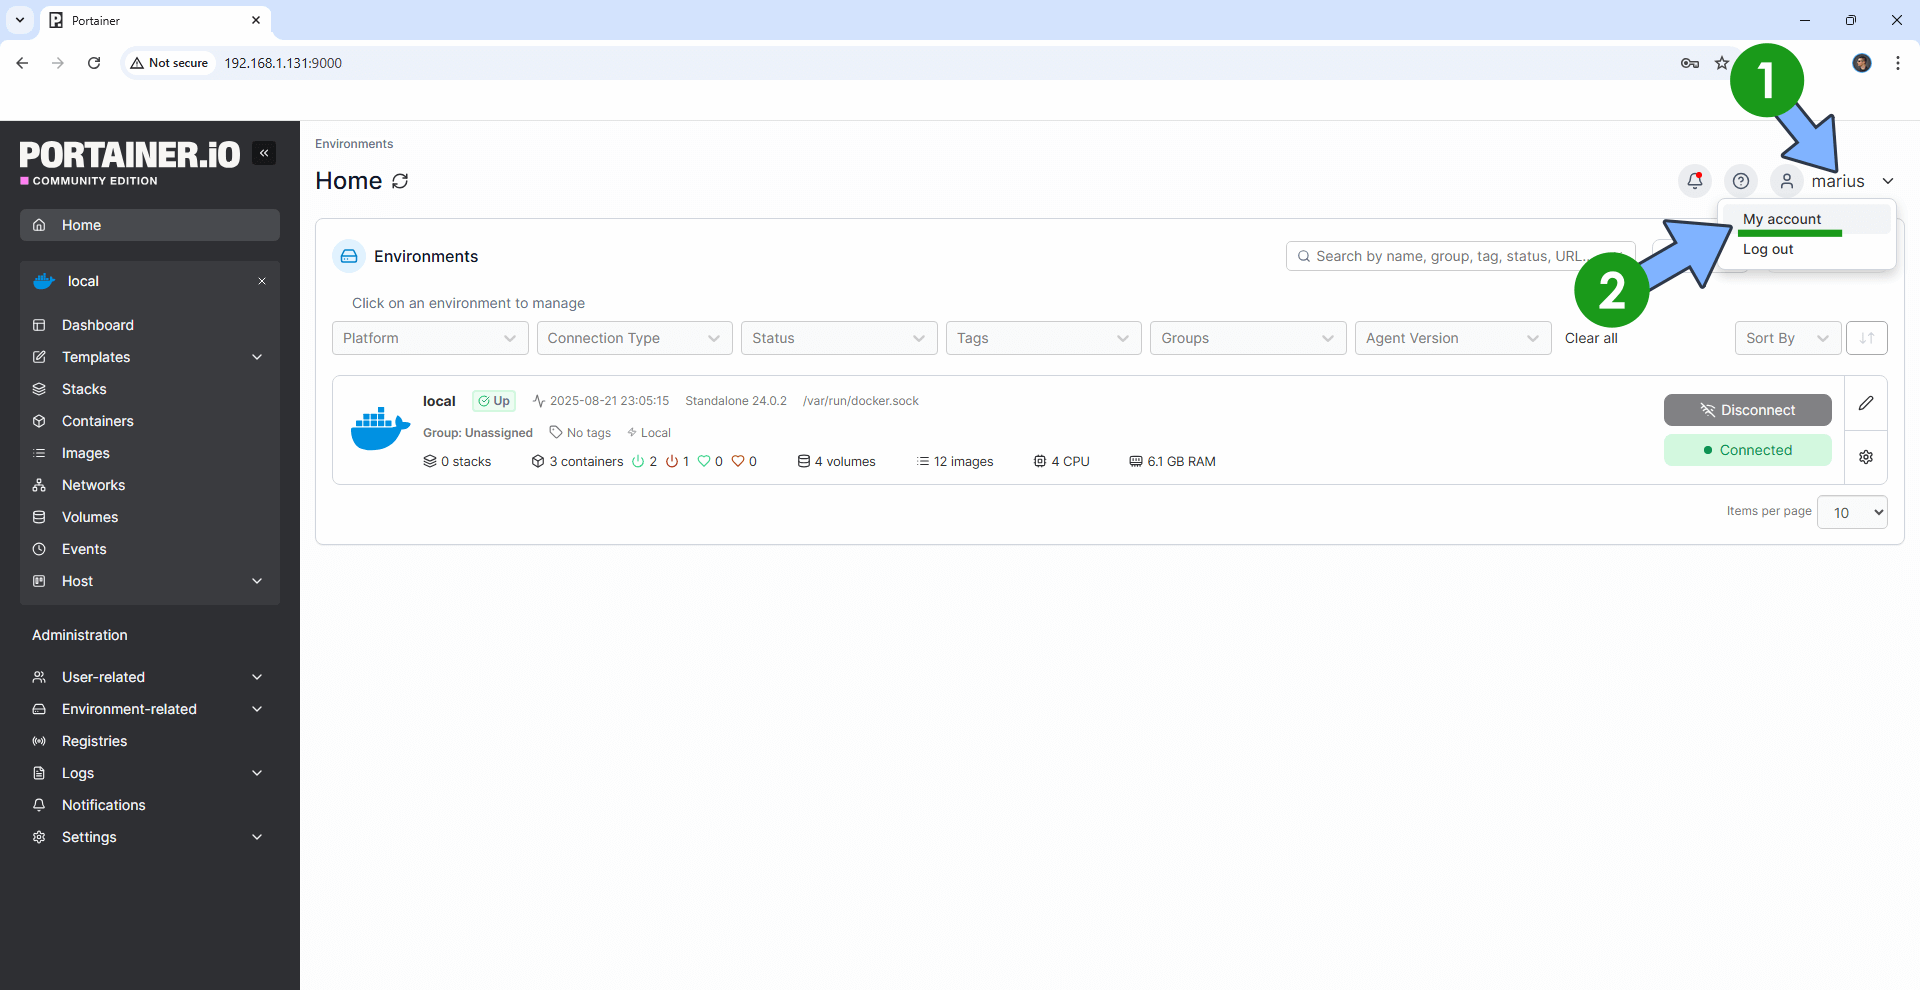
At the top right of the page, click on your username then My account. Follow the instructions in the image below.
STEP 14
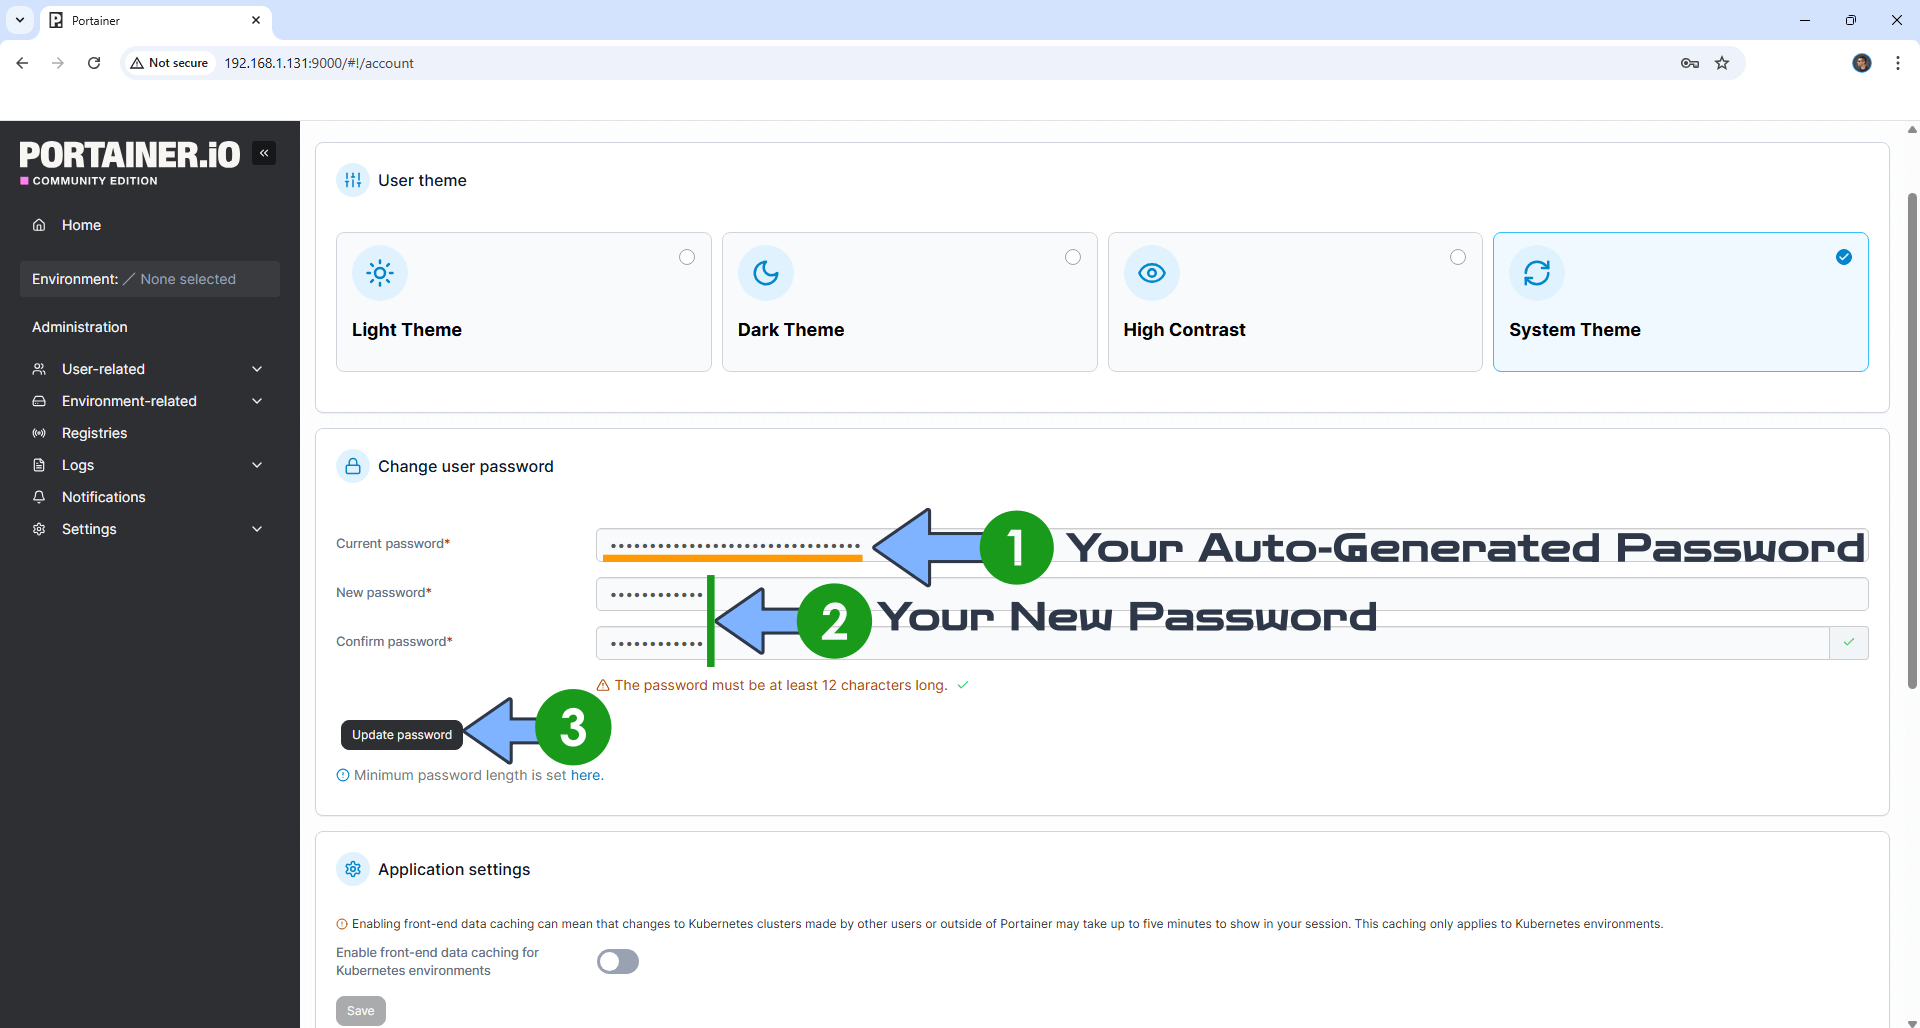
Change your current Auto-Generated password with your own password, then click Update password. Follow the instructions in the image below.
STEP 15
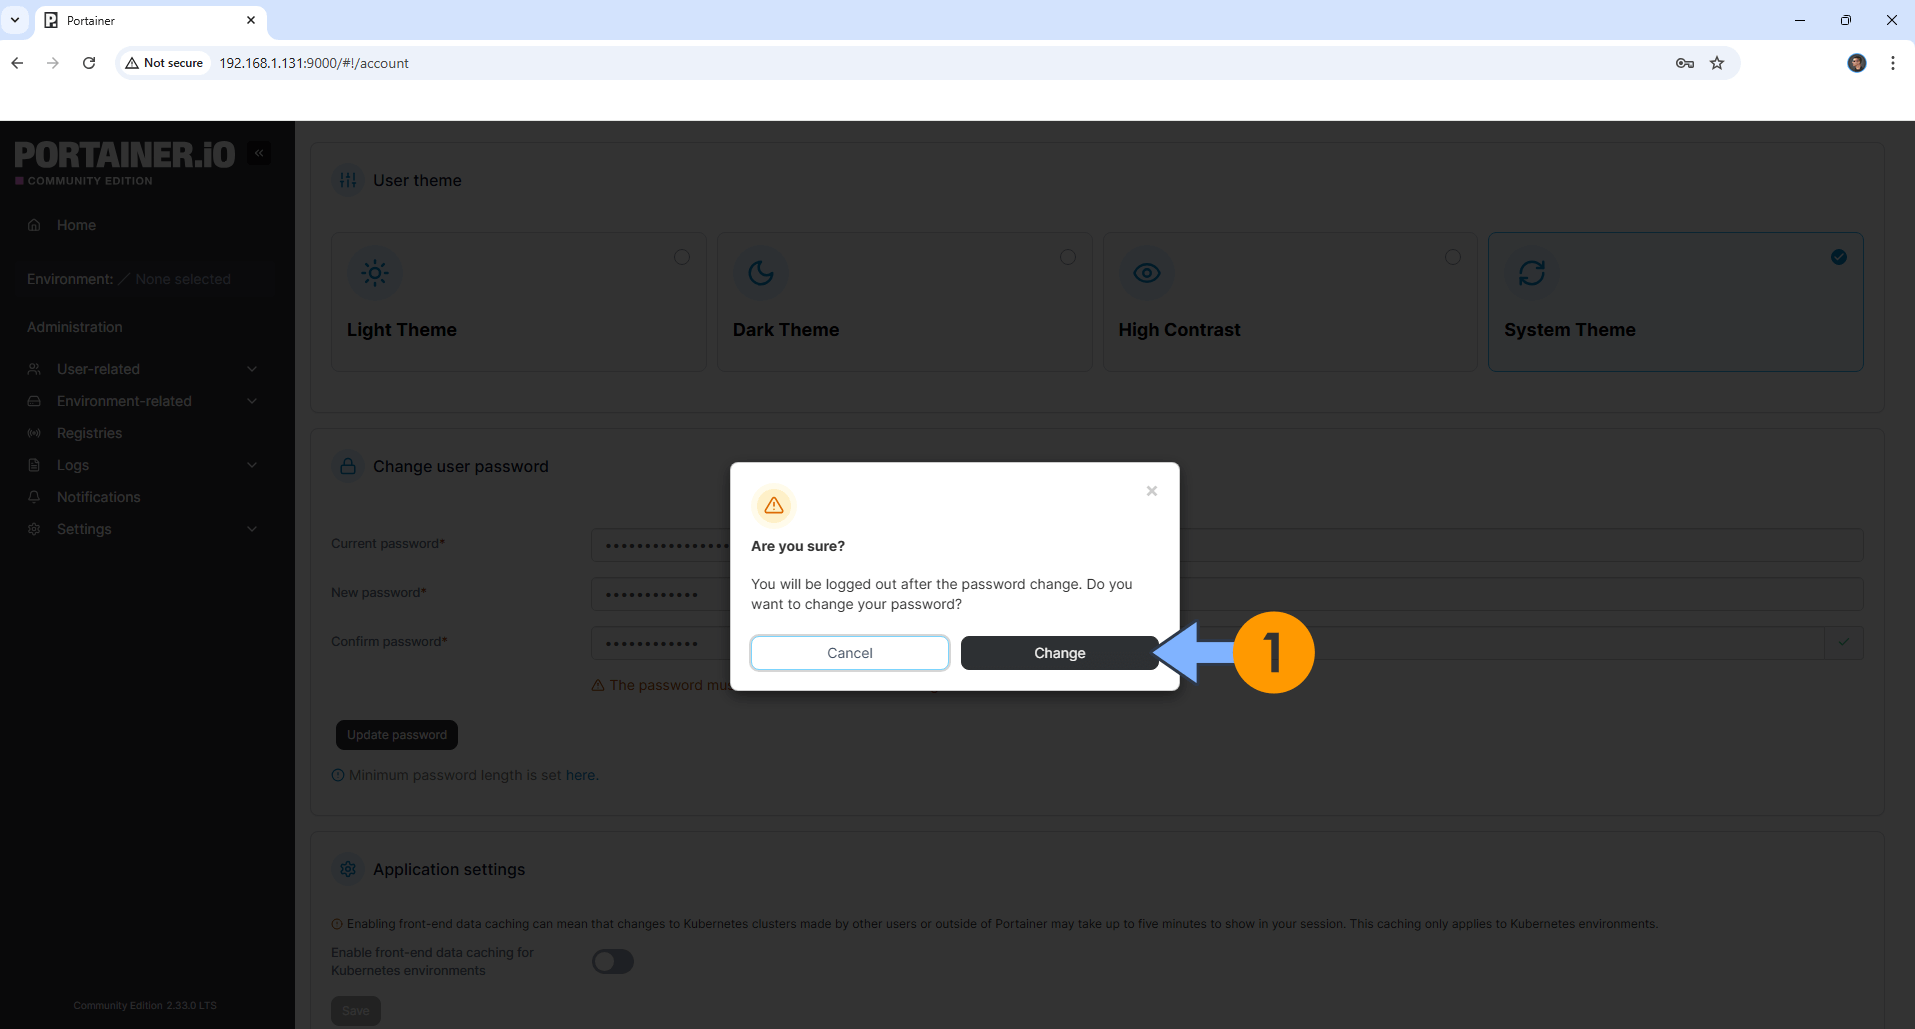
A new pop up window will open. Click Change. Follow the instructions in the image below.
STEP 16
Open Container Manager or Docker. On the left sidebar click Container. Right click on your portainer-reset instance, then click Delete.
STEP 17
Enjoy your Portainer!
This post was updated on Thursday / March 5th, 2026 at 11:11 PM