In a world where Docker containers have become the backbone of countless infrastructures, knowing what’s happening on our hosts at all times is essential. Dockhand, the modern interface for managing containers and Compose stacks in Synology, UGREEN and Asustor NAS devices, offers a very useful email notification system: available updates, unexpectedly stopped containers, health issues, discovered vulnerabilities or security-blocked updates… everything lands straight in your inbox. Enabling email notifications is one of those small tweaks that takes just a few minutes, but saves you a ton of manual checks over time and lets you react immediately when something goes wrong. Let’s see together with your Internet friend Marius how to set it up quickly and easily.
STEP 1
🟢Please Support My work by Making a Donation. Almost 99,9% of the people that install something using my guides forget to support my work, or just ignore STEP 1. I’ve been very honest about this aspect of my work since the beginning: I don’t run any ADS, I don’t require subscriptions, paid or otherwise, I don’t collect IPs, emails, and I don’t have any referral links from Amazon or other merchants. I also don’t have any POP-UPs or COOKIES. I have repeatedly been told over the years how much I have contributed to the community. It’s something I love doing and have been honest about my passion since the beginning. But I also Need The Community to Support me Back to be able to continue doing this work.
STEP 2
Install Dockhand using my Docker Guide. If you already have Dockhand installed on your Synology NAS or UGREEN NAS or Asustor NAS, skip this STEP.
STEP 3
⚠️Mandatory: Follow my step by step guide on how to activate SMTP for your Gmail account.
STEP 4
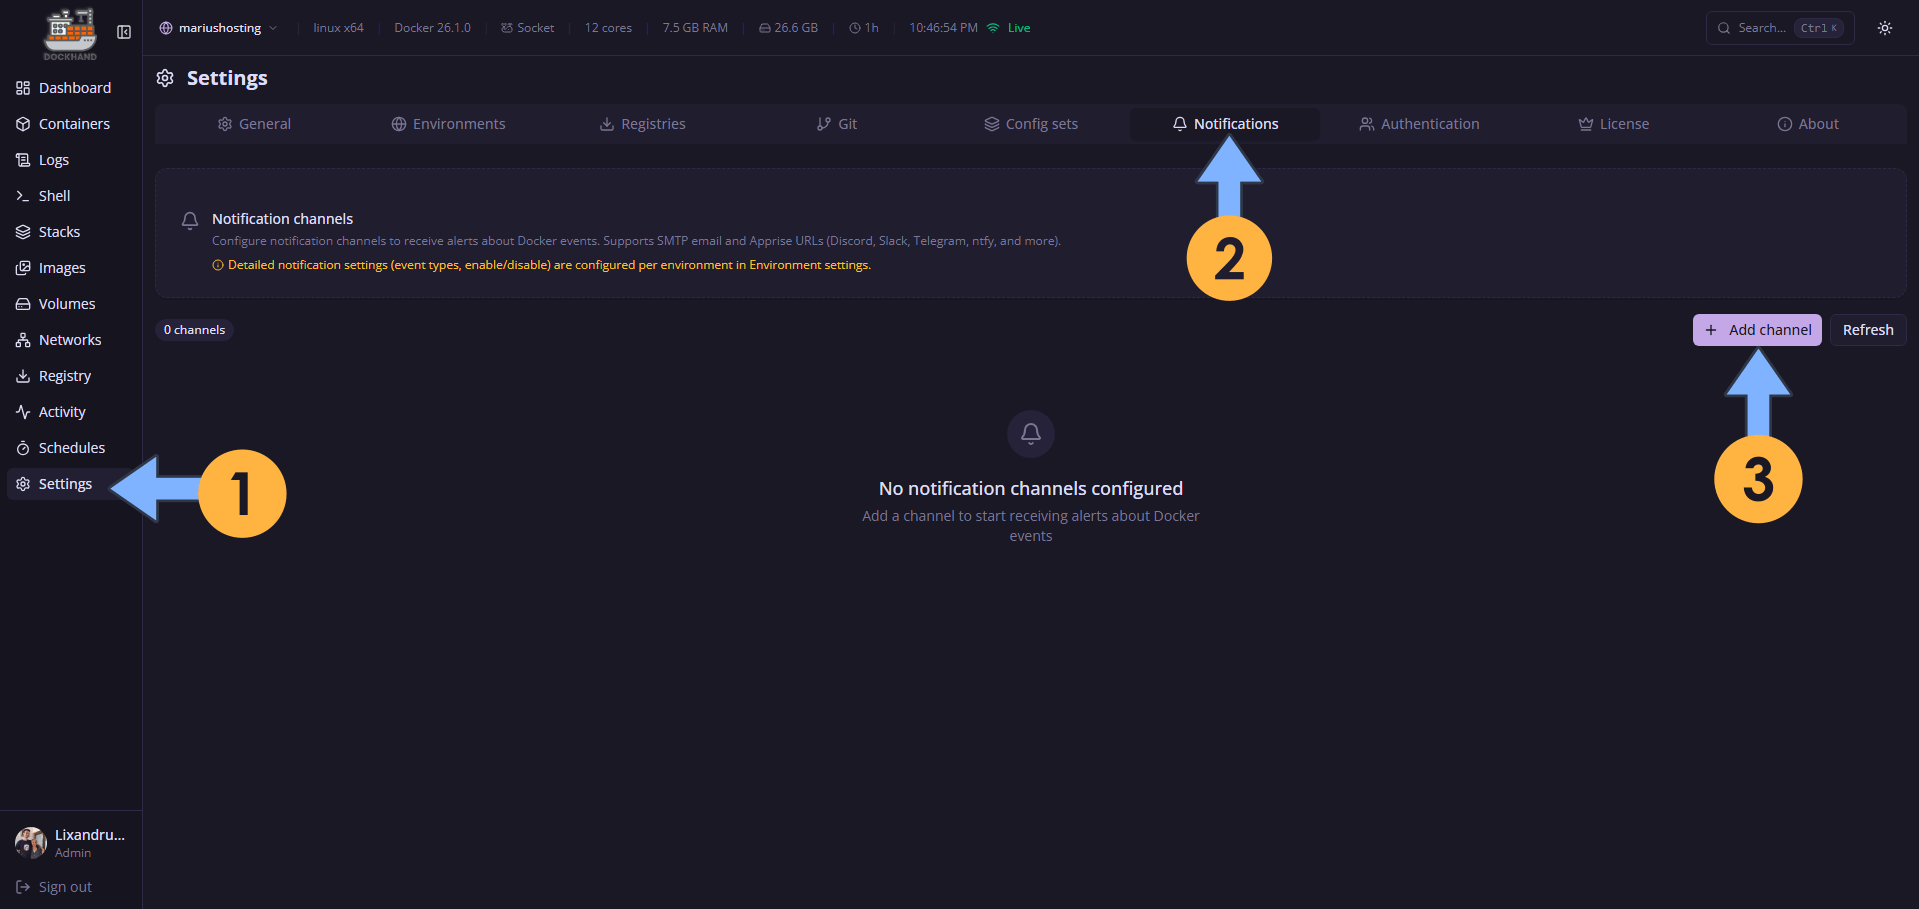
Open your Dockhand instance. On the left sidebar, click Settings. Click the Notifications tab. Click + Add channel. Follow the instructions in the image below.
STEP 5
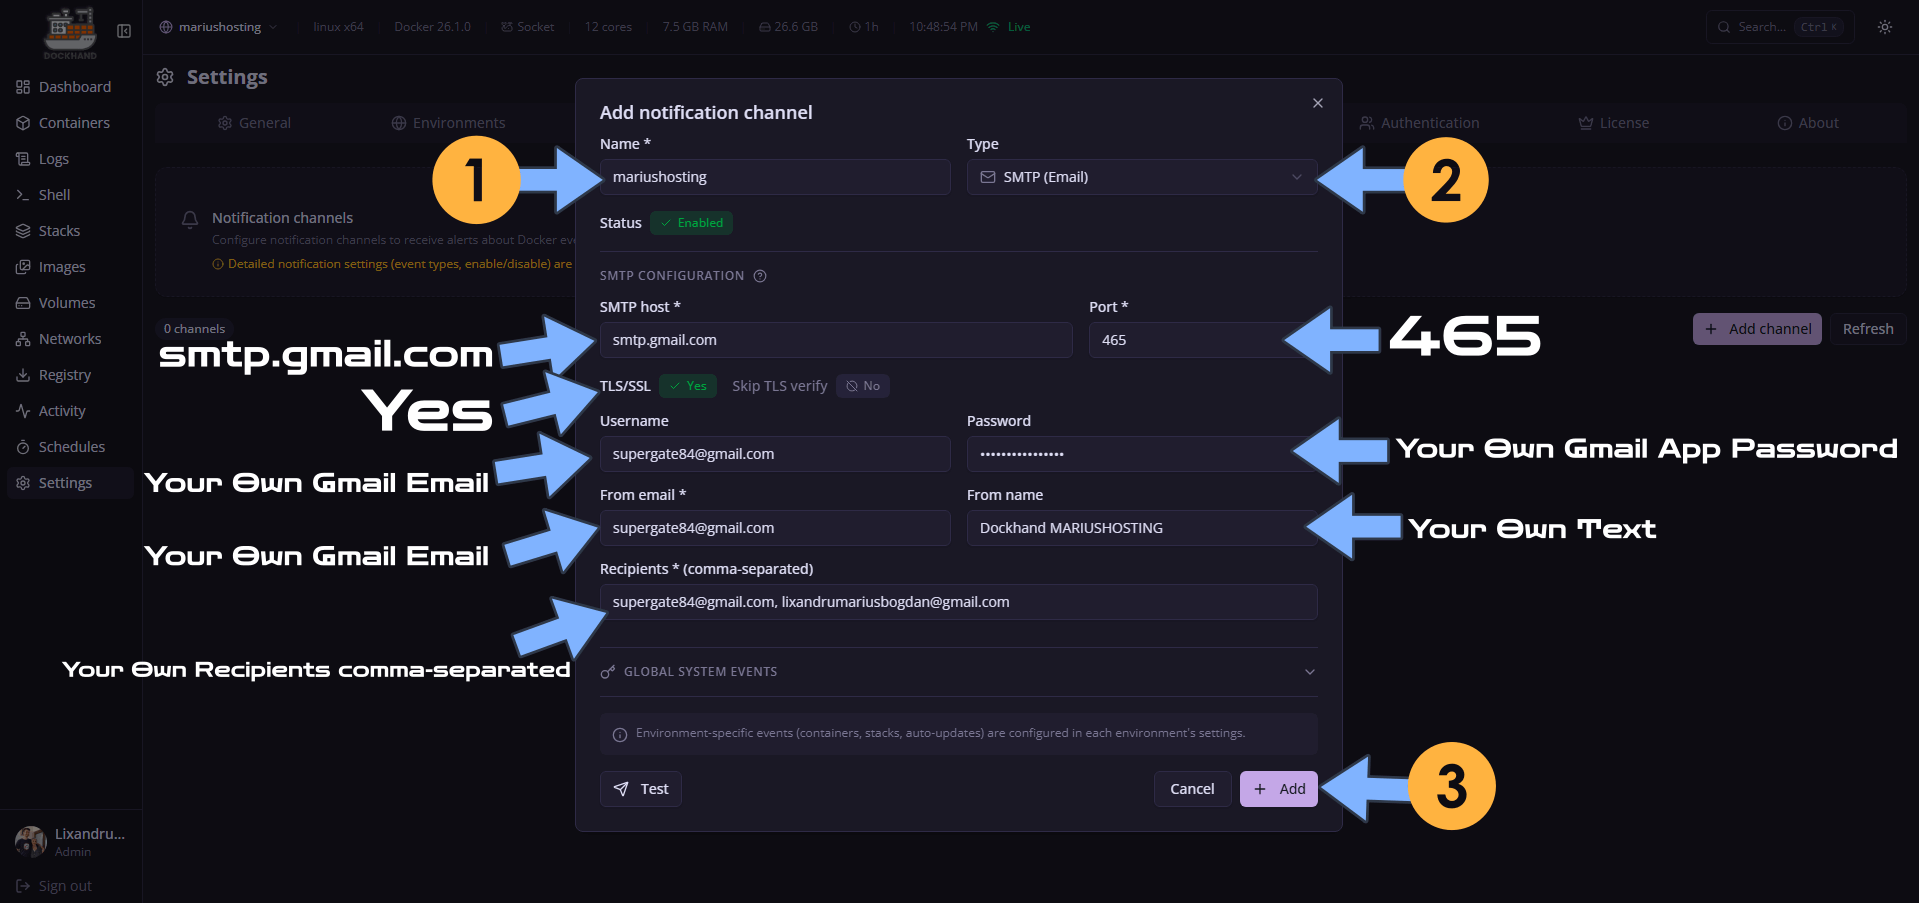
Add a name to your Notification channel, then select SMTP (Email).
Add the details below:
SMTP CONFIGURATION
SMTP host: smtp.gmail.com
Port: 465
TLS/SSL: Yes
Username: Type in your own Gmail address / STEP 3.
Password: Type in your own Gmail App Password / STEP 3. ⚠️Warning: Do NOT confuse your Gmail password with the APP Password that you have previously created at STEP 3. They are two different things. In this case you should use the APP Password, the one you have created at STEP 3.
From Email: Type in your own Gmail address / STEP 3.
From Name: Invent a name/text.
Recipients: Your own recipients, comma-separated, plus a space. Follow the image below.
Click + Add. Follow the instructions in the image below.
STEP 6
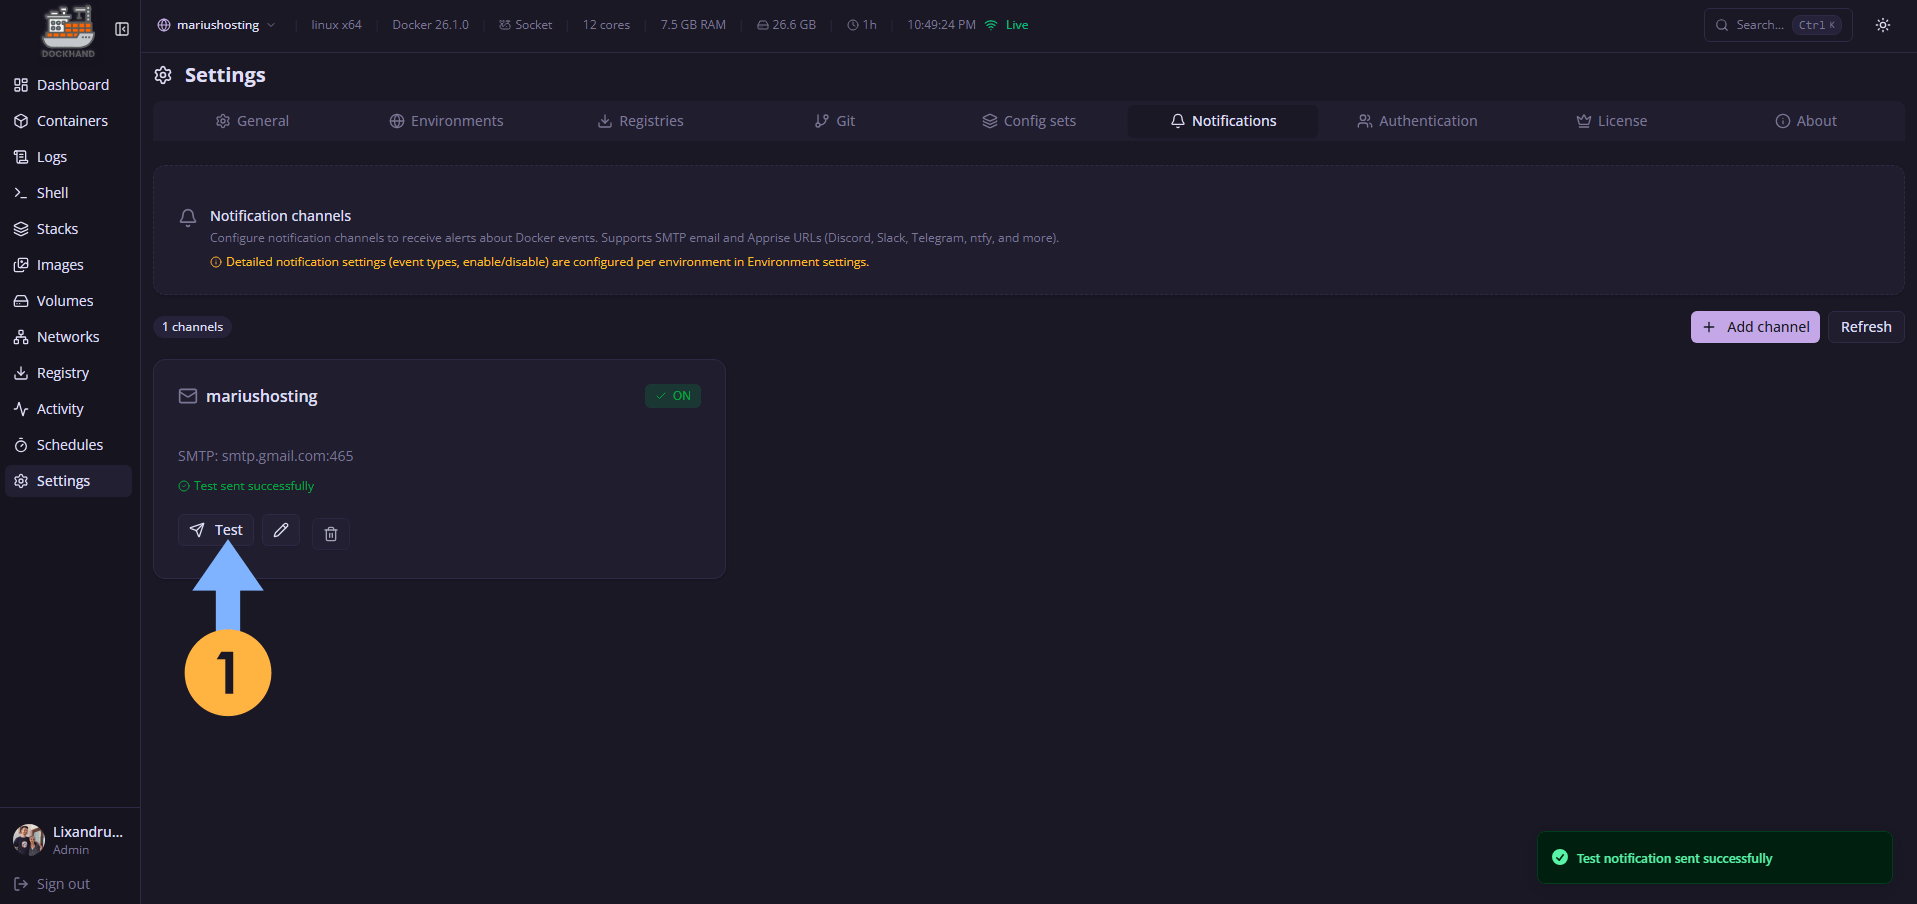
Click Test to test your channel settings. Follow the instructions in the image below.
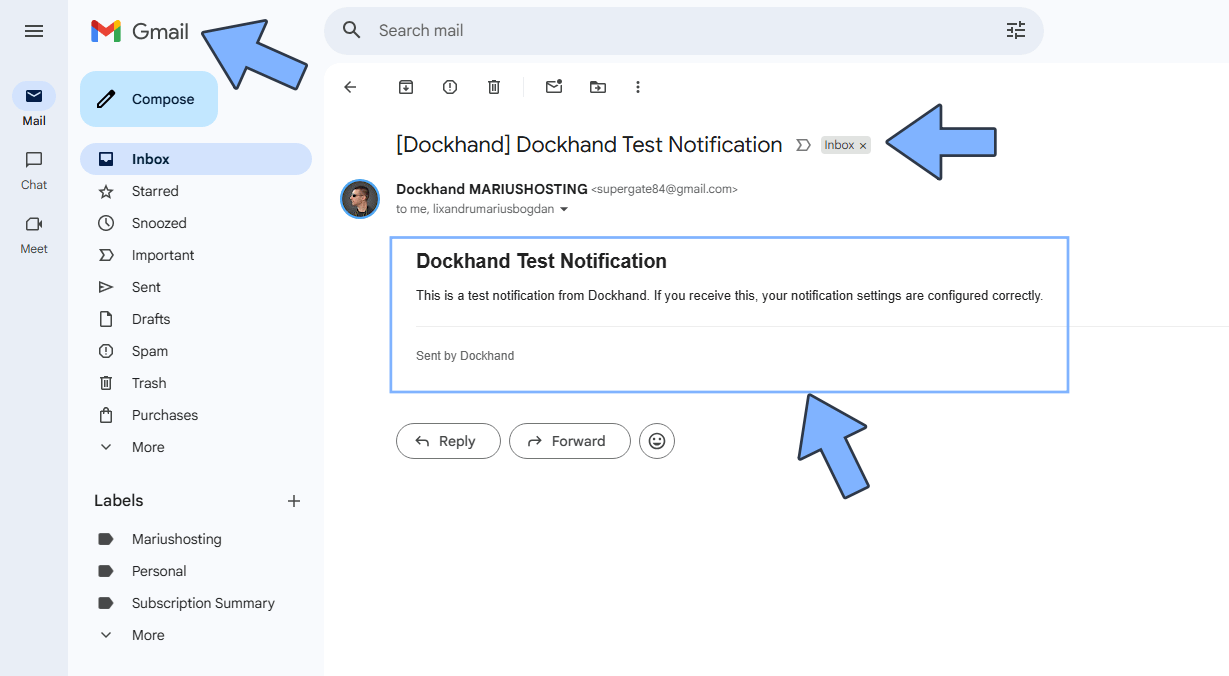
STEP 7
Check your Email!
This post was updated on Monday / April 6th, 2026 at 12:14 AM