
Starting from version v1.104.0, Immich introduced the possibility to set up email notifications. Have you already installed Immich on your Synology NAS or UGREEN NAS? If yes, I have finally come about to writing an article on how to set up Gmail notifications on Immich so you can now enjoy it to its full potential. See the details below.
STEP 1
Please Support My work by Making a Donation.
STEP 2
Install Immich using my Docker Guide For Synology NAS or UGREEN NAS. If you already have Immich installed on your Synology NAS or UGREEN NAS skip this STEP.
STEP 3
Follow my step by step guide on how to activate SMTP for your Gmail account.
STEP 4
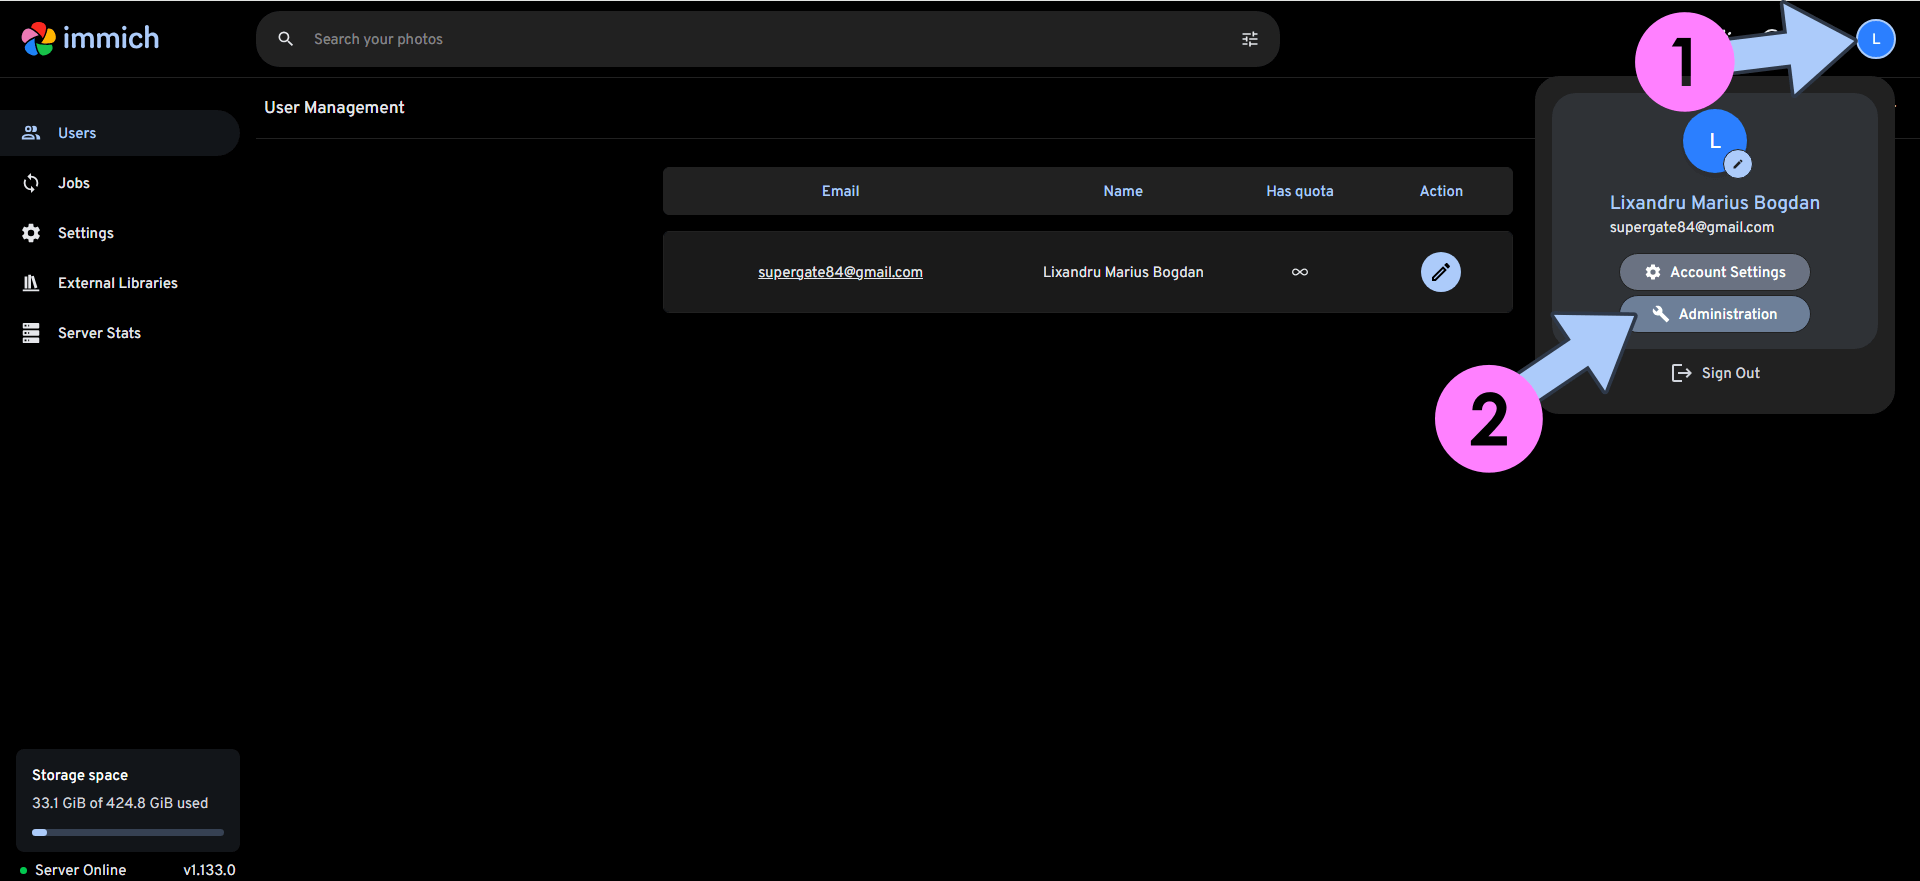
At the top right of the page, click on the user icon then Administration. Follow the instructions in the image below.
STEP 5
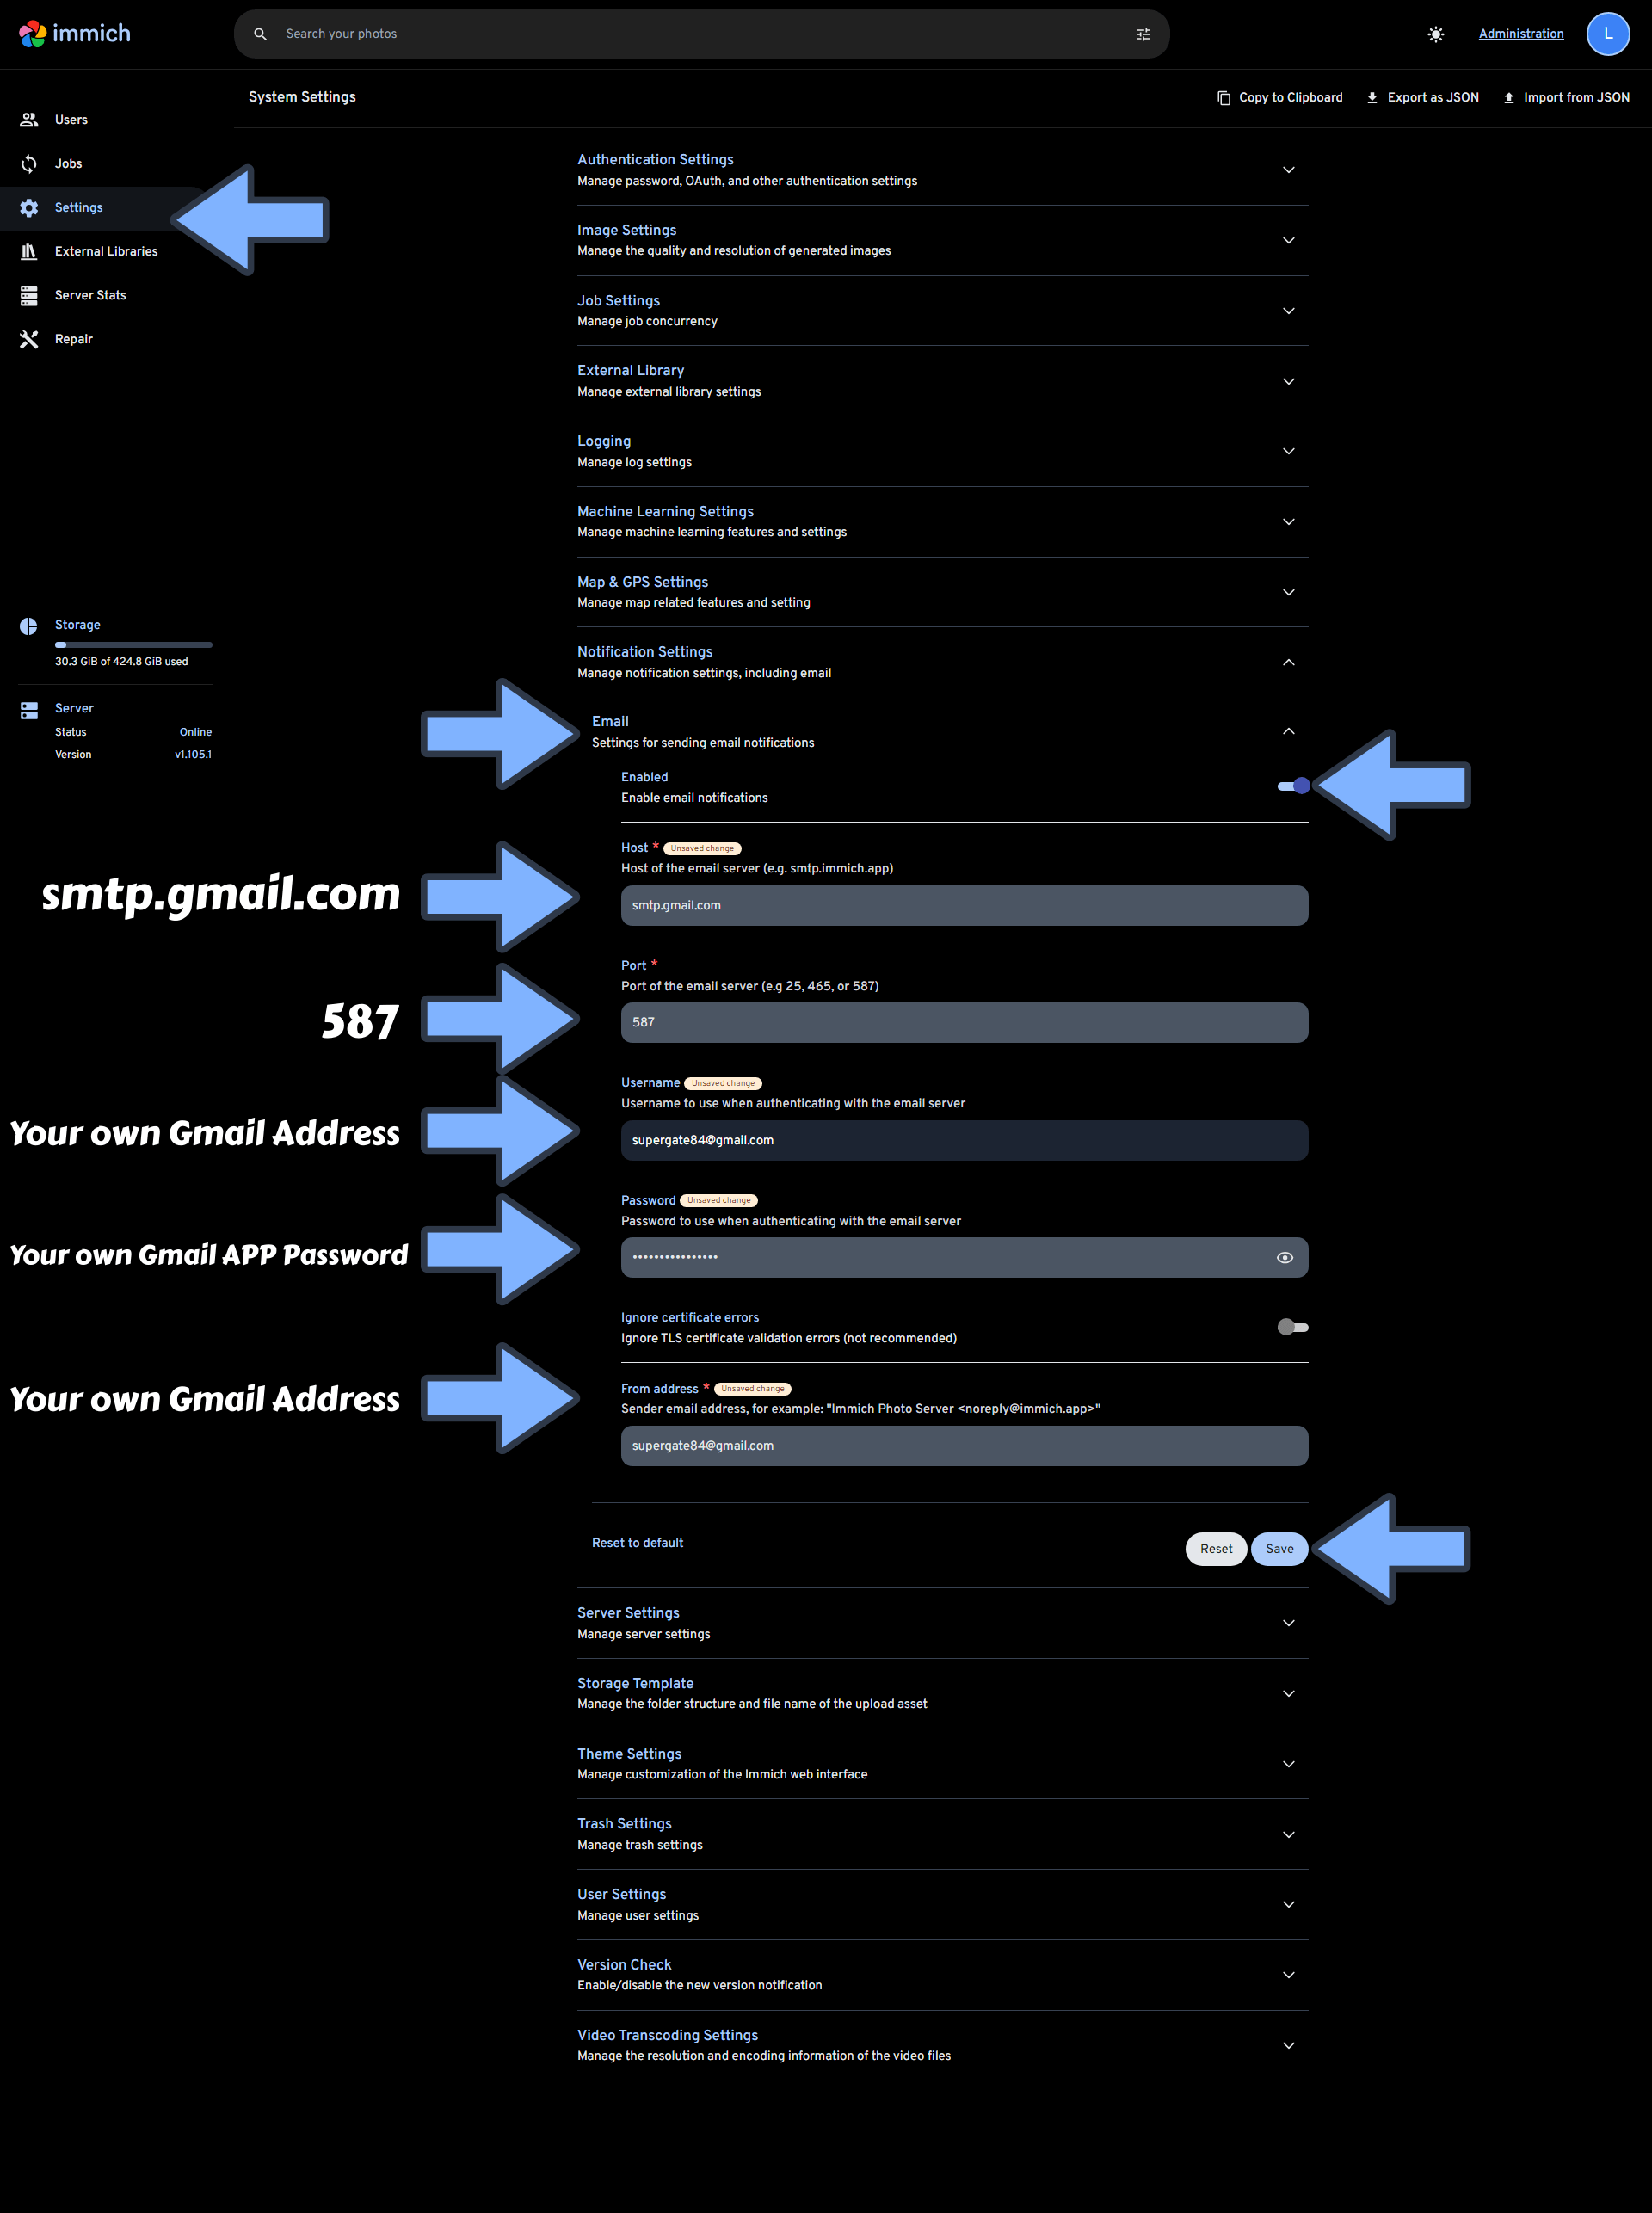
Once you are logged into your Immich instance, click Settings on the left sidebar. Follow the instructions in the image below.
Scroll down the page until you find the Email settings, then check Enable email notifications. Add the details below.
Host: smtp.gmail.com
Port: 587
Username: Type in your own Gmail address.
Password: Type in your own Gmail App Password / STEP 3
From Address: Type in your own Gmail address.
Click Save.
STEP 6
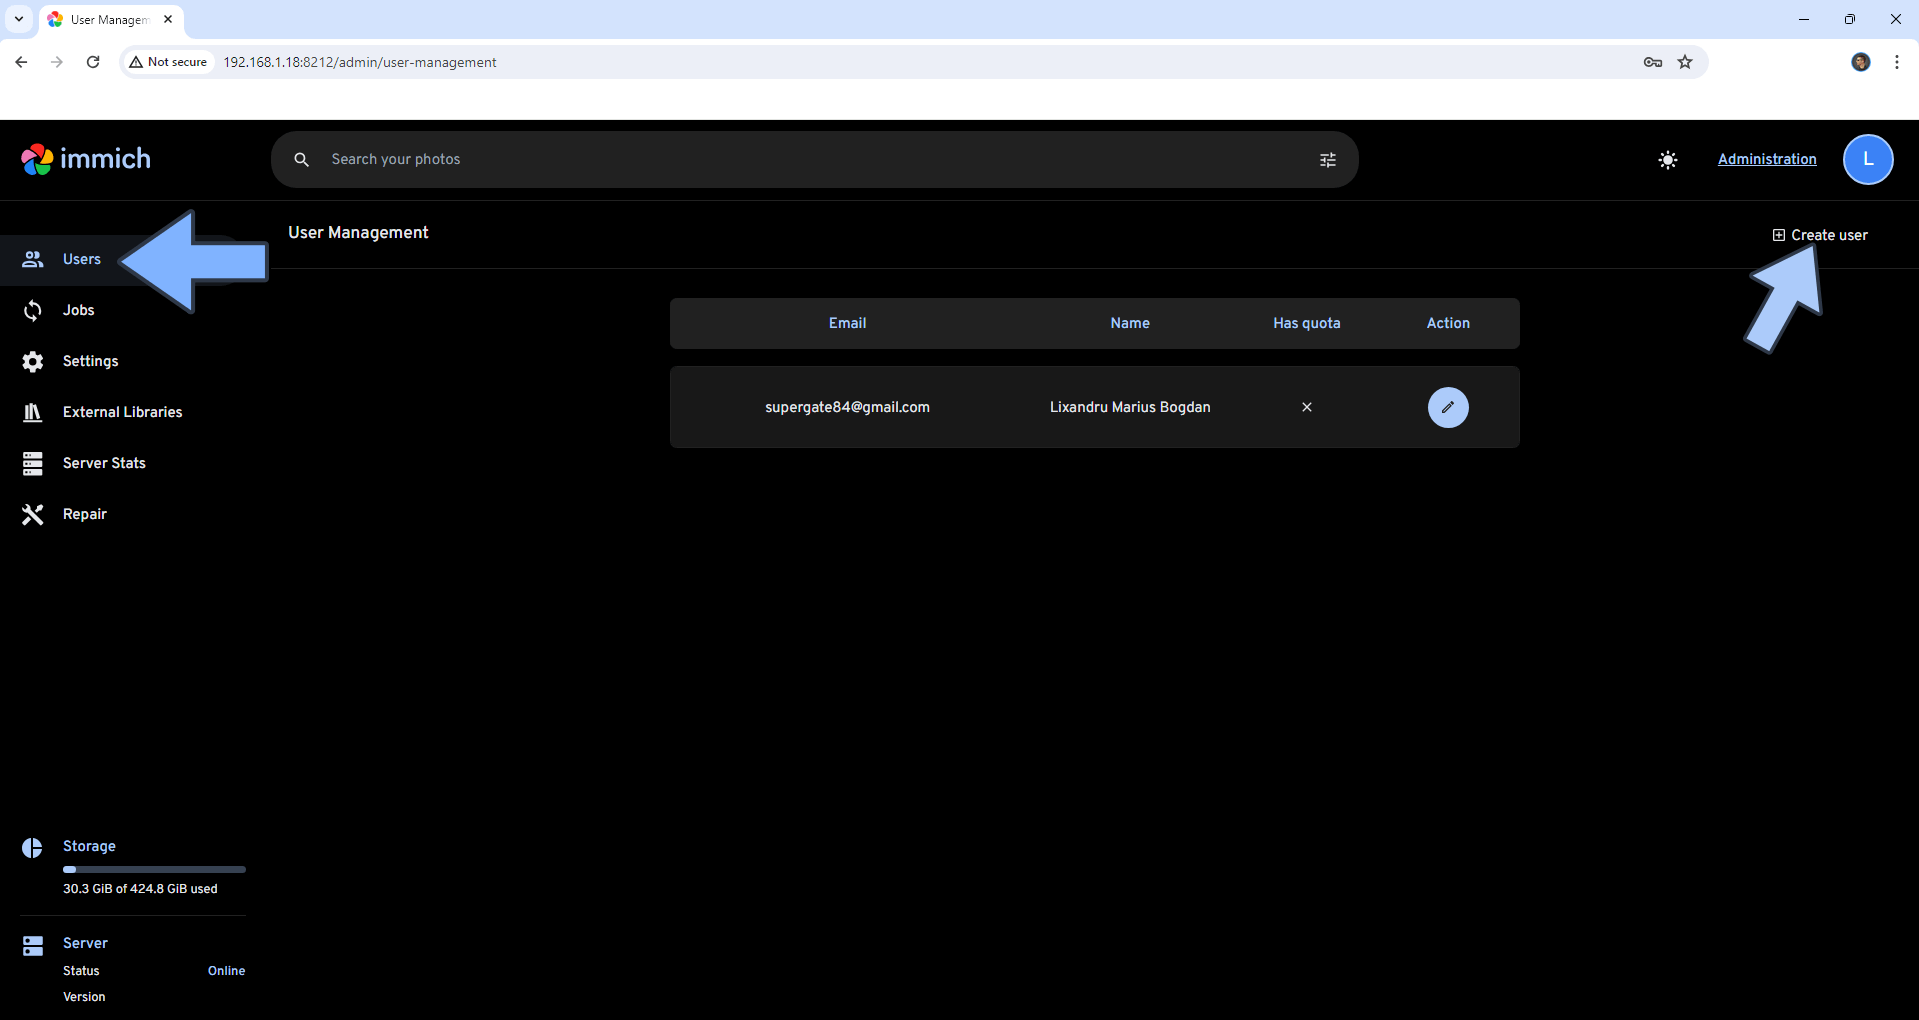
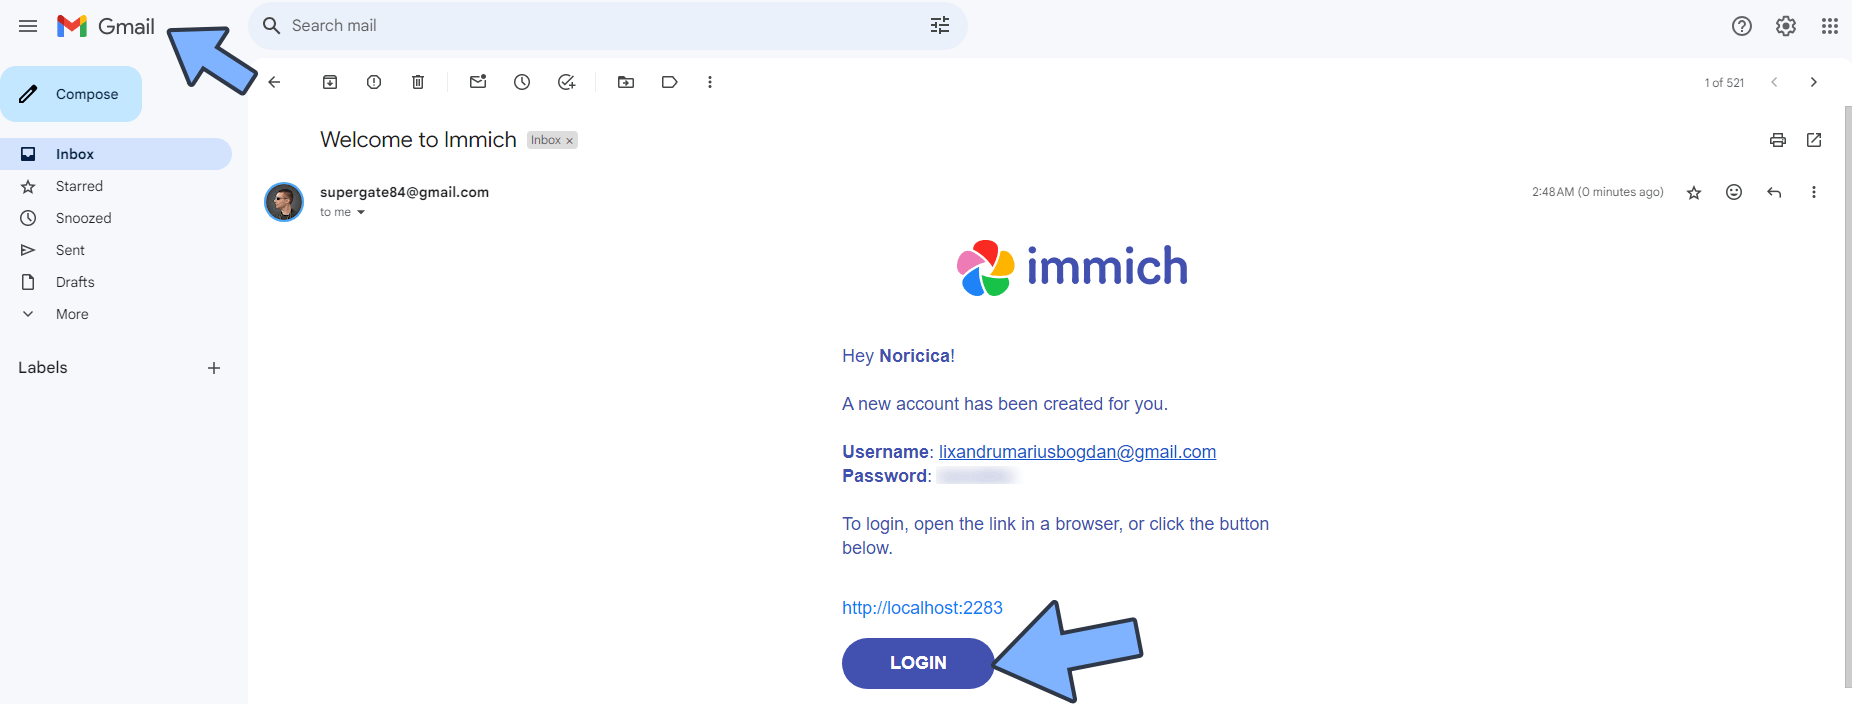
Check if the Email Notifications work. On the Immich left sidebar, click Users then Create user. Follow the instructions in the image below.
STEP 7
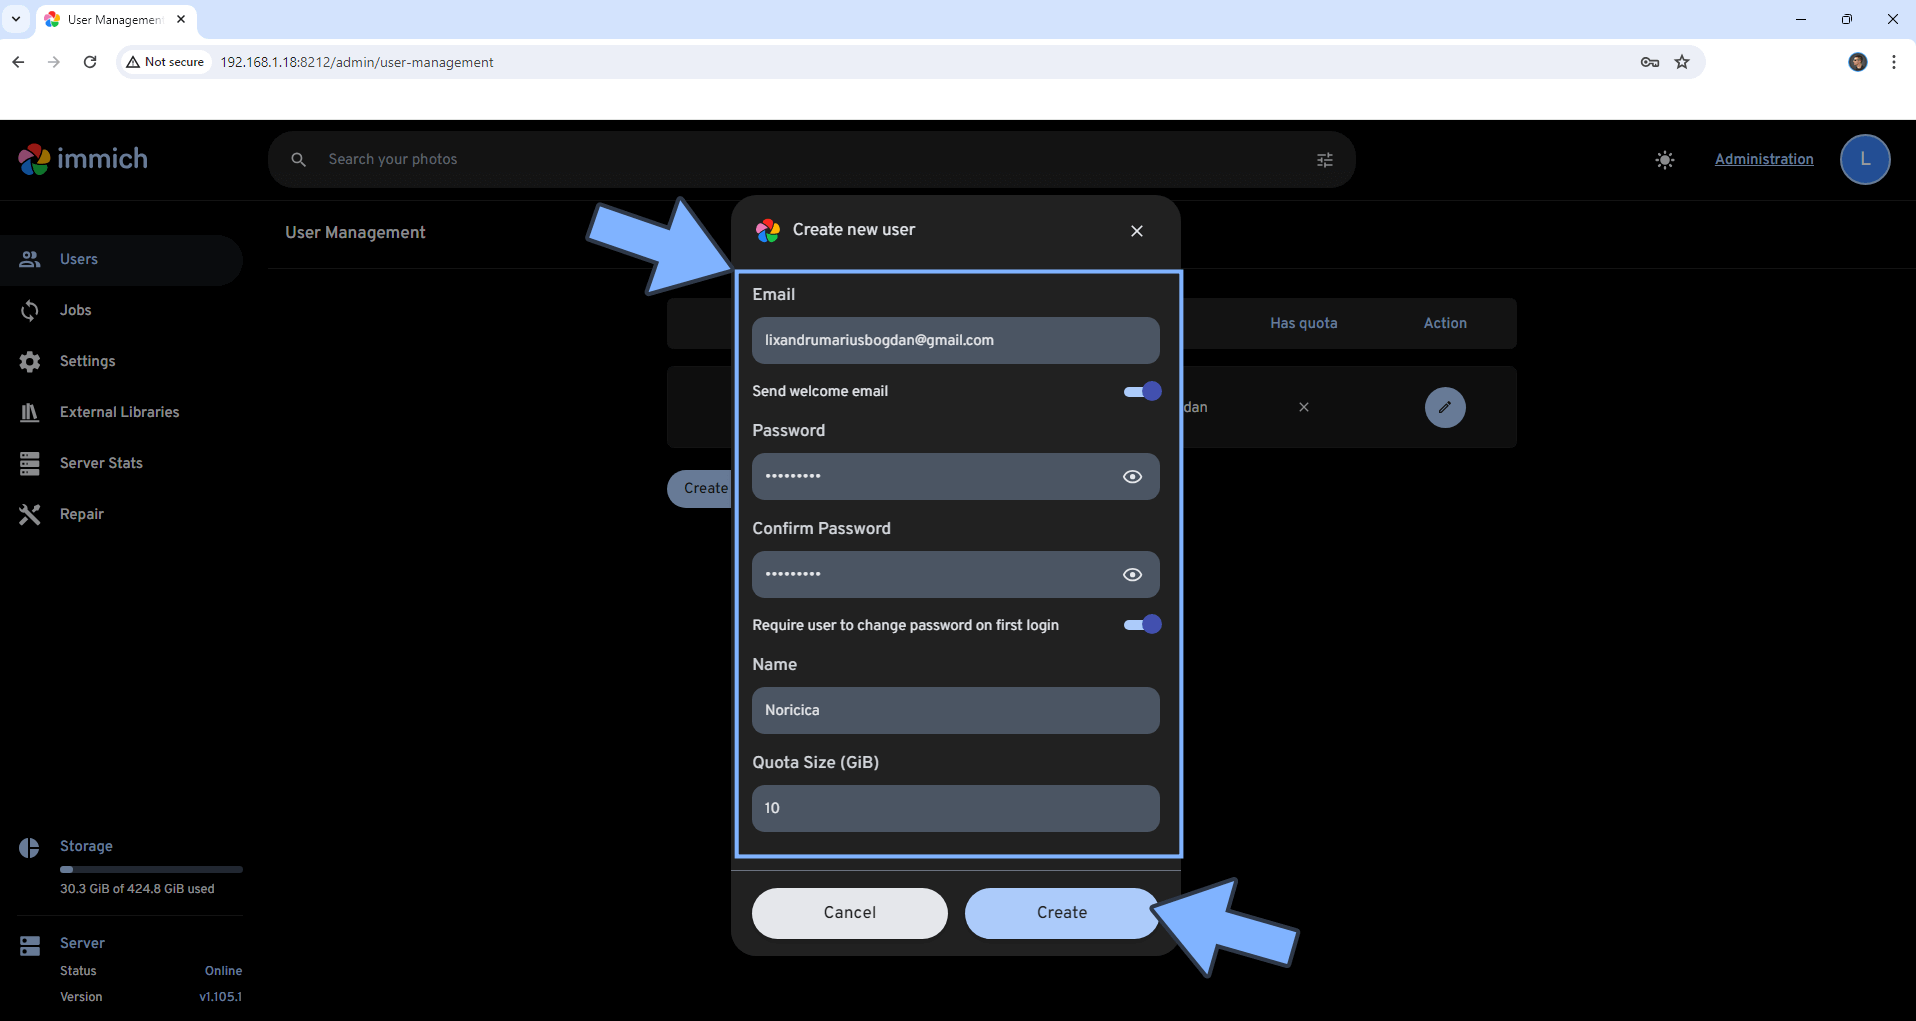
Create a new user account and remember to select the “Send welcome email” option. Follow the instructions in the image below.
STEP 8
Enjoy Immich with Email Notifications!
STEP 8
If you want to create users in Immich and give theme separate access with different storage quota, you need to activate Reverse Proxy to empower your Immich instance with HTTPS and make it reachable via the Internet.
This post was updated on Thursday / May 22nd, 2025 at 8:35 AM