Do you usually connect to your Synology NAS using a local IP like 192.168.0.122:5000? Did you know you can actually connect to your NAS through your browser using yourNASname.local instead of a numeric local IP like 192.168.0.122:5000? What is hostname? A hostname is a Server Name label that is assigned to a Synology NAS connected to a computer network and that is used to identify the NAS itself. In this step by step guide I will teach you how to add .local at the end of your Synology NAS hostname.
STEP 1
Please Support My work by Making a Donation.
STEP 2
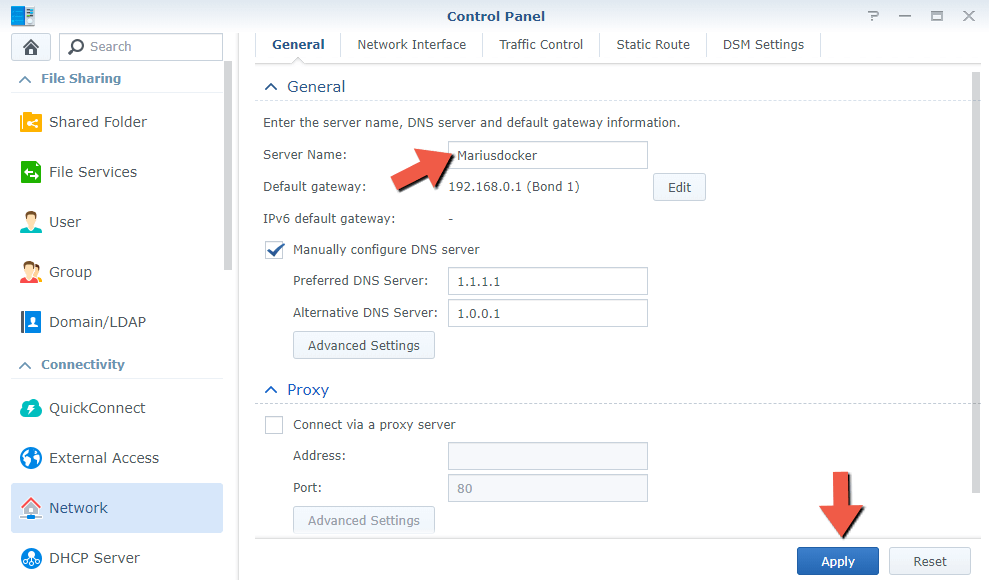
Go to Control Panel / Network / General / and on “Server Name” name your NAS, then click Apply. Follow the instructions in the image below.
STEP 3
As you can see in the screenshot above provided on STEP 2, I have set my Server Name to Mariusdocker.
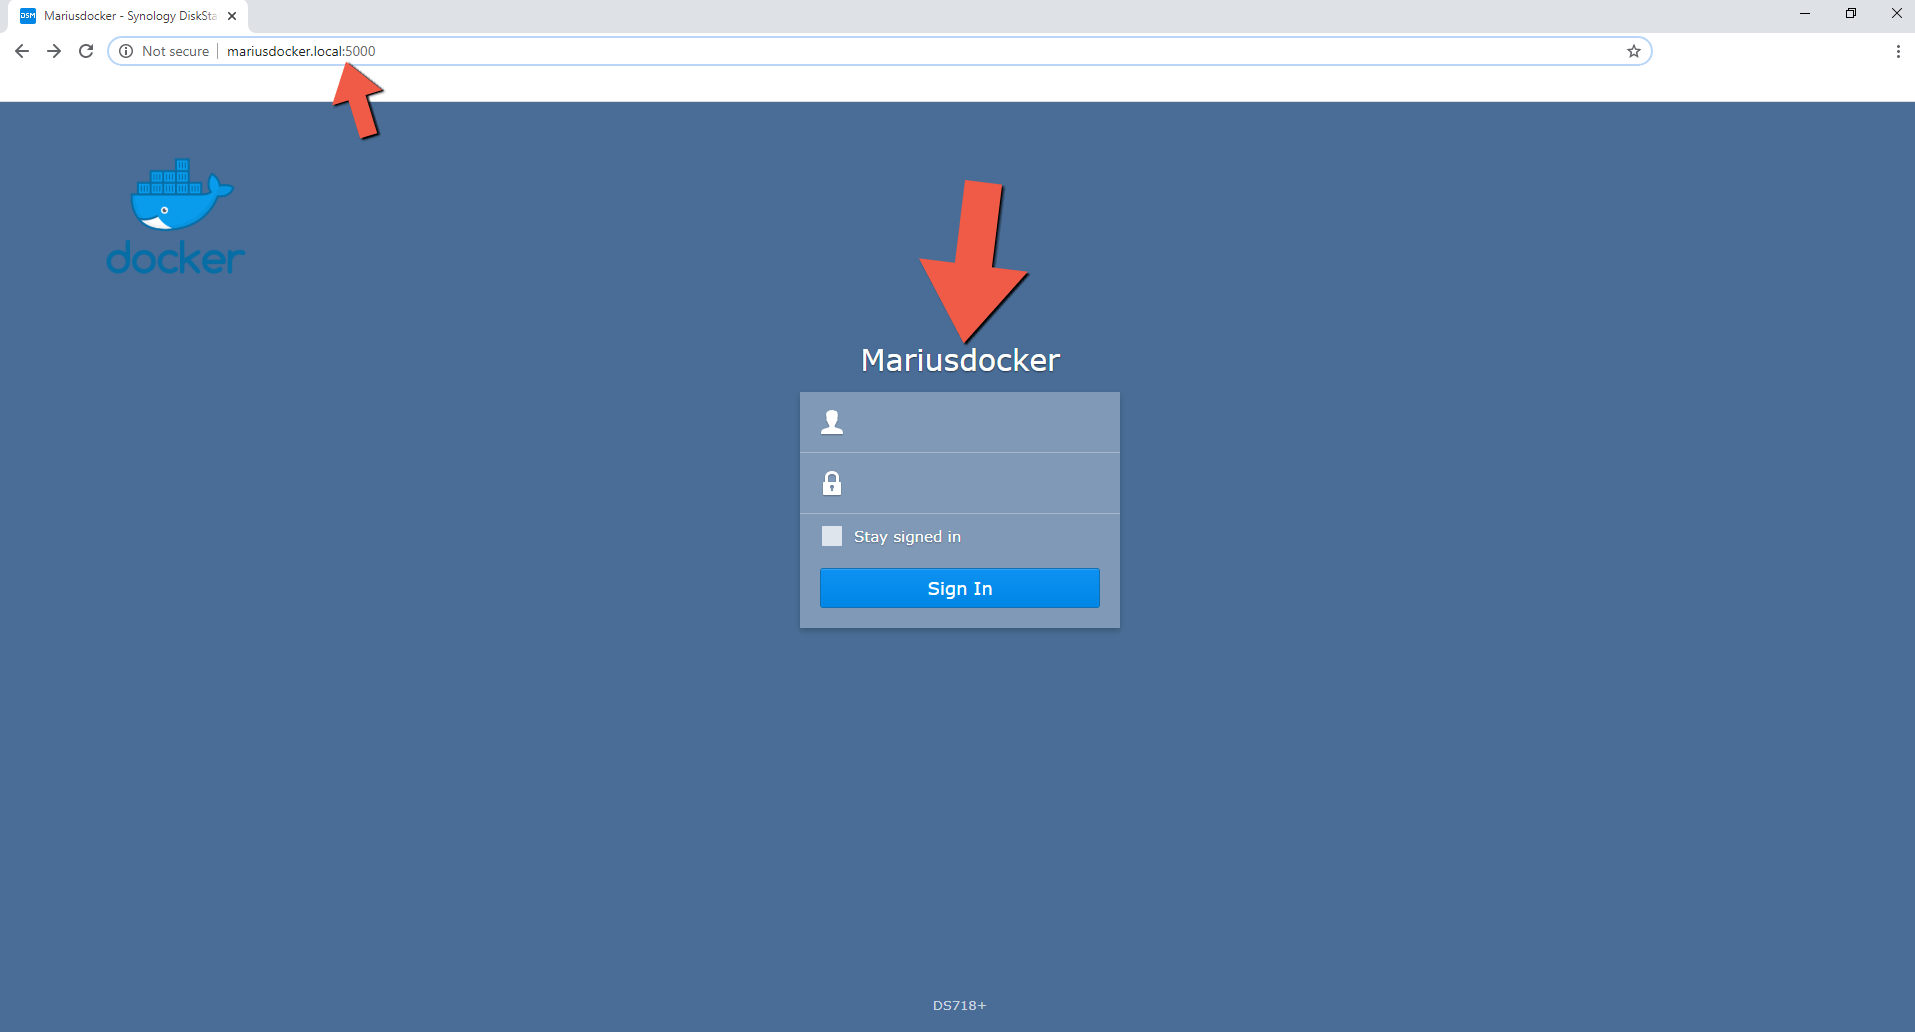
Now open your browser then type in http://mariusdocker.local:5000
As you can see in the image below, you will be able to see your DSM login homepage.
Note: In the browser address bar, instead of Mariusdocker, you have to type in the name you gave your NAS, as in http://yourNASname.local:5000
STEP 4
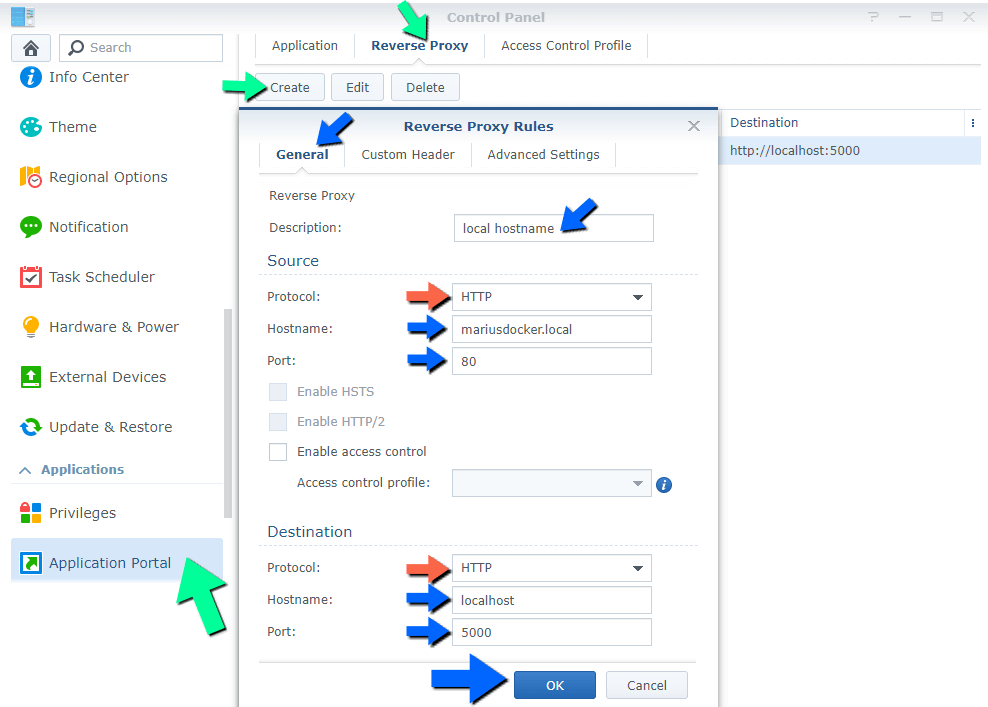
If you want to get rid of the :5000 at the end of .local and access your NAS just using http://yourNASname.local, you need to use Reverse proxy.
Go to Control Panel / Application Portal / Reverse Proxy / click on Create then add the following instructions:
Description: type in local hostname or whatever you want.
Source:
Protocol: HTTP
Hostname: yourNASname.local
Port: 80
Destination:
Protocol: HTTP
Hostname: localhost
Port: 5000
After that, click OK.
STEP 5
Now open your browser, then type in http://mariusdocker.local
As you can see in the image below, you will be able to see your DSM login homepage.
Note: In the browser, instead of Mariusdocker, you have to type in the name you gave your NAS, as in http://yourNASname.local

Note: The .local after the server name is actually a special internal domain name such as .com or .org – However, the difference is that .local cannot be a top level domain name so you can access it exclusively in your local network area.
Note: With this simple trick you will no longer have to remember a random sequence of numbers like 192.168.0.122, just yourNASname.local
Note: No more issues with setting static IP addresses which are susceptible to block should your network subnet change.
Note: Read How to Access synology.me Without port :5001 at the End
This post was updated on Sunday / October 24th, 2021 at 3:08 AM