Your Synology NAS has an automatic IP released by DHCP like http://192.168.0.182/ but what if you don’t like it and want to change it with http://192.168.0.100/ for example? Nothing could be simpler. Follow my easy step by step guide below.
STEP 1
Please Support My work by Making a Donation.
STEP 2
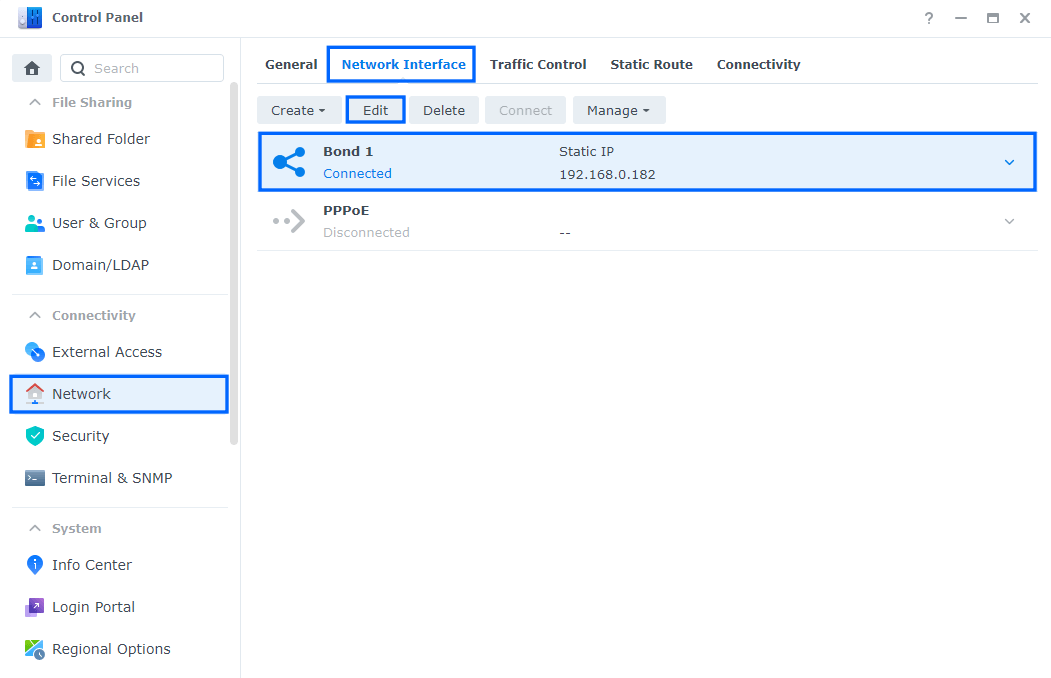
Go to Control Panel / Network / Network Interface. Select Bond 1 or Connected network then click on Edit. Follow the instructions in the image below.
STEP 3
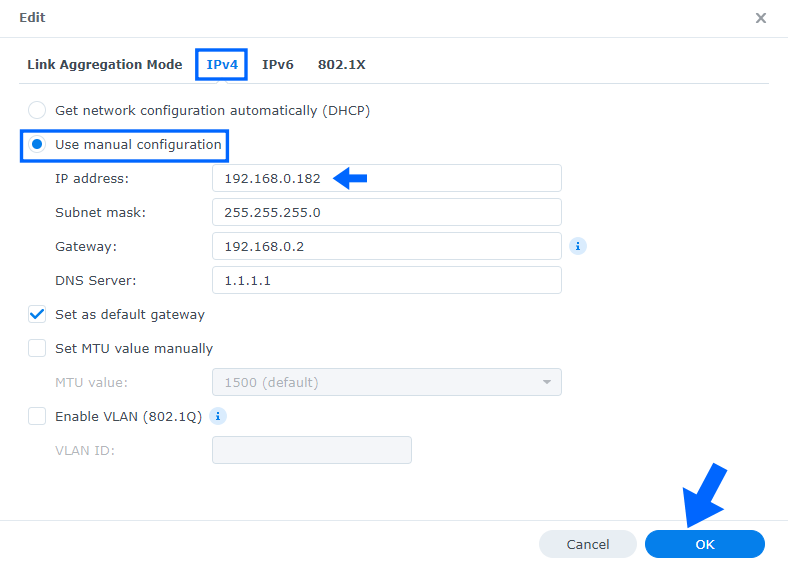
After you click Edit, the window below will open. Click on IPv4 and check “Use manual configuration“. On the IP address area type your favorite local IP address then press OK to save the settings. From now on your NAS will use the new IP instead of the one assigned to it automatically by DHCP. Follow the instructions in the image below.
What is DHCP?
DHCP stands for Dynamic Host Configuration Protocol and is a network management protocol used to automate the process of configuring devices on IP networks, thus allowing them to use network services such as DNS, NTP, and any communication protocol based on UDP or TCP.
Note: Pay attention to the local IP address you choose for you Synology NAS device. Make sure it’s not already being used by another device in your local network area. Each device in your local network area should have a unique IP address.
This post was updated on Thursday / February 18th, 2021 at 10:02 AM