Did you know that you can use an SSL certificate and connect to your Synology WRX560 router via HTTPS? In today’s article I will show you how to connect to your Synology router in HTTPS and see your browser address bar with the green padlock. The procedure that allows you to connect to your SRM Synology WRX560 router over a secure SSL connection is similar to the one for the NAS.
STEP 1
Please Support My work by Making a Donation.
STEP 2
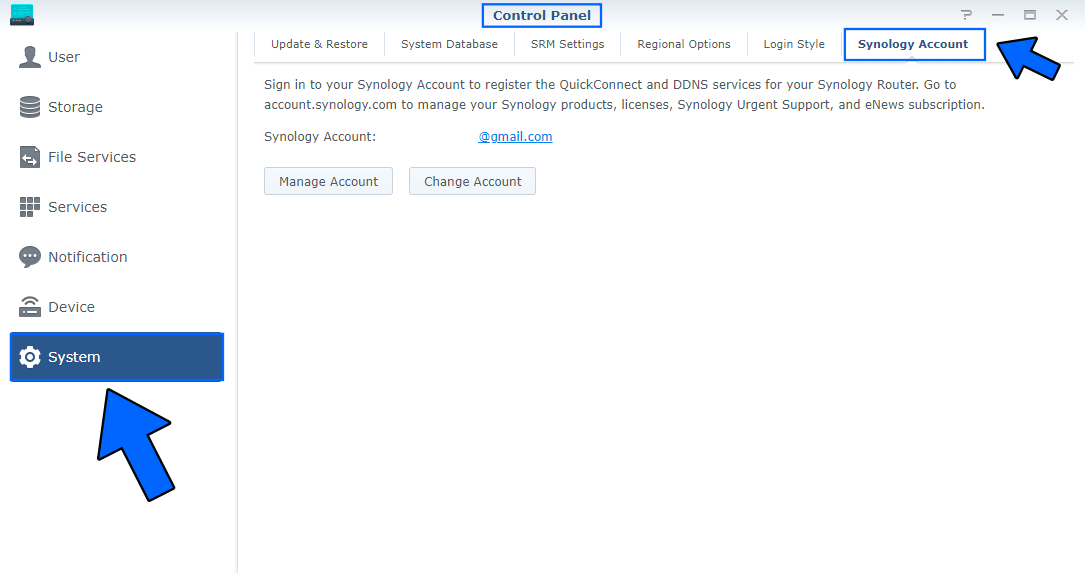
Make sure you have paired your SRM operating system to your Synology Account. Go to Control Panel and connect to your Synology account.
STEP 3
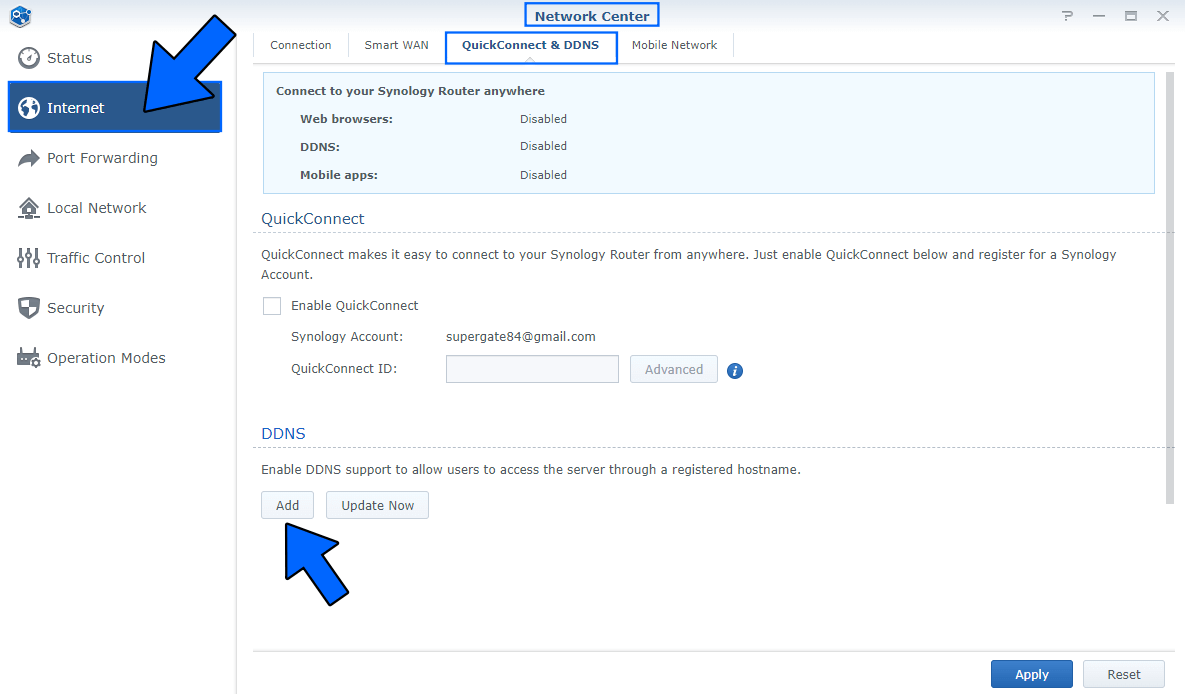
Log into your WRX560 router. Go to Network Center / Internet / QuickConnect & DDNS. Find the DDNS area, then click Add. Follow the instructions in the image below.
STEP 4
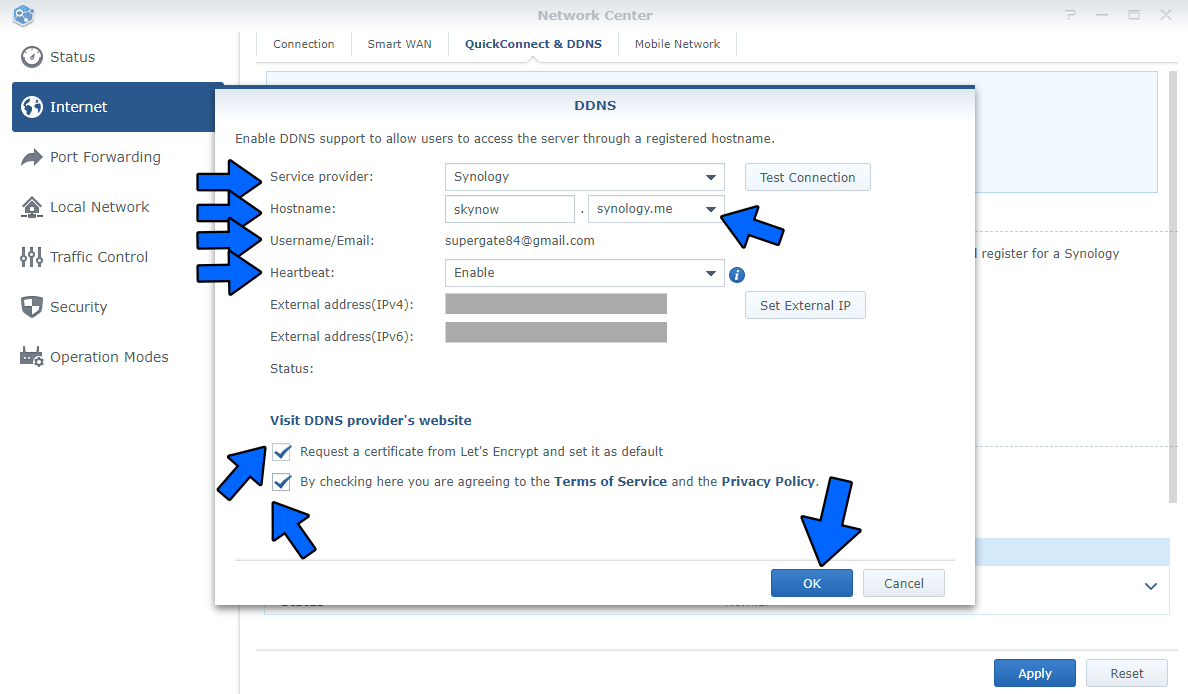
After you click Add on STEP 3, the DDNS window will open. Follow the instructions below.
- Select Synology as Service provider.
- Choose your own name in the Hostname field. As you can see in the screenshot below, I set my hostname to “skynow“.
- Add your Email.
- Enable Heartbeat.
- Check “Request a certificate from Let’s Encrypt and set it as default”.
- Check “By checking here you are agreeing to the Terms of Service and the Privacy Policy”.
- Click OK.
STEP 5
If everything goes right, you will see your own DDNS domain name in the DDNS area with a “Normal” green Status.

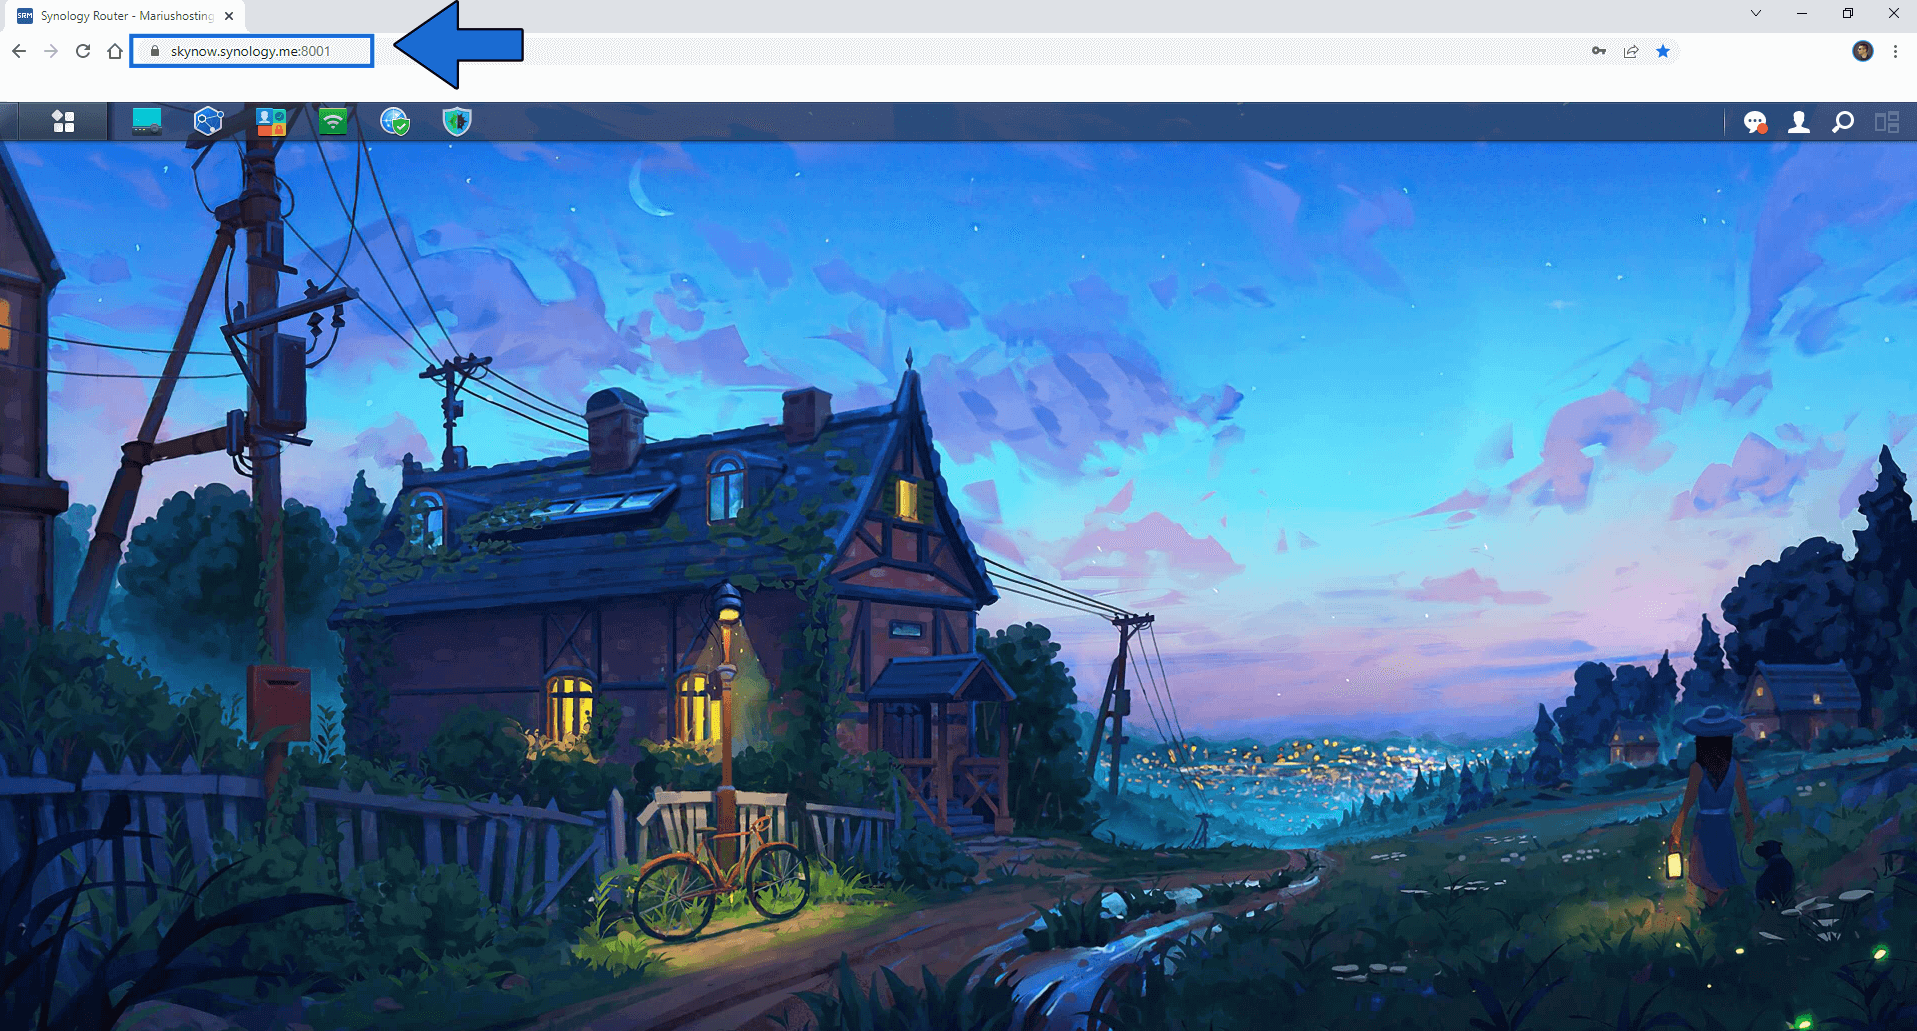
STEP 6
Now open your browser and type in https://yourownhostname.synology.me:8001 Log in using your username and password. Follow the instructions in the image below.
STEP 7
🟢Please Support My work by Making a Donation. Almost 99,9% of the people that install something using my guides forget to support my work, or just ignore STEP 1. I’ve been very honest about this aspect of my work since the beginning: I don’t run any ADS, I don’t require subscriptions, paid or otherwise, I don’t collect IPs, emails, and I don’t have any referral links from Amazon or other merchants. I also don’t have any POP-UPs or COOKIES. I have repeatedly been told over the years how much I have contributed to the community. It’s something I love doing and have been honest about my passion since the beginning. But I also Need The Community to Support me Back to be able to continue doing this work.
STEP 8
With the settings described above you can connect to your Synology router from your home or from your local network in HTTPS using your own SSL certificate. You will not be able to access your router if you connect from an external IP such as from the Wi-Fi of a pizza place or from your friend’s house. To allow you to connect to your WRX560 router in HTTPS / SSL when you are not at home, you must activate the following option described below. Note: I don’t keep this option below active; I only use it if I have to go away from home for 2 or 3 days, just in case I need to have full access to my WRX560router.
Log in to your WRX560 router. Go to Control Panel / System / SRM Settings / Check “Allow external access to SRM” then click OK. Follow the instructions in the image below.

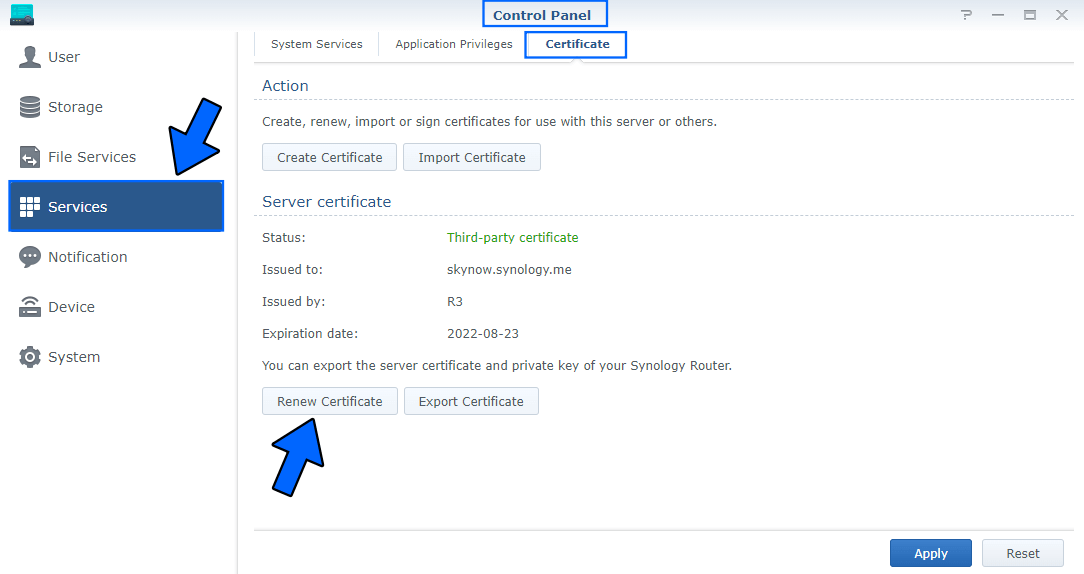
STEP 9
The SSL certificate released for free by Let’s Encrypt has a lifespan of 3 months starting from the day of its activation. To renew the SSL certificate of your custom DDNS you will need to follow the steps described below.
Log in to your WRX560 router. Go to Control Panel / Services / Certificate. On the Server certificate area click Renew Certificate. Your certificate will update within a few seconds. Follow the instructions in the image below.
Note: I recommend you change your SRM Default port numbers. Use different ports, other than the default HTTP 8000 and HTTPS 8001 ports you can see in the screenshot at STEP 8.
Note: How to Connect to Your RT6600ax via HTTPS.
This post was updated on Sunday / August 24th, 2025 at 2:25 PM