Did you know you can backup your NAS using another NAS in the same network area or in a totally different location? Let’s assume you want to backup your NAS 1 at your home to your NAS 2 which is located at your parents’ house or in a different location. How would you do it? In this step by step guide I will teach you how to backup your NAS 1 to your NAS 2 or vice versa.
STEP 1
Please Support My work by Making a Donation.
STEP 2
Follow my step by step guide on how to activate your synology.me DDNS. You will need a DDNS for your NAS 2 located at your parents’ house or in a different location.
STEP 3
You can ignore STEP 2 if NAS 2 is located in the same Network Area at your home.
STEP 4 (NAS 1)
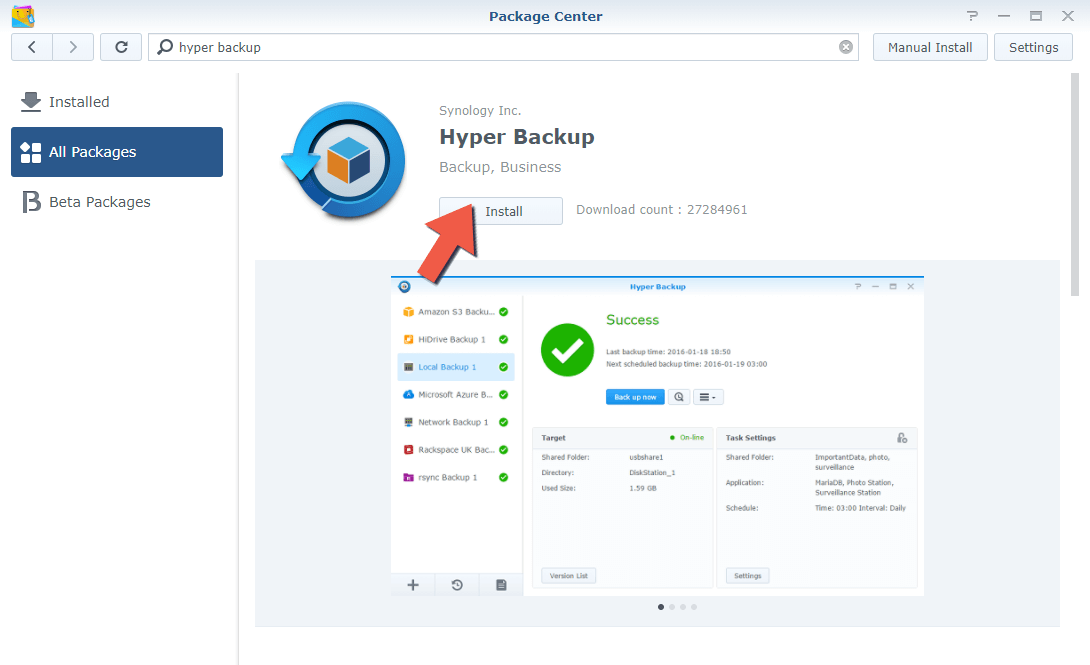
Go to Package Center and download and install the Hyper Backup Package on NAS 1. Follow the instructions in the image below.
STEP 4 (NAS 2)
Go to Package Center and download and install the Hyper Backup Vault Package on NAS 2. Follow the instructions in the image below.

STEP 5 (NAS 2)
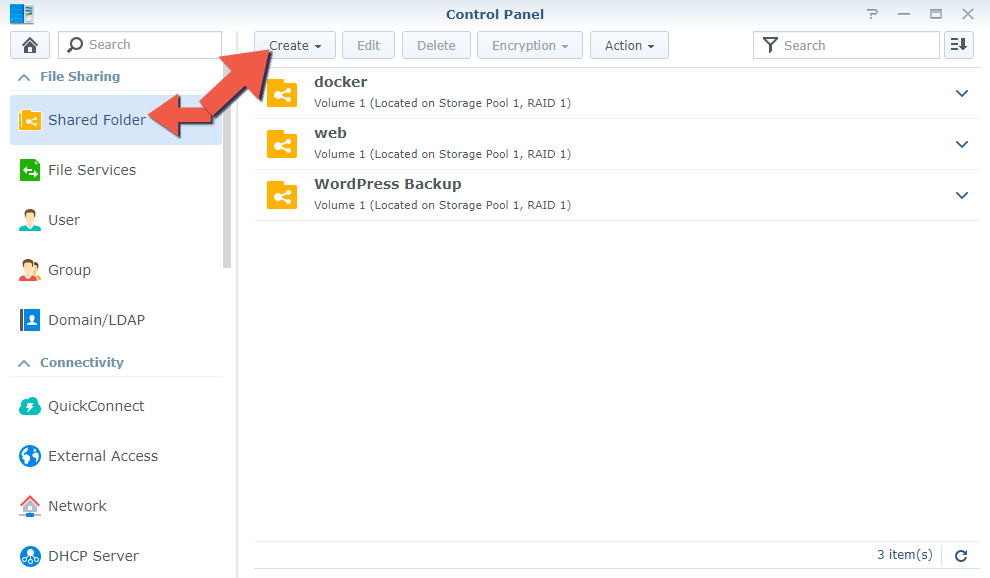
Go to Control Panel / Shared Folder / and create new Shared Folder. Name it Backup or anything you want (as you can see in the image below, I called mine WordPress Backup). Follow the instructions in the image below.
STEP 6 (NAS 1)
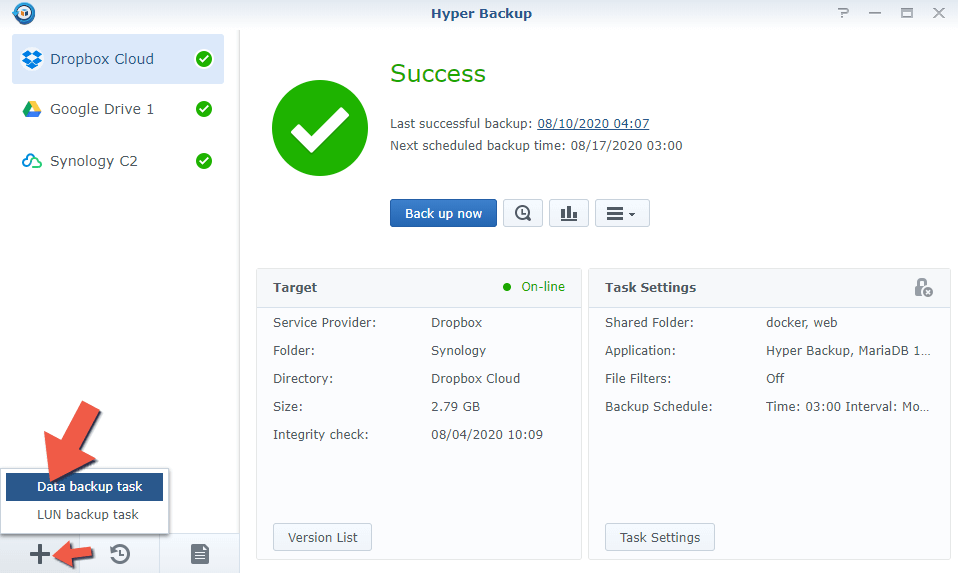
Open Hyper Backup. In the left sidebar at the bottom click the + then click on “Data backup task“. Follow the instructions in the image below.
STEP 7 (NAS 1)
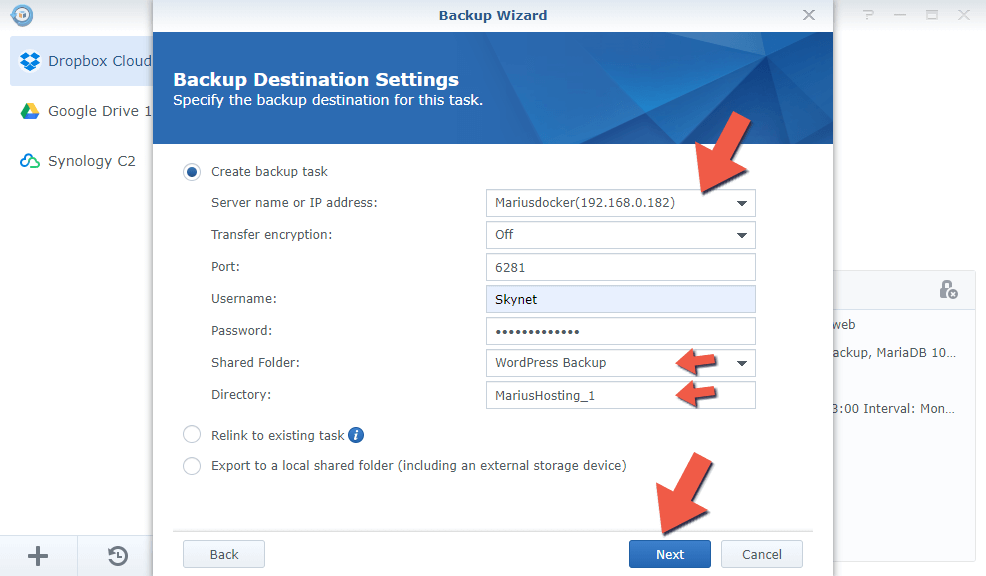
After you click on Data backup task, a new window will appear. Choose your NAS 2 as a destination. You can add a local IP if your NAS 2 is close to you (same network area) or use the DDNS synology.me address previously created at STEP 2 if your NAS 2 is at another location. Select the shared folder you have previously created on your NAS 2 at STEP 5. Type in your choice of directory name and the username and password for your NAS 2, then click Next.
STEP 8 (NAS 1)
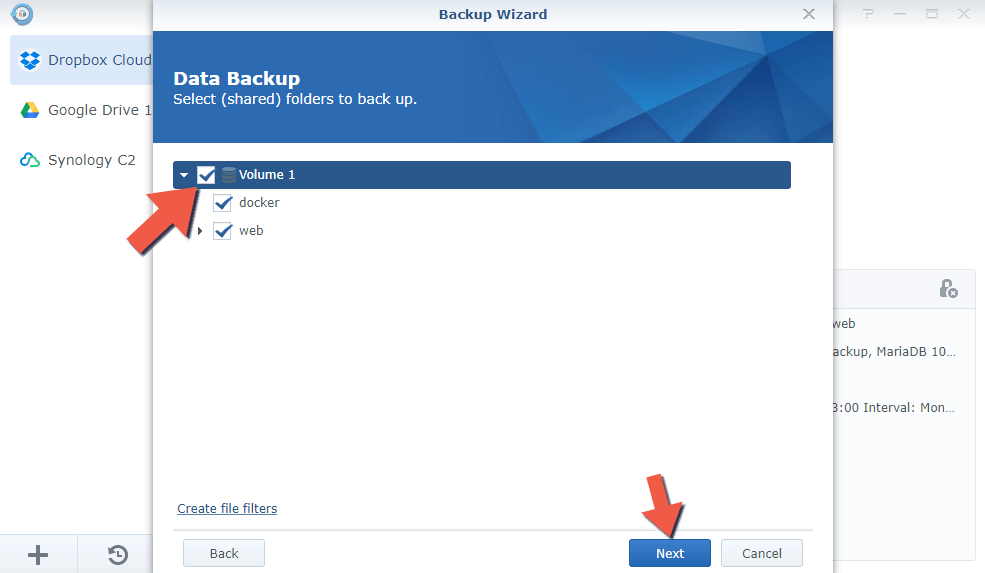
After you click Next, you will be prompted to select and backup entry Volume or a specific Shared Folder. Select according to your needs, then click Next. Follow the instructions in the image below.
STEP 9 (NAS 1)
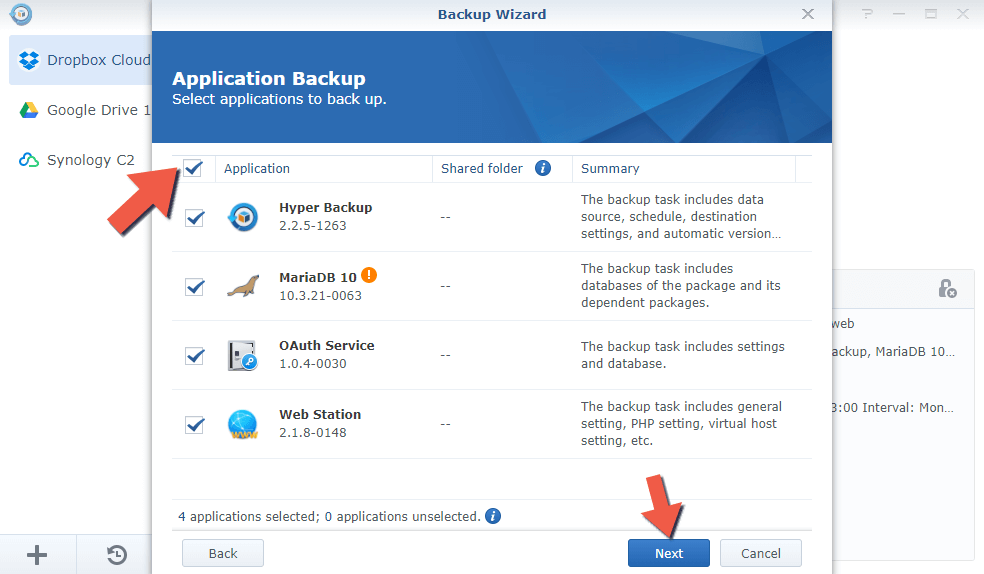
After you click Next, you will be prompted to select the Application you want to Backup. Select according to your needs, then click Next. Follow the instructions in the image below.
STEP 10 (NAS 1)
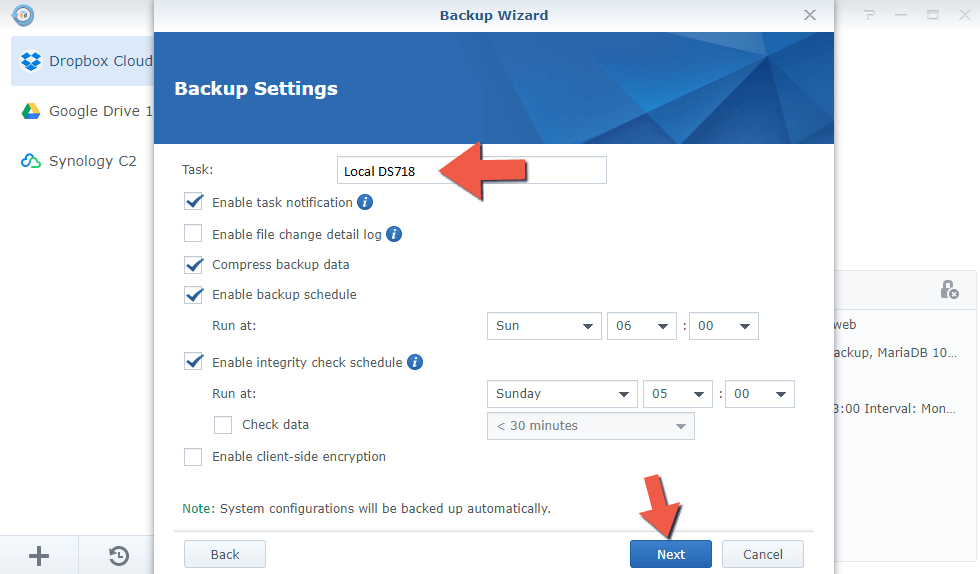
After you click Next, you will be prompted to give a name to your task. I named mine “Local DS718” because I backed up my NAS 1 (DS720+) in my NAS 2 (DS718+) in the same network area. Select a schedule and enable the options you need. After you are done with the settings, just click Next.
STEP 11 (NAS 1)
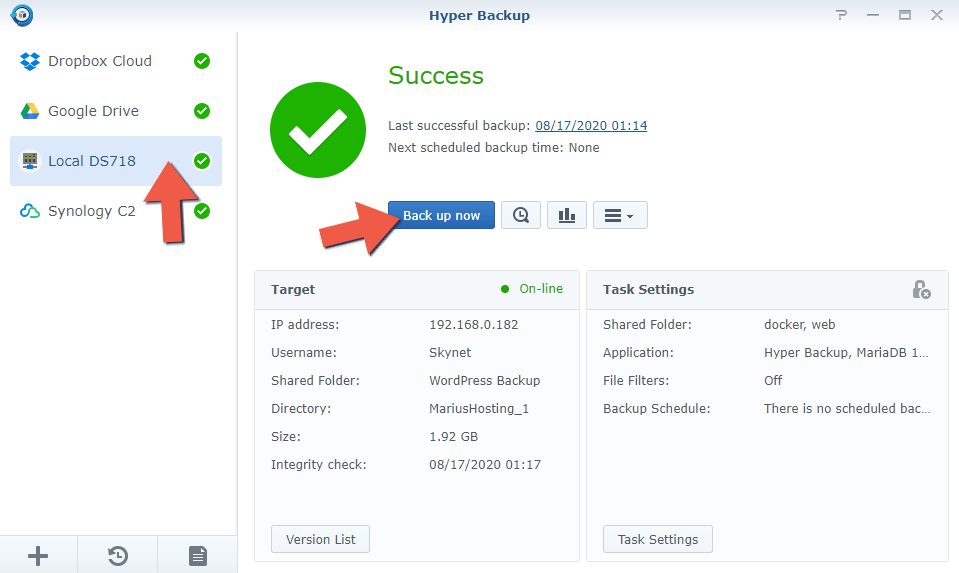
After clicking Next, your NAS 2 Task will appear on the left sidebar of Hyper Backup. Click on your NAS 2 then click Back up now. Follow the instructions in the image below.
STEP 12 (NAS 2)
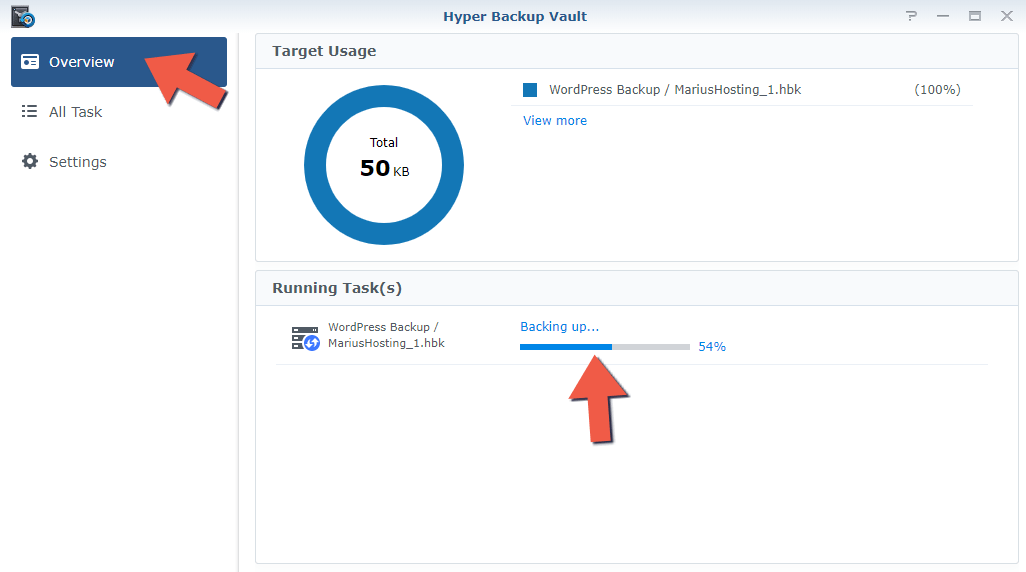
When the backup starts on NAS 1, you will be able to see the progress of the Backup on NAS 2 in real time. To see how the backup is progressing, on your remote NAS 2, open the Hyper Backup Vault application and in the left sidebar, click on “Overview“. Follow the instructions in the image below.
STEP 12 (NAS 2)
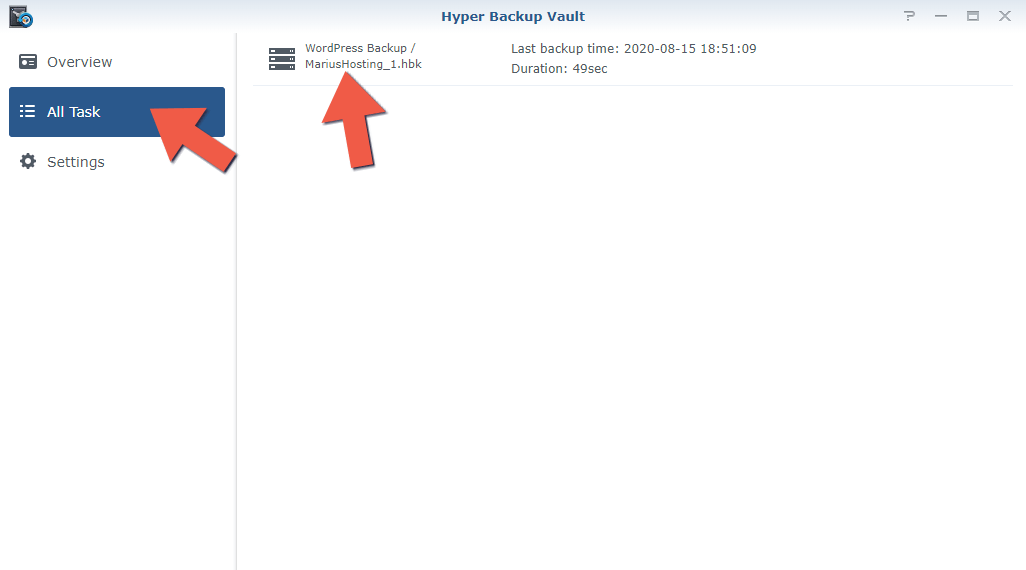
In the left sidebar of the Hyper Backup Vault, if you click on “All Task“, you will able too see all backups from NAS 1. Follow the instructions in the image below.
STEP 13 (NAS 1)
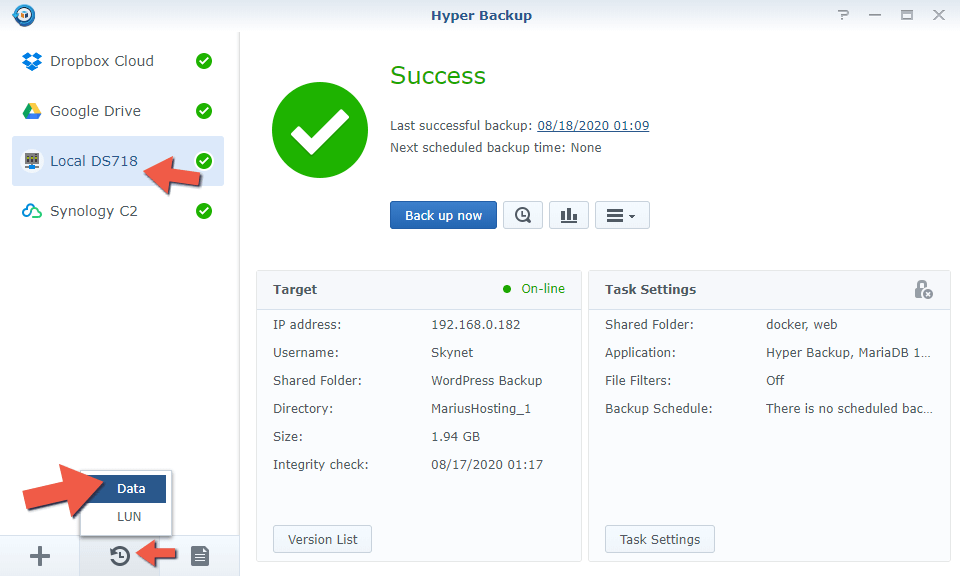
If you want to restore a Backup just open Hyper Backup then click Restore Data. Follow the instructions in the image below.
Note: If NAS 2 is in your local network area, you will not need a DDNS address like synology.me to reach it, just the local IP of your NAS 2 like 192.168.x.x
Note: You can also install Hyper Backup Vault on NAS 1 and Backup via Hyper Backup your whole NAS 2 or viceversa. Depends on your needs.
Note: At STEP 2, when creating your synology.me DDNS, pay close attention to correctly forward ports on your router using the Port-Forwarding option.
This post was updated on Sunday / August 28th, 2022 at 3:33 PM