Suppose you have installed WordPress via the Synology NAS Package Center and you have noticed that the installed version is outdated. How can you upgrade your outdated Synology WordPress version to a newer version? Updating WordPress to the latest version (7.0.1) is rather easy.
Synology WordPress Package vs Official WordPress Files:
- When WordPress.org releases a new version, it can take several weeks or months before the equivalent Synology Package becomes available. Most of the recent updates have been patches for security vulnerabilities so having quick access to updates is really important these days.
- While the manual installation process for the WordPress.org version is a little more complex than the wizard-driven Synology Package version, it gives you more control over the whole WordPress installation.
Before you upgrade, please read these important notes:
Overwrite all your files on web/wordpress except these: (Follow the instructions in the images below).
- wp-config.php (File)
- wp-content (Entry Folder)
- .htaccess (File)
STEP 1
Please Support My work by Making a Donation.
STEP 2
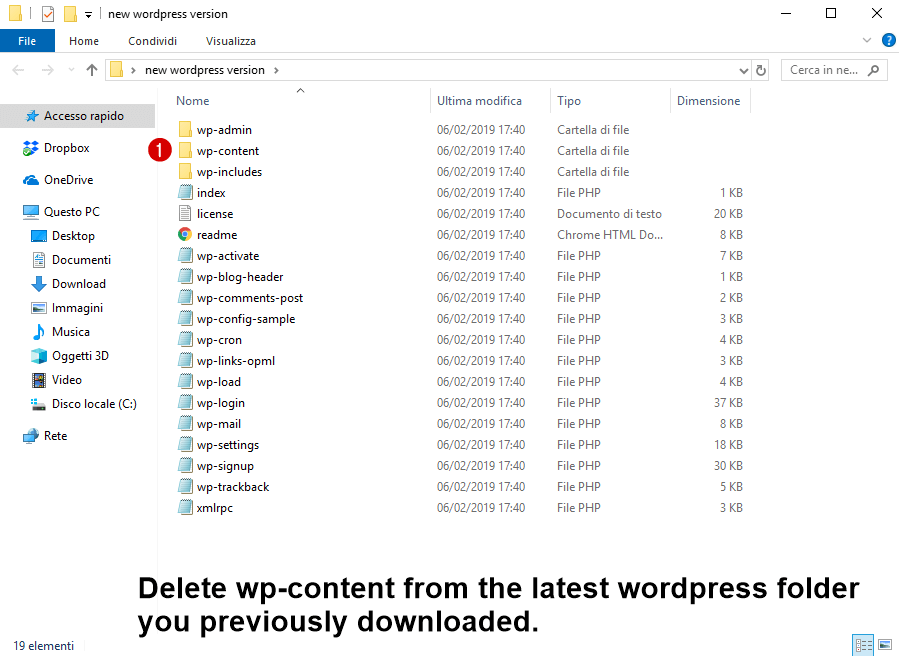
After downloading the latest WordPress version from the official website, unzip it and delete the folder named wp-content.
STEP 3
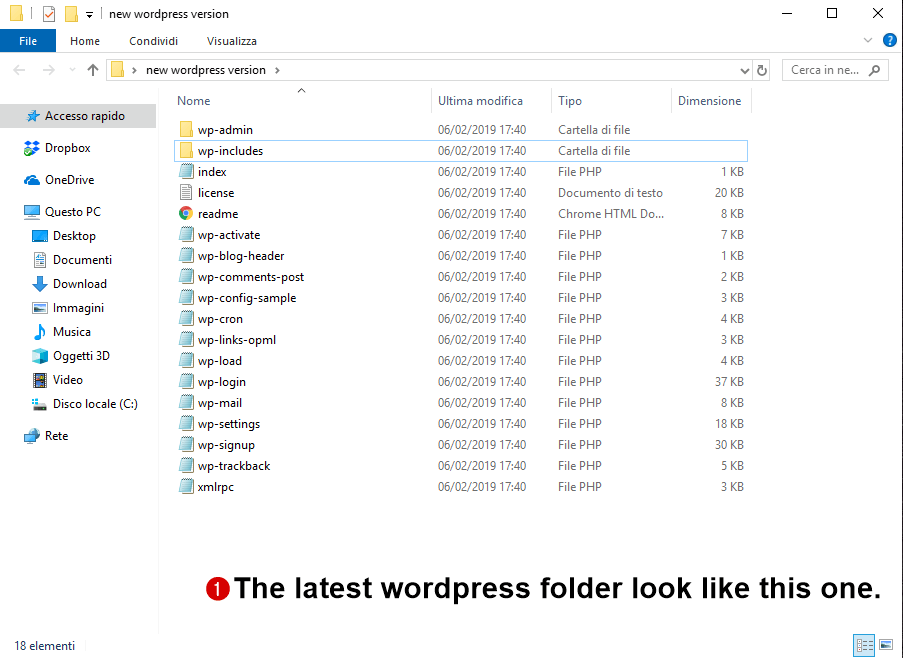
Your fresh WordPress folder should look like this one without the wp-content folder, wp_config.php and .htaccess files
STEP 4
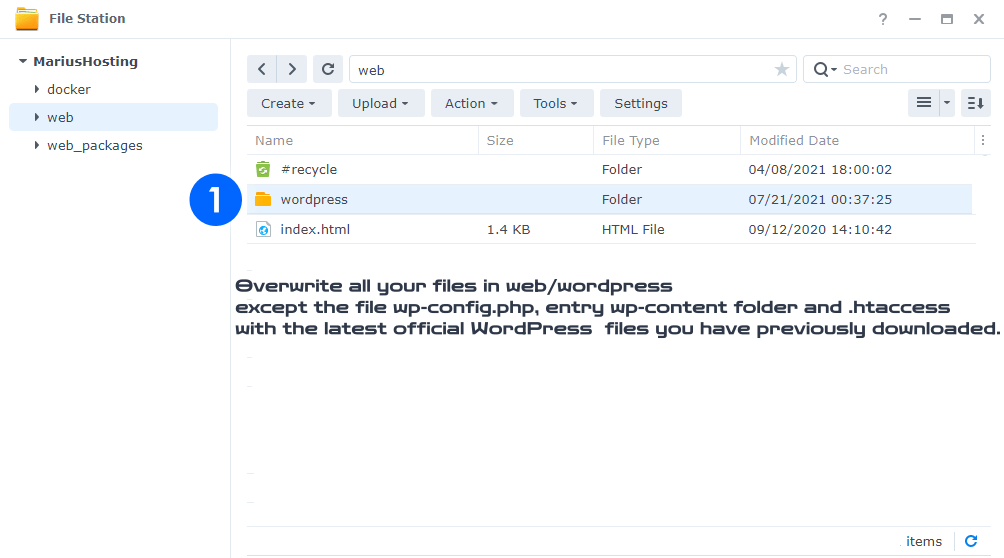
Log into your Synology, access File Station and the directory where your WordPress files are stored and overwrite them with the new WordPress files. Overwrite all your files on web/wordpress except the file wp-config.php, wp-content entry folder and .htaccess
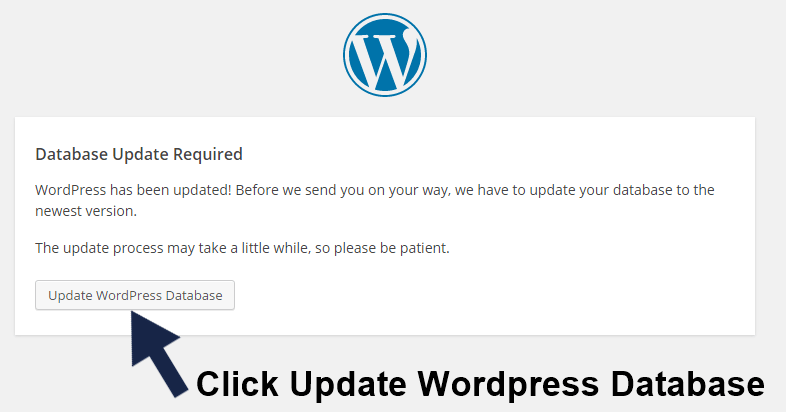
STEP 5
When you log into your WordPress again, you will be prompted to upgrade your database. Follow the instructions in the image below.
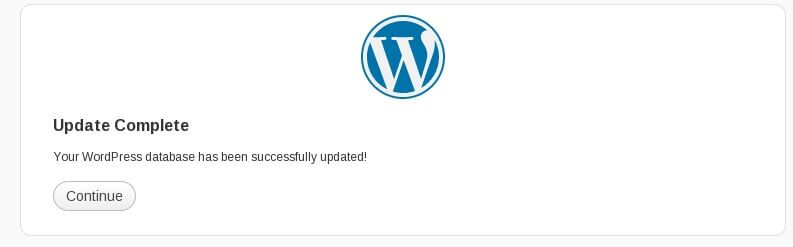
After clicking “Continue” you can Enjoy your latest WordPress version!
Can I delete syno-misc.php and pingbackIsOpend files already present in my Synology web/wordpress folder? Yes you can. You will no longer need these exclusive files requested only for the official version of Synology WordPress Package.
Something gone wrong after delete syno-misc.php and pingbackIsOpend? No problem you can download again by contacting me.
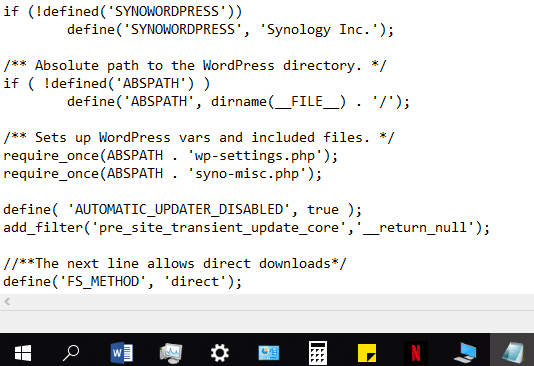
if deleting these files things go wrong open wp_config.php that you find in the main wordpress folder and delete these lines at the end of the file and save it:
/ ** Sets up WordPress vars and included files. * /
require_once (ABSPATH. 'wp-settings.php');
require_once (ABSPATH. 'syno-misc.php');
I can’t upload themes and plugins and I can’t update existing plugins or themes. If you have this problem please read my complete step by step guide Synology: WordPress Request FTP Credentials To Download Plugins (Solved) If you don’t have time to read the entire article, just follow these easy instructions below.
If you want to avoid inserting the FTP credentials every time you want to download/update plugins or themes, go to File Station – Web – WordPress – wp-config.php
Download the wp-config.php file, edit it in notepad or text editor and, at the end of the file, insert this code:
//**The next line allows direct downloads*/
define('FS_METHOD', 'direct');
It should look like this when you save the file:
After you do this, upload the file to File Station – Web – WordPress – and overwrite the existing wp-config.php file with the new one. Now you can try to install some plugins and no FTP credentials will be requested.
This post was updated on Friday / July 10th, 2026 at 12:26 AM